![]()
Download Article
![]()
Download Article
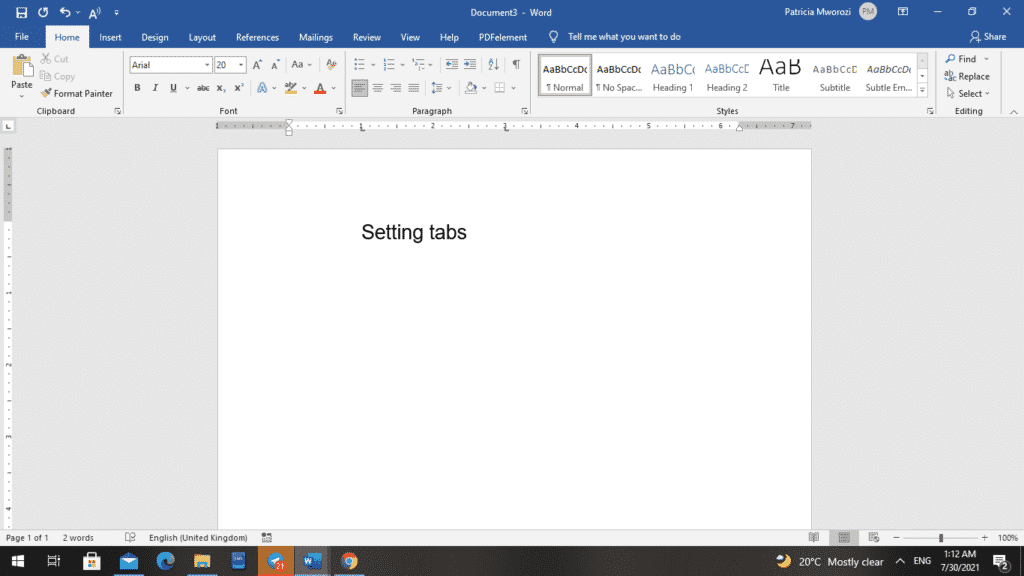
Setting tabs on your Microsoft Word document will let you align the text on a page. This will organize your text so it has a uniform look to it. You can set tabs to the right or left or even both sides of the document, and doing so is very easy and straightforward.
Steps
-

1
Open Microsoft Word. On your desktop, double-click the Microsoft Word icon to launch the application.
-
2
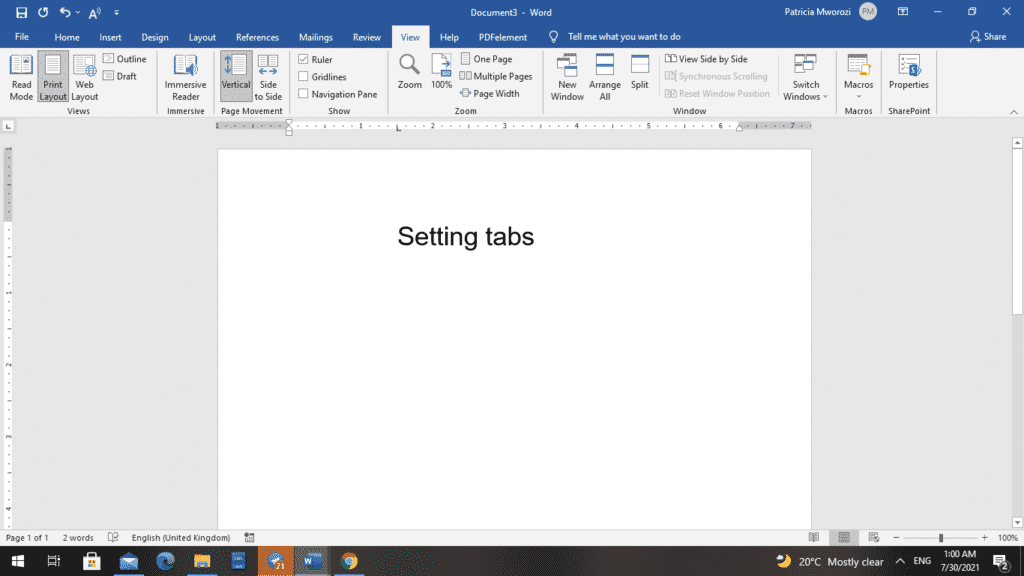
Make the ruler visible. By default, the ruler at the top of the document should already be visible. In the case that it is not, click the View option at the very top of the screen, and a window will drop-down. Click on “Ruler” to display it at the top of the document.
Advertisement
-
3
Click the tab selector. At the top-left corner of the document, you can see the tab selector. It should be exactly on the left side of the ruler. Click it and you will be able to select the type of tab you want.
-
4
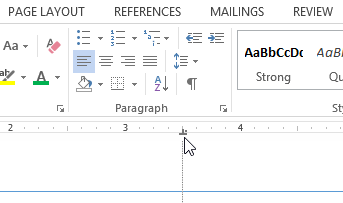
Set the tab position. Now click anywhere at the bottom edge of the ruler to set where you want the tab.
-
5
Adjust the tab. If you need some more adjusting to your tab, simply drag the tab you set left or right along the ruler.


Advertisement
Add New Question
-
Question
How do I change tabs?

To move left, press Ctrl + Tab; to move right, press Ctrl + Shift + Tab. Or you can just click on the tab you want.
-
Question
Can I set tabs when I have already made a Word document?
Yes you can. Your Word document just needs to be aligned in paragraph format, then you are able to drag the tabs where you would like them.
-
Question
How do I delete a tab in a Word document?
Click the tab stop on the ruler and drag down. Also, you can double-click the tab stop, select the position of the tab stop you want to delete, click clear, and click OK.
Ask a Question
200 characters left
Include your email address to get a message when this question is answered.
Submit
Advertisement
Thanks for submitting a tip for review!
About This Article
Thanks to all authors for creating a page that has been read 195,046 times.
Is this article up to date?
Would you like to be able to switch between your Word documents with tabs just like your web browser? Here’s how you can turn Word into a tabbed document interface so you can easily edit multiple files at once.
There are many different ways you could work on multiple documents at once, and Windows 7 Aero Snap makes it easy to work on documents side by side. But, sometimes it can be nicer to have a full-screened editing window, but still be able to switch between your documents without going all the way to the taskbar to switch windows. Doc Tabs is a great free addon that lets you use a familiar tabbed document interface in Word so you can switch between open documents just like you do on Firefox, Chrome, and other web browsers.
Please Note: This addon works great in Word 2007, but crashed when you open Backstage in Word 2010. If you’re still using Word 2007 though, this is a great addon and worked perfectly for it in our tests.
Getting Started
Download the Doc Tabs addon (link below), and install as normal. Make sure to exit Word before running the installer.

You may be prompted to install Visual Studio Tools during the setup if you haven’t already installed them. Click Accept to go ahead and install these necessary components.

The setup will automatically download and install the needed components, so you won’t need to worry about setting up anything else.
Finally, you’ll be asked if you want to install this Office customization. Click Install to continue.
Once it’s finished, you’ll notice a new Tabs bar underneath your Ribbon in Word.
Here’s a closer look at the new tab bar. Now when you open new documents, they’ll load in a new tab inside Word instead of in a new window.
Click the document titles to switch between open files, double-click in a blank tab area to open a new blank document, or click the X on an active document tab to close it. Alternately, right-click on a tab to close it or other tabs, create a new blank document, or get info about the addon.
You’ll now only see one Taskbar icon for Word even if you have multiple documents open. Now you can easily switch between the documents you’re working on, and still switch directly to another program to get data or run tests with a simple Alt-Tab.
The Doc Tab addon does work in Word 2010, and actually works fine if you’re only editing documents in the main interface.
However, if you click the File button to open Office Backstage to print, save, or open files while running Doc Tabs, Word 2010 will crash.
If you’d still like to make use of document tabs, you can install the addon and use it while you’re editing documents. Then, when you need to open the File menu, select the Add-ins tab and click the Tabs button to turn off Doc Tabs. Now your documents will open in individual windows, and you can open the File menu as before. If you want to go back to the tabbed interface, simply click the Tabs button again.
Whether you’re wanting to keep all your documents together in the same window or just want to easily copy some edits between two documents, Doc Tabs makes it easy to use Word in a single window. The addon worked very good for us in Word 2007, and with the workaround mentioned above, you can even take advantage of it in Word 2010.
Download the Doc Tabs Add-in
READ NEXT
- › The Best How-To Geek Articles About Microsoft Office
- › Discord Direct Message Won’t Go Away? Here’s the Fix
- › The New Winamp Is Here, but It’s Not What You’d Expect
- › Save Hundreds on Elegoo’s New PHECDA Laser Engraver Through Kickstarter
- › How to Get a Refund on the PlayStation Store
- › Android’s Nearby Share Has (Unofficially) Arrived on Mac
- › Windows 11 Has a New Photo Gallery in the File Explorer
How-To Geek is where you turn when you want experts to explain technology. Since we launched in 2006, our articles have been read billions of times. Want to know more?
Tabs are a text-alignment function in paragraph formatting. Tabs produce equally spaced text in your document. They also guarantee that your content is correctly aligned, versus if you just typed a couple of spaces to split it.
Below is a step-by-step guide to set tabs in Microsoft Word.
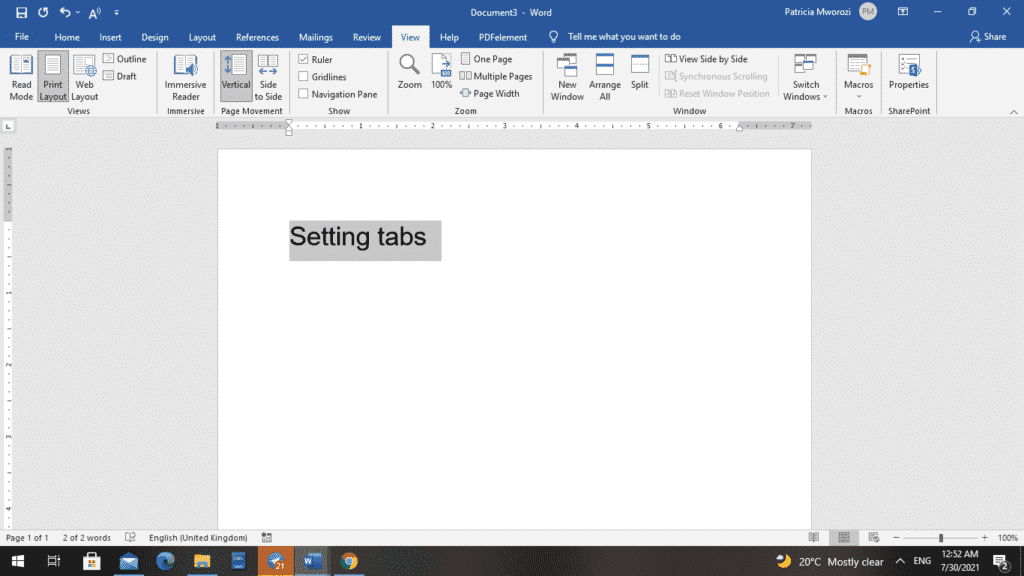
- Make sure your ruler is shown on your screen.
- If you do not see your ruler going across the top of your page, go to the view tab, and on it, there is a ruler choice.
- Check the ruler box, and your ruler will appear.

- Go back to your home ribbon and make sure your flashing insertion point is where you want your tabs to happen.

There is a button on the far-left side with a capital L on it, and if you hover your pointer right on it, it will show you that it is a left tab.
- When you click on that button once, twice, thrice, it will keep changing to different kinds of tabs.


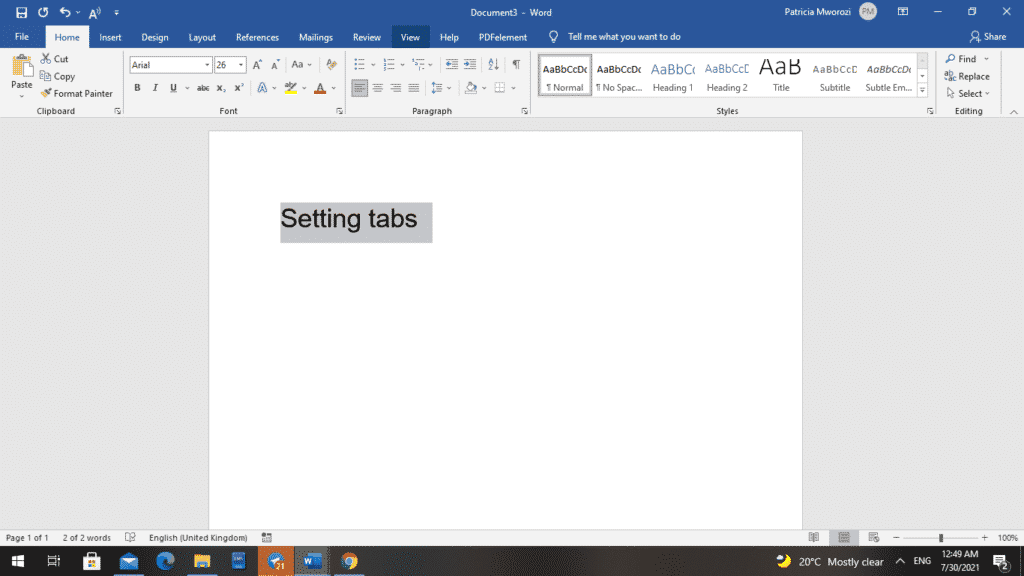
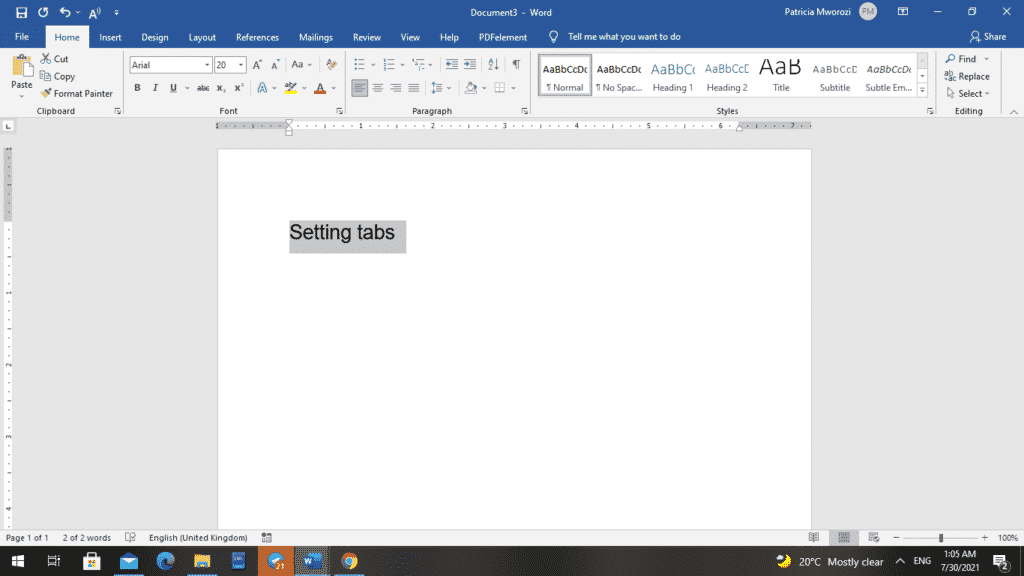
- Let us assume you want to put a left tab in front of a heading you have typed, such as ‘Setting Tabs.’ And you want to place it at one-and-a-half inches on the ruler.
- On the ruler, point to the one-and-a-half-inch mark (at the bottom of it) and click once.

- Press your Tab key.
The heading is aligned with the one-and-a-half-inch mark.
There is another way to set up tabs that is even easier and better because you can do more with it, using the tabs dialog box.
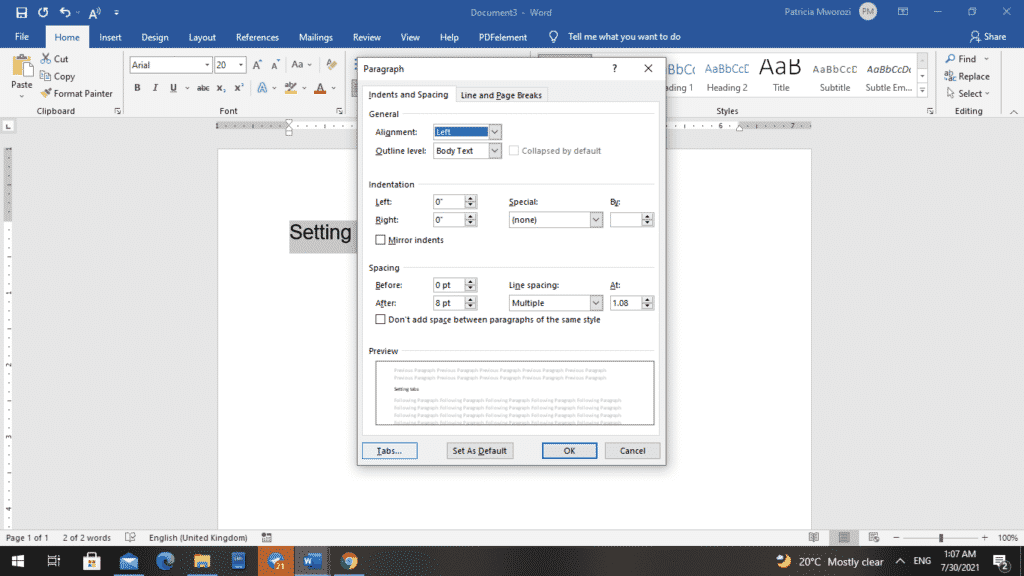
- To open the ‘Tabs’ dialog box, go to the home ribbon.
- Go to the paragraph area
- Click the downward-facing arrow in the corner.
This will open up the paragraph settings dialog box.
- On it, click ‘Tabs.’
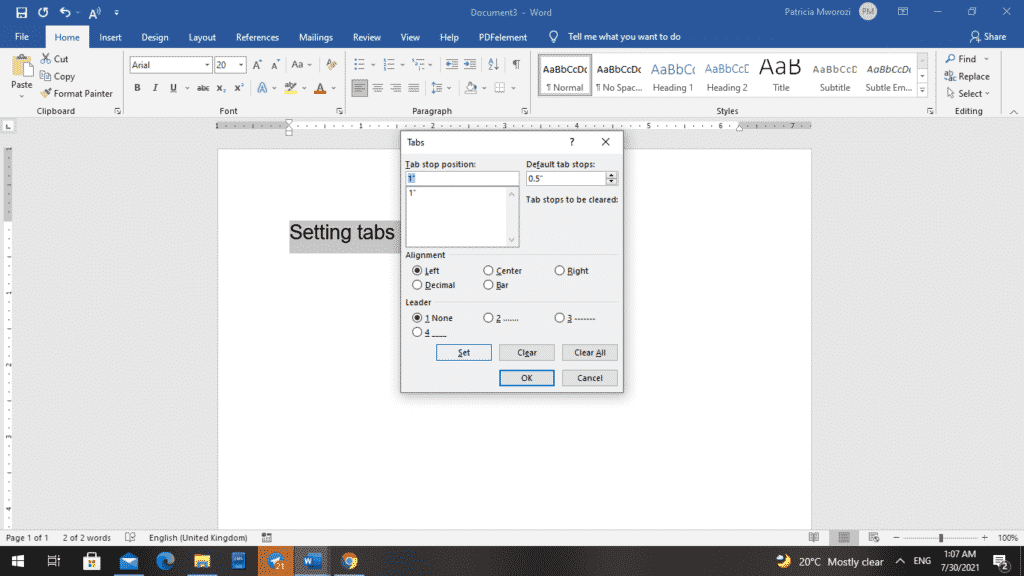
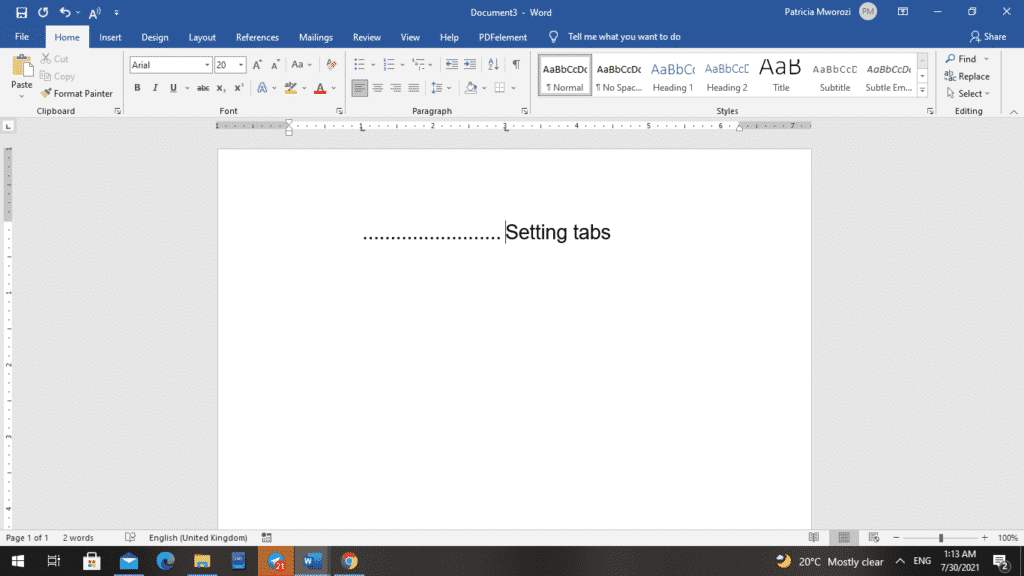
- Now you can make more modifications with Tabs, such as alignment, leaders. For example, with ‘Leaders,’ when you press your tab key, you will see a dotted line going along that tab space or dash or solid line.
Let us say you want to create two-tab stop positions: With the first one, you want to be at the one-inch mark.
- To do this, you will type ‘1’ in the tab stop position box for one inch.
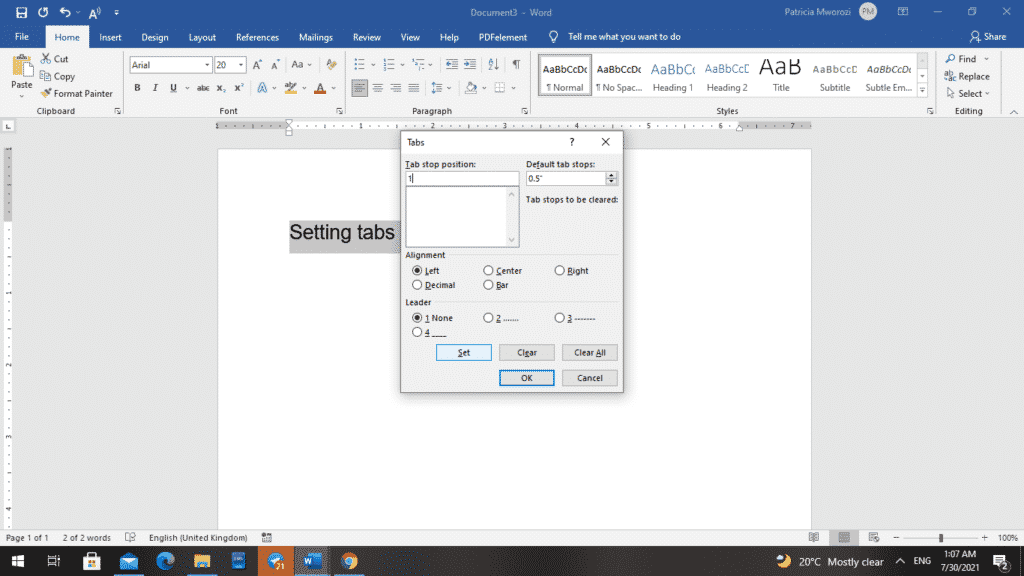
- To make it stick, you have to click ‘Set.’ If it appears in the big window below where you typed it, that means it has been set.
- With the second one, let us type ‘3’ in the tab stop position to mean three inches.
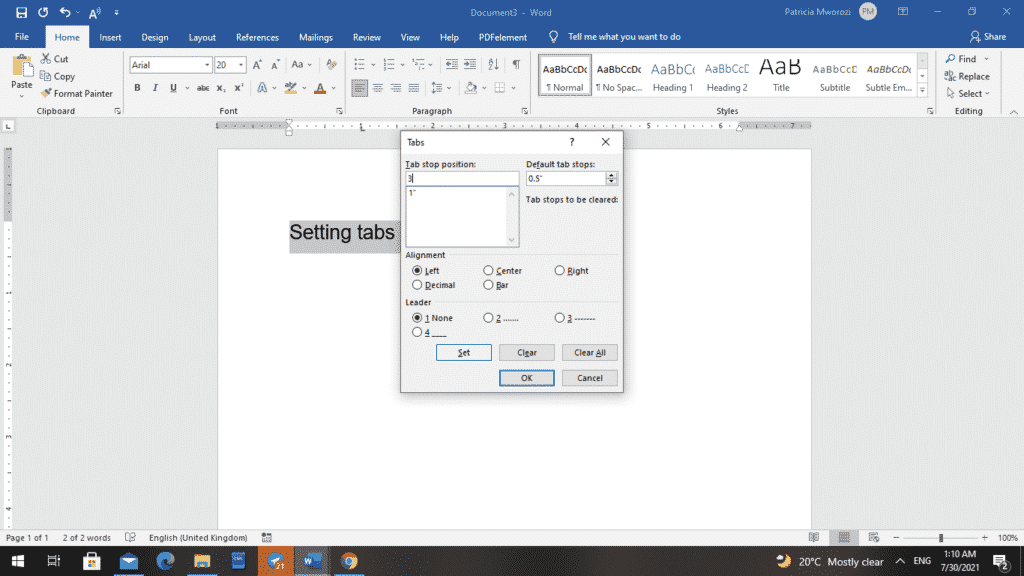
- Before we click ‘Set’ in the ‘Leaders’ option, pick a leader to go with that tab, such as 2 with the dotted line.
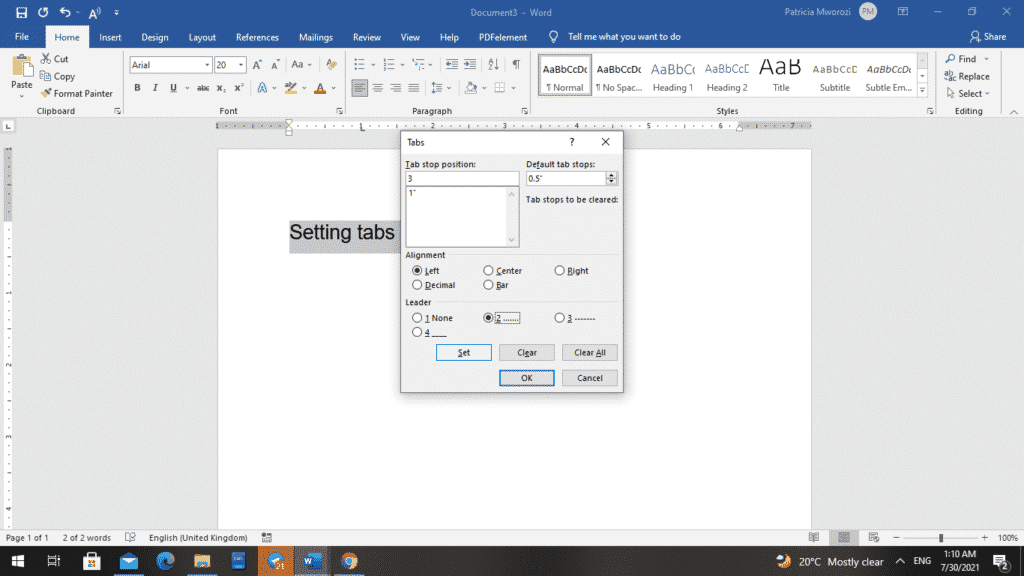
- Now that you have the left tab chosen and a dotted line selected from a leader, you can click ‘Set’ and ‘OK.’
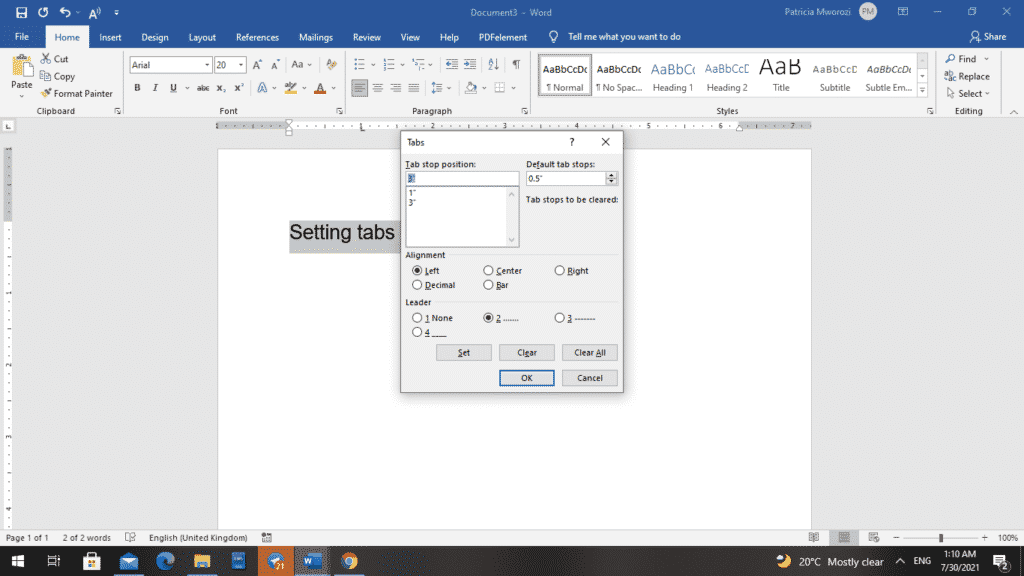
- You will have a left tab indicator at the one-inch mark and another at the three-inch mark on the ruler.
- Make sure that your flashing insertion is right before your heading and press Tab once.
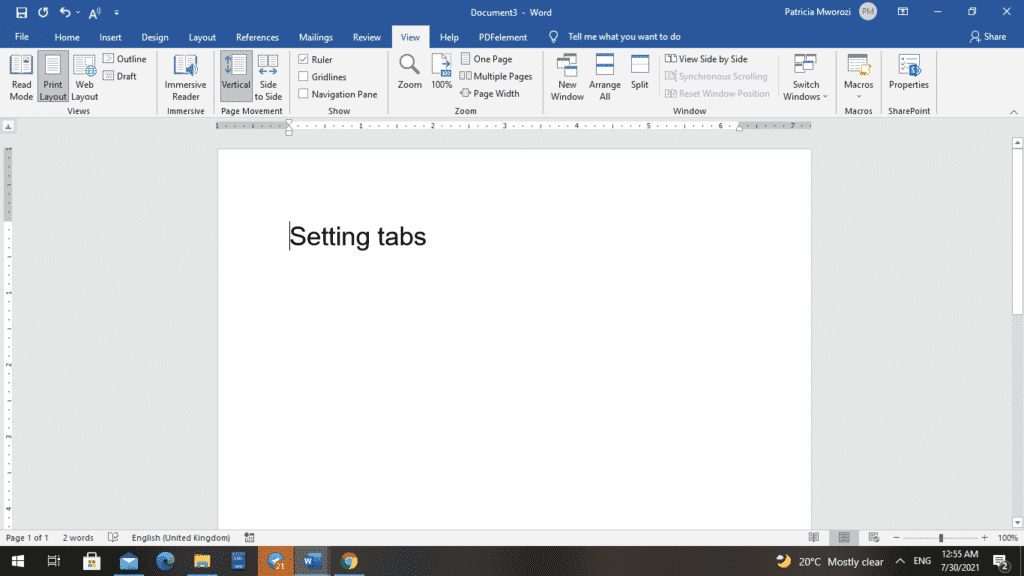
You will notice that your line is indented and brought to the one-inch mark.
- If you press your ‘Tab’ key once more, it will indent to the three-inch mark with a dotted line leader.
You can now play around with these tab settings and choose your preferred presentation.
Are you working on a written group project but cannot physically meet with your colleagues?
Simul Docs is your savior. Communication and collaboration will be so smooth, you will feel like you are in the conference room seated next to your colleagues.
With Simul Docs, even your initial thoughts can be documented at the same time. After writing your first draft in Microsoft Word, upload it to Simul Docs. This will automatically make it the first version. Now, another colleague can open it and make their edits.
This will create another version different from the first. Every time another person opens a version and makes edits, a new version is created, with the latest changes. The best part is, even if you forget to turn on tracked changes, they are automatically documented!
If another co-worker is supposed to include their input, but they do not have Simul Docs. All you have to do is download the document or forward it by email. Alternatively, you can upload it to any storage software like one drive, and once their changes have been made, they can forward it to you once again, and you can open it in Simul Docs.
Once all the necessary edits have been made, you can save the final version containing all the modifications with one click.
Visit simuldocs.com and simplify group edits today.
 When you press the Tab key while working in Microsoft Word, your cursor moves to a specific location called a tab stop. Tabs can be used to indent paragraphs, but they can also be used for other purposes including creating single- and multi-column lists. This tutorial shows (1) how to change Word’s default tab and (2) how to create, change, and delete tabs in Word on the ruler.
Important Note: Although tabs can be used to indent paragraphs, Word’s built-in indent options are more efficient and reliable for longer documents. See “Three Ways to Indent Paragraphs in Microsoft Word” for more information.
Before starting the tutorial, let’s look at the different types of tab stops you can use in Word.
Five Types of Tab Stops in Word
Word includes five different tab stops:
- The left tab places left-aligned text to the right of the tab stop. (This is the most common tab stop.)
- The center tab centers text on the tab stop.
- The right tab places right-aligned text to the left of the tab stop.
- The decimal tab aligns text based on the first decimal placed on the tab stop.
- The bar tab creates a vertical line at the tab stop. (Technically, this is not a tab; it is for formatting multi-column lists.)
This tutorial is available as a YouTube video showing all the steps in real time.
Watch more than 150 other writing-related software tutorials on my YouTube channel.
The images below are from Word for Microsoft 365. The steps also apply to Word 2021, Word 2019, Word 2016, Word 2013, and Word 2010.
How to Change Word’s Default Tab
By default, Word moves your cursor half an inch to the right when you press the Tab key on your keyboard. However, you can change the length of your default left tab stop without creating a new tab.
The following steps only affect your current document. If you want to change the default tab for all future documents, you have to modify your normal.dotm template. We will cover that advanced topic in a separate tutorial.
- Select the Home tab in the ribbon.

- Select the dialog box launcher in the Paragraph group.

- Select the Tabs button in the Paragraph dialog box.

- Use the increment arrows to adjust the default tab stop in the Tabs dialog box. Alternatively, you can type a new number directly into the text box.

- Select the OK button to close the Tabs dialog box.

The steps below use the ruler. You can also create and adjust tabs using the Tabs dialog box. However, that process is less user-friendly than the ruler method, so it will be presented in a separate, advanced tutorial.
How to Create Tabs on the Ruler
Skip to step 3 if your ruler is already visible.
- Select the View tab in the ribbon.

- Select Ruler in the Show group.

- Press Ctrl + A on your keyboard to select your entire document or select the portion of your document to which you want to apply the tab.
If you don’t select all or part of your document before creating your new tab, it will only apply to the paragraph your cursor is currently in or newly created content.
- Click the tab selector button until it changes to the symbol representing the tab you want. (Hover your pointer over each symbol in the tab selector for a tooltip explaining each symbol.)

- Click the location on the ruler where you would like to place the tab stop. The tab symbol will then appear on the ruler.

Note that you can place multiple tab stops on the ruler. Each time you press the Tab key, your cursor will move to the next stop.
How to Change Tabs on the Ruler
- [Optional step] If you want to change the location of a tab stop and update all the text formatted with that tab, select only that text.
- Slide the cursor symbol to a new location on the ruler. If your cursor is currently in a paragraph formatted with that tab, it will automatically update.
How to Delete Tabs on the Ruler
- Ensure that no text or other content is selected.
- Pull the tab symbol downward and release it. It will be removed from the ruler.
Pro Tip: If you accidentally delete a tab, immediately press Ctrl + Z on your keyboard to undo the deletion.
Related Resources
How to Create and Customize Headings in Microsoft Word
Three Ways to Insert Accent Marks in Microsoft Word
How to View the Word Count in Microsoft Word
Updated April 13, 2022
Aligning words and sentences in contracts, agreements, and other formal documents using multiple spaces and default tabulations is an ill practice. In proportional fonts, like Times New Roman symbols have different widths, and it is hard to align numerous lines with spaces or tabs precisely. Defining a custom tab stop in Microsoft Word is a precise and straightforward alternative to counting spaces and tabs.
The Tab key or Tabulation key moves the cursor to a fixed horizontal position in the document, marked with a tab stop.
You can use tab stops in two different ways:
I. Use the tab stops as they are pre-defined in Word
By default, the tab stops set at every half-inch from the beginning of the line.
So, when you press the Tab key or insert the Tabulation symbol, the cursor moves to the next half-inch position of the line. The distance between tab positions does not need to be equal for all tabs stops in the document:

You can change the pre-defined half-inch distance for the tab stops. For example, the 1-inch tab stops:

To customize the positions of tab stops, follow the next steps:
1. On the Layout tab, click the dialog box launcher:

2. In the Paragraph dialog box, click the Tabs… button:

3. In the Tabs dialog box:

In the Default tab stops field, instead of the pre-defined tab stops 0.5’’, type or choose the number you prefer.
4. Click OK to close the Tabs dialog box.
II. Set your tab stops
For example:
- To create
a table-like look for your data without using tables:

- To create
special types of text such as tables of content (the title and page number reside at the opposite ends of the line):


See also this tip in French:
Tabulations et taquets de tabulation dans le document Word.
In February this year, Microsoft rolled out its Office 2013 product, bringing numerous updates and several new features, such as the new start screen. One thing the Redmond-based software company failed to do was add tabs to Microsoft Office – a convenience that many of us have grown used to in our web browsers. For those of us who work with multiple documents, this would have been a huge and valuable addition to the new suite. But with this, Microsoft dropped the ball.
To save you from browsing from window to window, Office Tabs steps in – yes, the name could not get much more logical. This fills a rather basic need that Microsoft should have had the sense to do, not only in Office 2013, but back in the 2010 iteration of its flagship software package.
Office Tabs Means Business
To be fair, while Office is a popular service in almost every business, it is certainly a suite for the consumer environment as well, and resides in many homes, not to mention schools.
If you have need of multiple open documents – a problem more common than some of you may believe, then Office Tabs will feel like a gift, though not a free one, but that depends on your needs.
There are three flavors to chose from – Enterprise, Standard and Free edition. All of them have varying levels of features. Free, however, should work for the majority of customers, but businesses will need to pony up the cash and grab an Enterprise license which will lighten the company budget on a variable scale based on the number of licenses required to outfit the organization.
Your Free Office Tabs!
The free version of this add-in to your Office suite works for Word, Excel and PowerPoint and is compatible with both 32-bit and 64-bit Office 2010 and 2013, as well as 32-bit versions of 2003 and 2007.
The free version also provides the ability to customize Tab Length and appearance, get support for shortcuts and the ability to show or hide the tab bar.
But What Does it Look Like?

The way it looks and functions is more the bottom line to most customers … ahh … all customers. That is where this little app shines, with Chrome-like tabs that function almost exactly the same as any web browser.
This plays just like your browser, with an option to close a tab on the right and, to the further right, a choice of launching a new tab and adding yet one more.
The download is 20 MB and setup is simple, so no need to worry, and no extra bloatware is coming along for the ride during this installation.
What Are My Options?
Simply adding tabs is a nice feature, but far from a final play for your devoted use. When you get Office Tabs up and running, you will be faced with a number of options to customize the service. The Options page pops up upon a successful install and has only two tabs, but a number of features included within each.

In the left column, users will encounter options for tabs in each – each Office app can be individually customized, so if your wish is to have different options in Word and Excel, then it is an easy choice.
Customers further add flare to tabs by choosing color options, style and even setting tab width to prevent the window from being overrun as my browser currently is.

In the End
If you are someone who frequently runs multiple documents at a time, as I find myself doing with Word, then the free version will likely get you by. Corporate customers and power users will need to open their wallets, but the pricing does not break the bank. Honestly, for free, this is an easy choice. It is not using up computer resources, nor does it harm Office and can be handy even for those who use the app sparingly.

Alan Buckingham
Alan is an avid fan of all things technology, including Microsoft, Android, Google, and more. When not writing about or using gadgets and software, he can be found on the trails hiking or mountain biking.
Subscribe to our newsletter!
Our latest tutorials delivered straight to your inbox
Lesson 11: Indents and Tabs
/en/word2013/printing-documents/content/
Introduction
Indenting text adds structure to your document by allowing you to separate information. Whether you’d like to move a single line or an entire paragraph, you can use the tab selector and the horizontal ruler to set tabs and indents
Optional: Download our practice document.
Indenting text
In many types of documents, you may want to indent only the first line of each paragraph. This helps to visually separate paragraphs from one another. It’s also possible to indent every line except for the first line, which is known as a hanging indent.
 First line indent
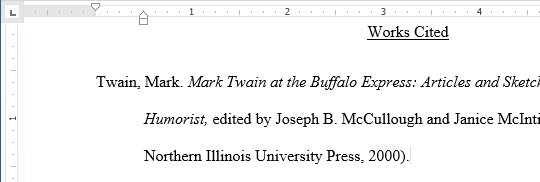 Hanging indent
To indent using the Tab key:
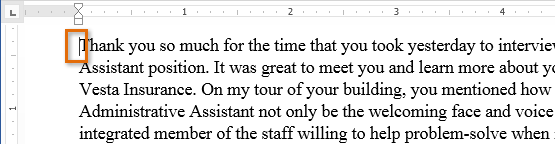
A quick way to indent is to use the Tab key. This will create a first-line indent of 1/2 inch.
- Place the insertion point at the very beginning of the paragraph you want to indent.
 Placing the insertion point
 - Press the Tab key. On the ruler, you should see the first-line indent marker move to the right by 1/2 inch.
- The first line of the paragraph will be indented.
 The indented paragraph
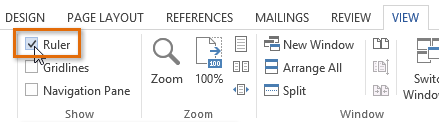
If you can’t see the ruler, select the View tab, then click the check box  next to Ruler.
 Showing the Ruler
Indent markers
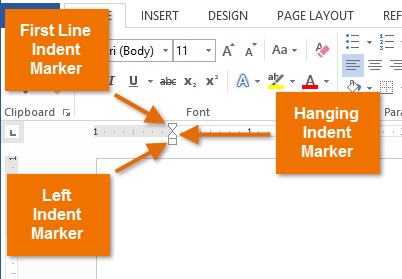
In some cases, you may want to have more control over indents. Word provides indent markers that allow you to indent paragraphs to the location you want. The indent markers are located to the left of the horizontal ruler, and they provide several indenting options:
- First-line indent marker : Adjusts the first-line indent
- Hanging indent marker : Adjusts the hanging indent
- Left indent marker : Moves both the first-line indent and hanging indent markers at the same time (this will indent all lines in a paragraph)
 The three indent markers
 : Adjusts the first-line indent
 : Adjusts the hanging indent
 : Moves both the first-line indent and hanging indent markers at the same time (this will indent all lines in a paragraph)
To indent using the indent markers:
- Place the insertion point anywhere in the paragraph you want to indent, or select one or more paragraphs.
 Selecting paragraphs to indent
 - Click, hold, and drag the desired indent marker. In our example, we’ll click, hold, and drag the left indent marker. A live preview of the indent will appear in the document.
 Moving a paragraph
 - Release the mouse. The paragraphs will be indented.
 The indented paragraphs
To indent using the Indent commands:
If you want to indent multiple lines of text or all lines of a paragraph, you can use the Indent commands.
- Select the text you want to indent.
 Selecting text to indent
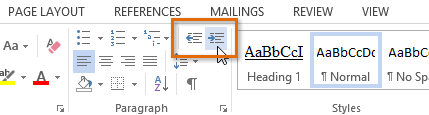
 - On the Home tab, click the desired Indent command:
- Increase Indent: This increases the indent by increments of 1/2 inch. In our example, we’ll increase the indent.
- Decrease Indent: This decreases the indent by increments of 1/2 inch.
 The Indent commands
- The text will indent.
 The indented text
To customize the indent amounts, select the Page Layout tab and enter the desired values in the boxes under Indent.
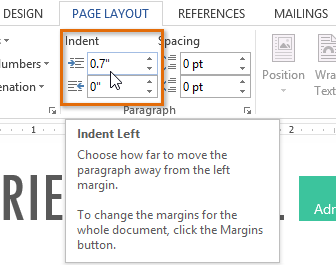 Customizing the indent amounts
Tabs
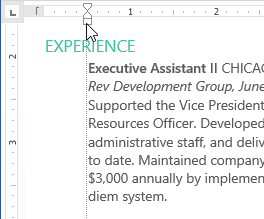
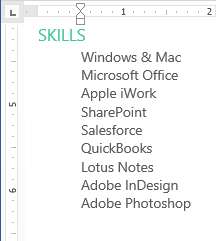
Using tabs gives you more control over the placement of text. By default, every time you press the Tab key, the insertion point will move 1/2 inch to the right. Adding tab stops to the Ruler allows you to change the size of the tabs, and Word even allows you to apply more than one tab stop to a single line. For example, on a resume you could left align the beginning of a line and right align the end of the line by adding a Right Tab.
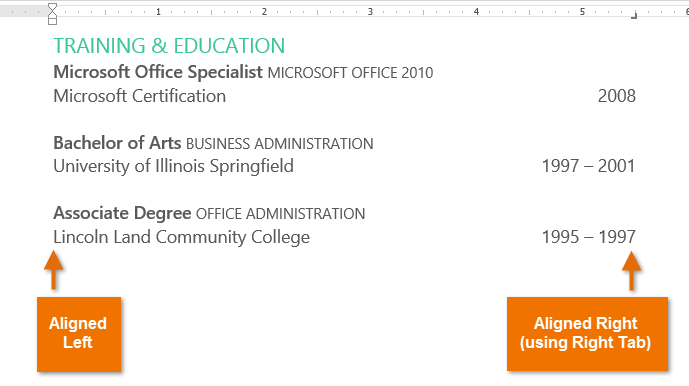 Using two types of alignment on the same line
Pressing the Tab key can either add a tab or create a first-line indent, depending on where the insertion point is. Generally, if the insertion point is at the beginning of an existing paragraph, it will create a first-line indent; otherwise, it will create a tab.
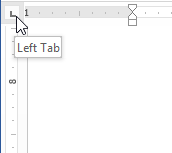
The tab selector
The tab selector is located above the vertical ruler on the left. Hover the mouse over the tab selector to see the name of the active tab stop.
 The tab selector
Types of tab stops include:
Although Bar Tab, First Line Indent, and Hanging Indent appear on the tab selector, they’re not technically tabs.
To add tab stops:
- Select the paragraph or paragraphs you want to add tab stops to. If you don’t select any paragraphs, the tab stops will apply to the current paragraph and any new paragraphs you type below it.
 Selecting text to tab
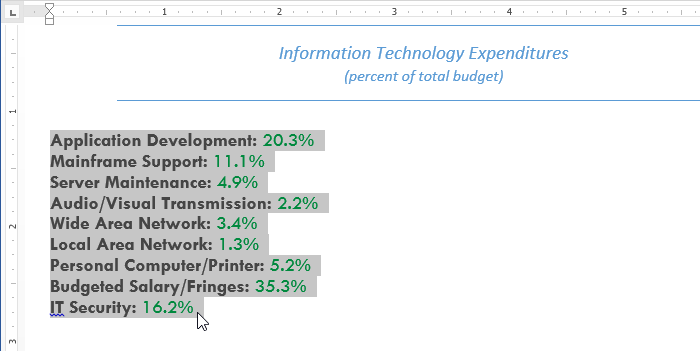
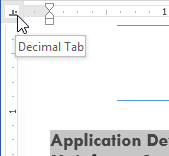
 - Click the tab selector until the tab stop you want to use appears. In our example, we’ll select Decimal Tab.
 Selecting a tab stop
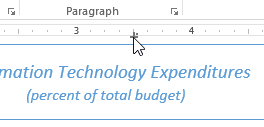
 - Click the location on the horizontal ruler where you want your text to appear (it helps to click on the bottom edge of the ruler). You can add as many tab stops as you want.
 Adding a tab stop to the Ruler
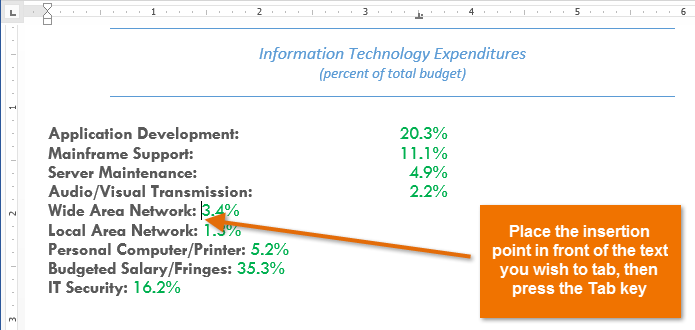
 - Place the insertion point in front of the text you want to tab, then press the Tab key. The text will jump to the next tab stop.
 Moving text to the Tab stop
Removing tab stops
It’s a good idea to remove any tab stops you aren’t using so they don’t get in the way. To remove a tab stop, click and drag it off of the Ruler.
 Removing a tab stop
Word can display hidden formatting symbols such as the spacebar ( ), paragraph (
 ), and Tab key (
 ) markings to help you see the formatting in your document. To show hidden formatting symbols, select the Home tab, then click the Show/Hide command.
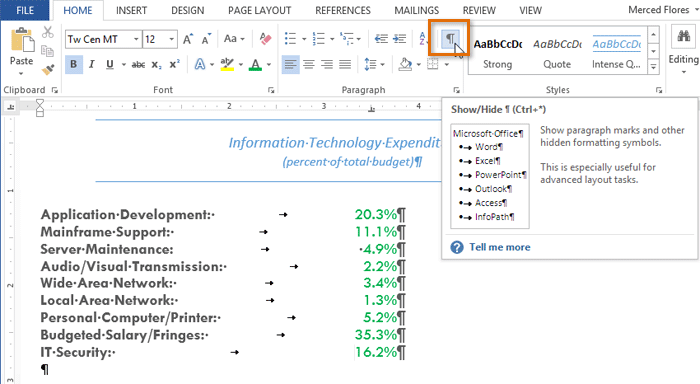 Displaying hidden formatting symbols
Challenge!
- Open an existing Word document. If you want, you can use our practice document.
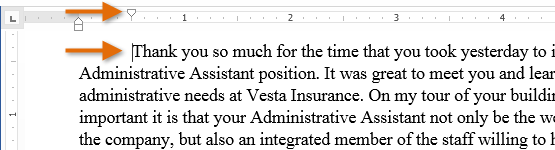
- Practice using the Tab key to indent some text. If you’re using the example, try indenting the second and third paragraphs of the thank-you letter.
- Select a paragraph, and try creating a hanging indent.
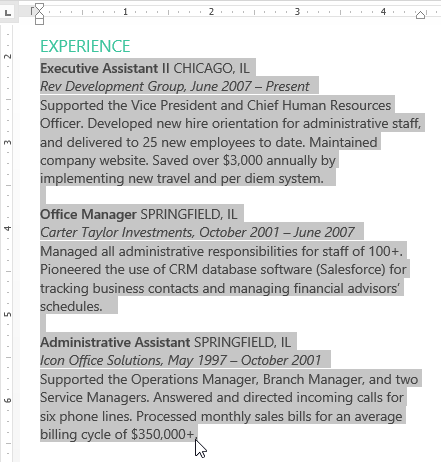
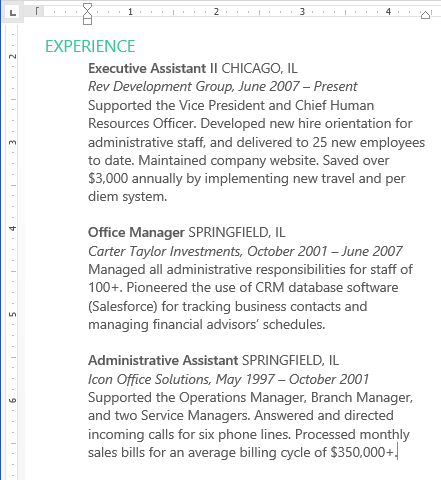
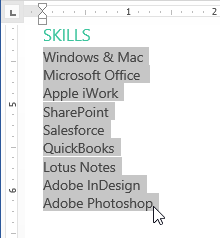
- Select some text, and use the Increase Indent and Decrease Indent commands to see how they change the text. If you’re using our example, practice increasing and decreasing the indent of the text in the Summary section of the resume.
- Explore the tab selector and tab stops. If you’re using our example, select the text in the Experience section of the resume and add a left tab stop at 3 inches, then align each of the cities to the tab stop.
/en/word2013/line-and-paragraph-spacing/content/
In this chapter, we will discuss how to set tabs in Word 2010. Microsoft Word tabs help in setting up information properly within a column. Word enables you to set left, center, right, decimal, or bar tabs to line up columnar information. By default, Word places tabs every .5 inch across the page between the left and right margins.
| S.No | Tab & Description |
|---|---|
| 1 |
Left Left-aligns text at tab stop and this is the default tab. |
| 2 |
Center Centers text over tab stop. |
| 3 |
Right Right-aligns text at tab stop. |
| 4 |
Decimal Aligns numbers at decimal point over tab stop. |
| 5 |
Bar Creates a bar to separate the text. |
Setting a Tab
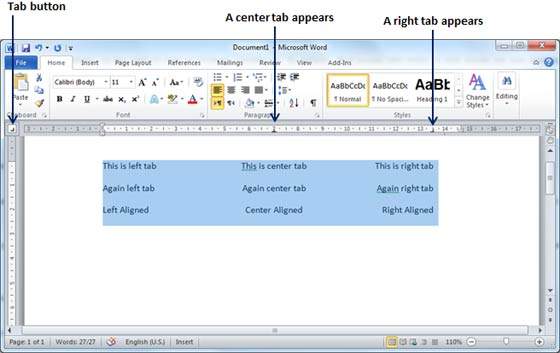
Following are the simple steps to set the center and the right tabs in a Word document. You can use similar steps but different tabs to set up decimal and bar tabs.
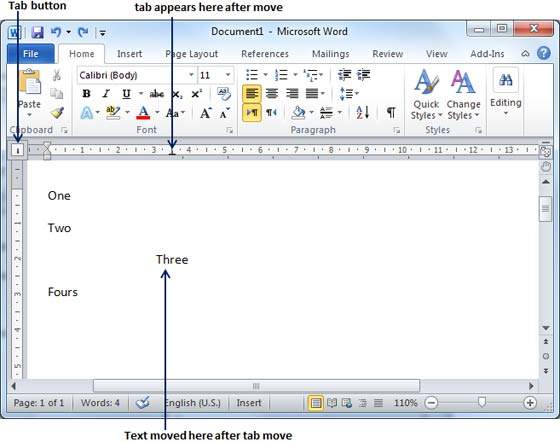
Step 1 − Type some text that you want to line up with the tab stops. Press the Tab key only once between each column of information you to want to line up. I typed the following three lines.
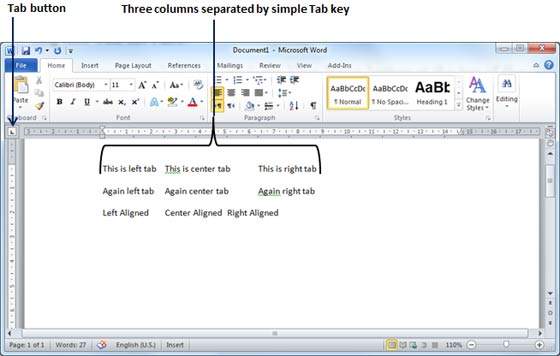
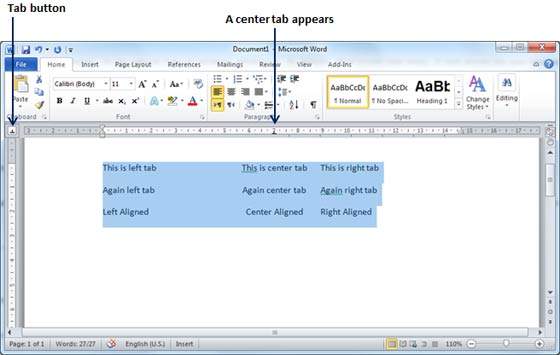
Step 2 − Select a tab type using the Tab button; assume the center tab and finally select the paragraph or paragraphs the tabs of which you want to set. Next click the ruler where you want the tab to appear, a tab will appear at the ruler where you just clicked and the selected portion of text will be adjusted in the center.
Step 3 − Now select the right tab using the Tab Button and click the ruler at the right side where you want to align the text at the right side. A right tab will appear at the ruler where you just clicked and the selected portion of text will be right-aligned.
Moving a Tab
You can move an already set tab at a particular location by following the steps given below.
Step 1 − Click just before the line for which you want to change the tab setting. Drag the tab sign available at the ruler to the left or right.
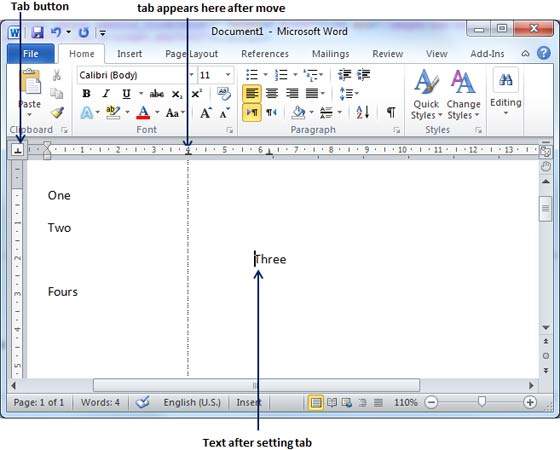
Step 2 − A vertical line marks its position as you drag and when you click and drag a tab, the text moves with the tab.