
Customizing the page numbers in a Word document can be difficult the first couple of times you try.
Page numbers in the header or footer and handled a little differently than the rest of the content in a document, and there are several different options.
You may be wondering how to add a page 1 of 2 numbering style in Word if your document requirements include that formatting.
Page numbers are a very important organizational aspect of a document, particularly if someone is editing it and might separate the document pages eventually. But the page number only tells part of the story of the document’s structure. It might also be important to know how many pages are in the document.
Fortunately, Microsoft Word 2013 has a page numbering option that allows you to include the total number of document pages as part of the page numbering.
So, for example, if you wanted to have Page 1 of 2 in a Word 2013 document, you would be able to select that format and number your document pages in that manner.
Our tutorial continues below with more information on how you can add page numbers to the header or footer sections of your document, as well as how to format the appearance of those page numbers.
- Open the document.
- Click Insert.
- Select Page Number.
- Choose a location.
Our article continues below with additional information on adding the page 1 of 2 page numbering style in Word, including pictures of these steps.
How to Add Page X of Y Page Numbers in Word (Guide with Pictures)
The steps in this article were performed in Microsoft Word 2013. Once this is finished you will have a document with page numbers in the format Page X of Y. So if you are looking at the first page of a two page document, then the page number would be Page 1 of 2.
Step 1: Open your document in Word 2013.
Step 2: Click the Insert tab at the top of the window.
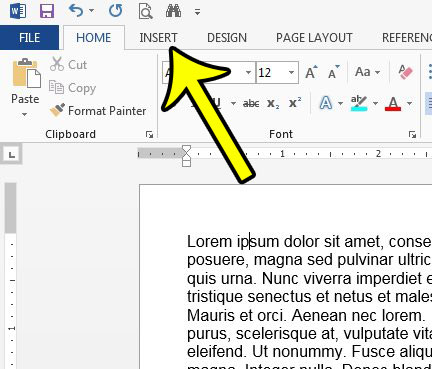
Step 3: Click the Page Number button in the Header & Footer section of the ribbon.

Step 4: Click the Top of Page or Bottom of Page option (depending on where you want your page numbers to display) then scroll down to the Page X of Y section and choose your preferred location.

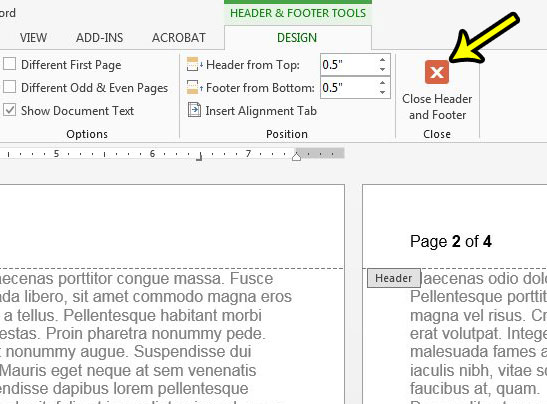
You can then make any adjustments to the page numbers using the options on the Header & Footer Tools Design tab.
Either double-click inside the body of the document or click the Close Header and Footer button to continue editing your document.
Our tutorial continues below with additional discussion about adding and customizing page number information in a Microsoft document.
How to Remove Page Numbers from the Title Page in Microsoft Word
One of the most common customizations that people want to make is whether or not their document has a different first page. if you have a title page and don’t want to include the first page number of that page, then you probably want to make use of that option.
These steps assume that you already have page numbers in the header or footer of your document.
- Double-click on your page number.
- Select Different First Page.
This will remove the page numbers from the header or footer on the first page.
If you want to choose the page number that your document starts with for your x of y format page numbers, then you can select the Insert tab, click Page Numbers, then select Format Page Numbers and click the Start at button and enter a number.
More Information on How to Add, Remove or Edit Page Numbers in a Word Document
Note that there are a handful of ways to alter the look of the page numbers that appear in your document. For example, in the article above we have chosen to use the option that shows the current page number, as well as the total number of pages in the document.
If you ever decide that you want to change the look of your page numbers then you can open the Insert menu by clicking Insert at the top of the window, select Page Numbers to expand the drop down menu, then click Format Page Numbers.
This opens a new Page Number Format dialog box that lets you select the number format (you could choose roman numerals, for example, if you wanted to), whether or not to include chapter numbers, and choose if you want your page numbering to have a different starting number, whether or not it should continue from the previous section if you have added a section break.
You can add a section break if you select the Layout tab, select Breaks in the Page Setup group, then click one of the Section Breaks options like Next Page, Continuous, Even Pages, or Odd Pages.
Do you also need to set up your Word document so that it isn’t displaying the page number on the first page, or title page? Learn how to skip the first page when numbering in Word 2013 to achieve this result.

Kermit Matthews is a freelance writer based in Philadelphia, Pennsylvania with more than a decade of experience writing technology guides. He has a Bachelor’s and Master’s degree in Computer Science and has spent much of his professional career in IT management.
He specializes in writing content about iPhones, Android devices, Microsoft Office, and many other popular applications and devices.
Read his full bio here.
I’ve had quite a few searches coming through to this blog from people wanting to know how to create a specific kind of page numbering – the kind when it reads “page 1 of 2”, “page 1 of 5”, “page 2 of 3”, etc. If you want more detail on page numbering, read this article on the basics and this one on the finer points. If you want to know how to make “page 1 of 10” appear on your document read on!
Why would I want to make my page numbers say page 1 of 2?
It’s a matter of personal choice as to how you format your page numbers. However, your department or office might have a style guide that dictates this, so it’s as well to know how to do it.
How do I get page numbers to say page 1 of 2?
As I mentioned, I have more detailed resources on page numbering. This is more of a ‘quick and dirty’ guide.
Go to the Insert tab, move to the Header and Footer area, and click on the little arrow at the bottom right of the Page Numbers button. This will give you a menu where you can select where your page number is to appear. Choose, for example, Top of Page, then scroll down the list of options to find Page X of Y:

This gives you three places where you can insert page x of y into your document. I’ve chosen the top one. Click the option and there you have it:

Note that you can’t change this in Page Number Options, you must do it using the Page Numbers option as shown above.
If you have found this article useful, please share it using the buttons below, and leave me a comment!
This is part of my series on how to avoid time-consuming “short cuts” and use Word in the right way to maximise your time and improve the look of your documents.
Related posts on this blog:
How to add page numbers to your document 1 – the basics
How to add page numbers to your document 2 – advanced editing etc.
Please note, these hints work with versions of Microsoft Word currently in use – Word 2003, Word 2007 and Word 2010, all for PC. Mac compatible versions of Word should have similar options. Always save a copy of your document before manipulating it. I bear no responsibility for any pickles you might get yourself into!
Find all the short cuts here …
![]()
Download Article
Learn the basics of formatting a Microsoft Word document
![]()
Download Article
- Formatting the Layout
- Formatting Text
- Adding Pictures, Graphs, & Tables
- Using a Formatted Template
- Saving in Other Formats
- Q&A
|
|
|
|
|
Microsoft Word is the world’s most popular word processing app. Depending on what kind of legal, formal, or personal paper you’re writing, each has its own formatting guidelines. Fortunately, Microsoft Word makes it easy to format the layout, text, and other objects in your document. If you’re new to using Microsoft Word, don’t worry. You can be formatting your document like a pro in no time. This wikiHow guide will teach you simple ways to format a Word document on your PC or Mac computer.
Things You Should Know
- You can find most of the formatting tools you’ll need in the Ribbon menu at the top of your document.
- If you don’t want to do all the formatting from scratch, try using one of Word’s premade templates.
- Save your document in different file formats using the Save a Copy or Save As menu.
-

1
Explore the Word user interface. You can access most of Word’s formatting tools from the Menu Bar or the Ribbon at the top of the window. You can modify which tools are visible using the View menu.
- The Menu Bar is the area at the top of the screen where you will find File, Edit, View, and other important menu commands.
- The Ribbon is at the top of your workspace and contains icons, menus, and shortcuts to common tasks.
-
2
Align your document. Different types of documents call for different text alignments. You can choose whether to align your entire document to the left, right, or at the center on the Home tab by clicking the Alignment buttons in the «Paragraph» section.
- These are the buttons that look like a small version of a document, with small black lines arranged according to their button’s alignment function.
- You can also adjust alignment by selecting the text and objects you want to align, right-clicking the selection, and choosing Paragraph. Select your preferred alignment from the Alignment menu under the General header.
- You can either set the alignment for the whole document or just a selected piece of text.
Advertisement
-
3
Set the line spacing of your document. Need to change your document to single or double-space? You can adjust the spacing of your entire document, or for selected text.
- If you haven’t begun typing or adding content to your Word document, click the Home tab, click the «Line and Paragraph Spacing» icon (a row of lines with vertical arrows to the left of the lines pointing up and down, and select an option.
- If your document already has text or other content, press Ctrl + A (PC) or Cmd + A (Mac) to select everything in the document, right-click the selection, and choose Paragraph. You can then choose your desired spacing from the «Line Spacing» menu.
- For a single-spaced document, choose 1.0. For double-spacing, choose 2.0.
- Many professional documents, like college essays and cover letters, should be double-spaced.
-
4
Adjust the page orientation. If you need to write the document in a different orientation, click the Layout tab at the top of Word, select Orientation, and choose either Portrait or Landscape.
-
5
Change the size of the paper. If you need to print the document on a specific paper size, click the Layout tab, click Size, and then select your desired size from the drop-down list.
- This will change the virtual size of the document you’re writing as well as the actual size of the printout.
-
6
Adjust the headers and footers. A header contains details that will appear on every page of the paper, such as page numbers, your name, or the document title.
- To set the header of your document, double-click on the topmost part of the page, and the header field will appear. You can also click the Insert tab and select Header.
- Footers are just like headers. All text in the footer will appear at the bottom of each page of your document. To set the footer, double-click on the bottommost part of the page, and the footer field will appear. You can also use the Footer button on the Insert tab.
- You can also format your headers and footers by selecting the View tab and clicking Header and Footer on the list. This action will open the headers and footers on your page and allow you to edit them.
-
7
Insert page or section breaks with the Breaks menu. Go to the Layout tab in the and click Breaks if you want to start a new page or section in your document. You can choose from a variety of types of breaks, including Page, Column, and Section. This is a very useful tool if you need to format different sections of your document in different ways.[1]
- For example, you can use section or page breaks to help you format your page numbers so that the numbering restarts with each new section.
-
8
Adjust the margin size with the Margins tool. Click the Margins button in the Layout tab and select a margin from the pre-defined margin settings listed on the drop-down list.
- If you want to use your own margin measurements, click Custom Margins at the very bottom of the drop-down list to set your own.
-
9
Add columns to split your text vertically on the page. If you need to create a newspaper-like document, you can do so by adjusting the format of the document to columns. Click the Layout tab, select the Columns option, and choose the number and alignment of columns from the drop-down list.
- The Columns button looks like a rectangle with two vertical columns of blue lines on it.
- If you want to create one, two, or three columns, you can do so from the preset options. If you’d like to create more, you’ll need to choose More Columns from the bottom of the dropdown menu.
- Note that this column option is different from the columns you get when you insert items like tables on your document.
-
10
Add bullets and numbers to make lists. Highlight the text that you would like to be numbered or bulleted and click the Numbering or Bullets button on the Home tab of the Ribbon.
- These buttons can be found side by side on the Ribbon, near the alignment buttons. The Numbering button displays three small lines with numbers to the left of the lines and the Bullets button displays three small lines with bullet points to the left of the lines.
- There’s also a third button that allows you to create more elaborate multi-level list styles, which is useful for formatting outlines.
-
11
Experiment with document styles. All documents have standard built-in styles (for example, Normal, Title, Heading 1). The default style for text is Normal. The template that a document is based on (for example, Normal.dotx) determines which styles appear on the Ribbon and on the Styles tab. You can see the current style presets for your document in the Home tab of the Ribbon.
- Before you apply a style, you can see all of the available styles and preview how they will appear when applied.
- On the Home tab, click a style to apply it to selected text.
- Click the Styles Pane button (the arrow pointing down and to the right) to view and select from advanced Style options.
- By default, Word applies a paragraph style (for example, Heading 1) to the entire paragraph. To apply a paragraph style to part of a paragraph, select only the specific part that you wish to modify.
-
12
Reveal hidden formatting symbols if you’re having trouble. Word documents often contain hidden code that can cause frustrating problems when you’re trying to modify your formatting. For instance, an invisible extra paragraph mark or section break can create unwanted spaces between paragraphs or lines of text. To see formatting symbols that are normally hidden so you can delete or modify them, you can click the ¶ button in the Home tab, or try one of the following:[2]
- On Windows, open File, select Options, and click Display. Tick the box next to Show all formatting marks.
- In Word for Mac, open the Word menu, then Preferences, then View. Check the box next to All in the Show Non-Printing Characters section of the View menu.
-
13
Use the View menu to change your view of the document. The View menu can let you change how your document looks in Word without actually making changes to the format. For example, Print Layout will show approximately what your document will look like when it’s printed out, while Web Layout will display the whole document in one long chunk without any page breaks.
- The View menu also lets you zoom in and out on your document.
- You can also change your view with the buttons and zoom slider at the bottom right side of the document pane, or with the View tab in the Ribbon.


Advertisement
-
1
Change the font face. On the Home tab, you will a drop-down menu containing a list of fonts to choose from. Use your mouse to select the text you want to change, then choose a font from the list.
-
2
Change font size and color. Also on the Home tab, you can change the size, color, and highlighting for your font. Select the text you want to format, then choose your options.
- By default, they will be set to the size and font associated with your document’s current Style settings. For example, if you’re using Word’s default template, the Normal style will use Calibri as the default font and 12 pt. as the default text size.
- Always consider the formatting guidelines of the document you are writing when choosing the font style and size.
- The standard font for most college and professional papers is Times New Roman font, text size 12.
-
3
Make text bold, underlined, or italicized. Besides setting the font style and size, you can also adjust the emphasis of words and lines in your document. Near the font and text size menus, you will see the Bold, Italics, and Underline buttons.
- Just click the buttons to make your text bold, underlined, or italicized.
- In this section, you can also find special text formatting options such as Strikethrough, Subscript, and Superscript.
-
4
Highlight text on the page. If you would like to change the background color behind selected text, similar to using a highlighter on a printed page, click the Text Highlight icon, which is a pen above a colored line.
- You can also add special text effects with the Text Effects button, which looks like a capital A with a glowing blue border.


Advertisement
-
1
Drag an image into your document. This is a quick way to add a picture to your Word document. Simply select an image on your desktop and drag and drop it into the document window. Make sure your image is placed exactly where you want it before you drop it.
- You can also insert an image by going to the Insert tab, then clicking Pictures. Select one of the options to browse for images on your computer, the web, or Word’s gallery of stock photos.
- You can also insert graphics or other media (such as video or audio clips) using the Shapes, Icons, or 3D Models, and Media buttons.
-
2
Enable text wrapping. Text wrapping changes the layout of your document, allowing the text to flow around the image no matter where it is placed. To turn on text wrapping:
- Right-click (or ctrl-click, on a Mac) on the image and hover over Wrap Text. Select the alignment that best suits your document. You will see a preview as you hover over each option.
- To change the location of the image in the document, select the image and then hold the Ctrl key. While holding the key, use the arrow keys to move the picture around the document.
- When you right-click or ctrl-click your image, you’ll also see an option in the context menu to add a caption under your image.
-
3
Edit your image in the Picture Format tab. Once you insert your image, you can select it to open a new Picture Format tab in the ribbon. From there, you can choose from a variety of tools, such as:
- Making corrections or adding artistic filters to the image
- Adding style effects, such as a drop shadow or frame, to the picture
- Entering alt text
- Tweaking the position of your image or changing the text-wrap settings
-
4
Add a graph or chart in the Insert tab. Click the Insert tab on the Ribbon, and then click the Chart option. Choose your preferred type of graph, such as a pie or bar chart, from the dropdown menu.
- Depending on the type of chart or graph you choose, Word may automatically launch Excel and create a new spreadsheet, where you can enter data for your chart.
-
5
Modify your graph. When you choose a graph type, a new tab will appear in the Ribbon menu called Chart Design. Navigate to that tab with the chart selected to make changes to the look of your graph or chart, or choose the Edit in Excel button to make changes to the data in your chart.
-
6
Use the Table tool to insert a table. If you want to add a table to your document, head over to the Insert tab and click the Table button. A menu will pop open where you can either scroll over a grid of squares to select your number of rows and columns, or select an option like Insert Table or Draw Table.
- Insert Table opens a pop-up menu where you can specify parameters like the number of rows and columns and whether or not the contents of the table autofit your document window.
- The Draw Table tool allows you to draw the table with your mouse directly in the document.
- Once you start creating a table, you’ll see several new table editing tools in the Layout tab.


Advertisement
-
1
Choose a template from the New Documents pane. Templates are a great way to create a nice-looking document without having to do all the formatting from scratch. To use one, open Word and select New from the side menu to create a new document, or select New from Template from the File menu. Click one of the templates on the screen to select it.[3]
- If you don’t see a template you like, use the Search bar at the top of the window to find one that fits your needs. For instance, use keywords like “flyer,” “resume,” or “research paper” to find different styles of templates.
-
2
Click Create to open the template. The template will open as a new document.
-
3
Select text within the template to modify it. Word templates are simply preformatted documents with text, graphics, and other elements already in place. To add your own text, select text anywhere on the document and type in your own. The new text will have the same format as whatever text you selected and replaced. You can also click on a blank area of the document and start typing to add new text.
- To select a single word, double-click it. You can select longer pieces of text by clicking and dragging your mouse, or positioning your cursor at the start of the selection and holding down Shift while pressing the Right Arrow key.
- You can also select and move, delete, or replace other elements in the template, such as images, graphs, or tables.
-
4
Modify your template with the Styles pane. Templates use styles to create their distinctive looks. If you want to change the look of the template, click the Styles button in the Home tab of the ribbon toolbar. Click the down arrow next to any of the style elements and select Modify Style… to make changes.
- You can also make any other types of changes you like using the rest of the tools in the ribbon menu or Format menu.
-
5
Save your modified template as a document. When you’ve made the changes you want to the template, save it the same way you would any other Microsoft Word document.


Advertisement
-
1
Click the file menu and select Save a Copy…. If you want to save a document as a file type other than .DOCX, you can do so with the Save a Copy function.
- If it’s a brand-new document that you haven’t already saved, select Save As… instead.
-
2
Open the File Format dropdown menu. You’ll see this menu at the bottom of the Save a Copy or Save As window.
-
3
Select the format you want from the menu. In addition to common formats like .DOC, .DOCX, .TXT and .RTF, you can also save your document as a PDF, an XML file, or a macro-enabled Word file.
- Check out the list of file formats that are supported in word here.


Advertisement
Add New Question
-
Question
What is Microsoft publishing?

UK_Gamer05
Community Answer
Publisher is a tool for making posters, leaflets, booklet,s etc. It’s for when you need to create something that isn’t a standard document.
-
Question
How do I move from page one to page two of a Word document?
UK_Gamer05
Community Answer
In Word 2016, on the insert tab, either select insert new page or page break.
Ask a Question
200 characters left
Include your email address to get a message when this question is answered.
Submit
Advertisement
Thanks for submitting a tip for review!
Tip
- Unless free-handedly writing your paper, consult the guidelines of your document first before adjusting its format.
- Besides the header, footer, and page layout formats (which affect the entire document), all the other formatting tools can be applied only on specific parts of the document.
About This Article
Thanks to all authors for creating a page that has been read 310,004 times.
Is this article up to date?
What if you need to use different page number formats (1, 2,….or I, II, …. or A, B, C,….etc.) in different sections of a document? Many writers follow this convention of using Roman numerals in the initial few pages and continue with integer numbers for the rest of the pages of the document.
To achieve such page numbering style in MS Word, we need to use Section Breaks. Each document section can have unique page number format.
The following procedure shows how to insert Roman numerals on the Footer section of the first three pages of a document and then integers for the rest of the document.
THE PROCEDURE
Firstly, will divide the document into two sections by applying a Section Break. The first section will consist of the first three pages of the document.
To apply a section break
- Place mouse cursor at the bottom of the third page of the document.
- From the Ribbon, under the tab Page Layout, within the group Page Setup, click Breaks. A drop-down list appears.
- From the list, select option Next Page available under Section Breaks.
See the following image:

Word inserts a Section Break at the end of the third page. If you are unable to view the Section Break, click Ctrl+Shift+8. With a Section break, Word divides the document into two logical sections.
To enable the Footer section of the document
- Right-click at the bottom of the document and then click Edit Footer. Word enables the Footer section.
- Place cursor at the Footer section of the third page (where you are going to insert page number). Now, we are going to insert page number in the footer.
To insert page number
- On the Insert tab, within the group Header & Footer, click the Page Number drop-down and then point to Current Position. From the Current Position sub menu, select Plain Number (see below image). Word inserts a page number at the cursor position for the first three pages.
- Subsequently, change the page number format to Roman numbers.
- Select the page number that has been inserted.
- On the Insert tab, within the group Header & Footer group, click Page Number and then navigate to Format Page Numbers.
- On the Format Page Numbers dialog box, select Roman numerals from the Number Format drop-down list.
- Word replaces the integer numbers with Roman numerals as pages i, ii and iii.
See the following image:

3. Now, place cursor at the Footer section of the fourth page. Then, on the Insert tab, within the group Header & Footer, click the Page Number drop-down and then click Current Position drop-down list and select Plain Number format. Word will insert page number starting with number.
Note: If you do not want your cover page to have the page number, do the following:
- On the Page Layout tab, in the Page Setup group, click the arrow button on the right bottom corner. The Page Setup window appears.
- Select the Different First Page check box.
- Click OK.

About wordknowhowhttp://wordknowhow.comThis blog site was started to help people with Microsoft Word. I use Word a lot at work, and I understand that some features are difficult to use. There were no simplified instructions online to help me use these features. It is for this reason that this site exists; to make your life easier with Word.
Feel free to post your comments, queries, suggestions, etc. I will do my best to help you!
I have a Word Document that I needed to save each page as a individual Document in Rich Text Format. You can change the variables for a .txt file, docx file, etc., as needed, but remember to change the FileFormat=.
Note that this starts at the current page you are on Application.Browser.Target = wdBrowsePage and continues thru a loop for the next 99 pages (100 total).
You can modify the macro to fit your need.
The variable i represents the file number (DCX_1.Rtf) (DCX_2.Rtf) etc.
For i = 1 To 100
    Application.Browser.Target = wdBrowsePage
    ActiveDocument.Bookmarks("page").Range.Copy
    Documents.Add
    Selection.Paste
    ChangeFileOpenDirectory "C:__BOOKJUNK"
    ActiveDocument.SaveAs FileName:="DCX_" & i & ".rtf", FileFormat:=wdFormatRTF
    ActiveDocument.Close
    Application.Browser.Next
Next i