
This article is for people with visual or cognitive impairments who use a screen reader program such as Microsoft’s Narrator, JAWS, or NVDA with Microsoft 365 products. This article is part of the Microsoft 365 screen reader support content set where you can find more accessibility information on our apps. For general help, visit Microsoft Support home.
Use Word with your keyboard and a screen reader to track, show, and list the changes in your document. We’ve tested it with Narrator, JAWS, and NVDA, but it might work with other screen readers as long as they follow common accessibility standards and techniques. You’ll also learn how to accept or reject tracked changes.
 Need instructions on how to track changes or accept tracked changes in a Word document, but not using a screen reader? See Track changes in Word or Accept tracked changes.
Notes:
-
New Microsoft 365 features are released gradually to Microsoft 365 subscribers, so your app might not have these features yet. To learn how you can get new features faster, join the Office Insider program.
-
To learn more about screen readers, go to How screen readers work with Microsoft 365.
-
When using a screen reader, you’ll use that screen reader’s modifier key, sometimes along with other related keys, to navigate and interact within the app and execute commands. In our documentation this will sometimes be indicated by «SR key.»
In this topic
-
Turn on Track Changes
-
Choose how to show changes (revisions)
-
Check and navigate the tracked changes
-
Show all changes in the Reviewing pane
-
Show all changes in the JAWS Virtual Viewer
-
Show all changes in the JAWS Revisions window
-
Read the tracked changes inline
-
Navigate the changes one by one
-
Move to the details of formatting changes with Narrator
-
-
Remove tracked changes
-
Accept a single tracked change
-
Reject a single tracked change
-
Accept or reject all tracked changes
-
-
Keep Track Changes turned on
-
Turn off Track Changes
Turn on Track Changes
When you turn on Track Changes, Word marks up and shows any changes that anyone makes to your document. You can turn this feature on using either a direct keyboard shortcut, or the ribbon.
-
To turn on Track Changes, do one of the following:
-
To use the direct shortcut, press Ctrl+Shift+E.
-
To use the ribbon, press Alt+R, G, G.
-
Choose how to show changes (revisions)
You can choose how to show the tracked changes in your document.
-
Press Alt+R, T, D. The markup menu is expanded, and you hear the name of the currently selected markup.
-
In the markup list, press the Up or Down arrow keys until you hear the name of the option you want. The following options are available:
-
Simple Markup is the default option, and indicates where the changes are with a vertical line in the document margin. Your screen reader announces that there’s a change at the beginning of a changed paragraph.
-
No Markup hides markup to show what the incorporated changes will look like. This option does not delete the changes.
Tip: To show the markup again, choose Simple Markup or All Markup.
-
All Markup shows all edits with different colors of text and lines. This option is the recommended markup. Your screen reader announces the change and change type where the change happened.
If formatting has been changed, JAWS also reads the details of the change. With Narrator, you need to move to the margin notes or Reviewing Pane to hear the details. For instructions, go to Move to the details of formatting changes with Narrator or Show all changes in the Reviewing Pane.
-
Original shows the document in its original form.
To select and apply an option, press Enter.
-
-
To select which changes are tracked, press Alt+R, T, M. The Show Markup menu is expanded. Press the Down arrow key until you hear the option you want, and then press Enter.
Repeat this step for all the markup types you’d like to select.
Check and navigate the tracked changes
You have several options to check and navigate the tracked changes in a document. You can simply let your screen reader read the document announcing the changes. If the document is long or there are many tracked changes, you might want to use the listing options that Word or the screen reader offers for an overview of the changes. Alternatively, you can navigate through the document change by change.
Show all changes in the Reviewing Pane
-
Press Alt+R+T, P. The Reviewing Pane menu is expanded.
-
Do one of the following:
-
To display the pane horizontally, press H.
-
To display the pane vertically, press V.
-
-
To browse the changes in the pane, press the Up or Down arrow key.
-
When you are done working with the Reviewing Pane, to close it, press Alt+R+T, P, and then press Enter.
Show all changes in the JAWS Virtual Viewer
-
Press the Windows logo key+Semicolon (;). The Items to Display in Virtual Viewer dialog box opens.
-
Press the Down arrow key until you hear «Revisions,» and then press Enter. The Virtual Viewer opens and you hear the total number of revisions in the document.
-
Press the Tab key to browse the list of revisions. JAWS reads the change and its details.
-
When on a change, press Enter to jump into the document body.
Show all changes in the JAWS Revisions window
-
Press Shift+SR key+R. The Revisions window opens.
-
Press the Down arrow key to browse the list of changes.
-
When on a change, press Enter to jump into the document body.
Read the tracked changes inline
The way your screen reader announces the changes and change types when reading through the document depends on the selected markup and the screen reader you’re using.
For instructions on how to use a screen reader to read a Word document, go to Read a document.
Tip: With JAWS, you can open the speech history if you want to check what JAWS has been saying. At any point, press the SR key+Spacebar, followed by H. To browse the speech history, press the Up or Down arrow key.
Navigate the changes one by one
You can use keyboard shortcuts to move through the tracked changes one by one.
-
To go to the next change in the document, press Alt+R, H, 1.
-
To go to the previous change in the document, press Alt+R, F.
Move to the details of formatting changes with Narrator
You can navigate from the document editing area to the margin to check the details of a tracked formatting change.
-
Select the All Markup option as instructed in Choose how to show changes (revisions).
-
Let your screen reader read the body text until it announces a formatting change. Then press the SR key+A.
-
The focus moves to the margin and Narrator announces the change detail. To return back to the body text, press the Left arrow key.
Remove tracked changes
The only way you can remove tracked changes permanently in a document is to accept or reject them.
Accept a single tracked change
You can accept single changes in the document body, Reviewing Pane, or margin notes.
-
Navigate to the tracked change you want to remove.
-
To accept the change, do one of the following:
-
Press Shift+F10. The context menu opens. Press E. The change is accepted, and the focus returns to the body text.
-
Press Alt+R, A, 2. You hear: “Accept and Move to Next.” Then press Enter. The change is accepted, and the focus moves to the next change.
-
Reject a single tracked change
You can reject single changes in the document body, Reviewing Pane, or margin notes.
-
Navigate to the tracked change you want to remove.
-
To reject the change, do one of the following:
-
Press Shift+F10. The context menu opens. Press R. The change is rejected, and the focus returns to the body text.
-
To reject the change, press Alt+R, J. You hear: “Reject and Move to Next.” Then press Enter. The current change is rejected, and the focus moves to the next change.
-
Accept or reject all tracked changes
-
To accept all tracked changes, press Alt+R, A, 2, L.
-
To reject all tracked changes, press Alt+R, J, L.
Keep Track Changes turned on
To prevent someone else from turning off Track Changes, turn on Lock Tracking and add a password. When Tracked Changes is locked, anyone opening your document can view the changes but they can’t turn off the feature, and they can’t accept or reject changes.
-
Press Alt+R, G, L. You hear: “Lock Tracking.”
-
Choose and type a password, and press the Tab key. You hear: “Re-enter to confirm.” Type your password again, and then press Enter.
Turn off Lock Tracking
-
Press Alt+R, G, L. You hear: «Unlock Tracking window, password.”
-
Type your password and press Enter.
Turn off Track Changes
When you turn Track Changes off, Word stops marking up new changes. All changes that were already tracked remain marked up in the document, until you remove them. You can turn this feature off using either a direct keyboard shortcut or the ribbon.
-
To turn off Track Changes, on the keyboard, press Ctrl+Shift+E.
-
To use the ribbon to turn off Track Changes, on the keyboard, press Alt+R, G, G.
See also
Use a screen reader to add, read, and delete comments in Word
Use a screen reader to check spelling and grammar in Word
Keyboard shortcuts in Word
Basic tasks using a screen reader with Word
Set up your device to work with accessibility in Microsoft 365
Use a screen reader to explore and navigate Word
What’s new in Microsoft 365: Release notes for Current Channel
Use Word for Mac with your keyboard and VoiceOver, the built-in macOS screen reader, to see who’s been making changes to your document, manage tracked changes, and delete comments in your Word for Mac document.
Need instructions on how to track changes or accept tracked changes in a Word document, but not using a screen reader? See Track changes in Word or Accept or reject tracked changes in Word.
Notes:
-
New Microsoft 365 features are released gradually to Microsoft 365 subscribers, so your app might not have these features yet. To learn how you can get new features faster, join the Office Insider program.
-
This topic assumes that you are using the built-in macOS screen reader, VoiceOver. To learn more about using VoiceOver, go to VoiceOver Getting Started Guide.
-
For the best reading and editing experience, we recommend using the Print Layout View and the All Markup option.
In this topic
-
Turn Track Changes on and off
-
Show changes (revisions) in a document
-
Navigate to tracked changes
-
Remove tracked changes
-
Keep Track Changes turned on
Turn Track Changes on and off
When you turn on Track Changes, Word for Mac marks up and shows any changes that anyone makes to your document. You can turn this feature on using a direct keyboard shortcut.
To toggle Track Changes on and off, in the document text area, press Command+Shift+E.
Show changes (revisions) in a document
You can choose how you’d like to show the tracked changes in your document.
-
Press F6 until you hear the currently selected tab. If you’re already on the Review tab, proceed to step 3.
-
Press the Tab key or Shift+Tab until you hear «Review tab,» and then press Control+Option+Spacebar. You hear: «Review tab, selected.»
-
Press the Tab key until you hear the current markup, followed by «Display for review, pop up button.»
-
To expand the markup menu, press Control+Option+Spacebar.
A list with the following four view options opens:
-
Simple Markup is the default option, and indicates where the changes are with a red line in the document margin.
-
No Markup hides markup to show what the incorporated changes will look like. This option does not delete the changes.
Note: To see the markup again, choose Simple Markup or All Markup.
-
All Markup shows additions in the body text with different colors, and deletions and format changes in the comments pane. This option is the recommended markup and best supported by screen readers.
-
Original shows the document in its original form.
-
-
Press the Up or Down arrow keys until you hear the option you’d like to select, and then press Control+Option+Spacebar. You hear the selected markup, followed by «Display for review.»
-
To choose the type of markup you’d like to see, press the Tab key until you hear “Markup options, menu button,” and then press Control+Option+Spacebar.
A list with the following options opens:
-
Comments
-
Ink
-
Insertions and Deletions
-
Formatting
-
Track Moves From/To
-
Balloons
-
Reviewers
-
-
In the list, press the Up or Down keys until you hear the name of the option you’d like to choose. Then press Control+Option+Spacebar. Repeat this step for all the markup types you’d like to select or unselect.
Navigate to tracked changes
When Track Changes is on, Word marks up the body text or the comments pane in your document. VoiceOver announces the changes and the change types when reading through the text.
-
Underline and color are used for insertions in the body text. You hear «Insertion change» when navigating by the beginning and end of a tracked change.
-
Word marks deletions in the comments pane. VoiceOver announces the deleted word.
-
If the formatting has been changed, you hear: «Format change.” To hear details about the formatting changes, you need to navigate to the margin of your document.
Note: Make sure you’ve selected the All Markup option as instructed in Show changes (revisions) in a document.
Use the Next and Previous buttons
-
To navigate through all tracked changes in your document one by one, navigate to the Review tab as instructed in Show changes (revisions) in a document.
-
Press the Tab key until you hear «Previous button, previous» or «Next button, next,» and then press Control+Option+Spacebar. Repeat this step until you’ve gone through the changes.
Use the Comments pane
-
To move through deletions and formatting changes logged in the Comments pane, in the editing area, press Control+Option+Right arrow key. The focus moves to the comments pane.
-
To move in the list, press Control+Option+Up or Down arrow key.
Use the Reviewing pane
-
To navigate to the Reviewing pane, press Control+Option+M. You hear: «Menu bar, Apple.»
-
Press the Right arrow key until you hear «View,» and then press Control+Option+Spacebar.
-
Press the Down arrow key until you hear «Sidebar,» and the press Control+Option+Spacebar.
-
Press the Down arrow key until you hear «Reviewing,» and then press Control+Option+Spacebar.
-
Press the Tab key until you hear: «Summary.» To listen to the overview of the changes, press the Right arrow key. You hear the total number of changes and the number of insertions, deletions, moves, formatting changes, and comments.
-
To move from the summary to the change details, press VO+Shift+Up arrow key. You hear: «Out of reviewing pane group.»
-
Press the Down arrow key once, and then press Control+Option+Shift+Down arrow key. VoiceOver reads the change details line by line.
-
To close the Reviewing pane, press Control+Option+Shift+Up arrow key. Press the Up arrow key until you hear: «Thumbnails pane.» Press the Right arrow key until you hear «Close button,» and then press Control+Option+Spacebar.
Remove tracked changes
The only way you can remove tracked changes permanently in a document is to accept or reject them.
Accept or reject a single tracked change
-
Navigate to the tracked change you’d like to remove as instructed in Navigate to tracked changes.
-
Navigate to the Review tab as instructed in Show changes (revisions) in a document.
-
Do one of the following:
-
To accept the change, press the Tab key until you hear “Accept menu button,» and then press Control+Option+Shift+M. Press the Tab key until you hear «Accept and move to next” and press Control+Option+Spacebar. The change is accepted, and the focus moves to the next change in your document.
-
To reject the change, press the Tab key until you hear «Reject menu button,» and then press Control+Option+Shift+M. Press the Tab key until you hear “Reject and move to next” and press Control+Option+Spacebar. The change is rejected, and the focus moves to the next change in your document.
-
Accept or reject all tracked changes
-
Navigate to the Review tab as instructed in Show changes (revisions) in a document.
-
Do one of the following:
-
To accept all tracked changes, press the Tab key until you hear “Accept menu button,» and then press Control+Option+Shift+M. Press the Tab key until you hear «Accept all changes» and press Control+Option+Spacebar.
-
To reject all tracked changes, press the Tab key until you hear “Reject menu button,» and then press Control+Option+Shift+M. Press the Tab key until you hear «Reject all changes» and press Control+Option+Spacebar.
-
Keep Track Changes turned on
To prevent someone else from turning off Track Changes, you can lock the feature. You can also add a password for further protection. When Tracked Changes is locked, anyone opening your document can view the changes but they can’t turn off the feature, and they can’t accept or reject changes.
-
Navigate to the Review tab as instructed in Show changes (revisions) in a document. Press the Tab key until you hear «Protect Document, unchecked checkbox» and press Control+Option+Spacebar. The Password Protect dialog box opens.
-
Press the Tab key until you hear «Protect document for,» and then press Control+Option+Spacebar.
-
Press the Tab key until you hear «Tracked changes, radio button» and press Control+Option+Spacebar.
-
To set a password, press the Tab key until you hear «Protection secure, edit text.» Type a password and press the Tab key.
-
In the confirmation dialog box, type the password again, and press the Tab key until you hear: «OK default button.» Press Control+Option+Spacebar.
-
Press the Tab key until you hear «OK, default button» and press Control+Option+Spacebar.
Turn off Track Changes locking
-
In the Password Protect dialog box, press the Tab key until you hear «Protect document for,» and then press Control+Option+Spacebar.
-
Type the password and press the Tab key until you hear «OK default button» and press Control+Option+Spacebar.
-
Press the Tab key until you hear «OK default button,» and then press Control+Option+Spacebar.
See also
Use a screen reader to share a document in Word
Keyboard shortcuts in Word
Basic tasks using a screen reader with Word
Set up your device to work with accessibility in Microsoft 365
Use a screen reader to explore and navigate Word
What’s new in Microsoft 365: Release notes for Current Channel
Use VoiceOver, the built-in iOS screen reader, to switch Track Changes on or off in your Word for iOS document. Find the existing changes in the document, and then accept or reject them. Lock Track Changes on so others cannot switch it off.
Notes:
-
New Microsoft 365 features are released gradually to Microsoft 365 subscribers, so your app might not have these features yet. To learn how you can get new features faster, join the Office Insider program.
-
This topic assumes that you are using the built-in iOS screen reader, VoiceOver. To learn more about using VoiceOver, visit Apple accessibility.
-
To learn more about screen readers, go to How screen readers work with Microsoft 365.
In this topic
-
Turn Track Changes on and off
-
Navigate to tracked changes
-
Accept or reject changes
-
Keep Track Changes turned on
Turn Track Changes on and off
When you turn Track Changes on, all changes made to your Word document are tracked and shown.
-
Open the document in Word. Swipe right until you hear «Show ribbon, button,» and double-tap the screen.
-
You hear the currently selected tab, such as: «Home, tab.» To change to the Review tab, double-tap the screen and swipe right or left until you hear «Review, tab,» and double-tap the screen.
-
Swipe right repeatedly until you hear «Track Changes, off, button» (if Track Changes is currently off) or «Selected, Track Changes, on, button» (if Track Changes is currently on), and double-tap the screen to turn on or off.
-
To close the tab and return to the document, swipe left repeatedly until you hear «Hide ribbon, button,» and double-tap the screen.
Navigate to tracked changes
Use the Review tab in the Print Layout view to navigate the tracked changes and comments in your Word document.
-
Make sure the document is open in the Print Layout view in Word.
To change to the Print Layout view, swipe right until you hear «Print Layout, button,» and double-tap the screen. If you hear «Mobile View, button,» you’re already in the Print Layout view.
-
Swipe right or left until you hear «Show ribbon, button,» and double-tap the screen.
-
You hear the currently selected tab, such as: «Home, tab.» If needed, double-tap the screen and swipe right or left until you hear «Review, tab,» and double-tap the screen.
-
To navigate to changes in the document, swipe right repeatedly until you hear «Next change, button» or «Previous change, button,» and double-tap the screen.
-
To hear the change or comment, swipe right repeatedly until you hear the person who’s made the change and the changed text or comment.
-
To move to the next change, swipe left until you hear «Next change, button,» and double-tap the screen. To hear the change or comment, swipe right until you hear it. To move back to the Next change button, swipe left.
Accept or reject changes
You can check and accept or reject the changes in a Word document one by one or select to accept or reject all of them at once.
-
Navigate to the change you want to accept or reject as instructed in Navigate to tracked changes.
-
Swipe left repeatedly until you hear «Accept, button» or «Reject, button,» and double-tap the screen.
-
The Accept or Reject menu opens. To hear the available options, swipe right. When you hear the option you want to select, double-tap the screen.
Keep Track Changes turned on
To prevent someone else from turning off Track Changes in your document, you can select to block other authors. Others opening your document can still view it but they can’t turn off Track Changes, or accept or reject changes.
-
Open the document in Word. Swipe right until you hear «Show ribbon, button,» and double-tap the screen.
-
You hear the currently selected tab, such as: «Home, tab.» To change to the Review tab, double-tap the screen and swipe right or left until you hear «Review, tab,» and double-tap the screen.
-
Swipe right repeatedly until you hear «Block other authors, button,» and double-tap the screen.
-
The Block Authors menu opens. Swipe right until you hear «Block other authors, button,» and double-tap the screen.
See also
Use a screen reader to share a document in Word
Keyboard shortcuts in Word
Basic tasks using a screen reader with Word
Set up your device to work with accessibility in Microsoft 365
Use a screen reader to explore and navigate Word
What’s new in Microsoft 365: Release notes for Current Channel
Use TalkBack, the built-in Android screen reader, to switch Track Changes on or off in your Word for Android document. Find the existing changes in the document, and then accept or reject them.
Notes:
-
New Microsoft 365 features are released gradually to Microsoft 365 subscribers, so your app might not have these features yet. To learn how you can get new features faster, join the Office Insider program.
-
This topic assumes that you are using the built-in Android screen reader, TalkBack. To learn more about using TalkBack, go to Android accessibility.
In this topic
-
Turn Track Changes on and off
-
Navigate to tracked changes
-
Accept or reject changes
Turn Track Changes on and off
When you turn Track Changes on, all changes made to your Word document are tracked.
-
Open the document in Word. Swipe right until you hear «Not checked, more options, switch,» and double-tap the screen.
-
You hear the currently selected tab, such as: «Tab menu, Home, selected.» To change to the Review tab, double-tap the screen and swipe right or left until you hear «Review, tab,» and double-tap the screen.
-
Swipe right repeatedly until you hear «Track Changes, not checked, switch» (if Track Changes is currently off) or «Track Changes, checked, switch» (if Track Changes is currently on), and double-tap the screen to turn on or off.
-
To close the tab and return to the document, swipe left repeatedly until you hear «Checked, more options, switch,» and double-tap the screen.
Navigate to tracked changes
Use the Review tab to navigate the tracked changes in your Word document.
-
Swipe right or left until you hear «Not checked, more options, switch,» and double-tap the screen.
-
You hear the currently selected tab, such as: «Tab menu, Home, selected.» To change to the Review tab, double-tap the screen and swipe right or left until you hear «Review, tab,» and double-tap the screen.
-
To navigate to the changes in the document, swipe right repeatedly until you hear «Next change, button» or «Previous change, button,» and double-tap the screen. You hear the changed text.
-
The focus remains on the Next change or Previous change button. To cycle through the changes, just double-tap the screen.
Accept or reject changes
You can check and accept or reject the changes in a Word document one by one or select to accept or reject all of them at once.
-
Navigate to the change you want to accept or reject as instructed in Navigate to tracked changes.
-
Swipe left repeatedly until you hear «Accept, menu» or «Reject, menu,» and double-tap the screen.
-
The Accept or Reject menu opens. To hear the available options, swipe right. When you hear the option you want to select, double-tap the screen.
See also
Use a screen reader to share a document in Word
Keyboard shortcuts in Word
Basic tasks using a screen reader with Word
Set up your device to work with accessibility in Microsoft 365
Use a screen reader to explore and navigate Word
What’s new in Microsoft 365: Release notes for Current Channel
Use Word for the web with your keyboard and a screen reader to see who’s been making changes to your document and manage tracked changes. We have tested it with Narrator in Microsoft Edge, JAWS in Chrome, and NVDA in Firefox, but it might work with other screen readers and web browsers as long as they follow common accessibility standards and techniques.
Notes:
-
If you use Narrator with the Windows 10 Fall Creators Update, you have to turn off scan mode in order to edit documents, spreadsheets, or presentations with Microsoft 365 for the web. For more information, refer to Turn off virtual or browse mode in screen readers in Windows 10 Fall Creators Update.
-
New Microsoft 365 features are released gradually to Microsoft 365 subscribers, so your app might not have these features yet. To learn how you can get new features faster, join the Office Insider program.
-
To learn more about screen readers, go to How screen readers work with Microsoft 365.
-
When you use Word for the web with a screen reader, switch to the full screen mode. Press F11 to toggle the full screen mode on and off.
-
When you use Word for the web, we recommend that you use Microsoft Edge as your web browser. Because Word for the web runs in your web browser, the keyboard shortcuts are different from those in the desktop program. For example, you’ll use Ctrl+F6 instead of F6 for jumping in and out of the commands. Also, common shortcuts like F1 (Help) and Ctrl+O (Open) apply to the web browser – not Word for the web.
-
If the Xbox Game Bar app is running on your device, opening the Review tab in Word for the web with the shortcut Alt+Windows logo key+R can cause unintentional activation of the screen recording feature in the app. To prevent this, close the Xbox Game Bar app.
In this topic
-
Turn on Track Changes
-
Navigate the tracked changes
-
Remove tracked changes
-
Turn off Track Changes
Turn on Track Changes
When you turn on Track Changes, Word marks up and shows any changes that either you or everyone makes to your document.
-
To turn on Track Changes, do one of the following:
-
To enable tracking changes for everyone, press Alt+Windows logo key+R, G, F.
-
To enable tracking changes for just yourself, press Alt+Windows logo key+R, G, J.
-
Navigate the tracked changes
-
To navigate the tracked changes in a document, do one of the following:
-
To navigate to the next tracked change, press Alt+Windows logo key+R, H.
-
To navigate to the previous tracked change, press Alt+Windows logo key+R, J.
-
Remove tracked changes
The only way you can remove tracked changes permanently in a document is to accept or reject them.
-
Navigate to the change you wish to accept or reject, as described in Navigate the tracked changes.
-
Do one of the following:
-
To accept the change, press Alt+Windows logo key+R, A, 2.
-
To reject the change, press Alt+Windows logo key+R, J.
The focus moves to the next tracked change.
-
Turn off Track Changes
When you turn Track Changes off, Word stops marking up new changes. All changes that were already tracked, remain marked up in the document until you remove them.
To turn off Tracked Changes, press Alt+Windows logo key+R, G, O.
See also
Use a screen reader to insert and change text in Word
Use a screen reader to check spelling and grammar in Word
Keyboard shortcuts in Word
Basic tasks using a screen reader with Word
Use a screen reader to explore and navigate Word
What’s new in Microsoft 365: Release notes for Current Channel
Technical support for customers with disabilities
Microsoft wants to provide the best possible experience for all our customers. If you have a disability or questions related to accessibility, please contact the Microsoft Disability Answer Desk for technical assistance. The Disability Answer Desk support team is trained in using many popular assistive technologies and can offer assistance in English, Spanish, French, and American Sign Language. Please go to the Microsoft Disability Answer Desk site to find out the contact details for your region.
If you are a government, commercial, or enterprise user, please contact the enterprise Disability Answer Desk.
Lesson 20: Reviewing Documents
/en/word2010/working-with-headers-and-footers/content/
Introduction
Let’s say someone asks you to proofread a report. If you have a hard copy of the report, you might use a red pen to cross out sentences, mark misspellings, or add comments in the margins. However, you could also do all of these things in Word using the Track Changes and Comments features.
When you’ve finished reviewing the document, the other person can choose to automatically accept all of your changes, or decide whether to accept or reject each change one by one.
In this lesson, you’ll learn how to track changes, add comments, and compare two versions of a document.
Using Track Changes and Comments
When you need to collaborate on the content of a document or if you need someone to proofread your document, Word’s Track Changes and Comments features make it easier for you to collaborate with others.
Optional: You can download this example for extra practice.
About Track Changes
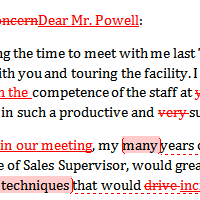
When you turn on the Track Changes option, all changes you make to the document show up as colored markups. If you delete some text, it won’t disappear but instead will have a visible strike through it. If you add text, it will be underlined. This allows another person to see which changes have been made before making the changes permanent.
 A document with tracked changes
The color of the markups will vary depending on who is reviewing the document, so if there are multiple reviewers you’ll be able to tell at a glance who made each change.
To turn on Track Changes:
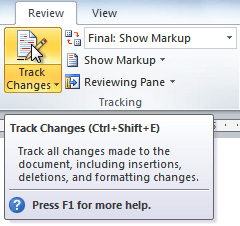
- Click the Review tab.
- Click the Track Changes command. It should now be highlighted in gold to show that it is active.
 The Track Changes command
 - Any changes you make to the document will be shown as colored markups.
Tracked changes
- Click the Track Changes command again to turn it off.

Adding and deleting comments
Sometimes instead of changing something, you may want to make a comment about part of the document. Comments show up in balloons in the right margin and can be read by the original author or by any other reviewers.
To add a comment:
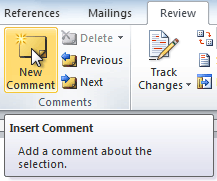
- Highlight some text, or place the insertion point where you want the comment to appear.
- From the Review tab, click the New Comment command.
The New Comment command
- Type your comment.
A comment

To delete a comment:
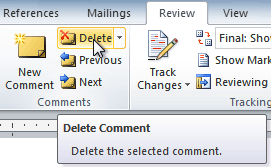
- Select the balloon containing the comment you want to delete.
A selected comment
- From the Review tab, click the Delete command.
Deleting a comment

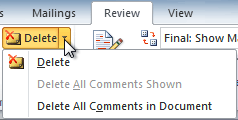
To delete all comments:
- From the Review tab, click the Delete drop-down arrow.
The Delete drop-down arrow
- Click Delete All Comments in Document.
Accepting and rejecting changes
Tracked changes are really just suggested changes. To become permanent, they have to be accepted. On the other hand, the original author may disagree with some of the tracked changes and choose to reject them.
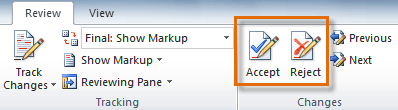
To accept or reject changes:
- Select the change you want to accept or reject.
Selecting a change
- From the Review tab, click the Accept or Reject command.
The Accept and Reject commands
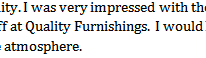
- If you accepted the change, the markup will disappear, and the text will look normal.
After accepting a change

For some tracked changes, you can reject the changes by deleting them as if they were normal text. For example, if a reviewer adds a word to a sentence, you can just delete the word.
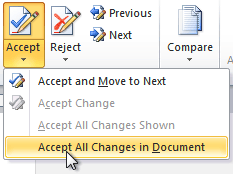
To accept all changes:
- From the Review tab, click the Accept drop-down arrow. A drop-down menu will appear.
Accepting all changes
- Select Accept All Changes in Document.
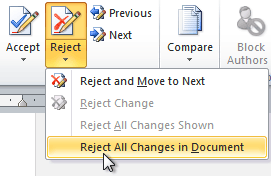
To reject all changes:
- From the Review tab, click the Reject drop-down arrow. A drop-down menu will appear.
Rejecting all changes
- Select Reject All Changes in Document.
Accepting or rejecting all changes does not affect comments, so if you want to delete them you’ll have to do so separately.
Changing how markups appear
If there are a lot of tracked changes in a document, they can become distracting if you’re trying to read through the document. There are a few settings you can use to hide the markups or change how they appear.
To hide tracked changes:
- From the Review tab, click the Display for Review command. The Display for Review command is located to the right of the Track Changes command, and it may not be labeled. It will probably say Final:Show Markup.
The Display for Review Command
- In the drop-down menu, there are four options:
- Final: Show Markup: Shows the final version along with the markup
- Final: Shows the final version and hides all markups
- Original: Show Markup: Shows the original version along with the markup
- Original: Shows the original version and hides all markups
- Choose Final or Original from the drop-down menu to hide markups.
Displaying the Final version (markups hidden)


Setting Display for Review to Final is not the same as accepting all changes. You will still need to accept or reject the changes before sending the final version of your document.
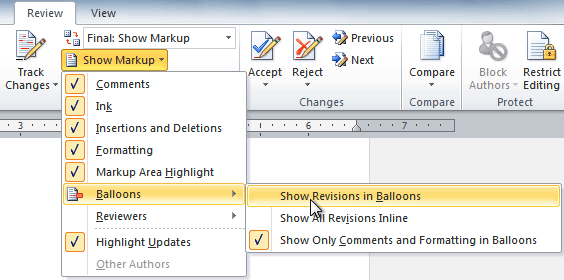
To show revisions in balloons:
By default, most revisions show up inline, meaning the text itself is marked. You can choose to show the revisions in balloons, which moves many of the revisions (such as deletions) to balloons in the right margin. This can make the document easier to read because there are fewer inline markups. Balloons also give you more detailed information about some markups.
- From the Review tab, click Show MarkupBalloonsShow Revisions in Balloons.
Showing revisions in balloons
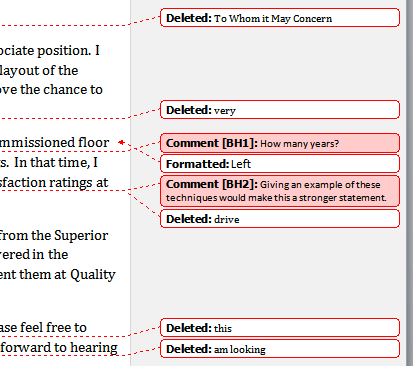
- Some of the revisions will move to the right margin.
Revisions in the right margin
To go back to inline markups, you can select either Show All Revisions Inline or Show Only Comments and Formatting in Balloons.
Comparing two documents
If you edit a document without tracking changes, it’s still possible to use reviewing features such as Accept and Reject. You can do this by comparing two versions of the document. All you need is the original document and the revised document, and they must have different file names.
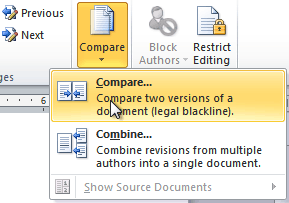
To compare two documents:
- From the Review tab, click the Compare command. A drop-down menu will appear.
- From the drop-down menu, click Compare.
The Compare command
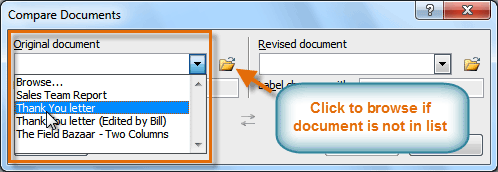
- A dialog box will appear. Choose your Original document by clicking the drop-down arrow and selecting the document from the list. If your document is not on the list, click the Browse button to browse for the file.
Choosing the Original document
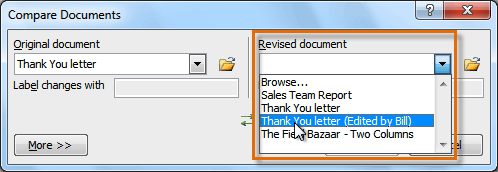
- Choose the Revised document the same way you chose the Original document, then click OK.
Choosing the Revised document
At this point, Word compares the two documents to determine which changes were made, and it creates a new document that you can save if you want. The changes show up as colored markups, just like the ones that appear when using Track Changes. You can then use the Accept and Reject commands to finalize the document.
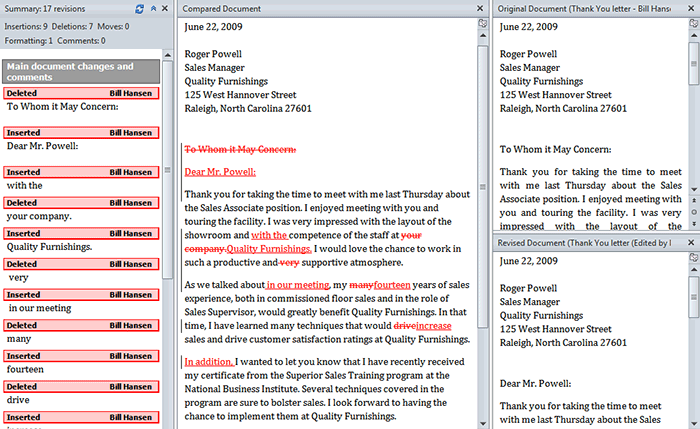 Comparing two documents
To the right of the new document, there’s a pane that displays the original and revised documents that you can use for reference (although you can’t edit them). If you don’t see the pane on the right, click Compare Show Source DocumentsShow Both.
Using the reviewing features safely
If there are any comments or tracked changes in your document, you should remove them before sending it to anyone you’re not collaborating with. Comments and tracked changes can reveal confidential information that could lead to embarrassment or make you or your company appear unprofessional—or worse.
Once you’ve removed all of the comments and tracked changes, it’s a good idea to double-check your document using the Document Inspector. The Document Inspector can tell you if there is any hidden data in your document that you may need to remove. It looks for data in many different places—not just comments and tracked changes.
To use the Document Inspector:
- Save your document.
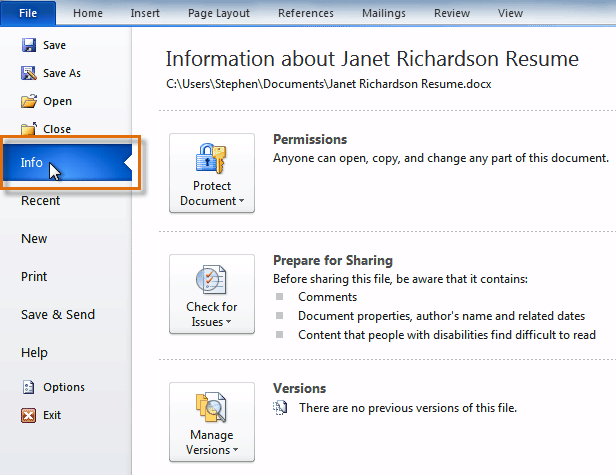
- Click the File tab to go to Backstage view.
- Select Info on the left side of the page.
Selecting Info
- Click the Check for Issues command. A drop-down menu will appear.
- Select Inspect Document.
Clicking Inspect Document
- Click Inspect.
Starting the inspection
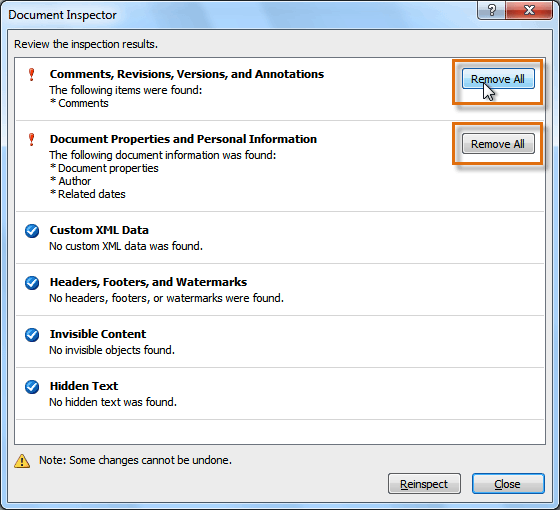
- The inspection results will show an exclamation mark for any categories where it found potentially sensitive data, and it will also have a Remove All button for each of these categories. Click Remove All to remove the data.
Removing possibly sensitive data
- Close the dialog box when you’re done.
- From Backstage view, click Save to make the changes permanent.


Challenge!
- Open an existing Word document. If you want, you can use this example.
- Turn on Track Changes.
- Delete some text.
- Add some text.
- Change some of the text formatting.
- Experiment with the Display for Review command.
- Accept all of the changes.
- Use the Document Inspector to check the document.
/en/word2010/working-with-tables/content/
Show or Hide Comments in Microsoft Word Documents
by Avantix Learning Team | Updated January 10, 2021
Applies to: Microsoft® Word® 2010, 2013, 2016, 2019 or 365 (Windows)
You can show and hide comments using the Review tab in the Ribbon in Microsoft Word. If you add comments in a Word document, they will appear in a markup area on the right side of pages by default. If you want to show or hide comments, you’ll need to control the display of markup. Keep in mind that comments that are hidden could be displayed by a colleague or client.
The markup area appears in Print Layout View (the default view in Word) whenever a document includes comments and its appearance can be controlled using settings on the Review tab in the Ribbon. The default markup is set to Simple Markup with comments displayed. If the markup area is not appearing on the right, click Show Comments in the Comments group. Tracked changes also appear in the markup area.
In this article, we’re assuming that the default markup options are being used (although you can change the display of markup using Track Changes Options).
Recommended article: How to Remove Comments in Word (3+ Ways to Delete Comments)
Do you want to learn more about Microsoft Word? Check out our virtual classroom or live classroom Word courses >
Hide comments using Display for Review
To hide comments in the markup area using Display for Review:
- Click the Review tab in the Ribbon.
- In the Tracking group, click Display for Review. A drop-down menu appears.
- Select No Markup or Original to hide the markup area, including comments.
The following drop-down menu appears when you click Display for Review:

When you click Display for Review, you have the following options:
- Simple Markup which displays the markup area with comments and revisions. If you select Simple Markup and then click Show Comments in the Comments group, the markup area appears or disappears (if there are no tracked changes). If no markup area appears on the right, comments appear as speech bubbles that you can click to display the comment.
- All Markup which displays the markup area with all comments or revisions as well as lines to their locations in the text.
- No Markup which hides the markup area so that comments and revisions are hidden.
- Original which hides the markup area as well as any revisions made to the document. In regard to comments, this option is the same as No Markup.
In the following example, Simple Markup is selected as well as Show Comments in the Comments group (Print Layout View in Word 365):

In the next example, Simple Markup is selected and Show Comments is not selected in the Comments group (Print Layout View in Word 365):

Comments appear in different ways depending on the selected view. Typically, you would change views using the View tab in the Ribbon. If you select Draft View, comments appear as the initials of the reviewer with square brackets and are highlighted with a background color. You can position the mouse pointer on the text to view the comment in a pop-up bubble. In Read Mode View, comments appear as speech bubbles to the right of the text. Simply click a bubble to view a comment.
Hide comments using Show Markup
To hide comments using Show Markup:
- Click the Review tab in the Ribbon.
- In the Tracking group, click Show Markup. A drop-down menu appears.
- Select Comments to deselect comments.
The Show Markup drop-down menu includes the following options:

Show comments in the markup area
To show comments in the markup area:
- Click the Review tab in the Ribbon.
- In the Tracking group, click Display for Review. A drop-down menu appears.
- Select Simple Markup or All Markup to show the markup area, including comments.
- Click Show Markup. A drop-down menu appears.
- Ensure Comments is selected.
- If you selected Simple Markup, in the Comments group, select Show Comments in the Comments group.
View all comments using the Reviewing Pane
To view all comments regardless of view:
- Click the Review tab in the Ribbon.
- In the Tracking group, click Reviewing Pane. A drop-down menu appears.
- Select either the horizontal or vertical display. The Reviewing Pane appears and will displays comments and revisions.
You can click the Reviewing Pane button again in the Ribbon to hide the Reviewing Pane.
Hiding markup is not the same as accepting changes or deleting comments. You should accept or reject changes and delete comments in your Word document before you send out the final version.
Subscribe to get more articles like this one
Did you find this article helpful? If you would like to receive new articles, JOIN our email list.
More resources
How to Find and Replace in Word (and Use Wildcards)
How to Superscipt or Subscript in Word (with Shortcuts)
How to Insert or Type the Sigma Symbol in Word (Σ or σ)
How to Insert Excel Data into a Word File (Linked or Unlinked)
How to Insert a Check Mark or Tick Mark in Word (5 Ways with Shortcuts)
Related courses
Microsoft Word: Intermediate / Advanced
Microsoft Excel: Intermediate / Advanced
Microsoft PowerPoint: Intermediate / Advanced
Microsoft Word: Long Documents Master Class
Microsoft Word: Styles, Templates and Tables of Contents
Microsoft Word: Designing Dynamic Word Documents Using Fields
VIEW MORE COURSES >
Our instructor-led courses are delivered in virtual classroom format or at our downtown Toronto location at 18 King Street East, Suite 1400, Toronto, Ontario, Canada (some in-person classroom courses may also be delivered at an alternate downtown Toronto location). Contact us at info@avantixlearning.ca if you’d like to arrange custom instructor-led virtual classroom or onsite training on a date that’s convenient for you.
Copyright 2023 Avantix® Learning
Microsoft, the Microsoft logo, Microsoft Office and related Microsoft applications and logos are registered trademarks of Microsoft Corporation in Canada, US and other countries. All other trademarks are the property of the registered owners.
Avantix Learning |18 King Street East, Suite 1400, Toronto, Ontario, Canada M5C 1C4 | Contact us at info@avantixlearning.ca
Long documents can have hundreds or even thousands of markups, which can make finding individual feedback quite time-consuming. Today’s tutorial shows how to quickly view specific reviewers’ comments and edits in Microsoft Word.
First, we’ll use Track Changes to view comments and edits from specific reviewers. Then, we’ll use the Navigation pane to view comments (but not edits) from specific reviewers.
This tutorial is also available as a YouTube video showing all the steps in real time.
Watch more than 150 other videos about Microsoft Word and Adobe Acrobat on my YouTube channel.
Please note that these steps are for Word for Microsoft 365, Word 2021, Word 2019, and Word 2016. The steps are similar for Word 2013 and Word 2010.
Use Track Changes to View Comments and Edits from Specific Reviewers
The Tracking tools offer the most control over the comments and edits you see from specific reviewers.
1. Select the View tab and then ensure the document is set to Print Layout for best viewing.

2. Select the Review Tab.

3. Select the Display for Review drop-down menu and then select All Markup.

4. Select the Show Markup drop-down menu and then check the options you want to view: Comments, Insertions and Deletions, and/or Formatting.

5. Select Balloons and then select the viewing option you prefer: Show Revisions in Balloons, Show All Revisions Inline, or Show Only Comments and Formatting in Balloons. (My personal preference is Show Only Comments and Formatting in Balloons.)

6. Select the Specific People drop-down menu. Deselect the reviewers’ names whose comments and edits you don’t want to see. (Alternately, you may have to select the reviewers’ names whose comments and edits you do want to see if none are selected.)

The comments and edits from the reviewer or reviewers you selected will now show in the document.
When you’re finished…
7. Return to Specific People in the Show Markup drop-down menu and select All Reviewers to show everyone’s comments and edits.
Use Navigation to View Comments from Specific Reviewers
If you only need to view specific reviewers’ comments (not edits), use the Navigation pane to quickly move through the document.
1. Select the View tab and then ensure the document is set to Print Layout for best viewing.
2. Select the Home Tab.

3. Select Find in the Editing group to open the Navigation pane.

Pro Tip: Windows users can select Ctrl + F to open the Navigation pane directly.
4. Select the magnifying glass.

5. Select Comments and then check the reviewers’ names whose comments you want to view.

6. Use the navigation arrows to move up and down through the comments in the documents. (The comments won’t appear in the Navigation pane itself.)

When you’re finished…
7. Select the X in the text box to return the comment view to All Reviewers.

In my next Microsoft Word tutorial, we’ll look at how to search within comments without having to run the search through the entire document.
Further Reading: How to Remove User Names from Existing Track Changes in Microsoft Word
Updated June 04, 2022
July 24, 2015 at 1:54 pm
People who use Track Changes sometimes find the Display for Review options confusing. For one thing, some users don’t realize that changing the Display for Review option to “Final” (or, in Word 2013 and Word 2016, “No Markup”) doesn’t actually remove the revision marks – for insertions, deletions, formatting changes, moves, etc. – from the document. Rather, it merely lets you preview the document as it would look if you accepted all of the changes.[1]
For another thing, the wording of the options isn’t particularly easy to understand. And the wording has changed between Word 2010 and Word 2013 / 2016, but remains somewhat obscure.
This post is intended to help clarify the various Display for Review options available in Word 2010 and Word 2013 / 2016.
Display for Review Options in Word 2010
In Word 2010, the Display for Review options are as follows:
Original
This option shows the document as it appeared before any insertions, deletions, moves, formatting changes, etc.
Original: Show Markup
This option shows the original document, along with revision marks for any insertions, deletions, formatting changes, and moves[2].
Note that this option appears different from the Final: Show Markup option only if you have chosen to display changes in balloons.[3] If so, you’ll see the following differences:
- Original: Show Markup displays deletions (including moved text in its original location, i.e., before it has been moved) inline, with insertions (as well as formatting changes and comments) displayed in balloons in the right margin – as if the revisions are planned, but not completed yet.
- Final: Show Markup displays insertions (and moved text in its new location, after it has been moved) inline, with deletions (as well as formatting changes and comments) displayed in balloons in the right margin – as if revisions have been completed.
If you don’t show balloons, or show them only for comments / formatting, there is no apparent difference between the two options.
Final: Show Markup
This option shows revision marks for all insertions, deletions, moves, formatting changes, etc. that have been made in the document.
Final
This option shows the document as if all proposed revisions have been accepted.
Display for Review Options in Word 2013 and Word 2016
The Display for Review Options in Word 2013 and Word 2016 are somewhat different from those in Word 2010. They are as follows:
Original
This option shows the document as it appeared before any insertions, deletions, moves, formatting changes, etc.
Simple Markup
Choosing Simple Markup means that the document appears as if all of the changes have been accepted – that is, as if insertions and deletions have been made – but with vertical lines in the margins next to portions of the document to indicate where text has been inserted, deleted, reformatted, and/or moved.
- Red vertical lines indicate that markup exists, but is hidden. To display the markup, left-click any of the red lines (or click the Display for Review drop-down and choose All Markup).
- Gray vertical lines appear when the markup is displayed (similar to the All Markup option). To hide the markup again, left-click any of the gray vertical lines (or click the Display for Review drop-down and choose Simple Markup).
All Markup
This option shows revision marks for all insertions, deletions, moves, formatting changes, etc. that have been made in the document. If you have chosen to display revisions in balloons, insertions appear inline, whereas deletions (along with moves, formatting changes, and comments) appear in balloons in the margin.[4]
No Markup
Like the “Final” option in Word 2010, this option shows the document as if all proposed revisions have been accepted.
Remember, this option does not mean that revision marks have been removed from the document. It’s just a way of previewing what the doc would look like if all of the proposed edits – insertions, deletions, moves, and formatting changes – had been accepted.
___________________________________________________________
[1] The only way to remove the revision marks is to accept or reject each and every change, and to delete each comment. Then you must save the “cleaned” document before closing it. If you close the cleaned document without saving, the revision marks remain in the document.
NOTE: It’s always a good idea to run the Document Inspector – from the File tab, Check for Issues, Inspect Document – after accepting / rejecting the changes and deleting the comments just to make sure that you didn’t miss anything. (TIP: I always uncheck “Headers, Footers, and Watermarks” even before running the Document Inspector so that I don’t inadvertently delete headers and footers from the document.) Again, be sure to save the doc after running the Document Inspector.
[2] You can disable revision marks for moved text and/or formatting changes if you like. In Word 2010, click the bottom portion of the Track Changes button (in the Tracking group on the Review tab), then choose “Change Tracking Options…” When the Track Changes Options dialog opens, you can uncheck (disable) Track Moves and/or Track Formatting. If you prefer to show revision marks for moved text and/or formatting changes, you can choose from among several different display options.
In Word 2013 and Word 2016, click the dialog launcher and when the collapsed Track Changes Options opens, click “Advanced Options” to disable or configure revision marks for moved text and/or formatting changes.
[3] There are two ways to enable balloons in Word 2010. From the Tracking group on the Review tab, do one of the following: (1) click the Track Changes drop-down and choose Track Changes Options…., then under Balloons> Use Balloons (Print and Web Layout), choose “Always”; or (2) click the Show Markup drop-down, Balloons, and choose Show Revisions in Balloons.
[4] There are two ways to enable balloons in Word 2013 and Word 2016. From the Tracking group on the Review tab, do one of the following: (1) click the dialog launcher to open the Change Tracking Options dialog and, from the drop-down labeled “Balloons in All Markup view show,” choose “Revisions”; or (2) click the Show Markup drop-down, Balloons, and choose Show Revisions in Balloons.
Entry filed under: Uncategorized.