
In this article, we will give you 5 ways to set different background colors for different pages in your Word document.
Word allows us to set a background color for our document. However, it will apply the same color for all pages. But, sometimes we may need to print a document with multiple background colors, or highlight important pages with different background colors. In such cases, we need some workarounds to set different background colors for different pages.
Method 1: Insert a Text Box
- First and foremost, click “Insert” and choose “Text Box”.
- Next choose “Draw Text Box” on the drop-down menu.

- Then draw a text box to cover the entire page.
- Now right click on the outline of text box. Move cursor on “Wrap Text” and click “Behind Text” on its submenu. You will be able to see the texts then.

- Next, right click on text box outline again. This time choose “Format Shape”.
- In “Format Shape” dialog box, click “Fill” and then choose a fill color.

- Then in the same box, click “Line Color” tab.
- And select “No line”. Close the box.


Now if you need to print the document, go to open “Word Options” by clicking “File” and “Options”. Next click “Display” and check “Print drawings created in Word” and “Print background colors and images” boxes. Click “OK”.
Here is the effect:
Method 2: Insert a Shape
- Firstly, click “Insert” and choose “Shapes”.
- Then select “Rectangle”.

- Next your cursor will change to a cross sign. Use it to draw a rectangle to cover the page.
- Likely, right click on the shape.
- Repeat from step 4 to 8 in method 1.

Ensure the print options are properly set if you need to print the document.
The above 2 methods are best used to apply colors for individual pages. If you have multiple pages which need to be in the same color, you may consider the following solutions.
Method 3: Copy the Color to More Pages
- After employing method 2, click on colored page and press “Ctrl+ D” to copy the color.
- Next drag the shape to another page and release your cursor. You will see the color is perfectly pasted.


Method 4: Insert Section Breaks
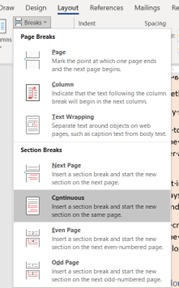
- If you need to apply a color for a number of pages in order, you can create a section first. Move cursor to the start of the first page in the section, click “Page Layout”, click “Breaks” and choose “Continuous”. This inserts a section break.

- Move cursor to the end of the last page in the section. Use the same way to insert a section break.
- Then double click on the header of the first page in the section to enter header and footer mode.
- Deselect the “Link to Previous”.

- Go to the first header of the next section. Repeat step 4.
- Then use either method 1 or 2 to color the pages.
- Lastly, click “Design” and click “Close Header and Footer” to exit header mode.


Method 5: Split a Document
There is one last way that is to split a document into several subdocuments. Then click “Page Layout”, click “Page Color”, and choose a color.
Fix the Annoying Word Issues
As most Word users have noticed, Word is susceptible to errors and mistakes. This is excusable but something needs to be fixed. Otherwise our treasurable data would be on the line. Thus, it’s necessary to find a utility to fix Word.
Author Introduction:
Vera Chen is a data recovery expert in DataNumen, Inc., which is the world leader in data recovery technologies, including fix xls and pdf repair software products. For more information visit www.datanumen.com

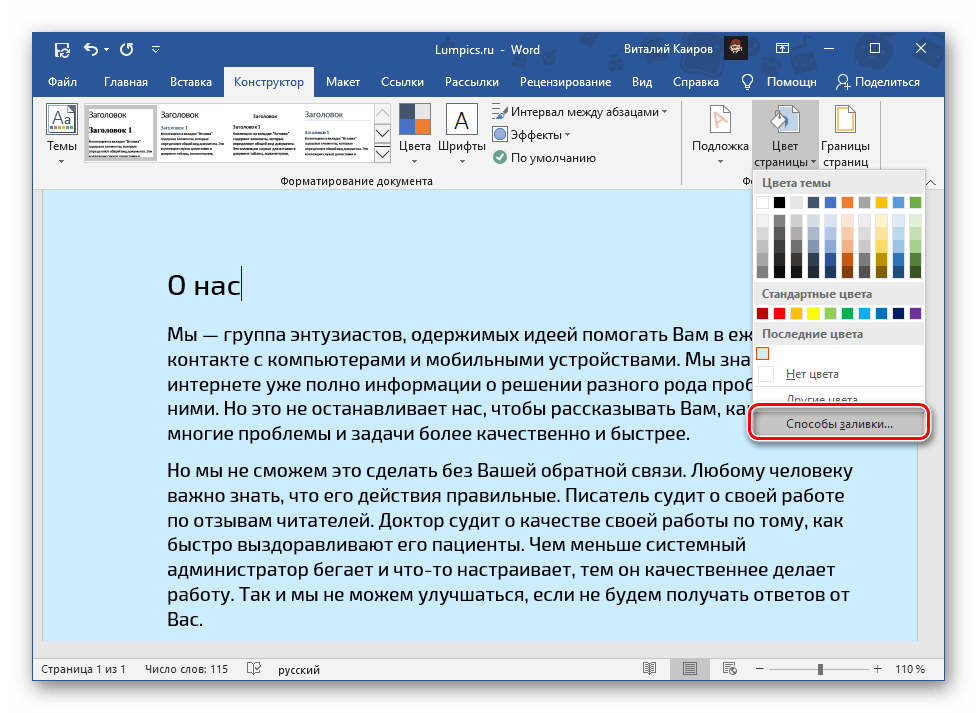
В Майкрософт Ворд присутствует возможность изменения фона страницы на монотонный цвет и другие варианты «заливки», такие как градиент, текстура, узор и рисунок. Применить любой из них к документу можно следующим образом:
- Перейдите во вкладку «Конструктор». В версиях Word 2012 – 2016 она называлась «Дизайн», в 2010 – «Разметка страницы», в 2003 – «Формат».
- Разверните меню расположенной справа на ленте кнопки «Цвет страницы».
- Выберите подходящий вариант.

Помимо доступных по умолчанию и представленных на палитре, можно устанавливать и «Другие цвета…»:
- «Обычные»;
- «Спектр».

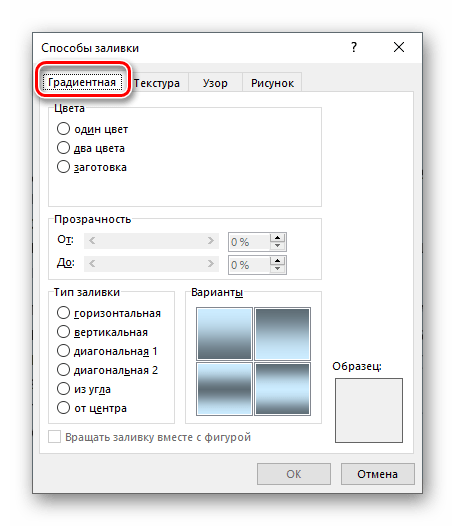
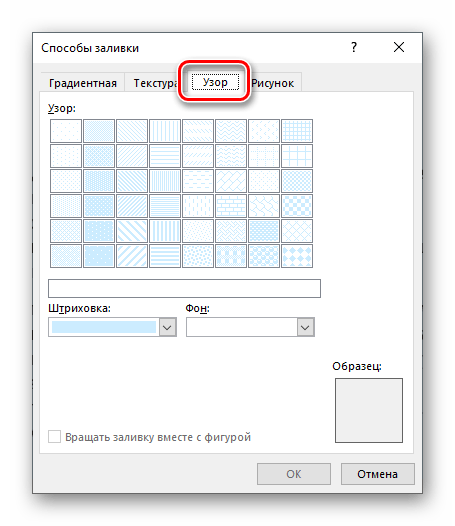
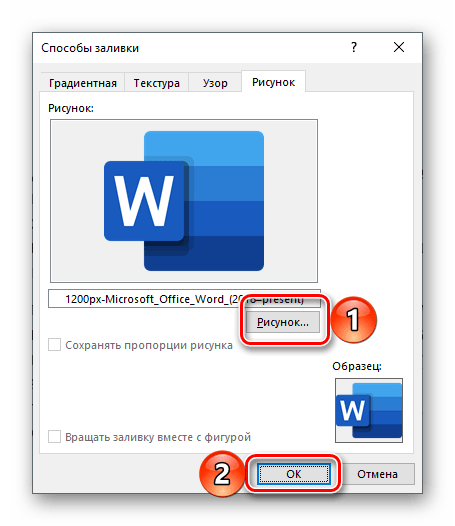
Выбор пункта «Способы заливки…» предоставляет доступ к следующим вариантам:
- Градиент;
- Текстура;
- Узор;
- Рисунок.


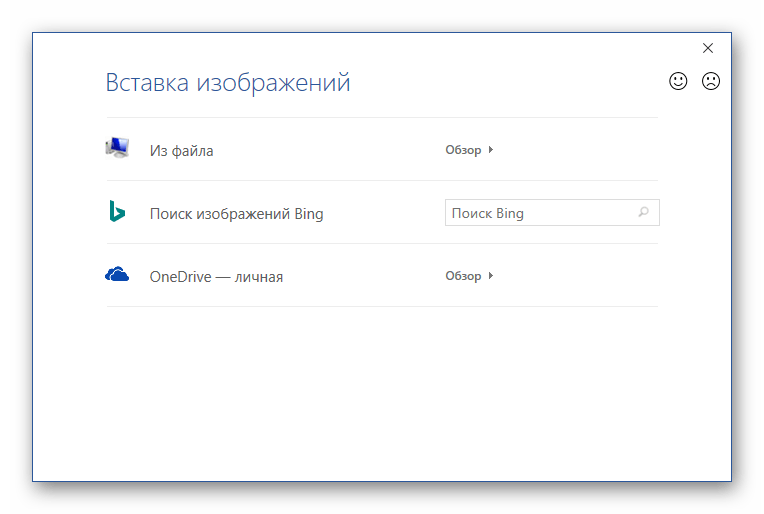
Для каждого из них имеется возможность изменения ряда параметров отображения. Последний вариант («Рисунок») позволяет вставить изображение из файла, хранилища OneDrive или найти его в Bing.

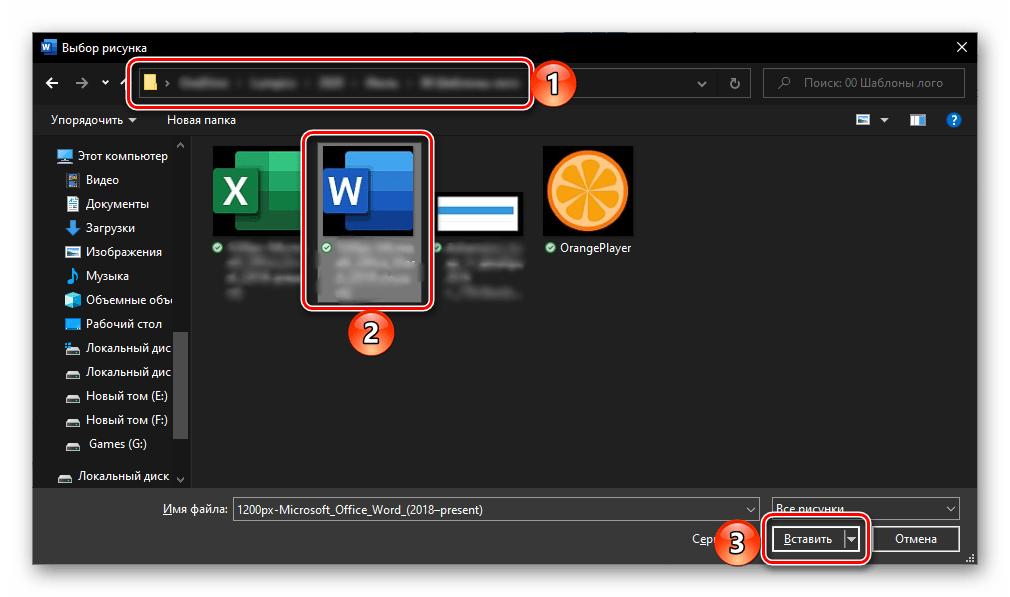
При выборе «Из файла» будет открыт предустановленный в Windows «Проводник», в котором необходимо перейти в директорию с подходящим изображением, выбрать его и нажать «Вставить»,

а затем подтвердить свои намерения в диалоговом окне.
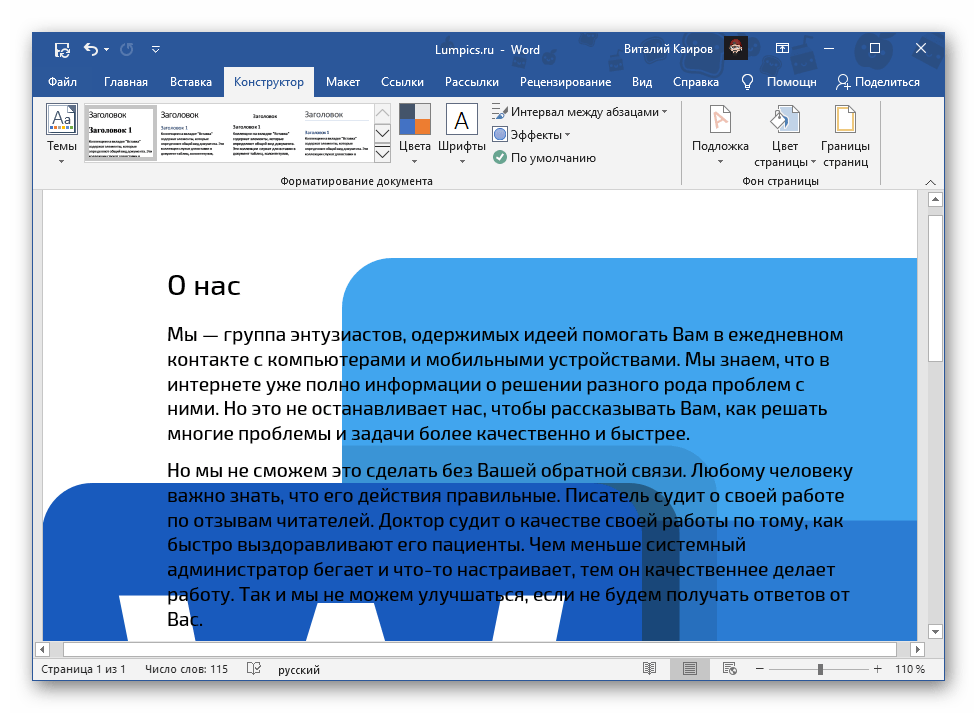
Крайне желательно выбирать однотонные или не слишком контрастные изображения, иначе весь текст или его часть, как в нашем примере ниже, будет плохо читаемой.


Таким образом в Ворд можно сделать не только цветную страницу, но и использовать в качестве фона любое произвольное изображение или узор. Помимо этого имеется возможность добавления подложки, о чем мы ранее писали в отдельной статье.
Подробнее: Как сделать подложку в Word
Печать документов с измененным фоном
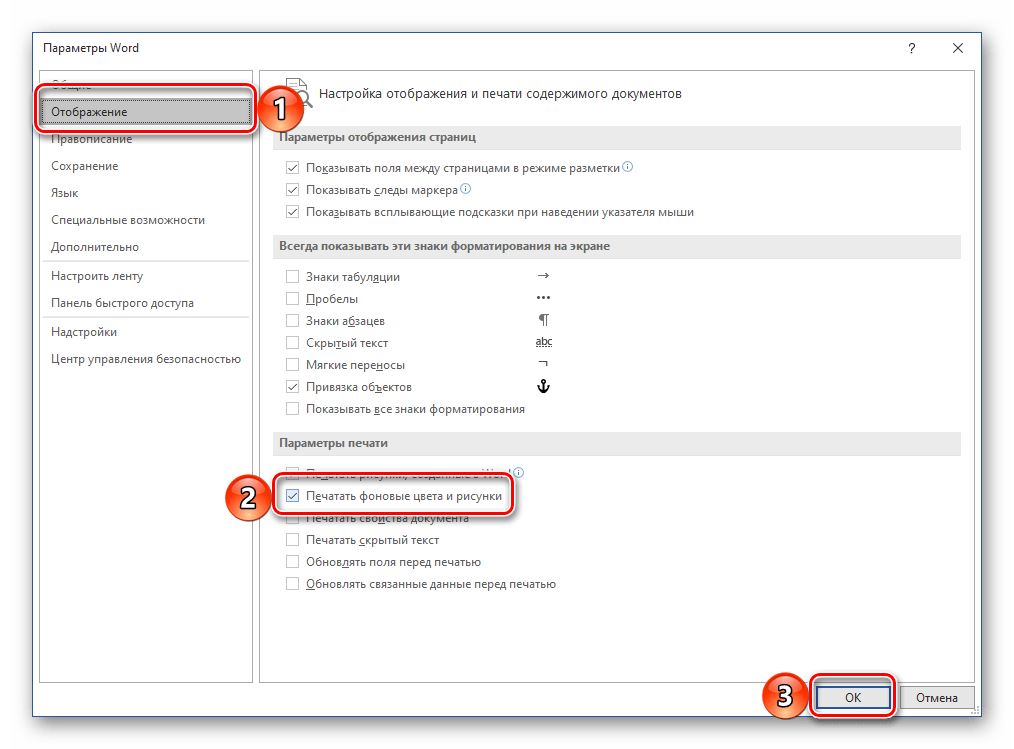
По умолчанию Ворд не печатает измененный, отличный от заданного по умолчанию фон текстовых файлов, и не важно, использовался ли в качестве такового монотонный цвет или полноценное изображение. Для того чтобы внесенные изменения отображались и на распечатанной с помощью принтера версии документов, необходимо изменить параметры отображения программы.
- Вызовите меню «Файл» и перейдите в «Параметры».
- В открывшемся окне перейдите на вкладку «Отображение».
- Установите галочку напротив пункта «Печатать фоновые цвета и рисунки» и нажмите на кнопку «ОК» для подтверждения.

Читайте таже: Печать документов в Microsoft Word
Еще статьи по данной теме:
Помогла ли Вам статья?
Document themes make it easy to coordinate colors, fonts, and graphic formatting effects across your Word, Excel, and PowerPoint documents and update them quickly. This video show you how-to change the entire theme, read below to just customize theme fonts, colors, or effects.

I want to
-
Choose a standard color theme
-
Create my own color theme
-
Change theme fonts
-
Change theme effects
-
Switch or remove a theme
-
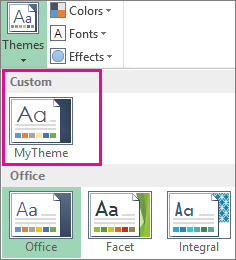
Save a custom theme for reuse
-
Make my changes the new default theme
-
Learn more about themes
Choose a standard color theme
-
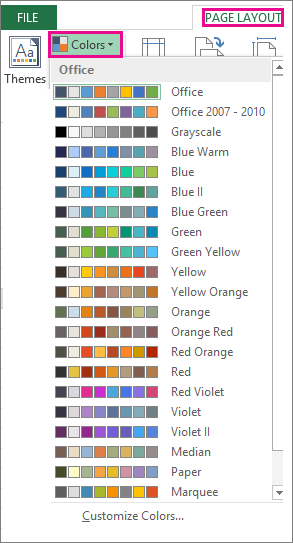
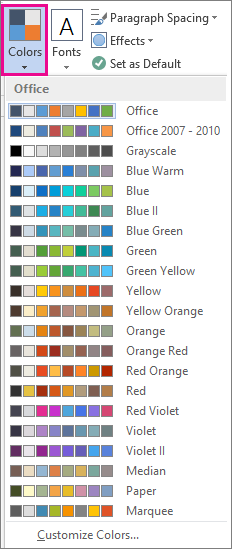
On the Page Layout tab in Excel or the Design tab in Word, click Colors, and pick the color set you want.
Excel
Word
Tip: The first group of colors are the colors in the current theme.
Create my own color theme
-
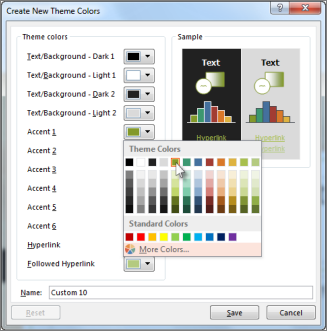
On the Page Layout tab in Excel or the Design tab in Word, click Colors, and then click Customize Colors.
-
Click the button next to the theme color you want to change (for example, Accent 1 or Hyperlink), and then pick a color under Theme Colors.
To create your own color, click More Colors, and then pick a color on the Standard tab, or enter numbers or select a color on the Custom tab.
-
In the Sample pane, preview the changes that you made.
-
Repeat this for all the colors you want to change.
-
In the Name box, type a name for the new theme colors, and click Save.
Tip: To return to the original theme colors, click Reset before you click Save.
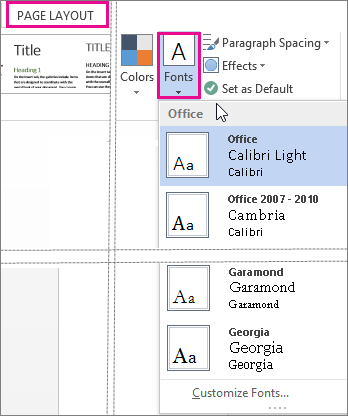
Change theme fonts
-
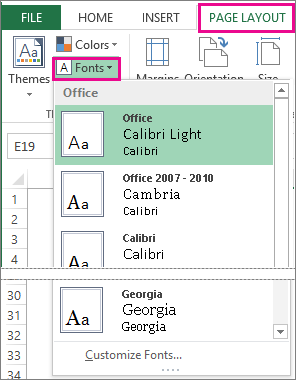
On the Page Layout tab in Excel or the Design tab in Word, click Fonts, and pick the font set you want.
Excel
Word
Tip: The top fonts are the fonts in the current theme.
-
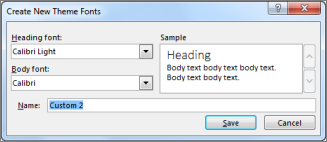
To create your own set of fonts, click Customize Fonts.
-
In the Create New Theme Fonts box, under the Heading font and Body font boxes, pick the fonts you want.
-
In the Name box, enter a name, and click Save.
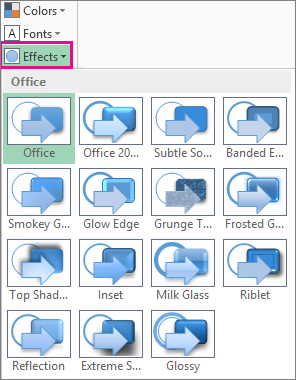
Change theme effects
Theme effects include shadows, reflections, lines, fills, and more. While you cannot create your own set of theme effects, you can choose a set of effects that work for your document.
-
On the Page Layout tab in Excel or the Design tab in Word, click Effects.
. -
Select the set of effects that you want to use.
 .
.
Switch or remove a theme
-
To change themes, simply pick a different theme from the Themes menu. To return to the default theme, choose the Office theme.
-
To remove theme formatting from just a portion of your document, select the portion you want to change and change any formatting you like, such as font style, font size, color, etc.
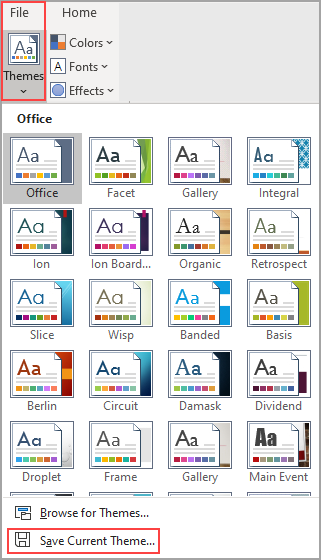
Save a custom theme for reuse
Once you’ve made changes to your theme, you can save it to use again. Or you can make it the default for new documents.
-
On the Page Layout tab in Excel or the Design tab in Word, click Themes > Save Current Theme.
-
In the File name box, enter a name for the theme, and click Save.
Note: The theme is saved as a .thmx file in the Document Themes folder on your local drive and is automatically added to the list of custom themes that appear when you click Themes.
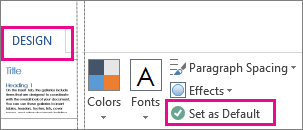
Make my changes the new default theme
After saving your theme, you can set it so it’s used for all new documents.
Excel
Apply your custom theme to a blank workbook and then save it as a template named Book.xltx.
Word
-
On the Design tab, click Set as Default.
More about themes
A document theme is a unique set of colors, fonts, and effects. Themes are shared across Office programs so that all your Office documents can have the same, uniform look.
You can also change the Office theme. The Office theme is the color scheme for your entire Office program, while document themes are more specific (they show up in individual Word documents or Excel spreadsheets).

In addition, you can add a pattern to your Office program, by changing the Office Background.
See Also
-
Change the font size in Word, Excel or PowerPoint
-
Change the line spacing in Word
-
Insert subscript or superscript text in Word
-
Add or remove a sheet background in Excel
-
Create your own theme in PowerPoint
-
Customize and save a theme in Word 2016 for Mac
In fact, in a professional way in Word, you do not have the option to change the page colour in Word.
However, if you are familiar with Word, you need to come up with an idea of how to add your favourite colours to the background of your favourite pages. If you still do not have an idea, follow the steps below.
Table of Contents
- How to Change Page Color in Word
- Set Printable Background Color and Image
- How to Remove Background Color in Word
- How to Change Background Color on Each Page in Word
- Other Way to Make Background Color
Initially, make sure your document has fewer pages along with content.
After that, on the “Insert” tab, in the “Illustrations” group, click on “Shapes” to expand its list.
Then select a rectangle and draw on the first page.

On the drawing tools format tab, click “Wrap Text” and select behind text if your document has text.

Now zoom out the document to reduce its size so that you can change the size equal to the page and adjust the shape evenly across the page as in the picture below.

Since the default page colour is blue, click on the “Shape fill” on the Format tab and select the colour of your choice.

Now if you want to change the page background colour to the next page, duplicate the existing shape (To duplicate it, select the shape and press Ctrl+D) and click and hold down the left mouse button, then drag and drop to the next page. And adjust the shape evenly across the page as in the picture below.
Since the duplicate shape colour is the same as the first shape, click on the shape fill on the Format tab and click the shape fill and select the colour of your choice.

In this way, you can (change the paper colour) and set the background colour for different pages in Word.
Set Printable Background Color and Image
To print all the pages with the background colour, do the following:

Click the file menu to navigate its options
Now select “Options”
In the dialogue box, click “Display” and make sure the ticks “Print drawings created in Word and “Print background colours and images”.
How to Remove Background Color in Word
Select the shape and click “delete” or “backspace” to remove the page colour in word.
How to Change Background Color on Each Page in Word
Changing the paper background colour is the same as explained in the steps to change the page colour in Word.
Other Way to Make Background Color
On the Insert tab, in the Text group, click “Text Box” and select “Draw Text Box”
On the drawing tools format tab, click “Wrap Text” and select “Behind text” if your document has text.
Now zoom out the document to reduce its size so that you can change the shape equal to the page size and adjust the shape evenly across the page.
Now click on the “Shape fill” on the Format tab and select the colour of your choice. In this way, you can change the page colour in a word document.
Can we change the page colour in Word?
In fact, in a professional way in Word, you do not have the option to change the page colour in word. However, if you are familiar with Word, you need to come up with an idea of how to add your favourite colours to the background of your favourite pages.
The other day a question was posed. “How do I change the color of pages in a Word Document?” That’s a no-brainer, I thought. Simply do the following:
Design→Page Background Group→Page Color
“Almost!” The person replied, “But I want to change different pages to different colors.”

Smugly, I responded, “No Problem. We will just insert Section breaks and change the colors of each section.”
Sigh…always something.
I wasn’t smug for very long!! It didn’t work. Oops…Life of a Microsoft Instructor…
Feeling a bit chagrined but undaunted, I set out to find a workaround. It turns out that others have been frustrated by this as well. After a bit of experimentation, I feel the following is a good workaround.
Anyway, here’s my solution.
You are not going to change the color of the page, but you will create a rectangle the size of the area that you wish to be colored and then you will send it behind the text. In this instance, the size will NOT include the header and footer area. We will have to do this separately to ensure the content is not hidden.
NOTE: If you start in the header section you can color the entire page in ONE rectangle. TRUE. BUT…there’s always a but…it is harder to edit the content because it is “behind “ the header footer. Let me know if you find otherwise.
After that we will create section breaks so we can format each header and footer separately (different colors) This may be overkill. You may not need to color code the headers and footers, but I am going to include it in this blog since there have been questions regarding this.
Download the file below if you want to use an example file to follow along.
Here we go!
Change Page Color
- Place your cursor in the page for which you want to change the color
- Choose Insert→Shapes→Choose a rectangle
Drag the mouse to draw a rectangle as large as the Word page—DO NOT INCLUDE Header/Footer area unless there is no content in either as you will not be able to see the content.
- Format Ribbon→Shape Format→Shape Fill drop-down
- Choose a Fill Color
With the Rectangle Selected; Choose Shape Format→Arrange→Wrap Text→Behind Text

- You should now see your page content

If you chose to color the entire page including the header and footer areas, you are good to go! However, if you want to see the header/footer content you must do this separately. I used different colors to show you that I did these individually. You would probably want to use the same color for all.
Change Header/Footer Color
Before we begin, we need to do some setup. When you create headers and footers they will automatically appear on every page. Obviously, we do not want the color that we apply to the header and footer to apply to every page.
We will have to add a SECTION BREAK so that we can create independent Headers and Footers
NOTE: This can be a problem if you need to change your header footer content.
Make sure you first create your header and footer content. Once you complete the following steps the header and footer sections will no longer be linked. If you have a large document, you will have to edit sections individually. This is where you may decide that changing the BODY of the document is fine, vs including the headers and footer.
Create a Section Break and Unlink your Headers and Footers
I added one at the bottom of pages 1, 2, and 3.
- Place your cursor where you want to add a section break
- Layout→Page Setup→Insert Page and Section Breaks→Continuous
- Scroll to the next page and double-click in the footer section if necessary
- Choose Header & FooteràNavigationàLink to Previous (make sure it is not selected)
The footer in this section will no longer be linked to the previous section’s footer. Note the footer on the first page now displays the text Footer – Section 1 and the footer on the second page now displays the text—Footer Section 2.
Create the footer color
- Select the footer section in which you want to change the color
- Choose Insert→Shapes→Choose a rectangle
- Drag the mouse to draw a rectangle in the footer section. (This may take some back and forth)
- Format Ribbon→Shape Format→Shape Fill drop-down
- Choose a Fill Color
- With the Rectangle Selected; Choose Shape Format→Arrange→Wrap Text→Behind Text
- You should now see your footer content
Repeat the above instructions for the Header area.
The Solution Page contains Three Examples
- The first colored page uses the above directions but uses different colors in each area.
- The second colored page uses the above directions using the same color everywhere (Try File→Print to see it blend well. Or save it to a PDF to see the results)
- The third colored page colors only the body of the page.
PUT (Power User Tip)
If you use color changes frequently think about creating a template!
Stephanie’s Thoughts: If you don’t need to edit this document again (e.g. you convert it to a PDF for distribution) then you can save steps by creating your section breaks first, then unlinking the Header/Footer sections, and then create the rectangle in the header section and drag it all the way down.
Did this work? Do you have suggestions to add to my instructions? Reach out! I love hearing from my Power Users. I like hearing other thoughts. 😊
I can easily change the page color of every pages in my document thanks to the Page Layout Tab in the Ribbon, but I would like to change the color of a single page.
Any idea about how to to this with Word 2010 ?
![]()
studiohack♦
13.5k19 gold badges85 silver badges118 bronze badges
asked Oct 26, 2010 at 14:15
![]()
Unfortunately, Microsoft Word has no option to change color of individual pages in a document. Since it is hardcoded in the program, there is no way to change this behavior (page color always applies to whole document).
However, there is a workaround. If you cover the page with a text box and fill the text box with whatever color you want, you can have individually colored pages. This is not a productive method but the only one I can suggest.
![]()
studiohack♦
13.5k19 gold badges85 silver badges118 bronze badges
answered Oct 26, 2010 at 14:43
![]()
0
Create a specific section for your page, then use the header/footer to insert a full-page rectangle with your specific color.
Mark the checkbox «different first page»
![]()
Ivo Flipse
24.6k31 gold badges102 silver badges147 bronze badges
answered Oct 26, 2010 at 14:42
![]()
tbolontbolon
4813 silver badges6 bronze badges
1
Insert a shape (square). Drag it by its handles to fit the extremities of the page. Choose ‘Behind text’ in Wrap Text. Tint it in ‘Fill’ menu. This will print just for this page.
answered Jan 27, 2012 at 1:45
![]()
namename
811 silver badge1 bronze badge
Create a seperate document titled «Cover Page…(your document title)». This way they save together in the document folder. So dumb that in 2010 they still can’t create different cover page color as has been requested for years, but this work around is so much easier than other options I have heard.
Bonus? You get to view side-by-side with your document when creating your table of contents (if you have one).
answered Feb 18, 2011 at 3:48
![]()
Create separate documents for each set of differently colored pages. For each set of pages, change the background color. Change all separate documents into .pdfs. Then merge the documents into a single .pdf. Each section will have its own page color
answered Nov 30, 2011 at 12:00
![]()
2
In Word 2007
- Draw a box (Insert -> Shapes …select the rectangle)
- Set the box’s colour (Format -> Shape Fill)
- Put the box behind the text (Format -> Send to Back -> Send behind text)
- Resize the box to fill the page (drag the handles)
- On a different page set the background colour for the rest of the document (Page Layout -> Page Color)
This avoids having text within a text box, yet enables individual page colours to be different.
answered Dec 21, 2015 at 17:03
![]()
You can’t change the background color of just one page. The background color applies to the whole document.
answered Oct 26, 2010 at 14:26
![]()
divideddivided
2452 silver badges10 bronze badges
In Microsoft Word 2007 and Microsoft Windows 7 it is quite easy to do. If you have already printed the page you want coloured, draw a ‘text box’ to cover the whole page and click on the ‘fill’ colour you want. Stretch the box to completely fill the page, then go to ‘Text Wrapping’ and click on ‘behind text’. This gives you your single coloured page.
Once you print it, it will say you are outside the printable area — ignore this and it should print the whole page.
![]()
answered Mar 15, 2013 at 14:48
![]()
go to tools then to merge documents then individual coloured pages than customise
answered Sep 22, 2013 at 14:20
![]()
It can be done. Highlight the words on the page then hit the color fill and select your color you prefer. You can color one page and not the others. What a beautiful sight.
answered Jan 21, 2014 at 3:40
![]()
In Word 2010:
— Insert/Shapes: Click the rectangular shape
— Draw the it in the page you want to change color
— Fill the rectangular with the color you want
— Format/Text Wrapping/In Front of Text
— Drag and enlarge the rectangular to the whole page
answered Feb 11, 2014 at 21:12
![]()
There is a way. You need to put your background in the header of each page and strech. Once you do that then creat a new section and repeat every time you want to change the background
answered Sep 9, 2014 at 13:48
![]()
It can’t be done properly, but if you go on images and type in the color you want, copy it, then paste it, and right click on it and press wrap text: then press wrap behind text, that will work.Then just make it fill the whole page. You can also do the near same thing by going on insert, then pictures, then choosing your picture. Right click on it and click wrap text, then behind text. Stretch out the picture until it fills the whole page.
![]()
answered Dec 10, 2012 at 16:13
![]()
I use Microsoft Word 2010 and I simply insert a cover page at the top of the document from the Insert tab. I then choose the preset cover page sample called ‘Perspective’ which has a gradient background. I remove/change the mountain picture as required and change the colour of the gradient or change it into a solid fill, use a pattern, texture or even picture backgrounds as usual. Remember to do this on the document you are actually working on. You will not be able insert any pages that you have been working on as separate document.
If you want to insert different coloured pages in between, then you can try setting the page margins to ‘narrow’ from the page layout tab and then simply draw a rectangle or insert a coloured text box that is as big as the borders and then choose ‘send backward’—> ‘send behind text’ from the format tab.
Alternatively, if you are not forced to use Word, you could try using Publisher instead, which would definitely make life so much easier on this aspect.
answered Nov 20, 2014 at 10:39
![]()
This a bit of an advanced method but super effective and requires the use of «InDesign» if you want to go the extra mile and you’re allowed to Submit in a .PDF format.
1.Create your first color page (save it as PDF)
2.create your second color page (do the same)
3.Open Indesign and place the pages accordingly.
Bonus: You can even make it look either like a normal page by page paper or a magazine-like paper!
answered Dec 5, 2014 at 15:55
![]()
1
We can use a rectangular shape and fill it with the color, or we can create a black picture in paint, and then can place it in word… remember to use ‘send to background’ after right clicking it 
answered May 23, 2015 at 12:33
![]()
Here is the solution.
First of all you cannot apply page colour to one separate page using the ‘Page Color’ option on the ‘Design’ tab.
However, there is one simple procedure to apply color for a single page using text box, which is explained in the following procedure:
- Go to a page for which you wish to apply page color.
- On the Insert menu, click Text Box > Draw Text Box.
- Select the text box, go to Shape Fill and select the color you wish to apply for the page.
- Select the text box, click Shape Outline> No Outline. Once this step has been followed, outline of the text box disappears.
- Now drag this text box till the edge of page. Make sure you have dragged the
- Again select the text box, select Wrap Text > Behind Text.
- Now the page color has been applied to the required page.
answered May 26, 2015 at 11:54
![]()
A document that needs to be eye-catching, like a newsletter or a flyer, can benefit from some images and some color.
One of the easiest ways to do this is with a different background color, which can leave you wondering how to change page color in Word.
Fortunately, there is a button in the navigational ribbon that lets you make this change very quickly.
How to Change Background Color in Microsoft Word for Office 365
- Open the document.
- Click the Design tab.
- Choose Page Color.
- Select the desired color.
Our guide continues below with additional information on how to change page color in Word, including pictures of these steps.
Do you have pictures that are backwards in your documents? Then our article on how to mirror images on Google Docs can show you how to fix them.
New documents that you create in Microsoft Word have a white background color by default. If you’re creating a document for school or work, then that’s likely the format that you need.
But some documents that you create in Microsoft Word are more effective with a different background color, so it would be helpful if you could change that.
Fortunately, the background color is something that can be switched in Microsoft Word. Our guide below will show you how to change your background color in Word for Office 365.
Need to know the number of letters, numbers, and spaces in your document? Check out our how to get character count in Word tutorial and learn about an easy way to do it.
How to Use a Different Background Color in Microsoft Word (Guide with Pictures)
The steps in this article were performed in the desktop version of the Microsoft Word for Office 365 application. If you’re a Google Docs user then you can learn how to set a background image in Google Docs as well.
Step 1: Open your document in Word.
Step 2: Select the Design tab at the top of the window.

Step 3: Click the Page Color button.

Step 4: Choose the desired page background color.

Now that you know how to change page color in Word you will be able to use different colors for your documents, or switch documents back to a white color if needed.
Find out how to make columns in Word Office 365 if one of the other items you need to adjust is the number of columns that are in your document.
If you want to use a color other than the one that is shown, click the More Colors option at the bottom of the dropdown menu, then click the desired color from the color picker.
If you would like to remove the background color you can select the No Color option from that dropdown menu instead.
Note that Word will not print a background color by default. If you would like to include the background color when printing, then click the File tab at the top-left of the window, then select Options at the bottom of the left column to open the Word Options window.
Select the Display tab at the left side of the Word Options window, then scroll down and check the box to the left of Print background colors and images. Click the OK button when you’re done.

Printing the background color on a document can use a lot of ink, so it’s best to only print the background color when you are doing the final version of the document.
Additionally, this setting is preserved after you enable it, meaning that future documents will print with background colors and images as well until you switch it back.
You can read our tutorial on how to remove background color in Google Docs as well if you also use that application to edit documents.
The next section of this article contains some common questions and answers regarding how to change page color in Word.
Frequently Asked Questions About MS Word Change Background Color Steps
How do I add a text box to my Word document?
The text that you add to your document normally will abide by the default layout options for a Word document, where the text fills in from left to right, and from top to bottom.
But if you have text that you want to put in a specific position in your document, then a text box can be a good choice.
You can add a Microsoft Word text box by clicking the Insert tab at the top of the window, then choosing the Text Box option.
You can then draw the text box in the desired location in the document and add your text to it.
If you want to change the background color of the textbox then you can click on it, choose the Text Box tab at the top of the window, then click the Shape Fill option and select a color.
How can I change my document theme in Microsoft Word?
if you would like to use a combination of colors and styles that has already been designed, then a theme can be a good option.
Simply select all of the document, click the Design tab at the top of the window, click the Themes button at the left side of the ribbon, then choose a theme.
If you want to change the theme colors or fonts you can click the corresponding button for that setting in the Document Formatting group of the ribbon on the Design tab.
There is also a Customize Colors option at the bottom of that dropdown menu that you can click to open a Create New Theme Colors dialog box and specify the color for various document elements.
Is there a way to change the Word Online background color?
No, Microsoft Word Online is missing many of the options that you will find in the desktop v person of the application, including the option to change the document background color.
You can change the background color of a document in Google Docs, however.
Simply open the document in Google Docs, click File at the top of the window, choose Page setup, then click the Page color dropdown button and choose a document background color.
Did you know that you can have text message conversations with multiple people? Our how to add someone to a group text guide can show you how.

Matt Jacobs has been working as an IT consultant for small businesses since receiving his Master’s degree in 2003. While he still does some consulting work, his primary focus now is on creating technology support content for SupportYourTech.com.
His work can be found on many websites and focuses on topics such as Microsoft Office, Apple devices, Android devices, Photoshop, and more.

on
November 4, 2020, 8:32 AM PST
How to color pages in a Word document
Learn three easy ways to add a bit of color to the pages of your Microsoft Word document.
We may be compensated by vendors who appear on this page through methods such as affiliate links or sponsored partnerships. This may influence how and where their products appear on our site, but vendors cannot pay to influence the content of our reviews. For more info, visit our Terms of Use page.

Adding a bit of color is an easy way to liven up or otherwise add a professional touch to a Microsoft Word document. You might decide to add a sedate color to a promotional letter or resume. Or you might want to add a meaningful color, such as a team color to a booster letter. Whatever your reasons, it’s easy to add color to all of the pages in your document. It takes a bit more work to colorize individual pages. In this article, I’ll show you how to do both, and a bit more.
SEE: 60 Excel tips every user should master
I’m using Microsoft 365 on a Windows 10 64-bit system, but you can use earlier versions. There’s no downloadable demonstration file; you won’t need one. The browser edition is unreliable displaying colors.
How to add one color to all pages in Word
If you run out of color print paper, you can quickly add color to every page in your Word document and then print the document. For most if it, the ink will cost more than colored paper, so I don’t recommend doing this all the time. If the document’s going to the web or via email, there’s no cost to you at all!
SEE: How to manipulate multiple graphic files at the same time in a Word document (TechRepublic)
To color the pages of a document, click the Design tab and then click Page Color in the Page Background group. Choose a color from the dropdown palette or choose More Colors or even Fill Effects. Later, you can explore both of the latter options, but for now, let’s stick with colors in the existing palette. If you want a border, click the Page Borders option. We won’t discuss every option, but Figure A shows a two-page document with a light blue background and a dark green border.
Figure A

Using the Page Color and Page Borders options, it took less than a minute. That was easy, but you won’t always want to add color to every page.
How to add one color for a single page in Word
For better or worse, Word offers no option for adding a background color to a single page or multiple pages. It’s an all-or-nothing setting. If you want to color a single or multiple pages, but not the entire document, you can insert a rectangle shape sized to fit the page and set a few properties. Now, let’s use this method on the second page of a three-page document:
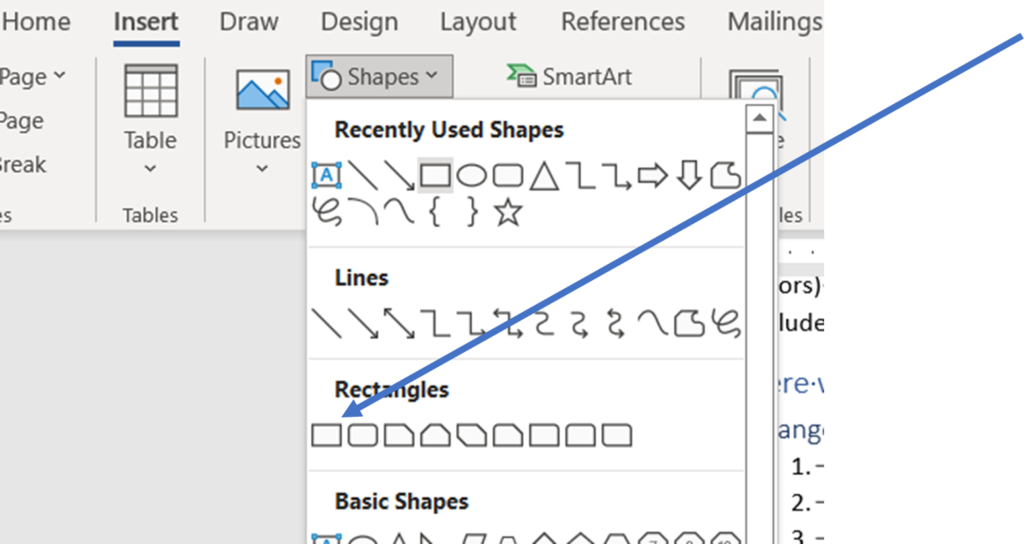
- Click the Insert tab, click Shapes in the Illustrations group, click the Rectangle shape and size it to the paper (Figure B).
- From the Shape Fill dropdown in the Shape Styles group, choose a color from the palette.
- With the rectangle selected, click the Send Backward option in the Arrange group, and choose Send Behind Text (Figure C).
Figure B

Figure C

Using this method, you could add more than one color to the background by using multiple rectangles, or even other shapes, but I recommend you keep it simple. To add a border, add a second rectangle, size it appropriately, and then remove the fill color and add a border color.
SEE: How to use the Dictate feature instead of typing in Microsoft Word (Tech Republic)
Once you have the rectangle and properties set (Figure D) you can quickly copy it to other pages. With the rectangle selected, press Ctrl+D to make a copy. Drag that copy and position it on another page. With this method, you can change the color for different pages.
Figure D

Make sure your colored page prints
If the background color doesn’t print, there’s an easy fix. Click the File tab and choose Display in the left pane. In the Printing options section, make sure the Print background colors and images option is checked, as shown in Figure E. The problem is that few printers can fulfill the promise. Most will leave a small uncolored border around the edges of the sheet of paper. There’s nothing you can do about this.
Figure E

How to color only one section of a page in Word
If you don’t want to color the entire page, you might want to consider adding color as a paragraph format. The good news is that it’s easy to apply or remove—you don’t even need a text box!
SEE: 4 tips for working more efficiently with footnotes and endnotes in Word (TechRepublic)
First, select the paragraph(s) you want to color. Then, in the Paragraph group, click the Shading dropdown and choose a color from the palette. As you can see in Figure F, I’ve used a light blue to shade a few paragraphs. You could use this method to color the entire portion of the page that’s inside the borders, leaving the borders white. The color is a paragraph property, so if you move the paragraph, the color goes with it.
Figure F

Stay tuned
Adding filled rectangles could be tedious work. But you’re in luck if you’re willing to add sections to the document. In a subsequent article, I’ll show you how to color the background of all the pages in a section with one rectangle.
Also See
-
How to become a software engineer: A cheat sheet
(TechRepublic) -
Zoom vs. Microsoft Teams, Google Meet, Cisco WebEx and Skype: Choosing the right video-conferencing apps for you (free PDF)
(TechRepublic) -
Hiring Kit: Application engineer
(TechRepublic Premium) -
Microsoft 365 (formerly Office 365) for business: Everything you need to know
(ZDNet) -
The 10 most important iPhone apps of all time
(Download.com) -
It takes work to keep your data private online. These apps can help
(CNET) -
Must-read coverage: Programming languages and developer career resources
(TechRepublic on Flipboard)
-
Microsoft
-
Software
10.10.2020
В данной статье показаны действия, с помощью которых можно изменить цвет фона страницы в документе Microsoft Word, чтобы придать документу красочности.
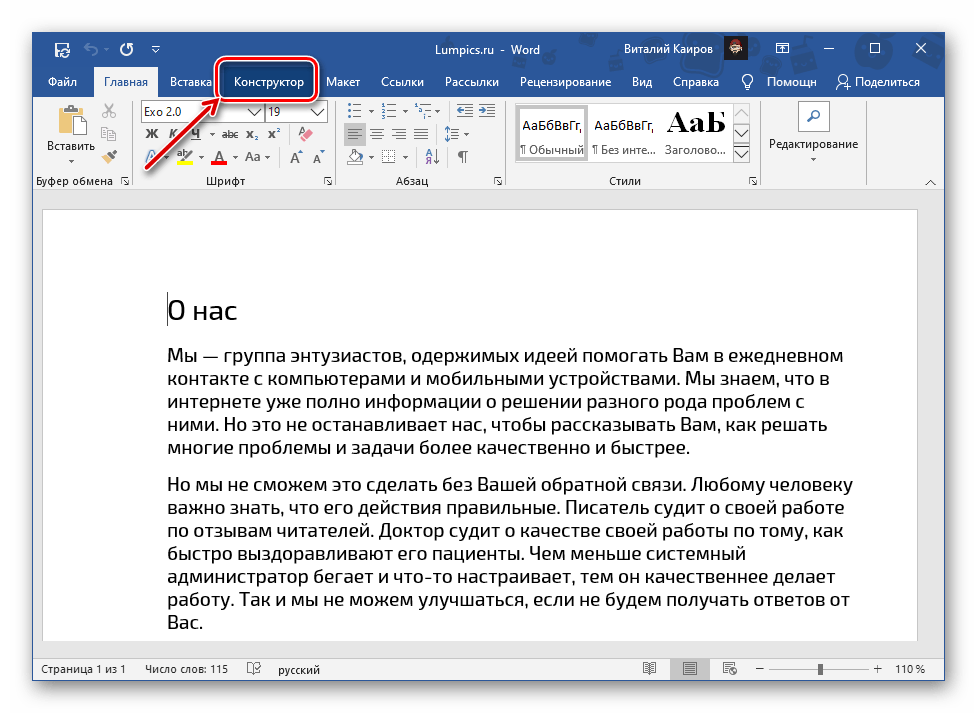
Как изменить цвет страницы в Word
Чтобы изменить цвет фона страницы, откройте документ и перейдите на вкладку Конструктор, в группе «Фон страницы» нажмите кнопку Цвет страницы.

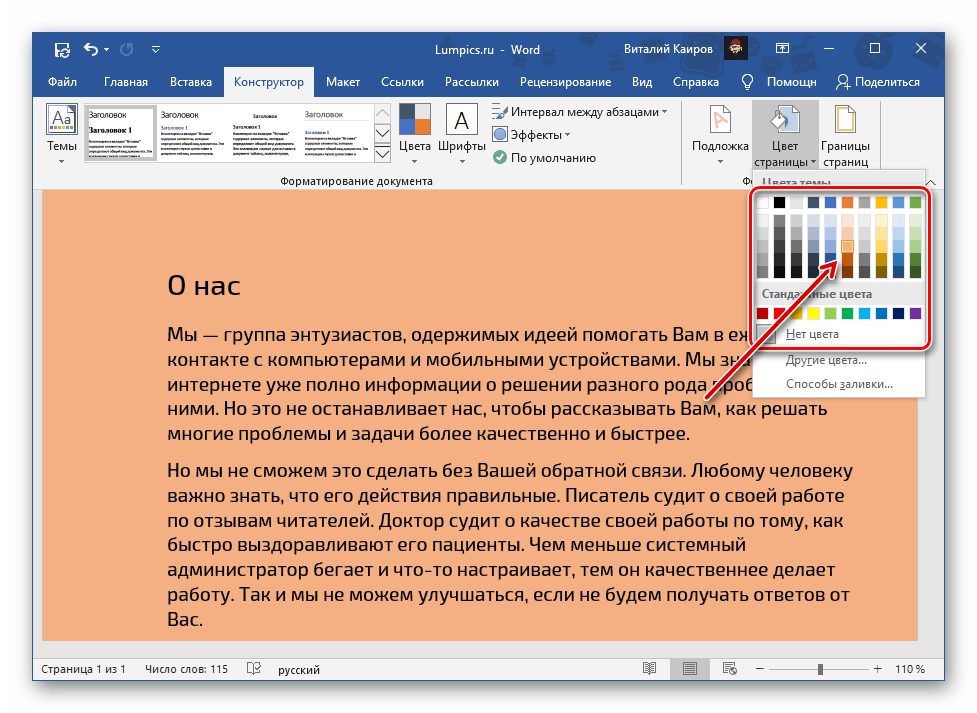
Затем выберите необходимый цвет страницы из галереи (палитры) цветов, как показано на скриншоте ниже.

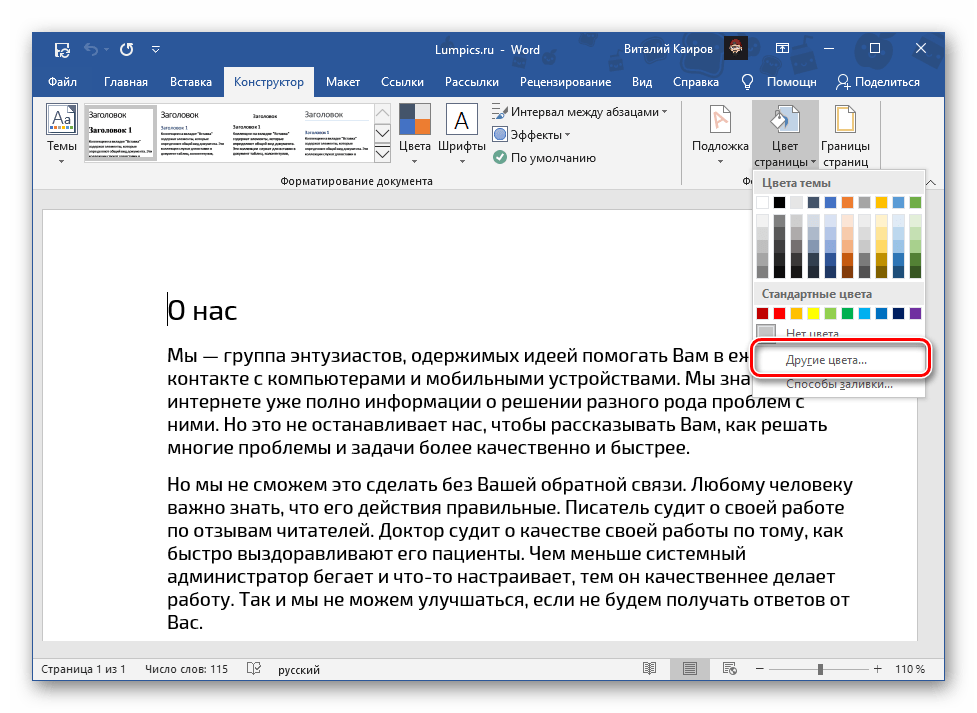
Также при необходимости можно использовать дополнительные цвета, для этого в галерее цветов нажмите Другие цвета…

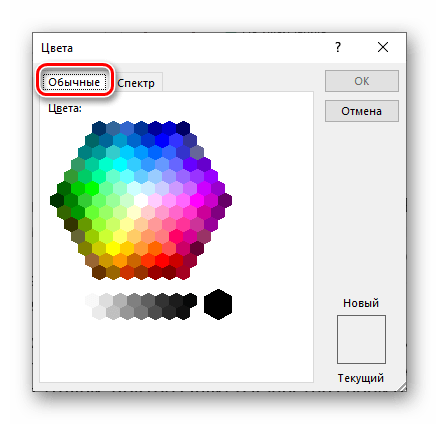
В открывшемся окне «Цвета» выберите необходимый цвет и нажмите кнопку OK.

В результата цвет фона страницы изменится, пример на скриншоте ниже.

Используя рассмотренные выше действия, можно изменить цвет фона страницы в документе Microsoft Word.