
-
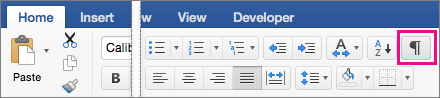
If not showing, select Home > Show/Hide
 to show section breaks.
Section breaks look like this:
Note: The type of section break shown above is a Continuous section break; there are other types of section breaks.
-
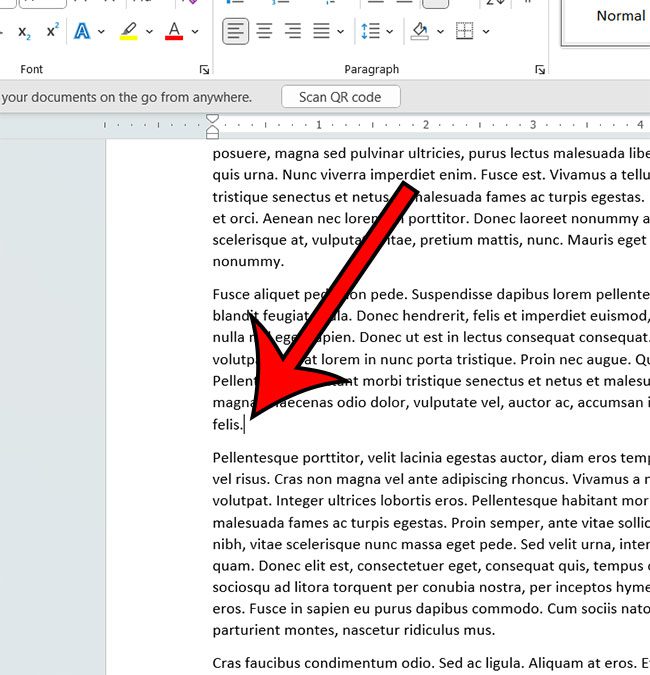
Place your cursor just before the section break and press Delete.
 to show section breaks.
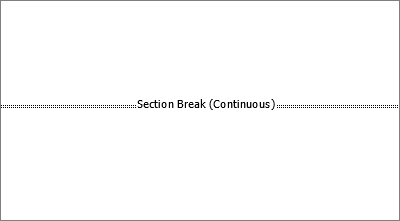
Delete a section break
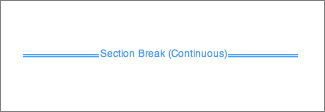
If you added section breaks to your document, the easiest way to see where they begin and end is to show formatting marks.
-
Go to Home, and select Show all nonprinting characters.
-
The section breaks look similar to this:
-
Select the section break and then press Delete.
Word for the web does not support section breaks, though it does display them. Use Word desktop to remove unwanted section breaks.
In this article, we want to share with you 3 ways to quickly delete all section breaks in your Word document.
Section breaks are useful in creating multiple sections in Word document. So you can format different sections in distinctive styles. And here is our previous article for you to quickly insert section breaks in document: 3 Ways to Quickly Insert Section Breaks into Your Word Document
However, it’s quite common to revise a document, such as changing styles, re-dividing sections, etc. Particular, if there is a big adjustment to make, you will probably need to remove all sections breaks. Following are 3 methods you can utilize to delete section breaks in batch.
Method 1: Find All Section Breaks in the Document
- First of all, press “Ctrl+ H” to open “Find and Replace” box in Word.
- Next put cursor inside “Find what” text box.
- Click “More” button to get more options.
- Then click “Special” and choose “Section Break” on its menu. Then you will see “^b” in “Find what” text box. So an alternative way is to enter “^b” directly after step 2.

- Lastly, leave “Replace with” box blank and click “Replace All”. Click “OK” on the confirmation box.


Method 2: Run a Macro to Delete All Section Breaks in One Document
Here is the auto way for you to get rid of all unwanted section breaks.
- To begin with, open VBA editor in Word by hitting “Alt+ F11”.
- Then create a new module by clicking “Normal”.
- Next click “Insert” and select “Module”.

- Now open module with double click.
- In the coding space on the right side, paste the following codes:

Sub DeleteAllSectionsInOneDoc()
  With Selection
    .HomeKey Unit:=wdStory
    With Selection.Find
      .ClearFormatting
      .Replacement.ClearFormatting
      .Text = "^b"
      .Replacement.Text = ""
      .Forward = True
      .Wrap = wdFindContinue
      .Format = False
      .MatchCase = False
      .MatchWholeWord = False
      .MatchWildcards = False
      .MatchSoundsLike = False
      .MatchAllWordForms = False
    End With
    Selection.Find.Execute Replace:=wdReplaceAll
  End With
End Sub
- Finally, click “Run”.


You will find all section breaks nowhere in a second.
Method 3: Delete All Section Breaks in Multiple Documents
Similarly, we must run a macro if we want to do it in a quick and dirty way.
- Before all, put all target documents in one folder.
- Then install a macro with steps in method 2.
- Run this macro instead:
Sub DeleteAllSectionBreaksInMultiDoc()
  Dim StrFolder As String
  Dim strFile As String
  Dim objDoc As Document
  Dim dlgFile As FileDialog

  Set dlgFile = Application.FileDialog(msoFileDialogFolderPicker)

  With dlgFile
    If .Show = -1 Then
      StrFolder = .SelectedItems(1) & ""
    Else
      MsgBox "No folder is selected! Please select the target folder."
      Exit Sub
    End If
  End With

  strFile = Dir(StrFolder & "*.docx", vbNormal)

  While strFile <> ""
    Set objDoc = Documents.Open(FileName:=StrFolder & strFile)

    With Selection
      .HomeKey Unit:=wdStory
      With Selection.Find
        .ClearFormatting
        .Replacement.ClearFormatting
        .Text = "^b"
        .Replacement.Text = ""
        .Forward = True
        .Wrap = wdFindContinue
        .Format = False
        .MatchCase = False
        .MatchWholeWord = False
        .MatchWildcards = False
        .MatchSoundsLike = False
        .MatchAllWordForms = False
      End With
      Selection.Find.Execute Replace:=wdReplaceAll
    End With

    objDoc.Save
    objDoc.Close
    strFile = Dir()
  Wend
End Sub
- Next in the “Browse” window open, select the folder to which you save documents.
- Last but not the least, click “OK”.


Get Prepared for Data Loss
Normally, with good operation habit, good luck and all blessings, you can achieve a lot in Word. But crashes can strike you anytime. Thus it’s of vital importance to back up documents on a regular basis. With a backup in hand, you will be more confident before starting the docx fix.
Author Introduction:
Vera Chen is a data recovery expert in DataNumen, Inc., which is the world leader in data recovery technologies, including xls recovery and pdf repair software products. For more information visit www.datanumen.com
While Microsoft Word can be a pretty intuitive application for many of the documents that you edit, you will inevitably find situations where you can’t fix a problem.
These issues are typically related to formatting choices that you made in the past, or that were made by someone else who has edited the document.
These problems often manifest when you are trying to make layout changes or adjustments to your entire document, but one small part of the document is not being affected by the changes.
One of the more common problems you might encounter can be resolved by following our how to remove section breaks in Word method outlined below.
Our guide continues below with additional how to delete section break in Word information, including pictures of these steps.
I like to use section breaks when I am making a document that contains information on a lot of topics. This allows me to use some additional navigation options, plus it gives me to option to change the formatting for different parts of my document.
Microsoft Word provides many tools that allow you to format the text that you have added to a document. But it also includes some formatting options for the document itself. This can range from things like columns, to other features like section breaks.
A section break in a Word document lets you split up your document into separate parts, which you can then format without affecting the rest of the document. A common use for this is to change the orientation for a single page of your document, while leaving the rest of the document in the current orientation.
But if you have previously created a section break that you no longer need, or if you are editing someone else’s document and wish to remove one of the section breaks they’ve added, then our guide below on how to remove section breaks in Word can help you out.
Full Guide – Removing a Section Break in Word (Guide with Pictures)
The steps in this article were performed in the Microsoft Word for Office 365 version of the application but will also work in most other recent versions of Word.
The next section of this article below provides a quick overview of how to remove a Word section break, but you can continue below to see the full guide with pictures.
Step 1: Open your document in Word.
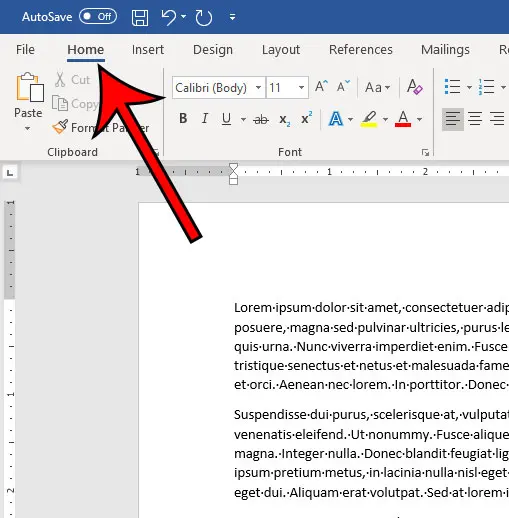
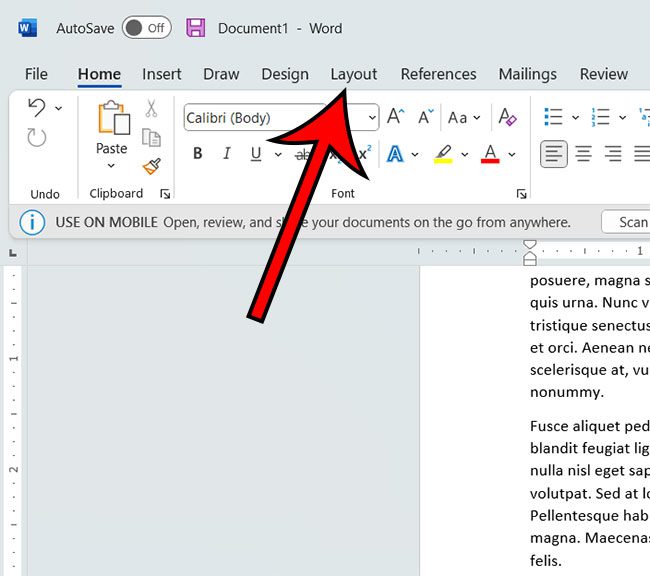
Step 2: Select the Home tab at the top of the window.
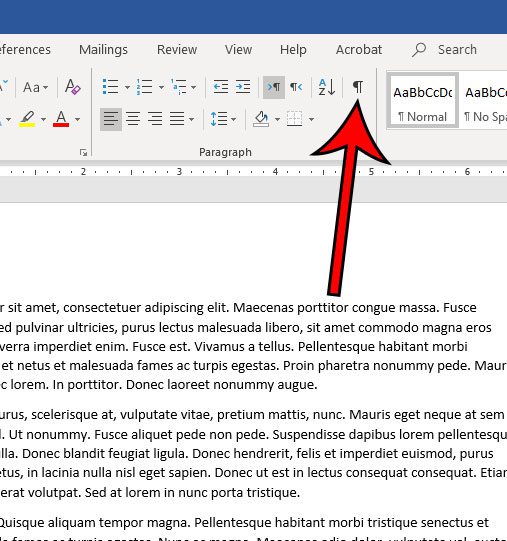
Step 3: Click the Show/Hide button in the Paragraph section of the ribbon.
Step 4: Locate a section break in your document, then use your click your mouse on the left side of the break, hold it down, then drag to the right end of the break to select the entire thing.
Alternatively, you can place your mouse cursor at the left end of the break, but you may find that part of the break may remain after deletion.

Step 5: Press the Delete key (not the Backspace key) on your keyboard to remove the section break.
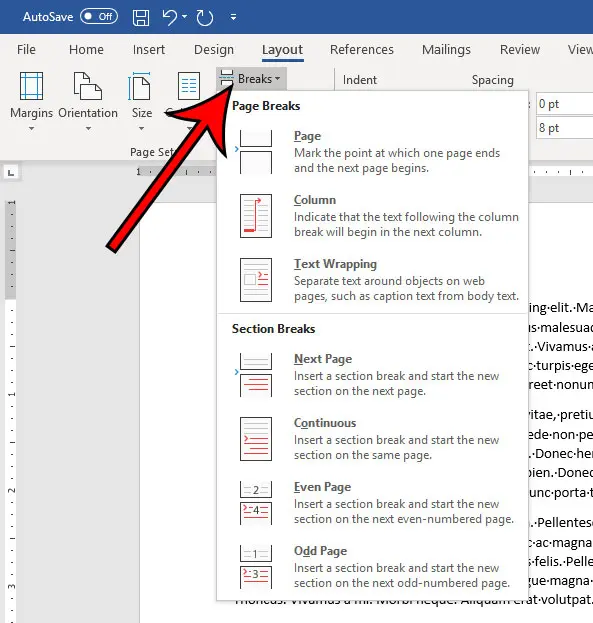
If you wish to add another section break to a document, click at the point where you wish to add the break, select the Layout tab, then click the Breaks button and choose the desired type of section break.
Last update on 2023-04-13 / Affiliate links / Images from Amazon Product Advertising API
| As an Amazon Associate, I earn from qualifying purchases.
Now that you are familiar with the how to remove section breaks in Word steps, you will be able to fix random spacing issues that might crop up in documents that you are creating or documents that you are editing which came from other people.
Active Time
2 minutes
Total Time
2 minutes
Difficulty
Medium
Materials
- Microsoft Word document with section break
Instructions
- Open your document in Word.
- Select the Home tab.
- Click the Show/Hide button in the Paragraph section.
- Select the section break you wish to delete.
- Press the Delete key on your keyboard.
Notes
New section breaks can be added by clicking the Breaks button on the Layout tab.
You can also delete a section break by placing your cursor to the left of the break, then pressing the Delte key on your keyboard.
Once you delete a section break, Word will use the formatting from the section after the combined sections. You will need to use the “Link to previous” option instead of deleting the section if you want to use the headers and footers from an earlier section instead.
How to Get Rid of a Section Break in Word on an iPhone
The mobile version of the Microsoft Word application that you use on your iPhone or Android device has most of the features that you would find in the desktop version of the application.
Luckily, this means that you can use this phone version of the app if you want to remove section breaks from a document.
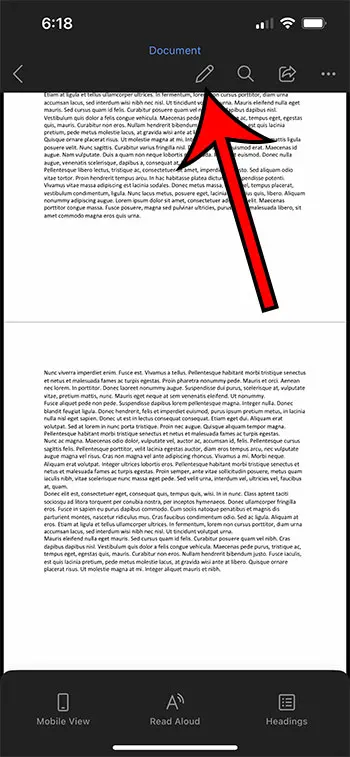
Step 1: Open the Word app on your iPhone.

Step 2: Open the document.
Step 3: Touch the pencil icon at the top of the screen.
Step 4: Tap the three dots in the horizontal bar in the middle of the screen.
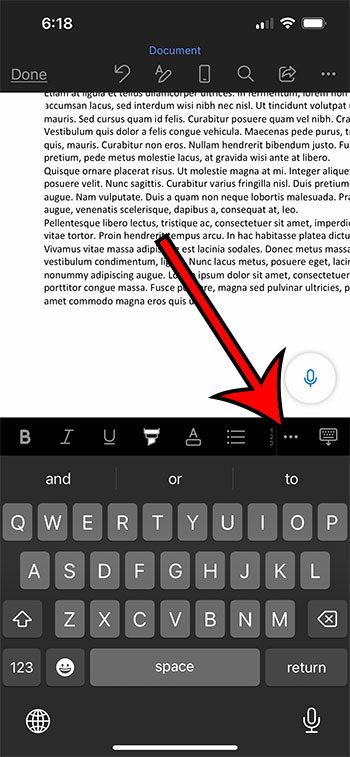
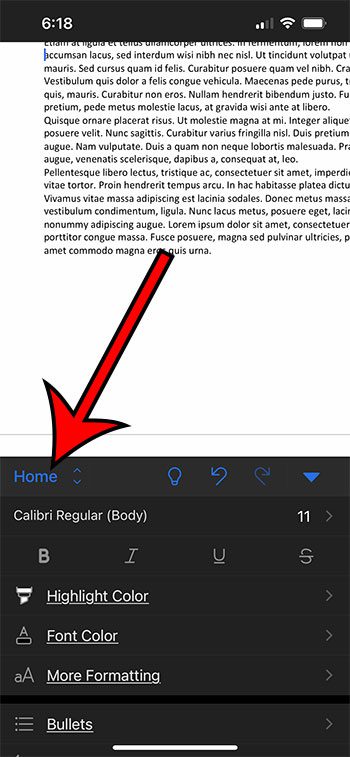
Step 5: Choose the Home option in the horizontal menu bar.
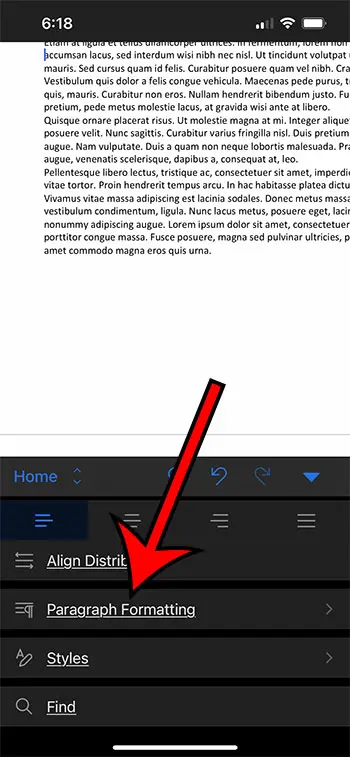
Step 6: Scroll down and select Paragraph Formatting.
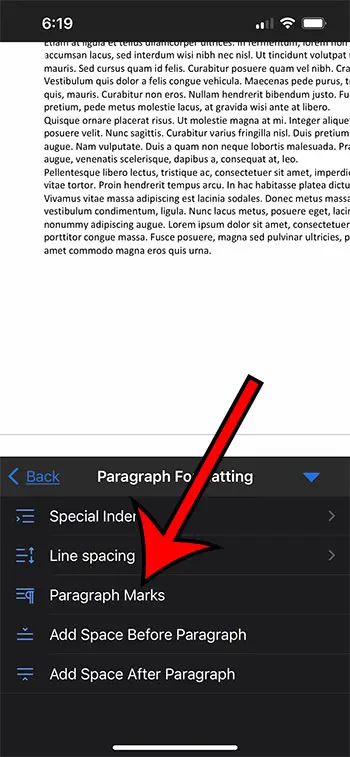
Step 7: Tap Paragraph Marks.
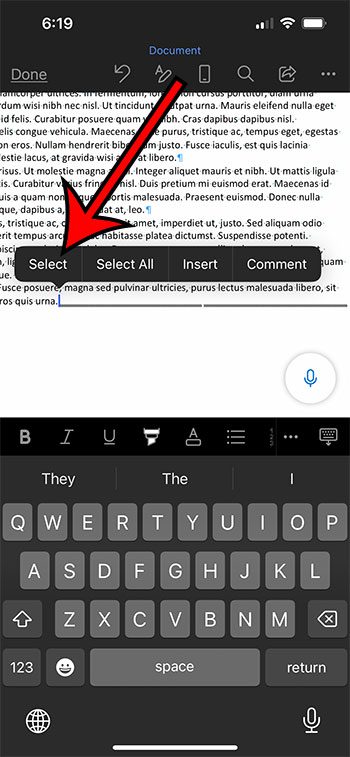
Step 8: Tap and hold on to the section break, then touch Select.
Step 9: Choose the Delete option to remove the break.

The next section discusses how to insert a section break in your document.
How to Insert a Section Break in Microsoft Word
While this article has focused on how to delete section breaks from documents, you may be curious about how they got there in the first place if you weren’t the person who added the break to a document.
Step 1: Open your document in Microsoft Word.
Step 2: Click at the point in the document where you want the break.
Step 3: Select the Layout tab at the top of the window.
Step 4: Click the Breaks button in the Page Setup group in the ribbon, then select the desired type of section break.
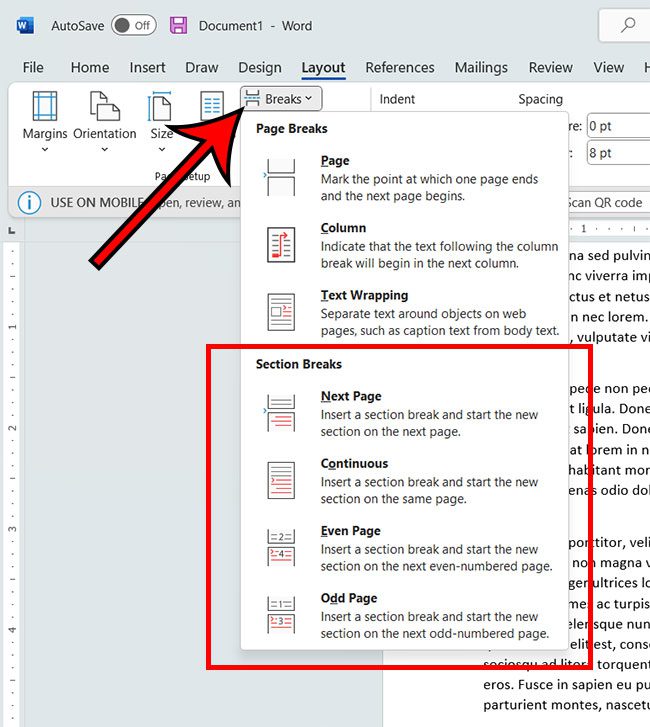
As you can see in the image above, the types of section breaks you can add to a Word document include:
- Next Page – this type of break lets you start the new section on the next page of the document.
- Continuous – this adds a new section on the current page.
- Even Page – this will start the next section on the next even-numbered page.
- Odd Page – this will start the next section on the next odd-numbered page.
Our article continues below with more about these breaks, as well as answers to some common questions about them.
More Information on How to Delete Microsoft Word Section Breaks
When you have displayed the formatting marks in your document, the section break that you are trying to remove will be identified with a word in parentheses after the section break indicator.
If you actually do want a section break in your document, but the one that is there currently isn’t correct, then you will need to delete that section break and replace it with one of the options from the list that you see when you expand the breaks drop down menu.
One other type of similar formatting mark that you might need to remove involves manual page breaks.
These are very similar in that a page break appears at a point within the document where it wouldn’t normally be. These can be seen if a paragraph in your document should be displayed on the same page as the previous paragraph, but has been forced to the next page.
If you would like to remove a page break in Microsoft Word then you can use the steps above to display the paragraph marks in your document, then you can place your cursor below the page break and press Delete on your keyboard. You can also read our how to remove a page break in Word guide for more information.
One other way to remove section breaks, especially if you have more than one that you want to get rid of, is with the Find and Replace dialog box. You can find this by selecting the Home tab at the top of the window, then clicking the Editing button in the ribbon and choosing the Replace option.

You can then select the More button to expand the Find and Replace box. Next, you will click inside the Find what field, then you will click the Special drop down menu at the bottom of the window and choose the Section Break option.
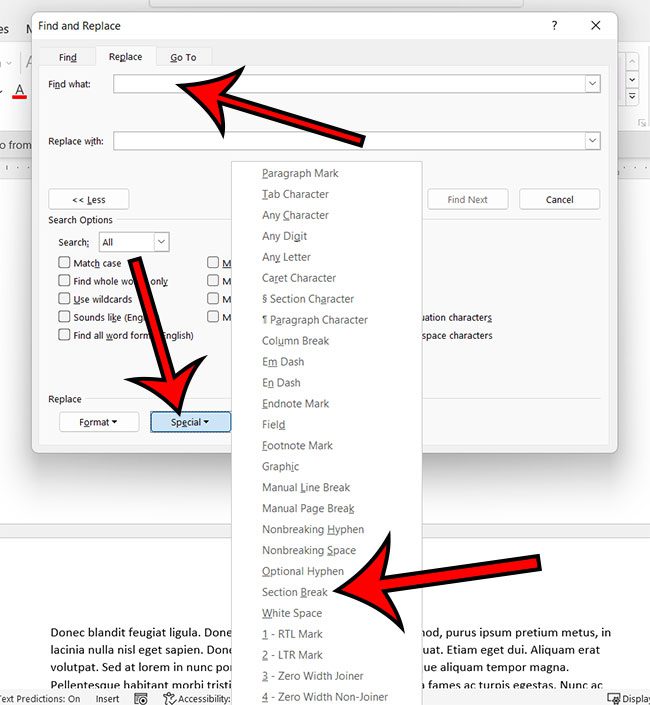
Finally, you will need to make sure that the Replace with field is empty, then you can click the Find Next button and navigate between the different section breaks in your document and delete them individually. Or you could choose the Replace All button which will delete all of the section breaks in the document by replacing them with nothing, as indicated by the empty “Replace with” field.
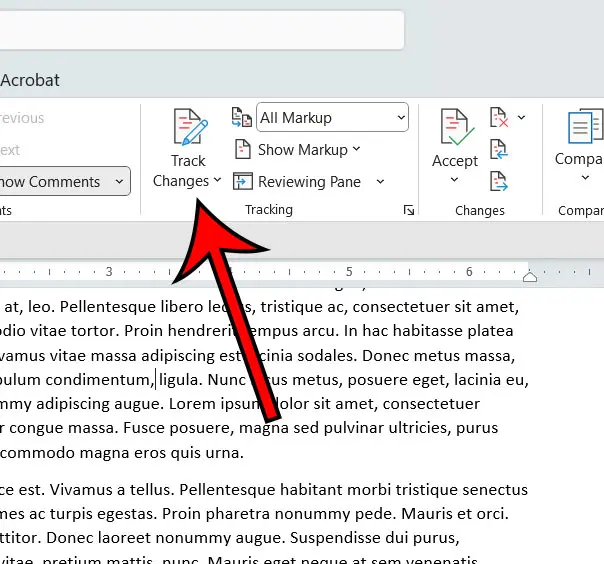
If you are having trouble removing your section breaks, then it might be because you currently have “Track Changes” enabled. You can turn this off by selecting the Review tab at the top of the window, then clicking the Track Changes button in the Tracking group of the ribbon.
If you work with Google Docs in addition to Microsoft Word, then you may want to know how to remove space in Google Docs when the standard options aren’t working.
Does your document have a lot of formatting that is proving difficult to remove? Find out how to clear all formatting in Word if you would rather start over with plain text.
Frequently Asked Questions When Working With Microsoft Word Section Breaks
Why can’t I delete a section break in Word?
After you create a new section break in your document and start making changes or formatting adjustments, you might discover that you no longer actually need to use section breaks.
I’ve run into this problem in the past, and it can be a little frustrating when it seems like you’re doing everything right and it’s still not working.
The main reason why many people can’t delete a section break is that they have the “Track Changes” feature enabled.
You can turn this off by going to the Review tab and clicking the Track Changes button in the Tracking group of the ribbon.
How do I delete all section breaks in a Word document?
If you’ve added more than one section break to your document and you want to get rid of all of them, then you can do so with the Find and Replace tool.
1. Press the F5 key on your keyboard.
2. Select the Replace tab at the top of the Find and Replace window.
3. Type ^b into the Find what field.
4. Click the Replace All button.
You can find the ^ key by holding down Shift on your keyboard and pressing the “6” key.
You can also open the Find and Replace window by selecting the Home tab at the top of the window, then clicking the Editing button and choosing Replace.
How do I delete a section break in Word for Mac?
Select the Home tab at the top of the window, then click the Show/Hide button to display the formatting marks.
You can then click the section break character that you wish to remove, then press the Delete key on your keyboard.
How do I select all sections in Microsoft Word?
If you want to select everything in your document, then you can press Ctrl + A on your keyboard to quickly select all content.
What are the different types of section breaks?
When you start to create different sections in your documents, such as when you want to use different formatting, margins, or other types of section formatting, you might be wondering which one to use.
Microsoft Word has four types of section breaks:
– Next Page – the next section will start on the next page
– Continuous – the next section starts on the current page
– Even Page – the next section will begin on the next even-numbered page
– Odd Page – the next section will begin on the next odd-numbered page
Can I delete a section break in Word Online?
No, unfortunately, the Web version of Microsoft Word does not support the removal of a section break from a document.
You will need to open the Word doc on a desktop or mobile version of the Microsoft Word application if you would like to remove an existing section break from one of your Word documents.
If you have a Microsoft Excel spreadsheet that contains a lot of links, then visit our how to break Excel links guide and learn about a quick way to remove all of them at once.

Matthew Burleigh has been writing tech tutorials since 2008. His writing has appeared on dozens of different websites and been read over 50 million times.
After receiving his Bachelor’s and Master’s degrees in Computer Science he spent several years working in IT management for small businesses. However, he now works full time writing content online and creating websites.
His main writing topics include iPhones, Microsoft Office, Google Apps, Android, and Photoshop, but he has also written about many other tech topics as well.
Read his full bio here.
Remove One or More Section Breaks in a Microsoft Word Document
Article by: Avantix Learning Team | Updated February 10, 2023
Applies to: Microsoft® Word® 2010, 2013, 2016, 2019, 2021 or 365 (Windows)
You can remove a single section break or multiple section breaks in Microsoft Word in a few different ways. In order to delete section breaks, you’ll need to display paragraph marks or symbols. Since section breaks can be tricky to delete, you may have to select and delete them in a different view. Be careful when deleting section breaks as each section can have different margins, headers and footers and page orientation so deleting a section break could change all of those settings.
Recommended article: How to Add or Remove Page Breaks in Microsoft Word
Do you want to learn more about Microsoft Word? Check out our virtual classroom or live classroom Word courses >
View section breaks
You can view section breaks in Print Layout View (the default view in Word) or in Draft View. Either way, it’s best to turn on paragraph marks (and other non-printing characters) if you want to delete section breaks.
To view section breaks, paragraph marks and other non-printing characters in Microsoft Word:
- Click the Home tab in the Ribbon.
- Click Show/Hide ¶ in the Paragraph group. Paragraph marks, tabs, spaces, section breaks and manual page breaks will display but will not print.
You can change between Page Layout View and Draft View by clicking the View tab in the Ribbon and selecting the required view.
Ensure Track Changes is off
You can’t delete section breaks when Track Changes is turned on.
To turn off Track Changes:
- Click the Review tab in the Ribbon.
- Click Track Changes in the Tracking group.
- From the drop-down menu, select Track Changes to turn tracking off.
You can also press Ctrl + Shift + E to turn off Track Changes.
Remove a section break
Section page breaks are hidden by default. If you want to delete a section break easily, turn on Show/Hide ¶.
To delete a break:
- If necessary, click the Home tab and then click Show/Hide ¶ in the Paragraph group.
- Double-click the break to select it or drag over it.
- Press Backspace or Delete to delete the break.
If you have difficulty deleting a section break, click the View tab in the Ribbon and select Draft in the Views group. Select the break by dragging over it and then press Delete. Return to Print Layout View by clicking the View tab again and clicking Print Layout in the Views group.
Remove multiple (or all) section breaks using Find and Replace
You can remove section breaks using Find and Replace:
- Click the Home tab in the Ribbon.
- Click Replace in the Editing group or press Ctrl + H. A dialog box appears.
- Click More >> to expand the dialog box (if necessary).
- Click in the Find what box.
- From the Special menu, choose Section Break. The characters «^b» will appear.
- Click in the Replace with box.
- Ensure there is nothing in the Replace with box by pressing Delete (multiple times if necessary).
- Click Find Next.
- Click Replace and then click Find Next to go to the next section break. Repeat for each section break. If you want to delete all section breaks, click Replace All.
Below is the expanded Find and Replace dialog box:

Find and Replace is an extremely useful dialog box in Word. You can use it to find and replace formatting, styles and other special characters.
Subscribe to get more articles like this one
Did you find this article helpful? If you would like to receive new articles, JOIN our email list.
More resources
How to Superscipt or Subscript in Word
14+ Word Selection Shortcuts to Quickly Select Text
How to View Word Count in Microsoft Word (4 Ways)
How to Insert Greek Letters or Symbols in Word (6 Ways)
10+ Great Microsoft Word Navigation Shortcuts to Move Around Quickly in Documents
Related courses
Microsoft Word: Intermediate / Advanced
Microsoft Word: Designing Dynamic Word Documents Using Fields
Microsoft Word: Long Documents Master Class
Microsoft Word: Accessible Word Documents
Microsoft Excel: Intermediate / Advanced
Microsoft PowerPoint: Intermediate / Advanced
VIEW MORE COURSES >
Our instructor-led courses are delivered in virtual classroom format or at our downtown Toronto location at 18 King Street East, Suite 1400, Toronto, Ontario, Canada (some in-person classroom courses may also be delivered at an alternate downtown Toronto location). Contact us at info@avantixlearning.ca if you’d like to arrange custom instructor-led virtual classroom or onsite training on a date that’s convenient for you.
Copyright 2023 Avantix® Learning
Microsoft, the Microsoft logo, Microsoft Office and related Microsoft applications and logos are registered trademarks of Microsoft Corporation in Canada, US and other countries. All other trademarks are the property of the registered owners.
Avantix Learning |18 King Street East, Suite 1400, Toronto, Ontario, Canada M5C 1C4 | Contact us at info@avantixlearning.ca
How to Remove a Section Break in a Word Document
Microsoft Word provides many tools that allow you to format the text that you have added to a document. But it also includes some formatting options for the document itself. This can range from things like columns, to other features like section breaks.
A section break in a Word document lets you split up your document into separate parts, which you can then format without affecting the rest of the document. A common use for this is to change the orientation for a single page of your document, while leaving the rest of the document in the current orientation.
But if you have previously created a section break that you no longer need, or if you are editing someone else’s document and wish to remove one of the section breaks they’ve added, then our guide below will show you how.
How to Delete a Section Break in Microsoft Word
The steps in this article were performed in the Microsoft Word for Office 365 version of the application, but will also work in most other recent versions of Word. The first section of this article provides a quick overview of how to remove a Word section break, but you can continue scrolling to see the full guide with pictures, or you can click here to jump to that section.
How to Delete a Section Break in Word

Learn how to locate a section break in a Word document and delete that break if you no longer wish to include it in your document.
Как убрать разрыв страницы в Ворде
Удобной функцией форматирования документа Microsoft Word является «разрыв страницы» — переброс курсора на новый лист с любого места на предыдущем листе. Он часто появляется при копировании текста из интернета, других документов или случайном нажатии клавиш Ctrl+Enter. Рассмотрим разные способы, как убрать разрыв страницы в Ворде в документах любой величины.
Способ 1: удаление разрыва страницы
Разрыв страницы дает пустое пространство на листе, куда не устанавливается курсор. Поэтому и возникает сложность с удалением свободного места.
Чтобы убрать разрыв страницы, проделайте следующее:
- Зайдите на вкладку «Главная» документа.
- В третьем блоке слева «Абзац» активируйте кнопку «Отобразить все знаки».

На листе появятся знаки абзацев, пробелы и другие символы, включая пунктирную линию перед пустым блоком со словами «Разрыв страницы».

Текст со следующего листа автоматически заполнит пустое пространство. Если перед предыдущим абзацем и следующим образовались пустые строчки, удалите их нажатием Delete.
Способ 2: удаление разрывов страницы во всем документе
Если в файле 2-5 страниц, убрать разрывы стандартным методом будет несложно. Но если документ содержит свыше 20 страниц, их просмотр и редактирование займет массу времени. Чтобы облегчить процедуру, можно воспользоваться опцией «Найти и Заменить». Ее можно вызвать одновременным нажатием клавиш Ctrl+H с клавиатуры или через меню блока «Редактирование» во вкладке «Главная».

Удалите страничные разрывы, проделав следующее:
- Вызовите окно «Найти и Заменить».
- Кликните по кнопке «Больше …».

Установите курсор в поле «Найти» и кликните по кнопке «Специальный».

Выберите из перечня опцию «Разрыв страницы».

Кликните по кнопки «Заменить все».

При работе с окном «Найти и Заменить» поле «Заменить на» необходимо оставить пустым. Функция редактирования в автоматическом режиме отыщет все разрывы во всем документе, удалит их ничем не заменяя. Если после операции окажется, что между абзацами подтянутого на лист текста образовались пустые строчки, их нужно удалить.
Способ 3: работа с интервалами в меню «Абзац»
Причиной большого отступа между абзацами, который нельзя удалить нажатием Delete, может быть отредактированный интервал. В этом случае при активации кнопки «Отобразить все знаки» на листе не появится пунктирная линия со словами «Разрыв страницы». Расстояние между абзацами не будет заполнено даже знаками абзаца.
Для того, чтобы убрать разрыв страницы в Ворде, сделанный интервалом, проделайте следующее:
- Выделите пустой промежуток между абзацами, захватив и сами абзацы.
- По выделенному фрагменту кликните правой клавишей мыши.
- Укажите в списке «Абзац».


Разорванные абзацы текста автоматически подтянутся друг к другу. Свободное поле удалится.
Способ 4: удаление разрывов таблицы
Разрывы используют и для редактирования таблиц на листе. Если свободное место после использования Ctrl+Enter никак не задействовано, его лучше удалить. Особенно если в дальнейшем таблица пойдет на печать.
Действуем так:
- Включите в документе «Отобразить все знаки».
- Найдите на странице признак разрыва с пунктирной линией.
- Установите курсор перед пунктиром.
- Нажмите клавишу Delete с клавиатуры.

Удаление автоматически склеит две части таблицы в одну. Текст будет выглядеть цельным. Если в документе несколько таких разорванных таблиц, используйте опцию «Найти и Заменить». Так не придется все операции удаления выполнять вручную. Это займет много времени.
Удаление разрыва страницы очень простая процедура, которая не влияет на читабельность текста. Но после нажатия кнопки Delete восприятие документа может измениться в худшую сторону. Если так случилось, нажмите с клавиатуры Ctrl+Z для отмены действия. Также при работе с «Найти и Заменить» перепроверяйте установку команд из «Специальные». Если она была выбрана неправильно, используйте Ctrl+Z.
Перед применением инструкции, сохраните документ в текущем виде, это поможет избежать потери данных.

Ворд объединил в себе много удобных функций и инструментов, с помощью которых можно создавать тексты с любым форматированием и стилизацией. Это мощный редактор, но чтобы использовать всю его силу, необходимо знать, как пользоваться его инструментарием.
Довольно часто пользователи, толком не разобравшись во всем, форматируют документ наугад и в итоге сталкиваются со множеством проблем, среди которых особое место занимают лишние разрывы разделов. Давайте попробуем разобраться, что это такое и как можно его убрать.
Удаление разрыва раздела в Word
Разрывы разделов в текстовом редакторе Ворд используются для изменения форматирования в документе. Соответственно, удаление разрывов разделов приводит к тому, что документ приобретает один стиль и одно форматирование. Если вам необходимо это сделать, воспользуйтесь одним из этих способов.
Способ 1: Клавиша «Delete»
В данном случае все очень просто – необходимо разместить курсор мыши непосредственно перед символом разрыва раздела и нажать на клавиатуре «Delete». Стоит заметить, что после этой операции следующий после удаленного разрыва раздел будет иметь то же форматирование, что и предыдущий.

Важно! Если вы не видите в документе знаков разрыва и других непечатных символов, нужно на вкладке «Главная» кликнуть по кнопке «Отобразить все знаки» (группа «Абзац»).

Способ 2: Окно «Найти и заменить»
Удалить разрыв раздела в документе также можно с использованием диалогового окна «Найти и заменить». Достоинство этого метода в том, что с его помощью можно удалить как один элемент, так и несколько сразу.
- В окне текстового редактора Ворд нужно перейти на начало документа и нажать сочетание клавиш «Ctrl+H». Затем перейдите на вкладку «Заменить» в диалоговом окне.
- Наберите символы «^b» в поле «Найти».
- Оставьте пустым поле «Заменить на».

Вот такими простыми способами можно удалить разрыв раздела в Ворде. Пользуйтесь этими знаниями для форматирования документа.