
You’re typing along, you make a mistake, and you see the wavy red underline.
You fix the mistake, but you’ve lost your flow, your idea. To avoid that distraction, you can turn spell check off, then check spelling manually when you’re done writing. Here’s how.
Click File > Options > Proofing, clear the Check spelling as you type box, and click OK.
To turn spell check back on, repeat the process and select the Check spelling as you type box.
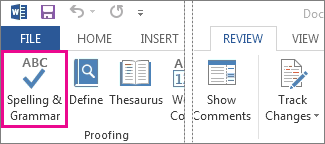
To check spelling manually, click Review > Spelling & Grammar.
But do remember to run spell check. Spelling and grammar errors can seriously undermine what you’re trying to say, especially when your boss, your teacher, or that person in HR sees them.
Need more help?
Spell checking is a convenient feature of Microsoft Word for short utility texts becomes an annoying nuisance that interferes with the creative writing process for long sophisticated texts. Professional writers disable spelling and grammar checks in moments of creativity and re-enable checks later at the editing and polishing stage.
To enable spell check as you type, follow the following steps:
1. On the File tab, click Options:

2. In the Word Options dialog box, on the Proofing tab:
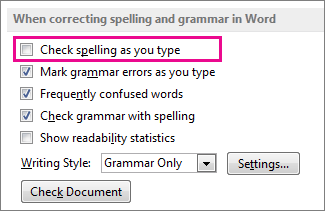
- In the When correcting spelling and grammar in Word section:
- To enable spell checking, make sure that the Check spelling as you type check box is selected,
- To disable spell checking, deselect the Check spelling as you type check box:

- In the Exception for group:
- To enable spell checking, make sure that all checkboxes are cleared,
- To disable spell checking, select both options.

Note: You can customize your local Word to use the selected or cleared options for all documents by selecting the appropriate option in the Exception for dropdown list:

3. Click OK to close the Word Options dialog box.
Please, disable AdBlock and reload the page to continue
Today, 30% of our visitors use Ad-Block to block ads.We understand your pain with ads, but without ads, we won’t be able to provide you with free content soon. If you need our content for work or study, please support our efforts and disable AdBlock for our site. As you will see, we have a lot of helpful information to share.
![]()
Download Article
Proofread and spell check your Microsoft Word documents with this user-friendly guide
![]()
Download Article
- Running a Spelling Check
- Correcting Errors as You Type
- Using the Mobile App
- Video
|
|
|
Microsoft Word has a built-in spellchecker for all your important documents and assignments. To find it, click the «Review» tab, click the down arrow next to «Spelling and Grammar,» and then choose «Spelling.» If you’re ever unsure about a spelling, Word will also point out any errors with a red squiggly line. Grammar is also automatically checked and indicated by a blue or green line. This wikiHow teaches you how to do a spelling and grammar check in Microsoft Word using your Windows, Mac, iPhone, iPad, or Android device.
Things You Should Know
- To run a spell check, click the «Review» tab. Click the down-arrow next to «Spelling and Grammar» and select «Spelling».
- Click a suggestion to apply it, or click «Ignore once», «Ignore all», or «Add to dictionary».
- On mobile, find a word with a red squiggly line underneath it. Tap a suggestion from the pop-up menu.
-
1
-
2
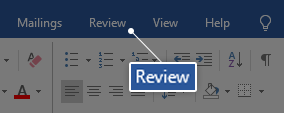
Click Review. This is at the top toolbar, between Mailings and View.
Advertisement
-
3
Click the down-arrow next to «Spelling and Grammar». A pop-up menu will open.
-
4
Select Spelling. The Editor panel will open on the right side.
- If you want to check both spelling and grammar at the same time, skip this step and click the abc icon instead
- You can also press F7 on your keyboard to quickly open the Editor panel. When it’s open, click Spelling.
-
5
View any errors. The Editor panel will show the nearest spelling (or grammar) error.
- Spelling errors will appear in red, while grammatical errors will appear in blue or green, depending on your version.
-
6
Apply an action. Below the error in the Editor panel, you’ll see suggested spellings along with three options: Ignore once, Ignore all, and Add to dictionary.
- To fix a mistake, click a correction in the suggestion list.
- If you don’t see any suggestions, Word’s dictionary was not able to find a similar replacement. You’ll need to delete the word and type it again.
- To skip this instance of the error, click Ignore. To skip all instances of this error in the document, click Ignore All.
- If you don’t want Word to ever report a certain spelling as incorrect, click Add to dictionary.
- To fix a mistake, click a correction in the suggestion list.
-
7
Select actions for the remaining errors. After you choose an option for the first error, Word will automatically take you to the next. When no more errors are found, you’ll see a confirmation message that says the spelling and grammar check is finished.
-
8
Click X to close the tool. Be sure to save your document when you’re finished.
Advertisement
-
1
Open a project in Microsoft Word. This looks like a W on top of a blue square.
-

2
Look for words or phrases underlined in red, green, or blue. Word is set up to check your spelling and grammar automatically as you type.[1]
- Spelling mistakes are underlined with a red squiggly line.
- Grammar issues are underlined with a blue or green line.
-
3
Click an error. A menu will open.
- You can also right-click the error for more options.
-
4
Select an action. You’ll see a few suggestions at the top of the menu.
- To replace an error with one of the suggestions in the menu, click it now.
- To ignore the error and remove its squiggly underline, click the slashed circle icon.
- To add the spelling to your dictionary, click the book icon.

Advertisement
-
1
Open the Microsoft Word app. Word is available for iOS in the App Store and for Android in the Google Play Store.
-
2
Enable spell check. Word should automatically have this enabled, but if it isn’t, do the following:
- Tap the edit icon. This looks like a pencil in front of an A.
- Tap Home.
- Tap Review.
- On Android, tap Spelling. On iOS, tap Proofing Tools and toggle on Spelling.
-
3
Look for words or phrases underlined in red. Word is set up to check your spelling automatically as you type.
-
4
Tap an error. A pop-up menu will open with suggestions and actions.
-
5
Select an action. Tap a suggestion to quickly apply it.
- Tap Learn to add the spelling to your device’s dictionary.
- Tap Cut or Delete to delete the word.
Advertisement
Ask a Question
200 characters left
Include your email address to get a message when this question is answered.
Submit
Advertisement
Video
Thanks for submitting a tip for review!
References
About This Article
Article SummaryX
1. Click Review.
2. Click Spelling & Grammar.
3. Select an action.
4. Repeat for all errors.
5. Click OK when finished.
Did this summary help you?
Thanks to all authors for creating a page that has been read 41,716 times.
Is this article up to date?
Your grammar can either make or break your documents. However, not everyone is a walking encyclopedia of grammar rules and correct spelling of words, which is why Microsoft Word is able to analyze your documents and notice your mistakes for you. With certain features, you can even have the app automatically correct your spelling errors to the correct one as you type.
Our article aims to teach you how you can take advantage of one of Word’s most famous capabilities. If you’re a beginner and want to know how to enable spell checking or AutoCorrect, this step-by-step guide is the perfect solution. Just follow along with us and learn how you can speed up and increase the quality of your work at the same time!
Things you’ll need
- A device with Microsoft Word installed and activated.
Now, let’s get right to the guides.
Check Spelling and Grammar Manually
- Launch Word, and either open an already existing document or create a new one from the welcome screen.
- From the Ribbon on the top of your screen, select the Review tab.

- In the Proofing section, you can see a button that says Spelling & Grammar. Click on this to start a manual check.

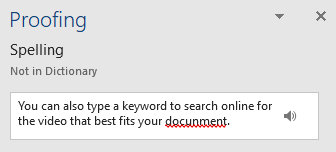
- If Word is able to detect any spelling issues in the language your document is set to, a new pane will open up on the right side of the application. You can see the error underlined with a red line.

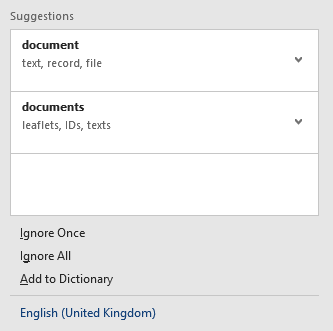
- You’ll see suggested words with definitions that allow you to select the correct spelling of the word you were trying to type. To implement any of these suggestions, simply click on them.

- You also have the option to make Word ignore the presumably misspelled word or words by pressing Ignore Once or Ignore All under the suggestions. You can also Add to Dictionary, meaning that the word in question won’t get detected by as a misspelling in the future.
- After you deal with the first misspelled word, you can move on to the next one if any more have been detected.


Tip: You can use a shortcut to activate the manual spelling and grammar check in Word. Simply press the F7 key on your keyboard, and the application will automatically perform a spelling and grammar check.
How to set Spelling Checker to Show errors while your work
- Launch Word, and either open an already existing document or create a new one from the welcome screen.
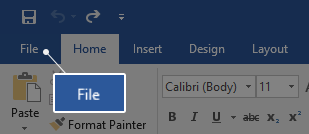
- From the Ribbon on top of your screen, select the File menu.

- Near the bottom, you can see a button that says Options. Click on it and direct your attention to the new Word Options window that appears.

- Click on Proofing from the menu on the left.

- To enable automatic spell checking as you type, place a checkmark next to the Check spelling as you type checkbox.

- To enable automatic grammar checking as you type, place a checkmark next to the Mark grammar errors as you type checkbox.
- After you enable automatic spell checking, whenever Word detects a misspelled word, it’ll be highlighted with a red squiggly line under it. You can right-click on the word and see a list of suggested words for replacement, and the option to Ignore or Add to Dictionary.

- After you enable automatic grammar checking, whenever Word detects a potential grammar error, two blue lines will appear. You can get assistance in fixing the error by right-clicking on it. You can also choose the Ignore option if you want to keep it in your document as it is.


We hope that this article was able to help you learn how you can easily check your spelling and grammar in Microsoft Word. Do you know someone who’s starting out with Word and other Microsoft Office products? Don’t forget to share this article with them! Your friends, classmates, colleagues, or employees can all get help in getting started with Word. If you want to learn more about Word or other Microsoft Office suite applications, feel free to browse our section of guides.
![Spell Check Not Working in Word [Fixed on Windows 10 PC]](https://www.freecodecamp.org/news/content/images/size/w2000/2021/11/word.png)
Spell check in Microsoft Word and other Word Processing apps is a powerful feature. With spell check, you don’t have to worry too about making small grammatical and typographical errors, because the program will point them out for you in real-time as you type.
But sometimes, the spell check feature in word processors stops working for various reasons, mostly to do with your Settings.
So, in this article, I will show you 4 ways you can fix the problem on a Windows 10 PC. The first 2 solutions work for the Word app in general, while the last 2 work for a particular Word document.
I will be using Microsoft Word 2016 in this tutorial, but everything applies to Word 2010, 2013, 2019, and some other versions.
How to Fix Spell Check Not Working in Word with Language Settings
If you are writing in English and your Word app language is set to French or Spanish, then spell check might not work.
The steps below takes you through how to select the right language:
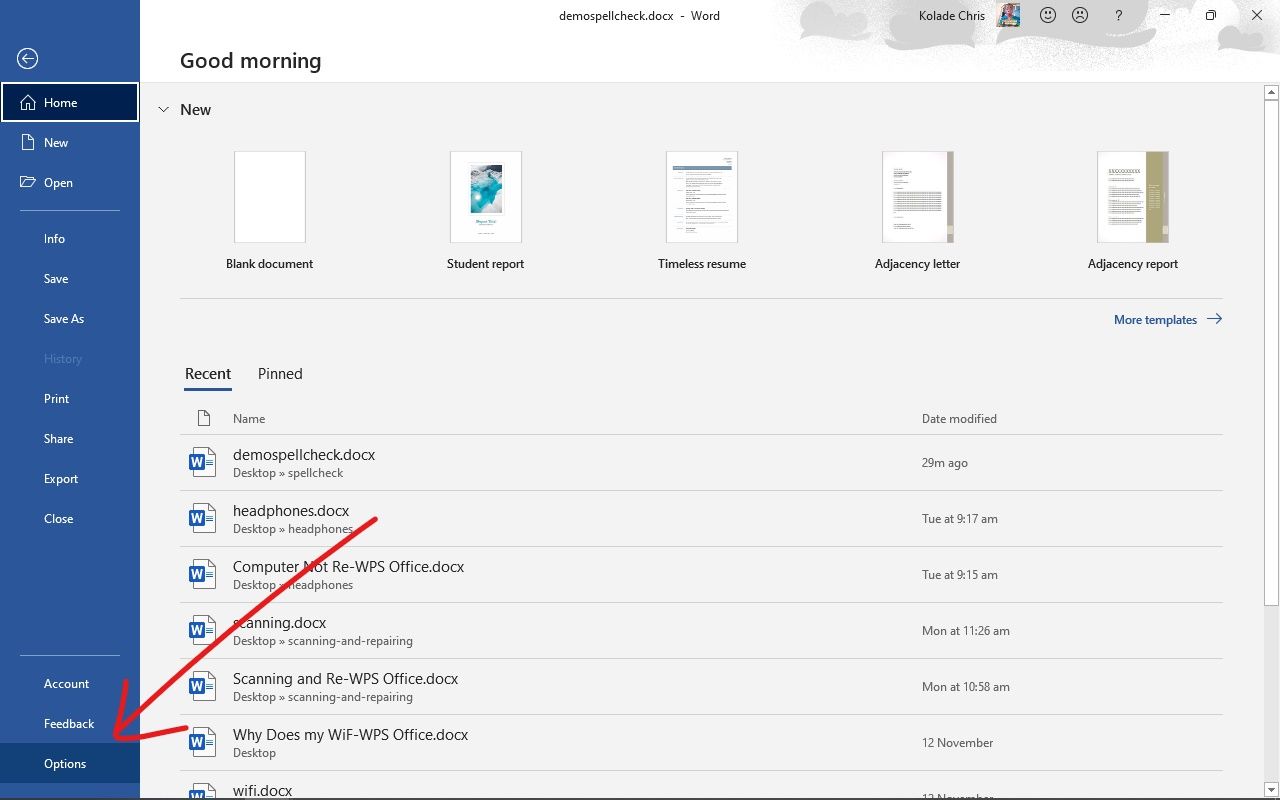
Step 1: Click on File in the menu bar and select Options.

Step 2: Head over to the Language tab.
Step 3: Under “Office authoring language and proofing”, select your preferred language and click Ok.

If your preferred language is not available in the list, click on “Add a language” and look for your language.
How to Fix Spell Check Not Working in Word by Turning off Disabling Add-ins
Firstly, you need to test if an add-in is preventing spell-check from working.
To do this, hold CTRL and open your Word app. If spell check isn’t working, then an add-in might be the culprit.
To disable an add-in, follow the steps below:
Step 1: Click on the File tab in the menu bar and select Options.
Step 2: Select add-in on the left.
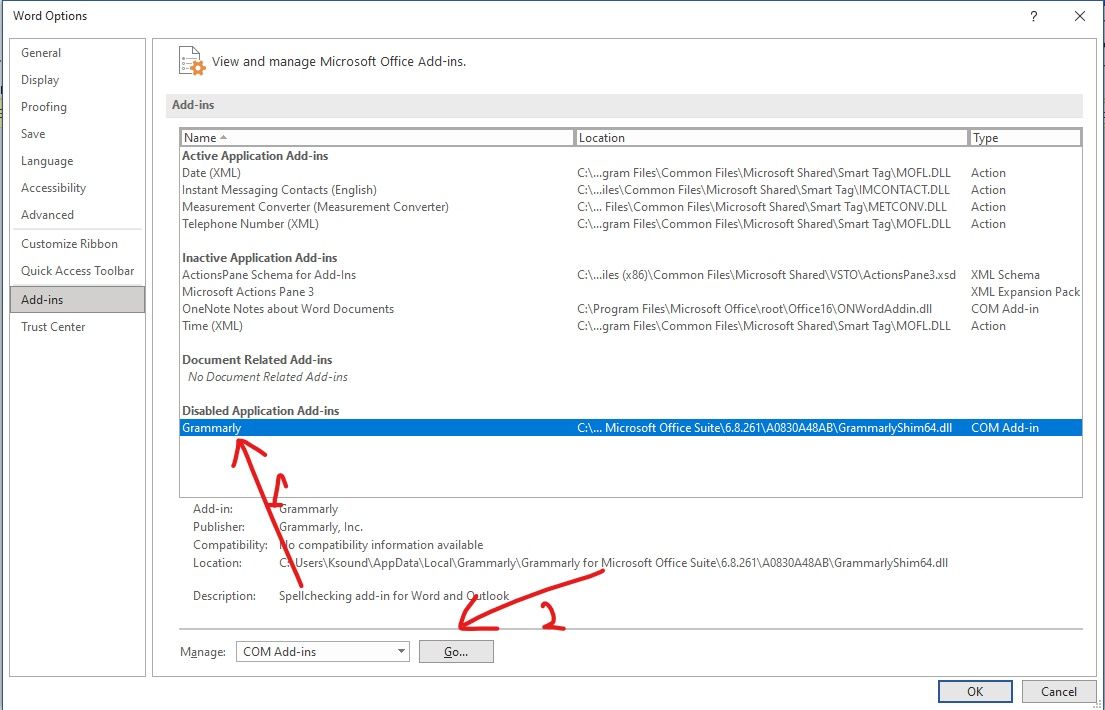
Step 3: Left-click on the add-in you want to remove and click “Go”.
Step 4: Check the add-in, then click “Remove”.
Do this for the individual add-ins you have and cross-check if spell check is working after each one. This way you’ll know which add-in is the culprit.
How to Fix Spell Check Not Working in Word by Turning off the Hide Spelling Error and Hide Grammar Error
Step 1: Make sure you have the Word document open where spell check is not working.
Step 2: Click on the File tab and select Options.
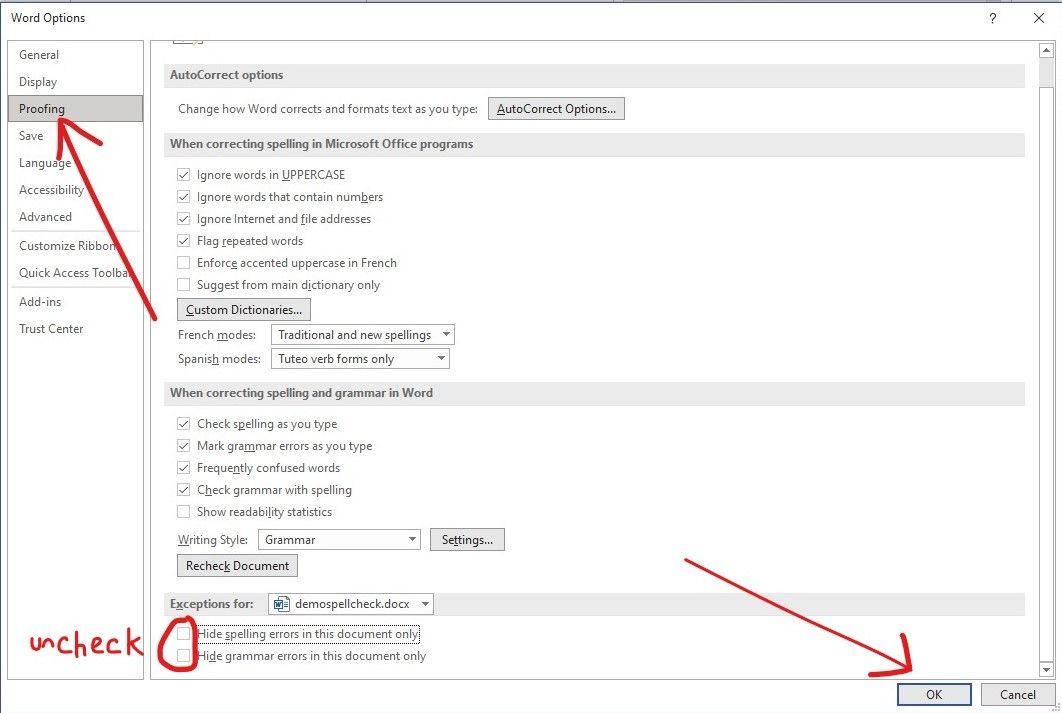
Step 4: Select Proofing.
Step 5: Uncheck both “Hide spelling error in this document only” and “Hide grammar error in this document only”, then select “Ok”.
How to Fix Spell Check Not Working in Word by Turning on Check Spelling as you Type
Step 1: Make sure the file is opened.
Step 2: Click on the File tab in the menu bar and select Options.
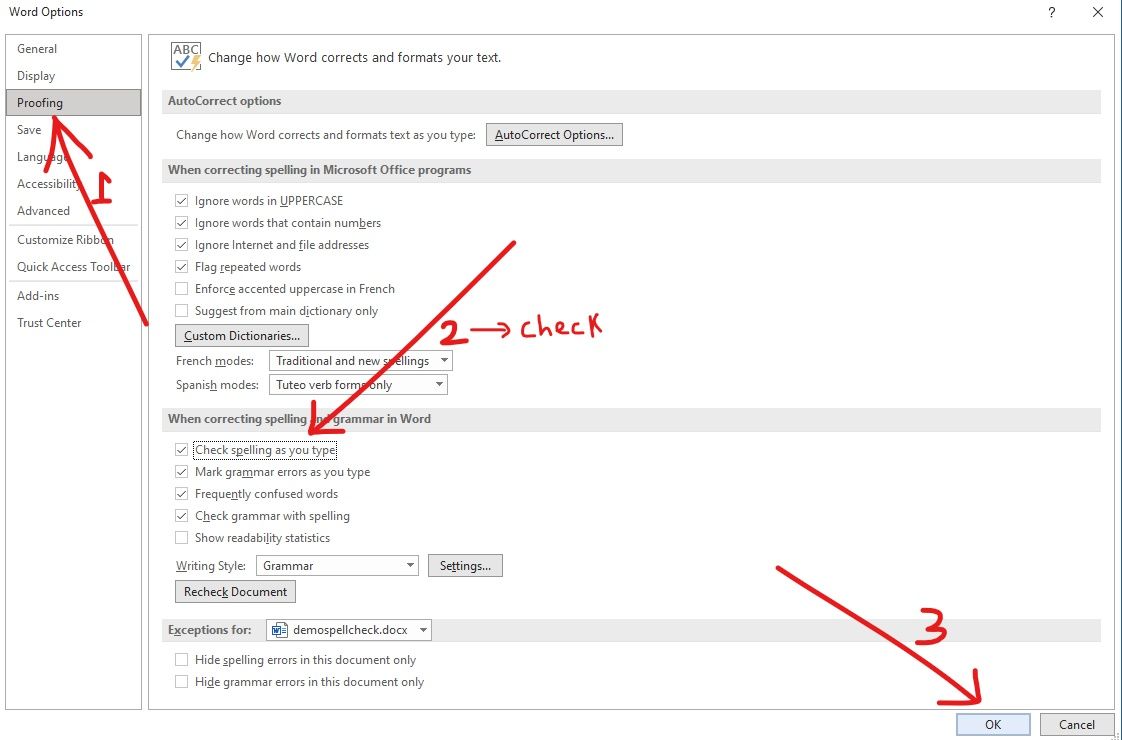
Step 3: Select Proofing.
Step 4: Make sure “Check «spelling as you type» is checked under “When Correcting Spelling and Grammar in Word”, then click Ok.
Final Thoughts
Spell check is a cool feature of Word that speeds up your productivity. And now you know how to fix it if it fails.
You can also apply these fixes to other Windows OS versions as Word works the same way in them.
Learn to code for free. freeCodeCamp’s open source curriculum has helped more than 40,000 people get jobs as developers. Get started