
Word for Microsoft 365 Word 2021 Word 2019 Word 2016 Word 2013 Word 2010 Word 2007 More…Less
Alignment determines the appearance and orientation of the edges of the paragraph: left-aligned text, right-aligned text, centered text, or justified text, which is aligned evenly along the left and right margins. For example, in a paragraph that is left-aligned (the most common alignment), the left edge of the paragraph is flush with the left margin.
Vertical alignment determines the position of the text within a section of a document relative to the top and bottom margins, and is often used to create a cover page.
-
Select the text that you want to align.
-
On the Home tab, in the Paragraph group, click Align Left
 or Align Right .
 or Align Right
  .
.-
Select the text that you want to center.
-
On the Home tab, in the Paragraph group, click Center
.
 .
.-
Select the text that you want to center.
-
On the Layout or Page Layout tab, click the Dialog Box Launcher
in the Page Setup group, and then click the Layout tab. -
In the Vertical alignment box, click Center.
-
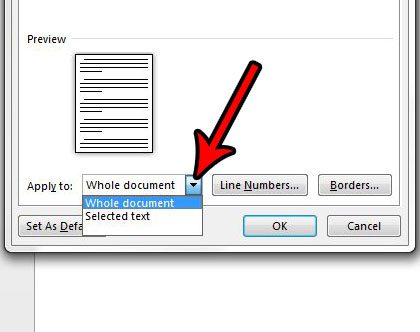
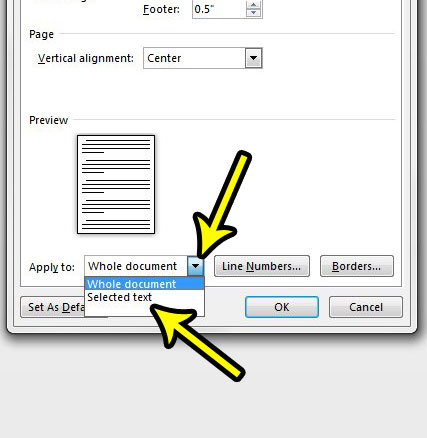
In the Apply to box, click Selected text, and then click OK.
 in the Page Setup group, and then click the Layout tab.
When you justify text in Word, you give your text straight edges on both sides of the paragraph. Justifying extends each line of your text to the left and right margins. Justifying text might make the last line of text in a paragraph considerably shorter than the other lines.
-
Select the text you want to justify.
-
On the Home tab, in the Paragraph group, click Justify
.
 .
.Tips:
-
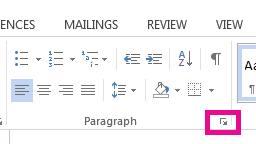
In the Paragraph group, click the Dialog Box Launcher
, and select the Alignment drop-down menu to set your justified text. -
You can also use the keyboard shortcut, Ctrl + J to justify your text.
In Office Word 2007, you can choose from a selection of predesigned cover pages to create a professional-looking document quickly and easily.
-
On the Insert tab, in the Pages group, click Cover Page.
-
Click the cover page that you want.
A cover page is always added to the beginning of the open document.

See also
Adjust indents and spacing
Need more help?
Change Word’s default vertical alignment for special design effects
Updated on October 21, 2022
What to Know
- To center text in Word, use the Vertical alignment menu.
- The Vertical Alignment menu also controls Top, Justified, and Bottom text alignment.
- To center text in Word for only part of the document, highlight what you want to center before choosing Vertical Alignment.
This article explains how to center text in Word. Instructions apply to Word for Microsoft 365, Word 2019, Word 2016, Word 2013, Word 2010, Word 2007, and Word 2003.
How to Vertically Align Text in Word
When you want to position text in a section of a document relative to the top and bottom margins, use vertical alignment.
To reflect a change in the vertical alignment, the document page or pages must be only partially full of text.
For Microsoft Word 2019, 2016, 2013, 2010, and 2007
-
Open the Word document in which you want to vertically align the text.
-
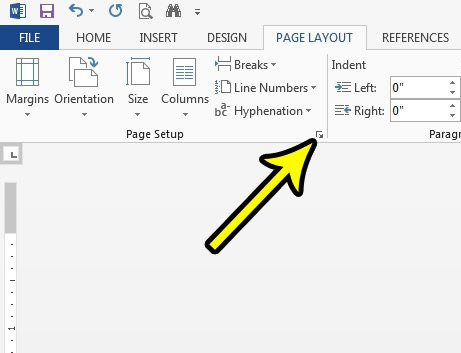
Go to the Layout tab (or Page Layout, depending on the version of Word).
-
In the Page Setup group, select the Page Setup dialog launcher (which is located in the lower-right corner of the group).
-
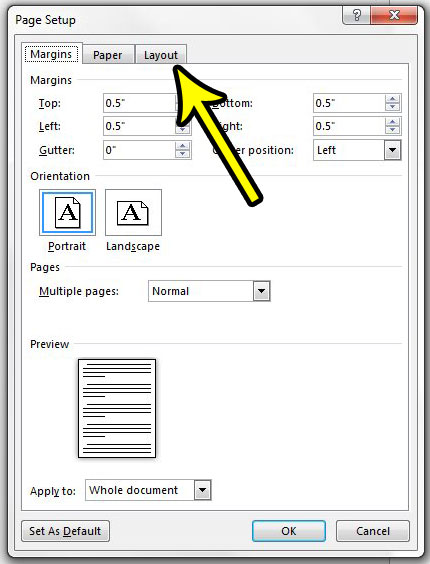
In the Page Setup dialog box, choose the Layout tab.
-
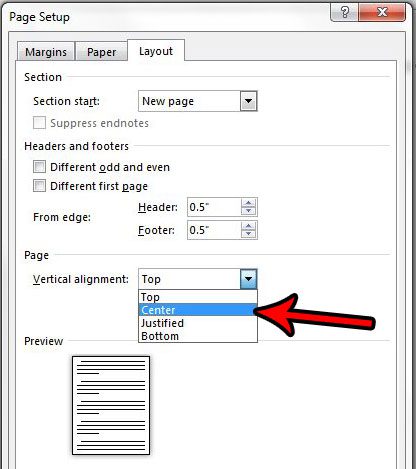
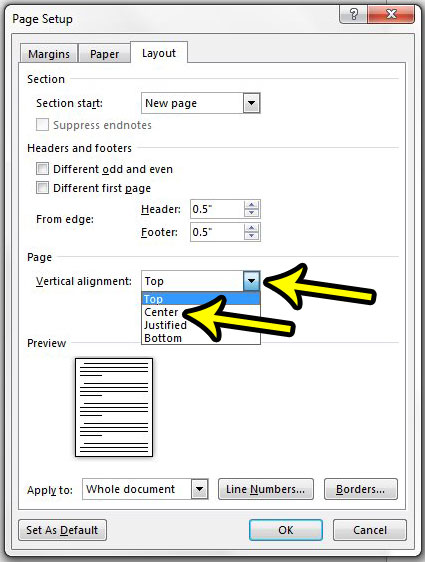
In the Page section, select the Vertical alignment drop-down arrow and choose either Top, Center, Justified, or Bottom.
If you choose Justified, the text is spread out evenly from top to bottom.
-
Select OK.
-
Your text will now be aligned the way you selected.
For Word 2003
To vertically align text in Microsoft Word 2003:
-
Select File.
-
Choose Page Setup.
-
In the Page Setup dialog box, select Layout.
-
Select the Vertical alignment drop-down arrow and choose either Top, Center, Justified, or Bottom.
-
Select OK.
Vertically Align Part of a Word Document
When you use the steps above, the default condition is to change the vertical alignment of the entire Microsoft Word document. If you want to change the alignment of only part of the document, select the text you want to vertically align.
Here’s how to vertically align part of a document:
-
Select the text you want to vertically align.
-
Go to the Layout tab (or Page Layout, depending on the version of Word).
-
In the Page Setup group, select the Page Setup dialog launcher (it’s located in the lower-right corner of the group).
-
In the Page Setup dialog box, choose the Layout tab.
-
In the Page section, select the Vertical alignment drop-down arrow and choose an alignment.
-
In the Preview section, select the Apply to drop-down arrow and choose Selected text.
-
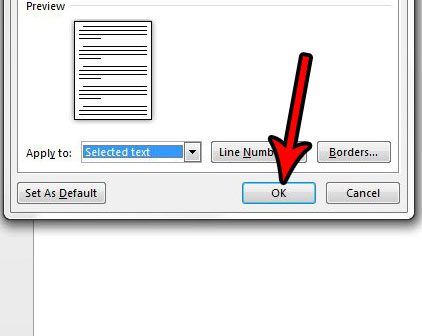
Select OK to apply the alignment to the selected text.
-
Any text before or after the selection retains the existing alignment choices.
If you don’t select text prior to performing the alignment selection, the Selected text preference can only be applied from the cursor’s current location to the end of the document.
To make this work, position the cursor, then:
-
Go to the Layout tab (or Page Layout, depending on the version of Word).
-
In the Page Setup group, select the Page Setup dialog launcher (which is located in the lower-right corner of the group).
-
In the Page Setup dialog box, choose the Layout tab.
-
In the Page section, select the Vertical alignment drop-down arrow and choose an alignment.
-
In the Preview section, select the Apply to drop-down arrow and choose This point forward.
-
Select OK to apply the alignment to the text.
FAQ
-
What is the default text alignment in Microsoft Word?
The standard text alignment default in Word (and most other word processing programs) is left-justified.
-
How do I create vertical text in Microsoft Word?
Create a text box and type what you want into it, then right-click on the edge of the box and select Format Shape from the drop-down menu. Select Size/Layout & Properties > Text Box, then open the drop-down menu next to Text Direction. From there, choose the options that best suit your needs.
Thanks for letting us know!
Get the Latest Tech News Delivered Every Day
Subscribe
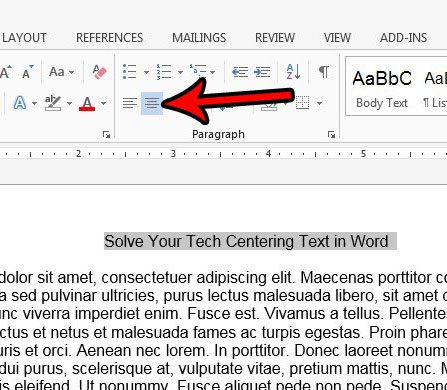
Text in a Microsoft Word document occasionally needs to be put in the center of the page between the left and right margins.
You might also need to know how to center text in Word vertically in Word documents, which means that it needs to be in the middle of the top and bottom margins.
You can vertically center text in Microsoft Word by selecting the text, choosing the Layout tab, clicking the Page Setup button, choosing the Layout tab, clicking the Vertical Alignment tab, choosing Center, then clicking Apply.
How to Horizontally Center Text in Microsoft Word
- Open the document in Word that contains the text you want to center.
- Use your mouse to select the text.
- Click the Home tab at the top of the window.
- Click the Center button in the Paragraph section of the ribbon.
How to Vertically Center Text in Microsoft Word
- Open the document containing the text to center vertically.
- Use your mouse to select the text you wish to center.
- Click the Page Layout tab.
- Click the small Page Setup button at the bottom-right corner of the Page Setup section of the ribbon.
- Click the dropdown menu to the right of Vertical alignment and choose the Center option.
- Click the dropdown menu to the right of Apply to and choose the appropriate option, then click the OK button.
Our article continues below with additional information on how to center align text in Microsoft Word, including expanded sections with pictures for the steps above.
Last update on 2023-04-13 / Affiliate links / Images from Amazon Product Advertising API
| As an Amazon Associate, I earn from qualifying purchases.
Adding content to a document in Microsoft Word can include a variety of options. You can format that text using a number of different tools and dialog box menus in the application, and many of those changes can be applied by simply selecting the text you want to change.
But if you need to align text to the center of the page, whether it is vertical alignment or horizontal alignment, then you may be wondering where that setting is found.
When you start typing in a Word document that is using the Normal template, all of the text that you enter will be left aligned by default.
This means that the first letter on each line will be against the left margin of the page. This is the standard for most corporations and institutions and is the most common alignment format used in documents.
But sometimes, a part of your document will need to be centered on the page, either horizontally or vertically.
Our tutorial below will show you how to center text in Microsoft Word using either the horizontal or vertical alignment option so that you can achieve the desired display result for your document.
You may also want to know how to get rid of space after paragraphs in Google Docs if you use that application for document editing, too.
Expanded – How to Center Text in Microsoft Word Horizontally
The summary section above gives a brief overview of how to horizontally center text in Word, but this section provides pictures as well if you would like a little more information. Note that I am using Microsoft Word 2013 in the images below, but the process is the same in most other versions of Word as well.
Find out how to use all small caps in Word if you have been struggling to manually apply that formatting in your document.
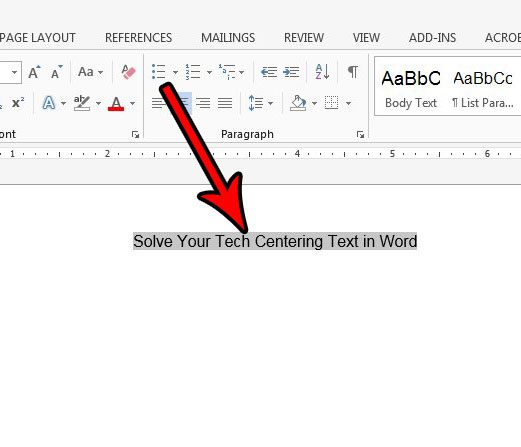
Step 1: Open your document in Microsoft Word.
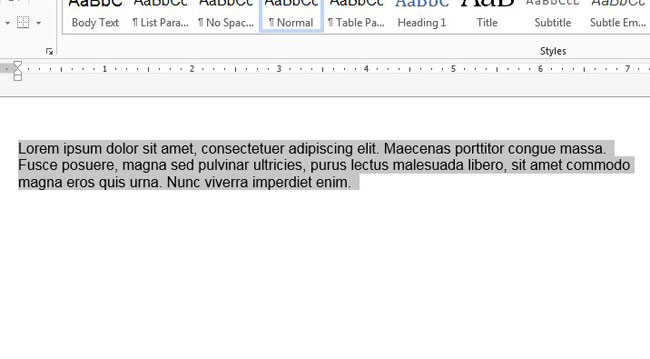
Step 2: Use your mouse to highlight the text that you want to center horizontally.
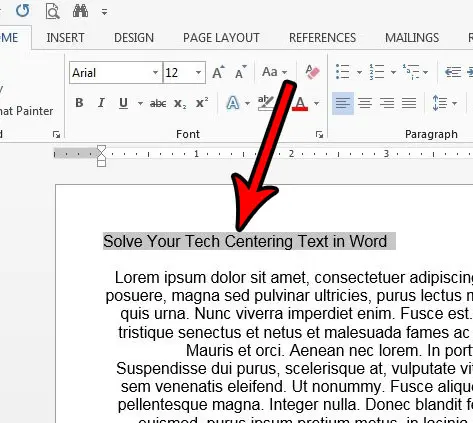
Step 3: Click the Home tab at the top of the window.
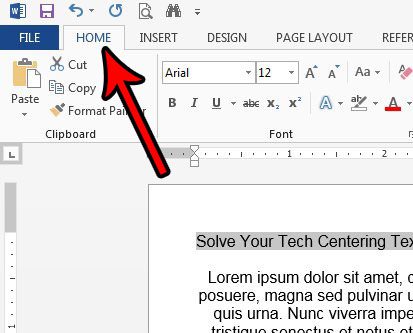
Step 4: Select the Center button in the Paragraph section of the ribbon.
The next section includes information on how to center text vertically if the text you want to modify in your document needs to be in the middle of the page.
Expanded – How to Center Text in Microsoft Word Vertically
We outlined how to vertically center text in the summary section above, but this section will provide images as well. This section was performed using Microsoft Word 2013.
Step 1: Open your document in Microsoft Word.
Step 2: Use your mouse to select the text that you want to center vertically.
If you wish to center the entire document you can skip this step.
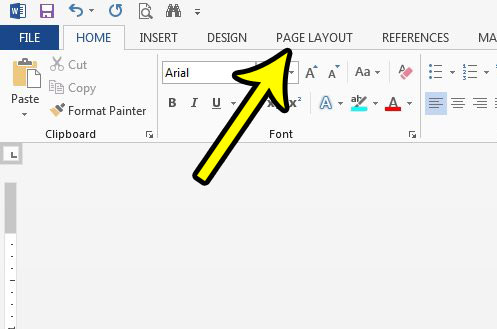
Step 3: Click the Page Layout tab at the top of the window.
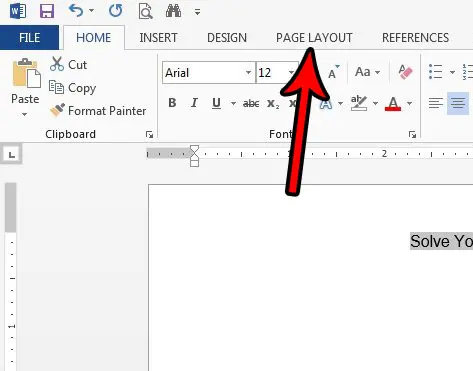
Step 4: Click the Page Setup button in the Page Setup section of the ribbon.
It’s the tiny button at the bottom-right corner of the section.
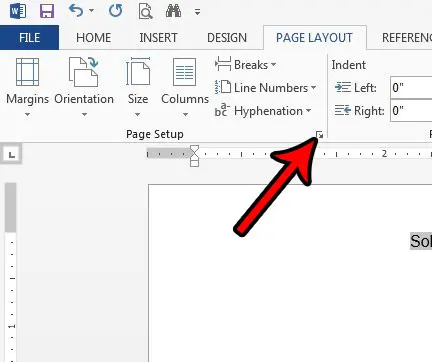
Step 5: Click the dropdown menu to the right of Vertical alignment, then choose the Center option.
Note that the vertical alignment drop down menu also has options for Top, Justified, and Bottom.
Step 6: Select the dropdown menu to the right of Apply to, then choose the option that fits your needs.
If you selected text earlier, then the Selected sections option will only vertically center that selected text. The Whole document option will vertically center the entire document, and the This point forward will vertically center all of the document text after the point at which your mouse cursor is currently located. Some of the vertical alignment options may not appear depending on the selected text’s locations, whether or not any text is selected, or the composition of the document.
Step 7: Click the OK button to apply the vertical centering.
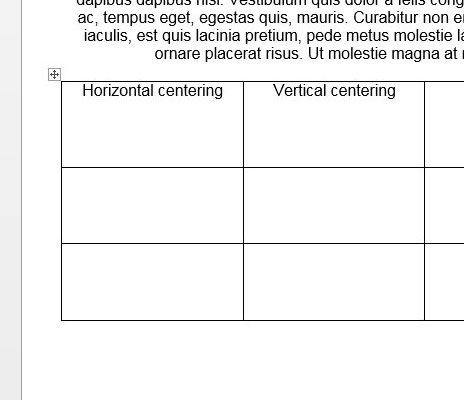
How to Center Text in a Table in Microsoft Word
If you have a table in your document and need to center the text in one of the table cells, then you get to use some table-specific centering options. By default the data in your table will be horizontally centered at the top of the table cell, but there are options that let you customize the alignment within a cell.
Step 1: Open the document containing the table text that you want to center.
Step 2: Click inside the cell containing the data you wish to center.
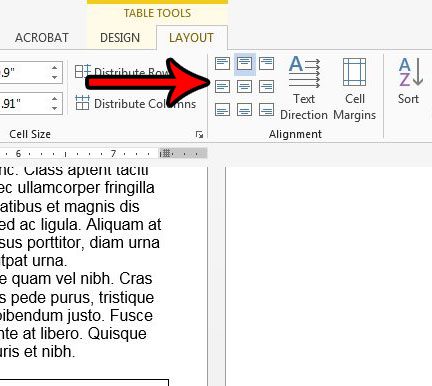
Step 3: Click the Layout tab at the top of the window under Table Tools.
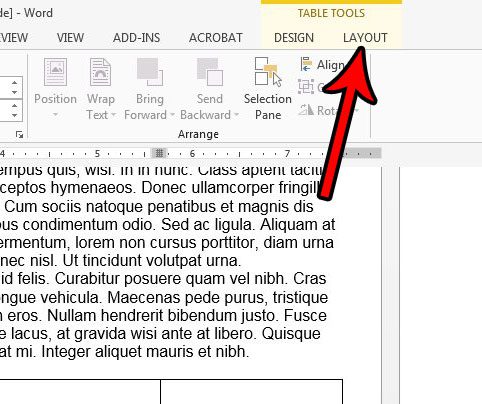
Step 4: Click the desired alignment option in the Alignment section of the ribbon.
Additional Notes on How to Center Text in Word
- You can also center text horizontally by selecting it and then pressing Ctrl + E on your keyboard.
- One of the most common reasons to align text either horizontally or vertically is to add a title. If you are adding a title, be sure to check your work or school’s guidelines on titles, as they often include additional requirements like font sizes. You can adjust font styles in the Font section of the ribbon on the Home tab.
- If you center some text in your document, the center align text setting will typically persist. You will likely need to select the Left Align option after centering your text if you want to return to normal text alignment after centering some of your text.
- If you vertically center text in Word, you will have several options concerning what parts of your document should be centered. These options include the selected text, the whole document, or “this point forward.”
If you have left aligned text on a page and you need it to be center aligned, then the keyboard shortcut option might be a little easier than using the option on the Home tab.
However, when you need to create vertical centered text on a cover page or title pages, then you will need to use the Page Setup button in the Page Setup group and make the adjustment from the Vertical alignment drop down menu on the Layout tab.
Does your document have a title page, but you need to number your pages and skip that title page? Find out how to start page numbering on the second page in Word so that a page number doesn’t display on the title page.
Additional Sources

Matthew Burleigh has been writing tech tutorials since 2008. His writing has appeared on dozens of different websites and been read over 50 million times.
After receiving his Bachelor’s and Master’s degrees in Computer Science he spent several years working in IT management for small businesses. However, he now works full time writing content online and creating websites.
His main writing topics include iPhones, Microsoft Office, Google Apps, Android, and Photoshop, but he has also written about many other tech topics as well.
Read his full bio here.

Microsoft Word comes equipped with a tool that allows users to align text both vertically and horizontally, giving you complete freedom for determining the position of text in a Word document. Here’s how it all works.
Horizontal alignment, also known as centered alignment, positions the text evenly between the margins on either side of the page. This tool also allows you to be selective with the text you align horizontally, giving you more control over what you can do to your document.
RELATED: How to Change the Alignment of the Numbers in a Numbered List in Microsoft Word
To align text horizontally on a page, highlight the text you want to center. Next, click the “Center Alignment” icon in the “Paragraph” group of the “Home” tab. Alternatively, you can use the Ctrl+E keyboard shortcut.

Your text will now be horizontally aligned. If you don’t already have text typed, it’s also an option to select the center alignment option before entering the text. It’s all up to you.
Aligning Text Vertically in Word
As you’ve probably guessed, vertical alignment positions the text evenly between the upper and lower margins of the page. You won’t notice a difference in the text alignment if you use it on a page that’s already full of text.
To see any real difference, try enabling the horizontal text option before inputting the text in your document.
RELATED: How to Align Text After a Bullet in PowerPoint
To align text vertically on a page, head over to the “Layout” tab and select the small icon in the bottom-right corner of the “Page Setup” group.
This opens the “Page Setup” dialog box. Select the “Layout” tab and then click the arrow next to “Vertical Alignment” in the “Page” section. A selection of vertical alignment options will appear. Go ahead and click “Center” (or choose another option that better suits your requirements).
Your text will now reflect the selected vertical alignment option.
What if you only want to align specific text in the document vertically? There’s also an easy way to make this happen.
First, highlight the text you want to align vertically. Once selected, head back to the “Layout” tab of the “Page Setup” dialog box. Next, choose the desired vertical alignment type, open the drop-down menu next to “Apply To,” select “Selected text,” and then click the “OK” button.
The selected text will now reflect the selected vertical alignment option.
READ NEXT
- › How to Perfectly Align Objects and Images in Microsoft Word
- › How to Center Text in a Microsoft Word Table
- › This 64 GB Flash Drive From Samsung Is Just $8 Right Now
- › Five Types of Phone Damage That Aren’t Covered by Your Free Warranty
- › Spotify Is Shutting Down Its Free Online Game
- › Save Hundreds on Elegoo’s New PHECDA Laser Engraver Through Kickstarter
- › Android’s Nearby Share Has (Unofficially) Arrived on Mac
- › How to Get a Refund on the PlayStation Store
How-To Geek is where you turn when you want experts to explain technology. Since we launched in 2006, our articles have been read billions of times. Want to know more?
To align text vertically on a page, head over to the “Layout” tab and select the small icon in the bottom-right corner of the “Page Setup” group. This opens the “Page Setup” dialog box. Select the “Layout” tab and then click the arrow next to “Vertical Alignment” in the “Page” section.
Contents
- 1 How do I fix vertical alignment in Word?
- 2 How do I align font vertically?
- 3 How do I move text vertically in Word?
- 4 How do I center text vertically in a text box in Word?
- 5 How do I vertically align text in Word 2019?
- 6 How do I align text vertically in a button?
- 7 What tool is used for vertical alignment?
- 8 What is vertical alignment?
- 9 How do I change text direction in Word 2020?
- 10 How do I change a Word document from vertical to horizontal?
- 11 How do I turn text sideways in a table in Word?
- 12 How do I center text vertically in a text box in Word 2010?
- 13 How do I center text vertically in a text box in Word 2016?
- 14 How do I center align in Word?
- 15 How do I align text horizontally?
- 16 How do I fix justified text in Word?
- 17 What are the 4 alignment options?
- 18 How do you align some text left and some right?
- 19 Which alignment is used to move the text to the right?
- 20 Does text-align work on buttons?
How do I fix vertical alignment in Word?
Instead, you can access the vertical alignment options in Word as follows:
- Go to Layout > Page Setup on the main ribbon.
- Click the arrow in the bottom right to open the full layout options.
- Click the Layout tab and go down to the Page section.
- Select the alignment you need from the Vertical alignment menu.
How do I align font vertically?
Use the CSS line-height property
Add the line-height property to the element containing a text larger than its font size. By default, equal spaces will be added above and below the text, and you’ll get a vertically centered text.
To change text orientation, follow these steps:
- Select the AutoShape, text box, or table cell that contains the text whose orientation you want to change.
- Choose the Text Direction option from the Format menu. Word displays the Text Direction dialog box.
- Choose an orientation from those offered.
- Click on OK.
How do I center text vertically in a text box in Word?
Align text vertically
- Right-click the text box for which you want to set vertical alignment.
- On the shortcut menu, click Format Text Box.
- In the Format Text Box dialog box, click the Text Box tab.
- In the Vertical alignment box, select Top, Middle, or Bottom.
- Click OK.
How do I vertically align text in Word 2019?
For Microsoft Word 2019, 2016, 2013, 2010, and 2007
In the Page Setup dialog box, choose the Layout tab. In the Page section, select the Vertical alignment drop-down arrow and choose either Top, Center, Justified, or Bottom. If you choose Justified, the text is spread out evenly from top to bottom. Select OK.
How do I align text vertically in a button?
Use line-height to center it vertically. I usually use the same value as its height. No need to use padding-top or margin-top for vertical align. Just use display: table-cell; and vertical-align: middle; .
What tool is used for vertical alignment?
A plumb bob, or plummet, is a weight, usually with a pointed tip on the bottom, suspended from a string and used as a vertical reference line, or plumb-line.
What is vertical alignment?
Vertical alignment is the state or act of lining items up, one above each other. The exact meaning of this concept varies depending on the context. Verical alignment has applications in a wide range of fields and subjects and can take on greatly differing meanings from place to place.
How do I change text direction in Word 2020?
Specify text direction in a shape or text box
- Right-click the edge of the shape or text box that contains the text.
- On the shortcut menu, select Format Shape.
- In the left pane of the dialog box, select Text Box.
- Under Text layout, select the option that you want in the Text direction list.
- Select Close.
How do I change a Word document from vertical to horizontal?
Change Word to Landscape (Basic)
To do this, go to the “Layout” tab (or “Page Layout” on some versions) and then click the drop-down menu below “Orientation” in the “Page Setup” group. This brings up two options: “Portrait” and “Landscape.” Click “Landscape” and you’re done.
How do I turn text sideways in a table in Word?
You can change text direction by following these steps:
- Right-click your mouse on the cell whose text direction you want to change. A Context menu appears.
- Choose Text Direction from the Context menu. The Text Direction dialog box appears.
- Select the Orientation you want used for your text.
- When satisfied, click on OK.
How do I center text vertically in a text box in Word 2010?
Align text vertically
- Click the outer edge of the text box to select it.
- On the Shape Format tab, click Format Pane.
- Click the Shape Options tab if it isn’t already selected.
- Click the text box icon. , and then click Text Box.
- Choose Top, Middle, or Bottom from the Vertical alignment drop-down list.
How do I center text vertically in a text box in Word 2016?
Center the text vertically between the top and bottom margins
- Select the text that you want to center.
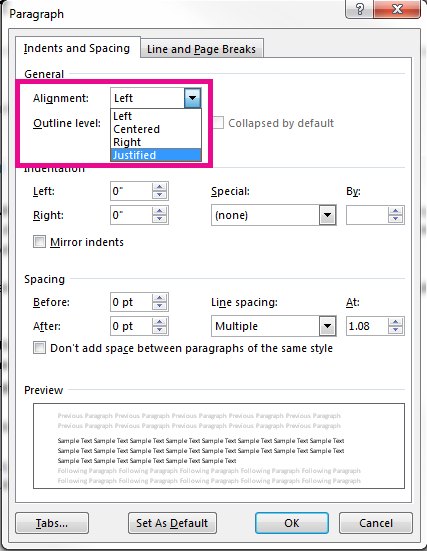
- On the Layout or Page Layout tab, click the Dialog Box Launcher.
- In the Vertical alignment box, click Center.
- In the Apply to box, click Selected text, and then click OK.
How do I center align in Word?
Open the document in Word that contains the text you want to center. Use your mouse to select the text. Click the Home tab at the top of the window. Click the Center button in the Paragraph section of the ribbon.
How do I align text horizontally?
To align text horizontally on a page, highlight the text you want to center. Next, click the “Center Alignment” icon in the “Paragraph” group of the “Home” tab. Alternatively, you can use the Ctrl+E keyboard shortcut. Your text will now be horizontally aligned.
How do I fix justified text in Word?
Right-click on the text, and click Paragraph. On the Indents and Spacing tab, click the drop-down next to Alignment, and click Justified, OK. Right-click on the text again, and click Format, Font.
- Click the Tools menu, Options. Then click the Compatibility tab.
- Tick “Do full justification like WordPerfect…”
- Click OK.
What are the 4 alignment options?
There are four main alignments: left, right, center, and justified. Left-aligned text is text that is aligned with a left edge. Right-aligned text is text that is aligned with a right edge.
How do you align some text left and some right?
Figure B
- On the Home tab, click the Paragraph group’s dialog launcher and then click Tabs in the bottom-left corner.
- Enter 6.5 in the Tab stop position.
- Click Right in the Alignment section (Figure C).
- Click Set.
- Click OK.
Which alignment is used to move the text to the right?
To make text right aligned, select and highlight the text first, then hold down Ctrl (the control key) on the keyboard and then press R. To make text justified, select and highlight the text first, then hold down Ctrl (the control key) on the keyboard and then press J.
Does text-align work on buttons?
You can enclose Button tag with div and apply text-align:center to div element! Hope this helps!
В ворде есть возможность автоматически выровнять текст между верхним и нижним полями страницы. Например, выравнивание текста в ворде по вертикали и по центру используется для титульного листа курсовой, дипломной работы или для обложки отчета. Конечно можно выровнять текст в ворде по вертикали добавив несколько новых пустых строк. Но в случае, если содержание текста увеличится или уменьшиться, вам заново придется выравнивать текст в ворде по вертикали. Давайте рассмотрим, как выровнять текст в ворде по вертикали, чтобы в случае изменения текста, он автоматически выравнивался по вертикали.
- Выделите текст, который вы ходите выровнять по вертикали. В нашем примере мы хотим выровнять текст в ворде для титульного листа по центру и по вертикали страницы.

Как выровнять текст по вертикали в Word – Выделение текста для выравнивания по вертикали и по центру страницы
- На вкладке «Макет страницы» в группе «Параметры страницы» нажмите по кнопке для вызова диалогового окна «Параметры страницы»:
 для вызова диалогового окна «
Как выровнять текст по вертикали в Word – Открыть окно для настройки вертикального выравнивания текста в ворде
- Откроется диалоговое окно «Параметры страницы»:

Как выровнять текст по вертикали в Word – Окно Параметры страницы
- Перейдите на вкладку «Источник бумаги» и проделайте следующие действия:
- В списке «Вертикальное выравнивание:» выберите «По центру», чтобы выровнять текст по вертикали и по центру страницы:

Как выровнять текст по вертикали в Word – Выровнять текст в ворде по вертикали и по центру
- И в списке «Применить» выберите «к выделенному тексту», чтобы выровнять по вертикали и по центру только тот текст, который мы выделили. Если вам необходимо выровнять текст по вертикали для всех страниц до конца документа выберите «ко всему документу».

Как выровнять текст по вертикали в Word – Выровнять выделенный текст по вертикали и перенести остальной текст на новую страницу
- Для применения внесенных изменений нажмите «ОК».

Как выровнять текст по вертикали в Word – Применить выравнивание текста в ворде по вертикали
- В результате выделенный текст в ворде выровнен по вертикали и по центру, а остальной текст перенесен на следующую страницу без выравнивания по вертикали:

Как выровнять текст по вертикали в Word – Текст титульного листа выровнен по вертикали
На этом закончим статью о том, как выровнять текст в ворде по вертикали.
Когда вы создаете обложку или титульный лист, вы можете захотеть выровнять текст по вертикали. В Microsoft Word вы можете центрировать текст или поместить его вверху или внизу всего за несколько шагов.
Выровнять весь текст по вертикали
Если вы хотите выровнять весь текст в документе, например, это может быть одностраничный документ Word, вы можете сделать это легко.
- Перейдите на вкладку «Макет» и откройте диалоговое окно «Параметры страницы». Вы можете сделать это, выбрав средство запуска диалогового окна (маленькая стрелка) в правом нижнем углу группы «Параметры страницы».
- Выберите вкладку Макет в открывшемся окне.
- Используйте раскрывающееся меню в разделе «Страница» рядом с «Выравнивание по вертикали», чтобы выбрать нужное место размещения. Вы можете выбрать выравнивание по верхнему краю, по центру, по ширине или по нижнему краю. Выбранный вами вариант помещает текст в эту позицию в зависимости от верхнего и нижнего полей.

- В раскрывающемся списке «Применить к» внизу убедитесь, что выбран «Весь документ», и нажмите «ОК», чтобы применить изменение.

Затем вы должны увидеть, что ваш текст выровнен по вертикали, используя выбранную вами позицию.

Выровнять определенный текст по вертикали
Возможно, вы хотите выровнять только определенную часть текста в документе Microsoft Word, например заголовок или абзац. Вы можете сделать это с помощью тех же шагов, что и выше, с одной небольшой поправкой.
- Выделите текст, который хотите выровнять, проведя по нему курсором.

- Перейдите на вкладку «Макет» и откройте диалоговое окно «Параметры страницы».
- Выберите вкладку Макет в поле.
- Выберите один из вариантов выравнивания в раскрывающемся списке Вертикальное выравнивание.
- В раскрывающемся списке Применить к выберите Выбранный текст.

- Нажмите OK, чтобы применить изменения.
После этого вы должны увидеть только выделенный текст, выровненный по вертикали.

Выровнять текст по вертикали от точки вперед
Еще один способ выровнять текст в документе по вертикали — начать с определенной точки. Вы можете сделать это, если хотите сохранить предыдущий текст как есть, но изменить текст, который вы добавляете, продвигаясь вперед.
- Поместите курсор в документ, чтобы установить начальную точку для выравнивания.

- Перейдите на вкладку «Макет» и откройте диалоговое окно «Параметры страницы».
- Выберите вкладку Макет в поле.
- Выберите размещение текста в раскрывающемся списке Выравнивание по вертикали.
- В раскрывающемся списке «Применить к» выберите «На этот пункт вперед».

- Нажмите OK, чтобы применить изменения.
После этого вы должны увидеть любой текст после вертикального выравнивания курсора.

Если вы хотите настроить внешний вид документа, отцентрируйте текст по вертикали или поместите его вверху или внизу страницы в Microsoft Word.
После того, как вы выберете вертикальное выравнивание текста, ознакомьтесь с нашим руководством по вставке горизонтальной линии в Microsoft Word.
While the formatting requirements for different schools and organizations can vary, there are certain settings that are somewhat common. For example, it’s very common to have to double-space documents so that readers can add notes between the lines.
Another formatting requirement that you might encounter involves centering your document title on a title page, but figuring out how to vertically center text in Word 2013 can be a little tricky.
Fortunately, it is a formatting requirement that you can accomplish through the Page Setup menu. Our guide below will point you to that setting and show you how to vertically align your text at the center of the page.
How to Center Text in the Middle of the Page in Word
- Open the document.
- Select the text.
- Click the Page Layout tab.
- Click the Page Setup button.
- Choose the Layout tab.
- Select the Vertical alignment menu and choose Center.
- Click Apply to and choose Selected text.
- Click OK.
Our guide continues below with additional information on centering text in Word 2013, including pictures of these steps.
How to Vertically Align Text in Microsoft Word (Guide with Pictures)
The steps in this guide are going to show you the setting to change in Microsoft Word 2013 so that the text in your document becomes vertically aligned to the center of the page. This is most commonly used when you need to vertically center a title, but is applicable to other situations as well.
Step 1: Open your document in Word 2013.
Step 2: Select the text that you want to center.
Step 3: Click the Page Layout tab at the top of the window.
Step 4: Click the Page Setup button at the bottom-right corner of the Page Setup group in the ribbon. This opens the Page Setup dialog box.
The button is very small and looks like a diagonal arrow inside a square.
Step 5: Click the Layout tab at the top of the window.
Step 6: Click the Vertical alignment dropdown menu, then select the Center option.
Step 6: Click the Apply to dropdown menu and click the Selected text option. If you would prefer to vertically center the text in the entire document, then click the Whole document option instead. Once you are finished, click the OK button.
Continue reading our tutorial below for additional discussion on centering text in a Word document.
If you have text inside of cells in a table, rather than directly in the document body, then you are going to need to use a different method to center that text.
- Select the text in the table cell.
- Right-click on the selected text and choose Table Properties.
- Choose the Cell tab at the top of the window.
- Click the Center option under Vertical alignment.
- Click the OK button.
Note that it may not change if you have a lot of blank lines in the document, as Word considers those to be characters. For the vertical centering to work for your table cells you need to have made the table rows larger by dragging the borders of the cells to be larger.
More Information on How to Vertically Align Text in Microsoft Word
The menu that you open when you click the Page Setup dialog launcher in the Page Setup section of the ribbon opens the Page Setup dialog box, which is one of the more useful menus that you can use in Microsoft Word.
Aside from giving you the option of adjusting the vertical alignment of your document text, whether you want to align that text to the top, middle, or bottom of the document, you can also change settings like header and footer size (by adjusting the top and bottom margins via the “Frome edge” section on the Layout tab), page margins, paper size, and more.
If you can’t achieve the type of text positioning that you require by using the option described above, then you may need to use text boxes instead. You can find the text box option on the Insert tab. you can then add the text box to your document, where you will be able to resize, reposition, and freely move it around to the desired location in your document.
For more freedom over text positioning, you might want to consider working in Microsoft Powerpoint instead. You will lose a lot of the editing and document creation norms that you gain with Microsoft Word, but Powerpoint can give you a lot more freedom if the Word editing tools feel too restrictive for your needs.
Conclusion
Once you familiarize yourself with the techniques above you should be able to position text however you need in your documents. You can also experiment with different types of text selections when you are using the selected text option for centering your content, or you can simply use the “Whole document” option if you need every page of your document to have that centering.
This method is most commonly used when you are working with a title page and your organization’s formatting requirements ask for the title to be at the center of the page, but it can be useful if you are creating more non-traditional document types like newsletters or even t-shirts.
Check out the section below for some additional Word, Excel, and Google Apps guides that can help you to perform tasks in those applications as well.
Do you need to add vertical text to your document, like you do in Microsoft Excel, but are unable to figure out how to do it in Word? Find out more about writing vertically in Word to see how you can accomplish this.
Additional Reading

Kermit Matthews is a freelance writer based in Philadelphia, Pennsylvania with more than a decade of experience writing technology guides. He has a Bachelor’s and Master’s degree in Computer Science and has spent much of his professional career in IT management.
He specializes in writing content about iPhones, Android devices, Microsoft Office, and many other popular applications and devices.
Read his full bio here.
Как выровнять текст по центру вертикально на странице в Microsoft Word
Вам необходимо сделать титульный лист для отчета? Вы можете создать его очень просто и качественно, выровняв как горизонтально, так и вертикально. Выровнять текст по центру горизонтально не составит особого труда -вы можете сделать это выделив нужный текст, и в меню «Главная» во вкладке «Абзац» нажать на кнопку «По центру».

Но так ли это просто с центрированием по вертикали? Это тоже просто, и в сегодняшней статье рассмотрим как это сделать.
Перед тем, как выровнять титульный лист, необходимо отделить его от остального текста. Только так у вас получится сделать, чтобы текст был по центру вертикально. Установите курсор перед текстом, который хотите поместить на другой странице, далее в верхнем меню нажимаем на вкладку «Вставка», выбираем «Страницы» и нажимаем на «Разрыв страницы».

После того как мы получили нужный нам текст для титульного листа => поместите курсор в любом месте на странице обложки и перейдите на вкладку меню «Макет».

В разделе «Параметры страницы» нажимаем на правый нижний угол.

В открывшемся окне «Параметры страницы» выбираем вкладку «Источник бумаги».

В разделе «Страница» нажимаем на «Вертикальное выравнивание» и выбираем «По центру».

Теперь текст вашего титульного листа расположен ровно по центру вертикально относительно листа.

Центрирование текста может вам очень помочь в создании маленьких текстовых документов, таких как деловые письма, или любые другие документы, которые содержат минимум текста, при этом гораздо улучшив их внешний вид.
Как вертикально выровнять текст в Word
Изменить вертикальное выравнивание Word по умолчанию для специальных эффектов дизайна
Если вы хотите выровнять текст по верху, середине или низу страницы, выровняйте текст по вертикали (вверх и вниз) в Microsoft Word. Эта функция полезна для создания правильного выравнивания титульного листа или для визуального интереса к любой странице или страницам документа.
Инструкции в этой статье относятся к Word 2019, 2016, 2013, 2010, 2007, 2003; и Word для Office 365.
Выровнять текст по вертикали
Если вы хотите расположить текст в разделе документа относительно верхнего и нижнего полей, используйте вертикальное выравнивание.
Чтобы отразить изменение вертикального выравнивания, ваша страница или страницы должны быть только частично заполнены текстом.
Для Microsoft Word 2019, 2016, 2013, 2010 и 2007
Перейдите на вкладку Макет (или Макет страницы , в зависимости от версии Word).
В группе Параметры страницы выберите стрелку Параметры страницы в правом нижнем углу.
В диалоговом окне Параметры страницы выберите вкладку Макет .
В разделе Страница выберите стрелку раскрывающегося меню Вертикальное выравнивание и выберите Верх , Центр , Обоснованный или Низ .
Если вы выберете Обоснованный , текст будет равномерно распределен сверху вниз.
Выберите ОК .
Ваш текст теперь будет выровнен так, как вы выбрали.
Для Word 2003
Чтобы выровнять текст по вертикали в Microsoft Word 2003:
Выберите Файл .
Выберите Параметры страницы .
В диалоговом окне Параметры страницы выберите Макет .
Выберите стрелку раскрывающегося списка Вертикальное выравнивание и выберите Верх , Центр , Обоснованный или Нижний .
Выберите ОК .
Выровнять по вертикали часть документа Word
При использовании описанных выше действий условием по умолчанию является изменение вертикального выравнивания всего документа Microsoft Word. Если вы хотите изменить выравнивание только части документа, выделите текст, который вы хотите выровнять по вертикали.
Вот как выровнять часть документа по вертикали:
Выберите текст, который вы хотите выровнять по вертикали.
Перейдите на вкладку Макет (или Макет страницы , в зависимости от версии Word).
В группе Параметры страницы выберите стрелку Параметры страницы в правом нижнем углу.
В диалоговом окне Параметры страницы выберите вкладку Макет .
В разделе Страница выберите стрелку раскрывающегося списка Вертикальное выравнивание и выберите выравнивание.
В разделе Предварительный просмотр выберите стрелку раскрывающегося списка Применить к и выберите Выбранный текст .
Выберите ОК , чтобы применить выравнивание к выделенному тексту.
Любой текст до или после выделения сохраняет существующие варианты выравнивания.
Если вы не выделите текст до выполнения выбора выравнивания, предпочтение Выбранный текст можно применить только от текущего местоположения курсора до конца документа.
Чтобы сделать это, поместите курсор и затем:
Перейдите на вкладку Макет (или Макет страницы , в зависимости от версии Word).
В группе Параметры страницы выберите стрелку Параметры страницы в правом нижнем углу.
В диалоговом окне Параметры страницы выберите вкладку Макет .
В разделе Страница выберите стрелку раскрывающегося списка Вертикальное выравнивание и выберите выравнивание.
В разделе Предварительный просмотр выберите стрелку раскрывающегося списка Применить к и выберите Этот момент вперед .
Выберите ОК , чтобы применить выравнивание к тексту.
Как выровнять текст в Ворде?
Стандартно текст в Ворде начинается с одного и того же места. Иногда приходится изменять местоположение символов или выровнять их. В этом текстовом редакторе можно сделать текст, например, выровненным с какой-либо стороны или посередине листа. Рассмотрим подробнее как это сделать в Word. Инструкция будет актуальна для всех редакций программы начиная с выпуска 2007 года.
Способ 1: Как выровнять тескт — На вкладке «Главная» подраздел «Абзац»
В Word есть верхнее меню с элементами управления. С его помощью можно выровнять текст следующим образом:

- Нажмите мышкой на желаемый абзац или часть или весь текст (Ctrl + A).
- На верхней панели переключитесь на раздел «Главная».
- В блоке «Абзац» найдите элементы управления выравнивания (4 кнопки с полосками разной длины и расположения).
- Выберите нужный вариант расположения текста (слева, по центру, справа, по ширине).
Способ 2: Как выровнять текст в Ворде с помощью горячих клавиш — быстрый способ выравнивания текста
Также отредактировать текст вам помогут горячие клавиши. Такие комбинации привязаны к определенному действию в программе. Таким образом, этот способ поможет сэкономить ваши силы и время. Выровнять текст этим способом можно с помощью следующих горячих клавиш:
- По левому краю — Ctrl + L;
- По центру — Ctrl + E;
- По правому краю — Ctrl + R;
- По ширине документа — Ctrl + J.
Так же потребуется кликнуть на нужный абзац или выделить текст.
Способ 3: Как выровнять тескт с помощью линейки
В Word есть такой элемент управления, как линейка. Она позволяет произвольно задавать размеры расположения текста. Чтобы выровнять текст в Ворде воспользуйтесь этим способом, следует сделать следующее:

- Активировать функцию линейки. Для этого требуется перейти в раздел «Вид» на верхней панели, затем в категории «Отображение» поставить галочку на пункте «Линейка».
- Нажать левой кнопкой мыши на желаемый абзац или выделить весь документ.
- С помощью линейки установить границы.
На линейке есть 3 ползунка. Два нижних позволяют смещать границы текста на листе. Верхняя правая задает место появления нового абзаца. Используя квадратный ползунок ниже линейки, можно одновременно менять границы текста и позицию начала красной строки.
Способ 4: Окно панели «Абзац» поможет выровнять текст
При нажатии на правую кнопку мыши в окне Word, появится контекстное меню, воспользовавшись которым вы сможете поменять различные параметры текста. Среди прочего, в нем есть пункт «Абзац», в котором можно установить выравнивание. Чтобы воспользоваться этим способом, следует:
- Установить курсор на желаемый абзац или зажать Ctrl + A.
- Кликнуть правой кнопкой мыши по выделенному тексту.
- Выбрать среди предложенных вариантов «Абзац».

- Откроется окно с параметрами. Сверху будет раздел «Общие», а в нем параметр «Выравнивание».
- Из выпадающего меню выберите нужный вариант.

- Нажмите «ОК».


Способ 5: Как выровнять текст вертикально по странице с помощью «Параметры страницы»
Окно «Параметры страницы» позволяет детально настраивать отображение документа. Таким образом можно легко изменять вертикальные границы документа.
Изменить вертикальное положение текста довольно просто, достаточно следовать данной инструкции:

- На верхней панели откройте вкладку «Макет».
- В категории «Параметры страницы» откройте настройки, нажав на иконку в правом нижнем углу интерфейса.
- В появившемся окне перейдите во вкладку «Источник бумаги». Выберите подходящий вариант из предложенных по вертикали: с центральным расположением элементов; по высоте; по нижнему краю; по верхнему краю.
- В категории «Страница» установите нужное значение для «Вертикальное выравнивание».
- Снизу выберите пункт для «Применить к».
- Нажмите «ОК».
Когда окно закроется, вертикальное положение текста поменяется. Если требуется отредактировать только часть документа, необходимо предварительно его выделить, а в конце в графе «Применить к» выбрать «к выделенным разделам».
Как выровнять текст в Ворде в таблице по центру
Кроме простого текста, в Word можно создавать таблицы. Нередко в них, так же, необходимо выравнивание. Чтобы разместить символы по центру ячеек, следует:
- Выделить требуемые ячейки или всю таблицу. Она может быть как заполненной, так и нет. В последнем случае новый текст будет появляться по центру.
- В верхнем меню во вкладке «Главная» в категории «Абзац» нажмите на «По центру».
Можно изменить формат расположения текста как для всей таблицы, так и для каждой ячейки. Выравнивать можно не только по центру, но и по краям или размеру текста.
Также можно воспользоваться горячими клавишами. Для этого так же требуется выделить нужные ячейки, а после одновременно нажать Ctrl + E. Все способы выравнивания текста подходят для таблиц.
Настройка выравнивания абзаца
С помощью окна настроек абзаца, кроме непосредственного расположения текста, можно установить отступы. Таким образом так же можно выровнять документ. Этот способ похож на линейку, однако позволяет детальнее устанавливать границы. Отступы особенно удобны тогда, когда нужно установить конкретные значения выравнивания по сантиметрам. Так же можно настроить красную строку.
Отступ от левого поля
Если необходимо выровнять текст от левой стороны листа, то подойдет этот способ. Требуется следовать инструкции:

- Поставьте курсор на желаемый абзац или выделите часть текста.
- С помощью правой кнопки мыши вызовите контекстное меню.
- Выберите в списке «Абзац».
- В разделе «Отступ» выберите нужный вариант для параметра «Слева».
- Нажмите «ОК».
Окно настроек абзаца можно открыть через верхнюю панель управления. Для этого следует перейти во вкладку «Главная», а затем нажать на иконку в левом нижнем углу категории «Абзац».
Альтернативно воспользоваться этим способом можно на вкладке «Макет». В категории «Абзац» можно выставить отступы для левого и правого края. Однако контекстное меню позволяет это делать быстрее и удобнее.
Отступ от правого поля
Чтобы выровнять текст от правой стороны листа нужно установить границы для правого поля следующим образом:
- Выделите нужный фрагмент.
- Через вкладку «Главная» или с помощью контекстного меню откройте настройки «Абзаца».
- Установите размер отступа справа.
- Нажмите «ОК».
Выравнивание с помощью помощника
Во многих продуктах Microsoft есть помощник, который упрощает использование программы для новых или неопытных пользователей. Word не стал исключением. С помощью этой функции можно выровнять нужный фрагмент, не разбираясь в интерфейсе. Для этого:
- Выделите нужную часть статьи или нажмите на «Абзац».
- В верхней части программы найти иконку помощника в виде лампочки и надписи «Что вы хотите сделать?».
- Нажмите на вопрос, начните вводить «Выровнять».
- Из предложенных вариантов выберите нужный.
За счет большого количества инструментов, MS Word позволяет отредактировать внешний вид под любые требования. Способов выровнять текст в этой программе много, поэтому всегда можно настроить документ так, как нужно. С помощью горячих клавиш можно быстро установить требуемые параметры, а для более детальных настроек стоит воспользоваться отступами или окном «Абзац».