
Last updated Monday, Dec. 5, 2022, at 11:13 a.m.
This article is based on legacy software.
After creating WordArt, you can change its color and style to make it even more appealing. This document includes instructions on the following topics that apply to Word:
Options on the Format Command Tab
When a WordArt text box is selected, the Format command tab should be active. In the WordArt Styles group, commands for editing your WordArt will appear.
The following table identifies buttons commonly used for working with WordArt.
Adjusting WordArt Colors
Fill color and line color may be adjusted in WordArt. Fill color is the color of the inside of the letters, and line color is the color of the letters’ borders.
Adjusting Fill Color
-
Double click the WordArt image.
-
From the Format command tab, in the WordArt Styles group, click Shape Fill
 » select the desired color.
NOTE: If the Format command tab is not visible, from the Ribbon, select the Format command tab. -
(Optional) To fill your WordArt with a texture, gradient, or picture, in the WordArt Styles group, click Shape Fill » select the appropriate fill type » select the desired option.
 » select the desired color.
Adjusting Outline Color
This option is available only if the WordArt in use contains outlines.
-
Double click the WordArt image.
-
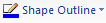
From the Format command tab, in the WordArt Styles group, click Shape Outline
» select the desired outline color.
NOTE: If the Format command tab is not visible, from the Ribbon, select the Format command tab. -
(Optional) To add a patterned outline or change the line style of the outline, in the WordArt Styles group, click Shape Fill » select the appropriate option » select the desired line style.
 » select the desired outline color.
Editing WordArt Text
You can easily change the spelling or words of the WordArt you have created.
-
Double click the WordArt image.
-
From the Format command tab, in the Text group, click Edit Text…
The Edit WordArt Text dialog box appears.
NOTE: If the Format command tab is not visible, from the Ribbon, select the Format command tab. -
In the Text text box, make your changes.
-
Click OK.

Changing WordArt Font Face & Size
If the font or size of the WordArt letters do not suit you, use the commands available on the Ribbon to format your WordArt.
-
Select the WordArt image.
-
From the Format command tab, in the Text group, click Edit Text...
The Edit WordArt Text dialog box appears. -
From the Font pull-down list, select a font.
-
From the Size pull-down list, select a font size.
HINT: You may also adjust the size by using the image handles. To adjust proportionally using the image handles, hold [Shift] down while moving a corner image handle. -
Click OK.
Changing WordArt Shapes
WordArt allows you to mold its text into a particular shape.
-
Double click the WordArt image.
-
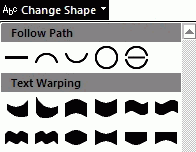
From the Format command tab, in the WordArt Styles group, click Change Shape » select the desired shape
The WordArt shape adjusts.
Rotating WordArt
To slant or rotate your WordArt image, you can use the dialog box to specify an exact rotation value.
NOTE: The text wrapping style for your WordArt must be something other than In Line With Text before you can rotate it. For information on changing the text wrapping style, see Wrapping Text around WordArt below.
-
Select the WordArt image.
-
From the Format command tab, in the Arrange group, click Rotate
» select More Rotation Options…
The Format WordArt dialog box appears, with the Size tab displayed. -
In the Rotate section, use the Rotation nudge button to select the desired angle.
OR
In the Rotation text box, type the desired angle. -
Click OK.
The rotation is applied to the WordArt.
 » select More Rotation Options…
Wrapping Text with WordArt
For a professional-looking document, wrapping text around your WordArt image will improve its uniformity and will not interrupt the text. In addition, there may be times when you want to place your WordArt in front of or behind the text.
Wrapping Text: Quick Menu Option
-
Select the WordArt image.
-
Right click your WordArt » select Format WordArt…
The Format WordArt dialog box appears. -
Select the Layout tab.
-
Under Wrapping style, select a style.
-
Under Horizontal alignment, select a position.
NOTES:
This option is only available if the selected text wrapping style is not set to In Line With Text.
To move the WordArt to a custom position within the document, select Other. - (Optional) To set more specific settings for the position of your WordArt, click Advanced…
The Advanced Layout dialog box appears. - Select the Text Wrapping tab.
- Select the desired options text wrap style for your WordArt.
Wrap text
Available with only certain text wrapping styles; allows you to decide whether text wraps around an object on both sides or only a specific side.Distance from text
Allows you to specify a set distance between an object and the text wrapping around it; available with only certain wrapping styles. -
Click OK.
-
Click OK.
The text wrap is applied to the WordArt.
Wrapping Text: Ribbon Option
-
Select the WordArt image.
-
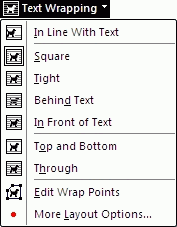
From the Format command tab, in the Arrange group, click Text Wrapping » select the desired text wrapping option.
- (Optional) To set more advanced options,
- In the Arrange group, click Text Wrapping » select More Layout Options…
The Advanced Layout dialog box appears. - Select the Text Wrapping tab.
- Select the desired options.
Wrapping style
Allows you to select a text wrap style for your WordArt.Wrap text
Available with only certain text wrapping styles; allows you to decide whether text wraps around an object on both sides or only a specific side.Distance from text
Allows you to specify a set distance between an object and the text wrapping around it; available with only certain wrapping styles. -
Click OK.
- In the Arrange group, click Text Wrapping » select More Layout Options…
Adding a Shadow to WordArt
Depending on the font and the WordArt shape you have selected, a shadow effect can enhance your WordArt image.
-
Select the WordArt image.
-
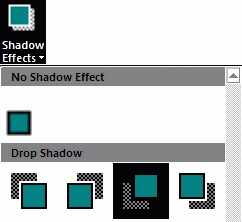
From the Format command tab, in the Shadow Effects group, click Shadow Effects » select the desired effect.
The effect is applied to the selected WordArt.
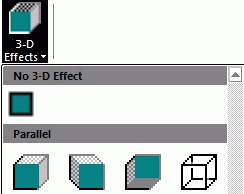
Adding a 3-D Effect to WordArt
A three-dimensional effect can give depth to your WordArt image.
-
Select the WordArt image.
-
From the Format command tab, in the 3-D Effects group, click 3-D Effects » select the desired effect
HINT: For more information about 3-D effects, please refer to Customizing 3-D.
Was this article helpful?
Yes
No
View / Print PDF
Fill refers to the interior of a WordArt or character.
Notes:
-
When you change options in this dialog box, the changes are immediately applied to your WordArt or text, making it easy to see the effects of the changes in your WordArt or text without closing the dialog box. However, since the changes are instantly applied, it is not possible to click Cancel in this dialog box. To remove changes, you must click Undo
on the Quick Access Toolbar for each change that you want to remove. -
You can simultaneously undo multiple changes that you made to one dialog box option, as long as you did not make changes to another dialog box option in between.
-
You may want to move the dialog box so that you can see both the WordArt and the dialog box at the same time.
 on the Quick Access Toolbar for each change that you want to remove.
No fill
To make a WordArt transparent or colorless, or to remove fill from a WordArt, click this option.
Solid fill
To add color and transparency to a WordArt, click this option.
Gradient fill
To add a gradient fill to a WordArt, click this option.
Picture or texture fill
To use a picture as fill for a WordArt or to add texture to a WordArt, click this option.
Solid fill
Color
To choose a color for the shape, click Color  , and then click the color that you want. To change to a color that is not in the theme colors, click More Colors, and then either click the color that you want on the Standard tab, or mix your own color on the Custom tab. Custom colors and colors on the Standard tab are not updated if you later change the document theme.
Transparency
To specify how much you can see through a WordArt, move the Transparency slider, or enter a number in the box next to the slider. You can vary the percentage of transparency from 0 (fully opaque, the default setting) to 100% (fully transparent).
Gradient fill
Preset colors
To choose a built-in gradient fill, click Preset colors  , and then click the option that you want.
Type
To specify the direction to use when drawing the gradient fill, select an option from the list. The Type that you select determines the available Direction.
Direction
To choose a different progression of color and shades, click Direction, and then click the option that you want. The Directions that are available depend on the gradient Type that you choose.
Angle
To specify the angle that the gradient fill is rotated within the WordArt, enter the degree value that you want. This option is available only when you select Linear as the Type.
Gradient stops
Gradient stops consist of a position, a color, and a transparency value. The transparency value applies to the gradient stop, not to the overall fill. Gradient stops are used to create non-linear gradients. For example, if you want to create a gradient that goes from red to green to blue, you need to add three gradient stops — one for each color. Or, if you want to create a gradient that shows up only in the corner of a WordArt, you need to use gradient stops to make the gradient non-linear.
Stop list
The gradient fill is made up of several gradient stops, but you can change only one gradient stop at a time. When you click the gradient stop that you want to edit in the list, the position, color, and transparency options reflect the current settings for that gradient stop.
Add
To add a gradient stop, click Add, and then set the Stop position, Color, and Transparency that you want.
Remove
To delete a gradient stop, click the Stop number in the list that you want to delete, and then click Remove.
Stop position
To set the location for the color and transparency change in the gradient fill, move the Stop position slider or enter a number in the box next to the slider.
Color
To choose the color used for the gradient stop, click Color , and then click the color that you want. To change to a color that is not in the theme colors, click More Colors, and then either click the color that you want on the Standard tab, or mix your own color on the Custom tab. Custom colors and colors on the Standard tab are not updated if you later change the document theme.
Transparency
To specify how much you can see through the WordArt at the specified Stop position, move the Transparency slider or enter a number in the box next to the slider. You can vary the percentage of transparency from 0 (fully opaque, the default setting) to 100% (fully transparent).
Picture or texture fill
Texture
To choose a built-in texture, click this button, and then click the option that you want.
Insert from
File
To insert a picture from a file, click this button, and then locate the picture that you want to add. Double-click the picture to insert it.
Clipboard
To paste a picture from the Clipboard or another program, copy the picture, and then click this button.
ClipArt
To insert ClipArt, click this button, and then in the Search text box, type a word that describes the clip that you want, or type in all or some of the file name of the clip. To include ClipArt that is available on Office Online in your search, select the Include content from Office Online check box, click Go, and then click the clip to insert it.
Tile picture as texture
A picture fill can either be stretched to fit across the selected WordArt or tiled (repeated horizontally and vertically) to fill the WordArt. To use multiple copies of the same picture as a texture for the WordArt, select this check box.
Stretch Options
Offsets
Offsets determine how much to scale a picture to fit a WordArt relative to the left, right, top, and bottom of the WordArt. Positive numbers move the picture edge toward the center of the WordArt, and negative numbers move the picture edge away from the WordArt.
Left
To specify a percentage for the picture or texture from the left border of the WordArt, enter a number in the box.
Right
To specify a percentage for the picture or texture from the right border of the WordArt, enter a number in the box.
Top
To specify a percentage for the picture or texture from the top border of the WordArt, enter a number in the box.
Bottom
To specify a percentage for the picture or tile from the bottom border of the WordArt, enter a number in the box.
Tiling options
The options below determine the scaling factor for the texture fill.
Offset X
To shift the entire tiled picture fill to the left (negative numbers) or the right (positive numbers), enter a number in the box.
Offset Y
To shift the entire tiled picture fill up (negative numbers) or down (positive numbers), enter a number in the box.
Scale X
To specify a percentage for the horizontal scaling of the original image, enter a number in the box.
Scale Y
To specify a percentage for the vertical scaling of the original image, enter a number in the box.
Alignment
Alignment describes the anchor position where the picture tiling begins. To specify the placement of the tiled picture or texture, select an option from the list.
Mirror type
To specify whether the alternating horizontal or vertical tiles display a mirror or flip image with every other tile, select an option from the list.
Transparency
To specify how much you can see through the picture or texture, move the Transparency slider or enter a number in the box next to the slider. You can vary the percentage of transparency from 0 (fully opaque, the default setting) to 100% (fully transparent).
Rotate with shape
To rotate the application of the picture or texture with the rotation of the WordArt, select this check box.
Excel 2010 Word 2010 Outlook 2010 PowerPoint 2010 Excel 2007 Word 2007 Outlook 2007 PowerPoint 2007 More…Less
Notes:
-
When you change options in this dialog box, the changes are immediately applied to your WordArt or text, making it easy to see the effects of the changes in your WordArt or text without closing the dialog box. However, since the changes are instantly applied, it is not possible to click Cancel in this dialog box. To remove changes, you must click Undo
on the Quick Access Toolbar for each change that you want to remove. -
You can simultaneously undo multiple changes that you made to one dialog box option, as long as you did not make changes to another dialog box option in between.
-
You may want to move the dialog box so that you can see both the WordArt and the dialog box at the same time.
Text layout
Vertical alignment
To specify the vertical position of the text in a WordArt, select an option from the list.
Text direction
To specify the orientation of the text in a WordArt, select an option from the list.
AutoFit
Do not AutoFit
To turn off the automatic resizing, click this button.
Shrink text on overflow
To make the text reduce in size to fit within the WordArt, click this button.
Resize shape to fit text
To increase the size of the WordArt vertically so that the text fits inside of it, click this button.
Internal margin
The internal margin is the distance between the text and the outer border of a WordArt or other object. You can increase or decrease the amount of this space by using the options below.
Left
To specify the distance between the left border of a WordArt and the text, enter the new margin number in the box.
Right
To specify the distance between the right border of a WordArt and the text, enter the new margin number in the box.
Top
To specify the distance between the top border of a WordArt and the text, enter the new margin number in the box.
Bottom
To specify the distance between the bottom border of a WordArt and the text, enter the new margin number in the box.
Wrap text in shape
To have text appear on multiple lines inside of a WordArt, select this check box.
Columns
To specify the number of columns of text in a WordArt and the spacing between the columns, click this button.
Number
To specify the number of columns of text in a WordArt, enter a number in the box.
Spacing
To specify the spacing between the columns of text in a WordArt, enter a number in the box.
Right-to-Left columns
Select this option to specify that the columns of text in the WordArt show as a reverse image of the default left-to-right display. This option displays only if you enable support for right-to-left languages.
Need more help?
Want more options?
Explore subscription benefits, browse training courses, learn how to secure your device, and more.
Communities help you ask and answer questions, give feedback, and hear from experts with rich knowledge.
Lesson 21: Working with Objects
/en/word2003/edit-tables/content/
Introduction
By the end of this lesson, you should be able to:
- Edit objects
Introduction to Word graphics
Now that you are comfortable adding and formatting text, headers and footers, columns, and tables, let’s learn to enhance your documents by adding objects and pictures.
The Drawing toolbar offers many options for including lines, lines with arrows, and many types of shapes into your document.
Drawing objects include:
- AutoShapes: Lines, curves, and text boxes
- WordArt drawing objects
Drawing objects
To draw lines and shapes:
- Open the Drawing toolbar by clicking View on the menu bar. Select Toolbars and then Drawing from the cascading menu.
OR
- Right-click any toolbar and select drawing.
OR
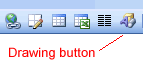
- Click the Drawing button on the Standard toolbar.
- The Drawing toolbar will appear.

- Choose an AutoShape from the AutoShape drop-down menu.
OR
- Click any of the drawing tools in the first group of buttons.
- The mouse pointer changes to a crosshair .
- Drag the crosshair from a starting point until the object is the desired size.
- Release the mouse button to end the drawing object and turn off the Drawing tool.
 .
. Hold the Shift key down to create straight lines, perfect circles, or perfect squares.
AutoShapes are inserted (on their own layer) with the In front of text wrapping style applied.
WordArt drawing objects
Also included on the Drawing toolbar is the WordArt feature. Using WordArt, you can create text graphics that bend, slant, and appear metallic or wooden and much more. WordArt can even be shadowed, skewed, rotated, and stretched.
Here are just a few examples of what WordArt allows you to do:

To insert WordArt:
- Place the insertion point where you would like to insert WordArt.
- Click the WordArt button on the Drawing toolbar . The WordArt gallery opens.
 . The WordArt gallery opens.
- Choose (click) a WordArt style.
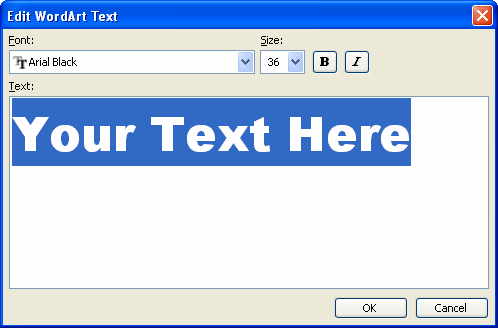
- The Edit WordArt Text dialog box appears.
- Edit the font, size, and style.
- Click OK.
Challenge!
- Open your document.
- Using both AutoShapes and WordArt, create an image for your flyer or newsletter.
- Edit the image.
- Save and close the document.
For example, if you wanted to create a stop sign, you would select the Octagon shape under AutoShapes and Basic Shapes and select any of the WordArt designs for the text.

/en/word2003/working-with-pictures/content/
 Please Note:
This article is written for users of the following Microsoft Word versions: 97, 2000, 2002, and 2003. If you are using a later version (Word 2007 or later), this tip may not work for you. For a version of this tip written specifically for later versions of Word, click here: Understanding WordArt.
![]()
Written by Allen Wyatt (last updated May 14, 2021)
This tip applies to Word 97, 2000, 2002, and 2003
WordArt is a program that allows you to treat text as a graphic. You can use the program to add special effects and flourishes to text, and then insert the text in your document. It is useful for creating special text elements such as logos, mastheads, or titles. Exactly how you access WordArt depends on the version of Word you are using.
Word 97 includes WordArt 2.0, although it is not automatically installed when you install Word. You can tell if WordArt is installed by trying to access WordArt. If it is not installed, then you can run the Word Setup program again and install WordArt on your system.
You access WordArt using either of these methods in Word 97:
- Double-click on a graphic originally created with WordArt.
- Choose Object from the Insert menu. You will see the Object dialog box. Choose Microsoft WordArt 2.0 from the Object Type list and click on OK. You will see the WordArt dialog box.
When WordArt if running, you see the WordArt dialog box, and most of your Word 97 menus and toolbars are hidden. It is a good idea to periodically update your Word document from within WordArt. This is done by clicking on the Apply button in the WordArt dialog box. When you do this, your changes will be updated in both the WordArt preview area and in your Word document. When you are through using WordArt, you can exit the program simply by using the mouse to click somewhere else in your Word document. (You can also press Esc to exit WordArt.)
Word 2000, 2002, and 2003 use a more integrated approach to WordArt. In these versions of Word you should follow these steps:
- Make sure the Drawing toolbar is displayed.
- On the Drawing toolbar click on the Insert WordArt tool. You then see the WordArt Gallery. (See Figure 1.)
- Select a general appearance that you want used for your text, and then click on OK. You then see the Edit WordArt Text dialog box. (See Figure 2.)
- Enter the text you want used by WordArt, and click on OK.
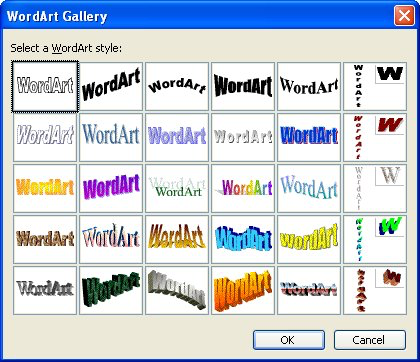
Figure 1. The WordArt Gallery.
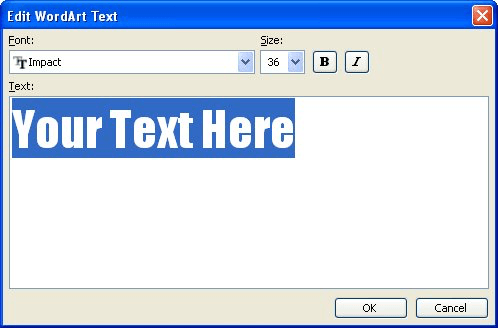
Figure 2. The Edit WordArt Text dialog box.
At this point, the WordArt graphic is created and added to your document. You should also see the WordArt toolbar, which includes commands specific to working with WordArt objects. To hide the toolbar, simply click a different place in your document so that the WordArt object isn’t selected.
WordTips is your source for cost-effective Microsoft Word training.
(Microsoft Word is the most popular word processing software in the world.)
This tip (1816) applies to Microsoft Word 97, 2000, 2002, and 2003. You can find a version of this tip for the ribbon interface of Word (Word 2007 and later) here: Understanding WordArt.
Author Bio
With more than 50 non-fiction books and numerous magazine articles to his credit, Allen Wyatt is an internationally recognized author. He is president of Sharon Parq Associates, a computer and publishing services company. Learn more about Allen…
MORE FROM ALLEN
No-border Text Boxes by Default
Text boxes can be a great design element when laying out your documents. If you want those text boxes to have no borders …
Discover More
Understanding Outlining in Word
Remember when you needed to create outlines for your writing when you were in school? Word includes outlining …
Discover More
Adding Hyperlinks
Adding a hyperlink to a text selection is easy to do in Word. All you need to do is make a couple of clicks and specify …
Discover More