
Microsoft Office documents not only offer an easy and effective way for users to communicate and collaborate, but they also get smarter with each new release and increase connectivity with the remainder of the software universe. In some cases, though, Office applications can’t replace the flexibility of custom code. Hence, the need to create and edit Office documents (mostly Word and Excel documents) programmatically exists—particularly from .NET applications.
Depending on your skills, this task can be approached from two diverse directions. You either use .NET to write GUI or console applications that manipulate documents, or leverage the true power of the .NET Framework to embed managed functions inside existing Office documents in a way that vaguely resembles a VBA macro. This article tackles both these techniques, beginning with the second approach.
Introducing VSTO
Thanks to the Visual Studio Tools for Office (VSTO), building a Word document or an Excel spreadsheet that is bound to managed code is relatively easy. Once you have installed VSTO, a new node appears in the Visual Studio project window to let you create a new type of output. In particular, you can choose to create Excel or Word documents and Word templates.
Using VSTO has many advantages. First off, you can use all the features of Visual Studio .NET and write Office-based applications in Visual Basic .NET or C#. Needless to say, both languages are much more powerful than VBA and they open you up to the whole .NET Framework of classes.
A VSTO application also introduces a strong security concept to the world of Office—far beyond what you can get through VBA. A VSTO solution won’t execute unless all the involved assemblies are explicitly full-trusted.
Creating a project with VSTO configures the working environment properly as well, adding any needed reference to the appropriate Office-related executables. What you have to do is simply open the code-behind class that’s there and hook up handlers for the document’s core events such as open and close.
Basics of a VSTO Application
A VSTO application is a piece of .NET code that runs inside a particular Office document. Users typically open the document and find some UI widgets to play with: dialogs or graphics. They work, update the document in a WYSIWYG fashion, and then save the results to another document (if you choose).
When you open the Office document, you find references to external .NET assemblies, the assemblies are loaded, and the _Startup function in your custom code is called. The _Startup function is defined in the auto-generated code section that VSTO inserts in the code-behind class for the document.
The code you write handles just events raised by the Word and Excel objects (such as an application or document). It does that through the standard COM event marshaling and doesn’t even interfere with VBA events. (This means that VBA-equipped documents can be further extended to .NET.)
An event handler can access any .NET subsystem (for example run a query, get some data, and create a chart or perhaps populate a Word template with data coming out of a Web service).
Creating Documents Manually
What if you have a .NET application and need to automate the creation of Word or Excel documents? You need to incorporate the Office model into your existing assemblies. The code in this section illustrates how to create a Word document programmatically from within a console application.
As the first step, you add a couple of specific references to the Office and Word (or Excel) COM object model. The interop infrastructure of .NET wraps those COM libraries in a .NET assembly for you:
using Office = Microsoft.Office.Core;
using Word   = Microsoft.Office.Interop.Word;
When working with Word or Excel object models, almost everything must be an object and you must take optional parameters into account. The .NET Framework doesn’t support optional parameters—there’s method overloading in .NET—but defines a value that should be used in lieu of parameters you don’t want to specify when making calls to COM objects. The following code creates a new instance of Word and a new document object:
object Missing    = System.Reflection.Missing.Value;
object fileToOpen = (object) @"c:sample.doc";
object fileToSave = (object) @"c:sample1.doc";

Word.Application app = new Word.ApplicationClass();
Word.Document doc    = new Word.Document;
The next step is opening the document. You can proceed as follows, limiting the non-null parameters to the file name:
doc = app.Documents.Open(ref fileToOpen,
      ref Missing, ref Missing, ref Missing, ref Missing,
      ref Missing, ref Missing, ref Missing, ref Missing,
      ref Missing, ref Missing, ref Missing, ref Missing,
      ref Missing, ref Missing, ref Missing);
What you do next depends on what you want to obtain. For this example, add some text to existing bookmarks. A bookmark is a well-known place in the document whose content can be changed programmatically. In a Word document, you create a bookmark by selecting the placeholder text and clicking on Insert|Bookmark. Imagine your sample document contains a bookmark named LetterDate that you expect to assign with the current date. You modify the content of a bookmark through a Range object:
object bookmarkName = null;
bookmarkName        = (object) "LetterDate";
Word.Range rng      = doc.Bookmarks.get_Item(ref bookmarkName).Range;
You store the new text in the Range object and re-add the bookmark to the Bookmarks collection. If the bookmark already exists, it will be replaced:
rng.Text       = DateTime.Now.ToShortDateString();
rng.Font.Bold  = 1;
rng.Font.Color = Word.WdColor.wdColorBlue;
object oRng    = rng;
doc.Bookmarks.Add("LetterDate", ref oRng);
The current date will be added in bold and blue. Following this approach, you can create a Word template, add as many bookmarks as needed, and factor out a .NET class to let you prepare and save Word documents automatically.
The following code saves a Word document:
doc.SaveAs(ref fileToSave,
      ref Missing, ref Missing, ref Missing, ref Missing,
      ref Missing, ref Missing, ref Missing, ref Missing,
      ref Missing, ref Missing, ref Missing, ref Missing,
      ref Missing, ref Missing, ref Missing);
Be sure to close both the document and the Word application before you quit your application. You can do that as follows:
doc.Close(ref Missing, ref Missing, ref Missing);
app.Quit(ref Missing, ref Missing, ref Missing);
Lastly, you need to know how to create a new Word document. After getting a new application instance, enter the following:
Word.Document doc = app.Documents.Add(
ref objMissing, ref objMissing,
ref objMissing, ref objMissing);
doc.Activate();
You first add a new document to the Documents collection of the application and activate it. Next, you start typing text using the methods of the Selection object:
app.Selection.TypeText("This is a sample Word document");
app.Selection.TypeParagraph();
No Easy Task
Creating and editing Office documents from within .NET applications is not as easy as it should be. The main obstacle remains the different programming models—COM versus .NET—that wrapper tools can’t always hide. Add to this the inherent complexity of the Word (or Excel) object models and you get a clear picture of why programming Office applications is complex and boring.
Whichever approach you choose, you can’t perform any step without a good understanding of the Office applications object models. In addition, if you use VSTO, strong knowledge of .NET security and deployment issues is required.
Resources
- Understanding the Excel Object Model from a .NET Developer’s Perspective
- Understanding the Word Object Model from a .NET Developer’s Perspective
About the Author
Dino Esposito is Wintellect‘s ADO.NET expert and a trainer and consultant based in Rome, Italy. He runs the Cutting Edge column for MSDN Magazine and is a regular contributor to MSDN News, Visual C++ Developers Journal, and SQL Server Magazine.

on
July 12, 2005, 6:52 AM PDT
Easily utilize Microsoft Word functionality in your .NET application
While the Microsoft Office suite still relies on VBA and COM, it may be utilized in .NET code via .NET and COM interoperability. This allows you to create more powerful applications by integrating the many functions available in the Word products into your application.
Developers often think they need they need to reinvent the
wheel, when all they really need to do for certain tasks is make use of
existing applications. A good example is utilizing one or more applications in
the Microsoft Office suite of products. For instance, you may want to utilize
an Excel spreadsheet to create a chart or an expense report, or create a Word
document that contains user-entered data. In this article, I’ll examine
integrating Word in a .NET application.
The programming model
It is strange that Microsoft pushes .NET as the ultimate
solution, yet it is not utilized within the Microsoft Office programming model;
Office still uses the older VBA (Visual Basic for Applications) model. A
critical aspect of VBA is that it is based on COM (Component Object Model), so .NET
and Microsoft Office cannot natively communicate with each other. However, a
.NET feature called COM interop provides callable
wrappers to allow .NET and COM to interoperate.
A runtime callable wrapper allows a COM component to be used
by .NET. If you are using the Visual Studio .NET IDE, follow these steps:
- Select
Add Reference from the Project menu. - Select
the COM tab of the Add Reference window and double-click the appropriate type
library file listed. - Select
OK to end and add the reference.
At this point, Visual Studio .NET converts the objects and
members in the COM type library file into equivalent .NET assemblies. Once the .NET
assemblies are generated, you can easily instantiate classes and call members
as if the COM objects and members were native .NET classes and members. This
process may also be reversed so you can utilize a .NET assembly in a COM-based
application, but that is beyond the scope of this article.
The process if further illustrated with an example. Let’s
create a Word document from a simple .NET Windows Form.
Using Microsoft Word
First, I create a new project within Visual Studio .NET and
add a reference to the Microsoft Word type library. I am using Microsoft Word
2003, so the type library is Microsoft Word 11.0 Object Library. Once the
reference is added, I can use the Word objects in the code. The VB.NET sample
in Listing A opens an existing Word
document from the local drive when the user clicks a button on the Windows
Form.
Here are a few notes about the code:
- The System.Runtime.InteropServices namespace is imported
to work with COM and .NET interoperability. It contains the COMException class. - The
.NET wrapper for the Word objects is contained in the Microsoft.Office.Interop.Word
namespace (the reference previously added to the project). - The
Application class within the Word namespace is used to access the Word
application. - The
Document class within the Word namespace allows you to work with Word
documents. - The
Open method contained within the Documents property of the application
allows an existing document to be loaded. It contains a Close method as
well. - The
Activate method of the Document class opens the document within a new
instance of Word. - The
code accessing the Word document is contained within a Try/Catch block. It
catches COM errors via the COMException class. - The MessageBox.Show method replaces the Office VBA MsgBox function.
Listing B
contains the equivalent C# code. The major difference in the C# code from the
VB.NET version is the call to Documents.Open requires
all parameters are passed to it, and these parameters must be references to
objects. For this reason, objects are created and assigned values. Also, only
references (ref) are passed to the method call. In addition, many of the
parameters are null so the Type.Missing value is used
in their place. In addition, the actual Word application must be activated via
its own Activate method, and it must be displayed by setting its Visible parameter to true. The last caveat is that C#
recognizes the backslash () as an escape sequence, so double backslahes (\) must be utilize to
include a single one in a string.
Populating Word documents via .NET
You can open an existing Word document, or you may want to
create a new Word document and populate it with data from an application. You
can create a new Word document via the Add method of the Documents collection.
The following VB.NET snippet uses the objects created in the previous example:
word.Documents.Add()
In addition, the Word Object Model includes numerous
methods and properties for working with text within a Word document. The
VB.NET example in
Listing C creates
a new document and inserts text in the beginning of the document when a button
is selected (only the code for the button is shown).
A few notes about this sample:
- The Word.Range object allows you to work with a group or
range of text within a Word document. The place within a document is
specified by starting and ending values. In this example, the beginning of
the document (start at zero) is used. An end value indicates the size of
the range—zero indicates the beginning as well. - The
Text property of the Word.Range object allows
the text to be set or reset. - The SaveAs method allows you to save a document using the
specified value.
Listing D
contains the C# equivalent. Once again, C# requires all parameters be specified so the Type.Missing value is utilized. You can browse the Word
Object Model to learn more about the methods and properties available.
Another development tool
Microsoft Office is the most popular office suite in the
world. You can easily integrate the power of the suite into your .NET
application via .NET and COM interoperability. It opens a world of
possibilities for adding powerful functionality to an application.
TechRepublic’s free .NET newsletter, delivered each Wednesday, contains useful tips and coding examples on topics such as Web services, ASP.NET, ADO.NET, and Visual Studio .NET. Automatically sign up today!
-
Software
How to create Word Documents in .NET Core using OpenXML and OutputFormatter
This guide will help you generate Word Documents using MS OpenXML library in .NET core with the help of an OutputFormatter
The projec tuses .NET Core 2.0 and OpenXml 2.8.1 and creates Word Documents (Docx) using Microsoft OpenXml library. The solution relies on .NET OutputFormatter to create a file using a template (DataExport folder).
Here’s a quick setup:
Create a new project/solution
- Add DocumentFormat.OpenXml 2.8.1 NuGet package as dependency
Create a DTO / Model class
public class DemoDto
    {
        public string Welcome { get; set; }
        public string HelloWorld { get; set; }
    }
Create a WordOutputFormatter class
public class WordOutputFormatter : OutputFormatter
    {
        public string ContentType { get; }

        public WordOutputFormatter()
        {
            ContentType = "application/ms-word";
            SupportedMediaTypes.Add(MediaTypeHeaderValue.Parse(ContentType));
        }

        public override bool CanWriteResult(OutputFormatterCanWriteContext context)
        {
            return context.Object is DemoDto;
        }

        // this needs to be overwritten
        public override async Task WriteResponseBodyAsync(OutputFormatterWriteContext context)
        {
            var response = context.HttpContext.Response;
            var filePath = string.Format("./DataExport/myfile-{0}.docx", DateTime.Now.Ticks);
            var templatePath = string.Format("./DataExport/my-template.docx");

            var viewModel = context.Object as DemoDto;

            //open the template then save it as another file (while also stream it to the user)

            byte[] byteArray = File.ReadAllBytes(templatePath);
            using (MemoryStream mem = new MemoryStream())
            {
                mem.Write(byteArray, 0, (int)byteArray.Length);

                //to create a new document

                using (WordprocessingDocument wordDoc = WordprocessingDocument.Open(mem, true))
                {

                    var body = wordDoc.MainDocumentPart.Document.Body;
                    var paras = body.Elements<Paragraph>();

                    //append some stuff to the document
                    Paragraph p = new Paragraph();
                    Run r = new Run();
                    Text t = new Text("Lorem ipsum dolor sit amet, consectetur adipiscing elit. Praesent quam augue, tempus id metus in, laoreet viverra quam. Sed vulputate risus lacus, et dapibus orci porttitor non.");
                    r.Append(t);
                    p.Append(r);
                    body.Append(p);

                    p = new Paragraph();
                    r = new Run();
                    t = new Text(viewModel.HelloWorld);
                    r.Append(t);
                    p.Append(r);
                    body.Append(p);

                    wordDoc.Close();

                }

                using (FileStream fileStream = new FileStream(filePath, System.IO.FileMode.CreateNew))
                {
                    mem.WriteTo(fileStream);
                    mem.Close();
                    fileStream.Close();
                }

                response.Headers.Add("Content-Disposition", "inline;filename=MyFile.docx");
                response.ContentType = "application/ms-word";

                await response.SendFileAsync(filePath);
            }

        }
Register WordOutputFormatter in MVC startup options
In the Startup.cs
services.AddMvc(config =>
            {
                config.OutputFormatters.Add(new WordOutputFormatter());
                config.FormatterMappings.SetMediaTypeMappingForFormat(
                  "docx", MediaTypeHeaderValue.Parse("application/ms-word"));

            });
Define your controller. Notice how the controller responds to ‘application/ms-word’ content type
[Route("api/[controller]")]
    [Produces("application/ms-word")]
    public class DemoController : Controller
    {
        [HttpGet("Export")]
        [Produces("application/ms-word")]
        public async Task<IActionResult> Export()
        {
            try
            {
                var demoDto = new DemoDto() { Welcome = "Lorem Ipsum", HelloWorld = "Hello World!!!" };
                return Ok(demoDto);
            }
            catch (Exception ex)
            {
                //log the exception
                return BadRequest();
            }
        }
    }
Optional: add Swagger support…because it’s awesome!
Add Swashbuckle.AspNetCore (2.3+) as a dependency
In your startup file (Startup.cs) ConfigureServices method, after the MVC configuration:
services.AddSwaggerGen(c =>
            {
                c.SwaggerDoc("v1", new Swashbuckle.AspNetCore.Swagger.Info { Title = "My App!", Version = "v1" });

            });
In the Startup.cs Configure method, add the following
app.UseSwagger(c => { c.RouteTemplate = "api/swagger/{documentName}/swagger.json"; });
            app.UseSwaggerUI(c => { c.SwaggerEndpoint("v1/swagger.json", "My App Api"); c.RoutePrefix = "api/swagger"; });
Test! Either use Swagger or directly navigate to your controller
Swagger: http://localhost:5000/api/swagger/index.html
Directly navigate: http://localhost:5000/api/export/demo

Большинству операций, выполняемых программным способом, есть эквиваленты в пользовательском интерфейсе (UI), доступные как команды в меню и на панелях инструментов. Также существует нижележащая архитектура, обеспечивающая поддержку команд, выбираемых из UI. Всякий раз, когда вы создаете новый документ Word, он базируется на каком-либо шаблоне; расширение файлов шаблонов «.dot», а файлы документов – «.doc». Шаблон Word может содержать текст, код, стили, панели инструментов, элементы автотекста, комбинации клавиш для быстрого доступа к командам. Новый документ связывается с шаблоном и получает полный доступ к его элементам. Если вы не указываете конкретный шаблон, новый документ создается на основе стандартного шаблона «Normal.dot», который устанавливается при установке Word).
Шаблон Normal.dot является глобальным, он доступен любому документу, который вы создаете. Вы могли бы при желании поместить весь свой код в Normal.dot и создавать все документы в своей среде на основе собственного шаблона Normal (Обычный). Но тогда его файл мог бы стать чрезмерно большим, поэтому более эффективное решение для многих разработчиков — создание собственных шаблонов для конкретных приложений. В документах, создаваемых на основе вашего шаблона, код из стандартного шаблона Normal по-прежнему будет доступен. При необходимости можно связывать документ с несколькими шаблонами в дополнение к шаблону Normal.
Для работы с приложением Microsoft Word в .NET, используется объект Application, который является предком всех остальных объектов. Получив на него ссылку, вы можете работать с его методами и свойствами. Этот объект предоставляет большой набор методов и свойств, позволяющих программным путем управлять Microsoft Word. Код инициализации нового объекта Application, представлен ниже.
Microsoft.Office.Interop.Word.Application winword =
  new Microsoft.Office.Interop.Word.Application();
Чтобы открыть существующий документ или создать новый, необходимо создать новый объект Document.
object missing = System.Reflection.Missing.Value;
Microsoft.Office.Interop.Word.Document document =
     winword.Documents.Add(ref missing, ref missing, ref missing, ref missing);
Выполняя какую-либо операцию в пользовательском интерфейсе Word (например, добавляя верхний колонтитул), вы выделяете соответствующую секцию, используя объект «Selection», определяющий текущую позицию «невидимого» курсора и применяете к ней новый параметр форматирования с использованием объекта «Range». Данный объект представляет область в документе и может включать в себя все что угодно — от пары символов, до таблиц, закладок и много другого. Вы не ограничены одним объектом «Range» — в одном документе можно определить сразу несколько таких объектов.
//Добавление верхнего колонтитула
foreach (Microsoft.Office.Interop.Word.Section section in document.Sections)
{
    Microsoft.Office.Interop.Word.Range headerRange =
    section.Headers[Microsoft.Office.Interop.Word.WdHeaderFooterIndex.wdHeaderFooterPrimary].Range;
    headerRange.Fields.Add(headerRange, Microsoft.Office.Interop.Word.WdFieldType.wdFieldPage);
    headerRange.ParagraphFormat.Alignment =
    Microsoft.Office.Interop.Word.WdParagraphAlignment.wdAlignParagraphCenter;
    headerRange.Font.ColorIndex = Microsoft.Office.Interop.Word.WdColorIndex.wdBlue;
    headerRange.Font.Size = 10;
    headerRange.Text = "Верхний колонтитул" + Environment.NewLine + "www.CSharpCoderR.com";
}

//Добавление нижнего колонтитула
foreach (Microsoft.Office.Interop.Word.Section wordSection in document.Sections)
{
    Microsoft.Office.Interop.Word.Range footerRange =
   wordSection.Footers[Microsoft.Office.Interop.Word.WdHeaderFooterIndex.wdHeaderFooterPrimary].Range;

    footerRange.Font.ColorIndex = Microsoft.Office.Interop.Word.WdColorIndex.wdDarkRed;
    footerRange.Font.Size = 10;
    footerRange.ParagraphFormat.Alignment =
    Microsoft.Office.Interop.Word.WdParagraphAlignment.wdAlignParagraphCenter;
    footerRange.Text = "Нижний колонтитул" + Environment.NewLine + "www.CSharpCoderR.com";
}
Чтобы добавить текст в документ, необходимо указать позицию для вставки и сам текст.
//Добавление текста в документ
document.Content.SetRange(0, 0);
document.Content.Text = "www.CSharpCoderR.com" + Environment.NewLine;
Так же вы можете применить к тексту определенный стиль.
//Добавление текста со стилем Заголовок 1
Microsoft.Office.Interop.Word.Paragraph para1 = document.Content.Paragraphs.Add(ref missing);
object styleHeading1 = "Заголовок 1";
para1.Range.set_Style(styleHeading1);
para1.Range.Text = "Исходники по языку программирования CSharp";
para1.Range.InsertParagraphAfter();
В классе Microsoft.Office.Interop.Word.Document, присутствует коллекция «Tables», которая позволяет добавить таблицу в документ с использованием метода Add.
//Создание таблицы 5х5
Table firstTable = document.Tables.Add(para1.Range, 5, 5, ref missing, ref missing);

firstTable.Borders.Enable = 1;
foreach (Row row in firstTable.Rows)
{
    foreach (Cell cell in row.Cells)
    {
        //Заголовок таблицы
        if (cell.RowIndex == 1)
        {
            cell.Range.Text = "Колонка " + cell.ColumnIndex.ToString();
            cell.Range.Font.Bold = 1;
            //Задаем шрифт и размер текста
            cell.Range.Font.Name = "verdana";
            cell.Range.Font.Size = 10;
            cell.Shading.BackgroundPatternColor = WdColor.wdColorGray25;
            //Выравнивание текста в заголовках столбцов по центру
            cell.VerticalAlignment =
                 WdCellVerticalAlignment.wdCellAlignVerticalCenter;
            cell.Range.ParagraphFormat.Alignment =
                 WdParagraphAlignment.wdAlignParagraphCenter;
        }
        //Значения ячеек
        else
        {
            cell.Range.Text = (cell.RowIndex - 2 + cell.ColumnIndex).ToString();
        }
    }
}
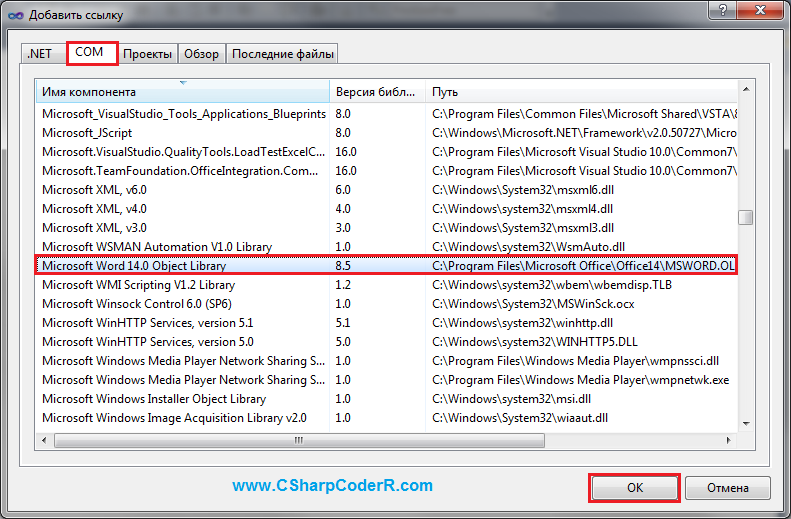
Для функционирования описанного выше кода, необходимо добавить к текущему проекту объектную библиотеку MS Word. Перейдите в меню «Проект» и выберете команду «Добавить ссылку» или в обозревателе решений, найдите пункт «Ссылки» и сделайте клик правой клавишей мыши по нему, из появившегося контекстного меню выберете соответствующий пункт.

В открывшемся окне «Добавить ссылку», перейдите на вкладку «COM» и выберете «Microsoft Word 14.0 Object Library» из предложенного списка библиотек.
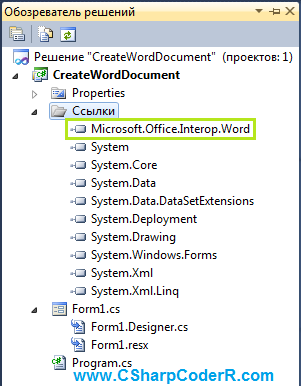
В обозревателе решений у вас появится ссылка на данную библиотеку.
Перейдите в конструктор главной формы и добавьте из панели элементов, командную кнопку «Button». Данный элемент необходим для запуска процесса создания документа и вызов MS Word для отображения.

Сделайте двойной клик левой клавишей мыши по элементу «Button» и вы перейдете в автоматически созданный метод события «button1_Click». Добавьте в него приведенный ниже код.
try
{
    Microsoft.Office.Interop.Word.Application winword =
        new Microsoft.Office.Interop.Word.Application();

    winword.Visible = false;

    //Заголовок документа
    winword.Documents.Application.Caption = "www.CSharpCoderR.com";

    object missing = System.Reflection.Missing.Value;

    //Создание нового документа
    Microsoft.Office.Interop.Word.Document document =
        winword.Documents.Add(ref missing, ref missing, ref missing, ref missing);

    //добавление новой страницы
    //winword.Selection.InsertNewPage();

    //Добавление верхнего колонтитула
    foreach (Microsoft.Office.Interop.Word.Section section in document.Sections)
    {
        Microsoft.Office.Interop.Word.Range headerRange = section.Headers[
        Microsoft.Office.Interop.Word.WdHeaderFooterIndex.wdHeaderFooterPrimary].Range;
        headerRange.Fields.Add(
       headerRange, Microsoft.Office.Interop.Word.WdFieldType.wdFieldPage);
        headerRange.ParagraphFormat.Alignment =
       Microsoft.Office.Interop.Word.WdParagraphAlignment.wdAlignParagraphCenter;
        headerRange.Font.ColorIndex =
       Microsoft.Office.Interop.Word.WdColorIndex.wdBlue;
        headerRange.Font.Size = 10;
        headerRange.Text = "Верхний колонтитул" + Environment.NewLine + "www.CSharpCoderR.com";
    }

    //Добавление нижнего колонтитула
    foreach (Microsoft.Office.Interop.Word.Section wordSection in document.Sections)
    {
        //
        Microsoft.Office.Interop.Word.Range footerRange =
wordSection.Footers[Microsoft.Office.Interop.Word.WdHeaderFooterIndex.wdHeaderFooterPrimary].Range;
        //Установка цвета текста
        footerRange.Font.ColorIndex = Microsoft.Office.Interop.Word.WdColorIndex.wdDarkRed;
        //Размер
        footerRange.Font.Size = 10;
        //Установка расположения по центру
        footerRange.ParagraphFormat.Alignment =
            Microsoft.Office.Interop.Word.WdParagraphAlignment.wdAlignParagraphCenter;
        //Установка текста для вывода в нижнем колонтитуле
        footerRange.Text = "Нижний колонтитул" + Environment.NewLine + "www.CSharpCoderR.com";
    }

    //Добавление текста в документ
    document.Content.SetRange(0, 0);
    document.Content.Text = "www.CSharpCoderR.com" + Environment.NewLine;

    //Добавление текста со стилем Заголовок 1
    Microsoft.Office.Interop.Word.Paragraph para1 = document.Content.Paragraphs.Add(ref missing);
    object styleHeading1 = "Заголовок 1";
    para1.Range.set_Style(styleHeading1);
    para1.Range.Text = "Исходники по языку программирования CSharp";
    para1.Range.InsertParagraphAfter();

    //Создание таблицы 5х5
    Table firstTable = document.Tables.Add(para1.Range, 5, 5, ref missing, ref missing);

    firstTable.Borders.Enable = 1;
    foreach (Row row in firstTable.Rows)
    {
        foreach (Cell cell in row.Cells)
        {
            //Заголовок таблицы
            if (cell.RowIndex == 1)
            {
                cell.Range.Text = "Колонка " + cell.ColumnIndex.ToString();
                cell.Range.Font.Bold = 1;
                //Задаем шрифт и размер текста
                cell.Range.Font.Name = "verdana";
                cell.Range.Font.Size = 10;
                cell.Shading.BackgroundPatternColor = WdColor.wdColorGray25;
                //Выравнивание текста в заголовках столбцов по центру
                cell.VerticalAlignment =
                WdCellVerticalAlignment.wdCellAlignVerticalCenter;
                cell.Range.ParagraphFormat.Alignment =
                WdParagraphAlignment.wdAlignParagraphCenter;
            }
            //Значения ячеек
            else
            {
                cell.Range.Text = (cell.RowIndex - 2 + cell.ColumnIndex).ToString();
            }
        }
    }
    winword.Visible = true;
}
catch (Exception ex)
{
    MessageBox.Show(ex.Message);
}
Запустите ваш проект, нажав на клавиатуре, клавишу «F5». Нажмите на единственную кнопку, расположенную на главной форме вашего проекта. У вас автоматически откроется документ Microsoft Word с заполненным верхним и нижним колонтитулом, обычным и с применением стиля текстом, а так же заполненной таблицей.

Для сохранения документа в определенной директории, добавьте приведенный ниже код, после строки «winword.Visible = true;».
//Сохранение документа
object filename = @"d:temp1.docx";
document.SaveAs(ref filename);
//Закрытие текущего документа
document.Close(ref missing, ref missing, ref missing);
document = null;
//Закрытие приложения Word
winword.Quit(ref missing, ref missing, ref missing);
winword = null;
При работе с приложением Word в памяти компьютера создается отдельный процесс, если его не закрыть или не вывести созданный документ на экран, то он будет работать до выключения компьютера. Так же при постоянной работе с такими документами, их процессы будут накапливаться незаметно для пользователя, что может привести к зависанию компьютера или другим последствиям.
The C# programming language includes capabilities that make working with Microsoft Office API objects easier. With the advent of named and optional arguments, introduction of the dynamic type in .NET, and the ability to pass arguments to the reference parameters in COM methods, C# 4.0 quickly became the language of choice for working with COM and Interop objects.
This article talks about office interop objects in C# and how you can use them to interact with Microsoft Word and Microsoft Excel. Code examples are also provided to illustrate the concepts covered.
Prerequisites for working with Interop Objects
Visual Studio 2019 or Visual Studio 2022 must be installed on your computer to work with the code samples demonstrated in this C# tutorial. In this example, we will be using Visual Studio 2022. If you don’t have it installed in your computer, you can download it from here.
As of this writing, Visual Studio 2022 RC 2 has been released. You should also have Microsoft Office Excel 2007 or Microsoft Office Word 2007 (or their later versions) installed on your computer.
Read: Code Refactoring Tips for C#.
How to Create a New Console Application in Visual Studio
In this section we will examine how we can create a new console application project in Visual Studio 2022. Assuming Visual Studio 2022 is installed on your system, adhere to the steps given below to create a new Console Application project:
- Start the Visual Studio 2022 IDE.
- Click on “Create new project.”
- In the “Create new project” page, select C# in the language drop down list, Windows from the Platforms list and Console from the “Project types” list.
- Select Console App (.NET Framework) from the project templates displayed.
- Click Next.
- In the “Configure your new project” screen, specify the project’s name and the location where you would want the project to be created.
- Before you move on to the next screen, you can optionally select the “Place solution and project in the same directory” checkbox.
- Click Next.
- In the Additional Information screen, specify the Framework version you would like to use. We will use .NET Framework 4.8 in this example.
- Click Create to complete the process.
This will create a new .NET Framework Console application project in Visual Studio 2022. We will use this project in the sections that follow.
Install NuGet Packages
Install the following libraries from NuGet using the NuGet Package Manager or from the NuGet Package Manager Console:
Microsoft.Office.Interop.Word
Microsoft.Office.Interop.Excel
Read: Working with C# Math Operators.
How to Program Office Interop Objects in C#
In this section we will examine how to work with Office Interop objects and use them to connect to Microsoft Word and Excel and read/write data.
You must add the following using directives in your program for working with Word and Excel respectively when using Office interop objects:
using Microsoft.Office.Interop.Excel;
using Microsoft.Office.Interop.Word;
Working with Excel Interop Objects in C#
To begin, create a new Excel document named Test.xslx as a sample Excel file present in the root directory of the D:> drive. We will use this file in the following example.
You should create an instance of the Application class pertaining to the Microsoft.Office.Interop.Excel library for communicating with Excel. To do this, write the following C# code:
Application excelApplication = new Application();
The next step is to create an instance of the Workbook class to access a Workbook in Excel. You can create an instance of Workbook using the following code:
Workbook excelWorkBook = excel.Workbooks.Open(@"D:Test.xslx");
To read the name of the workbook, you can use the Name property of the workbook instance as shown in the code snippet given below:
string workbookName = excelWorkBook.Name;
The following code listing illustrates how you can display the value of the first cell of the first worksheet of the Excel document:
int worksheetcount = excelWorkBook.Worksheets.Count;
if (worksheetcount > 0) {
  Worksheet worksheet = (Worksheet) excelWorkBook.Worksheets[1];
  string worksheetName = worksheet.Name;
  var data = ((Range) worksheet.Cells[row, column]).Value;
  Console.WriteLine(data);
} else {
  Console.WriteLine("No worksheets available");
}
Here’s the complete code listing for your reference:
using Microsoft.Office.Interop.Excel;
using Microsoft.Office.Interop.Word;
using System;
using System.Runtime.InteropServices;

namespace OfficeInteropDemoApp
{
    class Program
    {
        static void Main(string[] args)
        {
            string filename = @"D:Test.xlsx";
            DisplayExcelCellValue(filename, 1, 1);
            Console.Read();
        }

        static void DisplayExcelCellValue(string filename,
        int row, int column)
        {
            Microsoft.Office.Interop.Excel.Application
            excelApplication = null;
            try
            {
                excelApplication = new
                Microsoft.Office.Interop.Excel.Application();
                Workbook excelWorkBook =
                excelApplication.Workbooks.Open(filename);
                string workbookName = excelWorkBook.Name;
                int worksheetcount = excelWorkBook.Worksheets.Count;

                if (worksheetcount > 0)
                {
                    Worksheet worksheet =
                   (Worksheet)excelWorkBook.Worksheets[1];
                    string firstworksheetname = worksheet.Name;
                    var data = ((Microsoft.Office.Interop.Excel.Range)
                    worksheet.Cells[row, column]).Value;
                    Console.WriteLine(data);
                }
                else
                {
                    Console.WriteLine("No worksheets available");
                }
            }
            catch (Exception ex)
            {
                Console.WriteLine(ex.Message);
            }
            finally
            {
                if (excelApplication != null)
                {
                    excelApplication.Quit();
                    Marshal.FinalReleaseComObject(excelApplication);
                }
            }
        }
    }
}
Refer to the code listing given above. Note, the finally block of the DisplayExcelCellValue method. The Quit method is called on the Excel application instance to stop the application. Finally, a call to Marshall.FinalReleaseComObject sets the reference counter of the Excel application instance to 0.
The following code listing illustrates how you can create a new Excel document using Office Interop in C#. Note how a new workbook has been created:
static void CreateExcelDocument()
{
	Microsoft.Office.Interop.Excel.Application excelApplication = null;

	try {
		excelApplication = new
            Microsoft.Office.Interop.Excel.Application();
		Workbook excelWorkBook = excelApplication.Workbooks.Add();
		Worksheet worksheet = (Worksheet) excelWorkBook.Worksheets[1];
		worksheet.Cells[1, 1] = "Product Id";
		worksheet.Cells[1, 2] = "Product Name";
		worksheet.Cells[2, 1] = "1";
		worksheet.Cells[2, 2] = "Lenovo Laptop";
		worksheet.Cells[3, 1] = "2";
		worksheet.Cells[3, 2] = "DELL Laptop";
		excelWorkBook.SaveAs(@"D:Test.xls");
	}
	catch(Exception ex) {
		Console.WriteLine(ex.Message);
	}
	finally {
		if (excelApplication != null) {
			excelApplication.Quit();
			Marshal.FinalReleaseComObject(excelApplication);
		}
	}
}
When you run this code, a new Excel document will be created at the path specified with the following content inside:
Read: Working with Strings in C#.
Working with Word Interop Objects in C#
To work with Microsoft Word, you would need to create an instance of Microsoft.Office.Interop.Word.Application. Like Excel, this instance would be used to communicate with a Word document.
Microsoft.Office.Interop.Word.Application wordApplication = new Microsoft.Office.Interop.Word.Application();
The next step is to create a document instance using the Documents property of the Microsoft.Office.Interop.Word.Application instance we just created, as shown in the C# code snippet given below:
wordApplication.Documents.Add();
Next, you can create a paragraph and add some text to it using the as shown in the code snippet shown below:
var paragraph = document.Paragraphs.Add();
paragraph.Range.Text = "This is a sample text to demonstrate how Interop works...";
Then you can save the Word document using this code:
wordApplication.ActiveDocument.SaveAs(@"D:Test.doc", WdSaveFormat.wdFormatDocument);
Here is the complete code listing showing how to work with Microsoft Word Interop Objects in C# for your reference:
using Microsoft.Office.Interop.Excel;
using Microsoft.Office.Interop.Word;
using System;
using System.Runtime.InteropServices;

namespace OfficeInteropDemoApp
{
    class Program
    {
        static void Main(string[] args)
        {
            string filename = @"D:Test.doc";
            CreateWordDocument(filename);
            Console.Read();
        }

        static void CreateWordDocument(string filename)
        {
            Microsoft.Office.Interop.Word.Application
            wordApplication = null;
            try
            {
                wordApplication = new
                Microsoft.Office.Interop.Word.Application();
                var document = wordApplication.Documents.Add();
                var paragraph = document.Paragraphs.Add();
                paragraph.Range.Text = "This is a sample text to
                demonstrate how Interop works...";
                wordApplication.ActiveDocument.SaveAs(filename,
                WdSaveFormat.wdFormatDocument);
                document.Close();

            }
            finally
            {
                if (wordApplication != null)
                {
                    wordApplication.Quit();
                    Marshal.FinalReleaseComObject(wordApplication);
                }
            }
        }
    }
}
To read a Word document and display each word of the document you can use the following C# code:
static void ReadWordDocument(string filename)
        {
            Microsoft.Office.Interop.Word.Application
            wordApplication = null;
            try
            {
                wordApplication = new
                Microsoft.Office.Interop.Word.Application();
                Document document =
                wordApplication.Documents.Open(filename);

                int count = document.Words.Count;
                for (int i = 1; i <= count; i++)
                {
                    string text = document.Words[i].Text;
                    Console.WriteLine(text);
                }
            }
            catch(Exception ex)
            {
                Console.Write(ex.Message);
            }
            finally
            {
                if (wordApplication != null)
                {
                    wordApplication.Quit();
                    Marshal.FinalReleaseComObject(wordApplication);
                }
            }
        }
Note how the Words property of the Word application instance has been used to retrieve the words contained in the document.
C# Interop Objects Tutorial
In this article we have examined how we can access Microsoft Office Interop objects using C#. Since there is still no support for working with Interop objects in .NET Core, we have created a .NET Framework Console Application in this example.
- Download demo project — 313 Kb
Introduction
This article is being written in response of the need of building Microsoft Word document in an ASP.NET project. This article demonstrates how to create and modify document using Microsoft Word with ASP.NET.
Background
Automation is a process that allows applications that are written in languages such as Visual Basic .NET or C# to programmatically control other applications. Automation to Word allows you to perform actions such as creating new documents, adding text to documents, mail merge, and formatting documents. With Word and other Microsoft Office applications, virtually all of the actions that you can perform manually through the user interface can also be performed programmatically by using automation. Word exposes this programmatic functionality through an object model. The object model is a collection of classes and methods that serve as counterparts to the logical components of Word. For example, there is an Application object, a Document object, and a Paragraph object, each of which contain the functionality of those components in Word.
The project
The first step in manipulating Word in .NET is that you’ll need to add a COM reference to your project by right clicking in the solution explorer on References->Add Reference. Click on the COM tab and look for the Microsoft Word 10.0 Object Library. Click Select and OK.

This will automatically place an assembly in your application directory that wraps COM access to Word.
Now you can instantiate an instance of a Word application:
Word.ApplicationClass oWordApp = new Word.ApplicationClass();
You can call the interesting methods and properties that Microsoft Word provides to you to manipulate documents in Word. The best way to learn how to navigate the object models of Word, Excel, and PowerPoint is to use the Macro Recorder in these Office applications:
- Choose Record New Macro from the Macro option on the Tools menu and execute the task you’re interested in.
- Choose Stop Recording from the Macro option on the Tools menu.
- Once you are done recording, choose Macros from the Macro option on the Tools menu, select the macro you recorded, then click Edit.
This takes you to the generated VBA code that accomplishes the task you recorded. Keep in mind that the recorded macro will not be the best possible code in most cases, but it provides a quick and usable example.
For example to open an existing file and append some text:
object fileName = "c:\database\test.doc";
object readOnly = false;
object isVisible = true;
object missing = System.Reflection.Missing.Value;
Word.ApplicationClass oWordApp = new Word.ApplicationClass();

Word.Document oWordDoc = oWordApp.Documents.Open(ref fileName,
                            ref missing,ref readOnly,
                            ref missing, ref missing, ref missing,
                            ref missing, ref missing, ref missing,
                            ref missing, ref missing, ref isVisible,
                            ref missing,ref missing,ref missing);

oWordDoc.Activate();

oWordApp.Selection.TypeText("This is the text");
oWordApp.Selection.TypeParagraph();
oWordDoc.Save();

oWordApp.Application.Quit(ref missing, ref missing, ref missing);
Or to open a new document and save it:
Word.ApplicationClass oWordApp = new Word.ApplicationClass();

Word.Document oWordDoc = oWordApp.Documents.Add(ref missing,
                           ref missing,ref missing, ref missing);

oWordDoc.Activate();

oWordApp.Selection.TypeText("This is the text");
oWordApp.Selection.TypeParagraph();
oWordDoc.SaveAs("c:\myfile.doc");

oWordApp.Application.Quit(ref missing, ref missing, ref missing);
In C#, the Word Document class’s Open method signature is defined as Open(ref object, ref object, ref object, ref object, ref object, ref object, ref object, ref object, ref object, ref object, ref object, ref object, ref object, ref object, ref object). What this means is that in C# the Open method takes 15 required arguments, and each argument must be preceded with the ref keyword and each argument must be of type object. Since the first argument is a file name, normally a String value in Visual Basic. NET, we must declare a variable of type object that holds the C# string value, hence the code:
object fileName = "c:\database\test.doc";
Although we only need to use the first argument in the Open method, remember that C# does not allow optional arguments, so we provide the final 14 arguments as variables of type object that hold values of System.Reflection.Missing.Value
Use a template
If you are using automation to build documents that are all in a common format, you can benefit from starting the process with a new document that is based on a preformatted template. Using a template with your Word automation client has two significant advantages over building a document from nothing:
- You can have greater control over the formatting and placement of objects throughout your documents.
- You can build your documents with less code.
By using a template, you can fine-tune the placement of tables, paragraphs, and other objects within the document, as well as include formatting on those objects. By using automation, you can create a new document based on your template with code such as the following:
Word.ApplicationClass oWordApp = new Word.ApplicationClass();
object oTemplate = "c:\MyTemplate.dot";
oWordDoc = oWordApp.Documents.Add(ref oTemplate,
              ref Missing,ref Missing, ref Missing);
In your template, you can define bookmarks so that your automation client can fill in variable text at a specific location in the document, as follows:
object oBookMark = "MyBookmark";
oWordDoc.Bookmarks.Item(ref oBookMark).Range.Text = "Some Text Here";
Another advantage to using a template is that you can create and store formatting styles that you wish to apply at run time, as follows:
object oStyleName = "MyStyle";
oWordDoc.Bookmarks.Item(ref oBookMark).Range.set_Style(ref oStyleName);
Using the class CCWordApp
The project contains a file: CCWordApp.cs. I didn’t want to write every time all the code necessary to insert text, open a file, etc…So I decided to write a class CCWordApp that wraps the most important function. This is a brief description of the class and its functions.
public class CCWordApp
{

    private Word.ApplicationClass oWordApplic;

    private Word.Document oWordDoc;


    public CCWordApp();


    public void Open( string strFileName);


    public void Open( );


    public void Quit( );


    public void Save( );


    public void SaveAs(string strFileName );


    public void SaveAsHtml(string strFileName );


    public void InsertText( string strText);


    public void InsertLineBreak( );


    public void InsertLineBreak( int nline);


    public void SetAlignment(string strType );


    public void SetFont( string strType );


    public void SetFont( );


    public void SetFontName( string strType );


    public void SetFontSize( int nSize );


    public void InsertPagebreak();


    public void GotoBookMark( string strBookMarkName);


    public void GoToTheEnd( );


    public void GoToTheBeginning( );
So the code to open an existing file will be:
CCWordApp test ;
test = new CCWordApp();
test.Open ("c:\database\test.doc");
test.InsertText("This is the text");
test.InsertLineBreak;
test.Save ();
test.Quit();
Details
The demo project contains:
- CCWordApp.cs — the class
- CreateDocModel.aspx: an example of building a new document based on a template and the use of bookmarks
- CreateNewDoc.aspx: an example of building a new document and inserting some text
- ModifyDocument.aspx: an example of opening an existing document and appending some text at the end
- templatetemplate1.dot: an example of a template (used in CreateDocModel.aspx)
Keep in mind that the directory ,in which you save the files, must be writeable. Please check the Web.config to change the path.
References
- Microsoft Word Objects
- Converting Microsoft Office VBA Macros to Visual Basic .NET and C#
- HOWTO: Automate Microsoft Word to Perform a Mail Merge from Visual Basic .NET
- A Primer to the Office XP Primary Interop Assemblies
- HOWTO: Find and Use Office Object Model Documentation
- Creating and Opening Microsoft Word Documents from .NET using C#
This member has not yet provided a Biography. Assume it’s interesting and varied, and probably something to do with programming.