
Create a document in Word

With Word on your PC, Mac, or mobile device, you can:
-
Create documents from scratch, or a template.
-
Add text, images, art, and videos.
-
Research a topic and find credible sources.
-
Access your documents from a computer, tablet, or phone with OneDrive.
-
Share your documents and work with others.
-
Track and review changes.
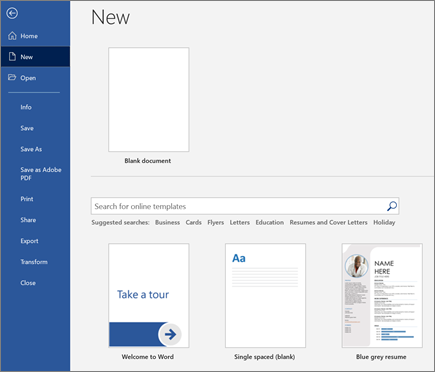
Create a document
-
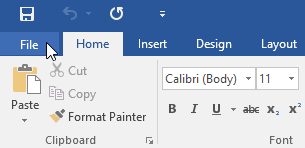
On the File tab, click New.
-
In the Search for online templates box, enter the type of document you want to create and press ENTER.
Tip: To start from scratch, select Blank document. Or, for practice using Word features, try a learning guide like Welcome to Word, Insert your first table of contents, and more.
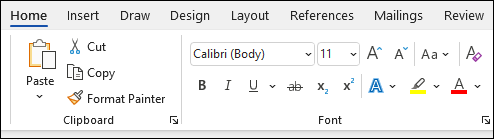
Add and format text
-
Place the cursor and type some text.
-
To format, select the text and then select an option: Bold, Italic, Bullets, Numbering, and more.
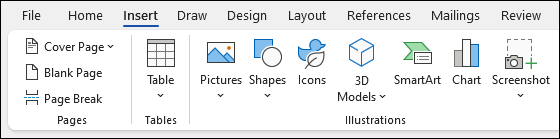
Add Pictures, Shapes, SmartArt, Chart, and more
-
Select the Insert tab.
-
Select what you want to add:
-
Tables — select Table, hover over the size you want, and select it.
-
Pictures — select Pictures, browse for pictures from your computer, select a stock image, or even search Bing.
Note:
Older versions of Word may have Online Pictures on the ribbon next to Pictures. -
Shapes — select Shapes, and choose a shape from the drop-down.
-
Icons — select Icons, pick the one you want, and select Insert.
-
3D Models — select 3D Models, choose from a file or online source, go to the image you want, and select Insert.
-
SmartArt — select SmartArt, choose a SmartArt Graphic, and select OK.
-
Chart — select Chart, select the chart you want, and select OK.
-
Screenshot — select Screenshot and select one from the drop-down.
-
Next:
Save your document to OneDrive in Word
Need more help?
Lesson 3: Creating and Opening Documents
/en/word/understanding-onedrive/content/
Introduction
Word files are called documents. Whenever you start a new project in Word, you’ll need to create a new document, which can either be blank or from a template. You’ll also need to know how to open an existing document.
Watch the video below to learn more about creating and opening documents in Word.
To create a new blank document:
When beginning a new project in Word, you’ll often want to start with a new blank document.
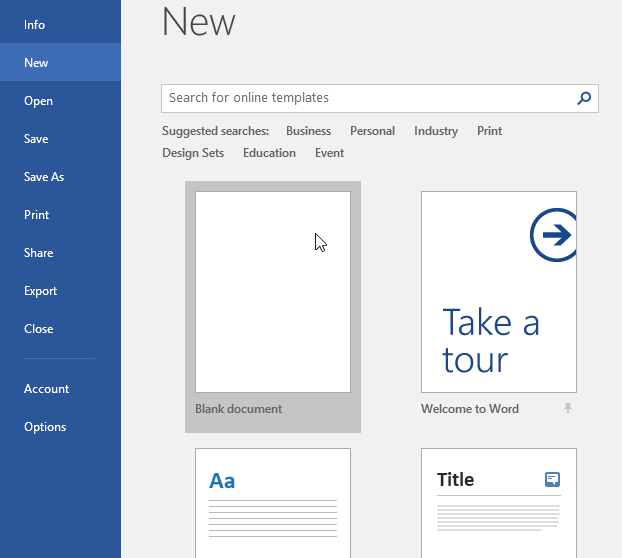
- Select the File tab to access Backstage view.

- Select New, then click Blank document.
- A new blank document will appear.
To create a new document from a template:
A template is a predesigned document you can use to create a new document quickly. Templates often include custom formatting and designs, so they can save you a lot of time and effort when starting a new project.
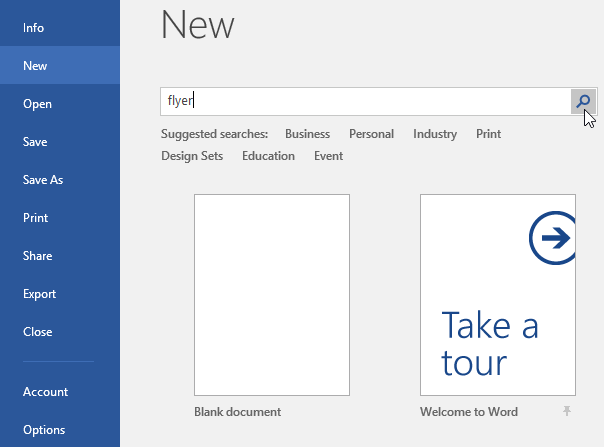
- Click the File tab to access Backstage view, then select New.
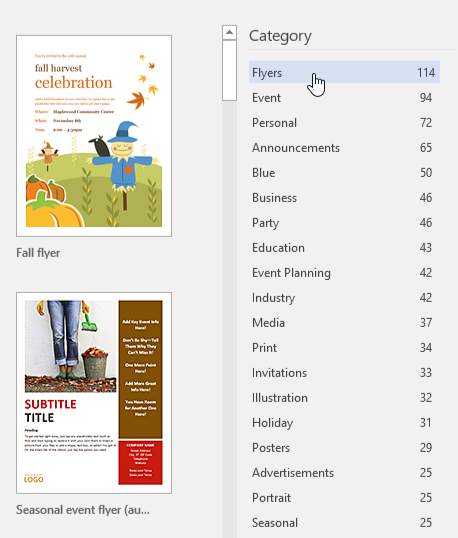
- Several templates will appear below the Blank document option. You can also use the search bar to find something more specific. In our example, we’ll search for a flyer template.
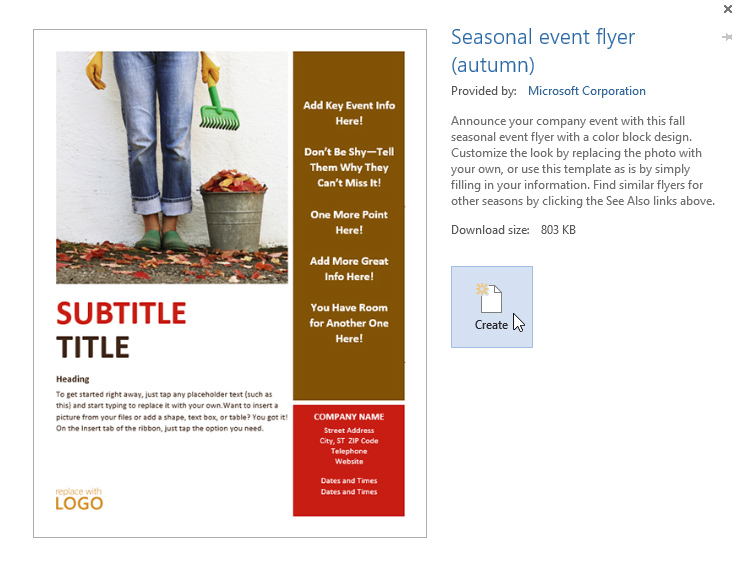
- When you find something you like, select a template to preview it.
- A preview of the template will appear. Click Create to use the selected template.
- A new document will appear with the selected template.
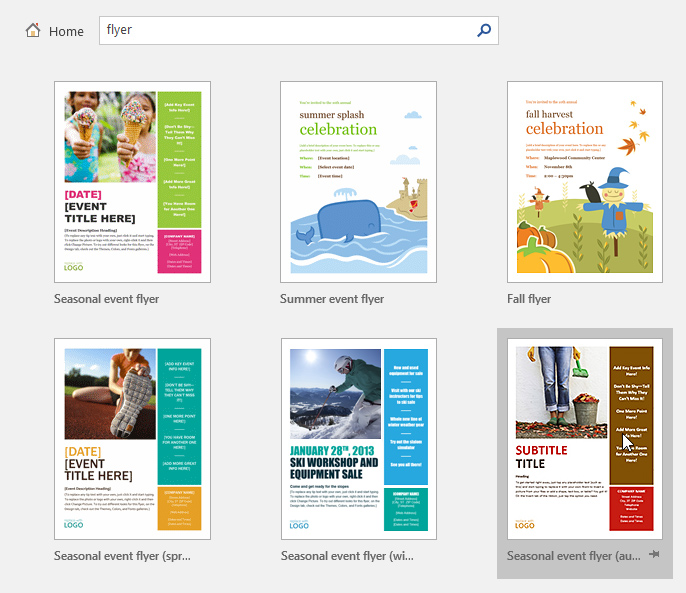
You can also browse templates by category after performing a search.
To open an existing document:
In addition to creating new documents, you’ll often need to open a document that was previously saved. To learn more about saving documents, visit our lesson on Saving and Sharing Documents.
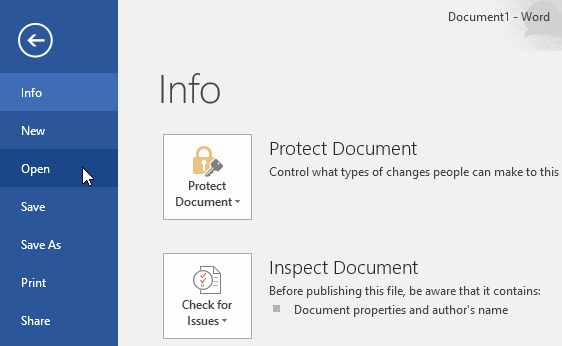
- Navigate to Backstage view, then click Open.
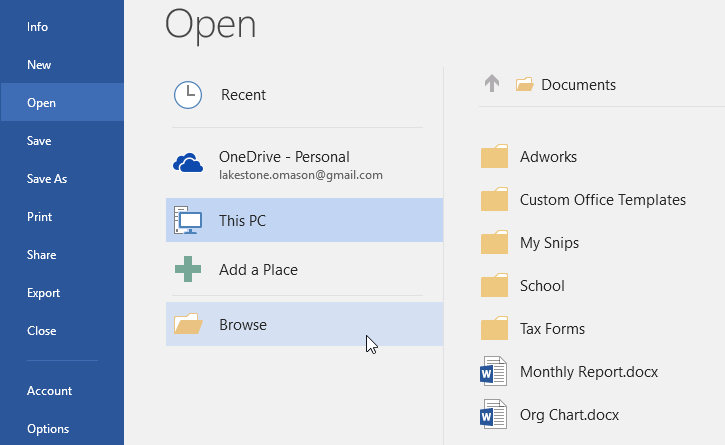
- Select This PC, then click Browse. You can also choose OneDrive to open files stored on your OneDrive.
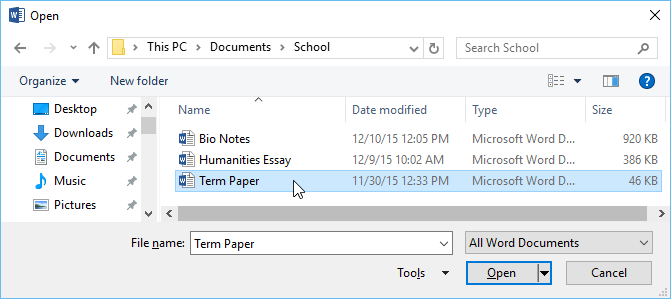
- The Open dialog box will appear. Locate and select your document, then click Open.
- The selected document will appear.
Most features in Microsoft Office, including Word, are geared toward saving and sharing documents online. This is done with OneDrive, which is an online storage space for your documents and files. If you want to use OneDrive, make sure you’re signed in to Word with your Microsoft account. Review our lesson on Understanding OneDrive to learn more.
To pin a document:
If you frequently work with the same document, you can pin it to Backstage view for quick access.
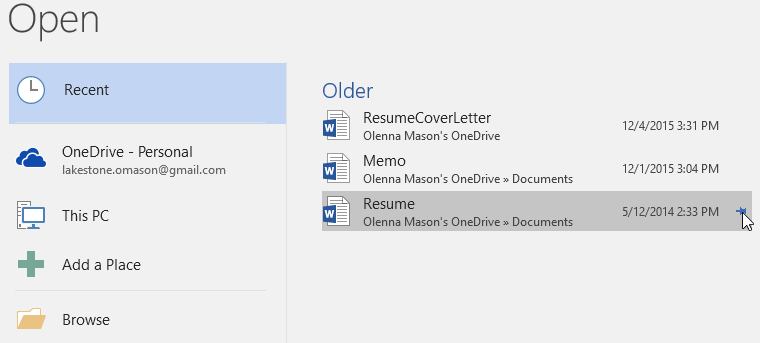
- Navigate to Backstage view, click Open, then select Recent.
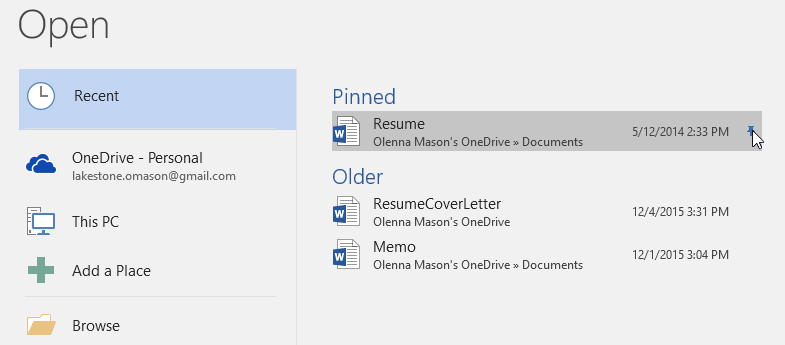
- A list of recently edited documents will appear. Hover the mouse over the document you want to pin, then click the pushpin icon.
- The document will stay in the Recent documents list until it is unpinned. To unpin a document, click the pushpin icon again.
Compatibility Mode
Sometimes you may need to work with documents that were created in earlier versions of Microsoft Word, like Word 2010 or Word 2007. When you open these types of documents, they will appear in Compatibility Mode.
Compatibility Mode disables certain features, so you’ll only be able to access commands found in the program that was used to create the document. For example, if you open a document created in Word 2007 you can only use tabs and commands found in Word 2007.
In the image below, you can see how Compatibility Mode can affect which commands are available. Because the document on the left is in Compatibility Mode, it only shows commands that were available in Word 2007.

To exit Compatibility Mode, you’ll need to convert the document to the current version type. However, if you’re collaborating with others who only have access to an earlier version of Word, it’s best to leave the document in Compatibility Mode so the format will not change.
You can review this support page from Microsoft to learn more about which features are disabled in Compatibility Mode.
To convert a document:
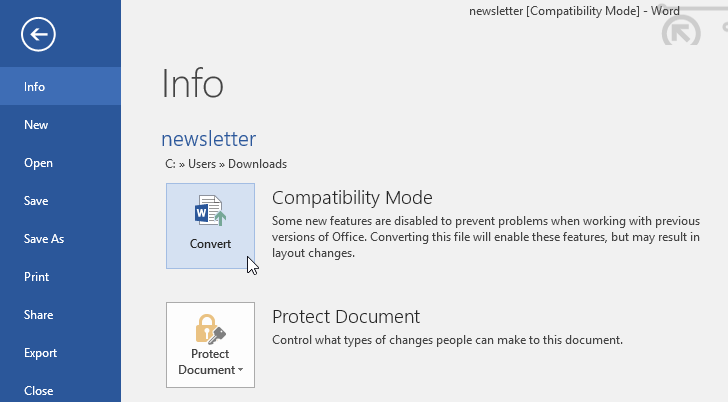
If you want access to the newer features, you can convert the document to the current file format.
- Click the File tab to access Backstage view, then locate and select the Convert command.
- A dialog box will appear. Click OK to confirm the file upgrade.
- The document will be converted to the newest file type.
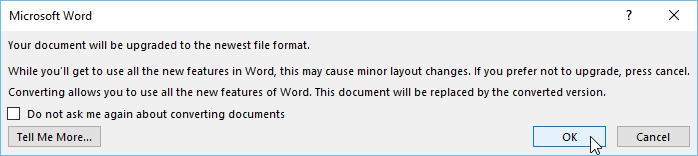
Converting a file may cause some changes to the original layout of the document.
Challenge!
- Open our practice document.
- Notice that the document opens in Compatibility Mode. Convert it to the current file format. If a dialog box appears asking if you would like to close and reopen the file in order to see the new features, choose Yes.
- In Backstage view, pin a file or folder.
/en/word/saving-and-sharing-documents/content/
Thanks to Microsoft Word, almost anyone can turn out professional-looking office documents.
Even if you’ve never used MS Word before, you’ll find that it only takes a few minutes to become familiar and comfortable with its interface and basic features.


Note: We used the Invoice template from Elements to create this letter. Find more great Word templates from Envato Elements.
In this tutorial, I’ll show you how to write a business letter in MS Word. In the process, you’ll learn the answers to the following:
- How to create a Word document?
- How do you save a file on Microsoft Word?
- How to open a new file in MS Word?
- How do you use a Word template?
- How do you copy a Word document?
By the end of the tutorial, you’ll be able to create your own document using Microsoft Word.
Launch Microsoft Word
Start by launching Microsoft Word. To use Microsoft Word online, you must have an Office 365 account (paid).
Sign in to your account, then click on Word.


How to Launch Microsoft Word on a Mac
If you’re on a Mac, you’ve got several options for launching Microsoft Word.
Option 1. Launch in Finder
Go to Applications, then double-click on Microsoft Word.


Note: In this tutorial, I’m using a Mac so that’s the interface you see. If you’re on Windows, the steps will be similar, albeit with different names for different applications and interfaces. For example, Finder on a Mac is either Windows Explorer or File Explorer on Windows, depending on which version you’re using.
Option 2. Launch in Spotlight.
Launch Spotlight by clicking on the search icon in the upper right-hand corner of the screen on your Mac.
![]()
![]()
![]()
A Spotlight search bar pops open. Type “Word.” Double-click on the Microsoft Word app that appears in the Spotlight results.


When you launch Microsoft Word for the first time, it automatically opens a new blank Word document. From here, you can proceed to make your business letter.
Otherwise, when prompted, select New > Blank Document > Create.


And that’s how to create a new document in MS Word.
Make a Business Letter From a Template
If you want your document to have a fancier layout, the fastest way is to start with a business letter template for Word made by a professional designer.
Word comes with its own built-in templates. You may wish to use one of these. But, keep in mind that many other Word users may use these templates. That means you may get a document that looks like someone else’s. What you want to do is to make a good impression and stand out. The best way to do that is with a template.
You could make a template yourself. But, unless you’re already familiar with the advanced features of Microsoft Word, creating a complicated layout would take you a lot of time.
In this section, I’m going to show you how to make a business letter from a template in Word. I’m using the Invoice template for Word from Envato Elements. It includes a template for a cover letter, which would work well with the business letter we’re making.


,
Step 1. Download the Template
Save the template to your hard drive. Duplicate it, so you’ll always have the original files on hand. These will come in handy in case you want to revert back to the original version of the template.


Most premium templates include a help file. Read it for specific instructions and tips from the template’s designer.


Step 2. Open the Template in Word
Launch Microsoft Word, then select Open. Follow the rest of the prompts to open the duplicate template file you created earlier.


Since I only need the letter template for Word, I’m going to delete the page with the invoice. Go to the invoice page, then click Edit > Select All.


Press the Delete key on your keyboard. Now, only the letter template page remains in the document.


Step 3. Customize the Letterhead Template for Word
Replace the placeholder text with your own. Double-click into the text boxes to type your own text. You may have to click-and-drag a corner of the text box to make it bigger and accommodate your text.


Delete any other text boxes and graphic elements you don’t want to use. Use the formatting tools to apply styles to your text and add a bullet list, as you learned to do in the previous section. Finally, insert your logo.
Since we’re not using the large signature, there’s a large space on the lower half of the letter. To balance the page, I moved the entire body of the letter lower on the page.
This is the business letter all done:
Next, I’m going to show you how to make a business letter without a template.
Make a Business Letter From Scratch
If you don’t need a professional appearance for your business letter or if it’s a personal letter, you can still make a business letter. With a new blank Word document open, type your business letter.


You’ve just created a business letter as a new Word document! As you’ll notice, it’s very plain.
However, you may wish to modify the document’s default settings in Word.
1. Change the Margins
Go to Format > Document.


Change the margins as you wish. Click OK.


2. Change the Font and Font Size
Highlight the text whose font you wish to change, then click the drop-down arrow for the font section of the Microsoft Word ribbon. Scroll down the list of fonts until you find the one you want to use. Click on it to apply the font to the selected text.


To change the font size, select the text you wish to edit. Click the drop-down arrow for the font size section of the ribbon (it’s beside the font selector). Click on the font size you want to apply.


3. Format the Text
It’s easy to apply formatting styles to your business letter. Highlight the text you want to format. Then, click on any of the formatting buttons on the Microsoft Word ribbon.


The text formatting section of the ribbon, shown above, lets you apply a variety of styles and effects on your text, including changing the color of the font. Hover over a button to learn what it’s for.
4. Add Bullets
It only takes one click to add a bulleted list in Microsoft Word. Take note that each item on the list must be typed on a separate line.
To create a bullet list, select the items for the list. Click on the Bullets button.


This applies a basic dot-bullet on your list, with default settings for indents.


If you want a different bullet character, after selecting the list text, click on the drop-down arrow beside the Bullets button. Choose a bullet style from the selection that appears.


Or, click Define New Bullet, then select a different bullet character.


Here, you can also change the bullet position and text position. When you’re done, click OK.
5. Insert Your Logo
Our business letter is looking good! The only thing missing is our logo.
To add a logo in the header of the letter, double-click on the top-most part of the document. This opens the header. Click the Picture from File button.


Find the logo file in your computer, then click Insert.
![]()
![]()
![]()
To exit the header, click the Header & Footer tab in the ribbon. Then select Close Header and Footer.


The logo appears greyed out when the Header section is closed. Don’t worry, it’ll display properly when you print the letter.
After moving the entire letter body down to add space below the logo, our business letter now looks like this:


You’ve just learned how to make a business letter from scratch using Microsoft Word.
How Do You Save a File in Microsoft Word?
Always save your work as you go! Otherwise, you run the risk of losing your work, should your computer shut off or crash unexpectedly. This section is for you if you’re asking: «how do you save a file on Microsoft Word?»
The quickest way is to click the Save button on the top of Microsoft Word.


Or, go to File > Save.


Alternatively, go to File > Save As to make a copy of the file.
If you’re saving the file for the first time, or if you selected Save As, you’ll be prompted to give the file a name and indicate where to save the file. When you’re done doing so, click Save.


You can also set up a default location where Word will save your files. To set this up, go to Word > Preferences.


Click File Locations.


Select AutoRecover files, then click Modify…


Choose a location on your computer for where you want your Word documents to be saved. Click Open.


The new location appears under File Locations. If it’s correct, close this dialogue box by clicking on the X in the upper-left corner.


From this point forward, the files you save will be placed in the location you specified.
There’s yet another way to save your Word files. Microsoft Word Autosave saves your work automatically every few seconds. To use Microsoft Word Autosave, you must:
- have an Office 365 account
- be logged into it when you use Word
- save your file in your OneDrive
To enable Microsoft Word Autosave, toggle the Autosave button on the top left corner of the screen.


How to Open a File in Word
You can open a saved MS Word file on a Mac in one of three ways:
Option 1. Use Spotlight
If you remember the file name, you can use Spotlight to find and open the file. Click on the Spotlight button in the upper-right hand corner of your screen. Type the file name in the Spotlight search box.


When the file appears in Spotlight, double-click on the file name. The file opens in MS Word.
Option 2. Use Finder
Launch Finder. Either use the Search bar to find the file or navigate to the file by going to its specific location.


Double-click on the file name to open the file.
Option 3. Use Microsoft Word
Here’s how to open a saved document in MS Word.
Launch Microsoft Word, then click on Recent to see a list of files you’ve worked on recently. Double-click on the file you wish to open.


Or, click on Open. Locate the file you want to open in your computer or cloud storage and select it. Click Open at the bottom of the dialog box.


Discover Great Word Graphic-Print Templates for 2019
As you can see, you can create an impressive document in Microsoft Word—even if you’re not a graphic designer, don’t want to hire one, or don’t want to spend hours designing a creative layout.
The answer is to start with a premium Word template. Envato Elements is a terrific source of graphic print templates for Microsoft Word. If you make many Word documents, you’ll love the unlimited downloads you get from Elements, all for one small subscription.
Aside from templates, you also get unlimited downloads of stock photos, graphics, logos, and fonts. It’s truly an amazing deal.
Here’s a sampling of the print templates for Word that you can find at Elements:
For those who only need the one-off document, GraphicRiver is another source of outstanding templates for Word. Here, you can find premium Word templates on a pay-per-use basis. That’s an economical option for those who don’t make a lot of print materials in Word.
Create Your Business Letter In Microsoft Word
In this tutorial, you learned how to create a Word document in the form of a business letter. You now know how to save a file on Microsoft Word, as well as how to open new and saved files. You’ve even picked up basic text formatting skills.
You’ve seen how to make a new document (such as a business letter) in Word from scratch. Or, you can create a new document with an advanced design by using a template for Word.
If you’re a power communicator who needs to churn out several documents, then look to Envato Elements for outstanding templates for MS Word. But, if your needs are few, then GraphicRiver may be the more logical place for you to find Word templates.
Updated: 11/18/2022 by
To create a document, you must either have a word processor for word processing or a computer capable of creating a document on an online service.
Note
When we refer to a «document,» we’re talking about a rich text document with text formatting (e.g., bold), images, different fonts, and font sizes, and not a plain text file. For steps on making a text-only file, see: How to create a text file.
The most common and widely used word processor program is Microsoft Word. However, because of all of the different needs of users today, we’ve included additional options that are available for creating a document.
Creating a document with Google Docs

Google Docs is one of our favorite solutions for most users, especially those who are new computers. The reasons we like it are because it’s free, easy to access, supports collaborative editing, can open other document files, and may be accessed from many devices. To create a document in Google Docs, follow the steps below.
Create a blank document
- Open Google Drive. If prompted, log into your Google account.
- In the upper-left corner of the window, click the
 button.
 - In the drop-down menu that appears, move your mouse cursor over the arrow next to Google Docs.
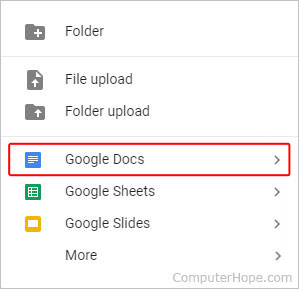
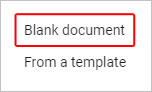
- Choose Blank document from the box that appears.
Create a document using a template
- Complete steps 1-3 in the previous section.
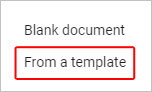
- Choose From a template in the box that appears.
- Select a template in the window that appears.
Tip
Your newly-created document may be accessed in the My Drive section (first tab in the left menu).


Creating a document with Microsoft Word
To use Microsoft Word to open a document, follow the steps below.
Open Word in Windows
- Open Microsoft Word. If you’re unsure how to open or find Word, skip to the finding Microsoft Word section.
- In newer versions of Word, the first screen asks what type of Word document you want to create. Select the «Blank document» option to create a document from scratch. You can also select from one of the Word templates provided if you want to create a specific type of document.
- Once the blank document or template is open, any new information can be entered using a keyboard or on-screen keyboard.
- Once complete or while working on the document, you can save through the File tab at the top of the Word program window.
How to find Microsoft Word in Windows
- In Windows, click Start.
- In the search box, type word. If Word is installed, it shows in the search results. For example, you may see Microsoft Word 2010, Microsoft Word 2013, or Microsoft Word 365.
Tip
In Windows 10, the search box is on the Taskbar next to Start. In Windows 8, start typing word on the Start page and the search results show on the right side of the screen.
Note
Word and WordPad are two different programs. See the creating a document with Microsoft WordPad section below for further information on this program.
How to install Microsoft Word
If Word is not found, it needs to be installed before it can run, or one of the other free alternatives can be used. Today, the latest version of Word is included in Office 365 and requires a subscription. You can download Office 365, which includes Excel, Word, and other Office applications, from the Office 365 website.
Tip
If you’ve purchased Office or Word in the past, older versions of Office can also be installed on newer computers, even those running Windows 8 or Windows 10. You must have the installation discs to install Office or Word again.
How to open a new document if a Microsoft Word document is already open
Press the shortcut keys Ctrl+N simultaneously to open a new document.
— OR —
- Click File in the file menu or the File tab at the top of the program window.
- Select the New option.
- A prompt should open that presents you with several options. Select the Blank document option.
Creating a document with Microsoft WordPad

Microsoft WordPad is a free rich-text editor included with Microsoft Windows for viewing and editing rich-text files (.RTF, .DOCX, and .ODT) files. WordPad can perform basic text formatting like changing the font, alignment, and inserting multimedia. However, realize that it does not support all formatting options in .DOCX and .ODT files, so some formatting may be incorrect. To open WordPad, follow the steps below.
- In Windows, click Start.
- In the search box, type wordpad and select the WordPad application in the search results. Once open, there should be a blank window similar to the example below.
Tip
In Windows 10, the search box is on the Taskbar next to Start. In Windows 8, start typing wordpad on the Start page and the search results show on the right side of the screen.
- Type and create the document how you want it to appear.
- After changes are made to your document, you can save the file in the File section.
If WordPad is already open and you want to create a new document
Press the shortcut keys Ctrl+N simultaneously to open a new document.
— OR —
In the menu bar, click File and select New. If the File tab or menu is not available, click the blue Menu tab ![]() in the top-left corner and select New from the drop-down menu.
in the top-left corner and select New from the drop-down menu.
Creating a document with LibreOffice and OpenOffice
LibreOffice and OpenOffice Writer are other great free products that allow anyone to create documents on their computer and can even support most of the features in Word. Below are the steps on how to run LibreOffice and OpenOffice in Windows.
Open LibreOffice and OpenOffice in Windows
- In Windows, click Start.
- In the search box, type writer. If LibreOffice or OpenOffice is installed, either LibreOffice Writer or OpenOffice Writer show in the search results.
Tip
In Windows 10, the search box is on the Taskbar next to Start. In Windows 8, start typing writer on the Start page and the search results show on the right side of the screen.
How to install LibreOffice or OpenOffice
LibreOffice is available for download on the LibreOffice website and OpenOffice is available for download on the OpenOffice website.
Once either of these programs are installed, you can follow the steps above to create a document.
Creating a document with AbiWord
AbiWord is another great free product and solution for creating documents on your computer. Below are the steps on how to create a document with AbiWord.
- Open AbiWord.
- Click File and New or press the shortcut Ctrl+N to create a new document.
- Type the document you want to create.
- Save the document by clicking File > Save or pressing the shortcut key Ctrl+S.
Создание нового документа Word или открытие существующего из кода VBA Excel. Методы Documents.Add и Documents.Open. Сохранение и закрытие документа.
Работа с Word из кода VBA Excel
Часть 2. Создание и открытие документов Word
[Часть 1] [Часть 2] [Часть 3] [Часть 4] [Часть 5] [Часть 6]
Новый документ Word создается из кода VBA Excel с помощью метода Documents.Add:
|
Sub Test1() Dim myWord As New Word.Application Dim myDocument As Word.Document Set myDocument = myWord.Documents.Add myWord.Visible = True End Sub |
Переменную myDocument можно объявить с типом Object, но тогда не будет ранней привязки к типу Word.Document и подсказок при написании кода (Auto List Members).
Открытие существующего документа
Существующий документ Word открывается из кода VBA Excel с помощью метода Documents.Open:
|
Sub Test2() Dim myWord As New Word.Application Dim myDocument As Word.Document Set myDocument = _ myWord.Documents.Open(«C:Документ1.docx») myWord.Visible = True End Sub |
Замените в этой процедуре строку «C:Документ1.docx» на адрес своего файла.
Подключение к открытому документу
Присвоение переменной ссылки на существующий экземпляр Word.Application осуществляется в VBA Excel с помощью функции GetObject:
|
Sub Test3() Dim myWord As Object, myDoc As Word.Document On Error GoTo Instr Set myWord = GetObject(, «Word.Application») Set myDoc = myWord.Documents(«Документ1.docx») myDoc.Range.InsertAfter «Добавляем новый текст, подтверждающий подключение к открытому документу.» Exit Sub Instr: MsgBox «Произошла ошибка: « & Err.Description End Sub |
Если открытого приложения Word нет, выполнение функции GetObject приведет к ошибке. Также произойдет ошибка, если не будет найден указанный документ (в примере — «Документ1.docx»).
Сохранение и закрытие документа
Сохранение нового документа
Чтобы сохранить из кода VBA Excel новый документ Word, используйте метод SaveAs2 объекта Document:
|
myDocument.SaveAs2 («C:Документ2.docx») |
Замените «C:Документ2.docx» на путь к нужному каталогу с именем файла, под которым вы хотите сохранить новый документ.
Сохранение изменений в открытом документа
Сохраняйте изменения в существующем документе с помощью метода Document.Save или параметра SaveChanges метода Document.Close:
|
‘Сохранение изменений документа myDocument.Save ‘Сохранение изменений документа ‘при закрытии myDocument.Close ‘по умолчанию True myDocument.Close True myDocument.Close wdSaveChanges ‘Закрытие документа без ‘сохранения изменений myDocument.Close False myDocument.Close wdDoNotSaveChanges |
Закрытие любого сохраненного документа
Метод Document.Close закрывает документ, но не приложение. Если работа с приложением закончена, оно закрывается с помощью метода Application.Quit.
Использование Word в приложениях на Visual Basic 6 открывает широчайшие возможности для создания профессионально оформленных документов (например отчетов). Это часто необходимо при работе в фирме или на предприятии для обеспечения документооборота. Основным преимуществом использования Wordа в этом случае является то, что практически на всех компьютерах, используемых в фирмах и на предприятиях установлены Windows и пакет Microsoft Office. Поэтому подготовленные документы Word не требуют каких-либо дополнительных усилий для их просмотра, печати и редактирования. Единственное что нужно помнить, это то что работа через автоматизацию OLE (связывание и внедрение объектов) на деле оказывается довольно медленной технологией, хотя и очень полезной.
Чтобы использовать объекты Word в Visual Basic , необходимо инсталлировать сам Word. После этого вы получаете в своё распоряжение библиотеку Microsoft Word Object Library, которую нужно подключить к текущему проекту через диалоговое окно «Разработать»>>»Ссылки» (References) и указать Microsoft Word 9.0 Object Library (для Word 2000).
Два самых важных объекта Word это Word.Application и Word.Document. Они обеспечивают доступ к экземпляру приложения и документам Word.
Поэтому в раздел Generals «Общее» формы введите следующий код для объявления объектных переменных приложения Word и документа Word.
Dim WordApp As Word.Application '  экземпляр приложения
Dim DocWord As Word.Document'  экземпляр документа
Чтобы создать новый экземпляр Word, введите такой код кнопки;
Private Sub Комманда1_Click()

'создаём  новый экземпляр Word-a
Set WordApp = New Word.Application

'определяем видимость Word-a по True - видимый,
'по False - не видимый (работает только ядро)
WordApp.Visible = True

'создаём новый документ в Word-e
Set DocWord = WordApp.Documents.Add

'// если нужно открыть имеющийся документ, то пишем такой код
'Set DocWord = WordApp.Documents.Open("C:DDD.doc")

'активируем его
DocWord.Activate

End Sub
Для форматирования печатной области документа используйте данный код:
(вообще-то Word использует для всех размеров своих элементов пункты, поэтому для использования других единиц измерения, необходимо использовать встроенные функции форматирования.)
Например:
- CentimetersToPoints(Х.ХХ) — переводит сантиметры в пункты.
- MillimetersToPoints(X.XX) — переводит миллиметры в пункты
Private Sub Комманда2_Click()

'отступ слева "2,0 сантиметра"
DocWord.Application.Selection.PageSetup.LeftMargin = CentimetersToPoints(2)

'отступ справа "1,5 сантиметра"
DocWord.Application.Selection.PageSetup.RightMargin = CentimetersToPoints(1.5)

'отступ сверху "3,5 сантиметра"
DocWord.Application.Selection.PageSetup.TopMargin = CentimetersToPoints(3.5)

'отступ снизу "4,45 сантиметра"
DocWord.Application.Selection.PageSetup.BottomMargin = CentimetersToPoints(4.45)

End Sub
Небольшое отступление.
Для того чтобы в своём приложении не писать постоянно одно и тоже имя объекта, можно использовать оператор With.
Например код находящейся выше можно переписать так:
With DocWord.Application.Selection.PageSetup
.LeftMargin = CentimetersToPoints(2)
.RightMargin = CentimetersToPoints(1.5)
.TopMargin = CentimetersToPoints(3.5)
.BottomMargin = CentimetersToPoints(4.45)
End With
Если вам необходимо создать документ Word с нестандартным размером листа, то используйте данный код:
With DocWord.Application.Selection.PageSetup
.PageWidth = CentimetersToPoints(20)    'ширина листа (20 см)
.PageHeight = CentimetersToPoints(25)   'высота листа (25 см)
End With
Данный код меняет ориентацию страницы (практически меняет местами значения ширины и высоты листа):
DocWord.Application.Selection.PageSetup.Orientation = wdOrientLandscape
- wdOrientLandscape — альбомная ориентация ( число 1)
- wdOrientPortrait — книжная ориентация ( число 0)
Для сохранения документа под новым именем и в определенное место
используйте данный код код:
'сохраняем документ как
DocWord.SaveAs "c:DDD.doc"
После такого сохранения вы можете про ходу работы с документом сохранять его.
'сохраняем документ
DocWord.Save
Или проверить, были ли сохранены внесенные изменения свойством Saved и если изменения не были сохранены — сохранить их;
If DocWord.Saved=False Then DocWord.Save
Завершив работу с документом, вы можете закрыть сам документ методом Close и сам Word методом Quit.
'закрываем документ (без запроса на сохранение)
DocWord.Close True

'закрываем Word (без запроса на сохранение)
WordApp.Quit True

'уничтожаем обьект - документ
Set DocWord = Nothing

'уничтожаем обьект - Word
Set WordApp = Nothing
Если в методах Close и Quit не использовать необязательный параметр True то Word запросит согласие пользователя (если документ не был перед этим сохранён) на закрытие документа.
Если вам необходимо оставить Word открытым, просто не используйте методы Close и Quit.
Если вам необходимо поставить пароль на документ, то используйте код:
DocWord.Protect wdAllowOnlyComments, , "123456789"
Пример программы можно скачать здесь.

Большинству операций, выполняемых программным способом, есть эквиваленты в пользовательском интерфейсе (UI), доступные как команды в меню и на панелях инструментов. Также существует нижележащая архитектура, обеспечивающая поддержку команд, выбираемых из UI. Всякий раз, когда вы создаете новый документ Word, он базируется на каком-либо шаблоне; расширение файлов шаблонов «.dot», а файлы документов – «.doc». Шаблон Word может содержать текст, код, стили, панели инструментов, элементы автотекста, комбинации клавиш для быстрого доступа к командам. Новый документ связывается с шаблоном и получает полный доступ к его элементам. Если вы не указываете конкретный шаблон, новый документ создается на основе стандартного шаблона «Normal.dot», который устанавливается при установке Word).
Шаблон Normal.dot является глобальным, он доступен любому документу, который вы создаете. Вы могли бы при желании поместить весь свой код в Normal.dot и создавать все документы в своей среде на основе собственного шаблона Normal (Обычный). Но тогда его файл мог бы стать чрезмерно большим, поэтому более эффективное решение для многих разработчиков — создание собственных шаблонов для конкретных приложений. В документах, создаваемых на основе вашего шаблона, код из стандартного шаблона Normal по-прежнему будет доступен. При необходимости можно связывать документ с несколькими шаблонами в дополнение к шаблону Normal.
Для работы с приложением Microsoft Word в .NET, используется объект Application, который является предком всех остальных объектов. Получив на него ссылку, вы можете работать с его методами и свойствами. Этот объект предоставляет большой набор методов и свойств, позволяющих программным путем управлять Microsoft Word. Код инициализации нового объекта Application, представлен ниже.
Microsoft.Office.Interop.Word.Application winword =
  new Microsoft.Office.Interop.Word.Application();
Чтобы открыть существующий документ или создать новый, необходимо создать новый объект Document.
object missing = System.Reflection.Missing.Value;
Microsoft.Office.Interop.Word.Document document =
     winword.Documents.Add(ref missing, ref missing, ref missing, ref missing);
Выполняя какую-либо операцию в пользовательском интерфейсе Word (например, добавляя верхний колонтитул), вы выделяете соответствующую секцию, используя объект «Selection», определяющий текущую позицию «невидимого» курсора и применяете к ней новый параметр форматирования с использованием объекта «Range». Данный объект представляет область в документе и может включать в себя все что угодно — от пары символов, до таблиц, закладок и много другого. Вы не ограничены одним объектом «Range» — в одном документе можно определить сразу несколько таких объектов.
//Добавление верхнего колонтитула
foreach (Microsoft.Office.Interop.Word.Section section in document.Sections)
{
    Microsoft.Office.Interop.Word.Range headerRange =
    section.Headers[Microsoft.Office.Interop.Word.WdHeaderFooterIndex.wdHeaderFooterPrimary].Range;
    headerRange.Fields.Add(headerRange, Microsoft.Office.Interop.Word.WdFieldType.wdFieldPage);
    headerRange.ParagraphFormat.Alignment =
    Microsoft.Office.Interop.Word.WdParagraphAlignment.wdAlignParagraphCenter;
    headerRange.Font.ColorIndex = Microsoft.Office.Interop.Word.WdColorIndex.wdBlue;
    headerRange.Font.Size = 10;
    headerRange.Text = "Верхний колонтитул" + Environment.NewLine + "www.CSharpCoderR.com";
}

//Добавление нижнего колонтитула
foreach (Microsoft.Office.Interop.Word.Section wordSection in document.Sections)
{
    Microsoft.Office.Interop.Word.Range footerRange =
   wordSection.Footers[Microsoft.Office.Interop.Word.WdHeaderFooterIndex.wdHeaderFooterPrimary].Range;

    footerRange.Font.ColorIndex = Microsoft.Office.Interop.Word.WdColorIndex.wdDarkRed;
    footerRange.Font.Size = 10;
    footerRange.ParagraphFormat.Alignment =
    Microsoft.Office.Interop.Word.WdParagraphAlignment.wdAlignParagraphCenter;
    footerRange.Text = "Нижний колонтитул" + Environment.NewLine + "www.CSharpCoderR.com";
}
Чтобы добавить текст в документ, необходимо указать позицию для вставки и сам текст.
//Добавление текста в документ
document.Content.SetRange(0, 0);
document.Content.Text = "www.CSharpCoderR.com" + Environment.NewLine;
Так же вы можете применить к тексту определенный стиль.
//Добавление текста со стилем Заголовок 1
Microsoft.Office.Interop.Word.Paragraph para1 = document.Content.Paragraphs.Add(ref missing);
object styleHeading1 = "Заголовок 1";
para1.Range.set_Style(styleHeading1);
para1.Range.Text = "Исходники по языку программирования CSharp";
para1.Range.InsertParagraphAfter();
В классе Microsoft.Office.Interop.Word.Document, присутствует коллекция «Tables», которая позволяет добавить таблицу в документ с использованием метода Add.
//Создание таблицы 5х5
Table firstTable = document.Tables.Add(para1.Range, 5, 5, ref missing, ref missing);

firstTable.Borders.Enable = 1;
foreach (Row row in firstTable.Rows)
{
    foreach (Cell cell in row.Cells)
    {
        //Заголовок таблицы
        if (cell.RowIndex == 1)
        {
            cell.Range.Text = "Колонка " + cell.ColumnIndex.ToString();
            cell.Range.Font.Bold = 1;
            //Задаем шрифт и размер текста
            cell.Range.Font.Name = "verdana";
            cell.Range.Font.Size = 10;
            cell.Shading.BackgroundPatternColor = WdColor.wdColorGray25;
            //Выравнивание текста в заголовках столбцов по центру
            cell.VerticalAlignment =
                 WdCellVerticalAlignment.wdCellAlignVerticalCenter;
            cell.Range.ParagraphFormat.Alignment =
                 WdParagraphAlignment.wdAlignParagraphCenter;
        }
        //Значения ячеек
        else
        {
            cell.Range.Text = (cell.RowIndex - 2 + cell.ColumnIndex).ToString();
        }
    }
}
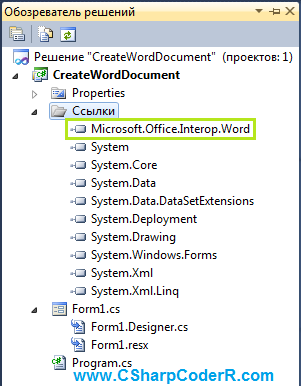
Для функционирования описанного выше кода, необходимо добавить к текущему проекту объектную библиотеку MS Word. Перейдите в меню «Проект» и выберете команду «Добавить ссылку» или в обозревателе решений, найдите пункт «Ссылки» и сделайте клик правой клавишей мыши по нему, из появившегося контекстного меню выберете соответствующий пункт.

В открывшемся окне «Добавить ссылку», перейдите на вкладку «COM» и выберете «Microsoft Word 14.0 Object Library» из предложенного списка библиотек.
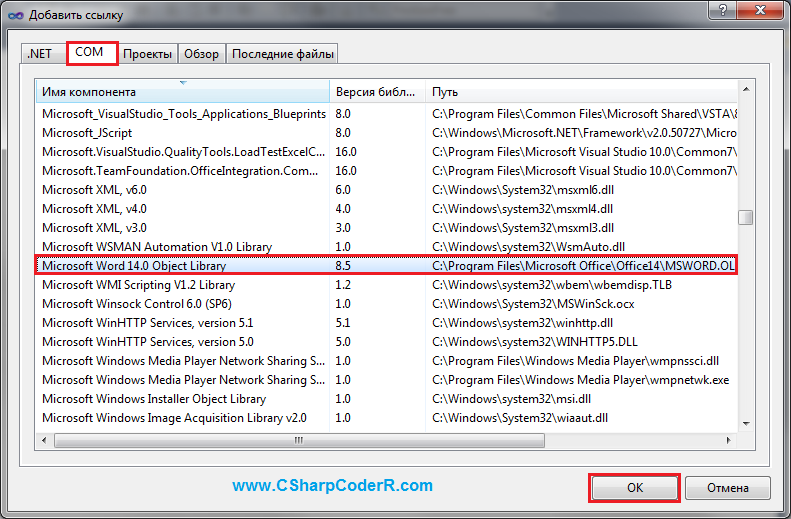
В обозревателе решений у вас появится ссылка на данную библиотеку.
Перейдите в конструктор главной формы и добавьте из панели элементов, командную кнопку «Button». Данный элемент необходим для запуска процесса создания документа и вызов MS Word для отображения.

Сделайте двойной клик левой клавишей мыши по элементу «Button» и вы перейдете в автоматически созданный метод события «button1_Click». Добавьте в него приведенный ниже код.
try
{
    Microsoft.Office.Interop.Word.Application winword =
        new Microsoft.Office.Interop.Word.Application();

    winword.Visible = false;

    //Заголовок документа
    winword.Documents.Application.Caption = "www.CSharpCoderR.com";

    object missing = System.Reflection.Missing.Value;

    //Создание нового документа
    Microsoft.Office.Interop.Word.Document document =
        winword.Documents.Add(ref missing, ref missing, ref missing, ref missing);

    //добавление новой страницы
    //winword.Selection.InsertNewPage();

    //Добавление верхнего колонтитула
    foreach (Microsoft.Office.Interop.Word.Section section in document.Sections)
    {
        Microsoft.Office.Interop.Word.Range headerRange = section.Headers[
        Microsoft.Office.Interop.Word.WdHeaderFooterIndex.wdHeaderFooterPrimary].Range;
        headerRange.Fields.Add(
       headerRange, Microsoft.Office.Interop.Word.WdFieldType.wdFieldPage);
        headerRange.ParagraphFormat.Alignment =
       Microsoft.Office.Interop.Word.WdParagraphAlignment.wdAlignParagraphCenter;
        headerRange.Font.ColorIndex =
       Microsoft.Office.Interop.Word.WdColorIndex.wdBlue;
        headerRange.Font.Size = 10;
        headerRange.Text = "Верхний колонтитул" + Environment.NewLine + "www.CSharpCoderR.com";
    }

    //Добавление нижнего колонтитула
    foreach (Microsoft.Office.Interop.Word.Section wordSection in document.Sections)
    {
        //
        Microsoft.Office.Interop.Word.Range footerRange =
wordSection.Footers[Microsoft.Office.Interop.Word.WdHeaderFooterIndex.wdHeaderFooterPrimary].Range;
        //Установка цвета текста
        footerRange.Font.ColorIndex = Microsoft.Office.Interop.Word.WdColorIndex.wdDarkRed;
        //Размер
        footerRange.Font.Size = 10;
        //Установка расположения по центру
        footerRange.ParagraphFormat.Alignment =
            Microsoft.Office.Interop.Word.WdParagraphAlignment.wdAlignParagraphCenter;
        //Установка текста для вывода в нижнем колонтитуле
        footerRange.Text = "Нижний колонтитул" + Environment.NewLine + "www.CSharpCoderR.com";
    }

    //Добавление текста в документ
    document.Content.SetRange(0, 0);
    document.Content.Text = "www.CSharpCoderR.com" + Environment.NewLine;

    //Добавление текста со стилем Заголовок 1
    Microsoft.Office.Interop.Word.Paragraph para1 = document.Content.Paragraphs.Add(ref missing);
    object styleHeading1 = "Заголовок 1";
    para1.Range.set_Style(styleHeading1);
    para1.Range.Text = "Исходники по языку программирования CSharp";
    para1.Range.InsertParagraphAfter();

    //Создание таблицы 5х5
    Table firstTable = document.Tables.Add(para1.Range, 5, 5, ref missing, ref missing);

    firstTable.Borders.Enable = 1;
    foreach (Row row in firstTable.Rows)
    {
        foreach (Cell cell in row.Cells)
        {
            //Заголовок таблицы
            if (cell.RowIndex == 1)
            {
                cell.Range.Text = "Колонка " + cell.ColumnIndex.ToString();
                cell.Range.Font.Bold = 1;
                //Задаем шрифт и размер текста
                cell.Range.Font.Name = "verdana";
                cell.Range.Font.Size = 10;
                cell.Shading.BackgroundPatternColor = WdColor.wdColorGray25;
                //Выравнивание текста в заголовках столбцов по центру
                cell.VerticalAlignment =
                WdCellVerticalAlignment.wdCellAlignVerticalCenter;
                cell.Range.ParagraphFormat.Alignment =
                WdParagraphAlignment.wdAlignParagraphCenter;
            }
            //Значения ячеек
            else
            {
                cell.Range.Text = (cell.RowIndex - 2 + cell.ColumnIndex).ToString();
            }
        }
    }
    winword.Visible = true;
}
catch (Exception ex)
{
    MessageBox.Show(ex.Message);
}
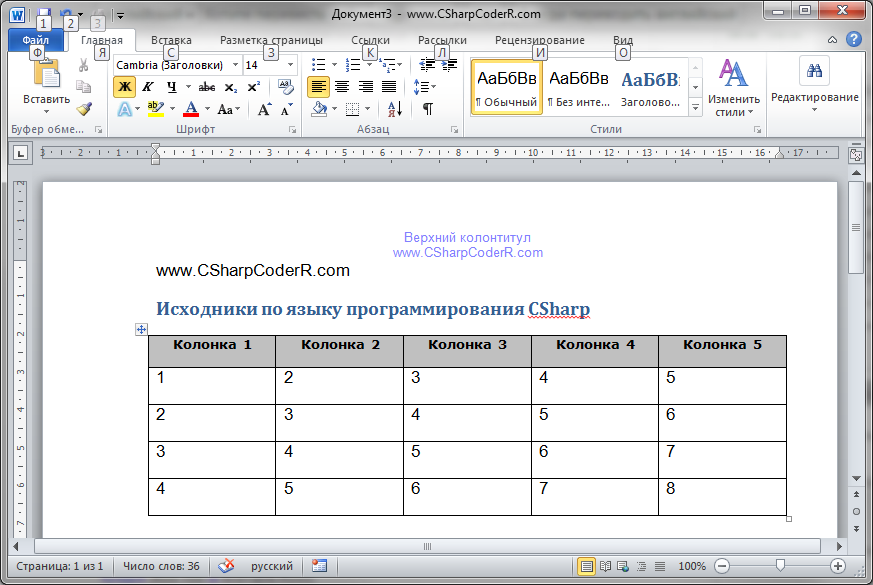
Запустите ваш проект, нажав на клавиатуре, клавишу «F5». Нажмите на единственную кнопку, расположенную на главной форме вашего проекта. У вас автоматически откроется документ Microsoft Word с заполненным верхним и нижним колонтитулом, обычным и с применением стиля текстом, а так же заполненной таблицей.
Для сохранения документа в определенной директории, добавьте приведенный ниже код, после строки «winword.Visible = true;».
//Сохранение документа
object filename = @"d:temp1.docx";
document.SaveAs(ref filename);
//Закрытие текущего документа
document.Close(ref missing, ref missing, ref missing);
document = null;
//Закрытие приложения Word
winword.Quit(ref missing, ref missing, ref missing);
winword = null;
При работе с приложением Word в памяти компьютера создается отдельный процесс, если его не закрыть или не вывести созданный документ на экран, то он будет работать до выключения компьютера. Так же при постоянной работе с такими документами, их процессы будут накапливаться незаметно для пользователя, что может привести к зависанию компьютера или другим последствиям.
Наконец то я смогу написать статью с примерами. Дело в том, что ключевым компонентом объектной модели Word является не сам объект Word.Application, а коллекция Documents, так как именно она предоставляет два ключевых метода – для создания и открытия документа Word. Конечно, у коллекции Word Documents есть и другие методы и свойства, но они не столь важны. И поэтому, мы рассмотрим только самые основные.
Сама по себе коллекция Documents хранит в себе набор всех объектов Document, которые в свою очередь позволяют работать с каждым экземпляром документа в отдельности. Я буду приводить примеры как в самом редакторе VBA, как и с помощью сценариев Windows Scrip Host.
Единственно свойство, которое позволяет узнать общее количество элементов коллекции является Count:
Count – содержит количество открытых в данный момент документов.
Для примера, откройте несколько word документов и в редакторе VBA пропишите следующий код (просто создайте новый модуль):
For Each objDoc In Documents
    DocName = DocName & objDoc.Name & vbCrLf
Next
MsgBox DocName

DocName = ""

For j = 1 To Documents.Count
    DocName = DocName & Documents.Item(j).Name & vbCrLf
Next

MsgBox DocName
В данном случае мы использовали два способа бля работы с коллекцией:
- Использовали цикл for each для обработки коллекции
- Использовали свойство count для определения количества элементов в коллекции Documents.
Оба способа позволяют получить имена всех документов открытых в данный момент.
Однако, если мы попробуем проделать аналогичный фокус в сценарии Windows script Host, то никакого результата не получим:
' -----------------------------------------------------
' Получение имени открытых документов
' documents-count.vbs
' -----------------------------------------------------
Option Explicit

dim objWord, objDoc, oDoc, DocName

Set objWord = CreateObject("Word.Application")
Set objDoc = objWord.Documents

For Each oDoc In objDoc
    DocName = DocName & oDoc.Name & vbCrLf
Next

MsgBox DocName
objWord.Quit
// ------------------------------------------------
// Получение имени открытых документов
// documents-count.js
// ------------------------------------------------

var objWord, objDoc, oDoc, DocName;

objWord = WScript.CreateObject("Word.Application");
objDoc = new Enumerator(objWord.Documents);

for (; !objDoc.atEnd(); objDoc.moveNext()){
    DocName += objDoc.item().Name+ "n";
}

WScript.Echo(DocName);
objWord.Quit();
Видимо из внешнего сценария мы можем обработать только ту коллекцию, которую создали тут же.
Методы коллекции Word Documents
Хорошо, теперь давайте рассмотрим некоторые методы коллекции Word Documents, один из методов мы уже использовали выше (Item).
Add(Template, NewTemplate, DocumentType, Visible) – отвечает за создание нового документа, который сразу же открывается, можно выполнить метод без параметров. Параметры:
- Template – задает шаблон для нового документа
- NewTemplate – определяет, сделать ли новый документ шаблоном (TRUE) или нет (FALSE)
- DocumentType – позволяет задать тип создаваемого документа, возможные значения: wdNewBlankDocument, wdNewEmailMessage, wdNewFrameset или wdNewWebPage (новый чистый документ, значение по умолчанию).
- Visible – видимость нового документа (TRUE или FALSE).
При отсутствии параметров, будет создан чистый документ на основе шаблона Normal.dot.
Обратите внимание, что свойство Visible есть и у объекта Word Application, там оно позволяет показать или скрыть все экземпляры объекта Application.
Ниже привожу пример, сценария, в котором создается пять документов, выводится их количество и далее они закрываются:
' --------------------------------------------
' Создание документов word
' Application Documents Word
' documents-add-word.
' --------------------------------------------
Option Explicit

dim objWord, objDoc, i

' Создаем ссылку на объект Word.Application
Set objWord = CreateObject("Word.Application")
' Создаем ссылку на объект Documents
Set objDoc = objWord.Documents
' Делаем видимым приложение Word
objWord.Visible = True

' Создаем пять документов
for i=1 to 5
     objDoc.Add
Next

' Выводим количество созданных документов
MsgBox "Количество документов " & objDoc.Count

'Закрываем все документы Word
objWord.Quit
// --------------------------------------------
// Создание документов word
// Application Documents Word
// documents-add-word.js
// --------------------------------------------

var objWord, objDoc, i;

// Создаем ссылку на объект Word.Application
objWord = WScript.CreateObject("Word.Application");
// Создаем ссылку на объект Documents
objDoc = objWord.Documents;
// Делаем видимым приложение Word
objWord.Visible = true;

// Создаем пять документов
for (i=1; i<=5; i++){
     objDoc.Add();
}

// Выводим количество созданных документов
WScript.Echo ("Количество документов " + objDoc.Count);

//Закрываем все документы Word
objWord.Quit()
Item(index) переход к заданному элементу коллекции по его индексу. Значение индекса можно задавать как через метод, так и через коллекцию, так как метод Item используется по умолчанию. Следующие две строки кода являются эквивалентными:
Application.Documents(3)
Application.Documents.Item(3)
' -------------------------------------------
' Обработка коллекции документов
' Application Documents Word
' documents-count-word.vbs
' -------------------------------------------
Option Explicit

dim objWord, objDoc, i, j, objInfo
' вызываем процедуру CreateDoc
Call CreateDoc

objInfo = "Имя:" & vbCrLf

' Начинаем перебор коллекции Documents
for j=1 to objDoc.Count
     objInfo = objInfo & objDoc.Item(j).Name & vbCrLf
Next

' Выводим имена созданных документов
MsgBox objInfo

'Закрываем все документы Word
objWord.Quit

Sub CreateDoc
     Set objWord = CreateObject("Word.Application")
     Set objDoc = objWord.Documents
     objWord.Visible = True

     for i=1 to 5
                 objDoc.Add
     Next
End Sub
// -----------------------------------------
// Обработка коллекции документов
// Application Documents Word
// documents-count-word.js
// -----------------------------------------

var objWord, objDoc, i, j, objInfo
CreateDoc()
objInfo = "Имя:n";

// Начинаем перебор коллекции Documents
for (j=1; j<=objDoc.Count; j++){
     objInfo += objDoc.Item(j).Name + "n";
}

// Выводим имена созданных документов
WScript.Echo(objInfo);

//Закрываем все документы Word
objWord.Quit()

function CreateDoc(){
     objWord = WScript.CreateObject("Word.Application");
     objDoc = objWord.Documents;
     objWord.Visible = true;

     for (i=1; i<=5; i++){
                 objDoc.Add();
     }
}
Open(FileName, ConfirmConversions, ReadOnly, AddToRecentFiles, PasswordDocument, PasswordTemplate, Revert, WritePasswordDocument, WritePasswordTemplate, Format) – открыть заданный документ
- FileName – только этот параметр является обязательным, содержит путь к файлу, если надо открыть несколько документов, то имена разделяются пробелами.
- ConfirmConversions – содержит логическое значение, определяющее, надо ли отображать (TRUE) или нет (FALSE) отображать диалоговое окно Convert File, если документ записан не в формате Word.
- ReadOnly – определяет, открывать ли документ только для чтения (значение TRUE).
- AddToRecentFiles – если значение TRUE, то документ добавляется к списку файлов внизу меню Файл.
- PasswordDocument, PasswordTemplate – пароль к документу или пароль к шаблону, соответственно. Application Documents Word.
- Revert – если данный параметр содержит значение TRUE, то при попытке открыть уже открытый документ, сделанные в нем изменения не будут сохраняться. Если значение FALSE – произойдет простая активизация документа.
- WritePasswordDocument – пароль, который запрашивается при сохранении документа.
- WritePasswordTemplate — пароль, который запрашивается при сохранении шаблона.
- Format – параметр содержит параметр для преобразования файла. Значения: wdOpenFormatAuto (по умолчанию), wdOpenFormatDocument, wdOpenFormatRTF, wdOpenFormatTemplate, wdOpenFormatText, wdOpenFormatUnicodeText.
Save() и Close() – сохранение и закрытие (соответственно) всех документов в заданной коллекции.
В этом примере показано, как заставить C# создать документ Word. Сначала откройте диалоговое окно «Добавить ссылки». На вкладке COM выберите «Библиотека объектов Microsoft Word 14.0» (или любую другую версию, установленную в вашей системе).
Добавьте следующий с помощью оператора, чтобы упростить работу с пространством имен Word. Часть Word = означает, что вы можете использовать Word как псевдоним для пространства имен.
using Word = Microsoft.Office.Interop.Word;
В этом примере используется следующий код для создания нового документа Word и добавления в него текста.
// Создаем документ Word.
private void btnGo_Click (отправитель объекта, EventArgs e)
{
// Получить объект приложения Word.
Word._Application word_app = new Word.ApplicationClass ();// Сделать Word видимым (необязательно).
word_app.Visible = true;// Создаем документ Word.
object missing = Type.Missing;
Word._Document word_doc = word_app.Documents.Add (
ref missing, ref missing, ref missing, ref missing);// Создаем абзац заголовка.
Word.Paragraph para = word_doc.Paragraphs.Add (ref missing);
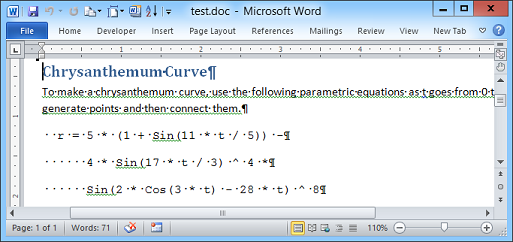
para.Range.Text = "Кривая хризантемы";
object style_name = "Заголовок 1";
para.Range.set_Style (ref style_name);
para.Range.InsertParagraphAfter ();// Добавить текст.
para.Range.Text = «Сделать кривую хризантемы» +
«используйте следующие параметрические уравнения, когда t идет» +
"от 0 до 21 *? для генерации" +
«точки, а затем соединить их»;
para.Range.InsertParagraphAfter ();// Сохраним текущий шрифт и начнем с использования Courier New.
string old_font = para.Range.Font.Name;
para.Range.Font.Name = "Courier New";// Добавим уравнения.
para.Range.Text =
"r = 5 * (1 + Sin (11 * t / 5)) - n" +
«4 * Sin (17 * t / 3) ^ 4 * n" +
«Sin (2 * Cos (3 * t) - 28 * t) ^ 8 n" +
"x = r * Cos (t) n" +
"y = r * Sin (t)";// Начнем новый абзац, а затем
// вернемся к исходному шрифту.
para.Range.InsertParagraphAfter ();
para.Range.Font.Name = old_font;// Сохраним документ.
object filename = Path.GetFullPath (
Path.Combine (Application.StartupPath, ".. \ ..")) +
"\ test.doc";
word_doc.SaveAs(ref filename, ref missing, ref missing,
ref missing, ref missing, ref missing, ref missing,
ref missing, ref missing, ref missing, ref missing,
ref missing, ref missing, ref missing, ref missing,
ref missing);// Закрыть.
object save_changes = false;
word_doc.Close (ref save_changes, ref missing, ref missing);
word_app.Quit (ref save_changes, ref missing, ref missing);
}
…
В этом примере видится сервер Word. В реальном приложении вы можете захотеть сохранить его скрытым.
Объектная модель Word использует множество вызовов методов, которые по какой-то причине принимают множество параметров по ссылке, даже если они не изменяются методами. Это означает, что вы должны поместить значения для этих параметров в переменные. Например, вы не можете использовать true как логический параметр, потому что вы не можете передавать константу по ссылке. Аналогично, вы не можете использовать литеральную строку, такую как C: wherever test.doc для имени файла, который вы открываете, потому что это не назначаемая переменная.
Код создает специальную переменную с именем missing, которая имеет значение Type.Missing. Код может использовать это значение для любых необязательных параметров, которые ему не нужно передавать методам Word. Затем программа использует его при вызове вызова Documents.Add сервера Word, который создает новый документ Word.
Теперь программа начинает добавлять текст в документ. Он добавляет объект Paragraph к коллекции документа Paragraphs.
Одним из наиболее важных объектов в Word является Range. A Диапазон представляет собой кусок документа. Код устанавливает текст нового абзаца в «Кривую хризантемы». Затем он устанавливает стиль объекта Range в «Заголовок 1.». Снова обратите внимание на нечетный способ, которым он должен поместить значение в переменную перед вызовом set_Style, чтобы он мог передавать имя стиля по ссылке.
Затем код вызывает метод Range объекта InsertParagraphAfter. Это добавляет метку абзаца после текущего текста объекта Range и обновляет Range, чтобы перейти к новому абзацу. Теперь Range готов добавить больше текста после первого абзаца.
Код снова устанавливает текст объекта Range для добавления нового текста и вызовов InsertParagraphAfter снова.
Далее код добавляет некоторый текст, отформатированный как код с шрифтом Courier New. Он сохраняет имя текущего шрифта и устанавливает шрифт объекта Range в Courier New. С этого момента новый текст будет иметь этот шрифт.
Код снова устанавливает текст объекта Range и добавляет новый знак абзаца. Затем он восстанавливает исходное имя шрифта, поэтому будущий текст будет в исходном шрифте.
Затем код вызывает метод SaveAs документа Word для сохранения нового документа. Это перезаписывает любой существующий файл с этим именем без предупреждения. Если вы хотите убедиться, что файл еще не существует, используйте File.Exists для проверки.
Наконец, код закрывает документ Word и приложение Word.
Источник: http://csharphelper.com/blog/2014/11/create-a-word-document-in-c/