
What is a Word add-in?
Word add-in is a user developed application that can be integrated with Microsoft word and can interact with the content of the document using the word javascript API.
What can we do using Microsoft word add-in?
- Adding different type of content to document
- bring external data in to office
- automate office documents
- Add breaks (line break, paragraph break etc)
- Text formatting (highlight, bold etc..)
- custom search options
- embed maps ,charts.
- Custom Ui design with fabric and many more things.
Why we use Word add-ins?
Some times our Requirements does not fulfil with pre-defined functions of the Microsoft word. At that time we can easily build functions as we needed and can integrate with those in to the Microsoft word. And office web add-ins are cross platform , So that we can run in office for windows, Mac, ios and office online.
How to start a project?
We can easily create word add-in using visual studio. In this tutorial I am using Microsoft visual studio 2015
Start new project and then select Templates -> visual c# -> office/sharepoint -> web add-ins -> word add-ins

if you do not see these templates, then you need to download office developer tools for visual studio 2015.
After creating your project, you will see lot of files. Office add-in consists with two main components.
Components of office add-in

Manifest
This is a xml file. This file consist of settings and configuration of the add-in. You can change the display name etc in that file
In the solution explorer we can see these files, under test-add-in part. You can see the manifest. open that file and see the xml contents.

 <DefaultSettings>
 <SourceLocation DefaultValue="~remoteAppUrl/Home.html" />
 </DefaultSettings>
Actually in a word add-in, a html file is loaded in to the task pane of the Microsoft word. You can see the configuration for that part in above code. In the <sourceLocation> tag we have set the Home.html file as the default html view.
Webpage
In the solution explorer we can see these files, under test add in web part. There are two main files under web app. Those are home.html and home.js.

In the home.html we write normal html that we all know to design the content of the task pane. In the Home.js, we write functions to handle the word web add in.we will se how to write our own function in a later post.
How to run the project ?
Click run arrow in visual studio to see the word web add-in. Then It will automatically generate self sign certificate and you will be asked to trust it.

Your html files are hosted in localhost. To load html file to Microsoft word, you need to trust the domain in your browser settings. You can see this is a self sign certificate because of issued-by and issued-to are from same person. Click yes, then you will not face certificate problems.
This certificate is only for testing purposes. We will see how to deploy project in a later post.
Then It will open Microsoft word automatically and you can see a task pane like this

OMG!. we have build our first web add-in successfully. This is the default template we will get into the task pane at we run the default project. we can change those things and add new contents as we like. According to this template we can display the selected word in the task pane. Try it your self.
In the next post, we will see how to customise and how to create our own design with the word add-in.

In this series, I want to create a custom Word Add-In and then start to build a set of REST API that are deployed as AWS Lambda functions that will allow us to Save As New, Check-Out, Check-In, Save, Release, Revise, Search and Open a word document that utilizes the AWS S3 bucket as the storage medium. Of course we will also have to create a series of database tables to manage the life-cycle of the data, and build a WPF client side application to go along with it.
In this blog we will create the Custom Word Add-in and then the following blogs will focus on each function in turn until we have a fully functioning application.

Visual Studio Solution
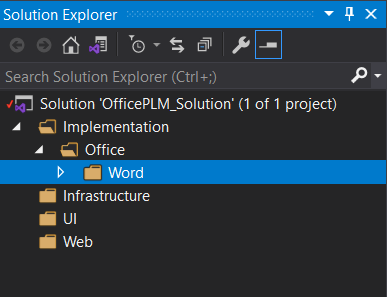
The first thing we need to do is create a new Visual Studio Solution and add the following Solution Folders. This may not be the final structure but its a good start.
Visual Studio Project
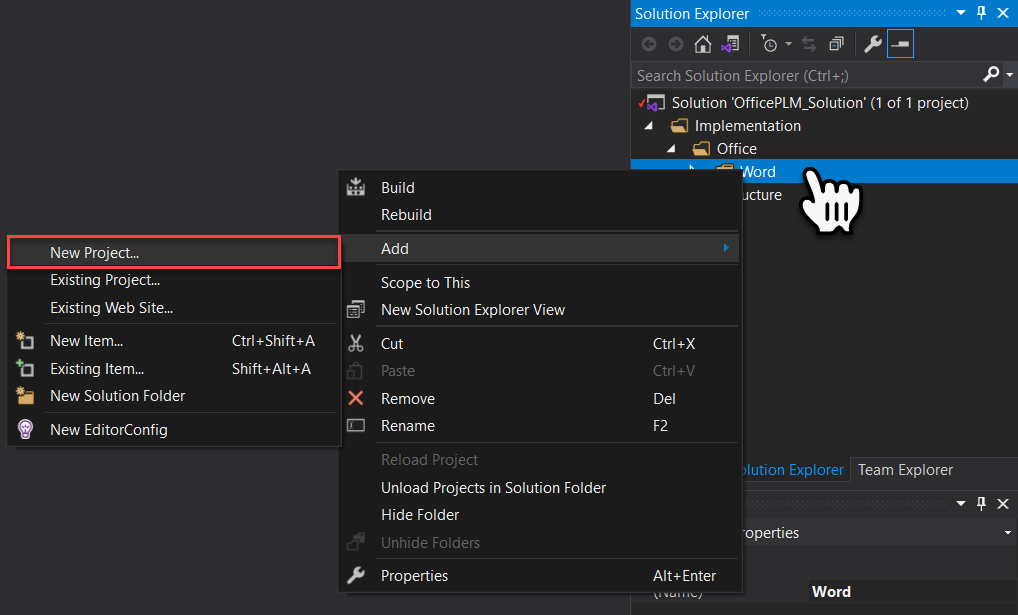
On the Word Solution Folder, Right Mouse click and select New Project from the secondary contextual menu.
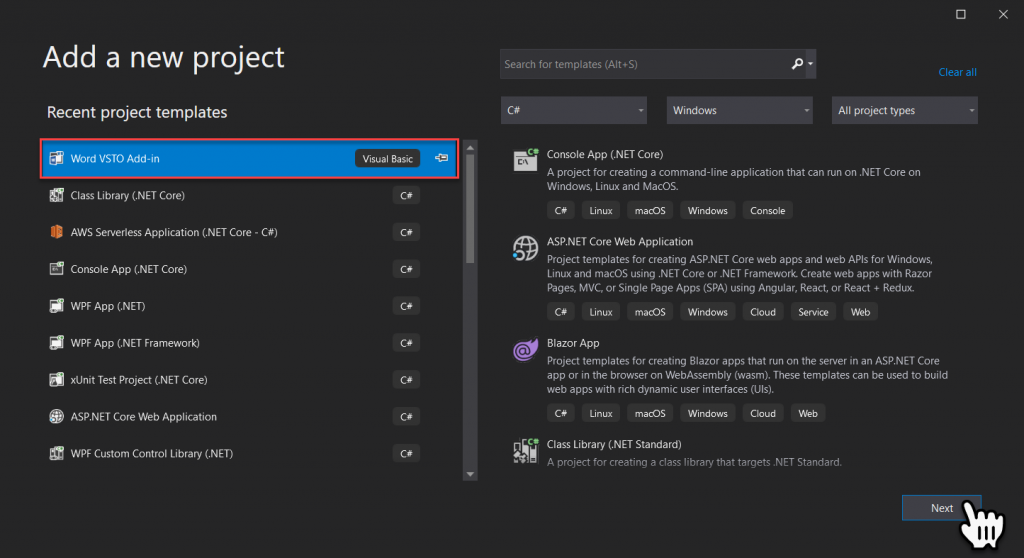
Select the Word VSTO Add-In project template and pick Next
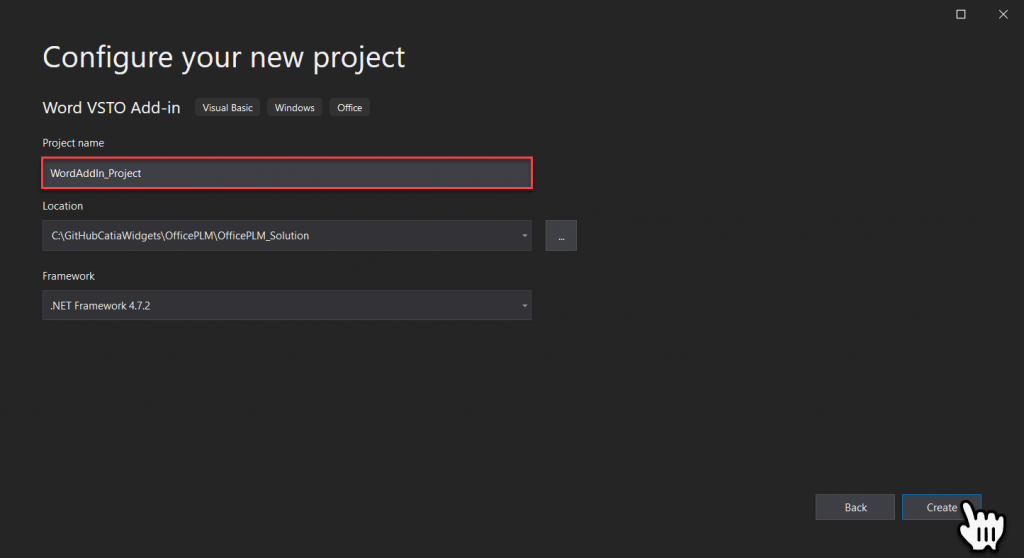
Within the Project Name field key in the name of the Project, and select Create.
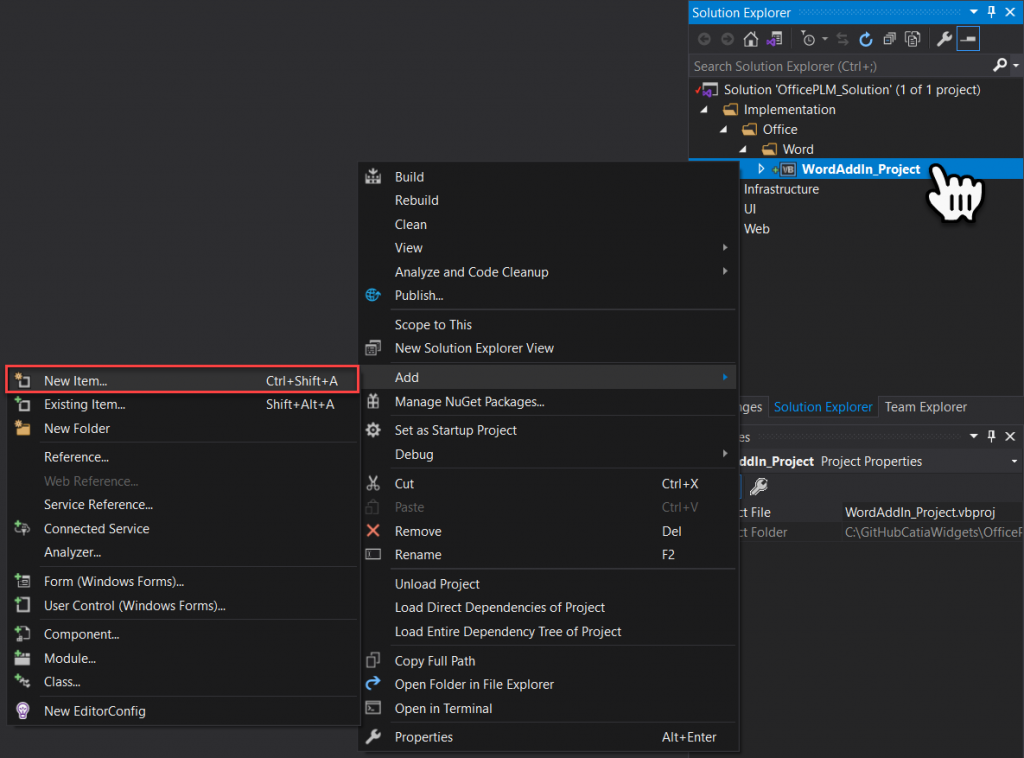
Next we will add the Ribbon (Visual Designer), to do this Right Mouse Click on the Project and select New Item… from the secondary contextual menu.
Select the Ribbon (Visual Designer) item template, then key in the name for the new item, and pick Add.

Editing the Ribbon Visual Designer
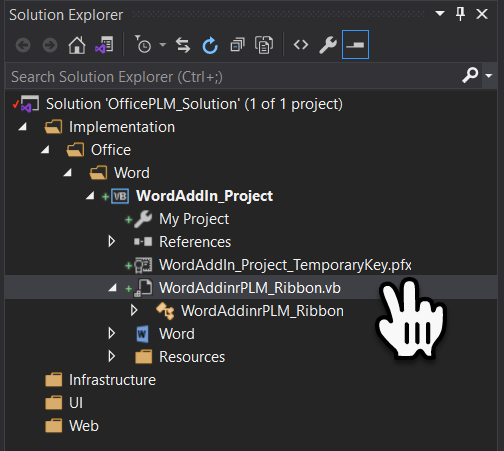
To open the Ribbon Visual Designer, expand the ‘WordAddin_Project’ and then double click on the WordAddinPLM_Ribbon.vb file.
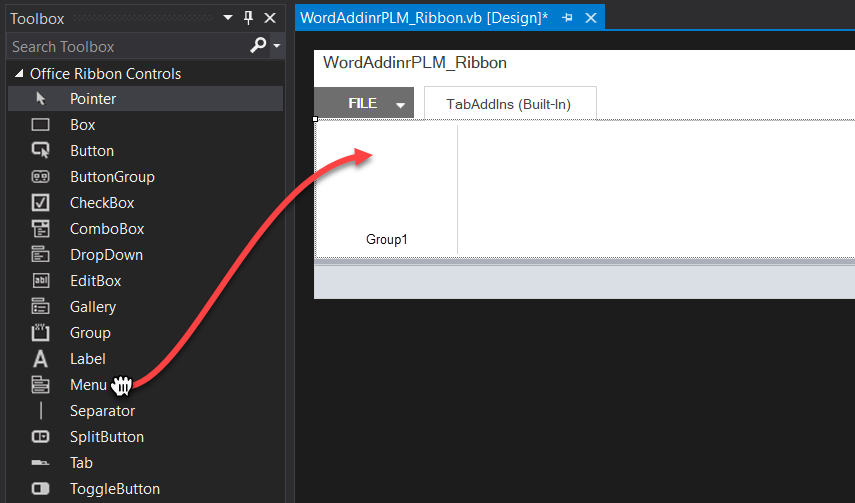
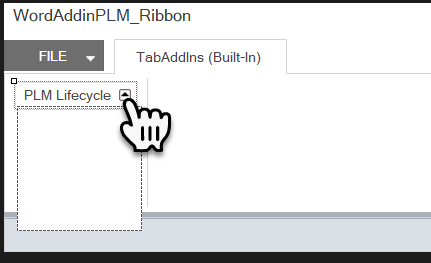
We can now ‘Drag and Drop’, Buttons and Menus into the ‘Group Box’, the first thing we will place into the Group Box will be a Menu.
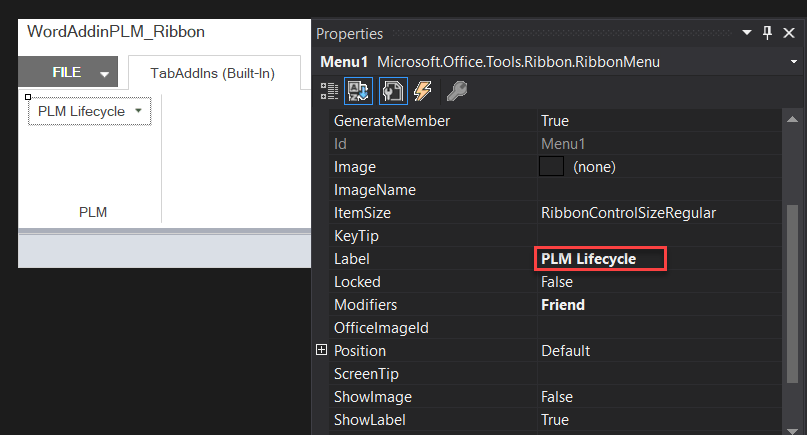
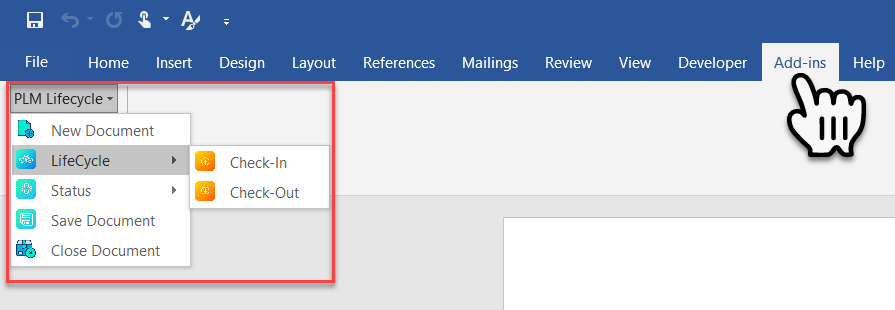
Now the Menu item is placed, we can change the Label property to ‘PLM Lifecycle’.
Next we will expand the PLM Lifecycle menu, so we can drop Buttons and Menus into it, by Selecting the ‘Black Arrow’.
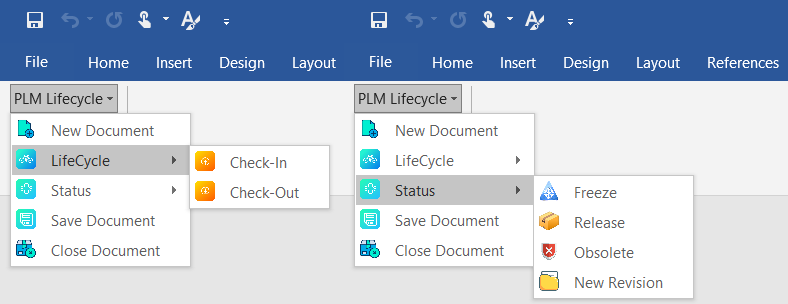
Repeat the process to add three Buttons and two Menu’s and rename them as shown below.
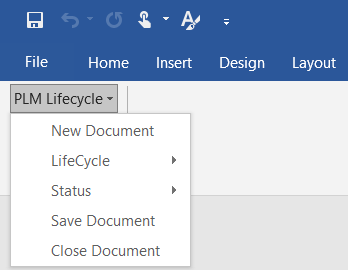
Then expand each of the menus adding the following buttons and again rename them.

Menu Images
Just to make it look a little prettier, I found a few images online for each of the menu items.

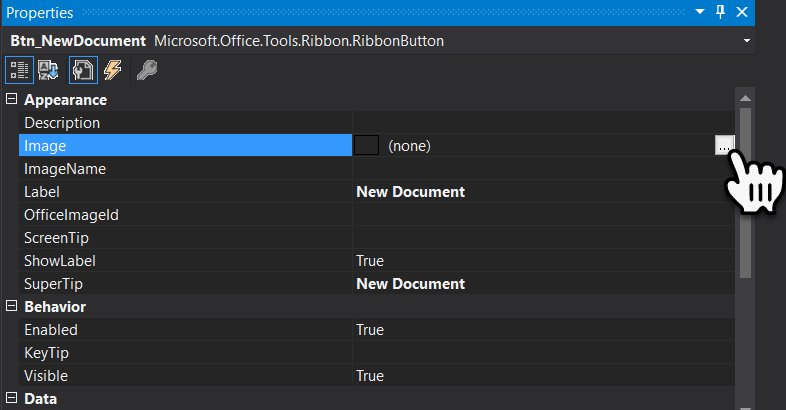
To add an image to a menu item, select one of the menu items and in the properties select Image…
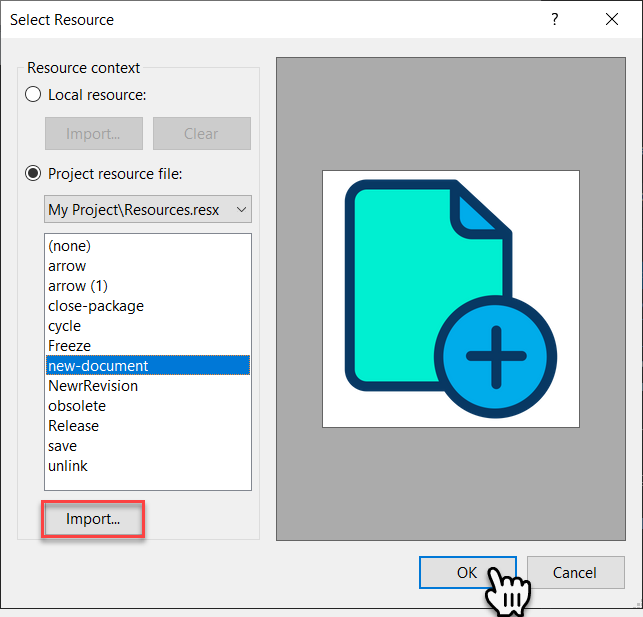
If you don’t have any image Resources, select the Import… which will open a Explorer window, where you can select an image to add to the resources. Once you have an Image Resource, you can select the resource and pick Ok.
You can now do this for all the menu items.
Button Handler Name
The last step we want to do is a little house keeping, by selecting each button we can change the Design -> Name

Once this is completed for all Buttons, double click on each button this will add the Handler to the underlying code.
Imports Microsoft.Office.Tools.Ribbon

Public Class WordAddinPLM_Ribbon

    Private Sub WordAddinrPLM_Ribbon_Load(ByVal sender As System.Object, ByVal e As RibbonUIEventArgs) Handles MyBase.Load

    End Sub

    Private Sub Btn_NewDocument_Click(sender As Object, e As RibbonControlEventArgs) Handles Btn_NewDocument.Click

    End Sub

    Private Sub Btn_SaveDocument_Click(sender As Object, e As RibbonControlEventArgs) Handles Btn_SaveDocument.Click

    End Sub

    Private Sub Btn_CloseDocument_Click(sender As Object, e As RibbonControlEventArgs) Handles Btn_CloseDocument.Click

    End Sub

    Private Sub Btn_CheckIn_Click(sender As Object, e As RibbonControlEventArgs) Handles Btn_CheckIn.Click

    End Sub

    Private Sub Btn_CheckOut_Click(sender As Object, e As RibbonControlEventArgs) Handles Btn_CheckOut.Click

    End Sub

    Private Sub Btn_Freeze_Click(sender As Object, e As RibbonControlEventArgs) Handles Btn_Freeze.Click

    End Sub

    Private Sub Btn_Release_Click(sender As Object, e As RibbonControlEventArgs) Handles Btn_Release.Click

    End Sub

    Private Sub Btn_Obsolete_Click(sender As Object, e As RibbonControlEventArgs) Handles Btn_Obsolete.Click

    End Sub

    Private Sub Btn_NewRevision_Click(sender As Object, e As RibbonControlEventArgs) Handles Btn_NewRevision.Click

    End Sub

    Private Sub WordAddinrPLM_Ribbon_Close(sender As Object, e As EventArgs) Handles Me.Close

    End Sub

End Class
Testing
Now we have setup the Ribbon Add-On select the Start button to start debugging, this will start an instance of Word.
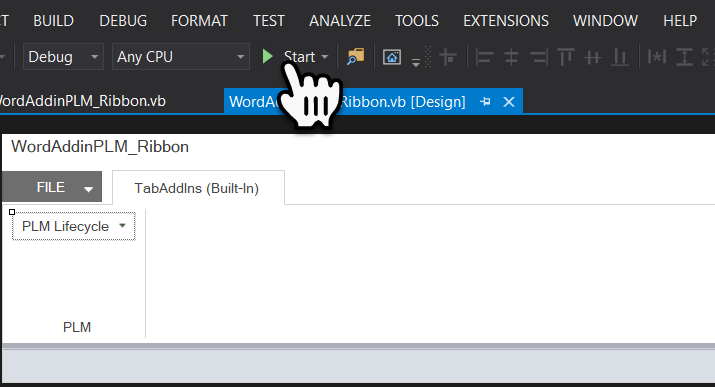
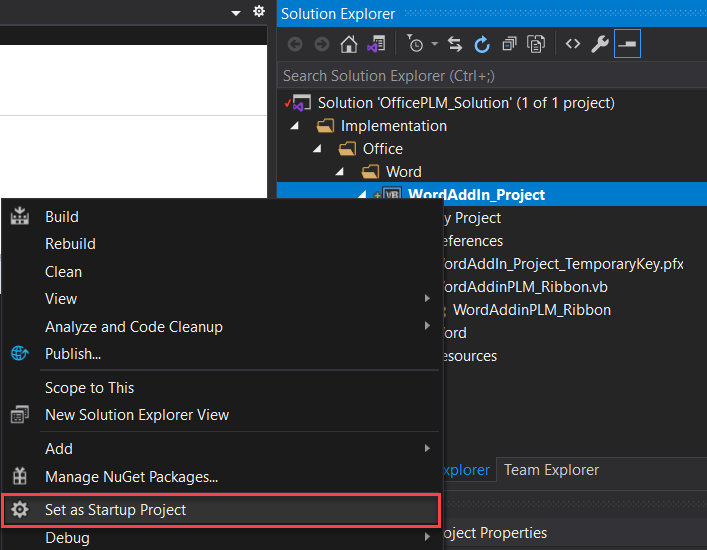
If Word does not start change the startup Project to the Word Add-in Project.
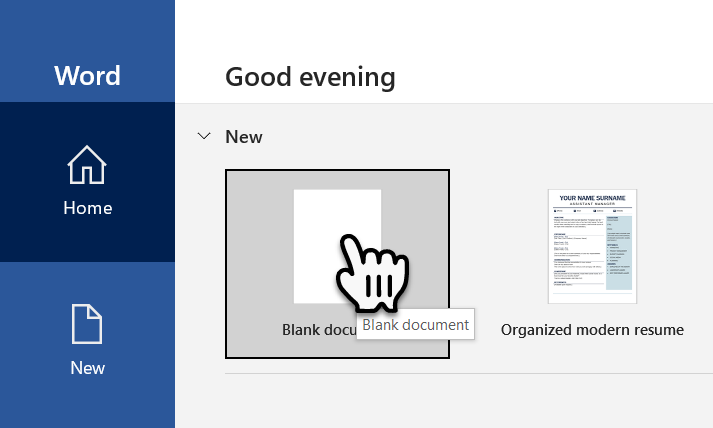
Once Word has started create a new Blank Document.
Change the active Ribbon tab to the Add-ins tab, we can now see our PLM Lifecycle Addin.
In a following Blog well start, to flesh out the rest of the project.
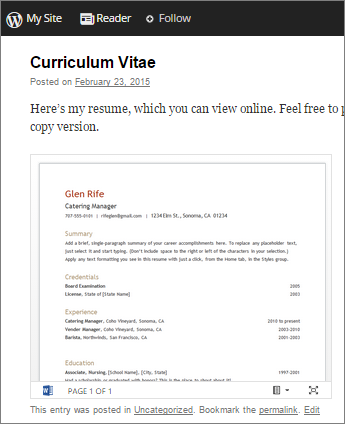
With your Word document stored on OneDrive, you can embed it in your blog or website, just like embedding a video. When you update the document, the embedded view automatically displays your updates.
With the document open for editing in Word for the web, use the following steps to copy the embed code:
-
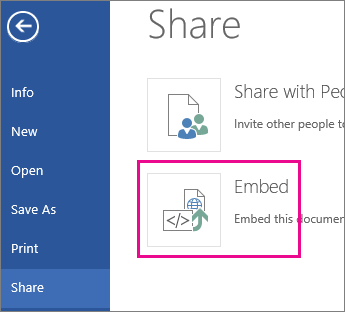
Go to File > Share, and then click Embed.

-
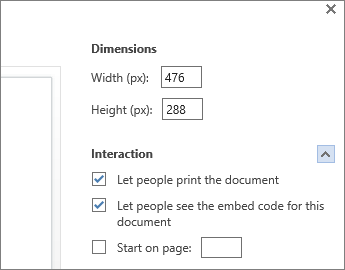
Click Generate.
-
Click the Expand arrow next to Interaction to make some choices about what people can do with the embedded view of the document. For example, if you don’t want them to be able to print your document, clear the Let people print the document check box.
The preview shows how your document will look when it’s embedded on the web page.
-
Right-click in the Embed Code box, and click Copy.
-
In your blog editor, begin writing your post. When you want to embed the document, switch to HTML editing and press Ctrl+V (or ⌘+V on a Mac) to paste the embed code.
Note: Your blog editor might have a trick for switching to HTML editing. For example, in TypePad, go to Blogs, click the name of your blog, and then click Compose. In WordPress, go to your blog’s dashboard and click Posts > Add New. Also in WordPress, don’t worry that the embed code is an iframe. Ordinarily WordPress doesn’t allow iframes in posts, but they make an exception for iframes that host Office for the web documents.
Need more help?
Blogging is a popular way to write for the Web. Many blogging platforms let you create new posts right in your Web browser. Formatting options available in your browser may be limited, however. Microsoft Word offers a wide variety of formatting features compatible with the Web, so composing your blog in Word gives you more control over its appearance. You can add Word documents to your blog in two ways: linking to the Word document within your blog text, or using Word’s blog-post feature to publish text from a Word document directly to your blog.
Add a Word Document As a Link Within a Blog Post
-
Log in to your blog’s administrative area and launch the editor tool that you use to create new posts.
-
Look for a button that allows you to upload files to your blog. You may have used this function previously to upload photographs. In WordPress, for example, the button is labeled «Media» and it gives you an option to add new items to a media library.
-
Upload the Word document that you want to place on your blog. If the blog does not accept DOC or DOCX Word files, trying saving your Word file as a PDF first. You can do this within Word with the «Save As» command, located under the File tab.
-
Create a new blog post and click the button in your blog control panel that allows you to link to files you have uploaded.
-
Select the Word document or PDF version from the list of uploaded files. This places a hyperlink in your blog post that visitors can click to view the Word document you want to share.
Publish a Word Document As a Blog Post
-
Open Microsoft Word and choose «New» from the File tab.
-
Select «New Blog Post» as the type of document to create.
-
Click the «Create» button to start the new document.
-
Enter your blog login information when prompted to register your blog. Click «OK» when done. You will only need to do this the first time you use Word’s blog post feature. The information is saved to Word’s preferences.
-
Type the blog post in the document window. Word provides a labeled field for the blog title and a field for the blog body content. Be sure to enter the appropriate information in the correct fields.
-
Use the buttons on the «Blog Post» tab to format the appearance of the blog text. You can adjust font, type size, colors and more.
-
Click the «Save» command under the File tab as you work.
-
Click the «Publish» button on the Blog Post tab when you are ready to place your Word document online. You have the choice of publishing it live immediately or as a draft first. Draft documents are not public but reside on the blog server until you decide to publish them.
As the project champion for my community college’s Open Learning Lab, I help literally hundreds of students, faculty, and other academics get started with their own WordPress sites.
I often encounter people who prefer to write in Microsoft Word rather than the default WordPress post editor.
They’re comfortable with Word. They know Word.
They assume they need to write first in Word and then copy-and-paste into WordPress.
I used to think the same thing but I just discovered there’s an easier way to move Word into WordPress.
MS Word offers a way to write and post directly to a WordPress blog/site without using copy-and-paste.
While the method has been around for a long time apparently–it’s possible in Word 10, Word 13, and Word 16.
I’ve only just discovered it. It’s easy and it works well.
In many ways, it’s easier than copy-and-pasting content. In my explanation here, I’ll use Word 16 as an example. The others are similar but might appear slightly different.
Steps to Blog From Word to WordPress
Create the Document
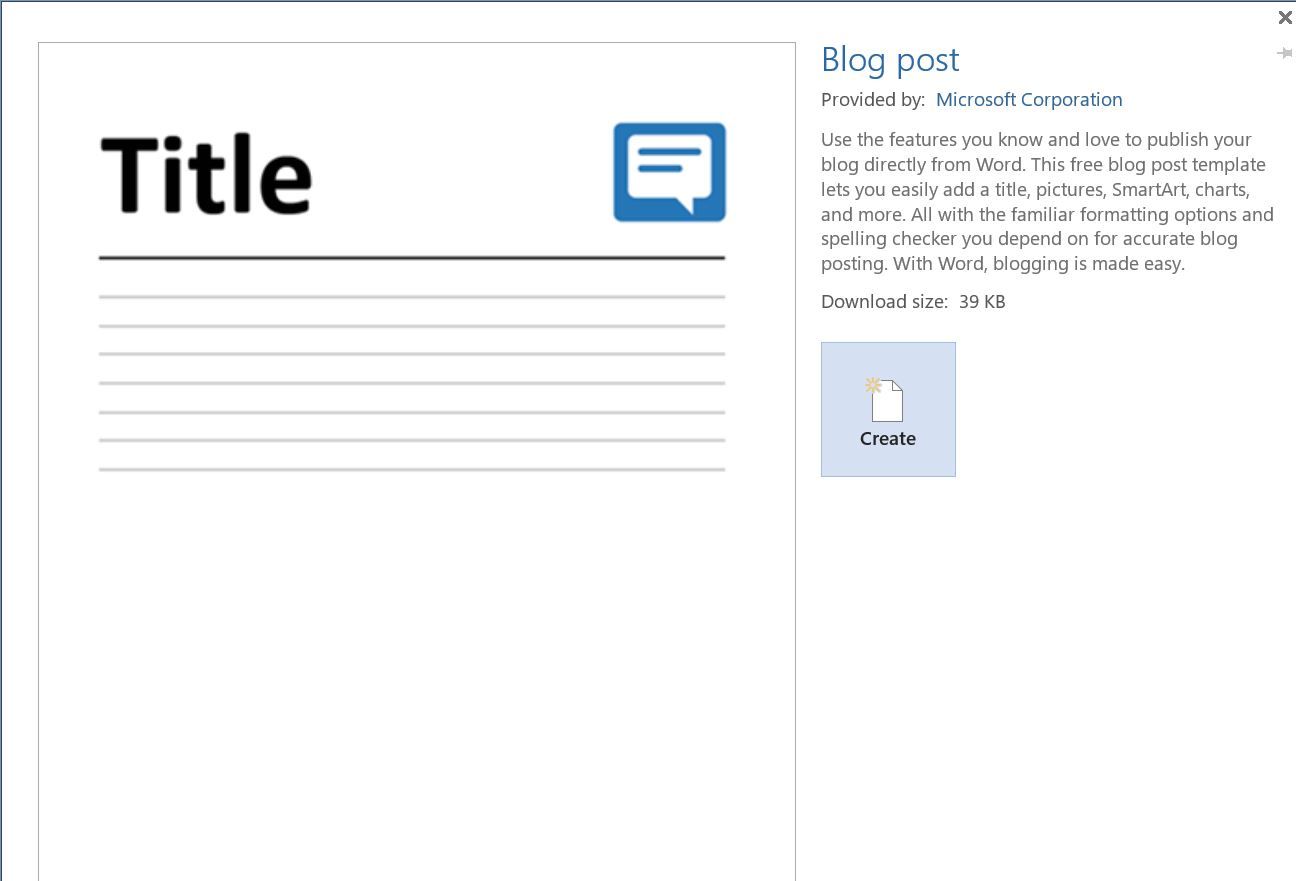
The first step is to create a new Word document by using the “Blog Post” template.
From the Word File menu > New, you’ll be prompted to select either a blank document or a template.
You want to use “Blog Post” template. If you don’t see it displayed right away, try searching for it.
When the template opens with you’ll see that the normal Word menus and the “ribbon” have changed.
Basically the menus and buttons have been slimmed down to only what’s relevant to creating a post for your blog.
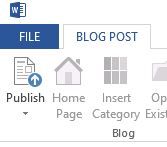
Here’s a partial screen shot of the slimmed down interface.

Writing Your Post
There are only three menus listed on the tool bar: File, Blog Post, and Insert.
The file menu is the standard Word file menu you can use to save a local copy, save as, print, etc.
The second menu/ribbon is labeled Blog Post and is shown in the screen shot above.
Except for the first five buttons on the left, the buttons available here correspond very closely to what you can do in the WordPress editor.
You can bold, italicize, change alignment, indent/outdent, change text color, change font size, and select paragraph/headings 1-6, etc.
I’ll get to those first five buttons in a moment when we want to actually publish.
To write your post, start typing. The first line has a horizontal rule below it and says “[Enter Post Title Here].”
Replace that text field with your title for your post. This corresponds exactly to the WordPress title box.
Immediately below the horizontal rule is a line that identifies the blog account you have connected to Word.
If you haven’t connected it yet, it will only say “Account.” We’ll connect to your blog when we publish.
On the next line, you start typing and writing your post. Style it using the buttons just as would in the WordPress visual editor.
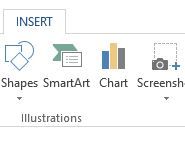
Adding Media
In WordPress we’re accustomed to using the “Add Media” button to insert graphics and other media.
The Word equivalent is the Insert menu. You also use the Insert menu to insert hyperlinks.
In many ways, the Word Insert menu offers capabilities beyond the normal WordPress Media Library since you can take advantage of Word’s regular insert features to not only insert pictures, but also shapes, SmartArt, screenshots, WordArt, symbols, and even Wikipedia quotes.
Connecting and Publishing Your Post
Once you’re finished and you think your post is ready to publish, you will need to connect Word to your WordPress site.
This need only be done the first time and you can have Word remember your connection.
Now we’re ready for those first five buttons on the left in the Blog Post menu, as shown here.

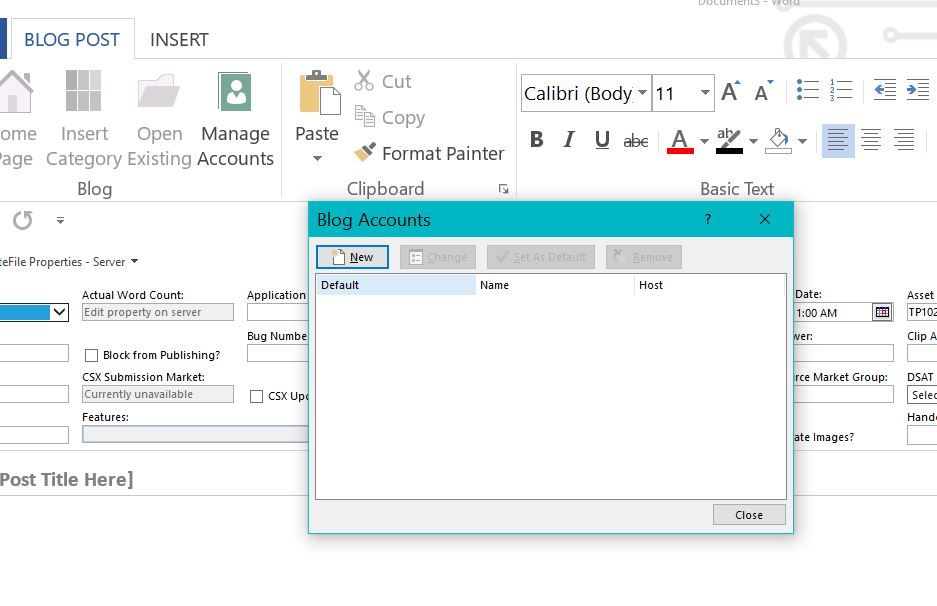
To connect Word to your site, you’ll need to select the Manage Accounts button. A dialog box opens listing all the sites you’ve connected to Word.
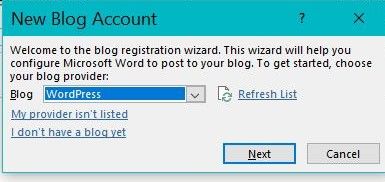
Of course since this is the first one, the list is blank. Select New, and another dialog box opens as shown below.

In this last dialog box, there’s a drop down menu to select your blog provider. Select WordPress. This is true for both WordPress.com and self-hosted WordPress sites.
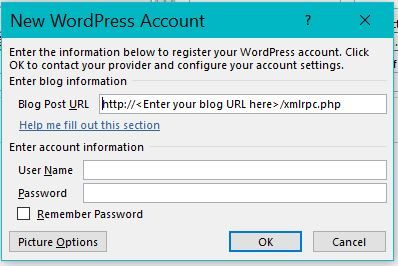
On this next dialog box, the New WordPress Account box, you need to enter three things:
- Blog post URL
- Your user name for your WordPress site
- Your WordPress password
You have the option to have Word remember your settings so you can skip this step in future posts. You also have some options for how pictures get handled.
The default is to upload pictures to your WordPress Media library. If you have an alternative server for images, you can configure Word to upload your images to that server and insert image-from-URL into WordPress.
Tip: The blog post URL is the address for your WordPress Site xmlrpc interface. It is typically of the form:
http(s):// <your blog URL> /xmlrpc.phpThis entry is very picky, especially regarding whether you are using http or https. (you are using https, right?)

Select OK. Select Close. And you’re ready to publish.
Once you have your site(s) entered and connected to Word, you can publish any post simply by selecting the Publish button.
If you have multiple sites connected, the Publish button becomes a drop-down menu listing your sites.
When you select Publish, the entire post gets uploaded including the graphics and media in just one step.
Pros & Cons of Using Word to Post to WordPress
Using Word has several advantages over using the default WordPress editor.
First, you can work offline. It also becomes easier to collaborate on a post or document with others in the draft phase–simply keep the Word draft copy in a sharable or cloud location and share the document with others.
This way you can collaborate with others without having to add them as a user in your WordPress site. You can also get all those great additional graphics insertions such as WordArt, symbols, etc.
The downside of using Word is that while it is easy and the resulting post will look the same in WordPress as it did Word, there might be some additional messiness in the HTML.
Word, of course, is notorious for creating very poor HTML code from Word documents. This method isn’t as bad as saving to HTML from Word, but it’s not as clean as the native WordPress editor might create.
If it’s critical for your posts to have very clean, neat HTML code, you probably should use the WordPress editor.
The other potential downside is that it depends on the xmlrpc interface in WordPress. Xmlrpc has been around a long time and has its own share of criticism.
The WordPress API is beginning to displace much of what xmlrpc did before and some developers are calling for xmlrpc to be removed.
If that happens, then this trick won’t work. We’ll need someone to write an API interface.
By the way, xmlrpc doesn’t work with Google Docs. If you want to connect Google Docs to your WordPress blog and publish directly, you’ll have to use the WordPress Jetpack plugin.
Give it a shot and tell us what you think.
Do you use Microsoft Word to write WordPress posts? Here’s a simple way to blog directly from the application.

Using your WordPress blogging editor for the first time can be rather hectic. Having to learn the controls and figure out your way around is not easy. Luckily, you could use Microsoft Word instead of struggling with your blogging site editor.
Here are some instructions to guide you in setting up Microsoft Word to create and edit posts for your WordPress blog.
Set Your WordPress Blog Account to Accept Posts
Before trying to link your blog to your WordPress account, you need to ensure that it will accept any posts from Microsoft Word. Although most new versions of WordPress accept outside posts by default, it is best to confirm the status of your site before proceeding manually.
- Go to the Admin settings in your WordPress blog account.
- Click on Settings > Writing > Remote Publishing.
- Check the XML-RPC.
- Click Save Changes.
Method 1: Draft Your Blog Post Account From Microsoft Word
One of the simplest ways to use Microsoft Word for your blog post is to draft it on Word before copying it to your blog’s editor. This method gives you the freedom to format your blog fully before publishing it.
The only downside with this method is that it may not convert some formatting to HTML. However, you can solve this by pasting your text in another editor, such as Google Docs, before copying it into your blog editor.
You could also use HTML cleaning tools to get rid of extra formatting that the blogging editor may not feature.
Method 2: Link Your Microsoft Word to Your Blog Account
A better way would be to link your blog account to your Microsoft Word. The process is pretty simple and may save you the trouble of copy-pasting every now and then.
You can either link your Word to a new or existing blog post.
Registering New Blog
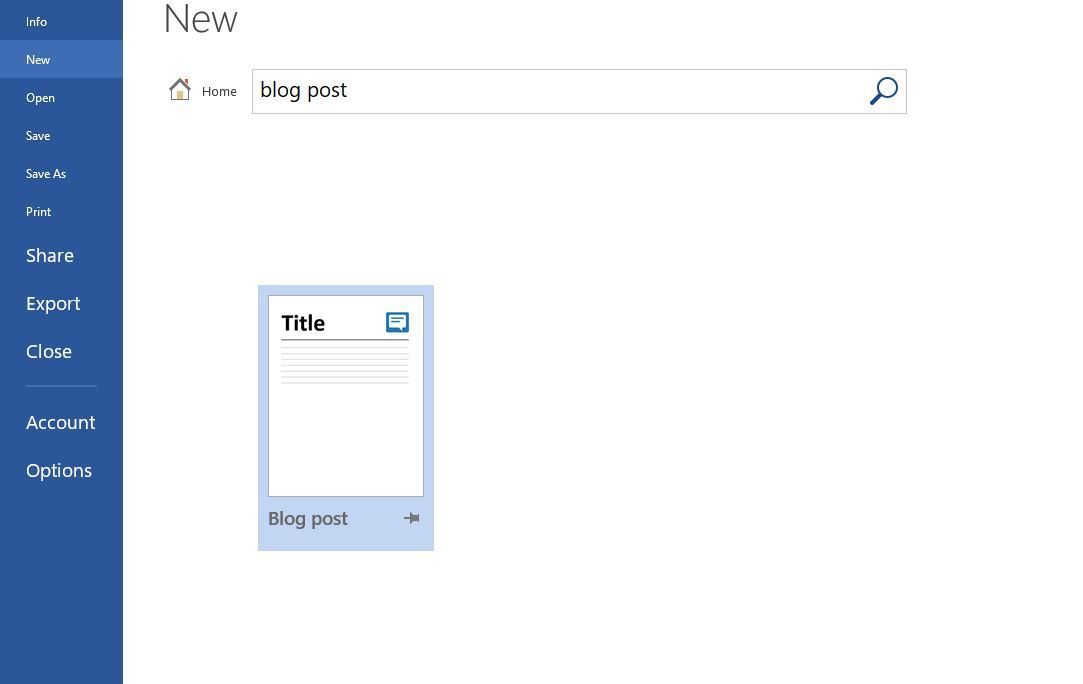
- Open your Microsoft Word and click on File, then New, and select Blog post. Some versions may require you to click on Create.

- You can also find it by performing a search using the search bar as shown below.

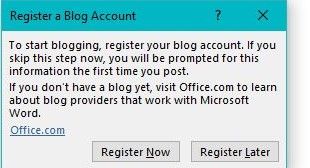
- A dialog box will appear asking you to Register a Blog Account.
- Click on Register Now. Feed-in all the necessary information as prompted.

- Alternatively, click on the Blog Post tab, select the blog group and Click on Manage Accounts, then New.

- A New Blog Account will appear. Here, click on the Blog drop-down arrow and select WordPress. Click Next.
- Feed-in the required information such as your username, password, and your blog URL.
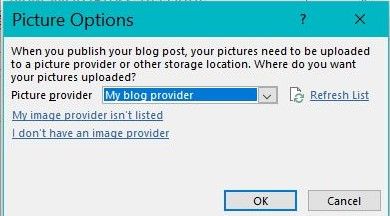
- Change your Picture Options to determine whether you will directly upload the pictures from Word or through your WordPress blog editor.

- Select OK to sign in to your account. Only do this when you are sure of all the details you have provided.
- If this does not work, try linking Microsoft Word to your blog by using your account settings. Check out the Dashboard or Admin in your blog. Check out for Remote Publishing.
Link an Existing Blog
- Open the New Blog Account dialog box in your Microsoft Word and click on your blog provider. For providers that are not listed here, click on Other.

- Click on Next.
- Fill in your account information as prompted. Your data should be accurate. Ensure to use your blog’s username and password.

- Activate the pictures feature by clicking on Picture Options and indicating how you want to upload your images.
- Click OK.
Write, Publish, Draft or Edit Your Blog Posts on Microsoft Word
After linking your blog post to your Microsoft Word, you are now ready to draft your content. You can do this by typing your text into the Blog post template you have created. You can also perform other tasks such as editing through these processes below.
Adding Content to Your Blog Post
- Select your Blog Post Template.
- If you want to apply styles, use the clipboard, enter basic text into your blog post, and click on Blog Post.

- On the other hand, if you intend to add media such as hyperlinks, select the Insert tab.

- Create the title for your blog post.
- Place the cursor beneath the title and start typing in your content. You can format it as you wish.

- Add a category to your post by clicking Insert Category.
- When done with your post, click Publish.
- You could choose to Publish as Draft. This option allows you to preview your blog post and see what it would look like if it went live.
Adding Images to a Post
- Set your cursor to the intended picture location.
- Select the Insert tab and click on Picture.
- Browse the Insert Picture dialog box for the image you want to upload.
- Select the image, then Insert.
- Use the Picture tools to edit the pictures and change how they appear.


Adding Hyperlinks to Your Blog Post
- Select your intended link text.
- Click on the Insert tab.
- Select Hyperlink.
- Type the URL into the Address box.
- Click OK.
Edit an Existing Blog Post
If you are working on a lengthy blog post or have to change something from an existing post, it is quite simple.
- To edit an existing blog post using Word, go to File, select Open Existing, and choose your existing blog post.
- Select the blog post you want to edit and click OK.
- You can now edit your blog post as you desire.
Please note that these may vary across various versions of Word. However, you can easily find the necessary controls once you get the basic concept.
Adding Your Feature Image
Adding a featured image to your WordPress blog is one of the few things you cannot do directly from Microsoft Word.
To add a featured image to your blog post, you may have to directly insert it from your WordPress blog account.
Why Use Word to Post to WordPress
Using Word to post your WordPress blogs has a number of advantages. It allows you to work offline before adding your content to the blog account.
This option also allows you to share your blog post with other contributors without giving them access to your WordPress editor. Word also allows you access to special features and graphics such as Word Art.
Use Microsoft Word For Your Blogging Today
Setting up your blog and keeping it running has never been easy. You have to come up with plenty of relevant content and keep your readers hooked. You do not want to spend more time figuring your way around a complicated blog editor.
Using Microsoft Word will help you save plenty of time while maintaining a lovely and relevant blog for your readers.

Blogging is a passion that can be turned into business and there are tons of proofs out there, but we should remember also that blogging is a passion that requires devotion and commitment if you want to turn it into business. With Microsoft Office, this is very simple and you are taking passion to another level.

You know that when you are blogging, your blog to be of quality it should follow some rules including SEO rules that will help your blog to be trusted by google and other search engines.
That reflects different factors to be able to achieve a better SEO including content writing. When you write content, it should be rich so that it attracts readers – I hope we agree on that.
Today we are going to see one of the best tools that can help you to achieve this good content for your blog – Microsoft Office.
Neil Patel as one of experienced bloggers on the earth, says that blog posts are still the firstresource for engaging with your audience and generating leads for your business.
You need to be careful while creating content because they seem to be a good marketing strategy for your business.
Microsoft Office is a package of many applications; Word, Excel, PowerPoint and so on but to our focus is on Microsoft Word right now.
Why content should be a top priority for a blog.
What you should know is that blog content is the backbone of on-page SEO, good content will give you advantages like backlinks and traffic which brings clients.
If you are a blogger, think your readers as your clients. If they don’t like your content then, you are losing clients and that’s a warning of failure.
Internet right now holds more than 600 million blogs among over 1.7 billion online websites, so you understand that there is a lot of work to do to show yourself. What you can do is to make a great difference in writing your content – create a rich content.
Content is the ideas that compose your post, texts, explanations, guidance and tips included in a document or a reading. Blog content also refers the same but this is for a blog post.
In Growthbadger’sblogging statistics, both high-earning and low-earning bloggers give high value content than any other thing where quality content holds 8.8 point out of 10 and 9.2 out of 10 respectively.

This is a proof of power in content of an article.
Don’t worry Microsoft Word will cover you
You know that all of us are not talented in authoring. If you know that weak side of yours that’s good news. But you can be one if you are smart enough to use tools that can make you look talented so that you know how to compete.
Then, let’s jump into Microsoft Word and see its best capability in helping you write a rich content that is best for readers.
Microsoft Word is capable of creating a great post for you, no hustle.
All you need is to follow this article.
Before we go into details on how Microsoft Word can help you to achieve a quality content, let’s break it into parts:
- Thesaurus to be linguistic
- Spelling and grammar, no mistake
- Word count, beat the SEO
- Blog Post template, no format
- Add-ins, spicing your writing
Let’s jump in.
Use Thesaurus to be linguistic
A thesaurus is a collection of words in groups of synonyms, antonyms and related concepts. You can ask yourself how thesaurus can help you in writing an article on your blog.
Microsoft Word has a built-in thesaurus where you can find a word related to other word in your text, when you find a word that is not getting your taste, you can replace it with an appropriate one using this feature.

There are numerous ways you can access thesaurus in Microsoft Word, here they are:
#1 using right-click
This is how you can do it:
- Right-click in the document
- You will see a list of choices and hover over Synonyms
- Choose in the drop-down list that comes to the right, if you are not happy.
- Choose Thesaurus… it has an open book icon along its side.

#2 Through tab
This is another way you get to thesaurus:
- Go in the ribbon above the document
- Click the Review tab
- Go to the left of and choose thesaurus

How to use thesaurus:
Thesaurus opens to the right side; it has three components which are:
- Search bar to use while searching a word
- Word list that shows similar words or antonyms
- Meaning of the word you searched in thesaurus

How to insert a word in thesaurus;
Once you find a word that meets the context in thesaurus, it is time to insert it into the document. There are two ways to do that; you can replace a word in the document or insert in the document as new.
Replace the word
If you want to replace a word in the document,
- Highlight the word in the document
- Go back in thesaurus, search that word
- In results, hover a word you want
- Click on the down arrow
- Choose insert and the word will appear in the document
Insert in document
When you want to insert in the document it is simple:
- Click where you want your word to be
- Go back in thesaurus, search that word
- Follow instructions above (in replace the word)
Another possibility possible is to copy instead of insert and you can go and paste that wherever you want, you can find more about pasting here.
You can see that thesaurus can open doors to many words and vocabularies without limit while avoiding vocabulary mistakes in your blog post.
Spelling and grammar
Generally, not all of us who are native speakers so if you aren’t good in grammar you don’t have to worry Microsoft knew that before.
Microsoft word has a system of grammatical errors correction that helps you to be as accurate as possible in grammar.
When you write a word and misspell it, Microsoft Word tries to warn you about a word that it is not in dictionary and suggests you to collect it.
There are two types of corrections in this case:
#1 Grammatical error
This is an error that happens when you describe an instance of faulty, unconventional, or controversial usage, such as a misplaced modifier or an inappropriate verb tense.
Yes, because every language has rules it is better to follow them to make people understand the context easily.
Whenever you make a grammatical error, you see two small blue lines below respective word or text which tells you that there is a change needed.
How to correct that error in Microsoft Word?
- After you see those lines, right-click on that word or text
- In the list in a pop-up menu choose a meaning that seems to be appropriate to you.
Another way, is to find grammar dictionary through tabs.
- Go in the ribbon, choose review tab
- Click on spelling and grammar in proofing ribbon.
- And a panel opens on the right side of the document.
If you are writing a blog it is better that you take into account the grammar, nowhere SEO suggests that but, in my opinion, the more people can’t understand the content, the more they will lose interest in reading.
MS Word can help you to create a strong grammar without much energy.

#2 Spelling
Spelling is the way you write words in a correct way and correct order of letters.
An example: Writing “pselling” instead of “spelling”, this is a spelling error. You can misspell a word by accident or because you are not sure how it is written. Some of the readers might spot that you have done a mistake and others might not.
How to correct spelling mistakes in Microsoft Word?
There is nothing new, just the same process as for grammatical error, and Microsoft Word suggests alternative words to the one you wrote. Sometimes, MS Word auto-corrects your word.
To avoid a misleading blog post you need to use well spelled words, and you can see that when you write an incorrect word, MS Word makes sure that you are also certain to that word.

Word count
Nowadays people are willing to know more, this means that people are out there searching for tangible and useful information.
Long-form content gets an average of 77.2% chance of being backlinked than short-form articles as backlinko reports. You can’t get backlinks without trust, when someone trusts your content can use it as reference from his/her blog or site.
If you want to write a long post with a target on number of words Microsoft Word has a solution for that.
Where you can find word count
Word count is located at the taskbar of Microsoft Word, you find it at the left side of the taskbar between the language and page count.
When you are writing Word records every word written in real time.
Where else to find word count
There are cases where you can’t find word count visible in the taskbar.
There is another way you can find this function this way:
- Go to taskbar
- Right-click on the bar, you will find a large list of options
- Choose word count, you see a tick on the left and word count appears at the taskbar
Word count works better, because it helps you to know if your blog article is meeting your needs or who you are writing it for.
For example, if you have to write a 2,000+ words article you will see when you are on track of achieving your goal.
Moreover, through word count you can have so much info on your writing including; number of words, characters (with or without space), lines and paragraphs.
From all of these components, it is easy to understand in details the structure of blog post.
Template
Microsoft is intelligent, it knows structures of different scripts and documents like financial, reports, books and it also has recognized bloggers among special writers. That’s why there is a template of a blog post. Kudos to MS Word!
Where you can find this template
Because all documents are not written in same format, there are premade templates in Word,
Follow these steps to know where you can find a blog post template in MS Word:
- Open Word as usual, in Windows start menu, search or taskbar shortcut
- In the opening screen you will see various presets
- Go into search and search “blog” you will see suggestions and choose blog post.
- Choose create and writing space opens, if they ask you to register ignore as long as you don’t want to.
- As like a template, heading comes branded to write post title.
Do you see how easy it is?
Blog template eases things and creates a blog panorama, when you open this template you immediately notice a great change. This template can make you distinguish your blog article from a simple document, that’s what I like about it. Below image shows whole walk-through.


Add-ins
You know add-ins save us from a lot of work, think an add-in as a nitro in a car.
Yes, they help us to be as perfect as possible. Do you know famous WordPress plugin called yoast, people like it because it makes people comfortable with what they do especially in SEO.
Microsoft Word also has an option of plugins and has so many useful plugins (Add-ins) that can help you improve the quality of content.
Where do we find add-ins in Microsoft Word?
Add-ins option is found in insert tab in the Add-ins ribbon, between Media and Illustrations.
How do we get an add-in?
Now we know where you can find add-ins, this is how you can add a new add-in in office.
- Go in insert tab
- In Add-ins ribbon, you find 2 components:
- Get Add-ins
- My Add-ins
- Choose get Add-ins, a new window will open. Click Add button beside Add-in
- Add-in will open.

Once you have added the Add-in, for some you can get use instructions for others you don’t get any. This was a guidance on how you can have access to Add-ins in Microsoft Word.
Favorite MS Word Add-ins now
While I am writing my blog post in Word, I use Add-ins to reduce some mistakes that can appear after publishing post. Following are two main add-ins I use:
- Wikipedia
- GradeProof
#1 Wikipedia
Wikipedia is famous, I give around 0% chances that you didn’t use it a single day.
What I like most about this Add-in is that I can access all information on Wikipedia without getting out of the document.
In case I want further reference from other site, Wikipedia as usual has reference links within its content however, to access an external content it redirects you into browser.
How to use Wikipedia Add-in for Microsoft Word
It is that simple like you do in browser. You type a word or topic you are looking for and hit enter,

#2 GradeProof
I don’t trust myself with English effectiveness that’s why I use GradeProof.
GradeProof is a proofreading Add-in that purify your text and sentences, in case of grammatical error that skipped MS Word, it can reveal that for you.
This Add-in though, has two versions free and pro but don’t worry free version works better. When you want to make corrections, you click on view suggestions and you do them into GradeProof as a pop-up.
GradeProof is adaptive to the fonts and formats in MS Word once you make changes, you save changes and then, you are done.

Conclusion
Since I have seen that to turn a blog into a business requires to follow rules of SEO, you will always need to have tools that have that caliber. Microsoft Word is a very powerful tool for writers and it doesn’t put behind bloggers.
Blogging is a profession like others, to be an outstanding professional you have to do things in a different way.
One of the best possible effective ways to achieve this is to produce quality, charming content that has power to attract a reader, and you will finally turn them into customers.
Similar posts to read:
- 18 Important keyboard shortcuts you should know
- Google analytics and social media insights are not handy: App screen UI Design
- Find Tool – Microsoft Office’s neglected but powerful tool
How do you prepare your blog post? Which tool do you prefer?
Check and format your addresses in just a few clicks
Address formatting:
the module arranges address components in the right order via your Word document.
Checking addresses:
for every address submitted, the module indicates whether or not it has been recognized.
In the event of any errors detected in an address, a corrected version is suggested if possible.
Le module est entièrement intégré à la fonctionnalité standard de Microsoft Word. Il est adapté à votre manière de travailler :
- You created a letter with the recipient’s address? Select the address and click on the Validate button to get immediate feedback.
- Are you starting a letter from scratch?
- Click on the Insert button and capture the return and destination address.
- After validation, they will be correctly positioned for your window envelopes.
- Would you like to send out a mailshot?
- The module permits to check all your addresses beforehand.
57
57 people found this article helpful
Use Microsoft Word to Create Blog Posts
Take advantage of integration with popular blogging platforms
Updated on October 28, 2019
If you’re new to blogging and struggling with the editor that accompanies your blogging platform, you don’t have to use it. Instead, use Microsoft Word, which many people are familiar with, to compose your blog posts.
Instructions in this article apply to Word for Microsoft 365, Word 2019, Word 2016, Word 2013, Word 2010, and Word Starter 2010.
Use Microsoft Word to Draft the Post
The simplest way to create a blog post in Word is to create it, then copy and paste your draft from Word into your blog platform’s editing interface.
Because Word creates some formatting that can be difficult to convert to HTML, there may be issues with the way the text appears. If that’s the case, take an extra step and paste the text you created in Word into an intermediary text editor such as Google Docs or Notepad, then copy and paste into your blog platform’s editor.
Another option is to use an HTML cleaning tool like HTML Cleaner, which strips out the extra formatting from Word.
Make Blog Posts Directly From Microsoft Word
A more direct way to use Word to publish your blog posts is to link Word to your blog account. Here’s how to do it.
-
With Word open, select File > New > Blog post. If required, select Create.
If you don’t see the Blog post template, perform a search using the search bar at the top of the screen.
-
In the Register a Blog Account dialog box, select Register Now. The information you provide in the following steps is needed so that Word can post to your blog.
If you don’t see this dialog box after opening a new blog post template, go to the Blog Post tab and, in the Blog group, select Manage Accounts > New.
-
In the New Blog Account dialog box, select the Blog drop-down arrow, choose your platform, then select Next.
-
In the New Account dialog box, enter the information requested, including the blog URL, your username, and your password. Use the same username and password that you use to log in to your blog. If you’re not sure how to fill out the URL section, see Microsoft’s help with blogging in Word.
Select Picture Options to decide how images are uploaded to your blog through Word: use your blog provider’s image hosting service, pick your own, or choose not to upload images through Word.
-
When you’re ready for Word to attempt an initial sign-on to your account, select OK.
-
If registration is unsuccessful, you may need to repeat the steps. Or you may need to associate Word with your blog account from your blog account’s settings. This option is typically found in the Admin or Dashboard area of the blog settings. It might be labeled Remote Publishing or something similar.
How to Write, Publish, Draft, or Edit Blog Posts
Once you linked Word to your blogging platform, draft your blog post. To do so, write your text within the Blog post template.
Writing in Word’s blog mode is streamlined and has fewer tools. However, the Word blog mode may have more features than your blog’s editor and are in a familiar Word format.
-
To post to your blog, select either Publish or Blog Post > Publish, depending on the version of Word.
-
To save the post as a draft, select the Publish drop-down arrow, then select Publish as Draft. In older versions of Word, select Blog Post > Publish as Draft.
-
To edit a blog post in Word, select File > Open, then choose an existing post. For some versions of Word, choose Blog Post > Open Existing, then select the blog post.
Thanks for letting us know!
Get the Latest Tech News Delivered Every Day
Subscribe