
I’ll admit it — I’m not a big fan of adding columns in Microsoft Word. Not that there’s anything wrong with columns, per se. Columns work fine (until they don’t). But in a legal office environment, I usually format blocks of information with tables because they’re a bit easier to control.
That said, I have seen lots of legal professionals insert multiple columns in Microsoft Word to format things like service lists in Certificates of Service. Hey, to each her [his] own.
So if you want to format text with columns in Microsoft Word documents, here’s what you need to know:
Inserting columns: the basic primer
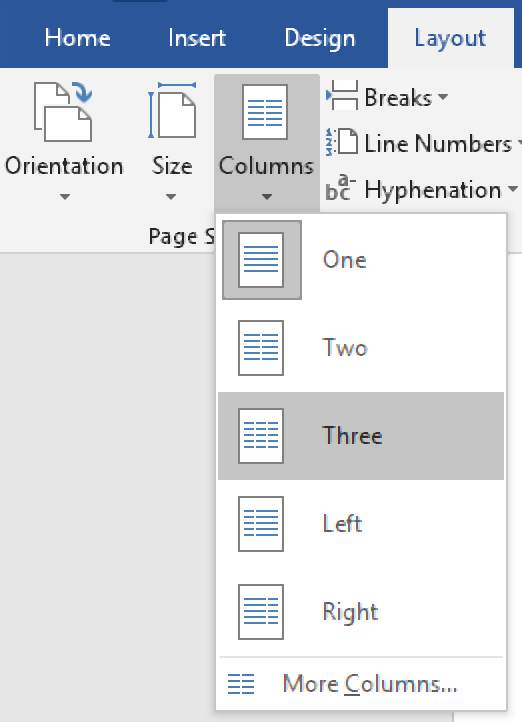
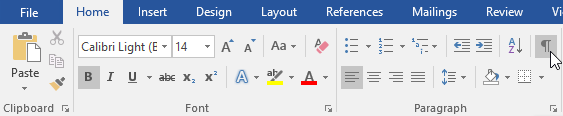
Everything starts from the Layout tab (known as Page Layout in versions 2007-2010) on the Ribbon:

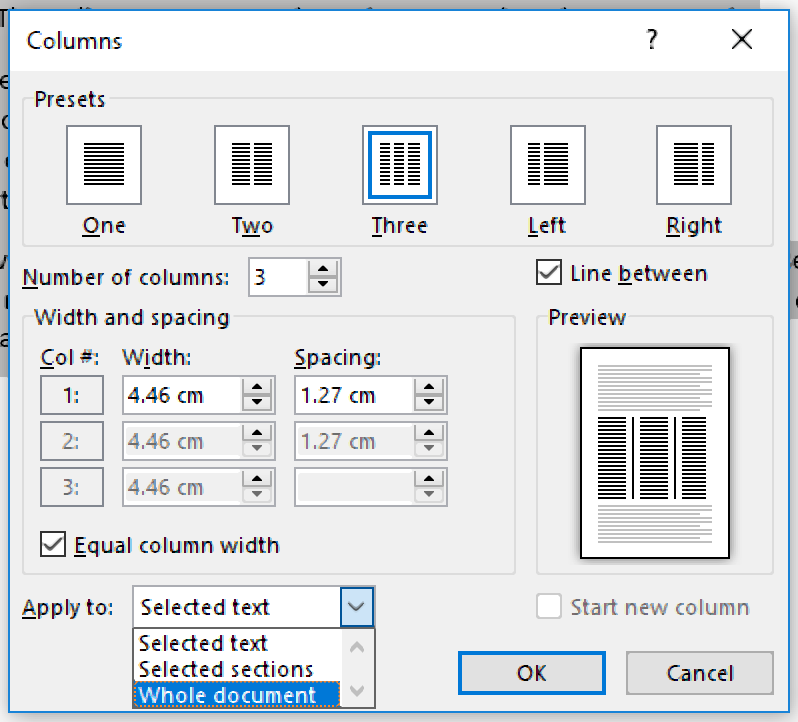
Click on More Columns, and you’re taken to a dialog box that allows you to set up your columns exactly the way you want them.
The default is one column — just a regular document. You can use one of the presets (the two-column layout is useful for the service list application I mentioned above). Or you can customize it within an inch of its life. Width? Space between columns 1 and 2, or 2 and 3, or …? How about a line between them (like a newsletter would have)? You decide!
(If you don’t want your columns to all be the same width, be sure to uncheck the “Equal column width” checkbox at the bottom of the dialog box. Then, you’ll be able to customize the width of each column separately.)

Navigating between columns
Once you’ve set up your columns, you come to the tricky part. This is part of the reason I usually opt for tables rather than columns. If you use tables, moving between the cells is easy — just use the Tab key. To insert a column, however, you need to know a few tricks.
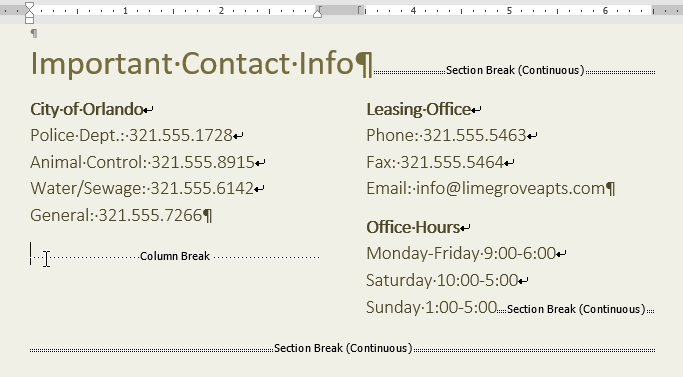
Say you’re typing in the first column of your document and you want to end that column there and start typing in the second column. To do that, you have to insert a column break. You can insert a column break in one of two ways:
- Press CTRL-SHIFT-ENTER simultaneously; or
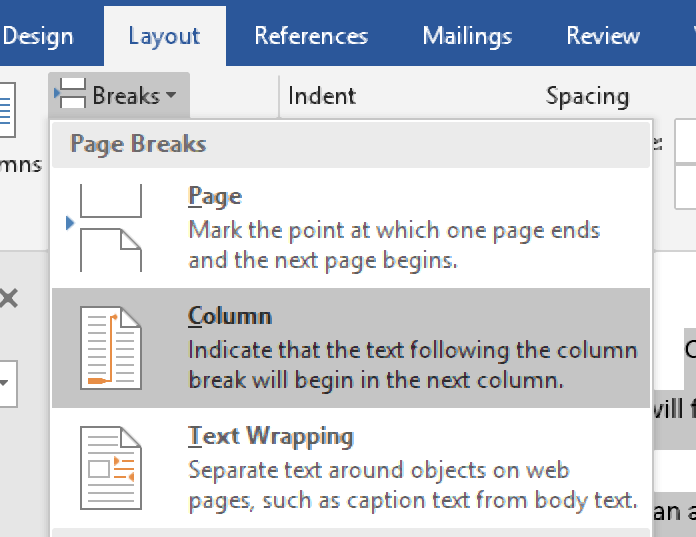
- Go to the Layout tab, click Breaks, and choose Column

Personally, I’d go with Option 1 (assuming I remember the key combination in the heat of the moment).
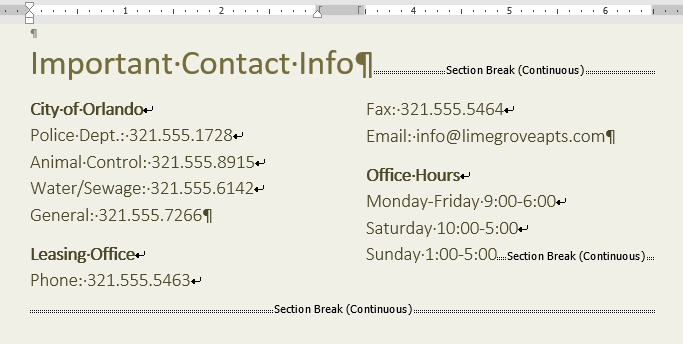
Once you’ve inserted a column break, your cursor is in the next column, ready for you to type. When you insert a column break in your last column (the one farthest to the right), the cursor will go to the first column on the next page.
Viewing column boundaries
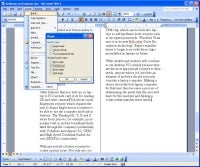
To me, it’s tough to work with columns (or tables, for that matter) if I can’t really see them. To turn on the column boundaries so you can see your columns laid out on the page, go to the File tab (or click the Office button in version 2007) and click Options, then go to Advanced and check the box next to Show text boundaries:

When columns are only part of your document
But what if only part of your document consists of multiple columns?
If you go back to the Columns dialog box (via Layout > Columns > More Columns), you’ll notice a drop-down at the bottom of the box:

If you choose This Point Forward, that will allow you to insert columns at the point your cursor is sitting in. Once you’ve inserted your columnar data, then go back to the Format Columns dialog box and choose the One Column format (being careful to once again choose This Point Forward in that bottom drop-down), and your document will return to the single-column format without disturbing the multi-column insertion you’ve just worked so hard on.
But what if you want to insert a two- or three- (or more-) column block of text into the middle of a one-column, normal document?
You may want to use a slightly different procedure, depending on whether you’re creating a brand-new document or you’re inserting a multi-column layout into the middle of an existing single-column document. You’re using the same dialog box, but if you’re editing an existing document and placing a multi-column layout in the middle, you’ll need to take a couple of extra precautions to ensure you don’t inadvertently create a formatting nightmare.
Inserting multi-columns into a new document
Let’s say you’re typing along in a brand-new document and decide that the next bit of text needs to be in two (or more) columns. There’s no text after the point where your cursor is right now, so you can switch back to single-column format once you get done inserting the multi-column section.
If you go back to the Columns dialog box (via Layout > Columns > More Columns), you’ll notice a drop-down at the bottom of the box:
If you choose This Point Forward, that will allow you to insert columns at the point your cursor is sitting in. Once you’ve inserted your columnar data, then go back to the Format Columns dialog box and choose the One Column format (being careful to once again choose This Point Forward in that bottom drop-down), and your document will return to the single-column format without disturbing the multi-column insertion you’ve just worked so hard on.
Inserting columns into the middle of an existing document
If you’re editing an existing document and you want to insert a multi-column layout somewhere in the middle of text you’ve already got typed, the “this point forward” method may result in a temporary and fixable but still infuriating mess.
Here’s how to avoid it: Insert section breaks before and after the point at which you want to insert your columns:

… then in Apply to:, choose This section instead:

Here’s a video demonstration:
Video: Inserting a column into the middle of an existing document (without creating a mess)
How do you see yourself using columns in your documents?
Word 2013
You can format your document in a newspaper-style column layout by adding columns. On the Page Layout tab, click Columns, then click the layout you want.
-
To apply columns to only part of your document, with your cursor, select the text that you want to format.
-
On the Page Layout tab, click Columns, then click More Columns.
-
Click Selected text from the Apply to box.
Word 2016
You can format your document in a newspaper-style column layout by adding columns. On the Layout tab, click Columns, then click the layout you want.
-
To apply columns to only part of your document, with your cursor, select the text that you want to format.
-
On the Layout tab, click Columns, then click More Columns.
-
Click Selected text from the Apply to box.
Need more help?
Want more options?
Explore subscription benefits, browse training courses, learn how to secure your device, and more.
Communities help you ask and answer questions, give feedback, and hear from experts with rich knowledge.
Much like ancient Greek architecture, some forms of writing would fall apart without columns. Newspapers, websites, journals, magazines and newsletters, for example, all present text in neat columns to increase readability and ensure professional presentation.
If you are writing something along these lines in Microsoft Word, then, you’ll need to know how the column formatting options work. Read on to find out.
Column Formatting in Microsoft Word
To use the pre-set column options in Microsoft Word, all you need to do is:
- Select the text that you want to format using the cursor
- Go to Layout > Page Setup > Columns on the ribbon
- Pick the number and style of columns required
If you do not select any text first, the column formatting will be applied to the entire document.
Custom Column Formatting
You can also create custom columns for more control over how text is presented. To do this:
Find this useful?
Subscribe to our newsletter and get writing tips from our editors straight to your inbox.
- Go to Layout > Page Setup > Columns and click More Columns…
- In the new window, select:
- The number per page
- Whether to use a line between columns
- The width of each column
- Which parts of the document to format (selecting This point forward will apply a section break at the cursor position)
When you are done, click OK to apply the selected options. This will format all selected text (or the entire document) according to your preferences.
Adding a Column Break
You can also add a “column break.” This is useful if you want to end one column part way down and start a new one at the top of the page. To do this, place the cursor where you want a column to end and go to Layout > Page Setup > Breaks > Column. This will add a column break in the place selected.
When to Use Columns
Finally, a brief word on when to use this formatting style. It would be unusual in most documents printed at portrait A4 size, such as college essays or business reports. Typically, you would only do so if a style guide requested that you format part or all of a document in this way.
However, for anything that will be printed or displayed in a wider format (e.g., on landscape A4 or larger paper), column formatting can make text easier to read by reducing the line length.
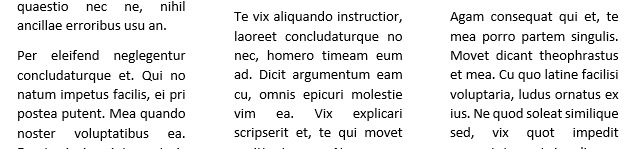
Typically, Word documents like books, reports, and letters have paragraphs that occupy the whole page width. In articles, newsletters, flyers, and brochures, all or only parts of the text may be arranged in two or more columns:

You don’t need to create tables to structure text into columns. Tables are useful for displaying translated versions of the legal document side-by-side, but table cells break the text flow and are not recommended for multi-column layouts. It is more convenient to use columns for text formatting in most other cases. Word also allows you to adjust your columns by adding column breaks.
Format text in columns
To format a text into columns, do the following:
1. Do one of the following:
- To use the same number of columns for an entire document, click anywhere in the document (empty or with content).
If you choose to format text in columns, Word fills the first column with text on the page and then moves to the beginning of the next column. When all columns on one page are filled, the text moves to the next page.
- To format only a part of the document, select the paragraphs that you want to wrap in columns.
If you select a part of the text and wrap it in columns, Word inserts section breaks at the beginning and end of the selected text to delineate the area where the column layout is applied:

See more about breaks and how to display them.

To manually specify where the text in each column should end, you can use a column break.
2. On the Layout tab, in the Page Setup group, click the Columns button:

3. In the Columns dropdown list, select one of the options:

- One (used by default),
- Two, Three to create two or three columns of equal width,
- Left, Right to create two columns of unequal width,
- More Columns… to specify more options in the Columns dialog box:

- In the Presets section, you can choose the same options as in the Columns dropdown list – One, Two, Three, Left, or Right.
- If you need more columns, type or select the number of columns you need in the Number of columns field. The maximum number of columns may vary depending on the font, font size, margins, etc. E.g., 13.
- The Line between checkbox inserts a vertical line between columns. This line clearly defines column borders, especially if you want to fit as much content on the page as possible (very handy for cheat sheets).
See more options below.

Format columns
I. It is recommended to justify the paragraphs in columns to give the page a clean and organized appearance. To justify the column text, select it and do one of the following:
- On the Home tab, in the Paragraph group, click the Justify button:

- Press Ctrl+J.

II. To change the width of columns or the space between them, do the following:
1. Click anywhere in the columnar text.
2. Do one of the following:
- On the Layout tab, in the Page Layout group, click the Columns button, then choose More Columns…
In the Columns dialog box, in the Width and spacing section:
In the Width box for any columns, enter or select a new width.
The Width measurements for the other columns change to match, and the width of all the columns changes.
See how the columns will be displayed in the Preview section.
- On the horizontal ruler, drag the margins to change the width of the columns:


III. To reduce white space on text lines, you can set up Word to hyphenate the text and break long words into syllables. See how to hyphenate automatically and manually for more details.
Remove columns
To remove column layout for the selected text or entire document, do the following:
1. Click anywhere in the columnar text.
2. On the Layout tab, in the Page Layout group, click the Columns button, then choose One.
Insert a column break
In the Word document, you can manually break columns. When you break a column, the text after the break moves to the top of the next column:

You can display column breaks as regular nonprintable symbols. Word displays them as ![]() .
.
To insert a column break, position the cursor at the beginning of the line you want to start in the new column, and then do any of the following:
- On the Layout tab, in the Page Setup group, click the Breaks button, and then click Column to insert a column break:

- Press Ctrl+Shift+Enter.

The column break is inserted, and the cursor moves to the beginning of the next column.
Remove a column break
To remove a column break, click at the left end of the break or select the break and press the Delete key.
Editor’s Note: This article was originally published in Apr. 2013 and the video tutorial for this article published Dec. 2018; while some menu options might have changed, the steps shown in this tutorial are still the same.
Arranging text and graphics into columns is an effective way to make your document more readable and to fit more content on a single page. These 10 tips will help you generate columns quickly and easily and maintain them with little to no effort.
LEARN MORE: Office 365 Consumer pricing and features
To enable columns, click the Page Layout tab, choose the number of columns from the Columns drop-down in the Page Setup section, and start typing. In Word 2003, click the Columns tool on the Standard toolbar and choose up to four columns or choose Columns from the Format menu. To return to just one column — the default — repeat the process and choose one column. If your columns suddenly disappear, check your view property. Columns are visible only in Print Layout view.
1: Use the right tool for the job
Once you enable columns, you must stick with the columnar flow. Text will flow down the left-most column and into the top of the next column in what’s known as newspaper style. This means that you can’t just click inside any column and start typing. When you need to align text across the page from column to column (in parallel format) use tabs or a table.
2: Add columns to existing text
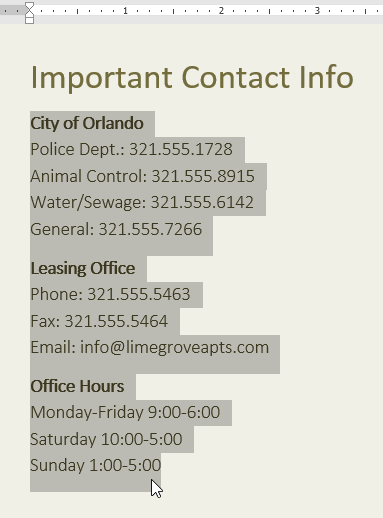
When you enable columns, Word will automatically guide your text into columnar format. If the text already exists, the technique is the same. However, you must select the text first as shown in Figure A. Then, using the instructions given in the introduction, select the number of columns you want. Figure B shows the results of dividing the existing single column of text into two columns.
Figure A
Select existing text to change the column property for only that text.
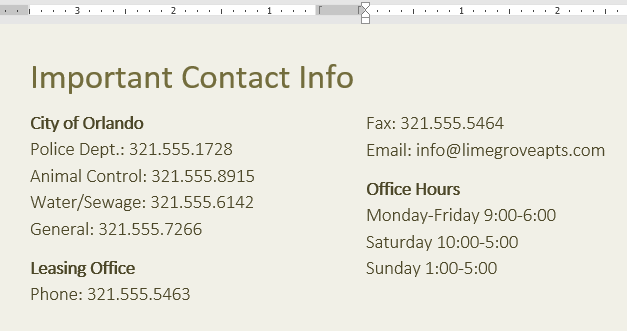
Figure B
These two columns began as one column.
3: Adjust spacing
Columns usually make content more readable because of the shorter lines. You can also use a smaller font than you might ordinarily use. That means you can fit more content on a page using columns. The type of document will determine the number of columns and whether columns are equal in width. However, the general run allows between 40 to 60 characters per line. Any more or less makes the document less readable.
The spacing between columns is the gutter. If it’s too narrow, readers will wander across the gutter to the next column instead of wrapping around to the next line in the column. To adjust the gutter, choose More Columns from the Columns drop-down (on the Page Layout tab), as shown in Figure C. In Word 2003, choose Columns from the Format menu.
Figure C
Adjust the spacing between the columns.
Because you’re working with short lines, you’ll need to rethink paragraph indents. I recommend that you use small indents or don’t indent paragraphs at all.
4: Display text boundaries
Figure D
- Click the File menu and choose Options (under Help). In Office 2007, click the Office button and then click Word Options. In Word 2003, choose Options from the Tools menu, and skip to step 3.
- Select Advanced in the left pane.
- In the Show Document Content section, check the Show Text Boundaries option.
- Click OK.
Figure D
Displaying text boundaries can facilitate column maintenance.
5: Quickly access options
Many options are available via the Columns dialog (shown in Figure C). To access it, click inside a multi-column section and double-click the gutter space in the horizontal ruler (displayed at the top of the page) shown in Figure E.
Figure E
Quickly access column properties by double-clicking the horizontal ruler.
6: Equalize the columns
To create columns of equal width and gutter space check the Equal Column Width option in the Columns dialog (at the bottom of the Width And Spacing section). Doing so will dim all but the first column’s measurements. Use the first column’s settings to adjust all of the columns. Word will adjust the other settings accordingly. Remember, you can use [Ctrl]+Z to undo changes.
7: Add a column break
When needed, you can force a column break by pressing [Ctrl]+[Shift]+[Enter]. Doing so will position the cursor at the top of the next column, leaving the remainder of the current column blank, as shown in Figure F. A column break positions a hard break at the inserted location and pushes remaining text to the top of the next column. If you insert a column break in the last column on a page, the break also acts as a page break. If you don’t want a page break there, you’ll have to delete the column break.
Figure F
Insert a column break to force text to the top of the next column.
To insert a column break, click the Page Layout tab and choose the Column Break from the Breaks drop-down in the Page Setup section. In Word 2003, choose Break from the Insert menu. Column breaks are similar to page breaks in that they inherit formatting from the following paragraph, which can be confusing. There’s nothing special you have to do — knowledge is the simple remedy.
SEE: Comparison chart: Office suites (Tech Pro Research)
8: Balance the columns
Depending on the amount of text you enter and the length of the columns, you might end up with a long and a short column. You can often insert a column break and balance the text yourself. However, the break remains if you return to a single column. When a forced break isn’t the right choice, insert a continuous section break. Doing so creates a new section and Word distributes the text across the columns. To add a continuous section break, do the following:
- Position the cursor at the end of the last column.
- On the Page Layout tab, click Breaks on the Page Layout tab. In Word 2003, choose Break from the Insert menu.
- Select Continuous in the Section Breaks section.
As before, you can adjust the balance between the two columns if you like by pushing text into the next column or pulling text back into the previous column. Unlike the column break method, there’s no column break to leave behind if you return to a single column format. However, the section break remains and you’ll probably want to remove it. To do so, click Show/Hide on the Standard toolbar to display formatting marks then just delete the section break marker.
9: Create a title that spans columns
Entering a title before you generate the columns is simple. You just enter the title and format it as you normally would. Then, set your column properties and start typing your columnar text. If, on the other hand, you enter the title after generating the columns, you might find yourself scratching your head. The good news is, it’s just as easy to add the title after you generate the columns as before:
- Position the cursor at the beginning of the first column, right where you want the title to appear.
- Enter the title text.
- Press [Enter] to push the column text to the next line, leaving the title text in a line of its own, as shown in Figure G.
- Select the title text.
- Click the Page Layout tab and click the Columns drop-down in the Page Setup group, then choose One, as shown in Figure H. In Word 2003, click the Columns tool on the Standard toolbar and choose one column.
- With the title still selected, click the Center alignment tool in the Paragraph group (on the Home tab). Figure I shows the centered title in a single column that spans all the columns. In Word 2003, Center is on the Formatting toolbar.
Figure G
Get the title on a line of its own.
Figure H
Generate a single column for the title text.
Figure I
This centered title spans the columns.
You’re not stuck with a one-column span. You can span the title across two, three, or as many columns as you like, regardless of the number of columns in the section. Just select the text and choose the appropriate number of columns.
In step 5, you might have noticed that Word interested a continuous section break. That’s how Word splits the multi-column section from the title section.
10: Add a picture
You can insert a picture in a columnar section the same way you would in a normal document (one column). Click the Insert tab and click Picture or Clip Art in the Illustrations group, locate your picture, and continue. Then, right-click the newly inserted graphic and choose Square or Tight from the Wrap Text drop-down in the Arrange group on the contextual Format tab. In Word 2003, right-click the image, choose Format Picture, and click the Layout tab.
Figure J shows a picture positioned in the gutter between columns. To accomplish this, repeat the process above and then drag the graphic over the break between the columns. When you drop the graphic, Word will scroll the text around the graphic if you specified the right wrap property.
Figure J
Position graphics between two columns.
Affiliate disclosure: TechRepublic may earn a commission from the products and services featured on this page.
Lesson 15: Columns
/en/word/breaks/content/
Introduction
Sometimes the information you include in your document is best displayed in columns. Columns can help improve readability, especially with certain types of documents—like newspaper articles, newsletters, and flyers. Word also allows you to adjust your columns by adding column breaks.
Optional: Download our practice document.
Watch the video below to learn more about columns in Word.
To add columns to a document:
- Select the text you want to format.

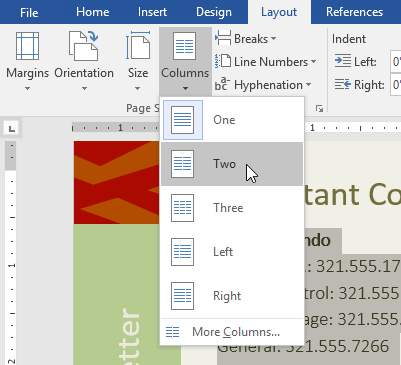
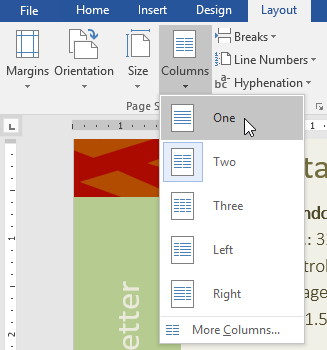
- Select the Layout tab, then click the Columns command. A drop-down menu will appear.
- Select the number of columns you want to create.
- The text will format into columns.
Your column choices aren’t limited to the drop-down menu that appears. Select More Columns at the bottom of the menu to access the Columns dialog box. Click the arrows next to Number of columns: to adjust the number of columns.

If you want to adjust the spacing and alignment of columns, click and drag the indent markers on the Ruler until the columns appear the way you want.
To remove columns:
To remove column formatting, place the insertion point anywhere in the columns, then click the Columns command on the Layout tab. Select One from the drop-down menu that appears.
Adding column breaks
Once you’ve created columns, the text will automatically flow from one column to the next. Sometimes, though, you may want to control exactly where each column begins. You can do this by creating a column break.
To add a column break:
In our example below, we’ll add a column break that will move text to the beginning of the next column.
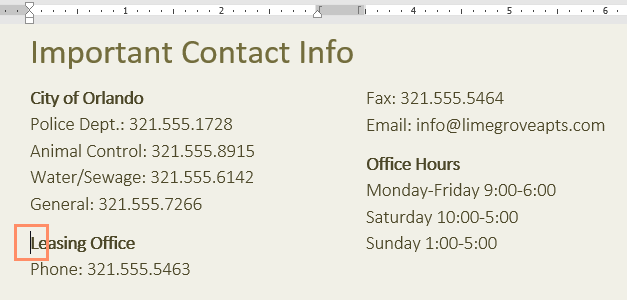
- Place the insertion point at the beginning of the text you want to move.
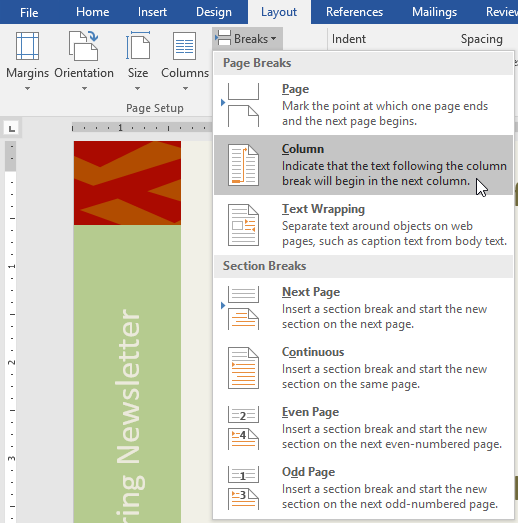
- Select the Layout tab, then click the Breaks command. A drop-down menu will appear.
- Select Column from the menu.
- The text will move to the beginning of the column. In our example, it moved to the beginning of the next column.
To learn more about adding breaks to your document, review our lesson on Breaks.
To remove column breaks:
- By default, breaks are hidden. If you want to show the breaks in your document, click the Show/Hide command on the Home tab.
- Place the insertion point to the left of the break you want to delete.
- Press the delete key to remove the break.
Challenge!
- Open our practice document.
- Scroll to page 3.
- Select all of the text in the bulleted list below Community Reminders and format it as two columns.
- Place your cursor at the beginning of the fourth bullet in front of the word Visitors.
- Insert a column break.
- When you’re finished, your page should look something like this:


/en/word/headers-and-footers/content/
Asked by: Aditya Nolan
Score: 4.5/5
(62 votes)
Essential to formatting many documents, columns help break up the layout of a page full of text. You can set columns just about any way you like with the ability to specify the number, size, and borders.
How do you use columns in Microsoft Word?
On the Layout tab, click Columns, then click the layout you want.
- To apply columns to only part of your document, with your cursor, select the text that you want to format.
- On the Layout tab, click Columns, then click More Columns.
- Click Selected text from the Apply to box.
What does the columns button do in Word?
Columns are a document-level format. Choosing a column format from the Columns button menu affects the entire document, reformatting every page to the number of columns specified. If you need to set different column formats on different pages, split the document into sections.
What are rows and columns in MS Word?
As discussed in the previous chapter, a table is a structure of vertical columns and horizontal rows with a cell at every intersection. A Word table can contain as many as 63 columns but the number of rows is unlimited. This chapter will teach you how to add and delete rows and columns in a table.
What is column example?
5. The definition of a column is a vertical arrangement of something, a regular article in a paper, magazine or website, or a structure that holds something up. An example of column is an Excel list of budget items. An example of column is a weekly recipe article.
38 related questions found
What are the 3 types of columns?
The three major classical orders are Doric, Ionic, and Corinthian. The orders describe the form and decoration of Greek and later Roman columns, and continue to be widely used in architecture today. The Doric order is the simplest and shortest, with no decorative foot, vertical fluting, and a flared capital.
What’s the difference between rows and columns?
Rows are a group of cells arranged horizontally to provide uniformity. Columns are a group of cells aligned vertically, and they run from top to bottom. Although the main reason for both rows and columns is to bifurcate groups, categories and so on, there is a fine line of difference between the two.
How do I add and delete rows and columns in Word?
Click where you want in your table to add a row or column and then click the Layout tab (this is the tab next to the Table Design tab on the ribbon). To add rows, click Insert Above or Insert Below and to add columns, click Insert Left or Insert Right.
What is the minimum number of rows and columns in MS Word?
The minimum number of rows and columns in the MS document is 1 and 1.
What is the maximum number of columns in a Word document?
In Microsoft Word you can insert a table with up to 63 columns, that is the limit to the number of columns allowed in a Word document.
How do I make columns in Word 2020?
How do you make columns in Word?
- Highlight the text you want to format; if you do not highlight any text, Word will format the entire document.
- Click the Page Layout tab, and then select Columns….
- Choose the format of your columns.
- Click OK.
How do I type in separate columns in Word?
Write your text, select it, and go to the Layout tab. Click Columns, and choose Three or click or tap More Columns if you need even more. If you choose Three, the text you have selected is immediately split into three columns.
How do I stop columns in Word?
Here’s how:
- Place the insertion pointer wherever you want your columns to stop.
- Summon the Columns dialog box.
- In the Columns dialog box, choose One from the Presets area.
- From the Apply To drop-down list, select This Point Forward.
- Click OK. The columns stop, and regular, one-column text is restored.
Why are my columns not working in Word?
Double-check the column settings you have in place to make sure the formatting is configured as required. Select the section of the text you’re working with, then choose «Columns» and «More Columns» from the Page Layout menu tab.
How do I fix columns in Word?
To fit the columns to the text (or page margins if cells are empty), click [AutoFit] > select «AutoFit Contents.» To fit the table to the text, click [AutoFit] > select «AutoFit Window.» To keep Word from automatically adjusting your column size, click [AutoFit] > select «Fixed Column Width.»
How do I move my cursor between columns in a Word document?
The standard way to do this (using the keyboard) is to use the Alt key in conjunction with the up and down arrow keys. If you press Alt+Down Arrow, the insertion point is moved to the top of the next column.
What is the minimum number of rows and columns?
The minimum number of rows and columns in MS Word document is 1 row and 1 column.
How many columns can be created in MS Word?
In Microsoft Word you can insert a table with up to 63 columns, that is the limit to the number of columns allowed in a Word document.
How many columns are there in MS Word by default?
Click on More Columns, and you’re taken to a dialog box that allows you to set up your columns exactly the way you want them. The default is one column — just a regular document.
How do I remove columns in Word 2010?
Step 1: Open the document with columns in Word 2010. Step 2: Click the Page Layout tab at the top of the window. Step 3: Click the Columns drop-down menu in the Page Setup section of the ribbon at the top of the window, then choose the number of columns that you want in your document.
How do I remove right columns in Word?
Remove columns from a document
- Place the insertion pointer anywhere in your document.
- Click the Page Layout tab.
- From the Page Setup group, choose Columns→More Columns.
- In the Columns dialog box, choose One from the Presets area.
- From the Apply To drop-down list, select Whole Document.
- Click OK.
When integrating Word and Excel word is usually the?
Solution(By Examveda Team)
When integrating ms-word and excel, word is usually the Destination and Client .
What is a column in math?
more … An arrangement of figures, one above the other. This is a column of numbers: 12.
What is a column writing?
A column is a recurring piece or article in a newspaper, magazine or other publication, where a writer expresses their own opinion in few columns allotted to them by the newspaper organisation. Columns are written by columnists.
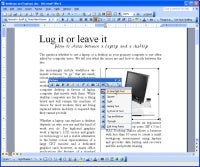
Give your business newsletters, manuals and brochures a designer look by arranging the text in them in a columnar layout. The shorter lines and punchier look of a two-column layout maximizes the use of space on the page and aids readability. In this article, I’ll show you how to work with columns inside Microsoft Word.
Benefits of Using Columns
When you lay out page text in columns you will generally fit a little more text on the page than if you laid it out so the lines stretch full width of the page. The shorter lines of text are also easier to read, as the reader’s eye doesn’t need to travel so far across the page before returning to read the next line of text. A document laid out in columns can look more approachable too, as there is white space within the page, which offers readers a place to rest their eyes.
Format Text in Columns
To format an entire document in columns, choose Format > Columns and select the number of columns to create. If you choose Two, the document will be laid out in two equal size columns arranged between the current page margins.
In most cases, you won’t format the entire document in columns, just part of it, such as everything below the heading and introductory paragraph. To do this select only the text you want to place in columns and choose Format > Columns. Select the number of columns – two is a good choice for a standard letter size page.
The Apply To dropdown list will show Selected Text indicating that only the text you have selected will convert to columns. To add a line between the columns check the Line Between checkbox and click OK.
The text in the columns will snake around the page similar to print in a newspaper. It will fill the first column on the page and then the second column. If you have more text than can fit on a single page it will scroll over to the first column on the next page and so on.
Managing the Last Page
If you have a long document formatted into columns, you may find that the last page is unbalanced, and that the text fills only part of one column. If you prefer the columns to be even, click after the last piece of text on the page and choose Insert > Break, and from the Section Break options choose Continuous and click OK. This evens out the text dividing it evenly to fill the two columns on the page.
To move from one column to begin the next, or to even out columns, use a continuous section break.
(Click for larger image).
Converting Columns to Text
If you have some text in your document that’s laid out in columns but you want it to stretch across the full page, you can undo the columns. To do this, select the text and choose Format > Columns, select One column and click OK. This returns the selected text to a single page-wide column.
When you convert text to columns or back to regular page-wide text, Word inserts continuous-section breaks into the document each time the column formatting changes. You can see these section breaks by clicking the Show/Hide button on the toolbar.
Starting a New Column
If you are typing text in a column and if you want to start a new one before you have completely filled the first, you can insert a column break. To do this, click after the last piece of text that you want to appear in the current column and choose Insert > Break > Column Break and click OK. This moves the following text to the top of the next column even though you haven’t yet filled the previous column.
Adding Images and Objects
When you add an image to a page, choose the “In line with text” layout to ensure it sits within the columns and moves with the text.
(Click for larger image).
When you add an image or textbox to a document, you can choose to place it in a column so that it moves with the text in the column or keep it independent of the text so that it remains in place as the rest of the text moves around it. Here’s how: click the image or text box and choose Format > Picture or Format > TextBox. From the Layout tab select In line with text to place the image inside the flow of text, or choose Square to move it out of the flow of text so that you can place it anywhere on the page.
Text Formatting Options
When you are working with columns of text, you will find that left-justified text and headings generally looks neater than fully justified text and centered headings. If you format text as fully justified, you will often see unsightly rivers of white space because the text will be stretched to fill the space between the column margins. You can reduce this effect if you hyphenate the text – to do this, choose Tools > Language > Hyphenation and select the Automatically Hyphenate document checkbox.
You will also find that bullet points and numbering look best left aligned in columns of text so the bullets or numbers are flush with the left margin of the column instead of inset in from the margin.
When you next work with a business document like a newsletter or manual in Microsoft Word, use your new column formatting skills to produce a more professional looking result.
Helen Bradley is a respected international journalist writing regularly for small business and computer publications in the USA, Canada, South Africa, UK and Australia. You can learn more about her at her Web site, HelenBradley.com
Do you have a comment or question about this article or other small business topics in general? Speak out in the SmallBusinessComputing.com Forums. Join the discussion today!