
In times with an increasing amount of remote work, presenting Excel files through Zoom, Microsoft Teams, Skype, etc. seems to be the new normal. I often present day-in day-out my Excel files through screen sharing sessions. Depending on the audience, the task and the status of the file, the presentation should probably look as professional as possible. In this article you’ll find the most important tips and tricks!
Introduction
Before we jump in, I’d like to mention a few things, including what you can expect from this article series.
First: This is collections of things you can do in Excel screen sharing sessions. Depending on your situation, who you present to, your state of work and so on, some of these tips and tricks make more sense and some less. So, please try them and decide for yourself, which one is suitable for you.
Second: There are many things within Excel you can do to perform great in virtual meetings. I will start with these. In the next chapter, we will look at especially Windows options. These options are quite general, but we’ll keep it related to Excel. In a third part of this series, I give some recommendations regarding how to present your content. Also here, always considering an Excel background.
Third: Of course, many of the tips and tricks in this series not only apply to online presentations. When sharing your (Excel) work in any way, these things apply universally.
And fourth: Please also consider well, what is the best tool to present your results. You could do that directly in Excel, but also PowerPoint might be an option. Excel might be in favor, when
- you are still working on your file and present preliminary results,
- when you collaboratively work on your Excel file in the meeting or
- when you need dynamic features, such as changing variables and looking at dynamic dashboards.
PowerPoint, however, should be considered when your work is finalized, and you have drawn your conclusions. PowerPoint is in the end made for presenting stuff. It is especially strong when highlighting, commenting and documenting things. And when you don’t want that the results change any longer but rather work on a “frozen” state.
That said, let’s get started!
Part 1: Things to consider within Excel when screen sharing Excel files
Let’s start with the things you can and should do within Excel. From some nice (but often unknown features) to formatting tips & tricks, we will cover the most important things.
01. Switch to Full Screen Mode to present Excel file
Yes, there is such thing in Excel! The full screen mode in Excel hides the ribbon, Quick Access Tool (both on top of the screen) as well as the status bar on the bottom of the screen. Also, Excel expands to cover the whole screen.
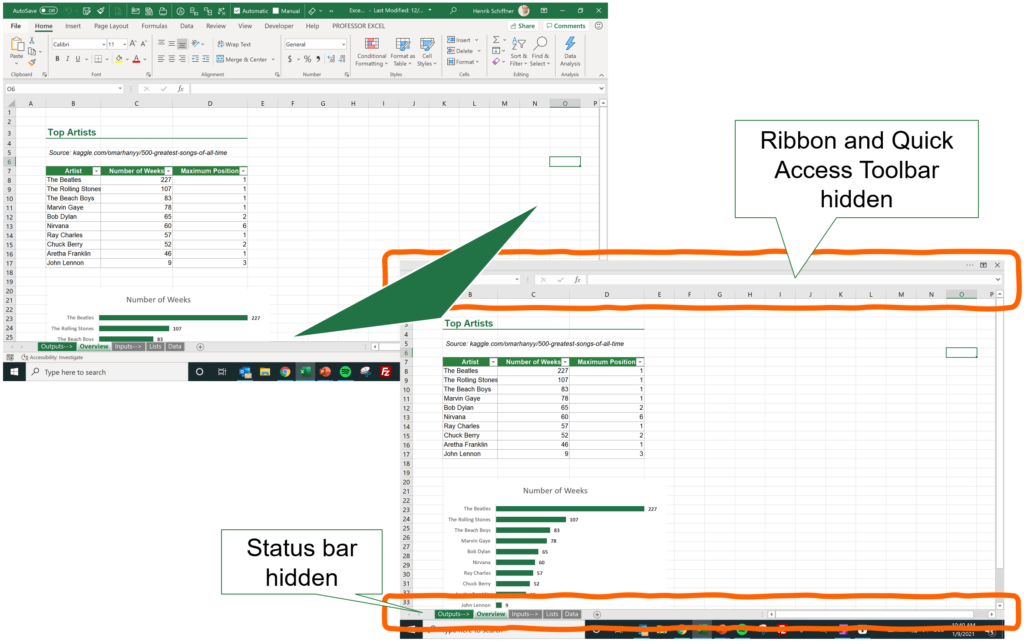
The advantage: You can very quickly enter and leave it. It’s just one keyboard shortcut: Press Ctrl + Shift + F1 on the keyboard.
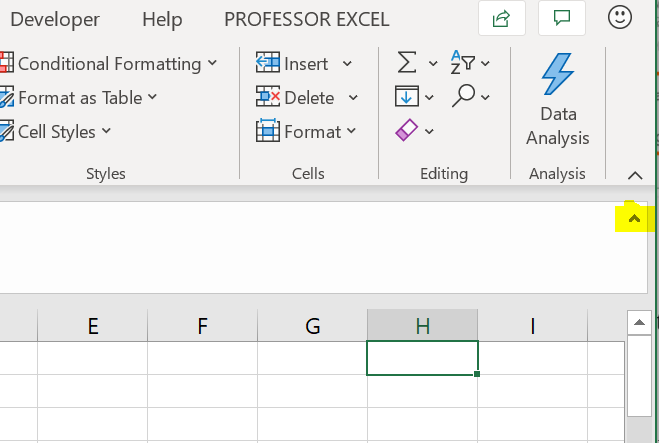
02. Minimize the ribbon
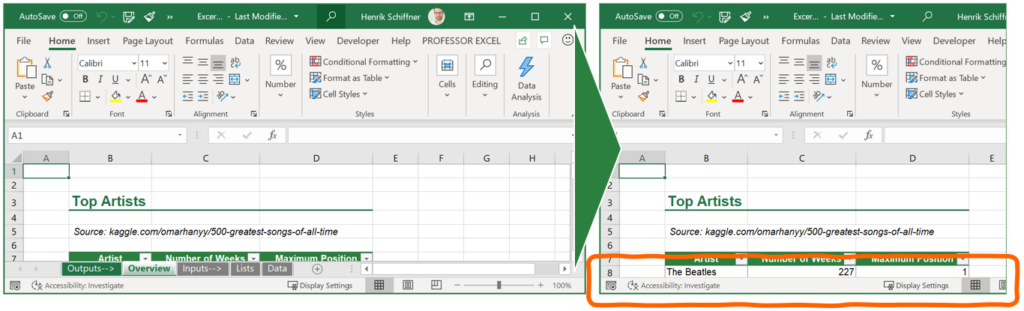
If you do not want the “Full Screen Mode” as described in our number 01 above, you can also hide Excel items and menus manually. So, when presenting Excel files, you usually do not need to access the ribbon. Or at least, seldom access it. You can hide it so that only the ribbon names and not the buttons are shown.
Just double click on the ribbon name, for example on “Home”. When you need to access a button on the ribbon, you can do it by single clicking on the ribbon name. Per double-click on it you’ll show it permanently again.
03. Hide the sheet tabs and scroll bars when you present your Excel file
You can fully hide the tab names on the bottom of the screen. This could be helpful when you only present one worksheet. If you always switch between worksheets, you might want to keep it shown.
Hide Sheets and Scroll Bars by clicking on
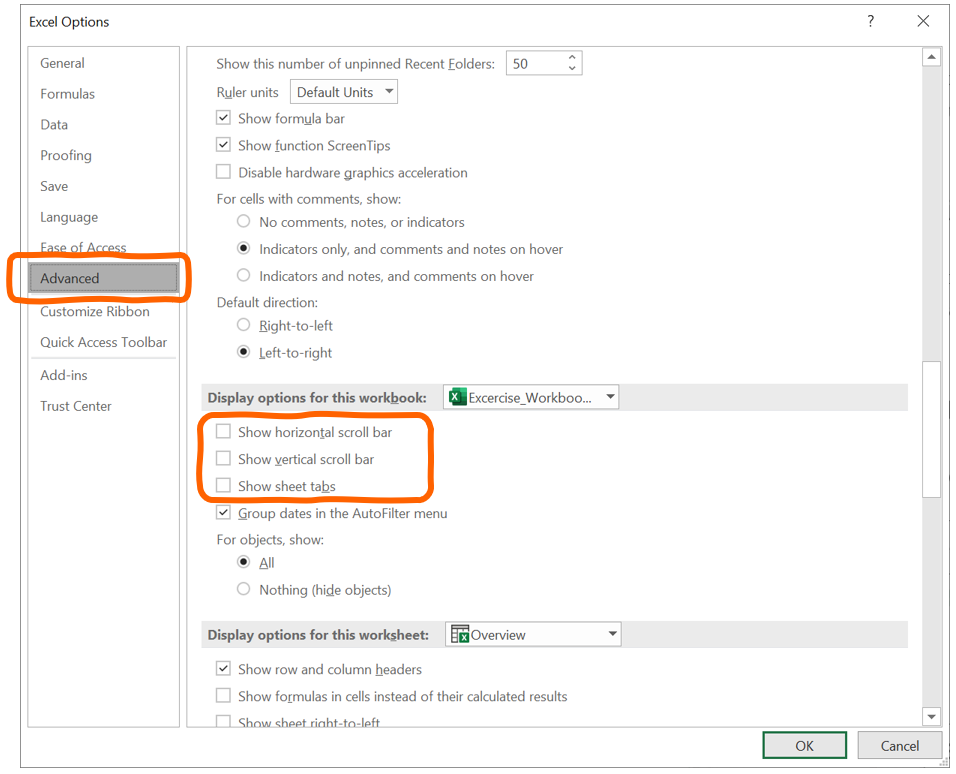
- File,
- then on Options
- and Advanced
- and removing the checkmarks at “Show horizontal scroll bar”.
04. Hide unimportant worksheets when sharing the screen
If you don’t want to hide the sheet names completely – for example if you have to switch between worksheets – you can at least hide unimportant sheets when you present a file.
I usually do this when I’m still in the middle of my work and still have to keep a bunch of temporary worksheets. When presenting my draft, I don’t want them to show up.
Hiding worksheets is very easy: Select all the worksheets you want to hide and right-click on one of them. Next, click on “Hide”. That’s it, sheets are hidden.

Please refer to this article to learn more about hiding and unhiding worksheets – including unhiding several sheets at once and respective keyboard shortcuts.
Just a fun fact in Excel: You can not only hide worksheets, but also set them to “very hidden”. If you want to know more, please also refer to the same article.
05. Excel screen sharing with hidden or minimized formula bar
The formula is usually one of the most used menu items when editing an Excel file. But do you need it when you present it? If not, you might want to hide it.
Furthermore, you can hide the row and column headings. That means, the row numbers on the left-hand side of your worksheet and the column letters A, B, C… are not shown.
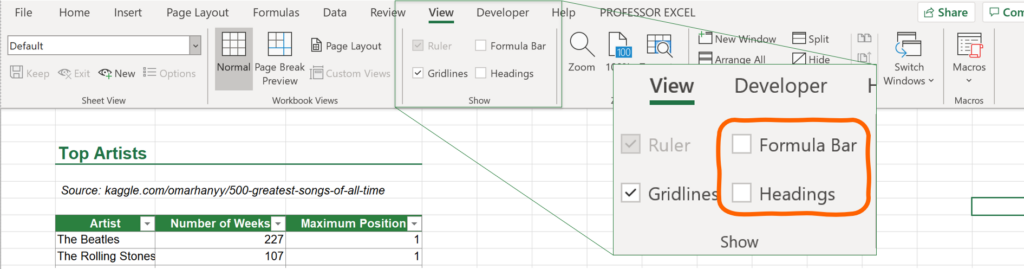
To hide the Formula Bar and row and column heading, go to the View ribbon and untick “Formula Bar” and “Headings”
If you don’t want to hide the formula bar entirely, you can at least make sure that it doesn’t use too much space on the screen. Have you noticed the small arrow on the right-hand side of the formula bar? If the arrow “shows up”, click on it to reduce the size of the formula bar to the minimum.
Do you want to boost your productivity in Excel?
Get the Professor Excel ribbon!

Add more than 120 great features to Excel!
06. Choose the appropriate zoom level when sharing your screen
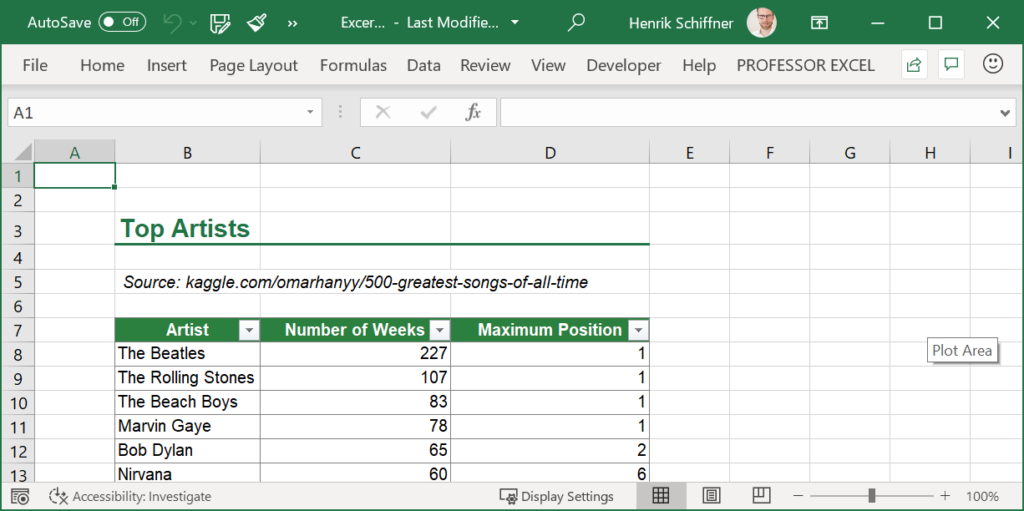
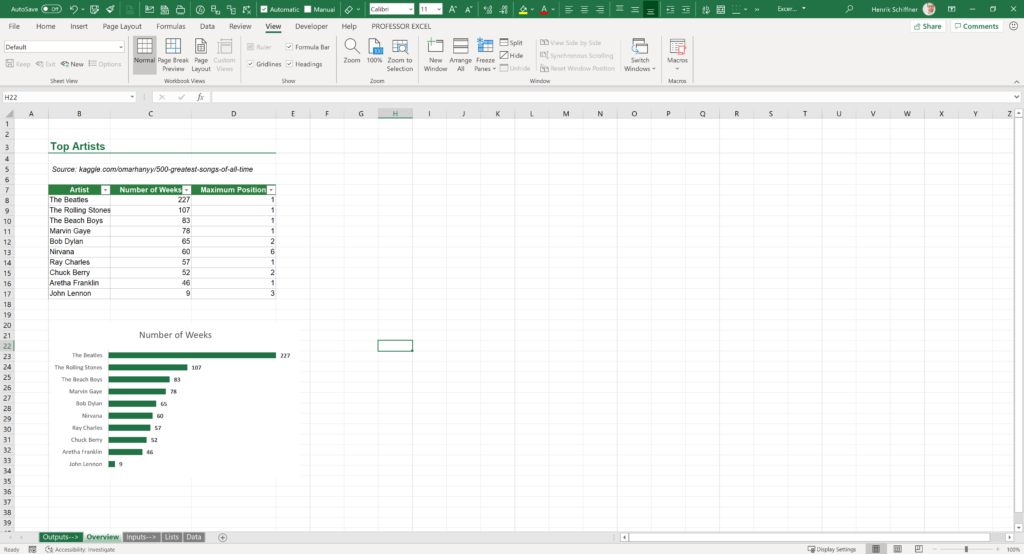
It sounds like a no-brainer that you should select the best zoom level. But it also happens to me over and over again that people I share my screen with complain that its everything looks too small.
That’s because I’m working on a large screen with a high resolution. When I look at Excel, this 100% zoom level looks perfectly fine for me. But when sharing, numbers are actually not really readable for others:
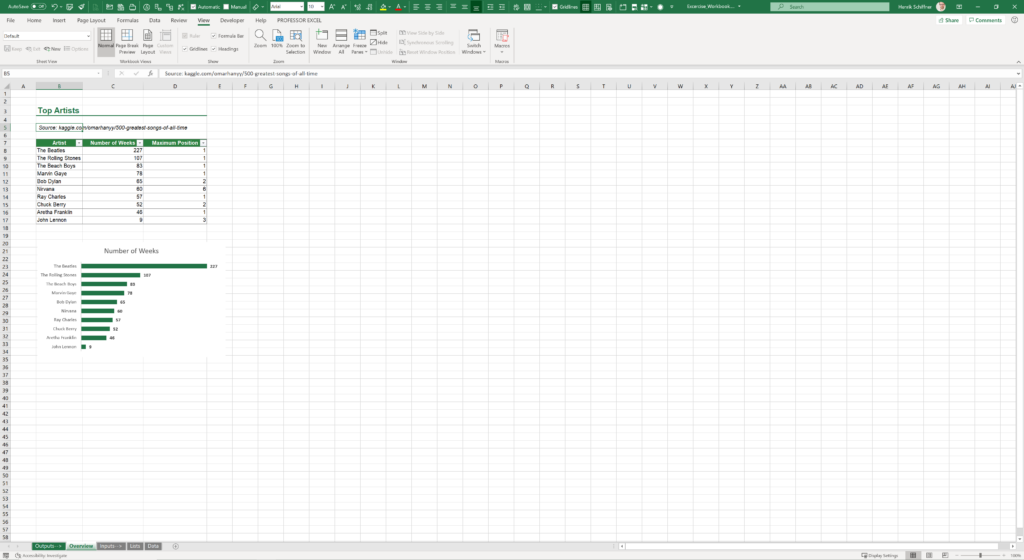
But the truth is that many people work on smaller resolution screens. In fact, more than 80% of the visitors of professor-excel.com use a screen with a resolution of 1920×1080 pixels or less.
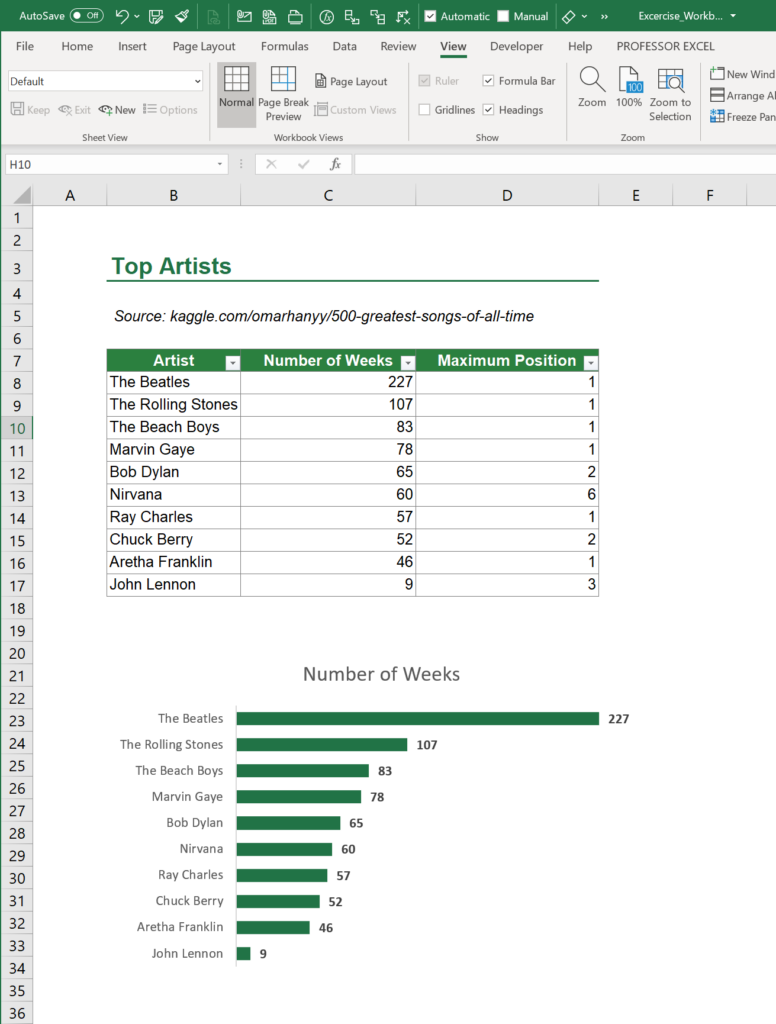
There are a couple of things you can do. First thing within Excel is to zoom into the area you want to show.
- Select the range you want to show.
- On the View ribbon, click on “Zoom to Selection”. In our example above, it now looks like this:
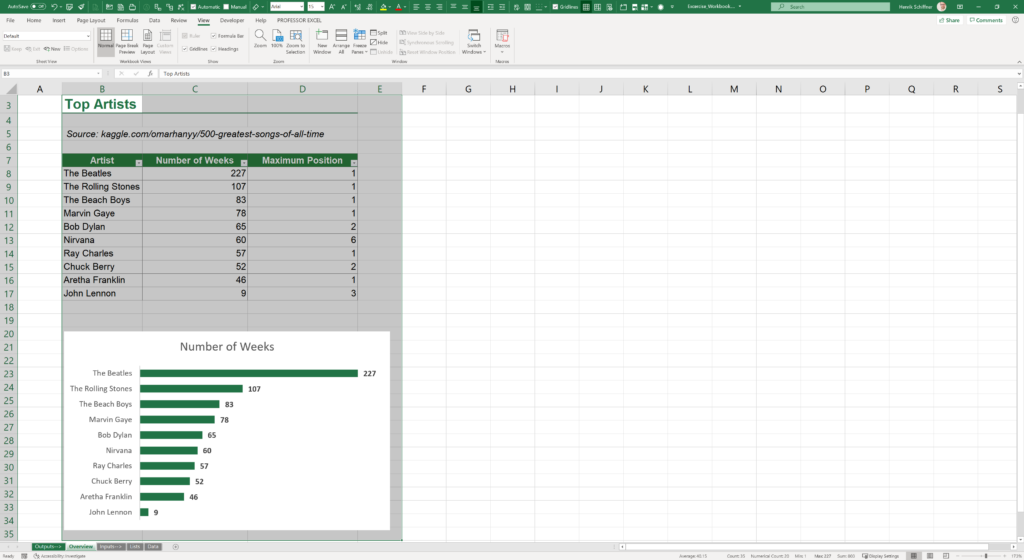
Already better, isn’t it? You can go back to 100% by clicking on “100%” on the View ribbon.
Another thing you can do is change the scaling in Windows. Right-click anywhere on the desktop and click on “Display Setting”. Set the scaling to a higher value in case you use a screen with a high resolution. The scaling increases text and icons without changing the resolution.
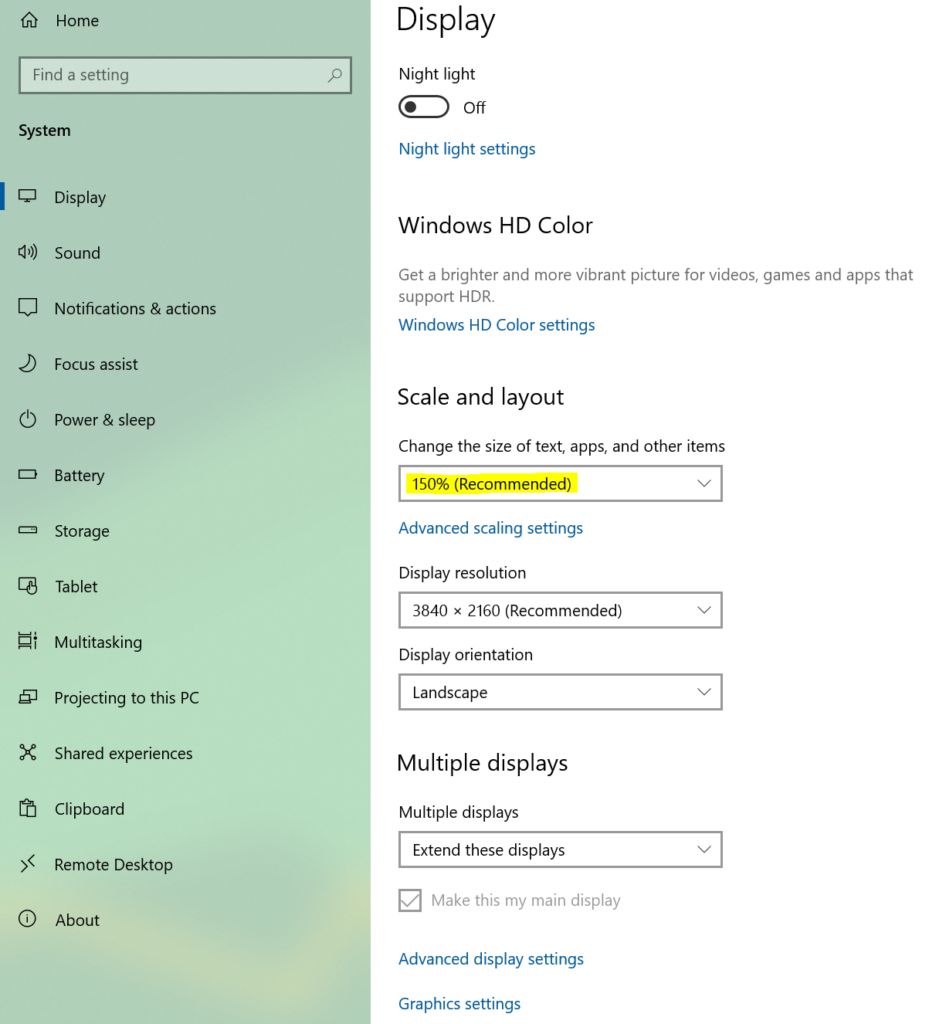
Applying the higher scaling (I’ve now set it to 200%), my Excel window looks like this:
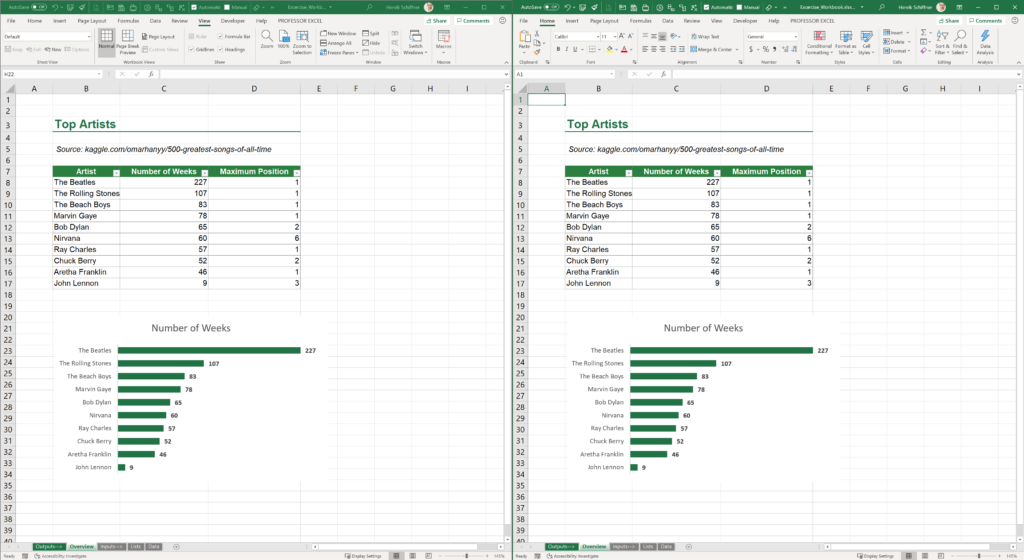
07. Display Excel file on multiple screens
You usually share one screen only. If you have a second screen, you can utilize it. Excel files can be displayed on two screen at the same time. You could display one major worksheet on the main screen which you also share. On your secondary screen you open a different worksheet, for example with assumptions, variables or global settings.
It’s actually very simple: Click on “New Window” on the view ribbon. Now you can arrange the windows as you like.
08. Excel screen sharing without unimportant rows and columns
When I work in larger Excel files, I use to insert lookup / helper rows and columns. Usually, these rows and column just serve a technical purpose and can be hidden.
Also, when working in larger files, unimportant stuff should not be cluttering up the screen. So, why don’t you hide them.
Of course, when I say hide, I mean “Group” and then “Collapse” them. I’ve written an article about that – please check it out.
09. Consider hiding gridlines in Excel screen sharing sessions
Gridlines are the small grey lines between rows and columns. They provide a visual guidance and in general are helpful. But when I present or finish up an Excel file, I usually hide them.
My tables are anyway formatted to have borders around the cells. So, within tables, there already is a visual help.
Hide the gridlines by unticking the “Gridline” checkbox on the View ribbon. Please refer to this article to learn more.
10. Format your file professionally
As usual, the first impression counts. That’s why I recommend applying professional formatting from the beginning. That doesn’t mean, however, to spend hours on formatting. Excel nowadays has some great quick formatting features.
Because I’ve already written many articles about formatting, please refer to these articles:
- 7 simple tricks to make an Excel file look professional
- Finalize Your Excel Workbook: The Complete Checklist
- Hide Zero Values in Excel: 3 Simple Methods
- Thousands or Millions in Excel: How to Change the Number Unit
- IFERROR: How to Handle Error Messages in Excel
11. And the last thing: Use fancy features (when appropriate)
And our last tip when presenting an Excel file through Zoom, Skype, Teams etc.: Use “fancy” features whenever appropriate to generate an additional “wow-effect”.
These features could be:
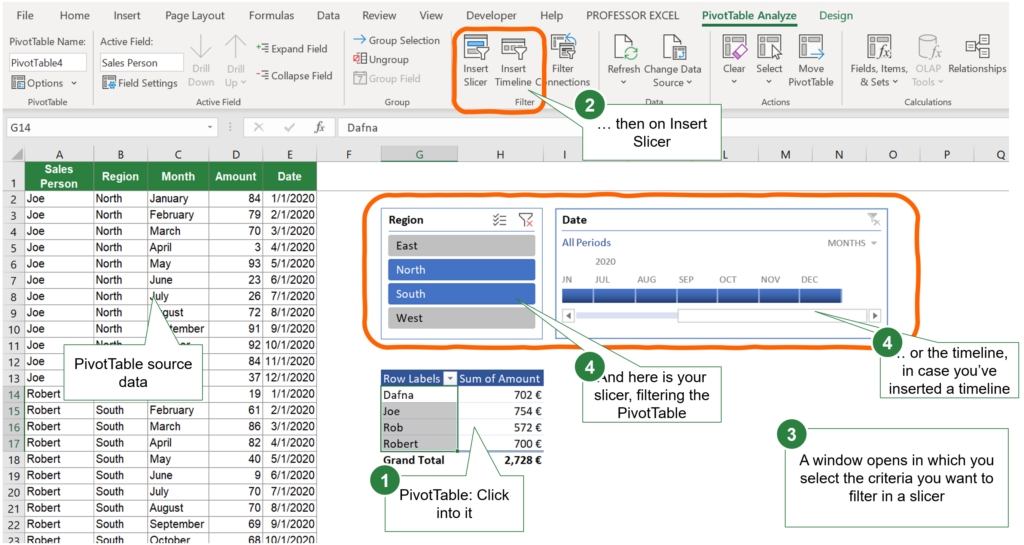
- Slicers when working with PivotTables or Excel tables. I’m planning a tutorial on this, in a nutshell: Slicers provide a very visual filtering (see the screenshot below).
- Timelines: Timelines are similar to slicers a way to filter PivotTables and Excel tables. Please also refer to the steps shown below to insert a timeline.
- Buttons: Buttons can be linked to cells. Please check this article: Insert buttons.
Wrap-up
There are many things to consider within Excel before starting a screenshare. The simple things often involve just the viewing options. More complex things are about formatting and showing or hiding content.
In our next part of this series, we’ll explore the Windows options. And in the third part we’ll look more into the content and presentation loop itself. So, stay tuned – once available, these parts will be linked here!
In the meantime: Zoom has also put together 10 general tips & tricks. Check them out here!
Bottom Line: Learn how to use the new Show Changes feature to see a history of all changes to a workbook from multiple users.
Skill Level: Beginner
Watch the Tutorial
See Everyone’s Changes!
There’s an awesome new feature in Excel called Show Changes. It’s especially helpful if you have multiple people co-authoring (collaborating on) the same file. Excel tracks all of the changes that you and your co-authors are making to a shared workbook. Now you can essentially access a transcript to those changes and see who did what and when.
Currently, you can only view this record of changes using Excel Online. While changes made on the desktop application are still tracked, to view those changes you need to be using the web version.
Viewing Changes
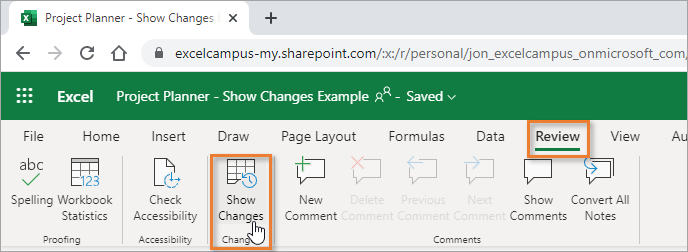
See the changes that have been made to a workbook by going to the Review tab. Then click the Show Changes button.
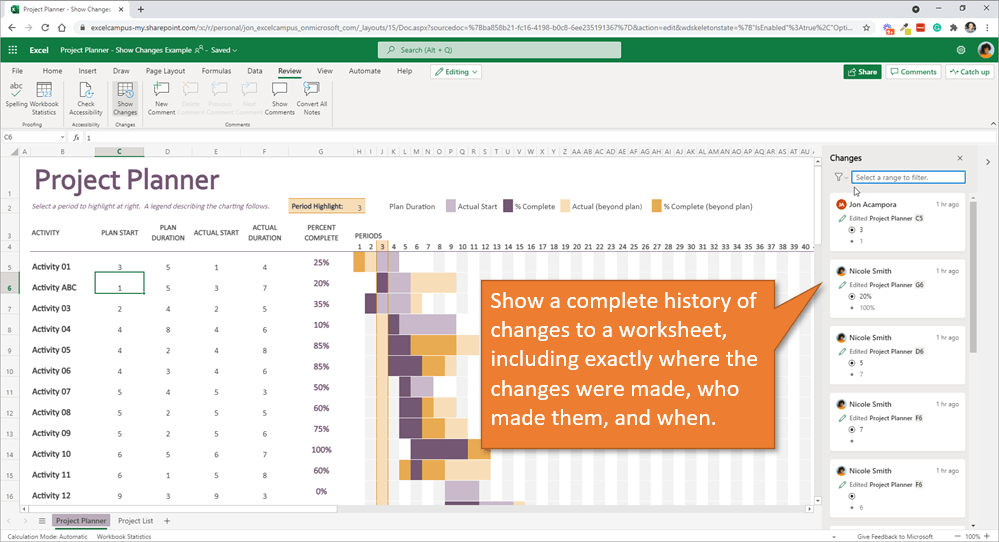
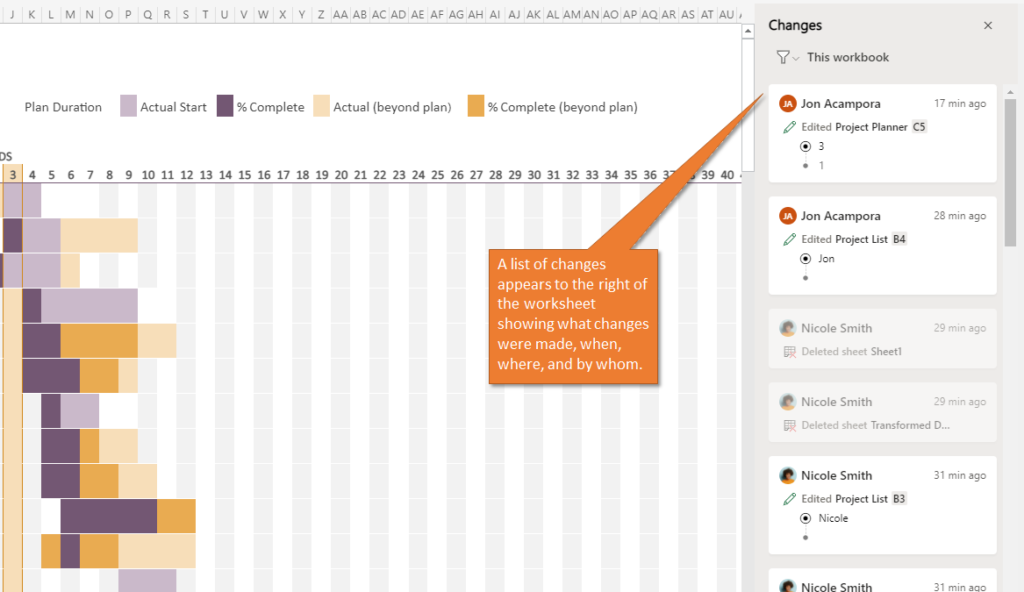
This will open up a task pane on the right side of the worksheet that has a running list. The list contains all of the changes that have been made in the workbook. Included with each entry is the name of the person who made the change, a timestamp of when the change was made, and a description of what the change was.
In instances where values were updated, the entry shows what the old value was in addition to the new value. Knowing what the previous value was can be useful in case you need to change it back.

Click on any of the changes in the list and it will automatically navigate to the cell where the change was made.
Compatibility & Version Requirements
The files that you want to track changes on must be stored on OneDrive or SharePoint, and you must have a Microsoft 365 subscription to use this feature.
The Show Changes pane is currently available on Excel for the web, which you will access in your web browser. As mentioned above, you can make changes to the file on the desktop version of Excel, then view the changes in the web version.
Here is a help page from Microsoft that explains when changes will be tracked and some scenarios where the history might be cleared.
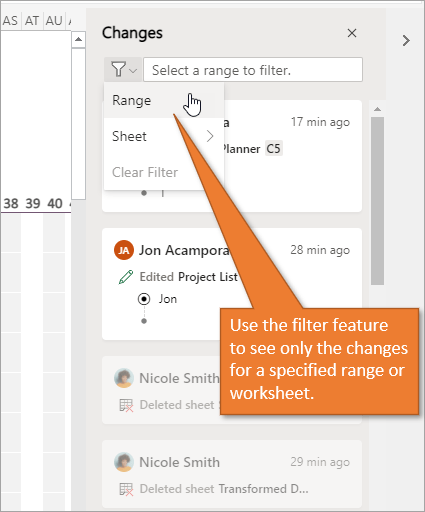
Filter the Change List
As you can imagine, the list of changes can get pretty long over time, so one of the cool features to know about is the ability to filter. You can filter by sheet or even by range. To filter, just click on the button with the funnel icon. Then you will be prompted to select the range or sheet that you want to filter. Once you enter that in, you will see only the changes that have been made to the specified range or sheet.
You can clear your filters using the same drop-down menu.
Viewing Older & Other Changes
As Chery mentioned in the comments below, you might not see older changes in the Show Changes list. I’m not sure of the exact time length or number of changes that are kept in the history. This Microsoft Help Page explains how you can see older changes in the Version History of the file.
At the time of this writing, only changes to cell values and formulas are tracked in Show Changes. Changes to shapes, charts, pivot tables, formatting, hiding, and filters are not tracked yet. Hopefully, those changes will be included in the future.
Conclusion
Again, this is a really useful new feature for Excel, and I’m excited to show it to you. If you haven’t used Excel Online in a while, I encourage you to go play around with it. The Microsoft development team has done a great job of updating the web version to be more in line with the desktop version of Excel.
Can you see yourself using this Show Changes feature? I’d love to hear your feedback or questions. You can write them in the comments section below.
 Do unwanted files open automatically when Excel starts? Perhaps something changed in your computer, and Excel files are opening automatically, and you want to get rid of them. Keep reading, to see where those files might be located, and how to stop them from opening.
Stop Unwanted Files Open Automatically
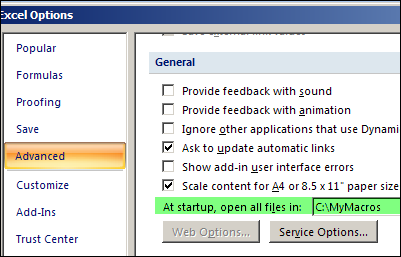
To stop files that automatically open in Excel 2007 and Excel 2010, you can remove a folder name in the Excel options:
- Click the Office Button, then click Excel Options (In Excel 2010, click the File tab, then click Options)
- Click the Advanced category, and scroll down to the General section.
- In the box for ‘At startup, open all files in’, you might see the name of a folder, and its path
- Clear the folder information from that box (or go to that folder and remove the unwanted files).
- Click OK, to close the Excel Options dialog box.
Check the XLSTARTUP Folders
If there was nothing listed in the Startup box, the unwanted files might have been accidentally saved to one of the XLSTART folders.
- C:Program FilesMicrosoft OfficeOffice12XLSTART (for Excel 2007)
- C:Program FilesMicrosoft OfficeOffice14XLSTART (for Excel 2010)
- C:Documents and SettingsUser nameApplication DataMicrosoftExcelXLSTART
In Windows Explorer, go to those folders, and remove the unwanted files, to prevent them from opening automatically when Excel starts.
Check for Add-Ins
Thanks to Sarah, who commented below. She discovered that her unwanted file had been installed as an add-in. Here’s how she fixed it:
“When I moved the file to a different folder, it wouldn’t open but I would get an error every time I opened Excel saying that if couldn’t find that file.
I finally fixed it by going to Options -> Add-Ins -> Manage (Go…) and I saw that file had been created as an add in. From here, I deleted it, and it’s working perfectly.”
Excel 2003 and earlier versions
For earlier versions of Excel, there are instructions in the Contextures Excel FAQs: When I start Excel, why do a million files open up automatically?
More Ways to Prevent Files from Opening
You can also use a command-line switch, or the Esc key, to stop files from opening automatically.
For more details on how to block files from opening automatically, see the Microsoft Knowledge Base article: How to prevent files from opening automatically in Excel.
For help with troubleshooting other problems when starting Excel, see Jan Karel Pieterse’s article: Startup Problems.
_______________
I need some assistance with Excel files not opening for a user. We have tried multiple files, and they all open Excel to a blue/gray screen. If you go to File>Open, the file will then load into Excel. This is only for one user. I am able to open the files fine on my device, and other users can open the files also. The other users use a Citrix connection, and have a published desktop. I did do research on this issue. The fixes that I have seen are all application fixes. I don’t think this would be a correct fix, since it is only one user with the issue. The user with the issue is a Citrix user, and I have tested files can open in Citrix, and not on Citrix. Below are fixes that I have found.
Click on Start > Control Panel > folder Options > File types.
Select XLSX file type extension and click on Advanced.
Highlight Open under actions and click Edit.
In the dialog box that appears you need to make two adjustments:
1. Application to perform action:
At the end of the line after /e append a space character followed by «%1» (including the quotes)
2.Delete [open(«%1»)] from DDE message, [rem see command line] and from DDE application not running.
Close Excel and
Windows Start Button|Run
excel /unregserver
then
Windows Start Button|Run
excel /regserver
The /unregserver & /regserver stuff resets some of the windows registry to
excel’s factory defaults.
Check to make sure that .xls opens with Excel.
And of course, uninstall and reinstall Office.
Thanks to all that read, and any help with this would be great.
Neil
I had the exact same problem in Excel 2015 for quite a while, and when I hid the Personal.xlsb workbook, a blank page would open instead and I couldn’t close that one without closing the file I actually wanted open.
But I finally found a solution! My problem was that I had a Personal.xlsb file in an alternate location, and for some reason a search of the C drive wasn’t returning a match for that file name. My location was the same one that Amber mentioned above, but I wanted to share how I found it in case someone else has a different location.
The solution is to find the real location of the Personal.xlsb file so you can delete it. To do that, open excel and switch to the Personal.xlsb file. Now select the «File» tab on the top left which will load an «Info» page. On the right side of the information on that page there is information such as «Properties, Related Dates, Related People, and Related Documents.» Directly under Related Documents is a hyperlink that says «Open File Location.» Click this hyperlink and excel will open the true location of the Personal.xlsb file regardless of where your particular installation has placed it.
Now close Excel, delete the Personal.xlsb file, and reopen Excel. It should open only the file you want and a second window will no longer appear. From this point on, I expect other tips online about creating/deleting/showing/hiding the Personal.xlsb file will work as expected. But I have left it deleted and Excel is finally loading as I expect.