
Содержание
- Workbook object (Excel)
- Remarks
- Example
- Events
- Methods
- Properties
- See also
- Support and feedback
- VBA Working with Workbooks (The Workbook Object)
- The Workbook Object
- Workbook Index Number
- Activate Workbook, ActiveWorkbook, and ThisWorkbook
- Activate Workbook
- ActiveWorkbook
- ThisWorkbook
- VBA Coding Made Easy
- Open Workbook
- Open and Assign to Variable
- Open File Dialog
- Create New (Add) Workbook
- Add New Workbook to Variable
- Close Workbook
- Close & Save
- Close without Save
- Workbook Save As
- Other Workbook VBA Examples
- Workbook Name
- Protect Workbook
- Loop Through all Open Workbooks
- Workbook Activate Event
- VBA Code Examples Add-in
- Объект Workbook И Семейство Workbooks
- Свойства объекта Workbook и семейства Workbooks
- Методы объекта Workbook и семейства Workbooks
- What Are Modules In Excel VBA Coding?
Workbook object (Excel)
Represents a Microsoft Excel workbook.
The Workbook object is a member of the Workbooks collection. The Workbooks collection contains all the Workbook objects currently open in Microsoft Excel.
The ThisWorkbook property of the Application object returns the workbook where the Visual Basic code is running. In most cases, this is the same as the active workbook. However, if the Visual Basic code is part of an add-in, the ThisWorkbook property won’t return the active workbook. In this case, the active workbook is the workbook calling the add-in, whereas the ThisWorkbook property returns the add-in workbook.
If you are creating an add-in from your Visual Basic code, you should use the ThisWorkbook property to qualify any statement that must be run on the workbook that you compile into the add-in.
Example
Use Workbooks (index), where index is the workbook name or index number, to return a single Workbook object. The following example activates workbook one.
The index number denotes the order in which the workbooks were opened or created. Workbooks(1) is the first workbook created, and Workbooks(Workbooks.Count) is the last one created. Activating a workbook doesn’t change its index number. All workbooks are included in the index count, even if they are hidden.
The Name property returns the workbook name. You cannot set the name by using this property; if you need to change the name, use the SaveAs method to save the workbook under a different name.
The following example activates Sheet1 in the workbook named Cogs.xls (the workbook must already be open in Microsoft Excel).
The ActiveWorkbook property of the Application object returns the workbook that’s currently active. The following example sets the name of the author for the active workbook.
This example emails a worksheet tab from the active workbook by using a specified email address and subject. To run this code, the active worksheet must contain the email address in cell A1, the subject in cell B1, and the name of the worksheet to send in cell C1.
Events
Methods
Properties
See also
Support and feedback
Have questions or feedback about Office VBA or this documentation? Please see Office VBA support and feedback for guidance about the ways you can receive support and provide feedback.
Источник
VBA Working with Workbooks (The Workbook Object)
In this Article
This guide will introduce you working with the Workbook Object in VBA.
The Workbook Object
First, in order to interact with workbooks in VBA, you must understand the Workbook Object.
With the workbook object, you can reference workbooks by their name like this:
However, this code will only work if the workbook is open. If the workbook is closed, you will need to provide the full workbook path:
Instead of typing out the full path, if your desired workbook is in the same directory as the workbook where your code is stored, you could use this line code to open the workbook:
This makes use of the ThisWorkbook object that we will discuss in the next section.
Workbook Index Number
Last, you can reference workbooks by their “Index Number”. The index number of a workbook corresponds to the order that the workbook was opened (technically its the workbook’s position in the Workbooks Collection).
This is useful if you want to do something like close the first (or last) opened workbook.
Activate Workbook, ActiveWorkbook, and ThisWorkbook
If a workbook is NOT ACTIVE, you can access the Workbook’s objects like this:
However, if the workbook is Active, you can omit the workbook object:
And if you want to interact with the workbook’s active sheet, you can also ommit the sheets object:
Activate Workbook
To activate a workbook, use the Activate Method.
Now you can interact with Book2’s object’s without explicitly stating the workbook name.
ActiveWorkbook
The ActiveWorkbook object always refer to the active workbook. This is useful if you’d like to assign the ActiveWorkbook to a variable to use later.
ThisWorkbook
The ThisWorkbook object always refers to the workbook where the running code is stored. To activate ThisWorkbook, use this line of code:
VBA Coding Made Easy
Stop searching for VBA code online. Learn more about AutoMacro — A VBA Code Builder that allows beginners to code procedures from scratch with minimal coding knowledge and with many time-saving features for all users!

Open Workbook
To open a workbook, use the Open Method:
The newly opened workbook will always become the ActiveWorkbook, allowing you to easily interact with it.
The Open Method has several other arguments, allowing you to open read-only, open a password-protected workbook, and more. It’s covered here in our article about Opening / Closing Workbooks.
Open and Assign to Variable
You can also open a workbook and assign it to a variable at the same time:
Open File Dialog
You can also trigger the Open File Dialog Box like this:

Create New (Add) Workbook
This line of code will create a new workbook:
The new workbook now becomes the ActiveWorkbook, allowing you to interact with it (ex. save the new workbook).
Add New Workbook to Variable
You can also add a new workbook directly to a variable:
Close Workbook
Close & Save
To close a workbook with saving, use the Close Method with SaveChanges set to TRUE:
Close without Save
To close without saving, set SaveChanges equal to FALSE:
Workbook Save As
The SaveAs Method is used to save a workbook as.
To save a workbook with a new name, in the same directory, you can imply use this:
where “new” is the new file name.
To save a workbook in a new directory with a specific file extension, simply specify the new directory and file name:
Other Workbook VBA Examples
Workbook Name
Protect Workbook
To protect the workbook structure from editing, you can use the Protect Method (password optional):
To unprotect a workbook use the UnProtect Method:
Loop Through all Open Workbooks
To loop through all open workbooks:
Workbook Activate Event
You can run some code whenever a specific workbook is opened with the Workbook Open Event.
Place this procedure your workbook’s ThisWorkbook Module:
This procedure will activate Sheet1 every time the workbook is opened.

VBA Code Examples Add-in
Easily access all of the code examples found on our site.
Simply navigate to the menu, click, and the code will be inserted directly into your module. .xlam add-in.
Источник
Объект Workbook И Семейство Workbooks
В иерархии Excel объект workbook (рабочая книга) идет сразу после объекта Application и представляет файл рабочей книги. Рабочая книга хранится либо в файлах формата XLS (стандартная рабочая книга) или XLA (полностью откомпилированное приложение). Свойства и методы рабочей книги позволяют работать с файлами.
Свойства объекта Workbook и семейства Workbooks
Выполняемые действия и допустимые значения
Возвращает активный лист книги.
Например выводит в диалоговом окне имя активного рабочего листа
MsgBox «Имя активного листа» & ActiveSheet. Name
Возвращает активное диалоговое окно Возвращает семейство всех листов книги Возвращает семейство всех рабочих листов книги Возвращает семейство всех диаграмм книги (которые не внедрены в рабочие листы) Возвращает число объектов семейства workbooks
Допустимые значения:
True (если у документа имеется пароль защиты)
False (в противном случае)
Допустимые значения:
True (если документ закрыт для записи)
False (в противном случае)
Допустимые значения:
True (если не производились изменения в документе со времени его последнего сохранения)
False (в противном случае)
Возвращает имя инсталлированных на компьютере средств работы с электронной почтой. Допустимые значения:
- xlNoMailSystem (не установлена система электронной почты)
- xlMAPi (установлена система Microsoft Mail)
- xlPowerTalk (установлена система Apple PowerTalk Mail, на компьютерах Macintosh).
В следующем примере проверяется, инсталлирована ли электронная почта. Если электронная почта не установлена, то отображается соответствующее сообщение:
If Application. MailSystem <> xlMAPI Then
MsgBox «Microsoft Mail неинсталлирован»
Методы объекта Workbook и семейства Workbooks
Активизирует рабочую книгу так, что ее первый рабочий лист становится активным.
Создает новый объект для семейства Workbooks.
Template — задает шаблон, на основе которого создается новая рабочая книга. Допустимые значения: xlWBATChart, xlWBATExce14IntlMacroSheet, xlWBATExce14MacroSheet или xlWBATWorksheet .
Если аргумент Template опущен, то создается новая рабочая книга с количеством листов, заданных свойством SheetsInNew Workbook
Защищает рабочую книгу от внесения в нее изменений.
Protect (Password, Structure, Windows)
- Password — строка, используемая в качестве пароля для защиты книги
- Structure — допустимые значения True (защищена структура книги, т. е. взаимное расположение листов) и False (не защищена)
- windows — допустимые значения True (защищено окно книги) и False (не защищено)
В следующем примере устанавливается защита для активной рабочей книги:
ActiveWorkbook. Protect Password:= «ВинниПух »
Снятие защиты с рабочей книги.
Password — строка, используемая в качестве пароля для защиты листа
В следующем примере снимается защита с активной рабочей книги:
ActiveWorkbook. Unprotect Password: = «ВинниПух « Открытие существующей рабочей книги Открытие текстового файла, содержащего таблицу данных
Сохранение рабочей книги в другом файле.
Filename — строка, указывающая имя файла, в котором будет сохранена рабочая книга
В следующем примере активная рабочая книга сохраняется в файле с именем НоваяВерсия:
ActiveBook. SaveAs Filename: = „НоваяВерсия“
Сохранить рабочую книгу в другом файле, оставляя рабочую книгу в памяти с прежним именем.
SaveAs (Filename, FileFormat)
Filename — строка, указывающая имя файла, в котором будет сохранена рабочая книга
В следующем примере активная рабочая книга сохраняется в файле с именем ЗапаснаяВерсия:
ActiveBook. SaveAsCopy Filename: = „ЗапаснаяВерсия“ Печать содержимого рабочей книги
Отсылка почты используя встроенные средства Microsoft Mail (MAPI).
SendMail (Recipients, Subject, ReturnReceipt)
- Recipients — строка или массив строк, перечисляющих получателей
- Subject — строка, специфицирующая тему сообщения Optional Variant .
- ReturnReceipt — допустимые значения True (требуется уведомление о получении сообщения) и False (в противном случае)
В следующем примере рабочая книга отсылается по электронной почте получателю Порфирию Заковыркину:
Источник
What Are Modules In Excel VBA Coding?
Thu 26th May 2011
If you’ve started using Excel VBA, perhaps using the Macro recorder, or writing code directly, you’ll have discovered that VBA code is contained in modules within the workbook. This article describes the four different kinds of modules, general purpose, workbook, worksheet and userform, and then describes how VBA code can be copied from one file to another by copying modules.
General Purpose Modules
Suppose you create and saving a macro in Excel using the macro recorder. To see the VBA code created, you can choose the Excel option to edit the macro and the VBA interface opens showing you the code created by the recorder. Alternatively you can open the VBA editor by using ALT + F11.
The code is contained in a module shown on the right of the VBA display. If you look at the left hand Project Explorer view your see the current workbook listed along with all the currently available worksheets. Under the worksheet you’ll see the VBA module under the workbook file details under a Module heading. VBA created using the macro recorder appears in a general purpose module. If you exit the VBA screen and return to the normal Excel view, you might then create more macros. If you do this the additional macros are placed in the same general purpose module with a line separator.
If you save and close the workbook, then re-open it and create another macro, the VBA code is created in a new general purpose module, so over time if you create macros in different Excel sessions, your code is stored in several general purpose modules, all accessible via the VBA interface. If you wish to, you can copy code between workbooks, or create new code within a workbook. You can also create a new general purpose module in the VBA editor by choosing New, Module.
Workbook Code Modules
If you create code which triggers following a workbook event, such as a workbook opening, or closing, the code is placed in the workbook code module. There is only one module of this type per workbook.
With a workbook open you can view the workbook module this way. Choose ALT+F11 to open the VBA editor. Then look in the Project Explorer on the left, and you’ll see ThisWorkbook in the list of items under the filename. Double click ThisWorkbook to open the module on the right. If you want to see the code options available, choose the pop down just right of General and select Workbook. Then in the right hand pop down you’ll see all the workbook events and corresponding code options available. Select any event and the corresponding code is added to the module.
Worksheet Code Modules
Similarly there is only one worksheet code module per worksheet. To view one, in the Project Explorer double click on any of the sheet items and the module will open on the right. In the left hand pop down choose Worksheet. Now choose the right hand pop down and you’ll see all the events available. Choose any event and the corresponding code is added to the module.
User Form modules
In the VBA editor you can create one or more user forms and then add form controls, for example for data entry. A separate userform module is created for each form you create. Once a form control is added to the form, the associated code is added to the module. To create a userform in the VBA editor you choose Insert, UserForm.
Copying VBA code between workbooks
If you open more than one Excel workbook, and then open the VBA editor using, say, ALT+F11 then you’ll see all the open files listed in the Project explorer. If you want to copy VBA code, including macros, from one file to another, navigate through the Project Explorer view until you can see the module where the code is.
You may need to double click the module to open it and view the code. Then in Project Explorer drag the module where the code is onto the filename where you want to copy the code to and then release the mouse. The module is copied to the target file, and will appear under the correct module heading under the filename. Dragging a module in this way will copy the module, so the original is not moved. So you can easily copy code for macros, hand created code or forms between workbooks.
Interested in learning more about Excel VBA? A really effective way is to attend a training course and then really see your VBA skills increase to new levels.
Источник
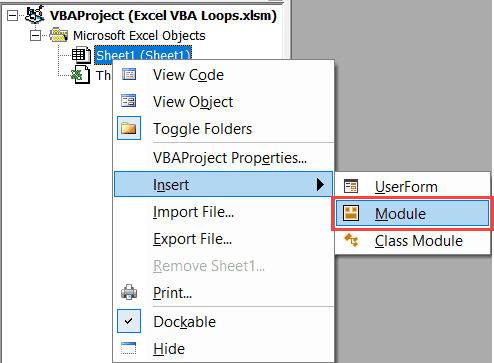
Open your workbook in Excel. Press Alt + F11 to open Visual Basic Editor (VBE). Right-click on your workbook name in the “Project-VBAProject” pane (at the top left corner of the editor window) and select Insert -> Module from the context menu. Copy the VBA code (from a web-page etc.)
Contents
- 1 How do I run a macro script in Excel?
- 2 Where is module on Excel?
- 3 Where are Excel modules located?
- 4 How do you run a script in Excel?
- 5 How do I run a macro line by line?
- 6 How do I add a module to Excel?
- 7 How do I automatically run a VBA module in Excel?
- 8 What is an Excel module?
- 9 What is a module code?
- 10 What is a module sheet?
- 11 How do I create a VBA module in Excel?
- 12 How do you automate something in Excel?
- 13 How do I turn on automated in Excel?
- 14 What is VBA in Excel?
- 15 How do you run a macro step by step in Excel?
- 16 How do I run a VBA function in Excel?
- 17 What are the steps to run a macro code?
- 18 Why can’t I run a macro in Excel?
- 19 How do I run all macros at once?
- 20 How do I save a module in Excel?
How do I run a macro script in Excel?
Run a macro from the Developer tab
- Open the workbook that contains the macro.
- On the Developer tab, in the Code group, click Macros.
- In the Macro name box, click the macro that you want to run, and press the Run button.
- You also have other choices: Options – Add a shortcut key, or a macro description.
Where is module on Excel?
To view a module, just double click on its icon in the Project Explorer window in the VBA Editor. Standard modules are located under the Modules folder, Object modules are located under the Microsoft Excel Objects folder, and Class modules are located under the Classes folder.
Where are Excel modules located?
The modules are located in the Modules folder within the workbook. Sheet Modules – Each sheet in the workbook has a sheet object in the Microsoft Excel Objects folder. Double-clicking the sheet object opens its code module where we can add event procedures (macros).
How do you run a script in Excel?
Getting started
- First, select the Automate tab on the ribbon.
- To create a new Office Script, press the Record Actions button, then start taking the steps you want to automate.
- When you start recording a new Office Script, you’ll see a Record Actions task pane open on the right.
How do I run a macro line by line?
F8 is the key! In the visual basic editor, place your cursor inside of the macro and hit F8. This will run the first line of your code. Hit F8 to run each additional line, or F5 to resume without stopping.
How do I add a module to Excel?
Press Alt+F11 to open the Visual Basic Editor (on the Mac, press FN+ALT+F11), and then click Insert > Module. A new module window appears on the right-hand side of the Visual Basic Editor.
How do I automatically run a VBA module in Excel?
Instructions:
- Open an excel workbook.
- Press Alt+F11 to open VBA Editor.
- Insert a New Module from Insert Menu.
- Copy the above code and Paste in the code window.
- Save the file as macro enabled workbook.
- Open the workbook to test it, it will Run a Macro Automatically. You should see a message box as shown above.
What is an Excel module?
Workbook And Sheet Modules are special modules tied directly to the Workbook object and to each Sheet object. The module for the workbook is called ThisWorkbook, and each Sheet module has the same name as the sheet that it is part of. These modules should contain the event procedures for the object, and that’s all.
What is a module code?
Each module and each course is designated by a specific code. The first four digits represent the respective institute and the department or study field (i.e. of the responsible person / course instructor). The next three digits correlate to the type of module and the term, as well as the courses.
What is a module sheet?
1. A module is simply a place to put your code. You can just see it as a sheet of paper where you can write something. In Excel you can put your code in a module, or “behind” a worksheet (what you call a modulesheet). A module is always added manually BY YOU.
How do I create a VBA module in Excel?
To create a new module:
- On the Tools menu, click Macro > Visual Basic Editor.
- In the Visual Basic Editor, on the Insert menu, click Module.
- In the Module editing window, paste the VBA code that you want to use.
- On the File menu, click Save Global.
How do you automate something in Excel?
To automate a repetitive task, you can record a macro with the Macro Recorder in Microsoft Excel. Imagine you have dates in random formats and you want to apply a single format to all of them. A macro can do that for you. You can record a macro applying the format you want, and then replay the macro whenever needed.
How do I turn on automated in Excel?
Click the Microsoft Office Button, and then click Excel Options. Click Add-Ins. Under Manage, click Excel Add ins, and then click Go. In the Add-Ins dialog box, click Automation.
What is VBA in Excel?
VBA stands for Visual Basic for Applications. Excel VBA is Microsoft’s programming language for Excel.and all the other Microsoft Office programs, like Word and PowerPoint. The Office suite programs all share a common programming language.
How do you run a macro step by step in Excel?
Right-click the macro in the Navigation Pane, and then click Design View. On the Design tab, in the Tools group, click Single Step. Click Run. If the macro is a new or edited macro, you will be prompted to save the macro before you can run it.
How do I run a VBA function in Excel?
Single Step
- Empty the range A1:E2.
- Press F8 four times.
- Press F8 two more times.
- Single step through the rest of the code to see how Excel VBA enters the other numbers.
- Click on the green arrow to execute the macro until the breakpoint.
- Only part of the macro (for i = 1) has been executed.
What are the steps to run a macro code?
Here are the steps:
- Go to the Developer Tab –> Code –> Macros.
- The Macros dialogue box lists all the macros in the workbook. Select the one that you want to run.
- Click Run.
Why can’t I run a macro in Excel?
Click the File tab, and then click Options at the very bottom of the left bar. On the left-side pane, select Trust Center, and then click Trust Center Settings… . In the Trust Center dialog box, click Macro Settings on the left, select Enable all macros and click OK.
How do I run all macros at once?
Just type the word Call then space, then type the name of the macro to be called (run). The example below shows how to call Macro2 from Macro1. It’s important to note that the two macros DO NOT run at the same time. Once the Call line is hit, Macro2 will be run completely to the end.
How do I save a module in Excel?
Saving a Module (Exporting)
- On the File menu, click Export File….
- Click the right mouse button, and click Export File….
- Press Ctrl + E keys on the keyboard.
In this tutorial, I will cover the how to work with workbooks in Excel using VBA.
In Excel, a ‘Workbook’ is an object that is a part of the ‘Workbooks’ collection. Within a workbook, you have different objects such as worksheets, chart sheets, cells and ranges, chart objects, shapes, etc.
With VBA, you can do a lot of stuff with a workbook object – such as open a specific workbook, save and close workbooks, create new workbooks, change the workbook properties, etc.
So let’s get started.
If you’re interested in learning VBA the easy way, check out my Online Excel VBA Training.
Referencing a Workbook using VBA
There are different ways to refer to a Workbook object in VBA.
The method you choose would depend on what you want to get done.
In this section, I will cover the different ways to refer to a workbook along with some example codes.
Using Workbook Names
If you have the exact name of the workbook that you want to refer to, you can use the name in the code.
Let’s begin with a simple example.
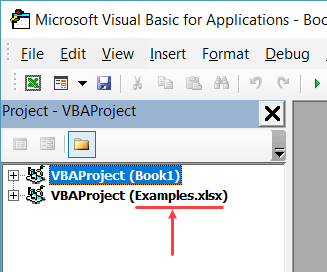
If you have two workbooks open, and you want to activate the workbook with the name – Examples.xlsx, you can use the below code:
Sub ActivateWorkbook()
Workbooks("Examples.xlsx").Activate
End Sub
Note that you need to use the file name along with the extension if the file has been saved. If it hasn’t been saved, then you can use the name without the file extension.
If you’re not sure what name to use, take help from the Project Explorer.
If you want to activate a workbook and select a specific cell in a worksheet in that workbook, you need to give the entire address of the cell (including the Workbook and the Worksheet name).
Sub ActivateWorkbook()
Workbooks("Examples.xlsx").Worksheets("Sheet1").Activate
Range("A1").Select
End Sub
The above code first activates Sheet1 in the Examples.xlsx workbook and then selects cell A1 in the sheet.
You will often see a code where a reference to a worksheet or a cell/range is made without referring to the workbook. This happens when you’re referring to the worksheet/ranges in the same workbook that has the code in it and is also the active workbook. However, in some cases, you do need to specify the workbook to make sure the code works (more on this in the ThisWorkbook section).
Using Index Numbers
You can also refer to the workbooks based on their index number.
For example, if you have three workbooks open, the following code would show you the names of the three workbooks in a message box (one at a time).
Sub WorkbookName()
MsgBox Workbooks(1).Name
MsgBox Workbooks(2).Name
MsgBox Workbooks(3).Name
End Sub
The above code uses MsgBox – which is a function that shows a message box with the specified text/value (which is the workbook name in this case).
One of the troubles I often have with using index numbers with Workbooks is that you never know which one is the first workbook and which one is the second and so on. To be sure, you would have to run the code as shown above or something similar to loop through the open workbooks and know their index number.
Excel treats the workbook opened first to have the index number as 1, and the next one as 2 and so on.
Despite this drawback, using index numbers can come in handy.
For example, if you want to loop through all the open workbooks and save all, you can use the index numbers.
In this case, since you want this to happen to all the workbooks, you’re not concerned about their individual index numbers.
The below code would loop through all the open workbooks and close all except the workbook that has this VBA code.
Sub CloseWorkbooks()
Dim WbCount As Integer
WbCount = Workbooks.Count
For i = WbCount To 1 Step -1
If Workbooks(i).Name <> ThisWorkbook.Name Then
Workbooks(i).Close
End If
Next i
End Sub
The above code counts the number of open workbooks and then goes through all the workbooks using the For Each loop.
It uses the IF condition to check if the name of the workbook is the same as that of the workbook where the code is being run.
If it’s not a match, it closes the workbook and moves to the next one.
Note that we have run the loop from WbCount to 1 with a Step of -1. This is done as with each loop, the number of open workbooks is decreasing.
ThisWorkbook is covered in detail in the later section.
Also read: How to Open Excel Files Using VBA (Examples)
Using ActiveWorkbook
ActiveWorkbook, as the name suggests, refers to the workbook that is active.
The below code would show you the name of the active workbook.
Sub ActiveWorkbookName()
MsgBox ActiveWorkbook.Name
End Sub
When you use VBA to activate another workbook, the ActiveWorkbook part in the VBA after that would start referring to the activated workbook.
Here is an example of this.
If you have a workbook active and you insert the following code into it and run it, it would first show the name of the workbook that has the code and then the name of Examples.xlsx (which gets activated by the code).
Sub ActiveWorkbookName()
MsgBox ActiveWorkbook.Name
Workbooks("Examples.xlsx").Activate
MsgBox ActiveWorkbook.Name
End Sub
Note that when you create a new workbook using VBA, that newly created workbook automatically becomes the active workbook.
Using ThisWorkbook
ThisWorkbook refers to the workbook where the code is being executed.
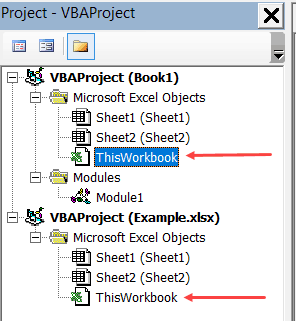
Every workbook would have a ThisWorkbook object as a part of it (visible in the Project Explorer).
‘ThisWorkbook’ can store regular macros (similar to the ones that we add-in modules) as well as event procedures. An event procedure is something that is triggered based on an event – such as double-clicking on a cell, or saving a workbook or activating a worksheet.
Any event procedure that you save in this ‘ThisWorkbook’ would be available in the entire workbook, as compared to the sheet level events which are restricted to the specific sheets only.
For example, if you double-click on the ThisWorkbook object in the Project Explorer and copy-paste the below code in it, it will show the cell address whenever you double-click on any of the cells in the entire workbook.
Private Sub Workbook_SheetBeforeDoubleClick(ByVal Sh As Object, ByVal Target As Range, Cancel As Boolean)
MsgBox Target.Address
End Sub
While ThisWorkbook’s main role is to store event procedure, you can also use it to refer to the workbook where the code is being executed.
The below code would return the name of the workbook in which the code is being executed.
Sub ThisWorkbookName()
MsgBox ThisWorkbook.Name
End Sub
The benefit of using ThisWorkbook (over ActiveWorkbook) is that it would refer to the same workbook (the one that has the code in it) in all the cases. So if you use a VBA code to add a new workbook, the ActiveWorkbook would change, but ThisWorkbook would still refer to the one that has the code.
Creating a New Workbook Object
The following code will create a new workbook.
Sub CreateNewWorkbook()
Workbooks.Add
End Sub
When you add a new workbook, it becomes the active workbook.
The following code will add a new workbook and then show you the name of that workbook (which would be the default Book1 type name).
Sub CreateNewWorkbook()
Workbooks.Add
MsgBox ActiveWorkbook.Name
End Sub
Open a Workbook using VBA
You can use VBA to open a specific workbook when you know the file path of the workbook.
The below code will open the workbook – Examples.xlsx which is in the Documents folder on my system.
Sub OpenWorkbook()
Workbooks.Open ("C:UserssumitDocumentsExamples.xlsx")
End Sub
In case the file exists in the default folder, which is the folder where VBA saves new files by default, then you can just specify the workbook name – without the entire path.
Sub OpenWorkbook()
Workbooks.Open ("Examples.xlsx")
End Sub
In case the workbook that you’re trying to open doesn’t exist, you’ll see an error.
To avoid this error, you can add a few lines to your code to first check whether the file exists or not and if it exists then try to open it.
The below code would check the file location and if it doesn’t exist, it will show a custom message (not the error message):
Sub OpenWorkbook()
If Dir("C:UserssumitDocumentsExamples.xlsx") <> "" Then
Workbooks.Open ("C:UserssumitDocumentsExamples.xlsx")
Else
MsgBox "The file doesn't exist"
End If
End Sub
You can also use the Open dialog box to select the file that you want to open.
Sub OpenWorkbook()
If Dir("C:UserssumitDocumentsExamples.xlsx") <> "" Then
Workbooks.Open ("C:UserssumitDocumentsExamples.xlsx")
Else
MsgBox "The file doesn't exist"
End If
End Sub
The above code opens the Open dialog box. When you select a file that you want to open, it assigns the file path to the FilePath variable. Workbooks.Open then uses the file path to open the file.
In case the user doesn’t open a file and clicks on Cancel button, FilePath becomes False. To avoid getting an error in this case, we have used the ‘On Error Resume Next’ statement.
Saving a Workbook
To save the active workbook, use the code below:
Sub SaveWorkbook()
ActiveWorkbook.Save
End Sub
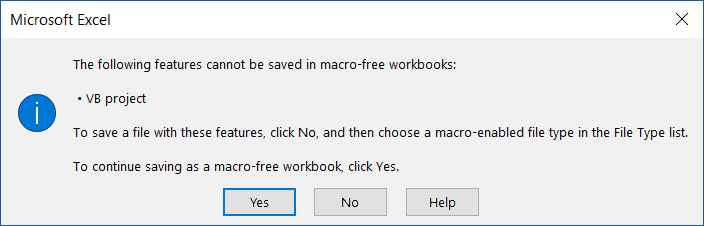
This code works for the workbooks that have already been saved earlier. Also, since the workbook contains the above macro, if it hasn’t been saved as a .xlsm (or .xls) file, you will lose the macro when you open it next.
If you’re saving the workbook for the first time, it will show you a prompt as shown below:
When saving for the first time, it’s better to use the ‘Saveas’ option.
The below code would save the active workbook as a .xlsm file in the default location (which is the document folder in my system).
Sub SaveWorkbook()
ActiveWorkbook.SaveAs Filename:="Test.xlsm", FileFormat:=xlOpenXMLWorkbookMacroEnabled
End Sub
If you want the file to be saved in a specific location, you need to mention that in the Filename value. The below code saves the file on my desktop.
Sub SaveWorkbook()
ActiveWorkbook.SaveAs Filename:="C:UserssumitDesktopTest.xlsm", FileFormat:=xlOpenXMLWorkbookMacroEnabled
End Sub
If you want the user to get the option to select the location to save the file, you can use call the Saveas dialog box. The below code shows the Saveas dialog box and allows the user to select the location where the file should be saved.
Sub SaveWorkbook()
Dim FilePath As String
FilePath = Application.GetSaveAsFilename
ActiveWorkbook.SaveAs Filename:=FilePath & ".xlsm", FileFormat:=xlOpenXMLWorkbookMacroEnabled
End Sub
Note that instead of using FileFormat:=xlOpenXMLWorkbookMacroEnabled, you can also use FileFormat:=52, where 52 is the code xlOpenXMLWorkbookMacroEnabled.
Saving All Open Workbooks
If you have more than one workbook open and you want to save all the workbooks, you can use the code below:
Sub SaveAllWorkbooks()
Dim wb As Workbook
For Each wb In Workbooks
wb.Save
Next wb
End Sub
The above saves all the workbooks, including the ones that have never been saved. The workbooks that have not been saved previously would get saved in the default location.
If you only want to save those workbooks that have previously been saved, you can use the below code:
Sub SaveAllWorkbooks()
Dim wb As Workbook
For Each wb In Workbooks
If wb.Path <> "" Then
wb.Save
End If
Next wb
End Sub
Saving and Closing All Workbooks
If you want to close all the workbooks, except the workbook that has the current code in it, you can use the code below:
Sub CloseandSaveWorkbooks()
Dim wb As Workbook
For Each wb In Workbooks
If wb.Name <> ThisWorkbook.Name Then
wb.Close SaveChanges:=True
End If
Next wb
End Sub
The above code would close all the workbooks (except the workbook that has the code – ThisWorkbook). In case there are changes in these workbooks, the changes would be saved. In case there is a workbook that has never been saved, it will show the save as dialog box.
Save a Copy of the Workbook (with Timestamp)
When I am working with complex data and dashboard in Excel workbooks, I often create different versions of my workbooks. This is helpful in case something goes wrong with my current workbook. I would at least have a copy of it saved with a different name (and I would only lose the work I did after creating a copy).
Here is the VBA code that will create a copy of your workbook and save it in the specified location.
Sub CreateaCopyofWorkbook()
ThisWorkbook.SaveCopyAs Filename:="C:UserssumitDesktopBackupCopy.xlsm"
End Sub
The above code would save a copy of your workbook every time you run this macro.
While this works great, I would feel more comfortable if I had different copies saved whenever I run this code. The reason this is important is that if I make an inadvertent mistake and run this macro, it will save the work with the mistakes. And I wouldn’t have access to the work before I made the mistake.
To handle such situations, you can use the below code that saves a new copy of the work each time you save it. And it also adds a date and timestamp as a part of the workbook name. This can help you track any mistake you did as you never lose any of the previously created backups.
Private Sub Workbook_BeforeSave(ByVal SaveAsUI As Boolean, Cancel As Boolean)
ThisWorkbook.SaveCopyAs Filename:="C:UserssumitDesktopBackupCopy" & Format(Now(), "dd-mm-yy-hh-mm-ss-AMPM") & ".xlsm"
End Sub
The above code would create a copy every time you run this macro and add a date/time stamp to the workbook name.
Create a New Workbook for Each Worksheet
In some cases, you may have a workbook that has multiple worksheets, and you want to create a workbook for each worksheet.
This could be the case when you have monthly/quarterly reports in a single workbook and you want to split these into one workbook for each worksheet.
Or, if you have department wise reports and you want to split these into individual workbooks so that you can send these individual workbooks to the department heads.
Here is the code that will create a workbook for each worksheet, give it the same name as that of the worksheet, and save it in the specified folder.
Sub CreateWorkbookforWorksheets()
Dim ws As Worksheet
Dim wb As Workbook
For Each ws In ThisWorkbook.Worksheets
Set wb = Workbooks.Add
ws.Copy Before:=wb.Sheets(1)
Application.DisplayAlerts = False
wb.Sheets(2).Delete
Application.DisplayAlerts = True
wb.SaveAs "C:UserssumitDesktopTest" & ws.Name & ".xlsx"
wb.Close
Next ws
End Sub
In the above code, we have used two variable ‘ws’ and ‘wb’.
The code goes through each worksheet (using the For Each Next loop) and creates a workbook for it. It also uses the copy method of the worksheet object to create a copy of the worksheet in the new workbook.
Note that I have used the SET statement to assign the ‘wb’ variable to any new workbook that is created by the code.
You can use this technique to assign a workbook object to a variable. This is covered in the next section.
Assign Workbook Object to a Variable
In VBA, you can assign an object to a variable, and then use the variable to refer to that object.
For example, in the below code, I use VBA to add a new workbook and then assign that workbook to the variable wb. To do this, I need to use the SET statement.
Once I have assigned the workbook to the variable, all the properties of the workbook are made available to the variable as well.
Sub AssigntoVariable()
Dim wb As Workbook
Set wb = Workbooks.Add
wb.SaveAs Filename:="C:UserssumitDesktopExamples.xlsx"
End Sub
Note that the first step in the code is to declare ‘wb’ as a workbook type variable. This tells VBA that this variable can hold the workbook object.
The next statement uses SET to assign the variable to the new workbook that we are adding. Once this assignment is done, we can use the wb variable to save the workbook (or do anything else with it).
Looping through Open Workbooks
We have already seen a few examples codes above that used looping in the code.
In this section, I will explain different ways to loop through open workbooks using VBA.
Suppose you want to save and close all the open workbooks, except the one with the code in it, then you can use the below code:
Sub CloseandSaveWorkbooks()
Dim wb As Workbook
For Each wb In Workbooks
If wb.Name <> ThisWorkbook.Name Then
wb.Close SaveChanges:=True
End If
Next wb
End Sub
The above code uses the For Each loop to go through each workbook in the Workbooks collection. To do this, we first need to declare ‘wb’ as the workbook type variable.
In every loop cycle, each workbook name is analyzed and if it doesn’t match the name of the workbook that has the code, it’s closed after saving its content.
The same can also be achieved with a different loop as shown below:
Sub CloseWorkbooks()
Dim WbCount As Integer
WbCount = Workbooks.Count
For i = WbCount To 1 Step -1
If Workbooks(i).Name <> ThisWorkbook.Name Then
Workbooks(i).Close SaveChanges:=True
End If
Next i
End Sub
The above code uses the For Next loop to close all the workbooks except the one that has the code in it. In this case, we don’t need to declare a workbook variable, but instead, we need to count the total number of open workbooks. When we have the count, we use the For Next loop to go through each workbook. Also, we use the index number to refer to the workbooks in this case.
Note that in the above code, we are looping from WbCount to 1 with Step -1. This is needed as with each loop, the workbook gets closed and the number of workbooks gets decreased by 1.
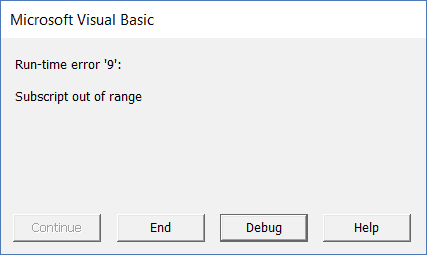
Error while Working with the Workbook Object (Run-time error ‘9’)
One of the most common error you may encounter when working with workbooks is – Run-time Error ‘9’ – Subscript out of range.
Generally, VBA errors are not very informative and often leave it to you to figure out what went wrong.
Here are some of the possible reasons that may lead to this error:
- The workbook that you’re trying to access does not exist. For example, if I am trying to access the fifth workbook using Workbooks(5), and there are only 4 workbooks open, then I will get this error.
- If you’re using a wrong name to refer to the workbook. For example, if your workbook name is Examples.xlsx and you use Example.xlsx. then it will show you this error.
- If you haven’t saved a workbook, and you use the extension, then you get this error. For example, if your workbook name is Book1, and you use the name Book1.xlsx without saving it, you will get this error.
- The workbook you’re trying to access is closed.
Get a List of All Open Workbooks
If you want to get a list of all the open workbooks in the current workbook (the workbook where you’re running the code), you can use the below code:
Sub GetWorkbookNames()
Dim wbcount As Integer
wbcount = Workbooks.Count
ThisWorkbook.Worksheets.Add
ActiveSheet.Range("A1").Activate
For i = 1 To wbcount
Range("A1").Offset(i - 1, 0).Value = Workbooks(i).Name
Next i
End Sub
The above code adds a new worksheet and then lists the name of all the open workbooks.
If you want to get their file path as well, you can use the below code:
Sub GetWorkbookNames()
Dim wbcount As Integer
wbcount = Workbooks.Count
ThisWorkbook.Worksheets.Add
ActiveSheet.Range("A1").Activate
For i = 1 To wbcount
Range("A1").Offset(i - 1, 0).Value = Workbooks(i).Path & "" & Workbooks(i).Name
Next i
End Sub
Open the Specified Workbook by Double-clicking on the Cell
If you have a list of file paths for Excel workbooks, you can use the below code to simply double-click on the cell with the file path and it will open that workbook.
Private Sub Workbook_SheetBeforeDoubleClick(ByVal Sh As Object, ByVal Target As Range, Cancel As Boolean)
Workbooks.Open Target.Value
End Sub
This code would be placed in the ThisWorkbook code window.
To do this:
- Double click on the ThisWorkbook object in the project explorer. Note that the ThisWorkbook object should be in the workbook where you want this functionality.
- Copy and paste the above code.
Now, if you have the exact path of the files that you want to open, you can do that by simply double-clicking on the file path and VBA would instantly open that workbook.
Where to Put the VBA Code
Wondering where the VBA code goes in your Excel workbook?
Excel has a VBA backend called the VBA editor. You need to copy and paste the code into the VB Editor module code window.
Here are the steps to do this:
- Go to the Developer tab.

- Click on the Visual Basic option. This will open the VB editor in the backend.
- In the Project Explorer pane in the VB Editor, right-click on any object for the workbook in which you want to insert the code. If you don’t see the Project Explorer go to the View tab and click on Project Explorer.
- Go to Insert and click on Module. This will insert a module object for your workbook.

- Copy and paste the code in the module window.


You May Also Like the Following Excel VBA Tutorials:
- How to Record a Macro in Excel.
- Creating a User Defined Function in Excel.
- How to Create and Use Add-in in Excel.
- How to Resue Macros by placing it in the Personal Macro Workbook.
- Get the List of File Names from a Folder in Excel (with and without VBA).
- How to Use Excel VBA InStr Function (with practical EXAMPLES).
- How to Sort Data in Excel using VBA (A Step-by-Step Guide).

В иерархии Excel объект workbook (рабочая книга) идет сразу после объекта Application и представляет файл рабочей книги. Рабочая книга хранится либо в файлах формата XLS (стандартная рабочая книга) или XLA (полностью откомпилированное приложение). Свойства и методы рабочей книги позволяют работать с файлами.
Свойства объекта Workbook и семейства Workbooks
|
Свойства |
Выполняемые действия и допустимые значения |
|
ActiveSheet |
Возвращает активный лист книги.
Например выводит в диалоговом окне имя активного рабочего листа MsgBox «Имя активного листа» & ActiveSheet. Name |
|
ActiveDialog |
Возвращает активное диалоговое окно |
|
ActiveChart |
Возвращает активную диаграмму |
|
Sheets |
Возвращает семейство всех листов книги |
|
Worksheets |
Возвращает семейство всех рабочих листов книги |
|
Charts |
Возвращает семейство всех диаграмм книги (которые не внедрены в рабочие листы) |
|
Count |
Возвращает число объектов семейства workbooks |
|
HasPassword |
Допустимые значения:
True (если у документа имеется пароль защиты) False (в противном случае) |
|
WriteReserved |
Допустимые значения:
True (если документ закрыт для записи) False (в противном случае) |
|
Saved |
Допустимые значения:
True (если не производились изменения в документе со времени его последнего сохранения) False (в противном случае) |
|
MailSystem |
Возвращает имя инсталлированных на компьютере средств работы с электронной почтой. Допустимые значения:
В следующем примере проверяется, инсталлирована ли электронная почта. Если электронная почта не установлена, то отображается соответствующее сообщение: If Application. MailSystem <> xlMAPI Then MsgBox «Microsoft Mail неинсталлирован» End If |
Методы объекта Workbook и семейства Workbooks
|
Методы |
Выполняемые действия |
|
Activate |
Активизирует рабочую книгу так, что ее первый рабочий лист становится активным.
Workbook. Activate |
|
Add |
Создает новый объект для семейства Workbooks.
Add (Template) Template — задает шаблон, на основе которого создается новая рабочая книга. Допустимые значения: xlWBATChart, xlWBATExce14IntlMacroSheet, xlWBATExce14MacroSheet или xlWBATWorksheet. |
|
Protect |
Защищает рабочую книгу от внесения в нее изменений.
Protect (Password, Structure, Windows)
В следующем примере устанавливается защита для активной рабочей книги: ActiveWorkbook. Protect Password:= «ВинниПух» |
|
Unprotect |
Снятие защиты с рабочей книги.
Unprotect (Password) Password — строка, используемая в качестве пароля для защиты листа ActiveWorkbook. Unprotect Password: = «ВинниПух « |
|
Close |
Закрытие рабочей книги |
|
Open |
Открытие существующей рабочей книги |
|
OpenText |
Открытие текстового файла, содержащего таблицу данных |
|
Save |
Сохранение рабочей книги |
|
SaveAs |
Сохранение рабочей книги в другом файле.
SaveAs (Filename) Filename — строка, указывающая имя файла, в котором будет сохранена рабочая книга ActiveBook. SaveAs Filename: = „НоваяВерсия“ |
|
SaveAsCopy |
Сохранить рабочую книгу в другом файле, оставляя рабочую книгу в памяти с прежним именем.
SaveAs (Filename, FileFormat) Filename — строка, указывающая имя файла, в котором будет сохранена рабочая книга ActiveBook. SaveAsCopy Filename: = „ЗапаснаяВерсия“ |
|
PrintPreview |
Предварительный просмотр |
|
Printout |
Печать содержимого рабочей книги |
|
SendMail |
Отсылка почты используя встроенные средства Microsoft Mail (MAPI).
SendMail (Recipients, Subject, ReturnReceipt)
В следующем примере рабочая книга отсылается по электронной почте получателю Порфирию Заковыркину: ThisWorkbook.SendMail recipients: = “ Порфирий Заковыркин» |
События объекта Workbook и семейства Workbooks
|
Событие |
Когда возникает событие |
|
BeforeClose |
При закрытии рабочей книги |
|
BeforePrint |
Перед печатью рабочей книги |
|
BeforeSave |
Перед сохранением рабочей книги |
|
Deactivate |
Когда рабочая книга теряет фокус |
|
NewSheet |
При добавлении нового листа |
|
Open |
При открытии рабочей книги |
|
SheetActivate |
При активизации любого рабочего листа |
|
SheetDeactivate |
Когда рабочий лист теряет фокус |
Возможно вам это будет интересно!
2019-12-21
In this Article
- The Workbook Object
- Workbook Index Number
- Activate Workbook, ActiveWorkbook, and ThisWorkbook
- Activate Workbook
- ActiveWorkbook
- ThisWorkbook
- Open Workbook
- Open and Assign to Variable
- Open File Dialog
- Create New (Add) Workbook
- Add New Workbook to Variable
- Close Workbook
- Close & Save
- Close without Save
- Workbook Save As
- Other Workbook VBA Examples
- Workbook Name
- Protect Workbook
- Loop Through all Open Workbooks
- Workbook Activate Event
This guide will introduce you working with the Workbook Object in VBA.
The Workbook Object
First, in order to interact with workbooks in VBA, you must understand the Workbook Object.
With the workbook object, you can reference workbooks by their name like this:
Workbooks("Book2.xlsm").ActivateHowever, this code will only work if the workbook is open. If the workbook is closed, you will need to provide the full workbook path:
Workbooks.Open ("C:UsersStevePC2Downloadsbook2.xlsm")Instead of typing out the full path, if your desired workbook is in the same directory as the workbook where your code is stored, you could use this line code to open the workbook:
Workbooks.Open (ThisWorkbook.Path & "book2.xlsm")This makes use of the ThisWorkbook object that we will discuss in the next section.
Workbook Index Number
Last, you can reference workbooks by their “Index Number”. The index number of a workbook corresponds to the order that the workbook was opened (technically its the workbook’s position in the Workbooks Collection).
Workbooks(1).ActivateThis is useful if you want to do something like close the first (or last) opened workbook.
Activate Workbook, ActiveWorkbook, and ThisWorkbook
If a workbook is NOT ACTIVE, you can access the Workbook’s objects like this:
Workbooks("Book2.xlsm").Sheets("Sheet1").Range("A1").value = 1However, if the workbook is Active, you can omit the workbook object:
Sheets("Sheet1").Range("A1").value = 1And if you want to interact with the workbook’s active sheet, you can also ommit the sheets object:
Range("A1").value = 1Activate Workbook
To activate a workbook, use the Activate Method.
Workbooks("Book2.xlsm").ActivateNow you can interact with Book2’s object’s without explicitly stating the workbook name.
ActiveWorkbook
The ActiveWorkbook object always refer to the active workbook. This is useful if you’d like to assign the ActiveWorkbook to a variable to use later.
Dim wb As Workbook
Set wb = ActiveWorkbook
ThisWorkbook
The ThisWorkbook object always refers to the workbook where the running code is stored. To activate ThisWorkbook, use this line of code:
ThisWorkbook.ActivateVBA Coding Made Easy
Stop searching for VBA code online. Learn more about AutoMacro — A VBA Code Builder that allows beginners to code procedures from scratch with minimal coding knowledge and with many time-saving features for all users!
Learn More
Open Workbook
To open a workbook, use the Open Method:
Workbooks.Open ("C:UsersStevePC2Downloadsbook2.xlsm")The newly opened workbook will always become the ActiveWorkbook, allowing you to easily interact with it.
ActiveWorkbook.SaveThe Open Method has several other arguments, allowing you to open read-only, open a password-protected workbook, and more. It’s covered here in our article about Opening / Closing Workbooks.
Open and Assign to Variable
You can also open a workbook and assign it to a variable at the same time:
Dim wb As Workbook
Set wb = Workbooks.Open("C:UsersStevePC2Downloadsbook2.xlsm")
Open File Dialog
You can also trigger the Open File Dialog Box like this:
Sub OpenWorkbook ()

    Dim strFile As String

    strFile = Application.GetOpenFilename()
    Workbooks.Open (strFile)

End Sub
VBA Programming | Code Generator does work for you!
Create New (Add) Workbook
This line of code will create a new workbook:
Workbooks.AddThe new workbook now becomes the ActiveWorkbook, allowing you to interact with it (ex. save the new workbook).
Add New Workbook to Variable
You can also add a new workbook directly to a variable:
Dim wb As Workbook
Set wb = Workbooks.Add
Close Workbook
Close & Save
To close a workbook with saving, use the Close Method with SaveChanges set to TRUE:
ActiveWorkbook.Close SaveChanges:=TrueClose without Save
To close without saving, set SaveChanges equal to FALSE:
ActiveWorkbook.Close SaveChanges:=FalseAutoMacro | Ultimate VBA Add-in | Click for Free Trial!
Workbook Save As
The SaveAs Method is used to save a workbook as.
To save a workbook with a new name, in the same directory, you can imply use this:
ActiveWorkbook.SaveAs "new"where “new” is the new file name.
To save a workbook in a new directory with a specific file extension, simply specify the new directory and file name:
ActiveWorkbook.SaveAs "C:UsersStevePC2Downloadsnew.xlsm"Other Workbook VBA Examples
Workbook Name
To get the name of a workbook:
MsgBox ActiveWorkbook.NameProtect Workbook
To protect the workbook structure from editing, you can use the Protect Method (password optional):
Workbooks("book1.xlsm").Protect "password"To unprotect a workbook use the UnProtect Method:
Workbooks("book1.xlsm").Unprotect "password"AutoMacro | Ultimate VBA Add-in | Click for Free Trial!
Loop Through all Open Workbooks
To loop through all open workbooks:
Sub LoopThroughWBs()

    Dim wb As Workbook

    For Each wb In Workbooks
        MsgBox wb.Name
    Next wb

End Sub
Workbook Activate Event
You can run some code whenever a specific workbook is opened with the Workbook Open Event.
Place this procedure your workbook’s ThisWorkbook Module:
Private Sub Workbook_Open()
    Sheets("sheet1").Activate
End Sub
This procedure will activate Sheet1 every time the workbook is opened.