
How to Insert and Format WordArt in Word
- Click where you want to insert WordArt.
- Click the Insert tab.
- Expand the Text group, if necessary.
- Click the WordArt button.
- Select a WordArt style from the gallery.
- Type to replace the text.
Contents
- 1 What is the use of WordArt feature in MS Word?
- 2 What is WordArt and how should it be used?
- 3 How do you format WordArt?
- 4 What is WordArt in MS PowerPoint?
- 5 What is the necessity of WordArt text?
- 6 What is watermark in MS Word?
- 7 Where is the WordArt in Word?
- 8 What is WordArt in word processing software?
- 9 How do I convert WordArt to Word?
- 10 How do you use WordArt in Excel?
- 11 How do I change Word Art in Word?
- 12 How do I create word art in PowerPoint?
- 13 How do you use WordArt in Word 2010?
- 14 What is the use of styles?
- 15 Is WordArt a graphic?
- 16 What are the two ways to create WordArt?
- 17 What is thesaurus in MS Word?
- 18 What is page color in MS Word?
- 19 What is hyperlink in MS Word?
- 20 How do you change Word Art in Excel?
What is the use of WordArt feature in MS Word?
You can use WordArt to add special text effects to your document. For example, you can stretch a title, skew text, make text fit a preset shape, or apply a gradient fill. This WordArt becomes an object that you can move or position in your document to add decoration or emphasis.
What is WordArt and how should it be used?
WordArt is a program that allows you to treat text as a graphic. You can use the program to add special effects and flourishes to text, and then insert the text in your document. It is useful for creating special text elements such as logos, mastheads, or titles.
How do you format WordArt?
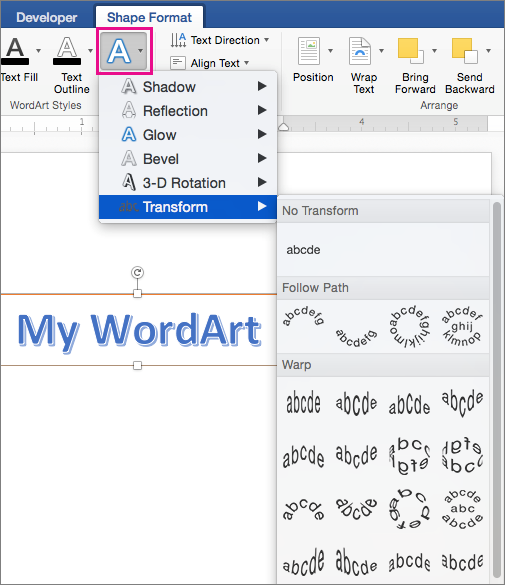
Select the WordArt you want to change. Go to Shape Format or Drawing Tools Format > Text Effects. Select Transform, and then choose the effect you want. If you don’t see Transform at the bottom of the menu, make sure you’ve selected Text Effects.
What is WordArt in MS PowerPoint?
WordArt is a special feature that allows the users to give special effects to the text such as curved text, 3D text, color gradiants, and more. To insert a WordArt you just need to click at Insert > WordArt.You can WordArt in any PowerPoint slide where you need to make nice text effects.
What is the necessity of WordArt text?
In Microsoft applications, including Excel, PowerPoint, and Word, users can add WordArt to their spreadsheet, slide, or document. WordArt is a more stylish type of text, allowing users to make the text more noticeable and more flashy.
What is watermark in MS Word?
A watermark is an image or text that appears behind the main text of the document. It is usually a lighter shade than the text, so you can read the document easily. Text Watermarks are often used to categorize or to show the purpose of a document with words such as DRAFT.
Where is the WordArt in Word?
If you have not installed Classic Menu for Office on your computer, you can access the WordArt command in Ribbon with following steps: Click the Insert Tab; Go to Text group; Then you will see the WordArt button.
What is WordArt in word processing software?
WordArt is a text modifying feature in Microsoft Word, a popular word processing program. It includes effects such as shadows, outlines, colors, gradients, and 3D effects that can be added to a word or phrase. WordArt can also bend, stretch, skew, or otherwise modify the shape of the text.
How do I convert WordArt to Word?
To convert regular text into WordArt:
Select the text you want to convert, then click the Insert tab. Click the WordArt drop-down arrow in the Text group. A drop-down menu of WordArt styles will appear. Select the style you want to use.
How do you use WordArt in Excel?
Using WordArt in Excel
- Display the Insert tab of the ribbon..
- In the Text group, click the WordArt tool. You then see the WordArt Gallery.
- Select a general appearance that you want used for your text, and then click on OK.
- Enter the text you want used by WordArt, and click on OK.
How do I change Word Art in Word?
You can easily change the spelling or words of the WordArt you have created.
- Double click the WordArt image.
- From the Format command tab, in the Text group, click Edit Text… The Edit WordArt Text dialog box appears.
- In the Text text box, make your changes.
- Click OK.
How do I create word art in PowerPoint?
How to Make WordArt in PowerPoint
- Click the Insert tab.
- Expand the Text group on the ribbon.
- Click WordArt. A gallery of WordArt options appears.
- Choose a WordArt style. To change the WordArt style of selected text, click the Format tab, select Quick Styles, and make a selection.
- Type to replace the placeholder text.
How do you use WordArt in Word 2010?
However, there’s a shortcut that allows you to convert text into WordArt even if it’s not in a text box.
- Select the text you want to convert.
- Click the Insert tab.
- Click the WordArt command.
- Select the desired quick style.
- Word will automatically create a text box for your text and apply the style to the text.
What is the use of styles?
Styles allow you to easily apply consistent formatting to documents, as well as to quickly change existing formatting. In addition, the use of styles provides a structure to your document that can be discerned by a screen reader.
Is WordArt a graphic?
A category of fine art, graphic art covers a broad range of visual artistic expression, typically two-dimensional, i.e. produced on a flat surface.Graphic art further includes calligraphy, photography, painting, typography, computer graphics, and bindery.
What are the two ways to create WordArt?
There are two ways to apply WordArt to text. You can select existing text and then select a style from the WordArt gallery, at which point Word will copy and insert the text into a text box. Or you can select a WordArt style first and then type the text into the text box that appears.
What is thesaurus in MS Word?
The Thesaurus is a software tool that is used in the Microsoft Word document to look up (find) synonyms (words with the same meaning) and antonyms (words with the opposite meaning) for the selected word.
What is page color in MS Word?
In MS Word there is a special feature called Page Color in which you can add color to the pages of your document. It has a range of beautiful colors. Also, you can customize your own background color. Adding page color makes your document more attractive and beautiful.
What is hyperlink in MS Word?
A hyperlink in a Microsoft Word document enables readers to jump from the link to a different place in the document, to a different file or website, or to a new email message.
How do you change Word Art in Excel?
So, here are the steps:
- Go to the Insert menu in the ribbon.
- Select the Text command.
- Click on WordArt to expand the gallery.
- Select one of the thumbnails of the WordArt style you want to use.
- Type your desired text in the box – the box that says ‘Your text here.
WordArt is a gallery of text styles that you can add to your publications to create decorative effects, such as shadowed or mirrored (reflected) text. You can use WordArt to add special text effects to your document.You can modify or add to the text in an existing WordArt object whenever you want.
Contents
- 1 How do you use WordArt in Word?
- 2 Where is the WordArt in Word?
- 3 What is WordArt and how should it be used?
- 4 What is a WordArt title?
- 5 What is WordArt in MS PowerPoint?
- 6 What are the WordArt features in Word?
- 7 Why would you use WordArt?
- 8 On which tab WordArt button is present?
- 9 How do I insert WordArt into Powerpoint?
- 10 Does Office 365 have WordArt?
- 11 Is WordArt a graphic?
- 12 How do I convert WordArt to Word?
- 13 Is WordArt free?
- 14 What is WordArt quizlet?
- 15 How do you convert WordArt to PPT?
- 16 What is the use of styles?
- 17 What are the two ways to create WordArt?
- 18 What is watermark in MS Word?
- 19 What is the advantage of using MS Publisher instead of Word?
- 20 Can you use WordArt in PowerPoint?
How do you use WordArt in Word?
How to Insert and Format WordArt in Word
- Click where you want to insert WordArt.
- Click the Insert tab.
- Expand the Text group, if necessary.
- Click the WordArt button.
- Select a WordArt style from the gallery.
- Type to replace the text.
Where is the WordArt in Word?
On the Insert tab, in the Text group, click WordArt, and then click the WordArt style that you want.
What is WordArt and how should it be used?
WordArt is a program that allows you to treat text as a graphic. You can use the program to add special effects and flourishes to text, and then insert the text in your document. It is useful for creating special text elements such as logos, mastheads, or titles.
What is a WordArt title?
WordArt titles are simple to create and can enhance the look of any Word document. To add a WordArt title, simply pull down the Insert menu, click on Picture, then click on WordArt.Type your title and click OK. Your WordArt title will appear with small boxes (called handles) around it.
What is WordArt in MS PowerPoint?
WordArt is a special feature that allows the users to give special effects to the text such as curved text, 3D text, color gradiants, and more. To insert a WordArt you just need to click at Insert > WordArt.You can WordArt in any PowerPoint slide where you need to make nice text effects.
What are the WordArt features in Word?
WordArt is a text modifying feature in Microsoft Word, a popular word processing program. It includes effects such as shadows, outlines, colors, gradients, and 3D effects that can be added to a word or phrase. WordArt can also bend, stretch, skew, or otherwise modify the shape of the text.
Why would you use WordArt?
WordArt helps in dealing with text by providing different styles to the letters and their typographic arrangement.It can modify the look of the text by bending, skewing or stretching the shape. It can help in enhancing the look and feel of the text used in the Microsoft Office applications, especially in Word.
On which tab WordArt button is present?
Insert command tab
WordArt can be added to your document using a button on the Insert command tab. The WordArt Gallery dialog box appears.
How do I insert WordArt into Powerpoint?
To insert WordArt:
- Click the WordArt button on the Drawing toolbar.
- The WordArt Gallery appears.
- Choose the WordArt that best fits your slide presentation.
- Click OK.
- The WordArt appears in your slide. You can drag it wherever you want it to appear on your slide.
- Type any text you want to display.
- Click OK.
Does Office 365 have WordArt?
Office 365/2013 most certainly does have the WordArt feature. However, if you are looking for the same WordArt as in Word 97-2003 or 2007, then you will need to save the document in Word 97-2003 format. Otherwise, the WordArt is the same as in Word 2010.
Is WordArt a graphic?
A category of fine art, graphic art covers a broad range of visual artistic expression, typically two-dimensional, i.e. produced on a flat surface.Graphic art further includes calligraphy, photography, painting, typography, computer graphics, and bindery.
How do I convert WordArt to Word?
To convert regular text into WordArt:
Select the text you want to convert, then click the Insert tab. Click the WordArt drop-down arrow in the Text group. A drop-down menu of WordArt styles will appear. Select the style you want to use.
Is WordArt free?
WordArt offers a freemium model but you’ll need to upgrade to the paid version of the word cloud generator if you want to download high-quality word art, which might be useful if you are planning to print your word cloud.
What is WordArt quizlet?
Word art. Decorative text that you can add to a document; makes text pop or standout. From new or by converting existing text. Ways to create word art.
How do you convert WordArt to PPT?
Select the WordArt you want to change. Go to Shape Format or Drawing Tools Format > Text Effects. Select Transform, and then choose the effect you want.
What is the use of styles?
Styles allow you to easily apply consistent formatting to documents, as well as to quickly change existing formatting. In addition, the use of styles provides a structure to your document that can be discerned by a screen reader.
What are the two ways to create WordArt?
There are two ways to apply WordArt to text. You can select existing text and then select a style from the WordArt gallery, at which point Word will copy and insert the text into a text box. Or you can select a WordArt style first and then type the text into the text box that appears.
What is watermark in MS Word?
A watermark is an image or text that appears behind the main text of the document. It is usually a lighter shade than the text, so you can read the document easily. Text Watermarks are often used to categorize or to show the purpose of a document with words such as DRAFT.
What is the advantage of using MS Publisher instead of Word?
Publisher Advantages
Publisher works more like an image editing program than Word does. Use Publisher, and you can select shapes and graphics and drag them to precise locations within your document. You can’t do that in Word, but you can resize shapes, tables and images using your mouse.
Can you use WordArt in PowerPoint?
1On the slide on which you want to insert WordArt, click the Insert tab on the Ribbon and then click the WordArt button in the Text group. 2Select the WordArt style you want to use. 3Click the WordArt text box and then type the text you want to use.
Wordart in ms word in detail. What is Wordart in MS word? Amazing feature to make some beautiful text. It is very necessary to create beautiful text. Use this option to make text moderative.
WordArt is made up of two words. Which means to furnish the word with art. WordArt is a text stylization tool. Which is used to stylize any text inside Microsoft Word or in Microsoft Excel or Microsoft PowerPoint.
With the help of this great feature, the outline of any text can be made as a 3D effect as well as a gradient shadow. This option gives beauty to any text or line.
Word Art provides a variety of options for creating different textures of a word. This amazing option is given in the text block inside the Insert menu tab of MS Word. Which can be easily used to make any text decorative.
When we click on the option of WordArt, then there are groups of different types of word art that appear at the bottom, now to use any of the word art options given in these, we will click on it after which the text The form will look very beautiful.
When we use the word art, we can also show different forms of a word. For that, apart from the size of the text, you can show that word as bold, or italic. Apart from this, the word on which you apply this feature can also be set as crooked or different shapes.
When word art is applied to a word. After that, you can increase or decrease the size of that word by mouse from top to bottom right left.
In this, after applying word art, a lot of options have also been given to make any kind of changes like you can edit that word again, apart from setting its position. If you want to change the alignment of that text, then you can change that too.
- How to change margins in words in detail
- What is Wordpad, How to use WordPad

Uses of WordArt
- Open Microsoft word
- Type or make any new document

- Select a particular word text line more visible
- Visit insert tab
- Text block
- A single click on the art option

- See more designs here
- choose on and click on

- ok
- Beautiful as seen in the picture above.
Format option meaning
Edit text – Edit the text easy to use this option.
Spacing – to use this option click on spacing this option is used to put text in normal format or tight, very tight, etc.
Even height – This option is used to make all words the same height.
Alignment – to set an alignment formatting then you can use this option to justify your text bold your text edit your text.
Wordart style – Change the word artist style to click one art style.
Shape fill – Fill the shape with a solid color like gradient and texture.
Shape outline – To set the outline.
Change shape – change the text shape like a circle, triangle, etc.
Shadow effects – To give shadow effects.
Position – To set a position.
Text wrapping – To change the way of text moves in the normal way.
Rotate – Rotate the paragraph at a 90-degree angle or different types of angles.
Height – To set height in increasing order or decreasing order.
Width – To increase or decrease the size of the line text you can use this option.
These are all options for text editing word art after creating.
- How to change margins in words in detail
- What is Wordpad, How to use WordPad
- How to use drop cap in MS word
- How to add comments in word
Summary
What is Wordart in MS word.

Hello Friends, This is Ravi Shankar Tiwari. Welcome to Gyanitechinfo Blog. He has completed MBA (IT). He is a Professional blogger and Founder of this website. He has deep knowledge about computers, technology, Internet, Blogging, SEO, MS Word, MS Excel, Make Money & Full Form. Always learn something new and grow your knowledge.
Updated: 03/05/2023 by
In Microsoft applications, including Excel, PowerPoint, and Word, users can add WordArt to their spreadsheet, slide, or document. WordArt is a more stylish type of text, allowing users to make the text more noticeable and more flashy.
There are multiple varieties of text styles with WordArt, including embossed text, bordered text, and shadowed text. Users can add WordArt that uses two different colors, one color being the text border and the other color being the fill color of the text. After adding WordArt to a document, it can be moved almost anywhere, and the WordArt text size can be adjusted as well. Below are several examples of WordArt.

ASCII Art, Computer art, Font, Text, Typography terms, Word
WordArt is a quick way to make text stand out with special effects. You begin by picking a WordArt style from the WordArt gallery on the Insert tab, and then customize the text as you wish.


Try it!
-
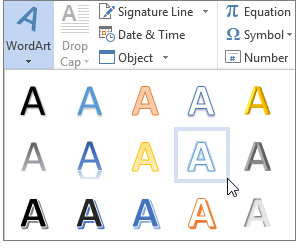
Click Insert > WordArt, and pick the WordArt style you want.

In the WordArt gallery, the letter A represents the different designs that are applied to all text you type.
Note: The WordArt icon is located in the Text group, and it may appear different depending on the program you’re using and the size of your screen. Look for one of these icons:
-
The placeholder text «Your text here» appears, with the text highlighted.
Enter your own text to replace the placeholder text.


Tips:
-
You can enter entire sentences, and even paragraphs, as WordArt. (You may have to change the font size for longer text.) And in Word, you can also convert existing text to WordArt in Word.
-
You can include symbols as WordArt text. Click the location for the symbol, and on the Insert tab, click Symbol, and pick the symbol you want.
Do more things with WordArt
Select a heading below to open it and see the detailed instructions.
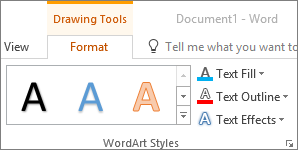
You might have tried using shape styles to change the shape of WordArt and then were puzzled that the text didn’t change. Use the text options in the WordArt Styles group instead. Shape styles and effects apply to the box and background surrounding your WordArt, not to the WordArt text. So, to add effects to your WordArt, such as shadows, rotation, curves, and fill and outline colors, you use the options in the WordArt Styles group, including Text Fill, Text Outline, and Text Effects.
Note: Depending on your screen size, you might only see the icons for WordArt Styles.

-
Select the WordArt text or letters to change.
The Drawing Tools Format tab appears.
-
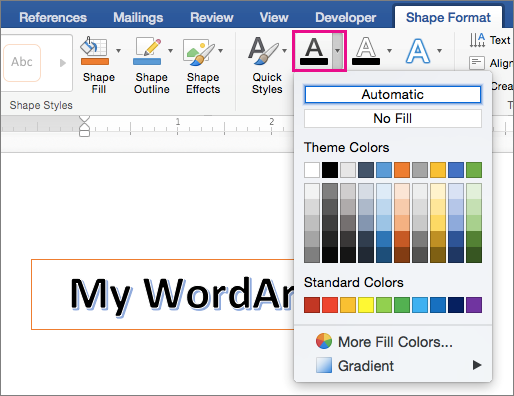
On the Drawing Tools Format tab, click Text Fill or Text Outline, and pick the color you want.
-
Click outside of your text box to see the effect.
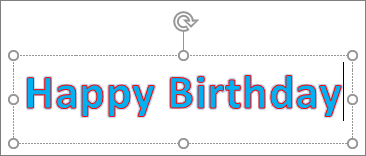
In this example, a light blue text fill and a red text outline were applied.

You can curve text around a circular object.
90 seconds
-
Select the WordArt text or letters to change.
The Drawing Tools Format tab appears.
-
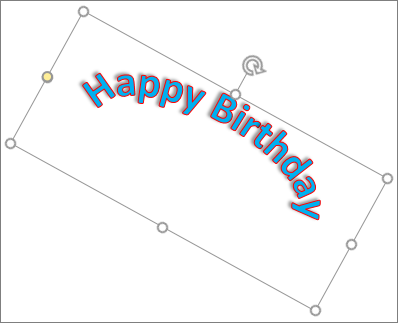
To create a curved effect, on the Drawing Tools Format tab, click Text Effects >Transform and pick the one you want.
Important: The Text Effects
menu is not the same as the Shape Effects menu. If you don’t see Transform at the bottom of the menu, make sure you’ve clicked the Text Effects menu.In this example, the first curved transform effect is selected.
-
Click outside of your text box to see the effect.
Use the Text Effects menu to create other effects, such as shadow, reflection, glow, bevels, and 3-D rotation. This example shows WordArt with a curved transform effect and a shadow applied.
 menu is not the same as the Shape Effects
  menu. If you don’t see Transform at the bottom of the menu, make sure you’ve clicked the Text Effects menu.

-
To rotate WordArt text to any angle, select it, and then drag the circular rotation handle at the top of the box.
-
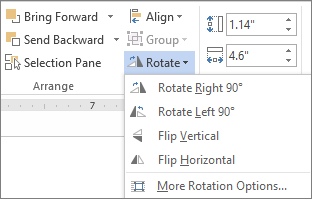
To flip WordArt or rotate it 90 degrees, click the Drawing Tools Format tab, click Rotate in the Arrange group, and then select an option.
To change the font size or style of your WordArt text:
-
Select the WordArt text or letters to change.
-
On the Home tab, select options in the Font group, such as font style, font size, or underline.
-
In your Word document, select the text to convert to WordArt.
-
On the Insert tab, click WordArt, and then pick the WordArt you want.
Double-click the WordArt that you want to remove, and then press Delete.
Insert WordArt
-
Click where you want to insert decorative text in a document.
-
On the Insert tab, in the Text group, click WordArt.
-
Click any WordArt style, and start to type.
Do more things with WordArt
Select a heading below to open it and see the detailed instructions.
-
Click anywhere in the WordArt text that you want to change.
-
Under Drawing Tools, on the Format tab, click any option.
For example, you can change the direction of the WordArt text by clicking Text Direction in the Text group and choosing a new direction for the text.
Double-click the WordArt that you want to remove, and then press Delete.
Add WordArt
Excel
-
On the Insert tab, in the Text group, click WordArt, and then click the WordArt style that you want.
-
Enter your text.
-
You can add a fill or effect to a shape or text box as well as the text in the WordArt.
-
If you have a chart in your 2007 Office release document, you can replace the chart title with WordArt to give the title additional emphasis.
-
Outlook
-
On the Insert tab, in the Text group, click WordArt, and then click the WordArt style that you want.
-
Type your text in the Text box.
You can add a fill or effect to a shape or text box as well as the text in the WordArt.
PowerPoint
-
On the Insert tab, in the Text group, click WordArt, and then click the WordArt style that you want.
-
Enter your text.
-
You can add a fill or effect to a shape or text box as well as the text in the WordArt.
-
If you have a chart in your 2007 Office release document, you can replace the chart title with WordArt to give the title additional emphasis.
-
Publisher
-
On the Objectstoolbar, click Insert WordArt
. -
In the WordArt Gallery, click the WordArt that you want, and then click OK.
-
Type your text in the Text box.
If you want to change the text in the WordArt, double-click the WordArt that you want to change, and then type the new text in the Text box.
 .
.Word
-
On the Insert tab, in the Text group, click WordArt, and then click the WordArt style that you want.
-
Type your text in the Text box.
You can add a fill or effect to a shape or text boxas well as the text in the WordArt.
Do more things with WordArt
Select a heading below to open it and see the detailed instructions.
Excel
Do one or more of the following:
-
To change the text, select it, and then make the changes that you want.
-
To change the font, see Change the font or font size in Excel or Change the color of text in a worksheet.
-
To add an effect to WordArt, see Add or delete a fill, outline, or effect for text or WordArt.
-
To rotate the WordArt, see Rotate or flip a picture, shape, text box, or WordArt in Excel 2007.
-
To resize the WordArt, see Change the size of a picture, shape, text box, or WordArt.
-
To align the WordArt, see Align or arrange a picture, shape, text box, or WordArt.
-
To move the WordArt, see Move a picture, shape, text box, or WordArt.
For more information about selecting WordArt, see Select a shape or other object.
Outlook
Do one or more of the following:
-
To change the text, select it, and then make the changes that you want.
-
To change the font, see Change the size or formatting of text.
-
To add an effect to WordArt, see Add or delete a fill, outline, or effect for text or WordArt.
-
To rotate the WordArt, see Rotate or flip a picture, shape, text box, or WordArt in Outlook 2007.
-
To resize the WordArt, see Change the size of a picture, shape, text box, or WordArt.
-
To align the WordArt, see Align or arrange a picture, shape, text box, or WordArt.
-
To move the WordArt, see Move a picture, shape, text box, or WordArt.
For more information about selecting WordArt, see Select a shape or other object.
PowerPoint
Do one or more of the following:
-
To change the text, select it, and then make the changes that you want.
-
To add an effect to WordArt, see Add or delete a fill, outline, or effect for text or WordArt.
-
To rotate the WordArt, see Rotate or flip a picture, shape, text box, or WordArt in PowerPoint 2007.
-
To resize the WordArt, see Change the size of a picture, shape, text box, or WordArt.
-
To align the WordArt, see Align or arrange a picture, shape, text box, or WordArt.
-
To move the WordArt, see Move a picture, shape, text box, or WordArt.
For more information about selecting WordArt, see Select a shape or other object.
Publisher
Do one or more of the following:
-
To change the text, select it, and then make the changes that you want.
-
To change the font, see Change the font size or Change the color of text.
-
To add an effect to WordArt, see Add or delete a fill, outline, or effect for text or WordArt.
-
To resize the WordArt, see Change the size of a picture, shape, text box, or WordArt.
-
To align the WordArt, see Align or arrange a picture, shape, text box, or WordArt.
-
To move the WordArt, see Move a picture, shape, text box, or WordArt.
For more information about selecting WordArt, see Select a shape or other object.
Word
Do one or more of the following:
-
To change the text, select it, and then make the changes that you want.
-
To change the font, see Change the font size.
-
To add an effect to WordArt, see Add or delete a fill, outline, or effect for text or WordArt.
-
To rotate the WordArt, see Rotate or flip a picture, shape, or WordArt.
-
To resize the WordArt, see Change the size of a picture, shape, text box, or WordArt.
-
To align the WordArt, see Align or arrange a picture, shape, text box, or WordArt.
-
To move the WordArt, see Move a picture, shape, text box, or WordArt.
For more information about selecting WordArt, see Select a shape or other object.
Excel
When you remove the WordArt style from your text, the text remains and changes to plain text.
-
Select the WordArt text that you want to remove the WordArt style from.
-
Under Drawing Tools, on the Format tab, in the WordArt Styles group, click the More button
, and then click Clear WordArt.To remove the WordArt style from part of your text, select the text that you want to remove the WordArt style from, and then follow the steps above.
 , and then click Clear WordArt.
PowerPoint
When you remove the WordArt style from your text, the text remains and changes to plain text.
-
Select the WordArt text that you want to remove the WordArt style from.
-
Under Drawing Tools, on the Format tab, in the WordArt Styles group, click the More button
, and then click Clear WordArt.To remove the WordArt style from part of your text, select the text that you want to remove the WordArt style from, and then follow the steps above.
Do the following for all programs listed in the Applies To at the top of the article.
-
Double-click the WordArt that you want to remove to select it, and then press Delete.
-
In Office for Mac 2016 or later, select the Insert tab on the Ribbon.
or
In Office for Mac 2011, select Insert on the toolbar.
-
Select WordArt, and pick the WordArt style you want.
In the WordArt gallery, the letter A represents the different designs that are applied to all text you type.
-
Enter your text.

Tip: You can also include symbols as WordArt text. To do so, click the location in your document for the symbol, and on the Insert tab, click Advanced Symbol, and pick the symbol you want.
Do more things with WordArt
Select a heading below to open it and see the detailed instructions.
To create curved or circular WordArt text, you add a Transform text effect.
-
Select the WordArt.
When you do that, the Shape Format tab appears.
-
Click Text Effects > Transform and pick the effect you want.

To change the color of the WordArt text, you change the Text Fill.
-
Select the WordArt text or letters to change.
When you do that, the Shape Format tab appears.
-
Click Text Fill, and pick the color you want.
Tip: To change the outline of the WordArt text, on the Shape Format tab, click Text Outline.
-
Select the text to convert to WordArt.
-
On the Insert tab, click WordArt, and then pick the WordArt style you want.
In Microsoft 365 for the web you can see WordArt that’s already in your document, presentation, or worksheet, but to add more WordArt you need to open or edit the doc in the desktop version of Word, PowerPoint, or Excel.
In Microsoft 365 for the web, you can use the Font features on the Home tab to change the font color and size, and apply bolding, italics, or underlines to your text.
If you don’t have the desktop version of Word or PowerPoint, you can try it or buy it in the latest version of Office now.
When you insert or select WordArt a new WordArt Tools tab becomes available. This article will tell you how to insert and delete WordArt, and walk you through using the features of the WordArt Tools tab.
In this article
-
WordArt Overview
-
Insert and delete WordArt
-
WordArt Tools tab
WordArt Overview
WordArt is a gallery of text styles that you can add to your publications to create decorative effects, such as shadowed or mirrored (reflected) text. You can use WordArt to add special text effects to your document. For example, you can stretch a title, skew text, make text fit a preset shape, or apply a gradient fill. This WordArt becomes an object that you can move or position in your document to add decoration or emphasis. You can modify or add to the text in an existing WordArt object whenever you want.
Insert and delete WordArt
Insert WordArt:
-
Select the Insert tab.
-
In the Text group, select the WordArt pull-down menu.
-
Select from either the Plain WordArt Styles or WordArt Transform Style galleries.
-
Type your text in the Edit WordArtText box, select the font, font size, and apply bold or italics, and click OK.
Delete WordArt:
-
Select the WordArt object.
-
Press Delete.
Top of Page
WordArt Tools tab
The WordArt Tools tab enables you to format the WordArt’s text and effects, arrange the WordArt in relation to other objects on the page, and change the size of the WordArt object.

Text group
The Text group gives you access to tools for changing the text content, spacing, height, switching between horizontal and vertical, and the text alignment within the WordArt object.

Edit Text
To change the text in the WordArt object click on Edit Text and edit your text in the Edit WordArt Text box.
Spacing
Spacing enables you to adjust the space between characters in your WordArt by using one of the five pre-set formats and using or not using kerning pairs.
-
Very Tight: Increases the width of the text to eliminate the space between characters in each word.
-
Tight
: Increases the width of the text to minimize the space between characters in each word. -
Normal
:This is the default selection and allows a normal amount of space between the characters with the text width at normal for the font.
-
Loose
: Decreases the width of the text to increase the space between the characters. -
Very Loose
: Decreases the width of the text to maximize the space between the characters. -
Kern Character Pairs: Kerning deals with pairs of characters that when next to each other appear to be farther apart than other pairs. To see this, create a WordArt object with the text «WordArt test» and turn on and off the kerning to see the difference.
Even Height
This selection will make all letters the same height, both upper and lower case.
WordArt Vertical Text
This tool toggles your WordArt between vertical and horizontal format.
Align Text
Here you can change the alignment of the text in the WordArt object.
-
Left Align: Aligns the text with the left side of the WordArt object.
-
Center: Centers the text in the WordArt object.
-
Right Align: Aligns the text with the right side of the WordArt object.
-
Word Justify: Aligns the text with both the right and left sides of the WordArt objects by moving the words in the text.
-
Letter Justify: Aligns the text with both the right and left sides of the WordArt objects by moving the letters in the text.
-
Stretch Justify: Aligns the text with both the right and left sides of the WordArt objects by stretching the characters.
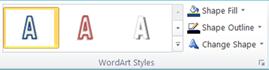
WordArt Styles group
The WordArt Styles group enables you to change the style of your WordArt, change the color of the fill and lines, and change the shape of the WordArt object. You can preview each of these effects by hovering your mouse cursor over the selection and Publisher will preview the selection in your Publication.
WordArt Styles
Select the style you want from the gallery, to see all the available styles click the More button. 
Shape Fill
You can change the color that fills your WordArt text. You can also replace the fill with a picture and adjust the gradient, texture, and pattern of the fill.
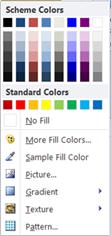
In the Shape Styles group, click Shape Fill, and do one of the following:
-
To use a color that you have used recently, click one of the colors that is displayed.
-
To see more color choices, click More Fill Colors, and then select the color that you want.
-
To use a color from anywhere in your workspace, click Sample Fill Color and then click the eyedropper on the color you want to use.
-
To use a Picture, Gradient, Texture, or Pattern, select the appropriate menu item.
Shape Outline
You can change the color of the outline of your WordArt text. You can also change the weight of the outline, make the outline dashed, or use a pattern.
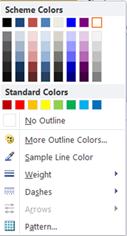
In the Shape Styles group, click Shape Outline, and do one of the following:
-
To use a color that you have used recently, click one of the colors that is displayed.
-
To see more color choices, click More Outline Colors, and then select the color that you want.
-
To adjust the Weight, Dashes, or Pattern of the outline, select the appropriate menu item.
Change Shape
Your WordArt text will follow a defined shape.
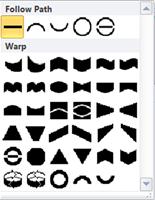
For example you can change the default straight shape to curve upwards by selecting the first Warp option from the gallery:


Note: Some of the shapes have yellow diamond shaped handle that you can drag to change the characteristics of the shape you choose.
Shadow Effects group
The Shadow Effects group enables you to format a shadow to your WordArt.

-
Click Shadow Effects, and then select the effect you want from the gallery of shadow effect styles.
-
To change the color of the shadow, select Shadow Color and select the color options you want.
-
To nudge the shadow distance, click the appropriate directional buttons.
-
To turn the shadow effect on and off, click the center button.

3-D Effects group
The 3-D Effects group gives you the ability to make your WordArt appear to be three-dimensional.

3-D Effects
You can apply a 3-D effect from a gallery of effects. You can also adjust the color, depth, direction, lighting, and surface of the effect. If you hover your mouse over the 3-D effect selection your WordArt will preview the effect.
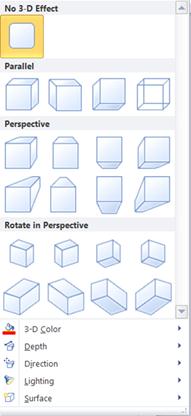
3-D effects gallery
Hover over the gallery selections to see the effect previewed on your WordArt. Click to select the effect. To remove all 3-D effects, click No 3-D Effect.
3-D Color
-
To use a color that you have used recently, click one of the colors that is displayed.
-
To see more color choices, click More 3-D Colors, and then select the color that you want.
-
To use choose color from your publication, perhaps in an image on the page, select Sample 3-D Color, move the sample cursor
to the color you want to sample and click.
 to the color you want to sample and click.
Depth
Select the depth of the 3-D effect, from Infinity to 0 pt.
Direction
Each effect in the gallery has a default direction, but you can use this tool to configure the direction the effect uses to simulate three dimensions.
Lighting
Like Direction, you can use the Lighting tool to change the direction of the apparent light source on your 3-D WordArt.
Surface
You can change the surface of your WordArt from Matte to Plastic, Metal, or Wire Frame.
3-D Tilt
The 3-D tilting tool enables you to exert a fine control over the direction of the 3-D effect by rotating the WorArt left, right, up, or down. The center button turns the 3-D effects on or off.

Top of Page
Arrange Group
The Arrange group enables you to set the text wrapping behavior around your WordArt, send the WordArt backwards or forwards relative to other objects on the page, align your WordArt on the page, group or ungroup the WordArt with other objects, and rotate the WordArt. For more information on arranging objects, please see:
-
Move an object forward or backward
-
Align objects
-
Group and ungroup objects
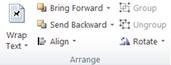
Size Group
The Size group gives you control over the Shape Height and Shape Width of your WordArt. You can also manually drag the handles of the WordArt object to change its size.
 .
.
Top of Page
What Does WordArt Mean?
WordArt is a text styling utility available in Microsoft Office applications such as Microsoft Word, Excel, PowerPoint and Publisher. It helps in providing special effects like outlines, gradient glow, shadow, bevel, textures and 3-D effects to the text, effects which are unavailable in the standard font formatting tools.
Techopedia Explains WordArt
WordArt helps in dealing with text by providing different styles to the letters and their typographic arrangement. WordArt is available in many preset styles and can be customized with the help of drawing tool options in the toolbar in applications or the WordArt tools tab. New styles were added in Office 2007 to WordArt, which also gave the feature a new look and a complete overhaul.
In the case of a Word document, WordArt can be added by selecting: Insert -> Picture -> WordArt. WordArt can also be modified or moved by choosing: Modify -> WordArt.
WordArt is simple to create and use and easy to access. It can modify the look of the text by bending, skewing or stretching the shape. It can help in enhancing the look and feel of the text used in the Microsoft Office applications, especially in Word. This is especially helpful in the case of highlighting titles, headlines or information. However, the styling offered is limited to the options included in the WordArt utility.
If it’s true, Microsoft Word is the world’s most relevant word processor. Since then, thanks to his remarkable trajectory and his excellent management throughout this period, many people, by default, have chosen to use this program to produce digital documents .
Thus, beyond facilitating the creation of texts, Word also has the necessary tools to edit, customize and manage any document in a professional manner . This is why it offers the possibility of create stylized texts with various special effects .
In this sense, this function refers to the WordArt format, which reveals great utility and, therefore, is one of the most substantial of this program. To learn more about this format and know how to set it up successfully in Word , we invite you to read this article.
What is the format of WordArt and how is it different from the format of text?
Basically, WordArt is a utility available in Word document editor that provides the ability to create texts in a stylized way, through various special effects such as: contours, textures and many other manipulations that cannot be found in font or standard format . In other words, in a nutshell, this setting is a type of style that users of Word and some other Microsoft Office products can use to enrich their texts.
In this way, the format of a WordArt has the necessary provisions for create shadows, widen, fold, rotate and stretch the shape of the text in question, as well as to change its color . Taking into account that in order to adapt to the needs of all users, there is a total of 30 different styles predefined in Word and, for more benefits, they are fully customizable .
In this sense, there is an absolute difference between the format of a standard text in Word and the format of a WordArt. What, quite simply, is that the first can only be considered as a common text to which it is possible to modify certain elementary aspects (like size, color, font type, etc.)
While using the format of a WordArt you will get an object that can be moved or included in the document in order to decorate it through writing that presents of more exclusive effects and artistic .
Learn how to set up your WordArts format step by step from scratch
After highlighting the main difference between a WordArt and the standard Word format, it is also important to know how this special format can be applied to any digital document to enrich it whenever you need it.
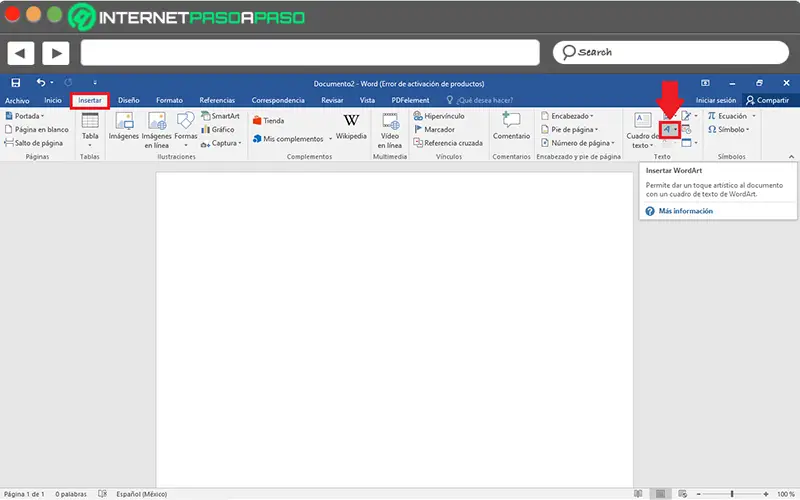
But first you have to know how insert this configuration in your Word writing . To do this, go to the program options bar and click on the «Insert» tab . Then find the Text group and there, select the WordArt option (its icon has an angled letter A), so continue to choose the type of WordArt you want to add to your document.
Now, once you have chosen the WordArt format, a space will be displayed on the document page that allows you to add the text you want, as well as each of the tools available in the program for easily configure and customize your WordArt format .
Which are in the Word ribbon and we will detail here:
Style
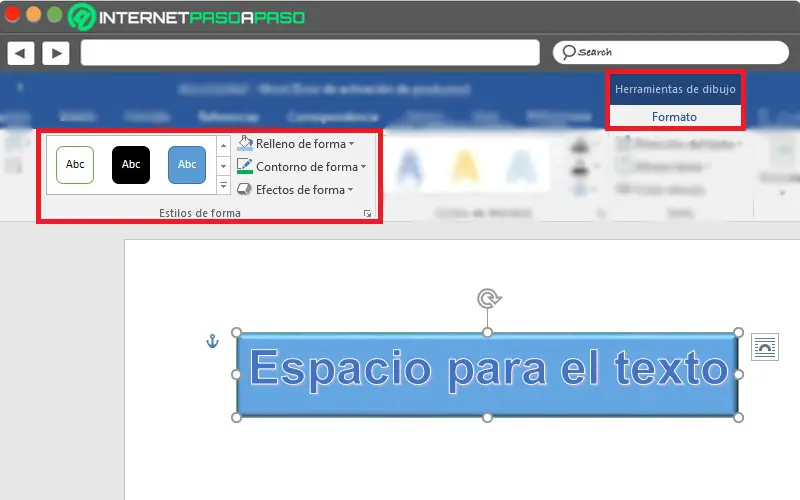
Start by inserting the WordArt format into the document (as we explained previously), to write the text in question in the indicated bar and thus being able to add a shape to it, in order to personalize it . To do this, simply go to the Shape styles group, in the «Drawing tools> Format» section and use the following available options:
- Theme styles : they can be selected in the area that displays a total of 26 lines with different theme styles available . Sorry for that, an option that lets you add visual styling to the chosen line or shape, basically. While, it simply gives you an overview by hovering your mouse over the style .
- Shape filling : allows you to fill the shape with a solid color, a gradient, an image or a texture; according to your preference.
- Outline of the shape: allows you to add an outline to the shape in question, as well as to choose the width, style and color of the line.
- Shape effects : It is used to apply a visual effect to the selected shape, from shadow, glow, reflection or 3D rotation.
The art of words
«UPDATE ✅ Want to learn more about WordArts format in Microsoft Word documents? ⭐ ENTER HERE ⭐ and learn all about SCRATCH! ”
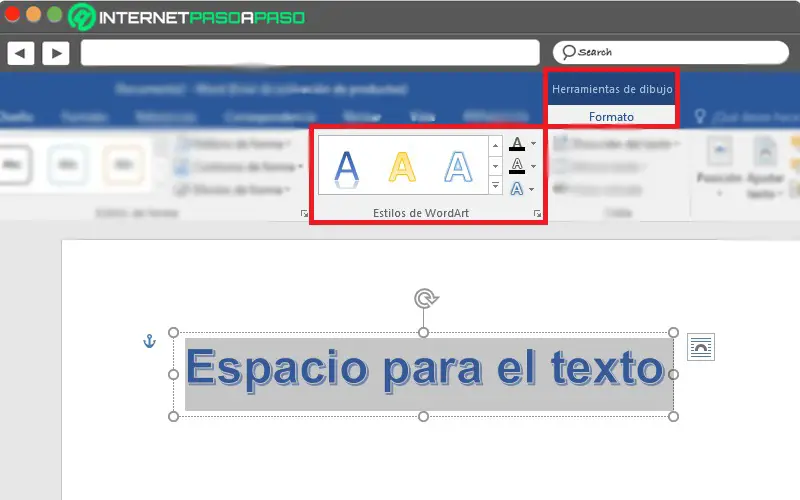
In order to apply a style to your WordArt writing, the first thing to do is to insert this format in the document (as we explained previously), to write the text in question in the indicated bar and to select completely (by dragging the Mouse cursor).
Then go to the section «Drawing tools> Format» at the top of the screen, from which you can customize WordArt style and even shape style (if you add them to the document).
In the case of the group called «WordArt Style», you have the following functions:
- Choose the preset style of the letter , directly in the box. Which are responsible for giving the document an artistic touch.
- Add text fill whether it’s a solid color, texture, gradient, or even an image.
- Customize the outline of the text by selecting the style, color and width of the line.
- Add visual effect to text ; that is to say, a shadow, a reflection or an illuminated one.
- If you click the down arrow to view options, you will find the option to add shadows, highlights, lighting, soft edges and 3D formatting to the text and shapes.
texts
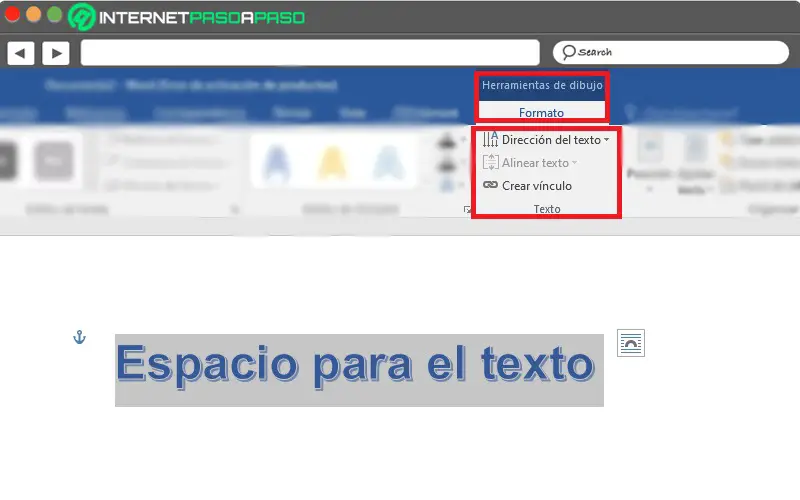
As in the previous cases, you need to insert the WordArt format into your document, write the text you need and select it, then go to the group called text and edit it. using the following functions or available options :
- Text direction : This allows you to easily set the direction of the text, either horizontally, with 90 ° or 270 ° rotation. In addition to allowing you to preview the changes.
- Align text : It allows you to modify the alignment of the text, only and exclusively in the text zone corresponding to WordArt.
- Create a link : this is a function responsible for allowing writing to move from one text area to another, easily.
Organize
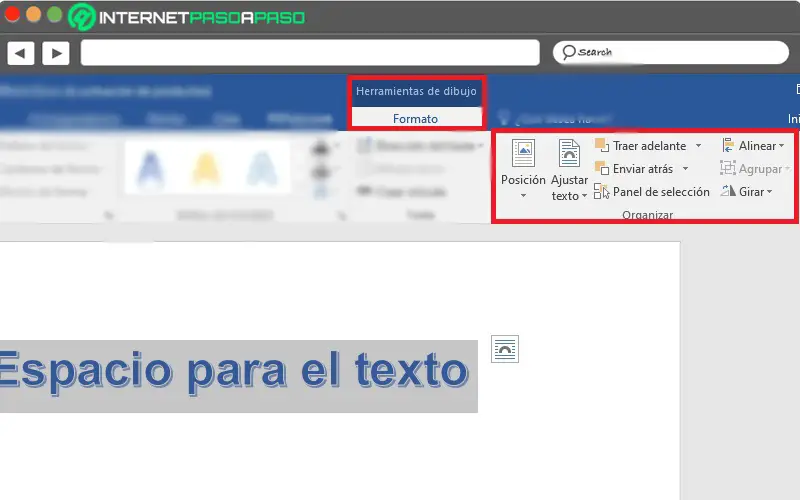
As the name suggests, this is a group of options that makes it easy to organize text included in WordArt format. Therefore, to display better quality once you insert this function, write the text and select it, you can go to «Drawing tools> Format», to access the following options in the organize group:
- Specify the position of the writing : Basically, this allows you to choose where the objects in question will be located (either in line with the text or in line with the text).
- Adjust exposed text : It can be aligned with text, square, narrow, transparent, above or below, behind text, in front of text and you can also change the adjustment points.
- Moving forward : It is used to move the selected object forward one level, so that it is hidden behind fewer objects.
- return : This function does the opposite of the previous one, since it sends the chosen object back one level.
- Selection panel : displays a list of all objects and makes it easy to select, change order, or change visibility, depending on your needs.
- Align : It is very useful to align objects on the edge of the page, on the margins or in relation to other objects.
- Grouper : Gather all the selected objects to be able to treat them as a single object and thus add formats to them.
- Rotation : automatically returns the selected object.
Size
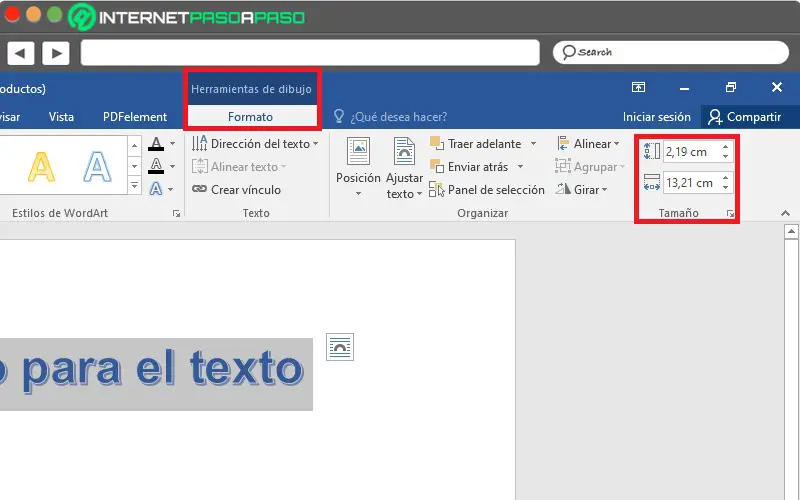
Finally, we find the Size group, which also allows you to change and adjust the dimensions of the WordArt text, once you have inserted and selected it in the document.
Thus, the options available are as follows:
- Height of the forms : allows you to modify the height of the selected shape, object or image (in centimeters).
- Shape width : This is used to change the width of the object or image (in centimeters).
If you have any questions, please leave them in the comments, we will get back to you as soon as possible, and it will be a great help for more community members as well. Thank you!

Что такое буквица в Ворде, что такое SmartArt и WordArt
Сегодня рассмотрим, что такое буквица в Ворде. Покажем на практике процесс поиска буквицы в Ворде и ее установки в текст. Поговорим об использовании функции SmartArt и WordArt. Данные инструменты Ворда будут нужны для форматирования текста.
Буквица в Ворде, что это такое и зачем она нужна

Здравствуйте, друзья! При работе с текстами в Ворде, мы привыкли писать обычными буквами и шрифтами. Ничего не меняем, делаем текст по стандартному значению. Но иногда возникает вопрос форматирования текста по тем или иным причинам. К примеру, нужно установить буквицу в тексте.
Итак, что такое буквица в Ворде? Это заглавная буква, которая вставляется вначале абзаца в документе Word. Другими словами ее называют прописной буквой.
Для чего нужна буквица в тексте? Она бывает необходима при написании различных книг, пособий, документов, статей и других текстовых материалов. Все зависит от того, какие используются требования в оформлении текста.
Далее установим буквицу в тексте и воспользуемся другими функциями Worda.
Буквица в Ворде, где находится и как пользоваться
Где находится буквица в Ворде? Чтобы найти буквицу, рассмотрим, для примера, Ворд 2007. Для этого открываете программу с готовым текстом. Далее переходите в раздел «Вставка» и нажимаете на «Буквица» (скрин 1).

Пользоваться буквицей в Ворде просто. После нажатия вышеуказанной кнопки, выбираете варианты буквицы – «В тексте» или «На поле». После выбора первого способа, буквица установится перед текстом (скрин 2).

Как видите, вы сможете легко установить буквицу. Если нажмете внизу «Параметры буквицы», сможете поменять ее шрифт и размер.
WordArt в Ворде, что это такое
В Майкрософт Ворд есть инструмент, который называется WordArt. Что это такое? С помощью ВордАрт вы сможете добавлять различные стили для вашего текста. Также эта функция помогает оформлять тексты различными эффектами, например, тенью или отражением.
Вместе с тем, она позволяет создать яркие тексты, которые можно использовать для ваших статей или книг.
Где находится WordArt в Ворде, как пользоваться
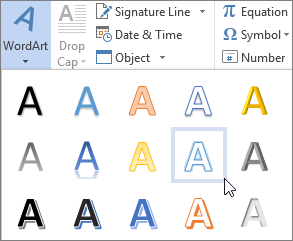
Функция WordArt находится в Ворде через раздел «Вставка», далее «WordArt» (скрин 3).

Чтобы использовать данную функцию, кликните по ней левой кнопкой мыши и выберите стили для текста (скрин 4).

В качестве примера, нажмем на второй стиль (скрин 5).

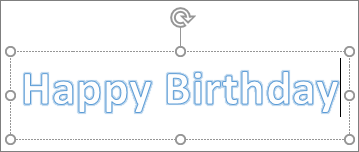
Вы увидите поле, в котором можете ввести текст, например, «Привет Мир!». После чего нажимаете «OK» и появится текст с новым стилем (скрин 6).

Появившейся текст можете отредактировать, если кликнуть по нему левой кнопкой мыши. Вверху будет доступна панель для редактирования. Выберите нужную функцию и сохраняете изменения с текстом.
SmartArt в Ворде, что это такое и где применяется
Итак, SmartArt в Ворде – это стили различных эффектов, которые применяются для фигур, линий и к графическим элементам. Другими словами вставляется рисунок, для визуального представления информации.
Пользователи могут выбрать разные эффекты: список, матрицу, процесс, цикл, иерархию, связь, пирамиду и другое. С помощью эффектов вы сможете изменить вид разных фигур и не только.
Как работать со SmartArt в Ворде
Чтобы работать со СмартАрт, откроем Ворд. Далее переходите в раздел «Вставка» и выбираете «SmartArt» (скрин 7).

Нажимаем на выбранный эффект, далее кнопку «OK».
Появится шаблон стиля, который можно отредактировать, например, написать текст на схеме. Вместе с тем, вы можете выбрать и другие стили в СмартАрт, о которых говорили выше.
Буквица в Ворде, WordArt, SmartArt – где находятся в разных версиях программы
Как установить и где находятся буквица в Ворде, ВордАрт и СмартАрт в разных версиях Ворда? Данные функции находятся аналогичным образом, как в Ворде 2007. У современной программы Ворд разный дизайн, но в целом, эти инструменты устанавливаются по похожему принципу.
Заключение
В статье мы рассматривали, что такое буквица в Ворде и как ее установить в текст. Также использовали другие инструменты, которыми можно изменять текст и не только. Используйте перечисленные функции в статье, чтобы улучшить вашу текстовую информацию.
Как создать WordArt заголовок в Microsoft Word 2013
В этом руководстве я покажу Вам, как создать WordArt заголовок в Microsoft Word 2013. Для этого прописываем текст заголовка и выделяем его.

Затем в разделе «Вставка» жмем кнопку «Текст» и в открывшемся окошке щелкаем кнопку «WordArt».

В открывшемся окошке выбираем вид надписи и кликаем по ней.

Заголовок оформлен. Теперь при помощи средств рисования создаем необходимый вид заголовка.

Для создания изогнутого текста заголовка жмем кнопку «Текстовые эффекты», затем щелкаем на графу «Преобразовать» и в новом окошке выбираем искривление и направление текста.

Заголовок готов! Если информация помогла Вам – жмите Спасибо!
Вставка текста WordArt
В этом курсе:
- Вставка таблицы
Статья - Вставка изображений
Статья - Вставка значков
Статья - Вставка текста WordArt
Статья - Вставка подложки
Статья - Отображение линейки
Статья - Поворот рисунка или фигуры
Статья - Обтекание текста вокруг рисунка
Статья
Добавление объекта WordArt
Совет. Видео не на вашем языке? Попробуйте выбрать Скрытые субтитры .
Перейти к вставке > WordArt
Выберите нужный стиль WordArt.

Примечание: Чтобы преобразовать существующий текст в объект WordArt, выделите его, а затем на вкладке Вставка нажмите кнопку WordArt.
Изменение цвета
Вы можете выбрать текст WordArt, который нужно изменить.
На ленте «Формат фигуры» или «Средства рисования » Формат»выберите «Заливка текста» или «Контуртекста» и выберите нужный цвет.

Щелкните или нажмите за пределами текстового окна, чтобы увидеть эффект.

Выбор текстового эффекта
Вы можете выбрать текст WordArt, который нужно изменить.
Перейдите в формат фигуры или средства рисования > текстовые эффекты > преобразования.

Выберите нужный эффект.
Щелкните за пределами текстового поля, чтобы увидеть результат.
Узнайте, как изогнуть текст вокруг круга.
Подробнее о формировании текста WordArt см. в тексте «Кривая» вокруг круга или другой фигуры.
Поворот
Вы выберите wordArt и перетащите круглый поворот в верхней части окна.

Чтобы отразить или повернуть wordArt на 90 градусов, выберите «Формат фигуры» или «Средства рисования> повернуть,а затем выберите один из вариантов.

Вы можете выбрать текст WordArt, который нужно изменить.
Перейдите на home и выберите такие параметры, как на стиль шрифта, размер шрифта или подчеркнутая.
Дважды щелкните объект WordArt, который нужно удалить, затем нажмите клавишу DELETE.
Щелкните место, куда вы хотите вставить wordArt, или коснитесь его.
На вкладке «> WordArt»
Выберите стиль WordArt и начните ввести его.
Примечание: Чтобы преобразовать существующий текст в объект WordArt, выделите его, а затем на вкладке Вставка нажмите кнопку WordArt.
Вы выберите текст WordArt, который вы хотите изменить.
Перейдите в > форматирование и выберите любой параметр.
Дважды щелкните объект WordArt, который нужно удалить, затем нажмите клавишу DELETE.
На вкладке «> WordArt»
Выберите нужный стиль WordArt.

Примечание: Чтобы преобразовать существующий текст в объект WordArt, выделите его, а затем на вкладке Вставка нажмите кнопку WordArt.
Выделите текст WordArt.
Перейдите в > «>» и выберите нужный эффект.

Подробнее о формировании текста WordArt см. в тексте «Кривая» вокруг круга или другой фигуры.
Вы можете выбрать текст WordArt, который нужно изменить.
После этого появится вкладка Формат фигуры.
Перейдите в > заливки фигуры и выберите нужный цвет.

Чтобы изменить контур текста WordArt, перейдите к формату фигуры > контура текста и выберите цвет.
На панели инструментов выберите «Вставить».
Нажмите кнопку WordArt и выберите нужный стиль WordArt.
Примечание: Чтобы преобразовать существующий текст в объект WordArt, выделите его, а затем на вкладке Вставка нажмите кнопку WordArt.
Выделите текст WordArt.
После этого появится вкладка Формат фигуры.
Перейдите > «Формат > текстовые >» и выберите нужный эффект.
Вы можете выбрать текст WordArt, который нужно изменить.
После этого появится вкладка Формат фигуры.
Перейдите в > заливки фигуры и выберите нужный цвет.
Чтобы изменить контур текста WordArt, перейдите к формату фигуры > контура текста и выберите цвет.
В Word в Интернете есть wordArt, который уже есть в вашем документе, но чтобы добавить другие, необходимо открыть или изменить документ в настольной версии Word.
С помощью функций «Шрифт» на вкладке «Главная» можно изменить цвет и размер шрифта, а также применить к тексту полужирное на применении к тексту полужирного на применении к ней полужирного налиния или подчеркивается.