
In this Article
- Accessing the VBE Editor
- Recording a Macro
- Opening the VBE Editor directly from Excel
- The VBA Project
- Inserting a Module or Form into the VBA Project
- Adding a Reference to a VBA Project
- VBA Project Properties
- Renaming a Project
- Adding Project Security
This tutorial will explain what a VBA Project is and how to edit a VBA Project in Excel.
When we record a macro in Excel using the Macro Recorder, a VBA project file is created in the file that we are working in or in a file called the Personal Macro Workbook. The Project File stores any modules or forms that are created either by using the record macro function in Excel, or by writing the VBA code within a module directly. To view the VBA Project, we need to access the Visual Basic Editor (VBE).
Accessing the VBE Editor
There are 2 ways to access the VBE Editor in Excel. You can either record a macro and then edit the macro, or open the Editor directly from the Excel Developer Ribbon.
Recording a Macro
Excel gives us the ability to record macros, and then to edit the macros in the Visual Basic Editor (VBE) should we need to do so.
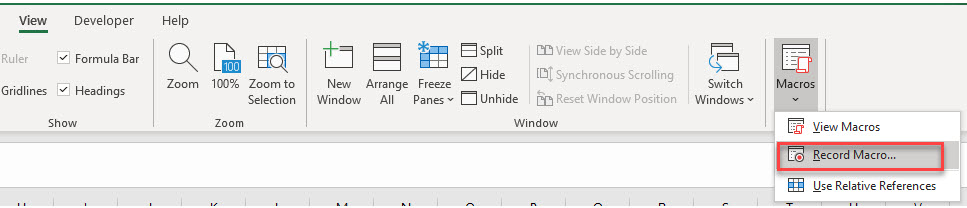
In the Ribbon, select View > Macros > Record Macro.
OR
Developer > Visual Basic > Record Macro
Note: If you don’t see the Developer Ribbon, you’ll need to enable it. You can learn how to do that here.
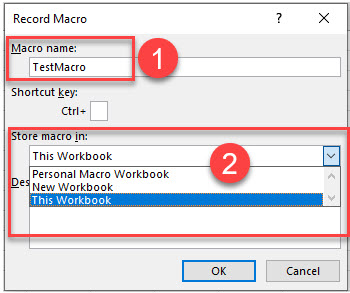
1) Type in the name for your macro, and then 2) select where to store the macro. This can be in the Personal Macro workbook, the workbook you are currently editing or a new workbook entirely.
Once you have clicked OK, you can follow the steps that you want in your macro (for example bolding a cell, changing the color of the text, etc.), and then click the stop button at the bottom of the screen to stop recording the macro.

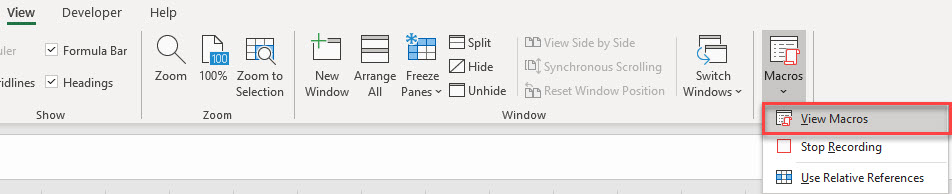
To run or view your macro, in the Ribbon, select View > Macros > View Macros.
OR
Developer > Visual Basic >Macros
Click on the Macro in the Macro name list, and then click on Edit.
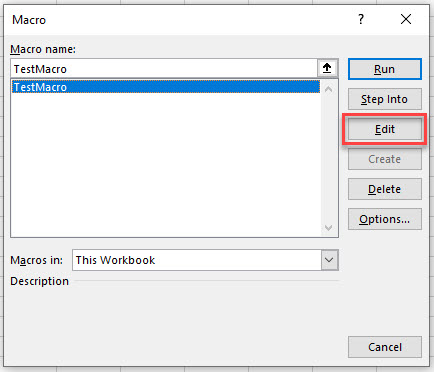
This will open the VBE and jump you into the VBA Code.
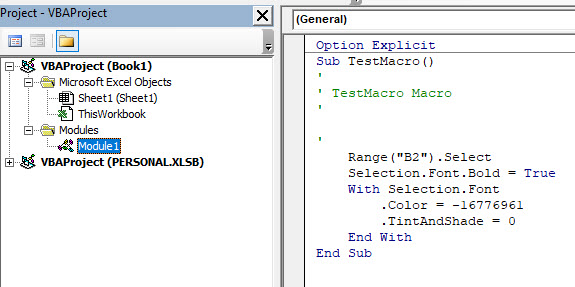
A VBA Project has now automatically been created for your workbook, and within this project, a module (Module 1) has also been created. The macro is contained within this new module on the right hand side.
Opening the VBE Editor directly from Excel
To open the VBE Editor from Excel directly, in the Ribbon, select Developer > Visual Basic.
The VBA Project
The VBA Project is where the modules and forms are stored when you write VBA code in Excel. As we recorded the above macro, a Module was automatically created for us within the VBA Project for the workbook we selected (in this case we selected This Workbook). Had we selected the Personal Macro Workbook to store the macro in, a module would have been created in the Perseonal.xlsb file.
NOTE: if you choose to save macros in the Personal Macro workbook, when you exit Excel you will get a prompt asking you to save this workbook. The Personal Macro workbook is a hidden workbook not visible in the Excel screen but visible in the VBE window.It is used to store modules and forms that can then be used across a multitude of Excel files. Modules and Forms that are stored in each individual workbook can only be used within that workbook.
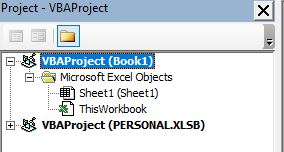
If we had opened the VBE Editor directly from Excel without recording a macro, our workbook would have a blank VBA Project file that does not contain any modules or forms.
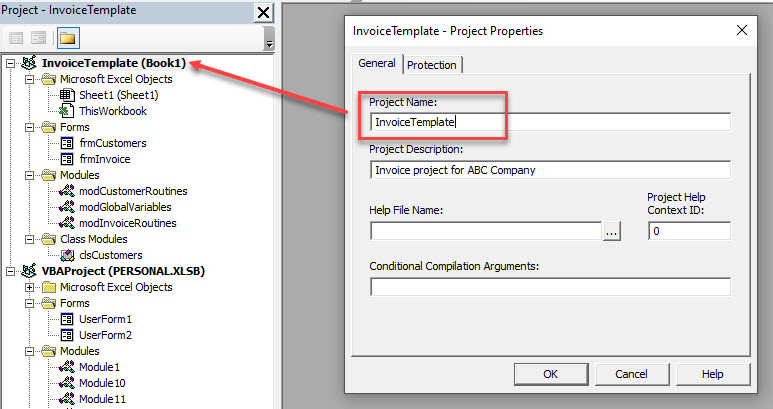
Each Excel file can only contain 1 VBA project, but can have multiple modules and forms. It is good practice when programming in VBA to group your procedures logically into relevant modules and often you will end up with a multitude of modules and forms.
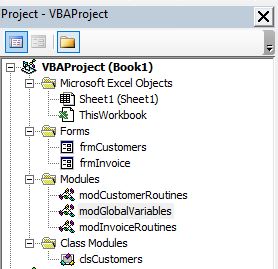
In the Book1 VBA Project in the graphic above, we have 2 forms (frmInvoice and frmCustomers), 3 Modules (modCustomerRoutines, modGlobalVariables and modInvoiceRoutines) and 1 class module (clsCustomers).
Inserting a Module or Form into the VBA Project
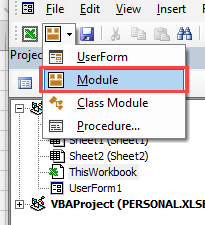
To insert a new module into your code, click on the Insert option on the menu bar, and click Module.
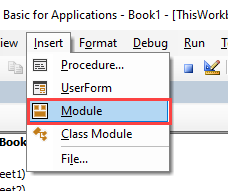
Or, click on the Insert Module button which you will find on the standard ribbon.
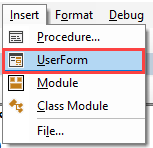
To insert a new user form into your code, select the UserForm option.
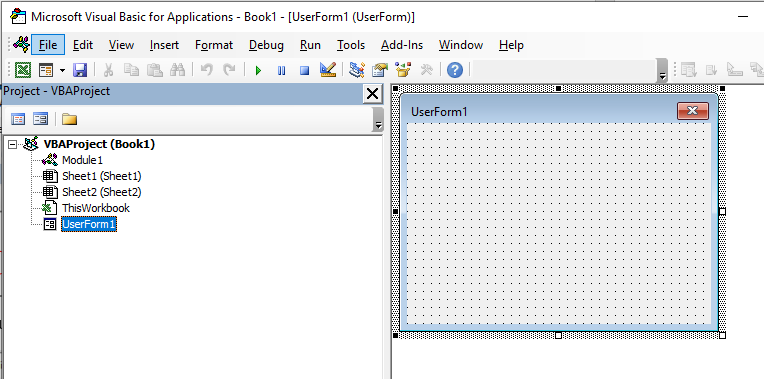
A new UserForm will appear in the Project Explorer and will be shown in the Code Window on the right.
You can also insert a Class Module
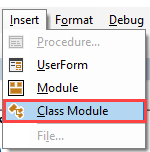
A class module is used to insert objects into your VBA project.

Adding a Reference to a VBA Project
You VBA project can also contain references to other VBA projects, or to other applications such as Word or Access. To view the references that are referred to in your VBA Project, click on the Tools menu, and then click on References.
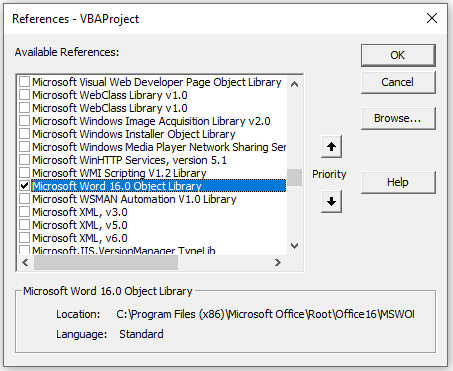
Should we need to add a new reference, we can select the object library in the References dialog box, or if the object library is not in the list, we can click the Browse button to find the relevant object library file on our PC.
VBA Coding Made Easy
Stop searching for VBA code online. Learn more about AutoMacro — A VBA Code Builder that allows beginners to code procedures from scratch with minimal coding knowledge and with many time-saving features for all users!

Learn More
VBA Project Properties
Each VBA Project has a number of properties associated with it. These can be customized to suit your needs.
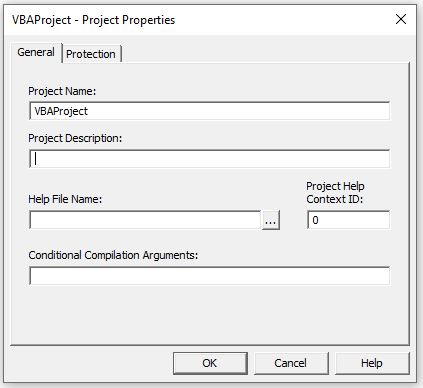
In the Menu, select Tools and then select VBAProject Properties.
Renaming a Project
In the General Tab, change the name of the project to something more relevant than VBAProject , and add a description to describe your project. If you click the OK button, you will notice that the name of the VBA Project will change to reflect the new project name in the VBE Project Explorer.
Adding Project Security
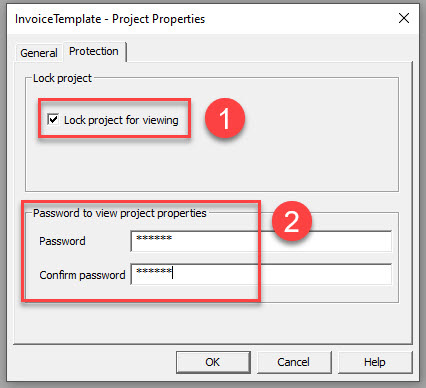
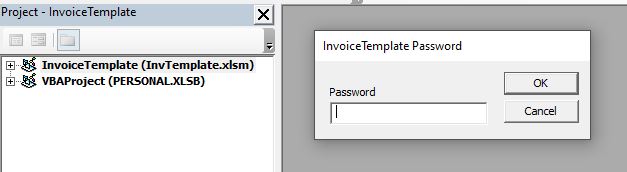
We can also password protect our VBA Project. This will prevent other users from being able to see any of your code and is most useful to protect intellectual property rights!
In the Protection tab, 1) make sure the check is on in the ‘Lock project for viewing’ and then 2) type in your password and confirm the password.
Now if you were to save your workbook, when you reopen the workbook and try to access the VBAProject, it will ask you for a password.
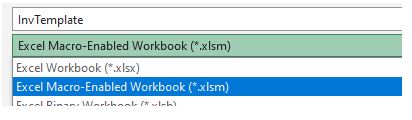
NOTE: when you save an Excel file that contains a VBA Project, it has to be saved as a macro enabled workbook (xlsm) to keep the VBA project. It cannot just be saved as an ordinary xlsx file.

Introduction
This is a tutorial about writing code in Excel spreadsheets using Visual Basic for Applications (VBA).
Excel is one of Microsoft’s most popular products. In 2016, the CEO of Microsoft said «Think about a world without Excel. That’s just impossible for me.” Well, maybe the world can’t think without Excel.
- In 1996, there were over 30 million users of Microsoft Excel (source).
- Today, there are an estimated 750 million users of Microsoft Excel. That’s a little more than the population of Europe and 25x more users than there were in 1996.
We’re one big happy family!
In this tutorial, you’ll learn about VBA and how to write code in an Excel spreadsheet using Visual Basic.
Prerequisites
You don’t need any prior programming experience to understand this tutorial. However, you will need:
- Basic to intermediate familiarity with Microsoft Excel
- If you want to follow along with the VBA examples in this article, you will need access to Microsoft Excel, preferably the latest version (2019) but Excel 2016 and Excel 2013 will work just fine.
- A willingness to try new things
Learning Objectives
Over the course of this article, you will learn:
- What VBA is
- Why you would use VBA
- How to get set up in Excel to write VBA
- How to solve some real-world problems with VBA
Important Concepts
Here are some important concepts that you should be familiar with to fully understand this tutorial.
Objects: Excel is object-oriented, which means everything is an object — the Excel window, the workbook, a sheet, a chart, a cell. VBA allows users to manipulate and perform actions with objects in Excel.
If you don’t have any experience with object-oriented programming and this is a brand new concept, take a second to let that sink in!
Procedures: a procedure is a chunk of VBA code, written in the Visual Basic Editor, that accomplishes a task. Sometimes, this is also referred to as a macro (more on macros below). There are two types of procedures:
- Subroutines: a group of VBA statements that performs one or more actions
- Functions: a group of VBA statements that performs one or more actions and returns one or more values
Note: you can have functions operating inside of subroutines. You’ll see later.
Macros: If you’ve spent any time learning more advanced Excel functionality, you’ve probably encountered the concept of a “macro.” Excel users can record macros, consisting of user commands/keystrokes/clicks, and play them back at lightning speed to accomplish repetitive tasks. Recorded macros generate VBA code, which you can then examine. It’s actually quite fun to record a simple macro and then look at the VBA code.
Please keep in mind that sometimes it may be easier and faster to record a macro rather than hand-code a VBA procedure.
For example, maybe you work in project management. Once a week, you have to turn a raw exported report from your project management system into a beautifully formatted, clean report for leadership. You need to format the names of the over-budget projects in bold red text. You could record the formatting changes as a macro and run that whenever you need to make the change.
What is VBA?
Visual Basic for Applications is a programming language developed by Microsoft. Each software program in the Microsoft Office suite is bundled with the VBA language at no extra cost. VBA allows Microsoft Office users to create small programs that operate within Microsoft Office software programs.
Think of VBA like a pizza oven within a restaurant. Excel is the restaurant. The kitchen comes with standard commercial appliances, like large refrigerators, stoves, and regular ole’ ovens — those are all of Excel’s standard features.
But what if you want to make wood-fired pizza? Can’t do that in a standard commercial baking oven. VBA is the pizza oven.

Yum.
Why use VBA in Excel?
Because wood-fired pizza is the best!
But seriously.
A lot of people spend a lot of time in Excel as a part of their jobs. Time in Excel moves differently, too. Depending on the circumstances, 10 minutes in Excel can feel like eternity if you’re not able to do what you need, or 10 hours can go by very quickly if everything is going great. Which is when you should ask yourself, why on earth am I spending 10 hours in Excel?
Sometimes, those days are inevitable. But if you’re spending 8-10 hours everyday in Excel doing repetitive tasks, repeating a lot of the same processes, trying to clean up after other users of the file, or even updating other files after changes are made to the Excel file, a VBA procedure just might be the solution for you.
You should consider using VBA if you need to:
- Automate repetitive tasks
- Create easy ways for users to interact with your spreadsheets
- Manipulate large amounts of data
Getting Set Up to Write VBA in Excel
Developer Tab
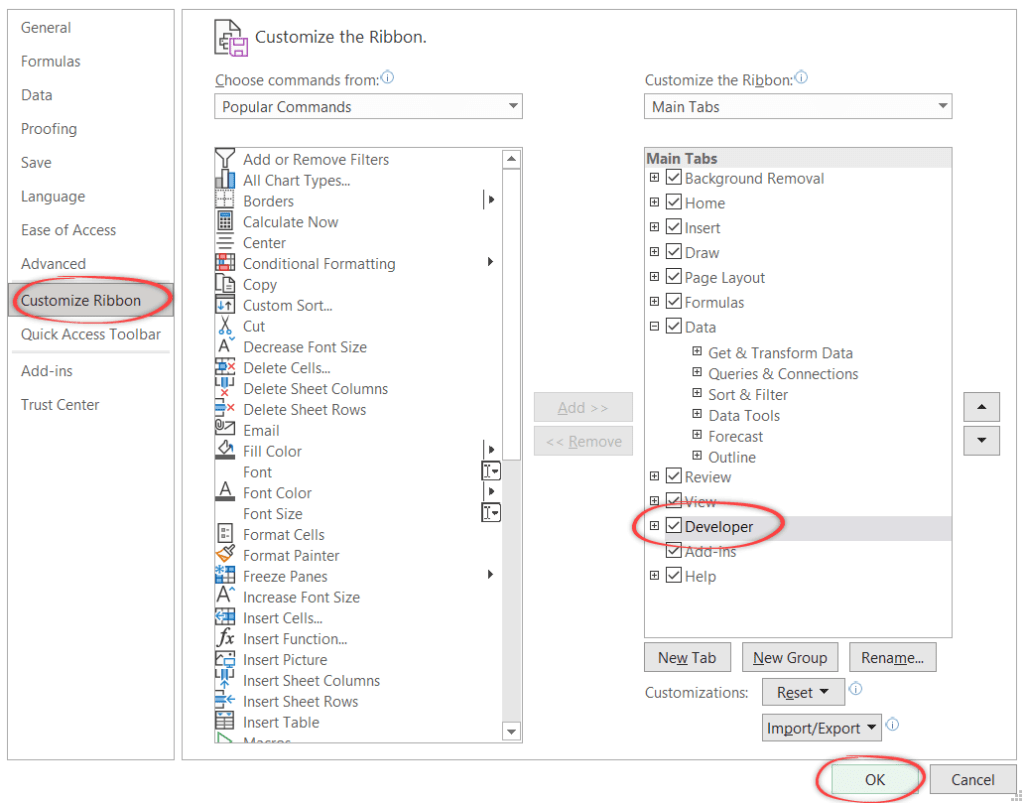
To write VBA, you’ll need to add the Developer tab to the ribbon, so you’ll see the ribbon like this.

To add the Developer tab to the ribbon:
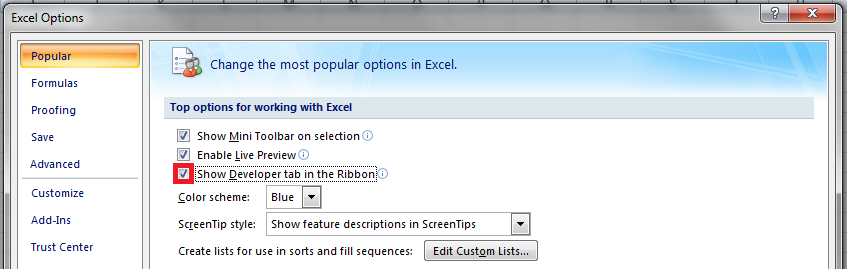
- On the File tab, go to Options > Customize Ribbon.
- Under Customize the Ribbon and under Main Tabs, select the Developer check box.
After you show the tab, the Developer tab stays visible, unless you clear the check box or have to reinstall Excel. For more information, see Microsoft help documentation.
VBA Editor
Navigate to the Developer Tab, and click the Visual Basic button. A new window will pop up — this is the Visual Basic Editor. For the purposes of this tutorial, you just need to be familiar with the Project Explorer pane and the Property Properties pane.

Excel VBA Examples
First, let’s create a file for us to play around in.
- Open a new Excel file
- Save it as a macro-enabled workbook (. xlsm)
- Select the Developer tab
- Open the VBA Editor
Let’s rock and roll with some easy examples to get you writing code in a spreadsheet using Visual Basic.
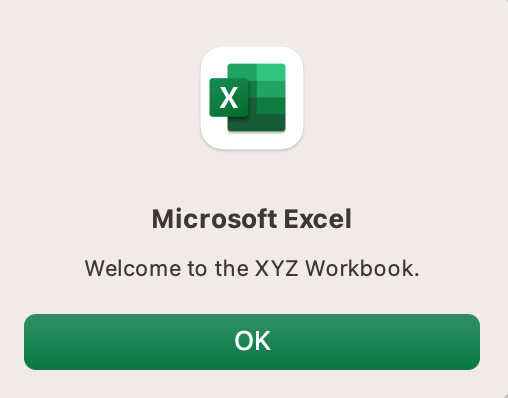
Example #1: Display a Message when Users Open the Excel Workbook
In the VBA Editor, select Insert -> New Module
Write this code in the Module window (don’t paste!):
Sub Auto_Open()
MsgBox («Welcome to the XYZ Workbook.»)
End Sub
Save, close the workbook, and reopen the workbook. This dialog should display.
Ta da!
How is it doing that?
Depending on your familiarity with programming, you may have some guesses. It’s not particularly complex, but there’s quite a lot going on:
- Sub (short for “Subroutine): remember from the beginning, “a group of VBA statements that performs one or more actions.”
- Auto_Open: this is the specific subroutine. It automatically runs your code when the Excel file opens — this is the event that triggers the procedure. Auto_Open will only run when the workbook is opened manually; it will not run if the workbook is opened via code from another workbook (Workbook_Open will do that, learn more about the difference between the two).
- By default, a subroutine’s access is public. This means any other module can use this subroutine. All examples in this tutorial will be public subroutines. If needed, you can declare subroutines as private. This may be needed in some situations. Learn more about subroutine access modifiers.
- msgBox: this is a function — a group of VBA statements that performs one or more actions and returns a value. The returned value is the message “Welcome to the XYZ Workbook.”
In short, this is a simple subroutine that contains a function.
When could I use this?
Maybe you have a very important file that is accessed infrequently (say, once a quarter), but automatically updated daily by another VBA procedure. When it is accessed, it’s by many people in multiple departments, all across the company.
- Problem: Most of the time when users access the file, they are confused about the purpose of this file (why it exists), how it is updated so often, who maintains it, and how they should interact with it. New hires always have tons of questions, and you have to field these questions over and over and over again.
- Solution: create a user message that contains a concise answer to each of these frequently answered questions.
Real World Examples
- Use the MsgBox function to display a message when there is any event: user closes an Excel workbook, user prints, a new sheet is added to the workbook, etc.
- Use the MsgBox function to display a message when a user needs to fulfill a condition before closing an Excel workbook
- Use the InputBox function to get information from the user
Example #2: Allow User to Execute another Procedure
In the VBA Editor, select Insert -> New Module
Write this code in the Module window (don’t paste!):
Sub UserReportQuery()
Dim UserInput As Long
Dim Answer As Integer
UserInput = vbYesNo
Answer = MsgBox(«Process the XYZ Report?», UserInput)
If Answer = vbYes Then ProcessReport
End Sub
Sub ProcessReport()
MsgBox («Thanks for processing the XYZ Report.»)
End Sub
Save and navigate back to the Developer tab of Excel and select the “Button” option. Click on a cell and assign the UserReportQuery macro to the button.
Now click the button. This message should display:
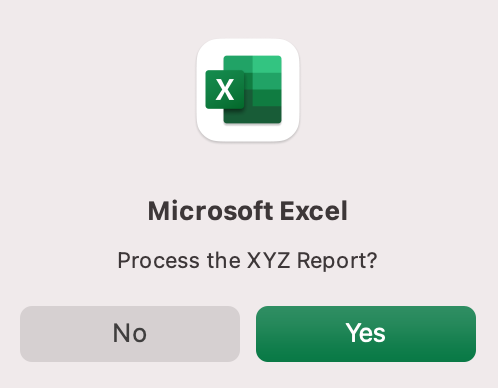
Click “yes” or hit Enter.
Once again, tada!
Please note that the secondary subroutine, ProcessReport, could be anything. I’ll demonstrate more possibilities in example #3. But first…
How is it doing that?
This example builds on the previous example and has quite a few new elements. Let’s go over the new stuff:
- Dim UserInput As Long: Dim is short for “dimension” and allows you to declare variable names. In this case, UserInput is the variable name and Long is the data type. In plain English, this line means “Here’s a variable called “UserInput”, and it’s a Long variable type.”
- Dim Answer As Integer: declares another variable called “Answer,” with a data type of Integer. Learn more about data types here.
- UserInput = vbYesNo: assigns a value to the variable. In this case, vbYesNo, which displays Yes and No buttons. There are many button types, learn more here.
- Answer = MsgBox(“Process the XYZ Report?”, UserInput): assigns the value of the variable Answer to be a MsgBox function and the UserInput variable. Yes, a variable within a variable.
- If Answer = vbYes Then ProcessReport: this is an “If statement,” a conditional statement, which allows us to say if x is true, then do y. In this case, if the user has selected “Yes,” then execute the ProcessReport subroutine.
When could I use this?
This could be used in many, many ways. The value and versatility of this functionality is more so defined by what the secondary subroutine does.
For example, maybe you have a file that is used to generate 3 different weekly reports. These reports are formatted in dramatically different ways.
- Problem: Each time one of these reports needs to be generated, a user opens the file and changes formatting and charts; so on and so forth. This file is being edited extensively at least 3 times per week, and it takes at least 30 minutes each time it’s edited.
- Solution: create 1 button per report type, which automatically reformats the necessary components of the reports and generates the necessary charts.
Real World Examples
- Create a dialog box for user to automatically populate certain information across multiple sheets
- Use the InputBox function to get information from the user, which is then populated across multiple sheets
Example #3: Add Numbers to a Range with a For-Next Loop
For loops are very useful if you need to perform repetitive tasks on a specific range of values — arrays or cell ranges. In plain English, a loop says “for each x, do y.”
In the VBA Editor, select Insert -> New Module
Write this code in the Module window (don’t paste!):
Sub LoopExample()
Dim X As Integer
For X = 1 To 100
Range(«A» & X).Value = X
Next X
End Sub
Save and navigate back to the Developer tab of Excel and select the Macros button. Run the LoopExample macro.
This should happen:
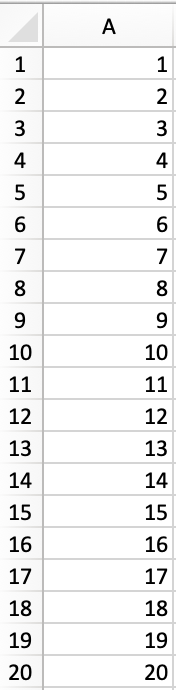
Etc, until the 100th row.
How is it doing that?
- Dim X As Integer: declares the variable X as a data type of Integer.
- For X = 1 To 100: this is the start of the For loop. Simply put, it tells the loop to keep repeating until X = 100. X is the counter. The loop will keep executing until X = 100, execute one last time, and then stop.
- Range(«A» & X).Value = X: this declares the range of the loop and what to put in that range. Since X = 1 initially, the first cell will be A1, at which point the loop will put X into that cell.
- Next X: this tells the loop to run again
When could I use this?
The For-Next loop is one of the most powerful functionalities of VBA; there are numerous potential use cases. This is a more complex example that would require multiple layers of logic, but it communicates the world of possibilities in For-Next loops.
Maybe you have a list of all products sold at your bakery in Column A, the type of product in Column B (cakes, donuts, or muffins), the cost of ingredients in Column C, and the market average cost of each product type in another sheet.
You need to figure out what should be the retail price of each product. You’re thinking it should be the cost of ingredients plus 20%, but also 1.2% under market average if possible. A For-Next loop would allow you to do this type of calculation.
Real World Examples
- Use a loop with a nested if statement to add specific values to a separate array only if they meet certain conditions
- Perform mathematical calculations on each value in a range, e.g. calculate additional charges and add them to the value
- Loop through each character in a string and extract all numbers
- Randomly select a number of values from an array
Conclusion
Now that we’ve talked about pizza and muffins and oh-yeah, how to write VBA code in Excel spreadsheets, let’s do a learning check. See if you can answer these questions.
- What is VBA?
- How do I get set up to start using VBA in Excel?
- Why and when would you use VBA?
- What are some problems I could solve with VBA?
If you have a fair idea of how to you could answer these questions, then this was successful.
Whether you’re an occasional user or a power user, I hope this tutorial provided useful information about what can be accomplished with just a bit of code in your Excel spreadsheets.
Happy coding!
Learning Resources
- Excel VBA Programming for Dummies, John Walkenbach
- Get Started with VBA, Microsoft Documentation
- Learning VBA in Excel, Lynda
A bit about me
I’m Chloe Tucker, an artist and developer in Portland, Oregon. As a former educator, I’m continuously searching for the intersection of learning and teaching, or technology and art. Reach out to me on Twitter @_chloetucker and check out my website at chloe.dev.
Learn to code for free. freeCodeCamp’s open source curriculum has helped more than 40,000 people get jobs as developers. Get started
Everybody in this country should learn how to program a computer... because it teaches you how to think." -Steve Jobs
I wish to extend the wise words of Steve Jobs and say everyone in the world should learn how to program a computer. You may not necessary end up working as a programmer or writing programs at all but it will teach you how to think.
In this VBA tutorial, we are going to cover the following topics.
- What is Visual Basic for Applications (VBA)?
- Why VBA?
- Personal & Business Applications of VBA in Excel
- Introduction to Visual Basic for Applications
- Step by step example of creating a simple EMI calculator in Excel
- How to use VBA in Excel Example
Visual Basic for Applications (VBA) is an event-driven programming language implemented by Microsoft to develop Office applications. VBA helps to develop automation processes, Windows API, and user-defined functions. It also enables you to manipulate the user interface features of the host applications.
Before we go into further details, let’s look at what computer programming is in a layman’s language. Assume you have a maid. If you want the maid to clean the house and do the laundry. You tell her what to do using let’s say English and she does the work for you. As you work with a computer, you will want to perform certain tasks. Just like you told the maid to do the house chores, you can also tell the computer to do the tasks for you.
The process of telling the computer what you want it to do for you is what is known as computer programming. Just as you used English to tell the maid what to do, you can also use English like statements to tell the computer what to do. The English like statements fall in the category of high level languages. VBA is a high level language that you can use to bend excel to your all powerful will.
VBA is actually a sub set of Visual Basic 6.0 BASIC stands for Beginners All-Purpose Symbolic Instruction Code.
Why VBA?
VBA enables you to use English like statements to write instructions for creating various applications. VBA is easy to learn, and it has easy to use User Interface in which you just have to drag and drop the interface controls. It also allows you to enhance Excel functionality by making it behave the way you want.
Personal & Business Applications of VBA in Excel
For personal use, you can use it for simple macros that will automate most of your routine tasks. Read the article on Macros for more information on how you can achieve this.
For business use, you can create complete powerful programs powered by excel and VBA. The advantage of this approach is you can leverage the powerful features of excel in your own custom programs.
Introduction to Visual Basic for Applications
Before we can write any code, we need to know the basics first. The following basics will help you get started.
- Variable – in high school we learnt about algebra. Find (x + 2y) where x = 1 and y = 3. In this expression, x and y are variables. They can be assigned any numbers i.e. 1 and 3 respective as in this example. They can also be changed to say 4 and 2 respectively. Variables in short are memory locations. As you work with VBA Excel, you will be required to declare variables too just like in algebra classes
-
Rules for creating variables
- Don’t use reserved words – if you work as a student, you cannot use the title lecturer or principal. These titles are reserved for the lecturers and the school authority. Reserved words are those words that have special meaning in Excel VBA and as such, you cannot use them as variable names.
- Variable names cannot contain spaces – you cannot define a variable named first number. You can use firstNumber or first_number.
- Use descriptive names – it’s very tempting to name a variable after yourself but avoid this. Use descriptive names i.e. quantity, price, subtotal etc. this will make your Excel VBA code easy to read
-
Arithmetic operators – The rules of Brackets of Division Multiplication Addition and Subtraction (BODMAS) apply so remember to apply them when working with expressions that use multiple different arithmetic operators. Just like in excel, you can use
- + for addition
- – for subtraction
- * for multiplication
- / for division.
-
Logical operators – The concept of logical operators covered in the earlier tutorials also apply when working with VBA. These include
- If statements
- OR
- NOT
- AND
- TRUE
- FALSE
How to Enable the Developer Tab
Below is the step by step process on how to enable the developer tab in Excel:
- Create a new workbook
- Click on the ribbon start button
- Select options
- Click on customize ribbon
- Select the developer checkbox as shown in the image below
- Click OK

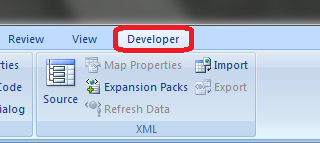
You will now be able to see the DEVELOPER tab in the ribbon
VBA Hello World!
Now we will demonstrate how to program in VBA programming language. All program in VBA has to start with “Sub” and end with “End sub”. Here the name is the name you want to assign to your program. While sub stands for a subroutine which we will learn in the later part of the tutorial.
Sub name()
.
.
.
End Sub
We will create a basic VBA program that displays an input box to ask for the user’s name then display a greeting message
This tutorial assumes you have completed the tutorial on Macros in excel and have enabled the DEVELOPER tab in excel.
- Create a new work book
- Save it in an excel macro enabled worksheet format *.xlsm
- Click on the DEVELOPER tab
- Click on INSERT drop down box under controls ribbon bar
- Select a command button as shown in the image below
 in Excel")
Draw the command button anywhere on the worksheet
You will get the following dialogue window
 in Excel")
- Rename the macro name to btnHelloWorld_Click
- Click on new button
- You will get the following VBA code window
 in Excel")
Enter the following instruction codes
Dim name As String
name = InputBox("Enter your name")
MsgBox "Hello " + name
HERE,
- “Dim name as String” creates a variable called name. The variable will accept text, numeric and other characters because we defined it as a string
- “name = InputBox(“Enter your name”)” calls the built in function InputBox that displays a window with the caption Enter your name. The entered name is then stored in the name variable.
- “MsgBox “Hello ” + name” calls the built in function MsgBox that display Hello and the entered name.
Your complete code window should now look as follows
 in Excel")
- Close the code window
- Right click on button 1 and select edit text
- Enter Say hello
 in Excel")
- Click on Say Hello
- You will get the following input box
 in Excel")
- Enter your name i.e. Jordan
- You will get the following message box
 in Excel")
Congratulations, you just created your first VBA program in excel
Step by step example of creating a simple EMI calculator in Excel
In this tutorial exercise, we are going to create a simple program that calculates the EMI. EMI is the acronym for Equated Monthly Instalment. It’s the monthly amount that you repay when you get a loan. The following image shows the formula for calculating EMI.
 in Excel")
The above formula is complex and can be written in excel. The good news is excel already took care of the above problem. You can use the PMT function to compute the above.
The PMT function works as follows
=PMT(rate,nper,pv)
HERE,
- “rate” this is the monthly rate. It’s the interest rate divided by the number of payments per year
- “nper” it is the total number of payments. It’s the loan term multiplied by number of payments per year
- “pv” present value. It’s the actual loan amount
Create the GUI using excel cells as shown below
 in Excel")
Add a command button between rows 7 and 8
Give the button macro name btnCalculateEMI_Click
Click on edit button
Enter the following code
Dim monthly_rate As Single, loan_amount As Double, number_of_periods As Single, emi As Double
monthly_rate = Range("B6").Value / Range("B5").Value
loan_amount = Range("B3").Value
number_of_periods = Range("B4").Value * Range("B5").Value
emi = WorksheetFunction.Pmt(monthly_rate, number_of_periods, -loan_amount)
Range("B9").Value = emi
HERE,
- “Dim monthly_rate As Single,…” Dim is the keyword that is used to define variables in VBA, monthly_rate is the variable name, Single is the data type that means the variable will accept number.
- “monthly_rate = Range(“B6”).Value / Range(“B5″).Value” Range is the function used to access excel cells from VBA, Range(“B6”).Value makes reference to the value in B6
- “WorksheetFunction.Pmt(…)” WorksheetFunction is the function used to access all the functions in excel
The following image shows the complete source code
 in Excel")
- Click on save and close the code window
- Test your program as shown in the animated image below
 in Excel")
How to use VBA in Excel Example
Following steps will explain how to use VBA in Excel.
Step 1) Open your VBA editor
Under Developer tab from the main menu, click on “Visual Basic” icon it will open your VBA editor.

Step 2) Select the Excel sheet & Double click on the worksheet
It will open a VBA editor, from where you can select the Excel sheet where you want to run the code. To open VBA editor double click on the worksheet.

It will open a VBA editor on the right-hand side of the folder. It will appear like a white space.

Step 3) Write anything you want to display in the MsgBox
In this step we are going to see our first VBA program. To read and display our program we need an object. In VBA that object or medium in a MsgBox.
- First, write “Sub” and then your “program name” (Guru99)
- Write anything you want to display in the MsgBox (guru99-learning is fun)
- End the program by End Sub

Step 4) Click on the green run button on top of the editor
In next step you have to run this code by clicking on the green run button on top of the editor menu.

Step 5) Select the sheet and click on “Run” button
When you run the code, another window will pops out. Here you have to select the sheet where you want to display the program and click on “Run” button

Step 6) Display the msg in MsgBox
When you click on Run button, the program will get executed. It will display the msg in MsgBox.

Download the above Excel Code
Summary
VBA Full Form : Visual Basic for Application. It’s a sub component of visual basic programming language that you can use to create applications in excel. With VBA, you can still take advantage of the powerful features of excel and use them in VBA.
Whether you’re new to Excel VBA or just want a refresher, this tutorial is for you. In 20 minutes (or less!), we’ll take you through the basics of working with VBA code. You’ll learn to write and run VBA code, use the macro recorder, and more! We also give you some common examples when working on VBA Excel. So, buckle up as we’re going to get started! 😉
What is VBA in Excel?
VBA stands for Visual Basic for Applications. It’s a programming language used to automate tasks in Microsoft Office products, including Excel, Word, and Outlook. With VBA Excel, you can write code to automate tasks, create custom functions, and even move data between Office programs.
This programming language was introduced with Excel 5.0 in 1993. It might be hard to believe that the Excel and VBA combo has been around for almost 30 years now. And as you can see, we’re still talking about it today! This means that this language is still popular among spreadsheet users—which makes sense considering what it offers and that few other spreadsheet apps can compete with this.
Why is VBA important?
VBA is important because of all the things it can do, but mainly its ability to automate mundane tasks that take a lot of time is particularly useful. As well as that, here are some common uses of VBA in Excel:
- Create custom functions. If you find yourself using the same complex formula over and over again, you can save yourself some time by creating a custom function using VBA.
- Create custom add-ins for Excel. Add-ins are small programs that extend the functionality of Excel. You can, for example, create an add-in that allows you to apply formatting to selected cells, generate random numbers, apply formulas, or anything else you may want to improve productivity.
- Simplify the data entry process. With Excel VBA, you can create custom forms that will simplify data entry and eliminate errors. You’ll be able to enter all information in one place with consistent formats. It’s easier for everyone involved.
- Automate tasks that you would otherwise have to do manually. Automating tedious, manual tasks with VBA Excel code is an easy way to save time and avoid mistakes. Here’s a common example. You might need to frequently update your spreadsheets by pulling data from various sources such as QuickBooks or Xero. However, doing this manually every day can prove costly in both efficiency and accuracy due to human error.
Are there no-code ways to automate workflows in Excel?
If you want to automate such processes without coding, Power Query is one of your best options. However, it’s not always ideal if any of your data sources isn’t supported by Power Query.
In this case, try using third-party integration tools like Coupler.io, which is a solution to import data from different sources into Excel automatically. You can even set up a schedule to refresh your data (hourly, daily, monthly, etc.) to keep it always up-to-date.
Coupler.io allows you to pull data from CRM applications like Pipedrive, time-tracking tools like Clockify and many other apps and sources including Microsoft Excel. Check out all the available Excel integrations to choose the ones you need. So, you basically can automate data flow between your workbooks or even merge Excel files using it.
Excel VBA programming: Before you get started
Before we get started with Excel VBA programming, let’s understand a few basic terminologies and how to open the Visual Basic Editor (VBE).
A few basic terminologies
Here are a few terminologies we’ll be looking at in this article:
- A macro is simply a procedure written in VBA Excel. You can write macros by using the macro recorder or write your own code.
- A module is where you will store your code. Think of it as a blank canvas where you can write whatever you want.
- A procedure is an instruction or a set of instructions. The two main types of procedures are Sub procedure and Function procedure.
- A Sub procedure (or Sub) is a procedure that only performs actions and does not return a value.
- A Function procedure (or Function) is a procedure that returns a value.
How to open VBA editor in Excel
To use VBA in Excel, you first need to open the Visual Basic Editor (VBE) by simply pressing Alt+F11 on your keyboard.
Alternatively, click on the Developer tab from the ribbon menu, then click on the Visual Basic button. If the Developer tab is not visible, see the section below on how to show the Developer tab in Excel.

After the Visual Basic Editor is open, you’ll be able to find multiple sections described below:

- Menu bar. This is the main menu of the VBE and contains various commands. Many of the commands have shortcut keys associated with them.
- Code pane. This area is where the macro/code can be found. Here are all declaration variables, procedures, functions, etc.
- Toolbar. It contains most of the useful commands that are used while codding. You can customize it by clicking View > Toolbars, then customize as you see fit. Most people just leave them as they are.
- Project Explorer. The Project Explorer Window can usually be found on the top left side of the VBA Excel editor, showing a hierarchical list of open projects. This list contains Microsoft Excel Objects (Sheets and ThisWorkbook section), Forms (all User Forms created in the project), Modules (all macro modules), and Class Modules.
- Properties Window. The Properties Window is where you can set all the properties for all objects from your application. The properties can be sorted alphabetically or by category.
How to show the Developer tab in Excel
The Developer tab is hidden by default in Excel, but you can easily show it if you need to access the features it contains. To do so, here’s a quick guide:
- First, click on File > Options.
- In the Excel Options dialog box, click on Customize Ribbon.
- On the right pane, check the box next to Developer.
- Click OK to save your changes and close the dialog box.
Just that! Now when you open Excel, you will see the Developer tab listed among the other tabs at the top of the window.
How to use VBA in Excel
Most of the code people write in VBA are Sub and Function procedures. So, in this section, we’ll mostly learn about how to write, edit, and run them.
How to write VBA code in Excel manually
To write VBA code manually, follow the steps below:
- Create a new Excel workbook.
- Press Alt+F11 to activate the VBE.
- Click Insert > Module in the menu bar.
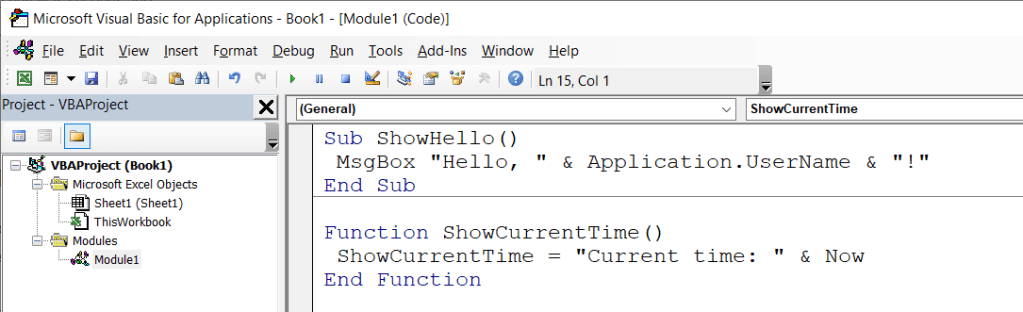
- Type manually or copy-paste the following code in the editor:
Sub ShowHello()
 MsgBox "Hello, " & Application.UserName & "!"
End Sub

Function ShowCurrentTime()
 ShowCurrentTime = "Current time: " & Now
End Function
- If you want, save the code by pressing Ctrl+S. The extension of the file needs to be XLSM because it contains a macro.
Code explanation:
- The ShowHello() is an example of a Sub procedure. Every Sub procedure starts with the keyword Sub and ends with an End Sub.
- The ShowCurrentTime() is an example of an Excel VBA Function procedure. Every Function procedure starts with the keyword Function and ends with an End Function.
How to run VBA code in Excel
Sub and Function procedures are run differently in Excel. Both can be executed in several ways, but we will cover only a few of them.
To execute an Excel VBA Function procedure:
You can click the Run button in the VBE toolbar or simply press F5 for the same command. Excel executes the Sub procedure in which the cursor is located.

Alternatively, you can execute Sub procedures from Excel by pressing the Macros button in the Developer tab:

To execute a Function procedure:
You can use it in a worksheet or call it from another procedure (a Sub or another Function procedure).
As an example, let’s see how to execute the ShowCurrentTime function by using it as a worksheet formula. To do that, simply type =ShowCurrentTime() in a cell, then press Enter. See the image below:

How to record VBA code in Excel
Another way you can get code into a VBA module is by recording your actions using the Excel Macro Recorder. The result is always a Sub procedure. So, we cannot use this tool as an alternative method of creating functions — they must be manually entered by writing and editing the code ourselves.
Here is the step-by-step for recording a macro:
- Go to the Developer tab and click the Record Macro button.
- In the Record Macro dialog box, enter a name for the macro. Optionally, you can enter a shortcut key, macro location, and description.

- Click OK to start recording.
- Perform all the actions that need to be recorded. For example, let’s just enter 1 to 10 from A1 to A10 manually:

- When you finish, click the Stop Recording button in the Developer tab.
How to edit recorded VBA code in Excel
After you record a macro, you may be curious to see what the code looks like. You might even wonder where your recorded macros are stored, right? Well, by default, they’re stored in a module.
So, to view and edit recorded macros, first, you need to activate the VBE by pressing Alt+F11 on your keyboard. After that, double-click the new module created and locate the code you want to edit.
For example, here is the AssignRowNumber macro we recorded previously:
Sub AssignRowNumber()
'
' AssignRowNumber Macro
' This procedure inserts row numbers to cells, 1 to 10.
'
' Keyboard Shortcut: Ctrl+Shift+M
'
    ActiveCell.FormulaR1C1 = "1"
    Range("A2").Select
    ActiveCell.FormulaR1C1 = "2"
    Range("A3").Select
    ActiveCell.FormulaR1C1 = "3"
    Range("A4").Select
    ActiveCell.FormulaR1C1 = "4"
    Range("A5").Select
    ActiveCell.FormulaR1C1 = "5"
    Range("A6").Select
    ActiveCell.FormulaR1C1 = "6"
    Range("A7").Select
    ActiveCell.FormulaR1C1 = "7"
    Range("A8").Select
    ActiveCell.FormulaR1C1 = "8"
    Range("A9").Select
    ActiveCell.FormulaR1C1 = "9"
    Range("A10").Select
    ActiveCell.FormulaR1C1 = "10"
End Sub
However, you may agree that the above code is not the best way to assign values to the cells. It selects a cell, assigns value as a formula, and then moves to the next cell. We can make the code more compact, readable, and dynamic using the following code:
Sub AssignRowNumber()
'
' AssignRowNumber Macro
' This procedure inserts row numbers to cells, 1 to 10.
'
' Keyboard Shortcut: Ctrl+Shift+M
'
 For i = 1 To 10
  ActiveSheet.Cells(i, 1).Value = i
 Next i

End Sub
In conclusion, the Macro Recorder is a great way to get into VBA programming. However, it can be complicated sometimes to understand the macro recorded. The good news is that recorded macros can be customized after they’re created, giving you even more control over what your program does and how it operates!
How to assign VBA code to a button in Excel
You can easily add a button to an Excel sheet and assign a macro to it. A few simple steps can do this.
For example, let’s take the running ShowHello() Sub procedure one step further by executing it on a button click.
Here are the steps:
- Click the Developer tab, then click Insert > Button (Form Control).
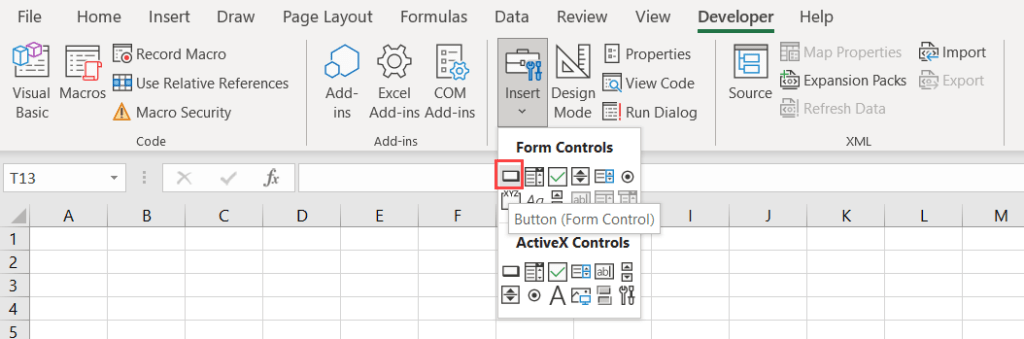
- Click and drag anywhere on the worksheet to create a button.
- In the Assign Macro dialog, select ShowHello, then click OK.

- By default, a “Button 1” is created. Click the button’s text and type “Show Hello” to rename it.
- To test the button, click on it. You’ll see a message box appear showing Hello to you 😉

More VBA Excel examples
This section contains several examples that demonstrate common VBA programming concepts. You may be able to use or adapt these pieces for your own needs.
Example #1: Looping through a range of cells
Many macros operate on each cell in a range, or they perform selected actions based on each cell’s value. These macros usually include a ForEach-Next loop that processes each cell in the range.
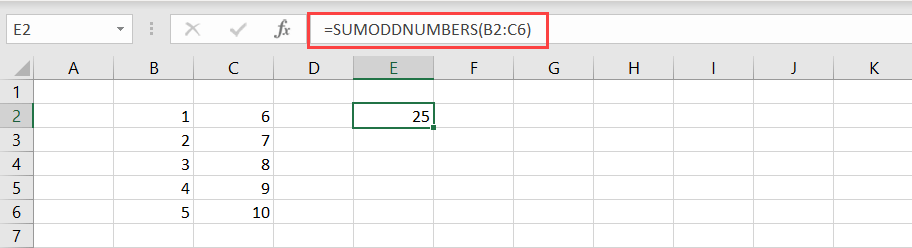
The following SUMODDNUMBERS function demonstrates how to loop through a range of cells to sum all the odd numbers.
Function SUMODDNUMBERS(range As range)
 Dim cell As range

 For Each cell In range
  If cell.Value Mod 2 = 1 Then
   SUMODDNUMBERS = SUMODDNUMBERS + cell.Value
  End If
 Next cell

End Function
To use the function, type =SUMODDNUMBERS() in a cell and input a range of cells in the parameter. See the screenshot below:
Example #2: Conditional structure
The following example shows how to use a decision structure using a Select-Case statement. Many programmers like the Select-Case structure over If-Then-Else because the code looks more readable when checking multiple conditions.
Sub ShowBudgetText()
    Dim Budget As Long
    Dim Result As String

    Budget = InputBox("Enter project budget: ")

    Select Case Budget
        Case 0 To 5000: Result = "LOW"
        Case 5001 To 10000: Result = "MEDIUM"
        Case Is > 10000: Result = "HIGH"
    End Select

    MsgBox "You have a " & Result & " budget."
End Sub
Code explanation:
The code prompts the user for a value, evaluates it, and then outputs a result. It evaluates the Budget variable and checks for three different cases (0–5000, 5001-10000, and greater than 10000). The Select-Case structure is exited as soon as VBA finds a TRUE case and executes the statements for that particular block.
Example #3: Error handling
You can’t always anticipate every error that might occur. But if possible, you should trap them to ensure your program doesn’t crash at runtime.
Below are the three methods of error handling in VBA. Each has its own benefits and drawbacks, so it’s important to choose the right one for your needs.
- On Error Resume Next ignores any encountered errors and prevents the code from stopping.
- On Error GoTo 0 stops the code on the line that causes the error and shows a message box describing the error.
- On Error GoTo [Label] allows you to specify what you want to do with the errors.
Let’s see an example. We’ll add an On Error GoTo [Label] error handling method to our previous ShowBudgetText Sub. This will trap any type of runtime error and then display the error in a warning message box.
Sub ShowBudgetText()
    Dim Budget As Long
    Dim Result As String

    On Error GoTo ErrorHandler

    Budget = InputBox("Enter project budget: ")

    Select Case Budget
        Case 0 To 5000: Result = "LOW"
        Case 5001 To 10000: Result = "MEDIUM"
        Case Is > 10000: Result = "HIGH"
    End Select

    MsgBox "You have a " & Result & " budget."

ErrorHandler:
    MsgBox "Please enter a valid input.", vbExclamation

End Sub
5 Tips for mastering Excel VBA programming
Learning any new programming language can be daunting at first, but we hope this article has given you a good start in learning Excel VBA.
In this last section, we’ve included five of our top tips that will help you on your journey to mastering the language:
- Start by learning the basics of programming. If you’re new to programming, it’s important to start with understanding what a variable is, various data types in VBA, how to use loops and conditions, etc.
- Make use of online resources. Fortunately, there are plenty of resources available to help you learn the basics. Once you have a good understanding of programming fundamentals, you’ll be able to start taking advantage of Excel VBA’s more advanced features.
- Familiarize yourself with common Excel VBA objects and methods. Some of the most commonly used Excel VBA objects include Range, Worksheet, and Workbook.
- Experiment with the Record Macro feature. This is a great way to get a feel for Excel VBA without having to write any code yourself. Simply record a macro and then edit the resulting code to customize it to your needs.
- Don’t forget to have fun! Excel VBA can be a powerful tool, but it’s also meant to be enjoyable. So relax and enjoy the process of learning something new.
Finally, thanks for reading, and have fun! 😊
-

Senior analyst programmer

Back to Blog
Focus on your business
goals while we take care of your data!
Try Coupler.io
Время на прочтение
7 мин
Количество просмотров 312K
Приветствую всех.
В этом посте я расскажу, что такое VBA и как с ним работать в Microsoft Excel 2007/2010 (для более старых версий изменяется лишь интерфейс — код, скорее всего, будет таким же) для автоматизации различной рутины.

VBA (Visual Basic for Applications) — это упрощенная версия Visual Basic, встроенная в множество продуктов линейки Microsoft Office. Она позволяет писать программы прямо в файле конкретного документа. Вам не требуется устанавливать различные IDE — всё, включая отладчик, уже есть в Excel.
Еще при помощи Visual Studio Tools for Office можно писать макросы на C# и также встраивать их. Спасибо, FireStorm.
Сразу скажу — писать на других языках (C++/Delphi/PHP) также возможно, но требуется научится читать, изменять и писать файлы офиса — встраивать в документы не получится. А интерфейсы Microsoft работают через COM. Чтобы вы поняли весь ужас, вот Hello World с использованием COM.
Поэтому, увы, будем учить Visual Basic.
Чуть-чуть подготовки и постановка задачи
Итак, поехали. Открываем Excel.
Для начала давайте добавим в Ribbon панель «Разработчик». В ней находятся кнопки, текстовые поля и пр. элементы для конструирования форм.

Появилась вкладка.
Теперь давайте подумаем, на каком примере мы будем изучать VBA. Недавно мне потребовалось красиво оформить прайс-лист, выглядевший, как таблица. Идём в гугл, набираем «прайс-лист» и качаем любой, который оформлен примерно так (не сочтите за рекламу, пожалуйста):

То есть требуется, чтобы было как минимум две группы, по которым можно объединить товары (в нашем случае это будут Тип и Производитель — в таком порядке). Для того, чтобы предложенный мною алгоритм работал корректно, отсортируйте товары так, чтобы товары из одной группы стояли подряд (сначала по Типу, потом по Производителю).
Результат, которого хотим добиться, выглядит примерно так:

Разумеется, если смотреть прайс только на компьютере, то можно добавить фильтры и будет гораздо удобнее искать нужный товар. Однако мы хотим научится кодить и задача вполне подходящая, не так ли?
Кодим
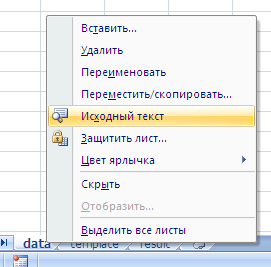
Для начала требуется создать кнопку, при нажатии на которую будет вызываться наша програма. Кнопки находятся в панели «Разработчик» и появляются по кнопке «Вставить». Вам нужен компонент формы «Кнопка». Нажали, поставили на любое место в листе. Далее, если не появилось окно назначения макроса, надо нажать правой кнопкой и выбрать пункт «Назначить макрос». Назовём его FormatPrice. Важно, чтобы перед именем макроса ничего не было — иначе он создастся в отдельном модуле, а не в пространстве имен книги. В этому случае вам будет недоступно быстрое обращение к выделенному листу. Нажимаем кнопку «Новый».


И вот мы в среде разработки VB. Также её можно вызвать из контекстного меню командой «Исходный текст»/«View code».

Перед вами окно с заглушкой процедуры. Можете его развернуть. Код должен выглядеть примерно так:
Sub FormatPrice()End Sub
Напишем Hello World:
Sub FormatPrice()

    MsgBox "Hello World!"

End Sub
И запустим либо щелкнув по кнопке (предварительно сняв с неё выделение), либо клавишей F5 прямо из редактора.
Тут, пожалуй, следует отвлечься на небольшой ликбез по поводу синтаксиса VB. Кто его знает — может смело пропустить этот раздел до конца. Основное отличие Visual Basic от Pascal/C/Java в том, что команды разделяются не ;, а переносом строки или двоеточием (:), если очень хочется написать несколько команд в одну строку. Чтобы понять основные правила синтаксиса, приведу абстрактный код.
Примеры синтаксиса
' Процедура. Ничего не возвращает

' Перегрузка в VBA отсутствует

Sub foo(a As String, b As String)

    ' Exit Sub ' Это значит "выйти из процедуры"

    MsgBox a + ";" + b

End Sub' Функция. Вовращает Integer

Function LengthSqr(x As Integer, y As Integer) As Integer

    ' Exit Function

    LengthSqr = x * x + y * y

End FunctionSub FormatPrice()

    Dim s1 As String, s2 As String

    s1 = "str1"

    s2 = "str2"

    If s1 <> s2 Then

        foo "123", "456" ' Скобки при вызове процедур запрещены

    End IfDim res As sTRING ' Регистр в VB не важен. Впрочем, редактор Вас поправит

    Dim i As Integer

    ' Цикл всегда состоит из нескольких строк

    For i = 1 To 10

        res = res + CStr(i) ' Конвертация чего угодно в String

        If i = 5 Then Exit For

    Next iDim x As Double

    x = Val("1.234") ' Парсинг чисел

    x = x + 10

    MsgBox xOn Error Resume Next ' Обработка ошибок - игнорировать все ошибки

    x = 5 / 0

    MsgBox xOn Error GoTo Err ' При ошибке перейти к метке Err

    x = 5 / 0

    MsgBox "OK!"

    GoTo ne
Err:
MsgBox
"Err!"
ne:
On Error GoTo 0 ' Отключаем обработку ошибок
' Циклы бывает, какие захотите
Do While True
Exit DoLoop 'While True
Do 'Until False
Exit Do
Loop Until False
' А вот при вызове функций, от которых хотим получить значение, скобки нужны.
' Val также умеет возвращать Integer
Select Case LengthSqr(Len("abc"), Val("4"))
Case 24
MsgBox "0"
Case 25
MsgBox "1"
Case 26
MsgBox "2"
End Select' Двухмерный массив.
' Можно также менять размеры командой ReDim (Preserve) - см. google
Dim arr(1 to 10, 5 to 6) As Integer
arr(1, 6) = 8Dim coll As New Collection
Dim coll2 As Collection
coll.Add "item", "key"
Set coll2 = coll ' Все присваивания объектов должны производится командой Set
MsgBox coll2("key")
Set coll2 = New Collection
MsgBox coll2.Count
End Sub
Грабли-1. При копировании кода из IDE (в английском Excel) есь текст конвертируется в 1252 Latin-1. Поэтому, если хотите сохранить русские комментарии — надо сохранить крокозябры как Latin-1, а потом открыть в 1251.
Грабли-2. Т.к. VB позволяет использовать необъявленные переменные, я всегда в начале кода (перед всеми процедурами) ставлю строчку Option Explicit. Эта директива запрещает интерпретатору заводить переменные самостоятельно.
Грабли-3. Глобальные переменные можно объявлять только до первой функции/процедуры. Локальные — в любом месте процедуры/функции.
Еще немного дополнительных функций, которые могут пригодится: InPos, Mid, Trim, LBound, UBound. Также ответы на все вопросы по поводу работы функций/их параметров можно получить в MSDN.
Надеюсь, что этого Вам хватит, чтобы не пугаться кода и самостоятельно написать какое-нибудь домашнее задание по информатике. По ходу поста я буду ненавязчиво знакомить Вас с новыми конструкциями.
Кодим много и под Excel
В этой части мы уже начнём кодить нечто, что умеет работать с нашими листами в Excel. Для начала создадим отдельный лист с именем result (лист с данными назовём data). Теперь, наверное, нужно этот лист очистить от того, что на нём есть. Также мы «выделим» лист с данными, чтобы каждый раз не писать длинное обращение к массиву с листами.
Sub FormatPrice()

    Sheets("result").Cells.Clear

    Sheets("data").Activate

End Sub
Работа с диапазонами ячеек
Вся работа в Excel VBA производится с диапазонами ячеек. Они создаются функцией Range и возвращают объект типа Range. У него есть всё необходимое для работы с данными и/или оформлением. Кстати сказать, свойство Cells листа — это тоже Range.
Примеры работы с Range
Sheets("result").Activate

Dim r As Range

Set r = Range("A1")

r.Value = "123"

Set r = Range("A3,A5")

r.Font.Color = vbRed

r.Value = "456"

Set r = Range("A6:A7")

r.Value = "=A1+A3"
Теперь давайте поймем алгоритм работы нашего кода. Итак, у каждой строчки листа data, начиная со второй, есть некоторые данные, которые нас не интересуют (ID, название и цена) и есть две вложенные группы, к которым она принадлежит (тип и производитель). Более того, эти строки отсортированы. Пока мы забудем про пропуски перед началом новой группы — так будет проще. Я предлагаю такой алгоритм:
- Считали группы из очередной строки.
- Пробегаемся по всем группам в порядке приоритета (вначале более крупные)
- Если текущая группа не совпадает, вызываем процедуру AddGroup(i, name), где i — номер группы (от номера текущей до максимума), name — её имя. Несколько вызовов необходимы, чтобы создать не только наш заголовок, но и всё более мелкие.
- После отрисовки всех необходимых заголовков делаем еще одну строку и заполняем её данными.
Для упрощения работы рекомендую определить следующие функции-сокращения:
Function GetCol(Col As Integer) As String

    GetCol = Chr(Asc("A") + Col)

End FunctionFunction GetCellS(Sheet As String, Col As Integer, Row As Integer) As Range

    Set GetCellS = Sheets(Sheet).Range(GetCol(Col) + CStr(Row))

End FunctionFunction GetCell(Col As Integer, Row As Integer) As Range

    Set GetCell = Range(GetCol(Col) + CStr(Row))

End Function
Далее определим глобальную переменную «текущая строчка»: Dim CurRow As Integer. В начале процедуры её следует сделать равной единице. Еще нам потребуется переменная-«текущая строка в data», массив с именами групп текущей предыдущей строк. Потом можно написать цикл «пока первая ячейка в строке непуста».
Глобальные переменные
Option Explicit ' про эту строчку я уже рассказывал

Dim CurRow As Integer

Const GroupsCount As Integer = 2

Const DataCount As Integer = 3
FormatPrice
Sub FormatPrice()

    Dim I As Integer ' строка в data

    CurRow = 1

    Dim Groups(1 To GroupsCount) As String

    Dim PrGroups(1 To GroupsCount) As String
Sheets(
"data").Activate
I = 2
Do While True
If GetCell(0, I).Value = "" Then Exit Do
' ...
I = I + 1
Loop
End Sub
Теперь надо заполнить массив Groups:
На месте многоточия
Dim I2 As Integer

For I2 = 1 To GroupsCount

    Groups(I2) = GetCell(I2, I)

Next I2

' ...

For I2 = 1 To GroupsCount ' VB не умеет копировать массивы

    PrGroups(I2) = Groups(I2)

Next I2

I =  I + 1
И создать заголовки:
На месте многоточия в предыдущем куске
For I2 = 1 To GroupsCount

    If Groups(I2) <> PrGroups(I2) Then

        Dim I3 As Integer

        For I3 = I2 To GroupsCount

            AddHeader I3, Groups(I3)

        Next I3

        Exit For

    End If

Next I2
Не забудем про процедуру AddHeader:
Перед FormatPrice
Sub AddHeader(Ty As Integer, Name As String)

    GetCellS("result", 1, CurRow).Value = Name

    CurRow = CurRow + 1

End Sub
Теперь надо перенести всякую информацию в result
For I2 = 0 To DataCount - 1

    GetCellS("result", I2, CurRow).Value = GetCell(I2, I)

Next I2
Подогнать столбцы по ширине и выбрать лист result для показа результата
После цикла в конце FormatPrice
Sheets("Result").Activate

Columns.AutoFit
Всё. Можно любоваться первой версией.

Некрасиво, но похоже. Давайте разбираться с форматированием. Сначала изменим процедуру AddHeader:
Sub AddHeader(Ty As Integer, Name As String)

    Sheets("result").Range("A" + CStr(CurRow) + ":C" + CStr(CurRow)).Merge

    ' Чтобы не заводить переменную и не писать каждый раз длинный вызов

    ' можно воспользоваться блоком With

    With GetCellS("result", 0, CurRow)

        .Value = Name

        .Font.Italic = True

        .Font.Name = "Cambria"

        Select Case Ty

        Case 1 ' Тип

            .Font.Bold = True

            .Font.Size = 16

        Case 2 ' Производитель

            .Font.Size = 12

        End Select

        .HorizontalAlignment = xlCenter

    End With

    CurRow = CurRow + 1

End Sub
Уже лучше:

Осталось только сделать границы. Тут уже нам требуется работать со всеми объединёнными ячейками, иначе бордюр будет только у одной:

Поэтому чуть-чуть меняем код с добавлением стиля границ:
Sub AddHeader(Ty As Integer, Name As String)

    With Sheets("result").Range("A" + CStr(CurRow) + ":C" + CStr(CurRow))

        .Merge

        .Value = Name

        .Font.Italic = True

        .Font.Name = "Cambria"

        .HorizontalAlignment = xlCenterSelect Case Ty

        Case 1 ' Тип

            .Font.Bold = True

            .Font.Size = 16

            .Borders(xlTop).Weight = xlThick

        Case 2 ' Производитель

            .Font.Size = 12

            .Borders(xlTop).Weight = xlMedium

        End Select

        .Borders(xlBottom).Weight = xlMedium ' По убыванию: xlThick, xlMedium, xlThin, xlHairline

    End With

    CurRow = CurRow + 1

End Sub

Осталось лишь добится пропусков перед началом новой группы. Это легко:
В начале FormatPrice
Dim I As Integer ' строка в  data

CurRow = 0 ' чтобы не было пропуска в самом начале

Dim Groups(1 To GroupsCount) As String
В цикле расстановки заголовков
If Groups(I2) <> PrGroups(I2) Then

    CurRow = CurRow + 1

    Dim I3 As Integer

В точности то, что и хотели.
Надеюсь, что эта статья помогла вам немного освоится с программированием для Excel на VBA. Домашнее задание — добавить заголовки «ID, Название, Цена» в результат. Подсказка: CurRow = 0 CurRow = 1.
Файл можно скачать тут (min.us) или тут (Dropbox). Не забудьте разрешить исполнение макросов. Если кто-нибудь подскажет человеческих файлохостинг, залью туда.
Спасибо за внимание.
Буду рад конструктивной критике в комментариях.
UPD: Перезалил пример на Dropbox и min.us.
UPD2: На самом деле, при вызове процедуры с одним параметром скобки можно поставить. Либо использовать конструкцию Call Foo(«bar», 1, 2, 3) — тут скобки нужны постоянно.
Excel VBA: Learn the Basics in a Few Minutes
What is VBA in Excel? VBA stands for Visual Basic for Applications. It is an implementation of Microsoft’s event-driven programming language Visual Basic Excel, which is now used with Microsoft Office applications such as MS Excel, MS Word, and MS Access.
Introduction to this Excel VBA Tutorial
Why do we need to learn VBA Excel? VBA is an incredible skill because it can help us automate our work that is anything you do in Excel with a certain amount of repetition or frequency can be dealt with automatically by controlling Excel. What do I mean by controlling Excel?
Well, quite simply, you can write some code (known as Visual Basic for Applications (or VBA), which sits ‘behind the scenes and can do all the tasks you normally would from copying/pasting, writing formulas, creating charts, saving files in a folder and pretty much everything else you can imagine! The potential to save time is incredible, I regularly create VBA scripts that save me up to an hour and my personal record is automating an entire monthly reporting process that lasted over 100 hours down to 5 minutes!
What’s even more remarkable is that from my time saved, I was able to solve other problems for the companies I worked for and was promoted several times. My peers simply couldn’t compete with me because I was significantly more productive than them.
So today, I am going to teach you the basics of VBA, and how it could be a great foundation to enhance your Excel skills to a higher level of expertise. After this tutorial, I hope you will be confident enough to start creating your own macros and continue practicing them. Soon, you’ll realize how amazing VBA can help you with your day-to-day work. And in no time, you can be the next Excel VBA Rock Star!
VBA Cells
For our first lesson, we are going to make something automatically display in a cell in our Excel spreadsheet. By the way, there are two ways to refer to a cell in Excel; one is using the word Cells and the other one is by using the word Range. The latter I am going to discuss after this topic.
However, before that, what we need to do first is to open the Visual Basic Excel window. For this, go to the Developer tab and click the Visual Basic button. Or, you can simply hold the ALT key then press the F11 key. (Alt+F11)

Excel VBA
Whichever method you choose, a window should appear like the picture below. Double click an object on the left pane under Project – VBA Project. In this case, I clicked Sheet1 to show the coding area for Sheet1, by doing so; all written codes in this object will only affect Sheet1 worksheet. Similarly, if you add codes in object Sheet2 or Sheet3, the codes will only be run in their respective worksheet.

Now let’s start writing some codes. Again, we want some texts to automatically appear in cell B5 in Sheet1 so we will need to add the following code:
Sub Learning()
Cells(5,2) = “Hello”
End Sub
Cells(5,2) also refers to cell B5, where 5 refers Row number, and 2 is the column number, which is B.
Hit the Run/Play button or press F5, and the word Hello should then appear in our Sheet1 cell B5 like this:

Note: A Sub (short for Subroutine) is a series of Visual Basic statements enclosed by the Sub and End Sub statements. A Sub procedure performs a task provided in a form of code.
VBA Range
As I have mentioned previously, we can also use the word Range when cell referencing. The good thing about using Range is it lets you reference either a single cell or multiple cells all at once. It is also easier to use because its format is a common way Excel cells are named like cell A1, A2, or cells A1:A10. But of course, the Cells property has its advantages as well when it comes to coding loops.
Let’s use the Range object in VBA.
This is the code to add in the VBA editor:
Sub Learning()
Range(“A1”) = “Hello”
End Sub

To display the text “Hello” in multiple cells or in a range of cells, we simply tweak the code like so:
Sub Learning()
Range(“A1:A10”) = “Hello”
End Sub

What we did is instead of cell “A1” enclosed in our range, we replaced it with “A1:A10”, displaying the word Hello from cells A1 to A10.
VBA Copy and Paste
Everyone would agree when I say that Copy and Paste are the two most common Excel operations. You may have done a lot of copying and pasting manually. Now I will show you how quick and easy VBA can do it for you.
First, go back to the VBA window. Assuming we have some text written in cell A1 and we want to copy and paste it in cell A2, add this code:
Sub Learning()
Range(“A1”).Copy Range(“A2”)
End Sub
The 2nd Range object is the destination range. This can also be a single or multiple range of cells.
This is how it would look like in the VBA editor and Excel sheet.

To paste to multiple cells, add this code:
Sub Learning()
Range(“A1”).Copy Range(“A2:A5”)
Color Cells with VBA Color Index
VBA is so useful when we want to automate repetitive tasks. One example at work is, we often use cell highlighting or cell colors for quick overview of statuses etc.
There are two ways to set the color. One is with the use of ColorIndex, which has 56 colors, or Color which makes it possible to use any color at all.
When using the ColorIndex, you can refer to the image below for the color and its corresponding colorindex.

To set the color of our cell to one of these, write the code:
Sub Learning()
Range(“A1”).Interior.ColorIndex = 49
End Sub
This is how it should look like in VBA Editor and Excel sheet:

Second option is to use the Color property. Under this, there are 2 inputs we can use:
- vbColor – This is the easiest way however; the colors are limited.
Sample code:
Sub Learning()
Range(“A1”).Interior.Color = vbYellow
Range(“A2”).Interior.Color = vbRed
Range(“A3”).Interior.Color = vbBlue
End Sub

1.RGB Colors – RGB which stands for Red Green Blue. To use RGB, enter a value between 0 to 255 for each color code.
Here is an example code:
Sub Learning()
Range(“A1”).Interior.Color = RGB(90, 70, 50)
End Sub
Illustrated in VBA editor and Excel sheet, we’ll see:

VBA Control Fonts
We can also control the font’s attributes in VBA. The commonly used attributes are:
Bold, Color, ColorIndex, FontStyle, Italic, Name, Size, Underline, etc.
Here is the sample code for your reference:
Sub Learning()
Range(“A1”).Font.Bold = True
Range(“A2”).Font.Italic = True
Range(“A3”).Font.Underline = True
Range(“A5”).Font.Color = vbRed
Range(“A6”).Font.Name = “Arial Black”
Range(“A7”).Font.Size = 30
End Sub
Let’s see our codes in action. By looking at the result of our codes, we can see that:
Text in A1 was set to Bold
A2 was set to Italic
A3 was underlined
A5 font color was set to red
A6 font name was set to Arial Black; and lastly,
A7 font size was set to 30

VBA Clearing Cells
There are different options to clear the cells in Excel. I will show you how to implement it using VBA.
The image below is the list of cell-clearing options. This suggestion box pops up when you start typing the word ‘clear’, giving you options on what to clear in a cell.
![]()
Clear – Clears the entire specified range
Range(“A7”).Clear
![]()
![]()
ClearComments – Clears all cell comments from the specified range
Range(“A6”).ClearComments
![]()
![]()
ClearContents – Clears formulas and values from the range
Range(“A6”).ClearContents
![]()
![]()
ClearFormats – Clears the formatting from the specified range
![]()
![]()
ClearHyperlinks – Removes all hyperlinks from the specified range
![]()
![]()
ClearNotes – Clears notes and sound notes from the specified range
ClearOutline – Clears the outline for the specified range
To clear cell color, you can use this code as reference:
Cells.Interior.Color = xlColorIndexNone
VBA Columns Widths
Excel column widths can also be manipulated using VBA. This one is quite important especially in reports or data presentations when same and exact column widths are needed to display data properly.
To set the column width in VBA, use this code are reference:
Sub Learning()
Columns(“A:C”).ColumnWidth = 12
End Sub


VBA Building Logic
VBA consists of several built-in operators and functions, which can be used to build expressions and conditional logic. This includes mathematical, string, comparison, and logical operators.
So, when logical function and operators are combined into a series of codes to evaluate a condition, it executes one set of code at a time, returns TRUE or FALSE as a result. Depending on the result, the following codes will continue to execute until it reaches the end of the conditional logic. Conditional statements are the If-Then with Else or ElseIf and the Select Case.
VBA IF Statement
VBA IF Statement is the most commonly used conditional statement. It allows you to evaluate for a condition then performs an action depending on the result.
IF THEN ELSE Statement simply means: “IF a condition is met, THEN what happens? ELSE, what happens when it is not met?”
Syntax # 1:
IF condition THEN code_if_true ELSE code_if_false
*Note that above statement is a simple one-line IF THEN ELSE statement where you don’t need to use the END IF statement. And that the ELSE part is optional.
Syntax # 2:
IF condition THEN code_if_true ELSE Code_if_false END IF
*Note that the second syntax is helpful if you have multiple lines of code to execute if the condition returns TRUE. Essentially, you need to use the END IF statement when using this syntax to avoid a compile error.
Examples of VBA IF THEN Statement
For instance, you want to check if a product’s quantity (cell B1) is under or above the minimum stock limit (10) and displays the result in cell C1.
Example#1 – One-line code:
Sub Learning()
If Range(“B1”) > 10 Then Range(“C1”) = “Above Minimum Limit” Else Range(“C1”) = “Below Minimum Limit”
End Sub

Example#2 – Block of code:
Sub Learning()
If Range(“B1”) > 10 Then
Range(“C1”) = “Above Minimum Limit”
Else
Range(“C1”) = “Below Minimum Limit”
Range(“C1”).Interior.Color = vbRed
End If
End Sub

Select Case Approach
Another logical function that you can use most specifically with three or more conditions is the Case Statement.
The Case statement performs the corresponding code for the first condition that is found to be TRUE.
Below is the syntax of Case statement:
Select Case test_expression
Case condition_1
Result_1
Case condition_2
Result_2
…
Case Else
Result_else
End Select
Once a condition is met, it will execute the corresponding code and will not evaluate the conditions any further.
Example code used in VBA:
Sub Learning()
Select Case Range(“A2”)
Case 90 To 100
Range(“B2”) = “A”
Case 70 To 90
Range(“B2”) = “B”
Case 60 To 70
Range(“B2”) = “C”
Case 50 To 60
Range(“B2”) = “D”
Case Else
Range(“B2”) = “No Score Found”
End Select
End Sub
The code returned “B” since score 75 falls under the case 70 to 90.

Second example, cell A2 is empty and as indicated in our Case Else, if no test_expression match any clause in all the other Case statements, then “No Score Found” will be the value in cell B2.

Start To Automate With Loops
Loops plays an essential role in controlling and handling code execution of repetitive tasks. Looping executes code repetitively until the condition is found TRUE. It is an effective way of optimizing your code in terms of speed and accuracy. There are multiple methods to loop, such as:
For – Next
For – Each – Next
Do While Loop
Do Until Loop
While – Wend
VBA For Loop
VBA for loop is the most common loop in Excel VBA. This type of loop allows you to run the VBA code a predetermined number of times. Once all the statements have been executed, it goes back to the start of the structure, and that is why it is called a loop.
This is the syntax for For Loop:
Sub ()
For counter_variable = <start> to <end>
…statements…
Next [counter_variable]
End Sub
Sample code for your reference:
Sub Learning()
For iCtr = 1 to 10
Cells(iCtr, 1).value = “Hello”
Next iCtr
End Sub
When used in Excel VBA:
Check roulette game.

Looking at the image above, the statement between For and Next was executed 10 times. For iCtr = 1, enters the value “Hello” to Cells (iCtr, 1) which is cell A1. The code then reaches Next iCtr, and so it increments and goes back to the For statement. Now, our variable iCtr = 2, “Hello” is entered in the cell at the intersection of row 2 and column 1 (cell A2). The code executes until it reaches the end counter, which is 10, and that will be row 10, column 1 (cell A10).
Combine Logic And Loops To Automate
Let’s start combining logic and loops to automate our Excel task. Here is one good yet simple example you can start practicing on:
Sub Learning()
Dim iCtr As Integer
For iCtr = 1 To 20
If Cells(iCtr, 1) = “Apple” Then
Cells(iCtr, 1).Interior.Color = vbYellow
End If
Next iCtr
End Sub
In this code, there is an IF statement between the For and Next statements. The IF statement evaluates the data and finds the value “Apple” in the list, and if found, colors the cell yellow. The counter 1 to 20 used as a variable for row number Cells(iCtr,1) indicates that it should loop from row 1 to 20 and then executes the statements that follow.
Here is how it should look like when added in VBA Editor.

The first step to working with VBA in Excel is to get yourself familiarized with the Visual Basic Editor (also called the VBA Editor or VB Editor).
In this tutorial, I will cover all there is to know about the VBA Editor and some useful options that you should know when coding in Excel VBA.
What is Visual Basic Editor in Excel?
Visual Basic Editor is a separate application that is a part of Excel and opens whenever you open an Excel workbook. By default, it’s hidden and to access it, you need to activate it.
VB Editor is the place where you keep the VB code.
There are multiple ways you get the code in the VB Editor:
- When you record a macro, it automatically creates a new module in the VB Editor and inserts the code in that module.
- You can manually type VB code in the VB editor.
- You can copy a code from some other workbook or from the internet and paste it in the VB Editor.
Opening the VB Editor
There are various ways to open the Visual Basic Editor in Excel:
- Using a Keyboard Shortcut (easiest and fastest)
- Using the Developer Tab.
- Using the Worksheet Tabs.
Let’s go through each of these quickly.
Keyboard Shortcut to Open the Visual Basic Editor
The easiest way to open the Visual Basic editor is to use the keyboard shortcut – ALT + F11 (hold the ALT key and press the F11 key).

As soon as you do this, it will open a separate window for the Visual Basic editor.
This shortcut works as a toggle, so when you use it again, it will take you back to the Excel application (without closing the VB Editor).
The shortcut for the Mac version is Opt + F11 or Fn + Opt + F11
Using the Developer Tab
To open the Visual Basic Editor from the ribbon:
- Click the Developer tab (if you don’t see a developer tab, read this on how to get it).
- In the Code group, click on Visual Basic.
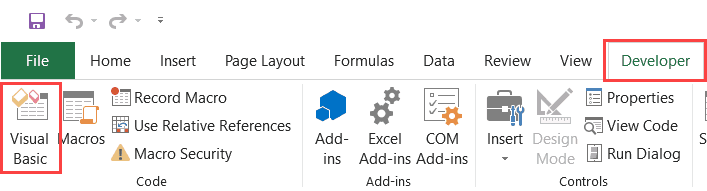
Using the Worksheet Tab
This is a less used method to open the Vb Editor.
Go to any of the worksheet tabs, right-click, and select ‘View Code’.
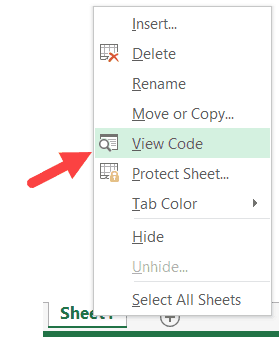
This method wouldn’t just open the VB Editor, it will also take you to the code window for that worksheet object.
This is useful when you want to write code that works only for a specific worksheet. This is usually the case with worksheet events.
Anatomy of the Visual Basic Editor in Excel
When you open the VB Editor for the first time, it may look a bit overwhelming.
There are different options and sections that may seem completely new at first.
Also, it still has an old Excel 97 days look. While Excel has improved tremendously in design and usability over the years, the VB Editor has not seen any change in the way it looks.
In this section, I will take you through the different parts of the Visual Basic Editor application.
Note: When I started using VBA years ago, I was quite overwhelmed with all these new options and windows. But as you get used to working with VBA, you would get comfortable with most of these. And most of the time, you’ll not be required to use all the options, only a hand full.
Below is an image of the different components of the VB Editor. These are then described in detail in the below sections of this tutorial.
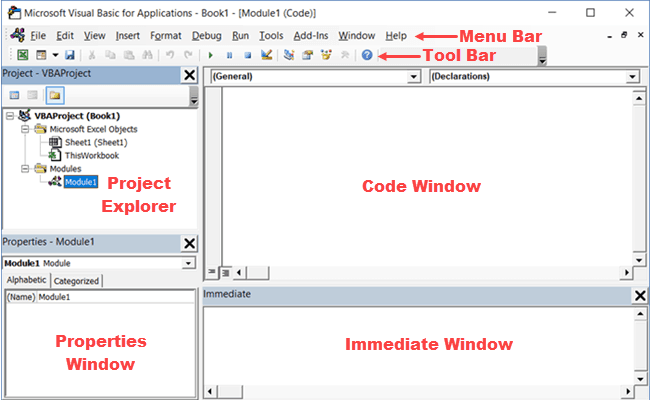
Now let’s quickly go through each of these components and understand what it does:
Menu Bar
This is where you have all the options that you can use in the VB Editor. It is similar to the Excel ribbon where you have tabs and options with each tab.
You can explore the available options by clicking on each of the menu element.
You will notice that most of the options in VB Editor have keyboard shortcuts mentioned next to it. Once you get used to a few keyboard shortcuts, working with the VB Editor becomes really easy.
Tool Bar
By default, there is a toolbar in the VB Editor which has some useful options that you’re likely to need most often. This is just like the Quick Access Toolbar in Excel. It gives you quick access to some of the useful options.
You can customize it a little by removing or adding options to it (by clicking on the small downward pointing arrow at the end of the toolbar).

In most cases, the default toolbar is all you need when working with the VB Editor.
You can move the toolbar above the menu bar by clicking on the three gray dots (at the beginning of the toolbar) and dragging it above the menu bar.
Note: There are four toolbars in the VB Editor – Standard, Debug, Edit, and User form. What you see in the image above (which is also the default) is the standard toolbar. You can access other toolbars by going to the View option and hovering the cursor on the Toolbars option. You can add one or more toolbars to the VB Editor if you want.
Project Explorer
Project Explorer is a window on the left that shows all the objects currently open in Excel.
When you’re working with Excel, every workbook or add-in that is open is a project. And each of these projects can have a collection of objects in it.
For example, in the below image, the Project Explorer shows the two workbooks that are open (Book1 and Book2) and the objects in each workbook (worksheets, ThisWorkbook, and Module in Book1).
There is a plus icon to the left of objects that you can use to collapse the list of objects or expand and see the complete list of objects.
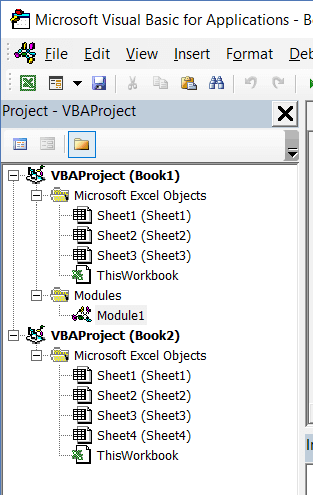
The following objects can be a part of the Project Explorer:
- All open Workbooks – within each workbook (which is also called a project), you can have the following objects:
- Worksheet object for each worksheet in the workbook
- ThisWorkbook object which represents the workbook itself
- Chartsheet object for each chart sheet (these are not as common as worksheets)
- Modules – This is where the code that is generated with a macro recorder goes. You can also write or copy-paste VBA code here.
- All open Add-ins
Consider the Project Explorer as a place that outlines all the objects open in Excel at the given time.
The keyboard shortcut to open the Project Explorer is Control + R (hold the control key and then press R). To close it, simply click the close icon at the top right of the Project Explorer window.
Note: For every object in Project Explorer, there is a code window in which you can write the code (or copy and paste it from somewhere). The code window appears when you double click on the object.
Properties Window
Properties window is where you get to see the properties of the select object. If you don’t have the Properties window already, you can get it by using the keyboard shortcut F4 (or go to the View tab and click Properties window).
Properties window is a floating window which you can dock in the VB Editor. In the below example, I have docked it just below the Project Explorer.
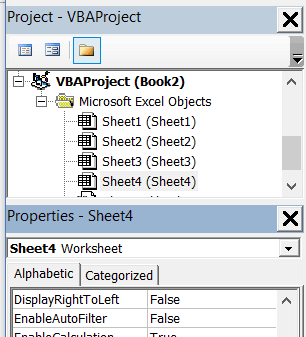
Properties window allows us to change the properties of a selected object. For example, if I want to make a worksheet hidden (or very hidden), I can do that by changing the Visible Property of the selected worksheet object.
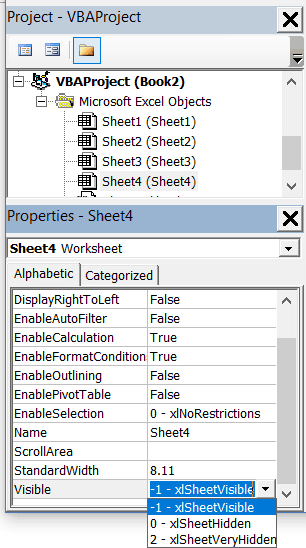
Related: Hiding a Worksheet in Excel (that can not be un-hidden easily)
Code Window
There is a code window for each object that is listed in the Project Explorer. You can open the code window for an object by double-clicking on it in the Project Explorer area.
Code window is where you’ll write your code or copy paste a code from somewhere else.
When you record a macro, the code for it goes into the code window of a module. Excel automatically inserts a module to place the code in it when recording a macro.
Related: How to Run a Macro (VBA Code) in Excel.
Immediate Window
The Immediate window is mostly used when debugging code. One way I use the Immediate window is by using a Print.Debug statement within the code and then run the code.
It helps me to debug the code and determine where my code gets stuck. If I get the result of Print.Debug in the immediate window, I know the code worked at least till that line.
If you’re new to VBA coding, it may take you some time to be able to use the immediate window for debugging.
By default, the immediate window is not visible in the VB Editor. You can get it by using the keyboard shortcut Control + G (or can go to the View tab and click on ‘Immediate Window’).
Where to Add Code in the VB Editor
I hope you now have a basic understanding of what VB Editor is and what all parts it has.
In this section of this tutorial, I will show you where to add a VBA code in the Visual Basic Editor.
There are two places where you can add the VBA code in Excel:
- The code window for an object. These objects can be a workbook, worksheet, User Form, etc.
- The code window of a module.
Module Code Window Vs Object Code Window
Let me first quickly clear the difference between adding a code in a module vs adding a code in an object code window.
When you add a code to any of the objects, it’s dependent on some action of that object that will trigger that code. For example, if you want to unhide all the worksheets in a workbook as soon as you open that workbook, then the code would go in the ThisWorkbook object (which represents the workbook).
The trigger, in this case, is opening the workbook.
Similarly, if you want to protect a worksheet as soon as some other worksheet is activated, the code for that would go in the worksheet code window.
These triggers are called events and you can associate a code to be executed when an event occurs.
Related: Learn more about Events in VBA.
On the contrary, the code in the module needs to be executed either manually (or it can be called from other subroutines as well).
When you record a macro, Excel automatically creates a module and inserts the recorded macro code in it. Now if you have to run this code, you need to manually execute the macro.
Adding VBA Code in Module
While recording a macro automatically creates a module and inserts the code in it, there are some limitations when using a macro recorder. For example, it can not use loops or If Then Else conditions.
In such cases, it’s better to either copy and paste the code manually or write the code yourself.
A module can be used to hold the following types of VBA codes:
- Declarations: You can declare variables in a module. Declaring variables allows you to specify what type of data a variable can hold. You can declare a variable for a sub-routine only or for all sub-routines in the module (or all modules)
- Subroutines (Procedures): This is the code that has the steps you want VBA to perform.
- Function Procedures: This is a code that returns a single value and you can use it to create custom functions (also called User Defined Functions or UDFs in VBA)
By default, a module is not a part of the workbook. You need to insert it first before using it.
Adding a Module in the VB Editor
Below are the steps to add a module:
- Right-click on any object of the workbook (in which you want the module).

- Hover the cursor on the Insert option.
- Click on Module.


This would instantly create a folder called Module and insert an object called Module 1. If you already have a module inserted, the above steps would insert another module.
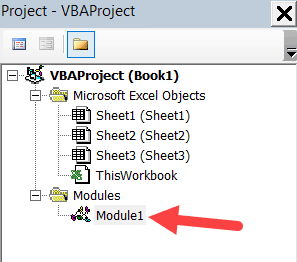
Once the module is inserted, you can double click on the module object in the Project Explorer and it will open the code window for it.
Now you can copy-paste the code or write it yourself.
Removing the Module
Below are the steps to remove a module in Excel VBA:
- Right-click on the module that you want to remove.
- Click on Remove Module option.

- In the dialog box that opens, click on No.


Note: You can export a module before removing it. It gets saved as a .bas file and you can import it in some other project. To export a module, right-click on the module and click on ‘Export file’.
Adding Code to the Object Code Window
To open the code window for an object, simply double-click on it.
When it opens, you can enter the code manually or copy-paste the code from other modules or from the internet.
Note that some of the objects allow you to choose the event for which you want to write the code.
For example, if you want to write a code for something to happen when selection is changed in the worksheet, you need to first select worksheets from the drop-down at the top left of the code window and then select the change event from the drop-down on the right.
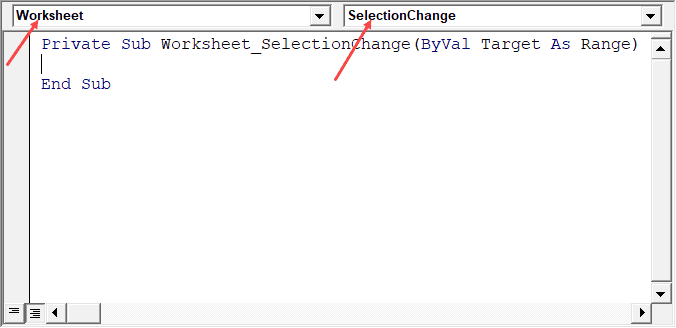
Note: These events are specific to the object. When you open the code window for a workbook, you will see the events related to the workbook object. When you open the code window for a worksheet, you will see the events related to the worksheet object.
Customizing the VB Editor
While the default settings of the Visual Basic Editor are good enough for most users, it does allow you to further customize the interface and a few functionalities.
In this section of the tutorial, I will show you all the options you have when customizing the VB Editor.
To customize the VB Editor environment, click Tools in the menu bar and then click on Options.
This would open the Options dialog box which will give you all the customization options in the VB Editor. The ‘Options’ dialog box has four tabs (as shown below) that have various customizations options for the Visual Basic Editor.
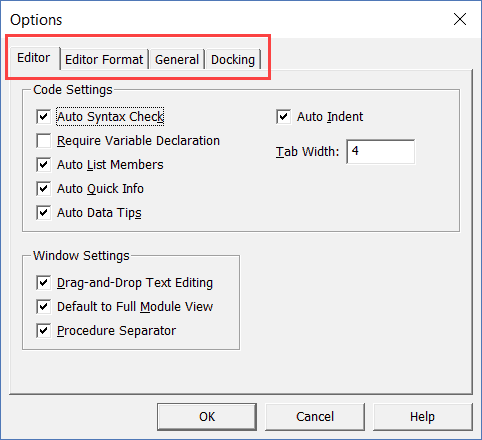
Let’s quickly go through each of these tabs and the important options in each.
Editor Tab
While the inbuilt settings work fine in most cases, let me still go through the options in this tab.
As you get more proficient working with VBA in Excel, you may want to customize the VB Editor using some of these options.
Auto Syntax Check
When working with VBA in Excel, as soon as you make a syntax error, you will be greeted by a pop-up dialog box (with some description about the error). Something as shown below:
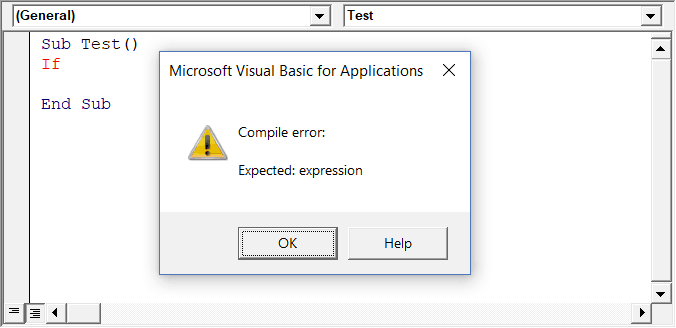
If you disable this option, this pop-up box will not appear even when you make a syntax error. However, there would be a change in color in the code text to indicate that there is an error.
If you’re a beginner, I recommend you keep this option enabled. As you get more experienced with coding, you may start finding these pop-up boxes irritating, and then you can disable this option.
Require Variable Declaration
This is one option I recommend enabling.
When you’re working with VBA, you would be using variables to hold different data types and objects.
When you enable this option, it automatically inserts the ‘Option Explicit’ statement at the top of the code window. This forces you to declare all the variables that you’re using in your code. If you don’t declare a variable and try to execute the code, it will show an error (as shown below).
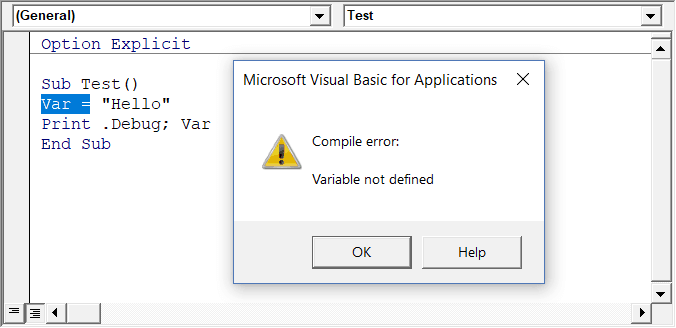
In the above case, I used the variable Var, but I didn’t declare it. So when I try to run the code, it shows an error.
This option is quite useful when you have a lot of variables. It often helps me find misspelled variables names as they are considered as undeclared and an error is shown.
Note: When you enable this option, it does not impact the existing modules.
Auto List Member
This option is quite useful as it helps you get a list of properties of methods for an object.
For example, if I want to delete a worksheet (Sheet1), I need to use the line Sheet1.Delete.
While I am typing the code, as soon as I type the dot, it will show me all the methods and properties associated with the Worksheet object (as shown below).
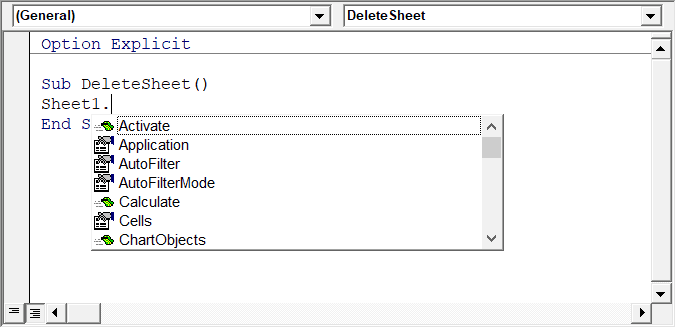
Auto list feature is great as it allows you to:
- Quickly select the property and method from the list and saves time
- Shows you all the properties and methods which you may not be aware of
- Avoid making spelling errors
This option is enabled by default and I recommend keeping it that way.
Auto Quick Info Options
When you type a function in Excel worksheet, it shows you some information about the function – such as the arguments it takes.
Similarly, when you type a function in VBA, it shows you some information (as shown below). But for that to happen, you need to make sure the Auto Quick Info option is enabled (which it is by default).
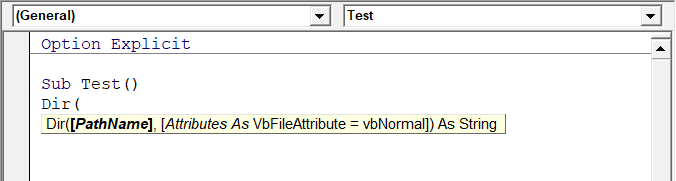
Auto Data Tips Options
When you’re going through your code line by line and place your cursor above a variable name, it will show you the value of the variable.
I find it quite useful when debugging the code or going through the code line by line which has loops in it.

In the above example, as soon as I put the cursor over the variable (var), it shows the value it holds.
This option is enabled by default and I recommend you keep it that way.
Auto Indent
Since VBA codes can get long and messy, using indentation increases the readability of the code.
When writing code, you can indent using the tab key.
This option ensures that when you are done with the indented line and hit enter, the next line doesn’t start from the very beginning, but has the same indentation as the previous line.
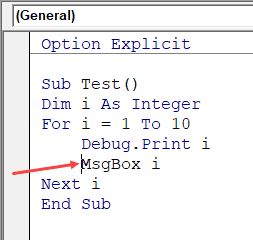
In the above example, after I write the Debug.Print line and hit enter, it will start right below it (with the same indentation level).
I find this option useful and turning this off would mean manually indenting each line in a block of code that I want indented.
You can change the indentation value if you want. I keep it at the default value.
Drag and Drop Text Editing
When this option is enabled, it allows you to select a block of code and drag and drop it.
It saves time as you don’t have to first cut and then paste it. You can simply select and drag it.
This option is enabled by default and I recommend you keep it that way.
Default to Full Module View
When this option is enabled, you will be able to see all the procedures in a module in one single scrollable list.
If you disable this option, you will only be able to see one module at a time. You will have to make a selection of the module you want to see from the drop-down at the top right of the code window.
This option is enabled by default and I recommend keeping it that way.
One reason you may want to disable it when you have multiple procedures that are huge and scrolling across these is taking time, or when you have a lot of procedures and you want to quickly find it instead of wasting time in scrolling.
Procedure Separator
When this option is enabled, you will see a line (a kind of divider) between two procedures.
I find this useful as it visually shows when one procedure ends and the other one starts.
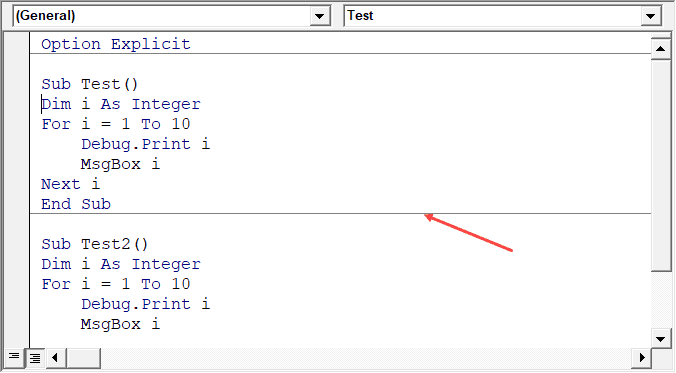
It’s enabled by default and I recommend keeping it that way.
Editor Format Tab
With the options in the Editor Format tab, you can customize the way your code looks in the code window.
Personally, I keep all the default options as I am fine with it. If you want, you can tweak this based on your preference.
To make a change, you need to first select an option in the Code Colors box. Once an option is selected, you can modify the foreground, background, and indicator color for it.
The font type and font size can also be set in this tab. It’s recommended to use a fixed-width font such as Courier New, as it makes the code more readable.
Note that the font type and size setting will remain the same for all code types (i.e., all the code types shown in the code color box).
Below is an image where I have selected Breakpoint, and I can change the formatting of it.
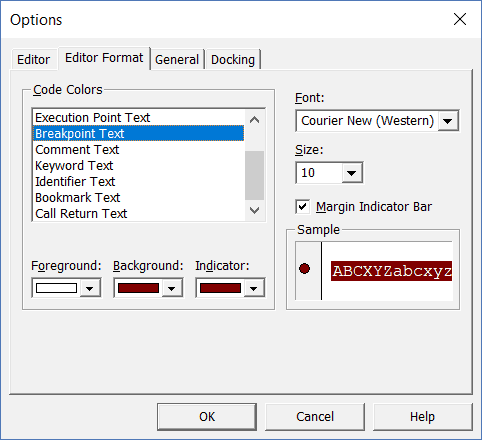
Note: The Margin Indicator Bar option when enabled shows a little margin bar to the left of the code. It’s helpful as it shows useful indicators when executing the code. In the above example, when you set a breakpoint, it will automatically show a red dot to the left of the line in the margin bar. Alternatively, to set a breakpoint, you can simply click on the margin bar on the left of the code line that you want as the breakpoint.
By default, Margin Indicator Bar is enabled and I recommend keeping it that way.
One of my VBA course students found this customization options useful and she was color blind. Using the options here, she was able to set the color and formats that made it easy for her to work with VBA.
General Tab
The General tab has many options but you don’t need to change any of it.
I recommend you keep all the options as is.
One important option to know about in this tab is Error Handling.
By default, ‘Break on Unhandled Errors’ is selected and I recommend keeping it that way.
This option means that if your code encounters an error, and you have not handled that error in your code already, then it will break and stop. But if you have addressed the error (such as by using On Error Resume Next or On Error Goto options), then it will not break (as the errors are not unhandled).
Docking Tab
In this tab, you can specify which windows you want to get docked.
Docking means that you can fix the position of a window (such as project explorer or the Properties window) so that it doesn’t float around and you can view all the different windows at the same time.
If you don’t dock, you will be able to view one window at a time in full-screen mode and will have to switch to the other one.
I recommend keeping the default settings.
Other Excel tutorials you may like:
- How to Remove Macros From an Excel Workbook
- Comments in Excel VBA (Add, Remove, Block Commenting)
- Using Active Cell in VBA in Excel (Examples)
How to Use the VBA Editor in Excel: Quick Guide (2023)
Excel’s Visual Basic for Applications (VBA) editor is a very powerful tool.
It lets you write and edit custom scripts that automate actions in Excel.
In fact, when you record a macro it is stored in VBA code in the VBA editor.
But writing a macro from the VBA editor directly gives you more flexibility than recording a macro in the traditional manner.
You can create better VBA code and complete more complicated tasks by working directly with Visual Basic for Applications.
In this tutorial, I show you the basics of how to use Excel’s VBA editor. Let’s get into it!
What is the VBA editor?
The Visual Basic editor, also called the VBA editor, VB editor, or VBE, is an interface for creating scripts.
VBA (Visual Basic for Applications) is the coding language that’s used to create these scripts.

Visual Basic is a full-featured programming language, but Microsoft Office’s very own VBA programming language is easier to get the hang of, so you can get started with developing applications much more quicker.
If you’ve done any programming in an integrated development environment (IDE), the VBA editor in Excel will look familiar. It lets you create, manage, and run VBA code on your Excel spreadsheet.
Let’s take a look at how to open the Visual Basic editor and do a few basic things.
How to use the VBA editor in Excel
Before you start coding, you’ll need to open the VBA editor. To do this, head to the Developer tab and click the Visual Basic button:

If you don’t see the Developer tab, go to File > Options > Customize Ribbon and make sure that the developer tab is checked in the right pane. If you want a more thorough explanation of how to add the developer tab in Excel, read it here.
You can also open the VBA editor with the shortcut key Alt + F11.
As you can see, the VBA editor is packed full of buttons, menu bars, and options. Don’t worry—we’ll go through the important ones in this guide.
In this guide, we’ll focus on the most basic parts of the Visual Basic editor.
The project view, in the left, vertical, menu bar in the VBA editor, has a folder called Modules.

This folder holds Excel VBA modules, which are like containers for VBA code. When you record macros, they’re included in a module.
Modules also contain the code window where you’ll be writing code (if you’re not recording it).
To add a new, empty module, click the Insert menu button and select Module.

If there was no Modules folder in VBAProject, the folder will be created and there will be a new module inside of it. This is where you’ll put your Excel VBA code when you’re ready to write it.
To delete a module, right-click it in the left pane and select Remove [module name].

Excel will ask you to confirm the removal. You may export the module if you’d like to save it.
Finally, let’s look at running a macro from the Visual Basic Editor window.
After you’ve created a macro, either by coding it directly or recording it from the standard Excel interface, you can run it from this view.
To run a macro, just click the Run Macro button in the menu bar:

You can also press the shortcut key F5 on your keyboard to run the macro from the VBA editor.
PRO TIP: Change the name of a module
If you’re developing big spreadsheets with lots of VBA, all the macro codes won’t be able to fit in one single module. You’ll need more. You can easily add those from the menu bar, but as you add more, it becomes increasingly more difficult to figure out what macros are in what modules.
Luckily, you can easily change the name of a module in the Properties window.
Add the Properties code window from the Insert button on the menu bar.
If the Project window is missing
If it looks like this when you open the Visual Basic editor:

The code window is missing, there’s no left vertical menu bar. Nothing is visible except the horizontal menu bar on top 🤷
You need to click on the ‘View’ tab on the menu bar, and then click to show the ‘Project Explorer’ window.
That’s it – Now what?
This was a simple Excel tutorial on getting started with the Visual Basic editor in Excel and should get you on the right track to write code (or record it).
Mastering the Excel VBA editor is important for both beginners and advanced Excel users.
When you write more VBA code, you’ll see that the Excel VBA editor becomes a better help for you in your work.
For instance, it helps you autocomplete your VBA coding with IntelliSense, helps you find syntax errors with auto syntax check, debug with the immediate window, uses the object code window, and much more.
For now, play around with the VBA editor to get a feel for where the buttons and menus are, and start getting used to the structure of VBA.
If you want to dive deeper into VBA programming, check out my free 30-minute VBA course here.
Other resources
The VBA editor is just a tiny portion of what macros are all about. You definitely need to check out my big VBA guide here.
Frequently asked questions
To open the Visual Basic Editor in Excel, follow these steps:
- Click the Developer tab.
- Click the Visual Basic button in the Code group on the Developer tab. This opens the VBA editor.
- Alternatively, you can open the VBA editor by pressing the Alt + F11 shortcut keys.
There is no need to install the VBA editor. It should already be available in your Excel program.
But you might be missing the developer tab. To add it:
- Click the File tab and Options.
- Then click the Customize Ribbon tab.
- Under Customize the Ribbon, in the right pane, select the Developer check box.
- Click OK.
Kasper Langmann2023-01-30T19:50:45+00:00
Page load link
 Editor: The Complete And Easy Guide To The VBE") What is the aspect about learning macros and Visual Basic for Applications that you find more intimidating?
What is the aspect about learning macros and Visual Basic for Applications that you find more intimidating?
For some people, the answer will revolve around having to learn a new programming language and coding. However, if you’re anything like me, your answer will be the Visual Basic Editor (or VBE).
The first few times I opened the Visual Basic Editor I had no idea what I was looking at or what I was supposed to do. At the time, I really wished I had access to an Excel tutorial that explained the main features of the VBE comprehensively. Unfortunately, I didn’t find it.
Obviously, in the last few years I’ve come a long way. Nowadays, I have no problems using the Visual Basic Editor and feel quite comfortable working on it. However, sometimes I take a look around the Internet to see if I can find a good and comprehensive Excel tutorial about the VBE. The truth is that, as of the time of this writing, there are not that many online resources covering this in detail.
I find this a little bit surprising. After all, I’m sure about one thing:
Many people who are interested in learning macros and Visual Basic for Applications feel confused the first time they open the Visual Basic Editor. I know it because, as explained above, that happened to me. This is a pity because, in practice, you’re likely to constantly work with the VBE on your way to becoming a proficient VBA user.
The place where you’ll find those Code Windows is the Visual Basic Editor. Therefore, if you want to become an advanced macro and VBA user, you must understand how to use the VBE properly.
The importance of the Visual Basic Editor and the lack of resources covering the VBE in detail are the main reasons why I decided to write this Excel tutorial. In this post, I cover the following topics:
Enough with the introduction. Let’s get into the first topic of this Excel tutorial about the Visual Basic Editor.
The Visual Basic Editor is not exactly the same as Excel. It is actually a separate application, even though you’ll usually open it through Excel. In fact, in order for the VBE to be able to run, Excel must be open.
The main function of the VBE is to allow you to write and edit VBA code.
The Visual Basic Editor is sometimes referred to as the Integrated Development Environment (IDE). In this Excel tutorial, I use the first term (Visual Basic Editor or VBE) but don’t be confused if you see the second term being used in other places.
How To Open The Visual Basic Editor In Excel
You can open the VBE using either of the following methods:
- Click on “Visual Basic” in the Developer tab of the Ribbon.

- Use the keyboard shortcut “Alt + F11”.

How Does The Visual Basic Editor Look
The basic VBE window can be divided in the following 6 sections, all of which I explain below. In reality, there are more components than those which appear in this screenshot (such as the Locals and Watch Windows) but, since they’re more advanced, I’ll cover them in a future Excel tutorial.

The Visual Basic Editor:
- Has several windows.
- Is highly customizable.
As a consequence of the above, there is the possibility that your VBE window doesn’t look exactly as the screenshot above.
In fact, if this is the first time that you’re opening the Visual Basic Editor, you probably can’t see element #6 that appears in the lower part of the image above. The reason is that this particular window (known as the Immediate Window) is, by default, hidden. I explain how you can easily unhide it below.
As you get more familiar with the VBE, you’ll notice that you have a lot of flexibility regarding how the interface looks like. The Visual Basic Editor allows you to, for example:
- Hide or un-hide windows.
- Move or re-arrange windows.
- Dock windows.
Let’s dive right in and understand the 6 main components of the Visual Basic Editor.
Component #1: Menu Bar

If you’ve been using computers for a reasonable amount of time, you’re probably quite familiar with menu bars. If that’s the case, the VBE menu bar is not very different from the other menu bars you’ve seen before.
The menu bar, basically, contains several drop-down menus. Each of the drop-down menus contains commands that you can use to interact and do things with the different components of the Visual Basic Editor.
One thing you’ll notice when clicking on any menu, is that several commands have a keyboard shortcut that is displayed at that point. Take a look, for example, at the Debug menu and notice all the keyboard shortcuts that appear on the right side of this image:

Component #2: Toolbar

Again, if you’re a computer user, a toolbar is an item that you’ve probably seen many times before. You’re probably aware that a toolbar contains on-screen buttons, icons, menus and other similar elements that you can use while working with the VBE.
The toolbar that appears in the screenshot above is called the Standard toolbar. This is the only toolbar that the Visual Basic Editor displays by default. There are, however, 3 other basic toolbars:
- The Debug toolbar.
- The Edit toolbar.
- The UserForm toolbar.
In addition to the above, the VBE gives you the possibility to customize the toolbars in several ways.
You can change all of these settings by going to the View menu and selecting “Toolbars”. The Visual Basic Editor displays a menu with the 4 different toolbars and the option to access the Customize dialog.

The toolbars with a checkmark to their left are those currently displayed by Excel. You can add or remove a checkmark in order to display or hide a particular toolbar by clicking on its name. For example, in the screenshot below, only the Standard toolbar is being displayed.

If you click on “Customize”, the Visual Basic Editor displays the Customize dialog, which looks as follows:

Using this dialog box, you can control additional aspects regarding the toolbars that are displayed by the VBE. This includes, for example, the possibility of controlling the display of the Shortcut Menus toolbar or adding new toolbars.
You may be wondering what toolbar display set up is commonly applied by VBA users. In practice, there are different opinions.
- Some advanced VBE users use the default settings.
- However, other advanced VBA users display several toolbars.
You can also add commonly used commands that aren’t by default in the Standard toolbar.
Component #3: Project Window / Project Explorer

The Project Window, also known as the Project Explorer, is useful for navigation purposes.
This is the section of the Visual Basic Editor where you’ll be able to find every single Excel workbook that is currently open. This includes add-ins and hidden workbooks. More particularly, each Excel workbook or add-in that is open at the moment appears in the Project Explorer as a separate project.
A project is (basically/simply) a set of modules. If it makes it easier to understand you can take John Walkenbach’s explanation in Excel VBA Programming for Dummies, who says that a project can be seen as “a collection of objects arranged as an outline”.
As explained by Walkenbach in Excel 2013 Power Programming with VBA, each project may have the following nodes:
- A node called “Microsoft Excel Objects” always appears in any project. This node usually contains 2 types of objects:
- #1: Each worksheet in the relevant Excel workbook. In other words, each of the worksheets is considered a separate object.
- #2: The Excel workbook itself, called “ThisWorkbook”.
- The Modules node appears when the project contains VBA modules.
- If the project contains UserForm objects, which are used to create custom dialog boxes, the Project Explorer displays a node called “Forms”.
- A project can also contain class modules (modules that define a class) and, in that case, the Project Window displays a node called “Class Modules”.
- Finally, if a project has references, there is a node called “References”.
Let’s take a look at how all of this looks in the VBE interface:
In the screenshot below, the only project that appears is the Excel workbook “Book 1. xlsm”. Within the Microsoft Excel Objects node, you can see that the Excel workbook has 2 worksheets. Finally, this particular project contains 1 VBA module and, therefore, the Modules node is visible. There are, however, no UserForm objects, class modules or references. Therefore, the Forms, Class Modules and References nodes don’t appear.

You can expand or contract the items that appear in the outline by double-clicking on them or by clicking on the “+” or “-” that appear to the left of each item, depending on the case.

You can also control whether the items that are displayed in the Project Window appear in a hierarchical or a non-hierarchical list. You change this setting by clicking on the Toggle Folders button of the Project Window.

The screenshot above shows items being displayed in a hierarchical list. When displayed in a non-hierarchical list, the Project Window looks roughly as follows:

You can also hide or unhide the Project Explorer itself. I explain how to do this below.
How To Display The Project Window
If you can’t see the Project Explorer, you can make the Visual Basic Editor display it by using any of the following methods:
- Clicking on “Project Explorer” in the View menu.

- Clicking on the Project Explorer icon in the toolbar.

- Using the keyword shortcut “Ctrl + R”.

How To Hide The Project Window
You can hide the Project Explorer by using either of the following methods:
- Clicking on the close button of the Project Window.

- Right-clicking anywhere on the Project Explorer and selecting “Hide”.


Component #4: Properties Window

The Properties Window displays the properties of the object that is currently selected in the Project Explorer and allows you to edit those properties.
Just as with the Project Window, you can hide or unhide the Properties Window. You’re likely to (eventually) work with the Properties Window, particularly in the context of creating UserForms. If you’re just beginning to use the VBE, you probably won’t need this window too much.
In any case, let’s take a look at how you can hide or unhide the Properties Window.
How To Unhide The Properties Window
You can get the Visual Basic Editor to show the Properties Window by using any of the following methods.
- Clicking on “Properties Window” within the View menu.

- Clicking on the Properties Window icon.

- Using the “F4” keyboard shortcut.

How To Hide The Properties Window
You can get the Visual Basic Editor to hide the Properties Window by doing either of the following:
- Click on the Close button of the Properties Window.

- Right-click on the Properties Window and select “Hide”.


Component #5: Programming Window / Code Window / Module Window

As you may expect, the Code Window of the Visual Basic Editor is where your VBA code appears, and where you can write and edit such code. At the beginning, though, the Programming Window is empty as in the screenshot above.
There is a Code Window for every single object in a project. You can access the window of a particular object by going to the Project Explorer and doing any of the following:
- Double clicking on the object. The main exception to this rule are UserForms. If you double-click on a UserForm, the Visual Basic Editor displays the UserForm in Design view, a topic I’ll cover in future tutorials.
- Selecting the object and, then, clicking on “Code” in the View menu.

- Selecting the object and clicking on the View Code icon that appears at the top of the Project Explorer.

- Right-clicking on the object and selecting “View Code”.

- Using the keyboard shortcut “F7”.


Component # 6: Immediate Window
The main purpose of the Immediate Window is to help you noticing errors, checking or debugging VBA code.
The Immediate Window is, by default, hidden. However, as with most of the other windows, you can unhide it. Let’ take a look at how you can do both the hiding and the un-hiding:
How To Unhide The Immediate Window
You can unhide the Immediate Window by doing either of the following:
- Clicking on “Immediate Window” in the View menu.

- Using the “Ctrl + G” keyboard shortcut.

However, as explained in Excel VBA Programming for Dummies, if you’re just getting started with the VBE “this window won’t be all that useful”. Therefore, if you’re just beginning to work with macros and Visual Basic for Applications, you probably don’t need to display the Immediate Window.
If you’re a more advanced user, you’ll probably want to have the Visual Basic Editor show the Immediate Window, since this can be very useful.
How To Hide The Immediate Window
You can hide the Immediate Window using either of the following methods:
- Click the Close button.

- Right-click on the Immediate Window and select “Hide”.


You already know that:
- The VBE allows you to customize several aspects.
- On your way to becoming a macro and VBA expert you’ll probably spend a significant amount of time working with the Visual Basic Editor.
Therefore, its important to have a basic idea of…
How To Customize The Visual Basic Editor
If you want to customize the Visual Basic Editor, the first thing you’ll want to do is open the Options dialog. To do this, go to the Tools menu and click on “Options”.

The Options dialog looks roughly as follows.

As you can see, there are plenty of settings you can modify. In most cases, you can enable or disable an option by clicking on the blank box to the left of it. If there is a checkmark, the option is enabled. If the box is empty, the option is not enabled.
In the screenshot above, the only option that is not enabled is “Require Variable Declaration”.

For the moment, let’s take a look at some of the most common suggestions made by Excel experts. The following sections go separately through each of the 4 tabs in the Options dialog:
- Editor.
- Editor Format.
- General.
- Docking.

Editor Tab
The Editor tab is where you can determine the settings for the Code Window and Project Window. Let’s take a look at the main settings of this tab.

Code Settings
Setting #1: Auto Syntax Check.
This option allows you to determine what happens when you make a syntax error while entering VBA code. There are 2 options:
- If Auto Syntax Check is enabled, a dialog box pops up as soon as the VBE discovers that you’ve made a syntax error. This dialog box gives you a rough idea of what mistake you’ve made. Additionally, the Visual Basic Editor highlights the syntax error by using a different font color (usually red).
Let’s take a look at the VBA code for a very simple macro that deletes rows when some of the cells are blank. The second statement of this macro is “Selection.EntireRow.SpecialCells(xlBlanks).EntireRow.Delete”. If, for example, I press the Enter key after “Selection.”, the Visual Basic Editor gives me the following warning signs:

- If Auto Syntax Check is disabled, the Visual Basic Editor displays syntax errors in a different font color (usually red). Under this setting, no dialog boxes pop on your screen.
In the case of the syntax error used as an example above, the VBE looks roughly as follows:


Should you enable or disable the Auto Syntax Check?
This decision comes down to personal preference and knowledge of Visual Basic for Applications.
You may want to disable the Auto Syntax Check if you:
- Think that having dialog boxes popping up anytime you make a syntax error is annoying.
- Have enough knowledge of VBA in order to find out what is the problem with a statement that has a syntax error.
Some advanced VBA users are of the opinion that Auto Syntax Check should be disabled. The main reason for this is that the VBE highlights the error by (by default) using red font. In this context, the message box displayed by the VBE may be redundant.
However, if you’re a beginner, keeping the Auto Syntax Check enabled can be of great help.
Setting #2: Require Variable Declaration.
This option allows you to determine whether the Visual Basic Editor automatically inserts a statement at the beginning of any new VBA module to require that you define (explicitly) all the variables that you use in those modules. This statement is:
Option Explicit
Note that changing the Require Variable Declaration setting only affects future modules. Modules that are already in existence when you modify the setting are not affected.
As explained in Excel VBA Programming for Dummies, you should get used to defining explicitly all the variables that you use. In that sense, it may make sense to enable the Require Variable Declaration option. Some advanced VBA users say that you should enable Require Variable Declaration. One of the (main) benefits of enabling Require Variable Declaration is the fact it reduces the risk of errors arising out of misspelled variable names.
The case for enabling Require Variable Declaration is even stronger if you’re beginning to use the VBE. In this context, Require Variable Declaration (usually) saves you time when debugging and improves your understanding of Visual Basic for Applications.
Despite the above, some advanced Excel users keep this option turned off.
Setting #3: Auto List Members.
The Auto List Members settings allows you to determine whether, while you’re typing VBA code, the Visual Basic Editor displays a list of options that can be used to complete the statement you’re writing. The list generally includes methods and properties that may apply to the object that you’ve just finished typing.
Let’s see how this looks in practice by using the VBA code of the first macro that I explain in this blog post, and whose purpose is to delete an entire row if there are blank cells in specified cell range. In particular, let’s take a look at the second statement, which is “Range(“E6:E257″).Select” and see what happens while I’m typing it:
The screenshot below shows how the Visual Basic Editor automatically displays a list to help me complete the statement:

If you scroll down the list, you’ll notice that one of the suggestions included in that list is “Select”, which is what we’re looking for.

Auto List Members has several advantages, including the following:
- The Visual Basic Editor may show you properties and methods that you weren’t aware of.
- The list displayed by the VBE updates itself automatically as you type characters. For example, continuing with the same example as above, the screenshot below shows the suggestions made by the Visual Basic Editor after I’ve partially typed “Selection”:

- You can avoid typing. This is due to the fact that you can enter any of the members that appear in the list by selecting it and pressing the Tab key or double-clicking on the relevant member.
- When you use Auto List Members, you reduce the risk of making syntax errors.

Overall, Auto List Members is probably one of the most helpful features of the Visual Basic Editor. Unless you have a very compelling reason to do otherwise, enable it.
Setting #4: Auto Quick Info.
The Auto Quick Info setting allows you to determine whether the Visual Basic Editor displays information about the arguments of functions, properties and methods as you type them.
To see how Auto Quick Info works in practice, let’s go back once more over the statement “Range(“E6:E257″).Select” which I used to illustrate the Auto List Members option above. The screenshot below shows how the VBE helps me while I am typing the range:

Just as the Auto List Members setting, Auto Quick Info is a really helpful feature that you’ll probably want to keep enabled.
Setting #5: Auto Data Tips.
Auto Data Tips works when you’re in break mode, where program execution is temporarily suspended. This occurs for example when debugging VBA code, a topic I will cover in future tutorials.
If Auto Data Tips is enabled, and you’re in break mode, the Visual Basic Editor displays the value of a variable when you place the cursor over it.
Let’s take a look at Auto Data Tips in action. For these purposes, I use the VBA code for a macro that deletes an entire row when the row is completely empty. This particular macro has 2 variables: aRow and BlankRows. In the screenshot below, Excel displays the value of the variable BlankRows (BlankRows = Nothing) when I place the cursor on top of it:

This is another option that you’ll probably like to enable. This is particularly useful in the context of debugging.
Setting #6: Auto Indent.
This setting is self-explanatory. If you have Auto Indent enabled, the indentation of each line of VBA code is the same as the indentation of previous line.
In addition to the above, you can determine what is the indentation width by inputting a value in the Tab Width box. The default number of characters to indent is 4. The value you input here must be between 1 and 32.

Some advanced VBA users use a different number of spaces (usually less than 4) for the tab width. The reasoning behind using less indentation is that it keeps code from extending too far into the right of the screen. Other advanced VBA users suggest that if you’re not using a fixed width font (as I suggest below), it may advisable to increase the number of characters (used to indent) to have clear levels of indentation in your Code Window.
To see how this works in practice, let’s take a look at the piece of VBA code that appears in the previous example where I illustrated Auto Data Tips. The full VBA code of that macro looks as follows:

You’ll notice that, near the end, there are three statements that have exactly the same indentation. The image below highlights them:

Let’s assume that I am writing this piece of code and I’m about to type “BlankRows.Delete”, the second of the 3 statements I highlight in the image above:
- If Auto Indent is turned on, once I press the Enter key after “Application.ScreenUpdating = False”, the VBE takes me to a new row with exactly the same indentation. Notice the location of the cursor in the screenshot below:

- The result of pressing the Enter key is different if Auto Indent is not enabled. Check out what happens when this is the case and compare the location of the cursor between the image below and the image above:
Now, the cursor appears at the left margin of the Programming Window, regardless of the indentation of the previous row.


Appropriate indentation is very important. Therefore, you’ll probably want to enable Auto Indent and set a tab width that works well for your particular circumstances and VBE settings.
Window Settings
Setting #1: Drag-and-Drop Text Editing.
If you enable the Drag-and-Drop Text Editing, the Visual Basic Editor allows you to move pieces of text by dragging and dropping them with your mouse.
Whether you enable this option or not depends on your own taste. I prefer to use the keyboard to copy and move pieces of VBA code. However, you may prefer to use the mouse to drag and drop.
Even if you don’t plan to use it much, enabling Drag-and-Drop Text Editing doesn’t do harm.
Setting #2: Default to Full Module View.
This option makes reference to, and regulates, how procedures are displayed in the Programming Window.
- If Default to Full Module View is enabled, procedures generally appear as a single list in the Code Window.
Take a look, for example, at how 3 macros for deleting rows with empty cells appear in the following screenshot.

- If the option is turned off, you’ll only be able to see 1 procedure at a time. You can use the Procedure Box, which is the drop-down menu at the upper right corner of the Programming Window, to switch between the different procedures.
Continuing with the example of the macros for deleting rows with empty cells, this looks roughly as follows:


You can also turn the Full Module View on and off using the Procedure View (where you can only see 1 procedure at a time) and Full Module View (where you can see all the procedures as a single list) buttons that appear on the lower left corner of the Programming Window.

This is another setting where personal taste is important. I leave Default to Full Module View enabled and my guess is that most Excel users would prefer to do the same.
Setting #3: Procedure Separator.
This setting is kind of self-explanatory. If enabled, it separates the procedures in the Code Window with a bar. This looks roughly as follows:

Without procedure separators, the Code Window (with the same macros that appear above) looks roughly as follows:

You’d probably agree that the first screen is more organized and makes it easier to distinguish between the different procedures. If that’s the case, you’d prefer to enable Procedure Separators.
In certain cases, there may be reasons to disable Procedure Separators but this is not very common.
Editor Format Tab
As implied by its name, the Editor Format tab is where you can format the editor. In other words, here is where you can customize the way the VBA code looks.

On the right side of the Options dialog, you’ll notice that there is a Sample box. Here is where the VBE provides you an example of how the text in the Visual Basic Editor looks under the current settings. For example:

The Editor Format regulates the way the Visual Basic Editor looks using 4 sections. Let’s take a look at each of them.
Section #1: Code Colors.

The Code Colors settings allows you to determine 3 characteristics for any type of text: font color, highlighting color and margin indicator. You can adjust these settings in 2 simple steps.
Step #1: Determine The Category Of Text You Want To Configure.
You can select which type of text you want to adjust by selecting it in the first list that appears on the upper left corner of the Options dialog.

Step #2: Adjust The Foreground, Background and Indicator Settings.
Once you’ve selected the type of text whose settings you want to modify, you can proceed to set the following 3 characteristics by using the relevant drop-down menus:
- The font color, determined by “Foreground” in the Options dialog.

- The highlighting color, set by “Background”.

- Whether the Visual Basic Editor displays an indicator on the margin of the Programming Window, and the color of that indicator.


In order to understand how this looks in practice, let’s take a look at the default settings for 2 types of text.
- As you’ve seen above (when reading about the Auto Syntax Check option), the Visual Basic Editor highlights syntax errors by making their font color red (by default).
The following screenshot shows the configuration for this type of text in the Options dialog:

- One of the screenshots I use above (when explaining Auto Data Tips) shows text highlighted in yellow. This is known as Execution Point Text and its configuration looks as follows:


Code Color settings are, as many other of these settings, a matter of personal taste. I prefer to leave the default colors. However, you may want to play around with the settings to find the configuration you like the most.
Section #2: Font.
As you probably expect, Font settings allow you to determine which font is used to display the VBA code in the Programming Window.
The default font is Courier New and my suggestion is that you keep it. The reason for this is that this font is fixed-width. In fixed-width fonts:
- All of the characters are the same width; and (therefore)
- Use the same amount of horizontal space.
This (usually) enhances the readability of your VBA code. For example:
- All characters are appropriately aligned; and
- You can (more) easily identify multiple or missing spaces.
Section #3: Size.
This is another setting that is self-explanatory. Here is where you can specify the font size used in the Code Window. This setting is a matter of personal taste, although factors such as the monitor you’re using may affect your decision.
Section #4: Margin Indicator Bar.
You can use this setting to determine whether to turn on or off the margin indicator bar.
So, what is the margin indicator bar?
This is the grey bar that appears on the left side of the Programming Window of the VBE. It displays very useful indicators that’ll help you, for example, when debugging your VBA code.
In the last screenshot above, I showed you the Code Colors settings for Execution Point Text. Now, let’s take a look at how Execution Point Text appears in the Code Window. Notice the indicator for this text in the margin indicator bar.

This is one of the settings that you’ll want to turn on. As mentioned above, margin indicators can be very useful when working on the Visual Basic Editor.
General Tab
The General tab of the Options dialog contains settings that fall in a variety of categories such as form, error handling and compiling. Additionally, several of them are relevant only for more advanced topics, such as debugging. Therefore, I only provide a rough explanation of the different options that are available in this tab.
When you’re starting to work with the VBE, the default settings in this tab (usually) work well enough.

Setting #1: Form Grid Settings.
Form Grid Settings allow you to control the way in which the VBE handles UserForms. This is a more advanced topic that I may cover in future tutorials.
Setting #2: Show ToolTips.
ToolTips are descriptions that the Visual Basic Editor can display in order to help you understand a particular toolbar button. If Show ToolTips is enabled, ToolTips are displayed automatically whenever you hover over a particular button.
As an example, the following image shows the ToolTip for the Project Explorer button in the VBE Standard toolbar:

Having ToolTips enabled is generally considered useful.
Setting #3: Collapse Proj. Hides Windows.
This option does what its title says: when you collapse a project in the Project Explorer, it hides any window related to that particular project. This (generally) applies to project, UserForm, object or module windows.
Let’s take a look at how this looks in practice. Notice how, in the following image, the project “Book 1.xlsm” is expanded and you can see the Programming Window that corresponds to Module1.

Compare the above with the next screenshot. In this image, I have simply collapsed the project in the Project Window. As a result, all related windows (the most prominent being the Code Window) are hidden.

If you expand the project again, the windows that have been hidden are restored in their previous positions.
Enabling Collapse Proj. Hides Windows is, usually, a good idea.
Setting #4: Edit and Continue & Notify Before State Loss.
When the Notify Before State Loss setting is enabled, the VBE issues you a notification if the following conditions are met:
- You’re running VBA code.
- You attempt to do something that requires the resetting of all the variables in the module.
Setting #5: Error Trapping.
As implied by its name, error trapping makes reference to how errors are trapped and handled when the VBA code runs.
Let’s take a quick look at what each of the 3 available options does:
- If you choose “Break on All Errors”, break mode is entered whenever there is an error in the VBA code. This includes cases where there may be an error handler or the code is in a class module. This option may be useful when doing debugging. However, at the beginning, I suggest that you don’t choose it.
- When “Break in Class Module” is enabled, break mode is entered if there is an error in the VBA code within a class module. This is the setting suggested by several advanced VBA users.
- “Break on Unhandled Errors” is the default setting. This is also the choice suggested by several advanced VBA users. Under this setting, break mode won’t be entered as long as there is an error handler that traps the error. However, if there is no adequate error handler, break mode is entered.
Setting #6: Compile.
The Compile settings allow you to control the moment at which VBA code is compiled.
Why is this important?
At this moment is not necessary to go too deep into the concept of compiling. For the moment, is enough to understand that applications written in a particular programming language (which can’t be executed by a computer) need to be transformed into another language (that can be executed by the computer). More precisely:
- VBA code must be compiled before it can be executed; but
- Not (absolutely) all VBA code in a project must be compiled before certain (usually the initial) parts of the VBA code can start running.
With this in mind, let’s take a look at the 2 options that appear in the General tab.
Option #1: Compile On Demand.
Compile On Demand means that the Visual Basic Editor compiles the VBA code as is needed. Let’s take a look at an example to understand how Compile On Demand works:
Let’s assume, for example, that you’re working with 5 procedures named “Procedure1” through “Procedure5”. You want to first run Procedure1. Procedure1 calls Procedure2 which, in turn, calls Procedure3. Procedure3 doesn’t call any further procedures.
If Compile On Demand is enabled, Procedure1 is the only procedure that is compiled at the beginning of the process described above. No additional code (from the other procedures) is compiled until the relevant procedure is called. Once Procedure1 calls Procedure2, the code of Procedure2 is compiled. Similarly, once Procedure2 calls Procedure 3, Procedure3 is compiled. Since Procedure4 and Procedure5 aren’t called, their codes are not compiled.
If Compile On Demand is disabled, the code of all the procedures (Procedure1 through Procedure5) is compiled before Procedure1 starts running. As you can imagine, under this scenario, the procedure you want to execute starts running a little bit later since there is more code to be compiled. Additionally, you won’t be able to run the procedure you want (Procedure1) if there is any language or compile error in any of the other procedures (Procedure2 to Procedure5).
Option #2: Background Compile.
This option is only available if you have enabled Compile On Demand. As implied by its name, Background Compile means that idle time is used for purposes of finish compiling a program in the background.
Docking Tab
The Docking tab is used to set the behavior of the different windows of the Visual Basic Editor. More precisely, is used to determine whether a tab docks, a concept that I explain below.

A window is dockable if the box to its left has a checkmark. Otherwise, the window isn’t dockable. In the screenshot below, the only window that isn’t dockable is the Object Browser.

You may be wondering what exactly happens when a window is dockable. The difference between being dockable and not is the following:
- When a window is docked, the VBE fixes that window in a certain spot along one of the edges of the Visual Basic Editor window.
Check out, for example, how the Project Explorer and the Properties Window are fixed along the left edge of the VBE window:

- If windows are not docked, you just have a bunch of windows within the VBE.
Compare the screenshot above with the following image, where the Project and Properties Windows are not docked. This image is only for illustration purposes. You can maximize and minimize these windows by clicking on the relevant buttons at the top right hand of the relevant window.


As you probably expect, I suggest that you dock most windows. Having the different VBE windows docked makes it easier to locate the window that you need when you need it, and generally improves the user experience.
If your screen is not big enough to dock the windows along the edges of the VBE, you may want to undock some of them. If you do this, you’ll probably have to switch between windows in order to get to the one you want. The advantage of having few (or none) docked windows is that you’ll have more space for your Code Window.
How To Add VBA Modules
When you record a macro, Excel automatically inserts a module into the Excel workbook you choose before beginning to record. However, there are other opportunities where you may want to add other VBA modules. You can do this by using either of the following methods.
How To Add A VBA Module: Method #1
Under this method, you can add a VBA module to a project in 2 easy steps.
Step #1: Select Project To Add Module To.
Go to the Project Explorer and select the project to which you want to add a module. For example, in the screenshot below, a module would be added to “VBAProject (Book 1.xlsm)”, which is the only open project.

Step #2: Insert Module.
Go to the Insert menu and select “Module”.

How To Add A VBE Module: Method #2
In this case, you add a module by right-clicking on the relevant project (in the Project Window), choosing “Insert” and clicking on “Module”.

How To Remove VBA Modules
Just as you can add new VBA modules to a project, you can remove them by using either of the 2 methods explained below. As a general rule, you can only remove VBA modules. You cannot remove other code modules, such as those for:
- Worksheets (Sheet#); or
- The workbook (ThisWorkbook).
How To Remove A VBA Module: Method #1
In this method, you can remove a VBA module by following 2 simple steps.
Step #1: Select Module To Be Removed.
Go to the Project Window and select the relevant module. For example, if you wanted to remove “Module2”.

Step #2: Remove Module.
Go to the File menu and select “Remove module_name”, where “module_name” stands for the name of the module you want to remove. For example, when removing “Module2”, the File menu looks roughly as follows:

How To Remove A VBA Module: Method #2
Under this method, you simply right-click on the relevant module in the Project Explorer and select “Remove module_name”. For example, in the case of “Module2”:

Regardless of which of the 2 methods above you use to remove a VBA module, the Visual Basic Editor displays a dialog asking you whether you want to export the module before actually removing it.

Most of the times, the reason why you’re removing a VBA module is because you don’t need the VBA code within it. In those cases, click “No”.
If, for any reason, you actually want to export the module, click on “Yes”. However, if you are interested in learning how to export objects in the Visual Basic Editor, take a look at the next section of this Excel tutorial…
How To Export Or Import An Object In The Visual Basic Editor
Let’s assume that you’re working on a VBA project and want to be able to access a particular object separately and use it, for example, in future VBA projects or share it with your colleagues. To do this, you need to learn how to export and import objects in the VBE.
But first, let’s define exporting and importing:
- Exporting an object means taking a particular VBA object from a VBA project and saving it in a separate file. Graphically, this looks as follows:

- Importing is, basically, the opposite of exporting. More precisely, it means taking a VBA object from a separate file and into a particular VBA project. Graphically:


You can’t export the objects that appear under the References node in the Project Explorer.
Also, if you export a UserForm object, the code associated with that UserForm is also exported. Therefore, exporting a UserForm actually creates 2 separate files.
Now, let’s take a look at how to export an object in the Visual Basic Editor…
How To Export An Object In The Visual Basic Editor
First of all, if your purpose for exporting an object is to use it another project, you may not need to go through the whole exporting and importing process. In most cases, you can simply do the following to have the object in both projects:
- Open both the original and the destination projects.
- Use the mouse to drag the relevant object from the original project to the destination project.
If you still need to export an object using the Visual Basic Editor, simply follow these 3 easy steps.
Step #1: Select The Object You Want To Export.
Go to the Project Window and click on the VBA object you want to export. For example, if you want to export Module2:

Step #2: Instruct The VBE To Export The Object.
You can instruct the Visual Basic Editor to export the object by using either of the following methods:
- Clicking on “Export File…” in the File menu:

- Right-clicking on the object you want to export and selecting “Export File…”.

- Using the “Ctrl + E” keyboard shortcut.


Step #3: Save The File.
Once you’ve instructed the VBE to export the object, the Export File dialog appears.

This dialog probably looks quite familiar. Here you get to save the exported object as any other file. Basically, choose the folder you want to save the file in (in the screenshot below is “Example”), give the file a name (in the image below is “Module2”) and click “Save”.

Note that, as explained in Excel VBA Programming for Dummies, the type of file that is saved depends on the type of object that you’re actually exporting. In all of the cases, however, the result is a text file.
You don’t need to worry about this too much, as the Visual Basic Editor tells you automatically what is the type of the file to be saved. In the example above, Module2 is a Basic File (*.bas).

Once you’ve completed the 3 steps above, the object is saved in a separate file. You can now, among others, share the exported object with your colleagues or use it yourself in other VBA projects.

This exported file is only a copy of the original VBA object. Therefore, the Visual Basic Editor keeps the original object in the project and you can continue working with it as usual.

How To Import An Object In The Visual Basic Editor
You can import an object in the Visual Basic Editor in 3 simple steps.
Step #1: Select The Project.
Go to the Project Window and select the project into which you want to import the object.
For example, if you want to import the object into the Excel workbook named “Book 1.xlsm”:

Step #2: Instruct The VBE To Import An Object.
You can give the Visual Basic Editor the instruction to import an object in any of the following 3 ways:
- Go to the File menu and click on “Import File…”.

- Right-click on the project and select “Import File…”.

- Use the “Ctrl + M” keyboard shortcut.


Step #3: Select The File To Be Imported.
After you’ve instructed the Visual Basic Editor to import a file, the Import File dialog is displayed.

You’ve probably seen very similar dialog boxes before and, therefore, are probably quite familiar with them. Here, you just need to:
- Find the file that you want to import.
- Select the file and click on the Open button on the lower right corner of the screen, or simply double click on the file name.
For example, if you wanted to import the module that was exported in the example above and which is named “Module2”:

Conclusion
If you plan on becoming an expert on macros and Visual Basic for Applications, you’ll have to understand and master working with the Visual Basic Editor. Even though the VBE may look intimidating at first, you now know enough about it to start using it appropriately and start creating macros now.
Since this tutorial is aimed at VBA beginners, I haven’t covered a few advanced topics. If you want to be informed about future tutorials, including those that cover more advanced VBE matters, please enter your email below.
Books Referenced In This Excel Tutorial
- Walkenbach, John (2013). Excel VBA Programming for Dummies. Hoboken, NJ: John Wiley & Sons Inc.
- Walkenbach, John (2013). Excel 2013 Power Programming with VBA. Hoboken, NJ: John Wiley & Sons Inc.