
Last Update: Jan 03, 2023
This is a question our experts keep getting from time to time. Now, we have got the complete detailed explanation and answer for everyone, who is interested!
Asked by: Tessie Marvin
Score: 4.3/5
(49 votes)
Press Ctrl + Home on your keyboard to get to the top of your document. 2. Press Ctrl + Shift + Enter to insert a section break. — A new blank page will appear at the start of your document.
How do you create a title page in Word?
Insert a cover page
- On the Insert tab, click Cover Page.
- Click a cover page layout from the gallery of options. After you insert a cover page, you can replace the sample text with your own text by clicking to select an area of the cover page, such as the title, and typing your text.
How do you create a title page?
You should use your first name, middle initial or initials, and your last name. Skip titles such as «Dr.» If more than one person is responsible for the paper, include all author names. Separate two names with the word «and.» Separate three or more names with commas, placing the word «and» between the final two.
What should be on a title page?
The title page should contain the title of the paper, the author’s name, and the institutional affiliation. A professional paper should also include the author note. A student paper should also include the course number and name, instructor name, and assignment due date.
What is a title page in Word?
If you want to give your document a professional look, you can insert a title page. Word offers predesigned cover pages that you can find in the gallery, or you can insert a blank page and edit it any way you want.
19 related questions found
How do I insert a blank page at the top of a Word document?
To put a blank page into your Word document, place the cursor where you want the new page to begin and then click Insert > Blank Page. The blank page opens, ready for whatever you want to add. Another option when you need a little space is to insert a page break.
How do you create a cover page?
Customize an essay cover page with EDIT.org
- Go to formats on the home page and choose Cover pages.
- Choose the template that best suits the project.
- You can add your images or change the template background color.
- Add your report information and change the font type and colors if needed.
- Save and download it.
How do you add a cover page to a Word document?
Microsoft Word 2016
- Open the first document.
- Place the cursor where you want the second document to be inserted.
- From the Insert tab, Text group, click on the down arrow next to Object and choose Text from file.
- Select the file to be inserted.
- Click on Insert.
How do I create a cover page in Google Docs?
How to make a cover page on Google Docs
- Open Google Docs. You can access Google Docs through your Gmail account or by visiting docs.google.com.
- Open a new document. Under «Start a New Document,» select «Blank Document.»
- Edit the page layout. …
- Add a border. …
- Add text. …
- Format your text. …
- Add an image. …
- Put text on your image.
How do you make a beautiful cover page in Word?
To make a cover page, follow these steps:
- Open a new Word document.
- Click on the Insert menu on the ribbon.
- The dropdown for Cover Page is the first feature you will spot on the menu (under Pages). …
- Pick one from the 16 pre-formatted templates and three more on Office.com.
- Select the one you like and click on it.
How do I insert a blank page in Word without header and footer?
Click or tap where you want to start a new page without the header or footer. Go to Layout > Breaks > Next Page to create a section break. Double-click the header or footer area (near the top or bottom of the page) to open the Header & Footer tab. Select Link to Previous to turn off the link between the sections.
How do you move a page to the top in Word?
And it’s most helpful if you have a heading at the top of each page.
- Click the View tab and check the box for Navigation Pane.
- When the tool opens on the left side of your document, click Headings in the pane.
- Select the heading for the page you want to move and drag it to its new location in the Headings list.
How do I insert a blank cover page in Word without page numbers?
All you need to do is go to the end of the document and insert a Break on the next page as follows:
- Go to the end of the document.
- Click on the Page Layout tab.
- Click on the Breaks option.
- Select Next page. then:
- Go to the end of the document again.
- Click on the PageLayout tab.
- Click on Line Numbers and select None.
How do I set Microsoft Word to APA format?
Follow these instructions:
- Use the keyboard shortcut Ctrl+D to open your font settings.
- Select Times New Roman» as your font.
- Select «Regular» for your font style.
- Select «12» for your size.
- Click on «Set as Default.»
- Select on the «All documents based on the Normal template» and click on «OK.»
How do you do APA format on Microsoft Word?
Add citations to your document
- Click at the end of the sentence or phrase that you want to cite, and then on the References tab, in the Citations & Bibliography group, click Insert Citations.
- From the list of citations under Insert Citation, select the citation you want to use.
How do you do APA format in Microsoft Word?
In your Word document, click on the References tab in the Ribbon. In the Citations & Bibliography group, click the arrow next to Style. Click the style that you want to use for the citation and source. Click at the end of the sentence or phrase that you want to cite.
How do you rearrange pages on word?
Open Word and the document to reorder. Scroll to the page you want to move. Hold down the left mouse button and drag down to the right to select a whole page. Release the mouse and the page is highlighted.
How do I change the page move in Word?
Use the Side to Side command (View tab), to flip through pages with your finger. If you don’t have a touch screen, use the horizontal scroll bar or your mouse wheel to move through the pages. Side-to-side page movement switches off your ability to pick a zoom setting.
How do I rearrange pages in Word for Mac 2019?
Rearrange pages
- In a page layout document, click. in the toolbar, then choose Page Thumbnails.
- Select the page thumbnail, then drag it to where you want it.
How do I remove the Header from the second page of a Word document?
Put the cursor in the header. The contextual «Header & Footer > Design tab will display. In the Option group, turn on (put a checkmark) in «Different first page». The scroll down to the second page and change the header, ie delete it.
How do I remove the Header and footer space in Word?
How to Remove a Header or Footer from a Document in Word 2016
- Edit the document’s header or footer.
- Click the Header & Footer Tools Design tab.
- In the Header & Footer group, click the Header button.
- Choose Remove Header. The header is gone.
- Click the Footer button and choose Remove Footer. The footer is gone.
How do I remove a Header from every page in Word?
Go to Insert > Header or Footer, and then select Remove Header or Remove Footer.
How do I save a custom Cover Page in Word?
Saving As Cover
Go to the Insert tab and pull down the Cover Page gallery. Scroll to the very bottom and click the ‘Save Selection to Cover Page Gallery…’ option. What is this? Give the cover a name, and you’re all done.
How do you make a design on Microsoft Word?
How to Make Designs on Microsoft Word
- Open Microsoft Word. …
- Click the «Insert» tab at the top of the work area. …
- Change the shape’s design elements using the ribbon. …
- Repeat the «Shapes» button process to add additional shapes to the page, layering them or positioning them to form the design.
You should use your first name, middle initial or initials, and your last name. Skip titles such as “Dr.” If more than one person is responsible for the paper, include all author names. Separate two names with the word “and.” Separate three or more names with commas, placing the word “and” between the final two.
How do you make a title page in APA format in Word?
How do I make my first page a title page?
On the View menu, click on Header and Footer. In the toolbar that appears, choose the Page setup image and then the tab Layout. In the menu, under Headers and footers, click the box that says Different first page. In the First Page Header box at the top of page 1, type Running head: and then your abbreviated title.
How do you write the title of an APA paper?
APA title page (cover page)
- Paper title.
- Author name.
- Department and university name.
- Course number and name.
- Instructor name.
- Due date of the assignment.
Does APA have a title page?
A title page is required for all APA Style papers. … Students should use the student version of the title page unless their instructor or institution has requested they use the professional version. APA provides a student title page guide (PDF, 199KB) to assist students in creating their title pages.
What is an APA title page?
The title page should contain the title of the paper, the author’s name, and the institutional affiliation. A professional paper should also include the author note. … APA recommends that your title be focused and succinct and that it should not contain abbreviations or words that serve no purpose.
How do you write an APA paper without a title page?
Beneath the title, type the author’s name: first name, middle initial(s), and last name. Do not use titles (Dr.) or degrees (PhD). Beneath the author’s name, type the institutional affiliation, which should indicate the location where the author(s) conducted the research.
Do I have to write running head on APA paper?
The running head is only required for professional manuscripts intended for publication, not student papers (unless instructed otherwise). An APA running head can be up to 50 characters (including spaces) and is written in all capital letters. It’s left-aligned and appears on all pages, including the title page.
How do you write a paper in APA format?
APA Format Guidelines
- Paper size: Use standard, white, 8.5 x 11–inch paper.
- Margins: Set page margins to 1-inch on all sides.
- Line spacing: Type and double-space your paper. …
- Font: A variety of accessible fonts are allowed. …
- Page header: The page header appears within the top margin of every page of the paper.
What goes on a title page?
The title page should contain the title of the paper, the author’s name, and the institutional affiliation. A professional paper should also include the author note. A student paper should also include the course number and name, instructor name, and assignment due date.
Do you write the words running head on title page?
Note that on the title page you should place the text “Running head:” before your running head. On all subsequent pages you should only have the text of the running head. For example: On the title page it should be “Running head: ABBREVIATED TITLE IN CAPS” (no more than 50 characters).
How do you write a running title?
Guidelines for Writing Running Head in APA Style
The running head is usually written in all capital letters. (For style purposes, the examples in this article use regular title case.) It is placed in a header at the top of the page.
How do you put a running head and page number in Word?
When Should et al be used in APA?
The phrase “et al.” is used with in-text citations only when referencing a source that has three or more authors. Include the name of only the first author’s last name plus “et al.” in every citation.
What does APA stand for?
the American Psychological Association
“APA” stands for the American Psychological Association. This is often the standard format used in the social sciences.
Is there a page number on the title page in APA?
Follow these guidelines to include page numbers in both student and professional APA Style papers: … Insert page numbers in the top right corner. The page number should show on all pages. The title page carries page number 1.
How do I make the first page different in Word?
Start page numbering later in your document
- Go to Insert > Header or Footer > Edit Header or Edit Footer.
- Select Different First Page. …
- In the header or footer area, you should see a label on the first page that says First Page Header. …
- Select Close Header and Footer or press Esc to exit.
What is a running head on a title page in APA?
The running head is a shortened version of your paper’s title and cannot exceed 50 characters including spacing and punctuation.
Does the title page count as page 1?
The first page of an essay should be numbered 1. Therefore, if you are preparing an essay that includes a title page, do not number the title page.
How do I start numbering on page 3 in Word?
Step 2: Insert page numbers
- Put the cursor in the footer of page 3.
- Go to the tab “Insert” and click on the button “Page Number” How to insert a page number (c) Screenshot.
- Choose your preferred design. By default, MS Word inserts page number 3. …
- Click on “Format Page Numbers” …
- Choose “Start at”
Does a research paper have a title page?
The title of your research paper should be written in the center of the page, about halfway down it. You are to write a full title (topic) of your research paper. … Running head is the header that should be used on each page of your writing.
What is a title page in research?
The title page of a thesis or essay is the work’s first page. It lists the title of the work and the name of the author. … The title page is not numbered. Title pages are not required in all citation styles; instead, some styles require that the same information is placed at the top of the essay’s first page.
What is title page in report writing?
The title page is the first page of your article, and therefore it is important to have a well-formatted title page that clearly represents your paper. This page should include all the information necessary for a reader to identify the contents of the article, its author(s), origin of the article, and the article type.
Click the “Title” button in the “Styles” group under the “Home” tab on the main menu ribbon to automatically apply a title style to your title text. Click the “Subtitle” button in the “Styles” group to automatically apply the recommended subtitle style to the selected text.
Contents
- 1 How do you create a title in Word?
- 2 How do I make a fancy title in Word?
- 3 Where is the title bar in Microsoft Word?
- 4 How do I add a title to a table of contents in Word?
- 5 How do you shade text in Word?
- 6 Where is the title bar in Windows 10?
- 7 What is the title bar in Word 2016?
- 8 What does title bar look like?
- 9 How do I insert a title style in a table of contents?
- 10 How do you make titles appear in table of contents?
- 11 Do you include title page in table of contents?
- 12 How do I use dictation in Word?
- 13 Is there a note taking template in Word?
- 14 How do I get rid of widow orphan control?
- 15 Where is the widow orphan control in Word?
- 16 How do you put a box around a border in Word?
- 17 How do I add a title bar?
- 18 Which toolbar is on the title bar?
- 19 How do I change my Windows title?
- 20 What is title bar in Word document?
How do you create a title in Word?
Inserting the Document Title in Your Document
- Position the insertion point where you want the title to appear.
- Display the Insert tab of the ribbon.
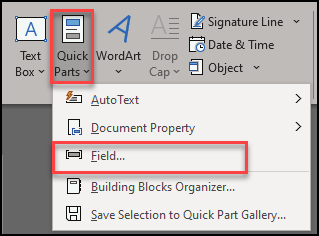
- Click the Quick Parts tool in the Text group and then choose Field.
- In the Categories list, choose Document Information.
- In the Field Names list choose Title.
How do I make a fancy title in Word?
Create a title style in Word to save time and mouse clicks
- Open a blank document and type Title.
- Select Title and click the Bold and Center buttons on the Formatting toolbar or Home tab.
- Change the font to 22 points.
- Click anywhere in your title text.
Where is the title bar in Microsoft Word?
We will start with the Title bar, which is located at the very top of the screen. On the Title bar, Microsoft Word displays the name of the document you are currently using.
How do I add a title to a table of contents in Word?
(3) To add a Heading to the Table of Contents, highlight the added heading on the document, and click on the correct “Heading” button ( e.i. Heading 1, or Heading 2, etc.) at the “Styles” Section from the “Home” Tab.
How do you shade text in Word?
Apply shading to words or paragraphs
- Select the word or paragraph that you want to apply shading to.
- On the Home tab, in the Paragraph group, click the arrow next to Shading.
- Under Theme Colors, click the color that you want to use to shade your selection.
Where is the title bar in Windows 10?
The title bar is at the top of every window in Windows 10. This includes three buttons at the top right corner of the window and a title for each open window. There are a number of ways you can customize the title bar with a few extra software packages and the options included in Windows 10.
What is the title bar in Word 2016?
name of current document
Title Bar: The title bar displays the name of current document. For the first time it is document when you saved your document the will display on the title bar. C. Sign in: Here you can use most of Microsoft word functionality.
What does title bar look like?
A title bar is a small strip that extends across the top of a window. It displays the title of the window and typically includes the close, minimize, and maximize buttons. In macOS, these buttons are on the left side of the title bar, while in Windows, they are on the right.
How do I insert a title style in a table of contents?
To verify that the Title style will now be added to the Table of Contents:
- Choose the References tab.
- Click Table of Contents.
- Choose Insert Table of Contents…
- Click the Options… button.
- Scroll through the Available styles: list to make sure that the Title style now shows up and that it has the desired TOC level.
How do you make titles appear in table of contents?
To customize your existing table of contents:
- Go to References > Table of Contents.
- Select Custom table of contents.
- Use the settings to show, hide, and align page numbers, add or change the tab leader, set formats, and specify how many levels of headings to show.
Do you include title page in table of contents?
The Table of Contents should appear after the title page in the document. To create the Table of Contents manually, start a new page right after the title page.The Table of Contents should be on its own page. Do not include the introduction or a dedication on the same page as the Table of Contents.
How do I use dictation in Word?
Dictate in Word For the Web
Open a document and click the Dictate icon on the Home Ribbon and dictate your text. When finished, click the icon again to turn off Dictation. To see other languages available for dictation, click the Down arrow next to the Dictate icon and choose the language you’d like to use.
Is there a note taking template in Word?
Organize your notetaking with this notes template in Word. With place for a title and bullet points, a Microsoft Word note taking template is perfect for lectures, important meetings or teleconferences, sales pitches, and more.
How do I get rid of widow orphan control?
How to Turn the Widow Orphan Control Setting On or Off in Microsoft Word
- Open a document in Word.
- Select everything with Ctrl + A.
- Click the Home tab.
- Click the Paragraph button.
- Select the Line and Page Breaks tab.
- Click Widow/orphan control to remove the checkmark.
- Click OK.
Where is the widow orphan control in Word?
Control widow and orphan lines
On the Format menu, click Paragraph, and then click the Line and Page Breaks tab. Select the Widow/Orphan control check box.
How do you put a box around a border in Word?
Boxing text or paragraphs
Select the text you want to box in. Choose the Borders and Shading command from the bottom of the Border menu. The Borders and Shading dialog box appears. If you want to apply the border to only text (words) and not to the entire paragraph, choose Text from the Apply To drop-down list.
How do I add a title bar?
There are two ways to change title bar for your activity:
- Design time (that is, change title in AndroidManifest. xml file).
- By coding (that is, you can code to change the activity title).
Which toolbar is on the title bar?
The toolbar that is present on the left of the title bar is most frequently used commands in the application. Toolbars are mostly present in the word, office suite, web browsers and other such computing languages. Mostly, the toolbar hides the menu bar by default.
How do I change my Windows title?
Right-click on one of the selected windows commands and click Change Window Title. You can also use the Actions button to select the Change Window Title option. Set a common Window title for the selected windows that your want to change and click OK. The windows titles are changed to the new title that you’ve assigned.
What is title bar in Word document?
• Title Bar: A horizontal bar at the top of an active document. This bar displays the. name of the document and application. At the right end of the Title Bar is the Minimize, Maximize and Close buttons. •
Something that really lights up your documents, especially when you are producing a thesis, book, long document or the like is a title page. These typically contain information about what the document is called, the author, date, and other pertinent information. They can also contain some graphics to draw the reader in and get them excited to read what you have written. Let’s see how you can make one and add some pizzaz to your Word document.

Do You Always Need a Cover Page?
The simple answer is no, of course not. However, I have found that when giving in a paper, report to a superior, a nice cover page always creates a good first impression. If you are on the border between an A or a B, the cover page will often get you over the line. It may be subconscious, but people like a cover page when they are checking through a paper. So, in my opinion, always go on the side of just creating one instead of not being sure. They are easy enough to make, so just ahead and make one.
It’s important to point out here that although the title of this post is about a title page, in Microsoft Word the correct phrase to use is Cover Page. In fact, this is what Microsoft uses for the button that we will get to know very soon.
Creating a Title Page Using the Built-in Microsoft Word Options
In order to add a cover page to your document, or even if you want one to start out, there are a number of different options available to you.
Using the Built in Style
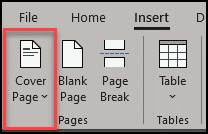
- Navigate to the Insert tab on the Ribbon and select the Cover Page Button:
- Simple select one of the options that appear:
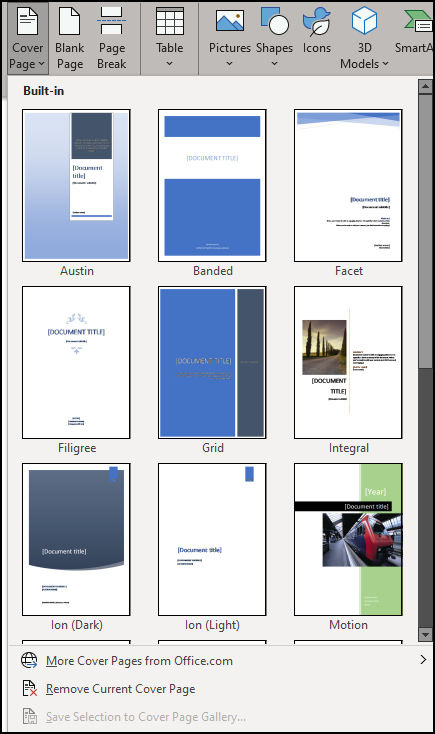
For this example let’s go with the Ion(Dark) option
As you can see, there are a number of different fields in this option and there are two different ways to fill them in. These things are called Quick Parts and you can learn more about them in the dedicated post about them.
If you are doing it just for one document though, what I recommend is just to type in what you want.
Method #1 – Just Fill Them In
- Navigate to the different fields in the cover page and click.

- Press delete and then type in your title:

That’s it, easy as pie.
However, if you are constantly using Cover Pages then it’s worthwhile spending a little bit of time knowing how to use the Quick Parts of Field and this will save you time in the long run.
Method #2 – Using Quick Parts in Your Cover Page
As you can see on the cover page that I’ve created, there are a number of fields that are empty:
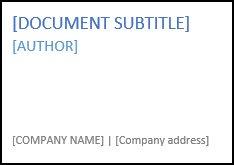
The reason for this is that they are blank somewhere else in the document. What you can do is to make them self-populate or fill in themselves by using the settings that are available in Word. In order to do so, do the following:
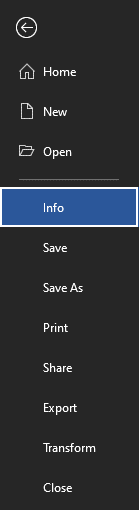
- Navigate to the File tab on the Ribbon:
- Select the Info option:
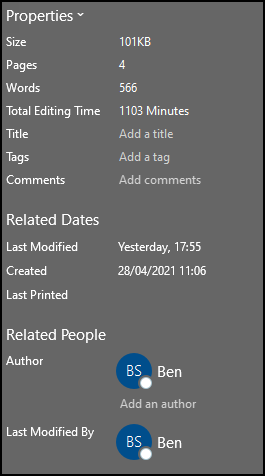
- On the right side of the screen, you will see the Properties list:
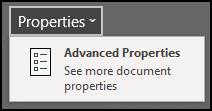
- Click on the Properties Drop down list and select the option there
- A pop up opens and from there you can add all the main details that you want
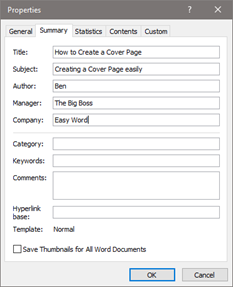
- As you can see, I have actually filled this in so that when I now create a new cover page, this information will be automatically filled in:
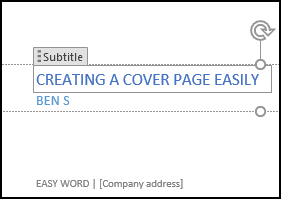
As you can see from the image, the Subtitle field has been selected and in fact, it has now been automatically filled in.
Once you have saved the general information for the document, you have it saved in all documents. This means that whenever you create a cover page, the general information is already there. This is important if the document goes through a number of revisions.
In truth though, I feel that these things are pretty arbitrary aside from the company name. What I do is just type them in when I need to because playing around with the settings behind the scenes can just be more trouble than it’s worth. However, I have provided these instructions just for you to experiment and see what is best for you.
Cover Page Template Limitations
Whilst there are plenty of different cover pages to choose from, oftentimes you want something that is unique to you and to the document. It’s obviously difficult to cater for everyone and even though there are many cover pages available both in your normal Word and online, you sometimes want something for you. Therefore it’s important to know how to make a cover page that is styled the way you want.
How to Create Your Own Cover Page in Word
The first thing that you want to do when you are creating a unique cover page is to plan what you want there. Here is a helpful list of the options that you can choose from:
- Your Name
- Company
- Title
- Date
- Border
- Photo
- Opening excerpt
- Class
- Professors’ name
- School
- Number of pages
This of course is just a general list and you can choose whatever you want. For this example I’m going to use a border, My name, Company, Title, and Date.
Step By Step Cover Page
Create a new page at the top of the document you are working on.
I’m just going to create a simple border by inserting some lines around the page:
I want to put the date at the top right corner, near the top. Then I want the Title in the center of the page with my name underneath it. Finally, I want the Company name at the bottom of the page.
In order to put the text where you want it, it’s important that you use text boxes and not just plain text such as typing in where you want. The reason why this is so important is that without doing so, only the frame will be saved and not the rest of the cover page. Here is how it looks now:
Obviously since I have created this I want to be able to use it wherever I want in new documents. For this reason we have to save it as such.
To Save Your New Cover Page
In order to save your new cover page you need to select everything. The easiest way to do so is by selecting Ctrl + a on your keyboard. It should look like this if you have done it correctly:

Now, navigate to the Insert menu and select the Cover page option again. You will see at the bottom of the option one that states: Save Selection to Cover Page Gallery
Once you have selected this you will get a pop up window where you can fill in all the pertinent information that you like:

For this example I’m going to call it Basic Cover Page.
Now, when I look for it in the Cover Page drop down, I can see it clearly:

Using Quick Parts and Field to Create a Cover Page
Although I’m not the biggest fan of fields in Word, for some of the information it’s useful to create the cover page with fields from quick parts instead of having to type the information in yourself.
What will happen is that when you use the fields as part of your cover page, they will automatically update to whatever you have set. Let’s see how:
In order to use fields in your cover page, do the following:
- Whilst the curser is in the text box, on the Insert tab of the Ribbon, click on Quick Parts and then on Field.
- In this instance I want to add the date so in the window I need to select date
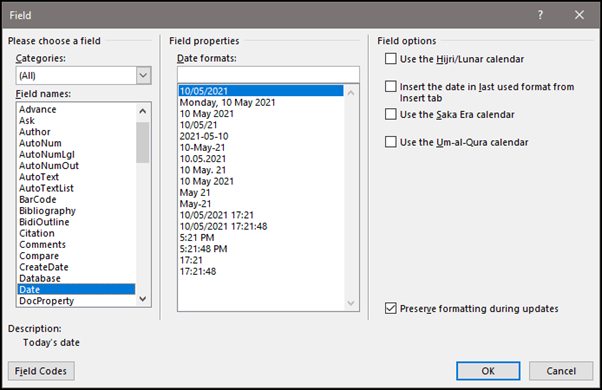
There are many different options as you can see, but I’m just going to select the top one. It’s important to note here that you can have your own style here as well. Just select the one that’s closest so what you want and then edit it in the box above the Date formats.
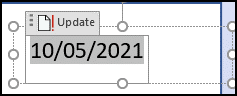
- Press OK and your date will now appear in the correct format in your new cover page
As you can see, you can Update this whenever you want by simply pressing on the Update button.
You can use this method for any number of fields that you want to add.
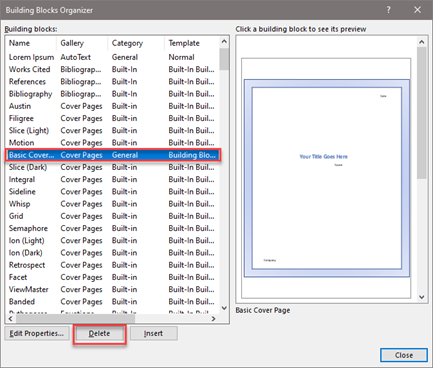
Removing a Cover Page That You Have Saved
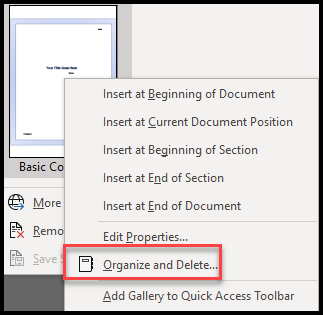
If you have made a mistake and want to remove the cover page that you have created, that’s pretty easy to. All you have to do is right click on the cover page that you want to delete and then select the organize and delete.
You are then taken to a new window with the cover page in question selected. All you then need to do is to hit delete, and you have removed the cover page:
In Summary
We have seen how you can use the inbuilt features of Word to create beautiful cover pages. You can take them further by editing them and saving them as such. Or you could create a title page to your own liking and save it for further use. I hope you have found this post helpful. If you have any questions, please leave them below and I will do my best at answering them. Good luck in creating beautiful cover pages yourself!

What is title page in MS Word?
A cover page also called a title page, is the first page of a book, thesis, research paper, project, assignment, proposal or any such document. The purpose of the inclusion of a cover page is to provide the general information about the document.
How do you put a Cover Page in the middle of a word document?
Add a Cover Page to a Document. Open up any document in Word and click on the Insert tab on the Ribbon. On the Pages section of the Ribbon on the far left, click on the button labeled Cover Page.
Why is a title page important?
The title page is the first page of your article, and therefore it is important to have a well-formatted title page that clearly represents your paper. This page should include all the information necessary for a reader to identify the contents of the article, its author(s), origin of the article, and the article type.
How do I number pages in Word without a cover page?
In the Header & Footer section of the Insert tab, click Page Number and select Format Page Numbers from the drop-down menu. On the Page Number Format dialog box, select Start at in the Page numbering section. Enter 0 in the edit box and click OK. This allows the second page of your document to be labeled as page one.
What all should be on a title page?
The professional title page includes the paper title, author names (the byline), author affiliation(s), author note, running head, and page number, as shown in the following example.
How to add a title to a Word document?
1 Open your document in Word 2013. 2 Select the Insert tab at the top of the window. 3 Click the Header button, then choose one of the listed options, based on the preferred style that you would like to use for your document title. … 4 Delete the placeholder text, then type the document title.
How to put a document title at the top of every page?
Step 1: Open your document in Word 2013. Step 2: Select the Insert tab at the top of the window. Step 3: Click the Header button, then choose one of the listed options, based on the preferred style that you would like to use for your document title. 5 Ways to Free Up Storage Space on an iPhone. Report this Ad.
How do you insert a cover page in word?
First, select everything in the document (that’s why we recommend starting this in a blank document) by pressing Ctrl+A. Next, head back to the “Insert” tab and then click that “Cover Page” button again.
How do you insert page numbers in a Word document?
Step 1. To insert page numbers in Word document, you can open the target Word file, click Insert tab at the top Ribbon bar. Under Insert column, you can find and click Page Number button in Header & Footer section. Step 2. A list of options will display that allows you to choose where you want to display the page numbers.
If you want to give your document a professional look, you can insert a title page. Word offers predesigned cover pages that you can find in the gallery, or you can insert a blank page and edit it any way you want. This article describes how to do both. In this article. Insert a predesigned cover page.
Where is title page in Word?
On the Insert tab, in the Pages group, click Cover Page. Click a cover page layout from the gallery of options. After you insert a cover page, you can replace the sample text with your own text by clicking to select an area of the cover page, such as the title, and typing your text.
How do you create a cover page in Word?
1] How to insert a custom Cover Page into a Word document Click the Insert tab. On the Insert tab in the Pages group, click Cover Page. A drop-down list will appear displaying built-in style templates of cover pages; select the style you want. A cover page will appear in the document; make your changes to it.
What information is on a title page?
It lists the title of the work and the name of the author. In the case of an academic paper, the title page also lists class information (such as the course name and number), identification information (such as the student number), the date, name of the professor, and name of the institution.
How do you create a title in Word?
Inserting the Document Title in Your Document
- Position the insertion point where you want the title to appear.
- Display the Insert tab of the ribbon.
- Click the Quick Parts tool in the Text group and then choose Field.
- In the Categories list, choose Document Information.
- In the Field Names list choose Title.
How do I insert a blank page over a Word document?
Press Ctrl + Home on your keyboard to get to the top of your document. 2. Press Ctrl + Shift + Enter to insert a section break. – A new blank page will appear at the start of your document.
What is a good title page?
The title page should contain the title of the paper, the author’s name, and the institutional affiliation. A professional paper should also include the author note. A student paper should also include the course number and name, instructor name, and assignment due date.
What are the example of title page?
The professional title page includes the paper title, author names (the byline), author affiliation(s), author note, running head, and page number, as shown in the following example. Follow the guidelines described next to format each element of the professional title page.
What is the difference between a cover page and title page?
Formatting the Title Page in APA. The is the main cover page of any book or . This page not only includes a running head and the title of your work but it also includes affiliation of the work.
What are the different parts of the title page?
The title page is comprised of a few key elements:
- Running head (or shortened title) and label.
- Page number.
- Full title of the paper.
- Author byline: first name(s), middle initial(s), and last name(s)
- Affiliated Institution(s) or Organization(s)
- Author note (optional)
How do you create a title page in Microsoft Word?
To create a title page Scroll to the beginning of the piece. Click the Page Layout tool . Choose Page Layout > Insert Blank Pages. For Insert, enter 1. Choose Before Page and enter 1 (these are the default values). Then click OK. Click the Text tool . You’re about to create the first piece of text (title) information.
What is title page in APA style?
An APA title page is simply a title page that is formatted according to the rules in the APA’s style manual. The title page appears at the beginning of the document and may also be called the cover page.
What is APA style in Microsoft Word?
Creating a paper in Word using the APA format means using a format designed by the American Psychological Association (APA). These papers are commonly written on topics of science or psychology. Combining the APA style with the Word formatting is as simple as understanding how the two formats go together harmoniously.
What is a cover page in Microsoft Word?
A Word cover page introduces the document with a title, an image or both, providing relevant information about the document. For example, a periodic report on business development may open with a cover page that includes your company logo. Word treats the cover much as it does any page, and offers templates for the cover’s design.
A book isn’t a book without a title (even if it’s “Untitled”). And, a book’s title page is essential for a professional-looking work. Whether you’re publishing in ebook, print book, or both, it’s important to include a title page. But what is a title page? What purpose does it serve? And, what should be on it? Luckily, the answers to all these questions are pretty simple. So read on to find out all about a book title page.
This is a part of a series where we are analyzing all of the different parts of a book, and how to best craft them. If you’d like to learn more about the different parts of a book, be sure to check it out here.
In this article, you will learn:
- What a title page is in a book
- How to format a title page for your book
- Title page examples
- What goes before and after a title page
Table of contents
- What is a Title Page in a Book?
- Half Title Page
- What is the Page Behind the Title Page Called?
- Industry Standards for Title Pages
- How Do You Format a Title Page for a Book?
- Are Title Pages Different for Fiction and Nonfiction Books?
- Title Page Examples
- What Comes After the Title Page?
What is a Title Page in a Book?
The title page is one of the first pages in any book. It signals the beginning of the front matter and shares the title, subtitle, author, and publisher. Of course, not all books these days have a publisher. And many books don’t have a subtitle. In these cases, it just lists the title and the author or authors.
You may be wondering why books even have a title page. After all, doesn’t the book cover have the title on it? Why reiterate the name of the book?
Title pages are useful for referencing and cataloging. They help libraries and academic citations. And, believe it or not, many books have two title pages. One is simply called the “title page” and the other is called the “half title page.”
Half Title Page
You may be able to take a book off your bookshelf and open it up to see two different title pages. The first one, known as the half title, only has the name of the book and nothing else. The second one has the name of the book, the subtitle (if there is one), the name of the author(s), and the publishing company. Sometimes the publisher logo is located here, too.
The half title book page is from back when books had to be bound in a separate location than where they were printed. The half title book page served two purposes back then: to protect the actual title page in case something happened and the first page was ripped, and to tell the bookbinder the name of the book (presumably so they didn’t put the wrong cover on it).
Having two title pages is no longer the norm, but you can still find books with both.
Having trouble thinking of a book title? Check out this book title generator.
What is the Page Behind the Title Page Called?
The page behind the title page is called the title verso. You may not be surprised to learn that verso is Latin for “reverse.” Sometimes this page is simply known as the “Copyright Page.” It contains important information such as the:
- Copyright notice
- ISBN number
- Date of publication
- Publisher information
- Disclaimers
- Cover or book design attribution
- Formatting attribution
Not every book has an ISBN or a publisher, in which case these things are left off. The same can be said for cover design (if you designed it yourself) and formatting. However, it’s important to include the copyright information, date of publication, and any disclaimers you deem fit.
Industry Standards for Title Pages
When developing your title page, it’s important to know what is the industry standards for that title page. Otherwise you could get it wrong and you’d be left with a book that is unprofessional.
While readers are unlikely to know these industry standards, they will understand them unconsciously, and it will make your book appear cheap and unorganized. So with that said, here are some best practices to include in your title page:
- The title of your book
- The subtitle of your book
- The name of the author (or editors if this is an anthology)
- The name of the illustrator, if applicable
- The name and location of the publisher
- The title’s typeface should match or compliment the cover’s typeface
- The title page must be located on the right side (the left side is typically left blank)
So how do we actually include this title page in our book? Well there are a few ways to do this…
How Do You Format a Title Page for a Book?
Creating the title page for your book depends on the software you are using. For this article, let’s look at two different options:
Formatting a Title Page in Microsoft Word
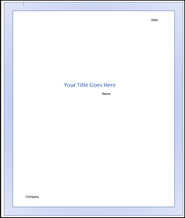
Formatting a title page in Word is possible, but it’s a slightly complicated process. Word is capable of formatting books, but it’s also not what it was built for. See this post for more on formatting with Word. Here is an example of what a title page in Word might look like:
WARNING: Before you use Word to format your book and title page, make sure you have the appropriate license for whatever font(s) you use in your book. Most fonts in Word are licensed for personal use only. If you want to create a product for publication (digitally or in print), you will need to buy an expensive license or find a different font. Thankfully, programs like Atticus only include fonts that you have 100% permission to use.
To create your title page in Word, follow these steps:
- Step 1: Click the “Insert” tab
- Step 2: Click the “Cover Page” button in the Pages group
- Step 3: Click on the cover page that you prefer. Make sure you have the space to include the industry standard fields above, and make provisions for the following:
- Make sure the style matches your book and genre
- Ensure you have the commercial license for any fonts used
- Don’t pick something that is overly styled unless this is an intentional choice
- Step 4: Insert any needed images
- Step 5: Insert the appropriate text, especially the title, subtitle, author/editor, and publishing company
- Step 6: Ensure your trim size is properly adjusted
- Step 7: Make sure your margins are correct, especially the “gutter” margin which will need to be larger than the rest
- Step 8: Make sure the title page is displaying on the right side, and that the left page directly opposite the title page is blank
- Step 9: Convert to PDF to see how it looks (you can also upload to KDP without publishing to see if it passes their automated formatting inspection)
You may need to tweak this here and there, but ultimately you should be left with a passable title page. Now, if you want to save some time in this process and boil it all down to three simple steps, read on…
Formatting a Title Page in Atticus
By far the easiest option is to use a program like Atticus, which provides a pre-made template and automatically generates the title page for your book. All you have to do is enter the information and you’re good to go!
Here’s an example of the preview of a title page on Atticus.
Made in Atticus.io
As you can see, the font size varies, separating each element from the other. This makes it look good and signals to the reader that some time and effort went into the book. It’s a small thing, but it’s important to get it right.
So whether the reader has a printed book in their hand, or they’re reading an ebook, a good title page is important.
Keep in mind that all title pages are on the right hand page when you open the book (something Atticus automatically adjusts for). This may not matter for ebooks, but it’s best to make sure this is the case on your print book.
Also, remember that the title page has no page number.
Are Title Pages Different for Fiction and Nonfiction Books?
Both fiction and nonfiction books generally stick with the same formatting styles. Academic or textbooks may have more information on the title page due to the number of authors involved in the work.
Title Page Examples
Here are a couple of examples of title pages for various genres. Notice how each contains the title, author name, and publisher at the very least. The good ones include artwork as well.
What Comes After the Title Page?
As mentioned above, the page right after the title page is called the verso or copyright page. However, when putting your fiction or nonfiction book together, it’s important for the author to know what comes next in the front matter before the main text begins.
Here’s the most common formatting order for the front matter of a book:
- Title Page
- Copyright Page
- Table of Contents (i.e. chapter headings)
- Dedication Page
- Acknowledgments
- Foreword
- Preface
- Epigraph
Not every book has each of these elements. Again, it’s up to you as the author to decide which ones you want to include. However, the first three elements are the most important and every nonfiction and fiction book should have them.
How to Ensure an eReader Doesn’t Skip Your Title Page
You may have noticed that when you open an eBook on a Kindle or other device, that it usually doesn’t start at the very beginning (i.e. the cover of your book).
Instead, Amazon and other retailers estimate where the book starts, and in some cases this can lead to a reader starting with chapter 1 and completely missing your title page!
So, assuming you want people to open to your title page (and you might not), you need a way for readers to start there, instead of chapter 1.
Thankfully, Atticus is the only formatting program that lets you do this.
All you have to do is go to the formatting settings and scroll down until you find the section labelled Ebook Settings.
From there, you simply select where you would like readers to start when they open your book for the first time.
This inserts a special code into the eBook file that lets Amazon know exactly where to open the book for new readers. Simple as that!
Atticus is the currently the only formatting software that lets you customize the Start Page of your book, and not only that, but it also works on virtually every platform, and it’s over $100 cheaper than the competition (which does not have this Start Page feature).
Check Out Atticus Today!
Now It’s Time to Make Your Own Title Page
Although seemingly simple, the title page is often the first thing the reader sees. It should be professional and well-formatted. All books need a title page, although more than one isn’t really necessary these days.
You can use an all-in-one writing software like Atticus to get this done, or you can do it yourself in your writing program of choice. Either way, a great title page is a gateway to a great book!
Why Do I Need a Title Page?
The Publication Manual of the American Psychological Association states that «The title page includes five elements: title, running head, author byline, institutional affiliation, and author note» (pg. 229). The title page should include the page number «1» (pg. 229). Generally, however, an author note is not required if the paper is part of a college course, and the paper is not meant for publication.
In general, a title page is a greeting to the reader. It quickly offers
the reader pertinent information about the paper: its topic and tone, the
identity of the writer, and the writer’s organization. In professional writing,
an APA title page even offers the reader a brief biography of the writer. Just
as shaking someone’s hand gives a speaker an opportunity to prepare to speak to
a listener, a title page gives the writer an opportunity to prepare to
communicate with a reader.
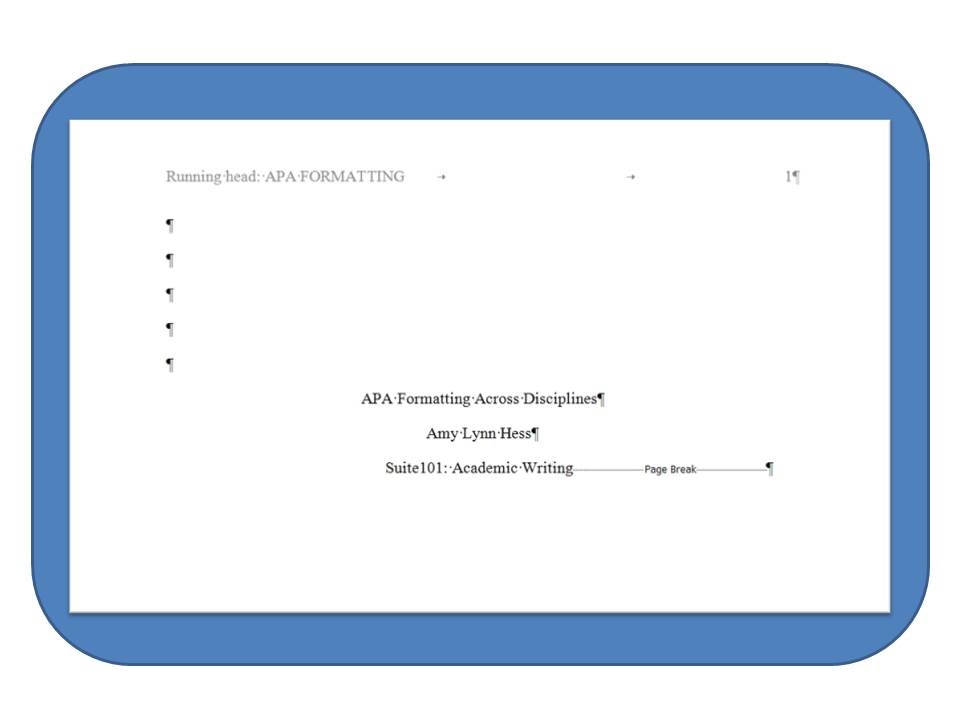
What Does a Title Page Look Like?
A title page is a neat and tidy, very specifically
formatted, first page of the paper. It includes the running head at the top of
the page and the title block in the upper half of the page. The title block is centered, and it can be three or four
lines long. It includes the title of the paper, the writer’s name, and the
writer’s organization.
Just like a suit and tie can impress a potential
employer, a dressed-up title page can impress a reader.
How Do I Create a Title Page in MS Word 2010?
Creating a 6th Edition APA title page can be completed
properly in Microsoft Word 2010 pretty simply.
- Take a look at your whole page by using the «Print
Layout» view accessible from the «View» tab. - From the «Home» tab, choose to show the hidden
formatting marks by clicking on the symbol that looks like a widened
backward-facing «P.» This is called the pilcrow symbol. You’ll now
see your hidden formatting marks. They will not print on your final copy. - Double-click in the header area of the page. That opens the
«Header and Footer» «Design Tools» menu, and that will
allow you to create your running head. - After you create your running head, double-click back into
the center area of the page to leave the header area. The header will display
as light grey, but it will print the same as the rest of your text. - Now, type CTRL and A on the keyboard at the same time.
That’s how you select everything in a document. You’ll get a light blue box.
Without clicking anywhere else on the screen, from the «Home» tab,
change your font to Times New Roman 12. - If the light blue box disappears, select all, again. Without
clicking anywhere else on the screen, from the «Home» tab, now change
your «Paragraph» settings by clicking on the square box next to the
word «Paragraph.» - In the popup menu, set your «Before» and
«After» spacing to 0, and set your «Line Spacing» to
«double.» Check «Don’t add space between paragraphs of same
style.» - Click «OK.» Your font and line spacing is now
properly set for your entire paper. - Type enter four times. You’ll see four double-spaced pilcrow
symbols appear. - Under the «Home» tab and «Paragraph»
menu, click the option to center your text. - Type your title in proper title case. If your title is quite
long or has a subtitle, you may use two lines for your title. - On the next double-spaced line, type your name.
- On the next double-spaced line, type your organizational
affiliation. For example, if you’re writing content to deliver to your 4-H
club, the name of your club might appear here. If you’re writing a paper for
school, use the name of your school or class, depending on the preference of
your professor. - If required, skip a space and complete your short author’s
biography. This is generally only required for peer-reviewed publication
submissions. - After typing the final line of your title block, insert a
page break from the»Insert» tab and the «Pages» menu. Your
cursor will now appear at the very top of the next page.
Want to learn more about APA formatting? Try
Copyright Amy Lynn Hess. Contact the author for permission to republish.