
A header is the top margin of each page, and a footer is the bottom margin of each page. Headers and footers are useful for including material that you want to appear on every page of a document such as your name, the title of the document, or page numbers.
Contents
- 1 How do I use headers in Word?
- 2 What is header in simple words?
- 3 What is difference between header and footer?
- 4 What are the uses of header?
- 5 What is header in Word?
- 6 What is a header in writing?
- 7 What is header with example?
- 8 What is a header in an essay?
- 9 What is a header on a document?
- 10 What is a header example?
- 11 What do you write in a header?
- 12 What is a header in construction?
- 13 What is the use of header in a document?
- 14 What is a header in computer?
- 15 How do I delete a header in a Word document?
- 16 What is a header in a paper?
- 17 What is a header in it?
- 18 How do I view headers in Word?
- 19 What is a heading example?
- 20 What is a header in a letter?
Insert a header or footer
- Go to Insert > Header or Footer.
- Choose the header style you want to use. Tip: Some built-in header and footer designs include page numbers.
- Add or change text for the header or footer.
- Select Close Header and Footer or press Esc to exit.
A header is a separate bit of text at the top of a printed page. A header might be the title of the novel you’re reading, which is repeated on each page of the book. One kind of header — also called a “page header” — is a chapter title, which is often printed at the top of every page.
What is difference between header and footer?
Header and footer are areas at the top and the bottom of a page. A header is at the top of the page and footer is at the bottom of the page. This is the main difference between header and footer. Both header and footer are set up to stay constant (the area) throughout a document.
Headers and footers are typically used in multiple-page documents to display descriptive information. In addition to page numbers, a header or footer can contain information such as: The document name, the date and/or time you created or revised the document, an author name, a graphic, a draft or revision number.
A header is the top margin of each page, and a footer is the bottom margin of each page. Headers and footers are useful for including material that you want to appear on every page of a document such as your name, the title of the document, or page numbers.
In typography and word processing, a page header (or simply header) is text that is separated from the body text and appears at the top of a printed page.In academic writing, the running head usually contains the page number along with the author’s last name, or an abbreviated version of the title.
A header or heading is text at the top of a page in an electronic document or hard copy.For example, in Microsoft Word, a header could be created in a document to display the page number of each page. By contrast, a footer is at the bottom of a page in an electronic document or hard copy.
A: A heading is a short phrase that indicates what the next section of your essay, report or thesis is all about. Headings are used to organise the presentation of your argument and lead the reader through the paper. The reader should be able to preview what your paper covers—your argument—by reading just the headings.
A header is text that is placed at the top of a page, while a footer is placed at the bottom, or foot, of a page. Typically these areas are used for inserting document information, such as the name of the document, the chapter heading, page numbers, creation date and the like.
The definition of a header is a person or thing that puts tops on something, or is information at the top of pages in a paper, or is slang for a headfirst fall.An example of a header is the title and page number on the top of the pages in a report. An example of a header is falling headfirst down a ski slope.
Headers include: Title of Document. Sub-Title or Chapter or Section.
Footers include:
- Name of Author (very important)
- Date of Publication.
- File Name (optional)
- Version Number (optional)
- Page Number.
A header in the construction and engineering world is a beam over an opening that disperses the structural load to the outside of the opening to keep structural integrity. Otherwise, the load from the roof, floor, or whatever is above the opening can lead to stress that can cause cracks, shifting, or even worse.
Headers and footers are the top and bottom sections of the document respectively. They are separate sections from the main document, and are often used to hold footnotes, page numbers, titles, and other information. The Header and Footer options each contain a dropdown menu.
A header is a part of a document or data packet that carries metadata or other information necessary for processing the main data. It is a widely used term in information technology that refers to any supplemental data that are placed before the actual data. The header usually marks the start of the data.
Remove all headers and footers
- Go to Insert > Header or Footer, and then select Remove Header or Remove Footer.
- If your document has more than one section, repeat this process for each section.
The header is a section of the document that appears in the top margin, while the footer is a section of the document that appears in the bottom margin.Headers and footers generally contain information such as page number, date, document name, etc.
In information technology, header refers to supplemental data placed at the beginning of a block of data being stored or transmitted. In data transmission, the data following the header is sometimes called the payload or body.
Select the Insert tab, then click the Header or Footer command. In our example, we’ll click the Header command. In the menu that appears, select the desired preset header or footer. The header or footer will appear.
What is a heading example?
The definition of a heading is the title or subject of an article or another piece of written work. An example of a heading is a few words telling the subject of an article.Heading is defined as the direction a person or thing is moving. An example of a heading is a car driving south.
1. Letter heading. The letter heading, typically found in the upper left-hand corner of the page, introduces you to the recipient and includes important contextual information such as your name, return address, phone number, email and date.
This chapter describes what header and footer are in MS Word and how to add a header and footer in Word. Headers and footers are sections of a document that contain special information, such as page numbers and the total number of pages, the title of the document, the company logo, and any images. The header and footer appear at the top and bottom of each page, respectively.
Table of contents
- What is the header and footer in MS Word?
- Header
- Footer
- Why header and footer used in MS Word
- Advantages of header and footer in MS Word
- How to Use Header and Footer in MS Word
- Different Headers for Different Sections
- How to Remove Header and Footer in Word
- How do I change single-page header or footer of Word
- Shortcut key for header and footer in MS Word
- Summary
Headers and footers are handy for including information on each page of a document, such as your name, the document’s title, and page numbers.
Text that goes at the top of a page is called a header. Most of the time, this is where you put information about the document, like its name, the chapter heading, page numbers, the date it was made, and so on.
A footer is a section at the bottom of a document page that contains information shared with other pages. Footers may contain page numbers, creation dates, copyrights, or references that occur on a single page or all pages.
Header and footer are typically used in Word documents because they include additional information such as page numbers, dates, an author’s name, and footnotes, which can aid in the organization and readability of lengthy publications. Text supplied in the document’s header or footer will appear on each page.
By utilizing the header and footer sections, you can make your document look professional and polished. The header is a piece of the document that appears at the top margin, whereas the footer is a section that appears at the bottom margin.
One of the advantages of header and footer in Word document is that they repeat important information on every page or section. This makes it easier for people to find what they need quickly in a long document. This is shown by page numbers, which are important in any long document.
Header and footer are helpful because they give quick information about your document or data in a predictable way and set up different parts of a document. Simply, they make it much easier to read and understand calculations, graphs, and pivot tables.
The main difference between a header and a footer is their placement inside the document. Thus, what functions for the header also functions for the footer. Therefore, let’s begin by placing anything into the Word header.
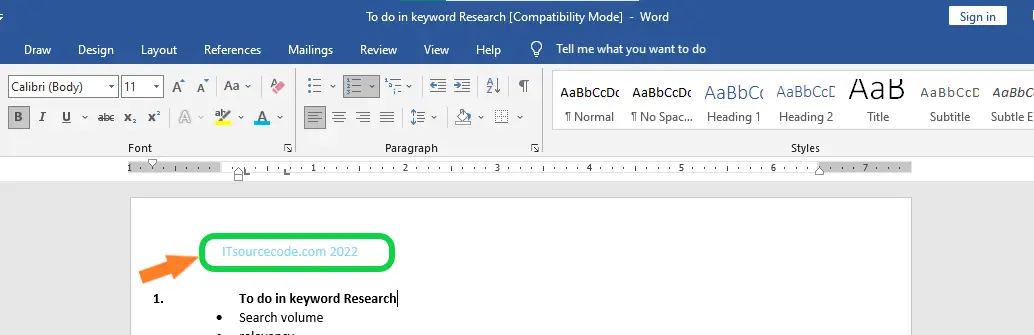
Steps on How to Use Header and Footer in MS Word. In this example, we want the actual article to appear at the top of each page, so we will include it in the header.
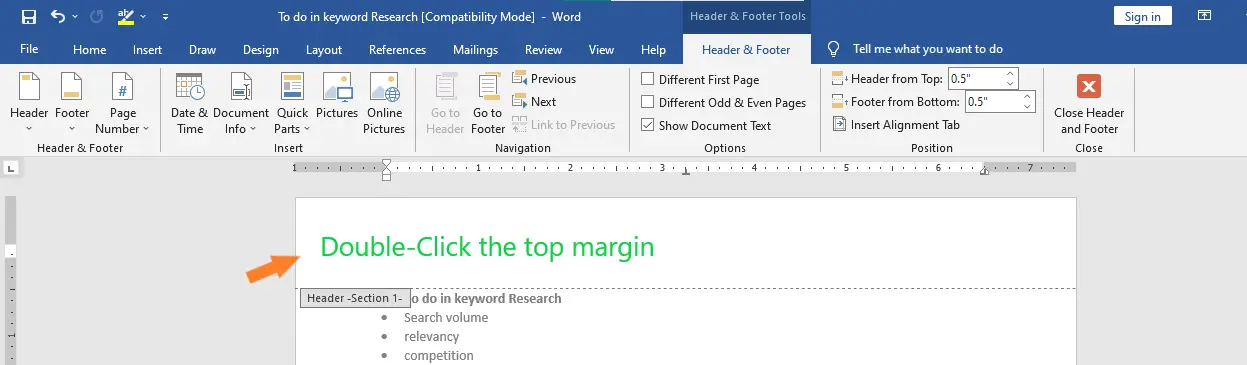
- Step 1: Double-click anywhere on the document’s top or bottom margins. Here we will double-click the upper margin in our example.

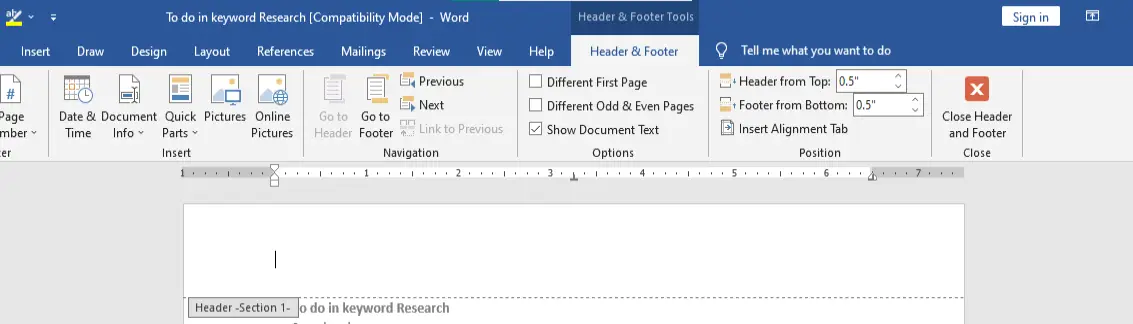
- Step 2: The header or footer tab will be displayed. The insertion point will be displayed in either the header or footer.

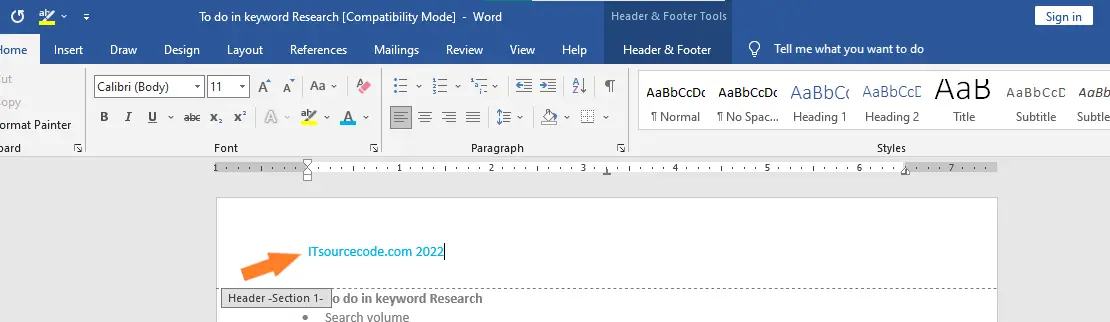
- Step 3: Fill in the blanks with the required information in the header or footer. We’ll type the website name and the date in our example.

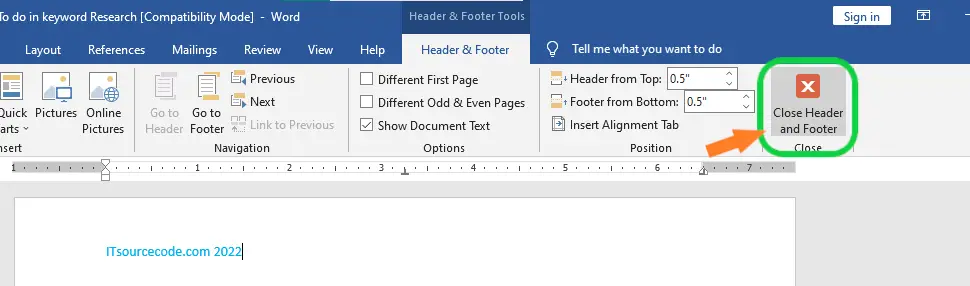
- Step 4: Close the Header and Footer when you’re finished. Alternatively, press the Esc key.

- Step 5:The text of the header or footer will load.

Additionally, here are the instructions to have Different Headers for Different Sections. To accomplish this, you must first create sections in your document. To make sectioning:
- Select the location where you wish to create a section by positioning the cursor there.
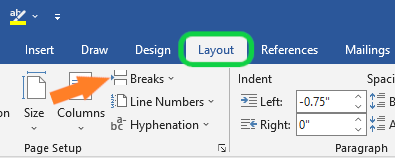
- Select the Layout tab, then click Breaks.

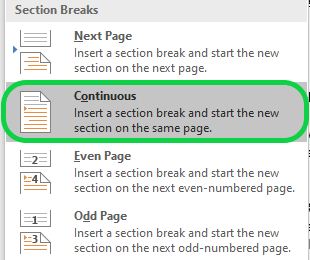
- In the bottom half of the menu, the Section Breaks are displayed.
- Choose “Continuous” from the list. This will make a Section Break right where the cursor was.

Once you divide your document into sections, you can give each section a different header.
To have different section headings:
- Go to the Header & Footer Tools tab by double-clicking on the header.
- Click the Link to Previous button to turn it off. If you keep this option turned on, this section will use the same header and footer as the last one.
So there you go! With these, each page in your document can have its own header.
The following are Remove Header and Footer from the first page of word document.
- Double-click the first page header or footer area.
- Check Different First Page to see if it’s selected. If not:
- Select Different First Page.
- Content of the header or footer on the first page is removed.
- Add your new content into the header or footer.
- Select Close Header and Footer or press Esc to exit.
Breaks between pages and between sections are different. If you want to change single-page header or footer of Word there is already a page break before the page where you want to change the header or footer, remove the page break and replace it with a section break, as shown below.
- Click or press where you want a new page to begin without a header or footer.
- To make a section break, go to Layout > Breaks > Next Page.
- To open the Header & Footer tab, double-click the header or footer section.
- Select Link to Previous to disable the connection between parts.
- Choose Header or Footer and do one of these:
- Choose Remove Header or Remove Footer .
- Change or add to the information in the header or footer. If you want to delete or change both the header and the footer, you’ll need to repeat steps 3 through 5.
- To get back to your document’s body, choose Close Header and Footer or press ESC.
The table shows the Shortcut key for header and footer in MS Word.
| Shortcut Key | Description |
| Alt+N, H, E. | To open the Header & Footer ribbon, You can add a header or footer picture or modify their location with the Header & Footer ribbon. |
| Alt+V, H. | Hold down the Alt key and press the V key at the same time. You can hold down the Alt key while you press H, or you can let go of it. |
| Alt+N, O | Press it to make a footer. |
Summary
In summary, we’ve learned what is header and footer in MS Word are and how to add header and footer in a document, as well as what those terms mean. In addition, we know why we need a header and footer to make our document presentable and creative.
Meanwhile, if you want to learn more about formatting text, see the previous tutorial on how to check and change lines and paragraphs as well as how to adjust page margin in Microsoft Word, which are still part of formatting your documents. You can browse those guides if you are having a hard time exploring your documents.
We hope this tutorial helps you as you format your documents in MS Word.
PREVIOUS

NEXT

Lesson 16: Headers and Footers
/en/word2016/columns/content/
Introduction
The header is a section of the document that appears in the top margin, while the footer is a section of the document that appears in the bottom margin. Headers and footers generally contain additional information such as page numbers, dates, an author’s name, and footnotes, which can help keep longer documents organized and make them easier to read. Text entered in the header or footer will appear on each page of the document.
Optional: Download our practice document.
Watch the video below to learn more about headers and footers in Word.
To create a header or footer:
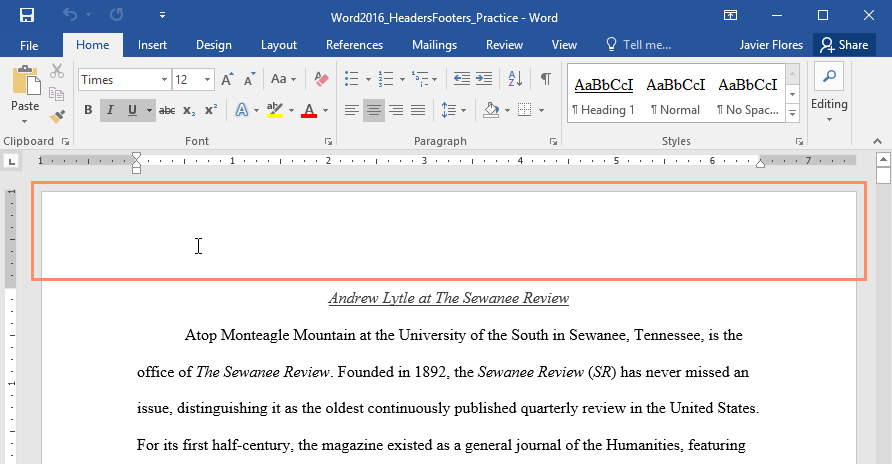
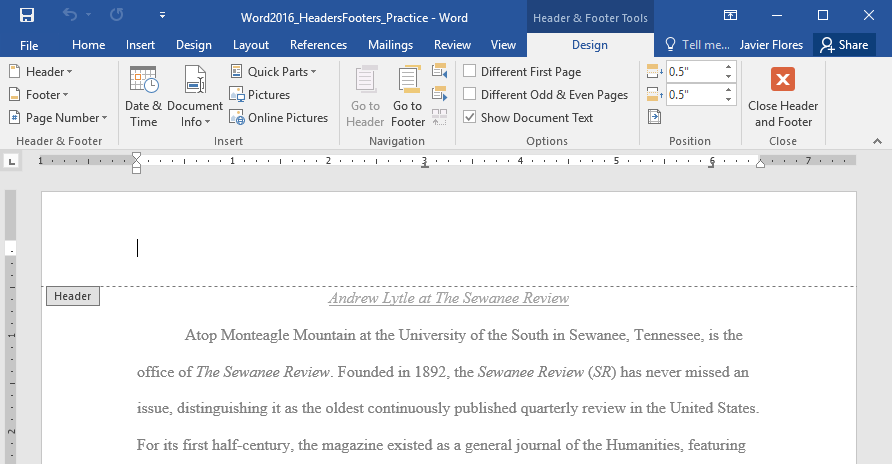
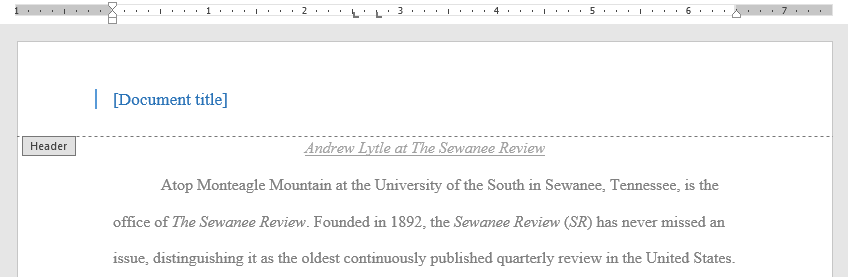
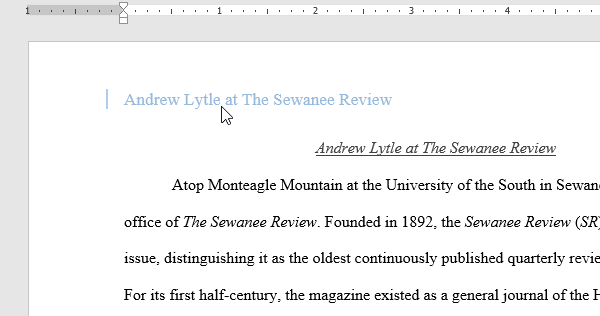
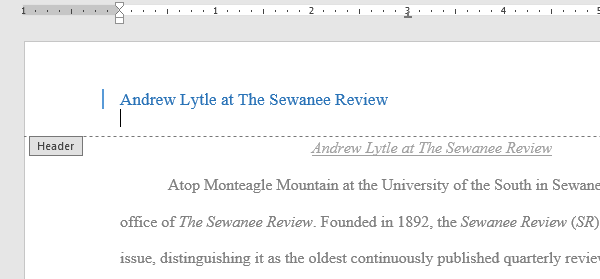
In our example, we want to display the author’s name at the top of each page, so we’ll place it in the header.
- Double-click anywhere on the top or bottom margin of your document. In our example, we’ll double-click the top margin.

- The header or footer will open, and a Design tab will appear on the right side of the Ribbon. The insertion point will appear in the header or footer.
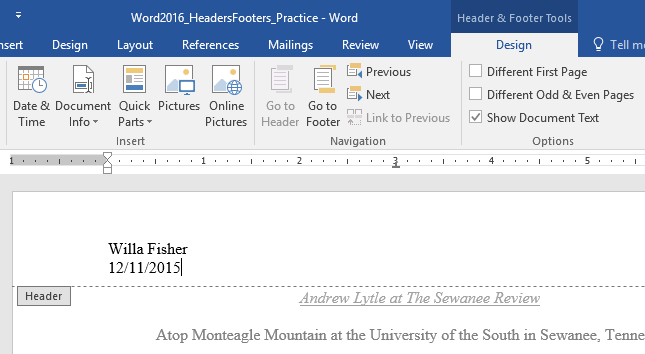
- Type the desired information into the header or footer. In our example, we’ll type the author’s name and the date.

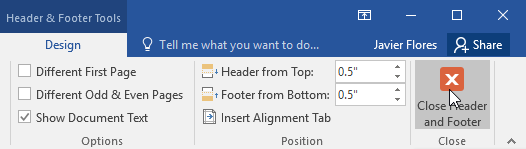
- When you’re finished, click Close Header and Footer. Alternatively, you can press the Esc key.
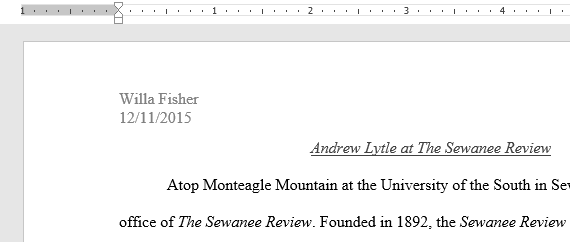
- The header or footer text will appear.
To insert a preset header or footer:
Word has a variety of preset headers and footers you can use to enhance your document’s design and layout. In our example, we’ll add a preset header to our document.
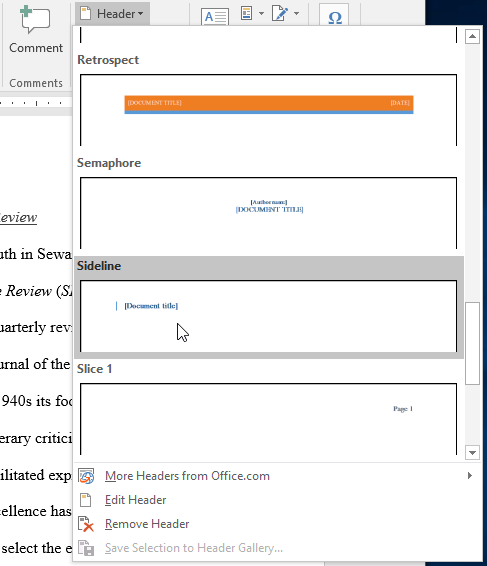
- Select the Insert tab, then click the Header or Footer command. In our example, we’ll click the Header command.

- In the menu that appears, select the desired preset header or footer.
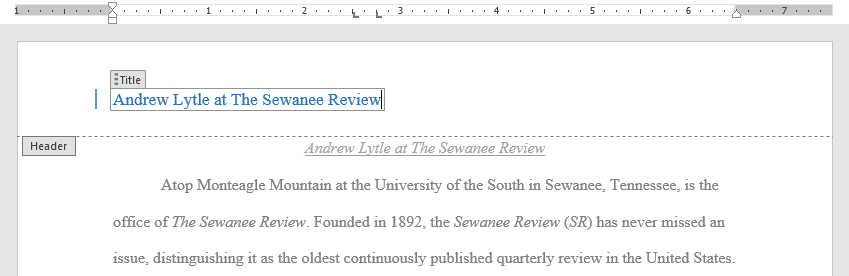
- The header or footer will appear. Many preset headers and footers contain text placeholders called Content Control fields. These fields are good for adding information like the document title, author’s name, date, and page number.

- To edit a Content Control field, click it and type the desired information.

- When you’re finished, click Close Header and Footer. Alternatively, you can press the Esc key.

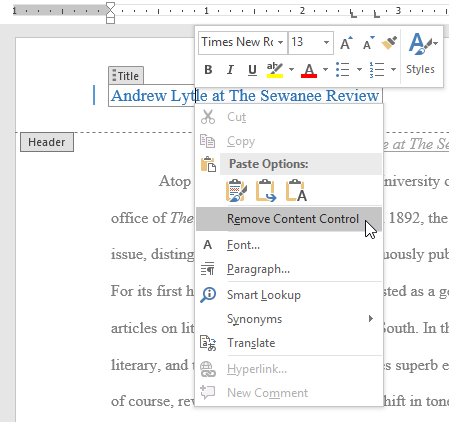
If you want to delete a Content Control field, right-click it and select Remove Content Control from the menu that appears.
Editing headers and footers
After you close the header or footer, it will still be visible, but it will be locked. Simply double-click a header or footer to unlock it, which will allow you to edit it.
Design tab options
When your document’s header and footer are unlocked, the Design tab will appear on the right side of the Ribbon, giving you various editing options:
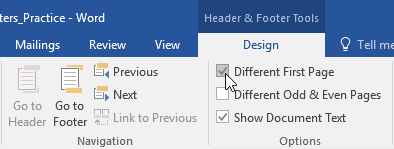
- Hide the first-page header and footer: For some documents, you may not want the first page to show the header and footer, like if you have a cover page and want to start the page numbering on the second page. If you want to hide the first-page header and footer, check the box next to Different First Page.
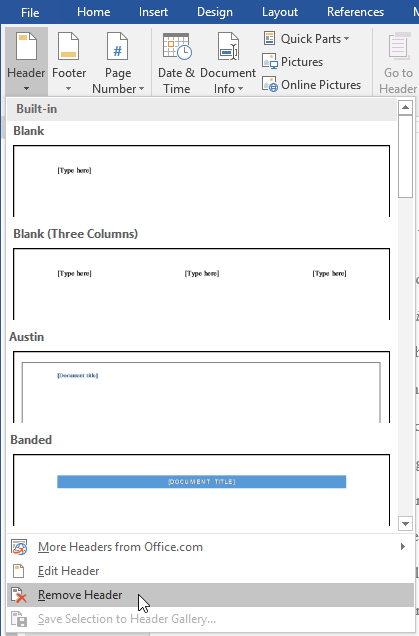
- Remove the header or footer: If you want to remove all information contained in the header, click the Header command and select Remove Header from the menu that appears. Similarly, you can remove a footer using the Footer command.
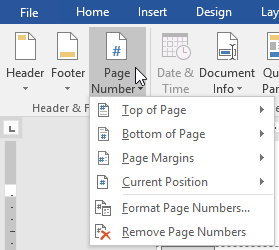
- Page Number: You can automatically number each page with the Page Number command. Read our Page Numbers lesson to learn more.
- Additional options: With the commands available in the Insert group, you can add the date and time, document info, pictures, and more to your header or footer.

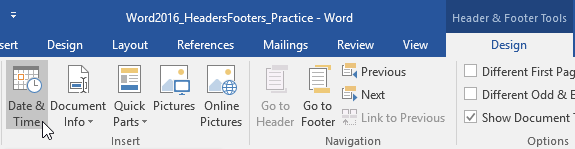
To insert the date or time into a header or footer:
Sometimes it’s helpful to include the date or time in the header or footer. For example, you may want your document to show the date when it was created.
On the other hand, you may want to show the date when it was printed, which you can do by setting it to update automatically. This is useful if you frequently update and print a document because you’ll always be able to tell which version is the most recent.
- Double-click anywhere on the header or footer to unlock it. Place the insertion point where you want the date or time to appear. In our example, we’ll place the insertion point on the line below the author’s name.
- The Design tab will appear. Click the Date & Time command.
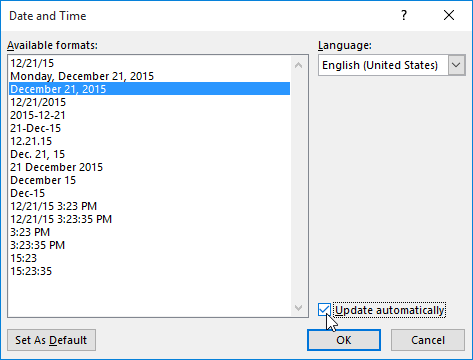
- The Date and Time dialog box will appear. Select the desired date or time format.
- Check the box next to Update Automatically if you want the date to change every time you open the document. If you don’t want the date to change, leave this option unchecked.
- Click OK.
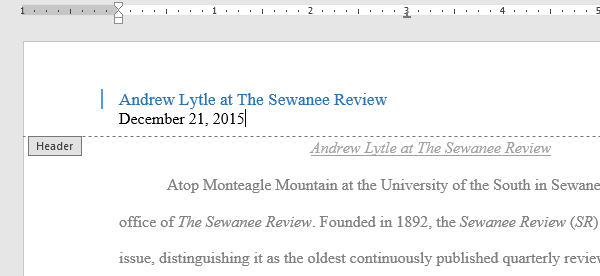
- The date will appear in the header.
Challenge!
- Open our practice document. If you’ve already downloaded our practice document in order to follow along with the lesson, be sure to download a fresh copy by clicking the link in this step.
- Open the header.
- Choose Align Right on the Home tab and type your name.
- Below your name, use the Date & Time command on the Design tab and insert the date. You can use whichever format you like.
- In the footer section, insert the preset footer Grid. If your version of Word doesn’t have a Grid preset, you can choose any available preset.
- Close the header and footer.
- When you’re finished, your page should look something like this:


/en/word2016/page-numbers/content/
- Home
- Word Tips
- Headers
Header in Microsoft Word
What Is a Header in Microsoft Word?
A header in Microsoft Word is the information that appears at the top of every page of your document.
In academic writing, the header may contain information such as the title (maybe shortened) of the paper, or chapter, or section.
The content of the header depends on the instructions you have been given. For example, you may have to follow APA style or the Chicago style, or a modified style your instructor has given you.
You may just have one header only (e.g. containing the title and the page number), or several headers (e.g. a different title for every chapter and the page number).
For example, a more complex piece of academic writing, like a thesis, could have the following:
- a Title page with no header
- preliminary pages (Abstract, Acknowledgements, Table of Contents, List of Tables and List of Abbreviations) with different headers in each section
- page numbers in the headers that change from Roman numerals in the preliminary pages, to Arabic numbers in the content pages
- different chapter or section headings in different parts of the academic paper.
For an example of different headers, see this thesis submitted at the University of Sydney.
You can easily add, change or delete a header in Microsoft Word. You can easily format different headers in separate parts of your academic paper.
Why Create Headers?
Headers will make your academic writing look more professional and improve your chances of success because:
- headers make it easier for your reader (e.g. your instructor) to find their way around your academic paper.
For example, if reference is made to a page number (e.g. see page 88), they can quickly find that page by looking at the page number in the header. - A header can easily re-orientate a reader.
For example, after reading several pages, a quick look at the title in the header will remind what the topic is about. - They make you look professional! Just look at any substantial professional writing—it will have headers.
When to Create a Header or Headers
You will have a header (or headers) because:
- it is a requirement of the academic writing style (e.g. APA, Chicago) you are using and/or
- it is a requirement of your institution’s writing style and/or
- your instructor has instructed to do so.
Failure to follow requirements or instructions could result in a lesser grade, or even rejection of your work.
Where to place a header or headers
A header in a Word document is placed at the top of the page.
The header part is some reserved space on the top of each page.
To see how much space there is, do the following:
- select the Layout tab from the ribbon
- select Margins from the Page Setup group
You will see the space allocated to the Top (i.e. Header), Bottom (i.e. Footer), Left and Right margins.
The standard Microsoft Word setting is 1 inch or 2.54 cm.
If you wish to vary, you can choose one of the presets (e.g. Narrow, Moderate, Wide, Mirrored) or you can create your own custom margins including the header.
Your academic writing may have different headers in different parts of the document.
An example in Figure 1 shows:
- a Title page with no header
- a Table of Contents with a header containing «Table of Contents» and Roman numeral page numbers i and ii
- the main text with the header containing the Chapter title and Arabic numeral page number 1
 Figure 1: Example of Different Running Heads in an Academic Paper
To create a different header in Microsoft Word:
- divide your academic paper into sections (each section will have your unique header)
- break the link between the new header and the previous header (remove Link to Previous)
Then add the information you want to the header in each section.
If you need to know how to create sections, see section break in Microsoft word.
The following example shows how to set up the headers in an academic paper (or any other document) that have the following:
- title page (i.e. a cover page)
- prelims (preliminaries) which are the pages before the main text such as
abstract, table of contents, list of figures, list of tables, acknowledgements, declarations - main text.
Note: your document may vary, such as no title page, or different prelims or no prelims.
The principle remains the same — when you want to change the header on the next page:
- insert a section break at the end of the current page
- break the connection between the new header and the previous header (i.e. remove the Link to Previous)
1. Insert a Section Break Between the Title (or Cover) and Preliminary Pages
To create a section break at the end of the Title (or Cover) page (See Figure 2):
- select Layout from the ribbon
- select Breaks
- select Next Page
Please note: if you already have a page break at the end of the Title (Cover) page, either:
- delete it or
- insert a Continuous section break.
Otherwise you will insert an extra blank page.
 page and the rest of the text") Figure 2: Insert a Section Break at the End of the Title (or Cover) Page.
Figure 2: Insert a Section Break at the End of the Title (or Cover) Page.
2. Remove the Link Between the Headers
Now you have a header for section 1, and a header for section 2.
Remove the dependencies between the section 1 header and section 2 header as follows:
- place your cursor in the header of section 2 (e.g. Table of Contents in Figure 3)
- double click (or tap) in the header section to open the Header & Footer tab
- deselect (click or touch) Link to Previous in the Navigation group
 Figure 3: Remove Linkage Between the Header in the Table of Contents Section and the Title Page Header
Creating Multiple Headers in Complex Documents
Often academic writing (e.g. thesis, dissertations) contain many different sections, each with its own header.
The principle remains the same — insert a Section Break Next Page, then remove Link to Previous.
Consider a thesis that has several sections, with each section having a different header:
|
Title |
No header — Insert Section Break Next Page at the bottom of the page. |
|
Declaration |
Remove Link to Previous (i.e. Section 1) — Enter «Declaration» into the Header — Insert Section Break Next Page at the end of this section. |
|
Abstract |
Remove Link to Previous (i.e. Section 2) — Enter «Abstract» into the Header — Insert Section Break Next Page at the end of this section. |
|
Statement of Contribution |
Remove Link to Previous (i.e. Section 3) — Enter «Statement of Contribution» into the Header — Insert Section Break Next Page at the end of this section. |
|
Acknowledgements |
Remove Link to Previous (i.e. Section 4) — Enter «Acknowledgements» into the Header — Insert Section Break Next Page at the end of this section. |
|
Table of Contents |
Remove Link to Previous (i.e. Section 5) — Enter «Table of Contents» into the Header — Insert Section Break Next Page at the end of this section. |
|
List of Tables |
Remove Link to Previous (i.e. Section 6) — Enter «List of Tables» into the Header — Insert Section Break Next Page at the end of this section. |
|
List of Figures |
Remove Link to Previous (i.e. Section 7) — Enter «List of Figures» into the Header — Insert Section Break Next Page at the end of this section. |
|
List of Abbreviations |
Remove Link to Previous (i.e. Section |
|
Chapter 1 — Introduction |
Remove Link to Previous (i.e. Section 9) — Enter «Chapter 1 — Introduction» into the Header — Insert Section Break Next Page at the end of this section. |
|
Chapter 2 — Literature Review |
Remove Link to Previous (i.e. Section 10) — Enter «Chapter 2 — Literature Review» into the Header — Insert Section Break Next Page at the end of this section. |
|
Chapter 3 — Method and Results |
Remove Link to Previous (i.e. Section 11) — Enter «Chapter 3 — Method and Results» into the Header — Insert Section Break Next Page at the end of this section. |
|
Chapter 4 — Discussion |
Remove Link to Previous (i.e. Section 12) — Enter «Chapter 4 — Discussion» into the Header — Insert Section Break Next Page at the end of this section. |
|
Chapter 5 — Conclusion |
Remove Link to Previous (i.e. Section 13) — Enter «Chapter 5 — Conclusion» into the Header — Insert Section Break Next Page at the end of this section. |
|
References |
Remove Link to Previous (i.e. Section 14) — Enter «References» into the Header — Insert Section Break Next Page at the end of this section. |
|
Appendix |
Remove Link to Previous (i.e. Section 15) — Enter «Appendix» into the Header — Insert Section Break Next Page at the end of this section. |

This example has shown how easy it is to add a header in Microsoft Word for each section.
No matter how complex your document is, you can easily create different headers.
Summary
Headers in your academic writing improves the professional look of your writing. It also provides a quick reference point for the reader and reminds them of the main topic you are writing about..
Adding one single header in a Word document (starting with page number 1) on the first page is quite easy.
Adding a different header in a Word document require some extra steps.
These steps are simple to do, and you will make your academic and professional writing so much better.
Like This Page? Please Share It.

Microsoft Word gives you the option to place a header and footer at the top and bottom of your pages. You can place anything in this section, but Word uses header and footer information in all pages. You can use these settings to create titles above your pages and page numbers at the bottom of your pages.
Header and Footer Buttons
The header and footer settings buttons are in the «Insert» tab. Click the tab and find the «Header & Footer» category located in the tab.
(Header and footer buttons)
The arrows under each button indicate that clicking it will display a set of options. Headers are generally reserved for leaving titles at the top of pages. When you read a paper novel, you see the book’s title at the top of a page. Some books have the chapter name at the top of a page. This is what a header does in a Word document.
Footers are generally used for information regarding page numbers or information that you want to mark at the bottom of each page. If you choose to add page numbers to the bottom of your pages in a footer setting, Word will automatically increment each page number. You don’t need to manually type a page number in each footer. Word knows that a page number setting should display the page number.
In this lesson, we’ll discuss header and footer configurations to customize long documents with several sections, chapters and pages.
Setting a Word Document Header
When you click the «Header» button, Word opens another window asking if you want to create a header for your document. If you click the button a second time, a list of preset header configurations is shown in a dropdown list.
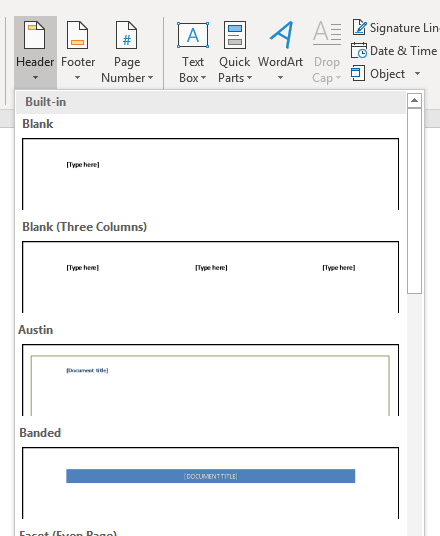
(Header options dropdown styles)
You can add any one of these header options to the document, and Word will automatically format it using the style shown in the example. Choose the «Banded» option and notice that a header is added to the top of the currently active page.

(Header added to document)
After you choose a header style, it’s shown at the top of the current page with a tab at the bottom-left corner that says «Header.» Whenever you type any content in a document header, Word automatically displays this tab to let you know that the content you’re adding to the document is the header and not the body of the page.
Word displays a prompt where you can type your custom header. In the image above, the template location is labeled «Title.» Remember that headers are generally used for titles that will be displayed on every page, so typing content in the header template will be shown in each page as static content. When you add static content to a header or footer, this same content persists across all pages. Not only does the content remain the same, but the style also persists across all pages.
In the image above, the title «Test Document» is added to the header. The content is set at all capital letters due to the style presets created by Word. You can still customize header settings, but any changes that you make will affect all pages in your file. To test the new header settings, add a new page to the document.
Before you add a page break, click the document body. Notice that the «Header» tab disappears, and you’re returned to the page body as the active part of the document. To add a page break, go to the «Pages» category in the «Insert» tab. Click the «Page Break» button and a new page is added to the document. Depending on the view layout, you see a new page added to the right or to the bottom of the current page. Notice that the header persists, and you see the same text and style in the footer of the new page.
Creating Footer Settings
Headers give you the benefit of adding static content at the top of your pages, but footers are usually reserved for content that changes from page to page. Most commonly, footers contain page numbers. Word supports a number of preset footer styles. You can place a page number to the left, center or right of the page. Word also supports styles that make footer settings more attractive than just having a number at the bottom of a page.
The «Footer» button is located next to the «Header» button, and clicking it displays the same action. A dropdown list of styles is displayed where you can choose the one that you prefer for your document.
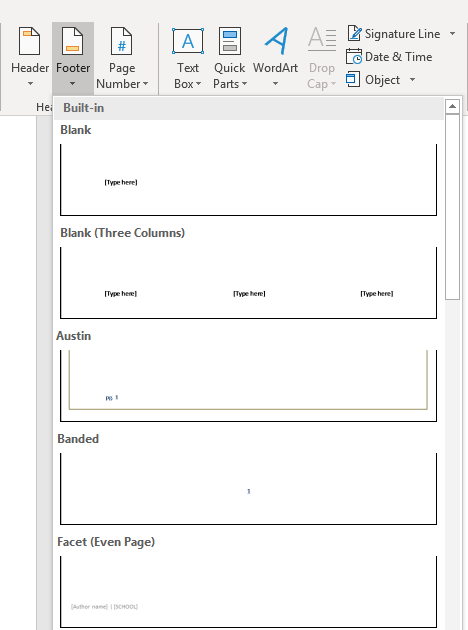
(Footer dropdown options)
You’ll notice that several footer options and styles are the same as the options displayed for the header dropdown. These preset styles can be added to your footer so that you don’t need to create one on your own.
The most common footer is page numbers. In the footer dropdown options, you can see the page number examples with the styles applied so that you can sample what your footer will look like.
A better option to create a page number in a footer is using the «Page Number» Word function. Next to the «Footer» button is the «Page Number» button. Click this button and then choose a location for the page number. In this example, the bottom of the page is chosen. Then, choose a style and location for the page number. In this example, the right side of the bottom of the page is chosen, and Word opens the footer and places a page number to the right side of the page.

(Page number footer added to a document)
Similar to the «Header» tab that displays when you edit the header section, Word displays a «Footer» tab as you change the content in a footer. This lets you know that you aren’t editing the body of a document but rather the footer. Notice in the image above that the page number «2» displays. This number is automatically generated based on the page where it’s displayed.
If you look at the first page in your document, you’ll notice that the page number is «1.» You can test the footer feature by adding a new page break on page two. A new page is created, and at the bottom of the page will show the number «3.» Word takes care of the page numbers, so should you add or delete a page in your document, the numbers will reflect the right page.
You can further format page numbers by clicking the «Page Number» button again and selecting «Format Page Numbers.» This selection opens a configuration window.

(Page Number Format configuration window)
It’s standard to start page number counts on page two, and this window lets you configure at which page the first number displays. You can start at any page, but it’s common to start after the table of contents if you have a large document. You can also change the number format from the top dropdown. For instance, you can use roman numerals as page numbers.
You can also include chapter numbers if you’re creating an ebook or a large document that has a table of contents. These footer configurations help customize the way Word displays page numbers and other information across the document.
Setting headers and footers is common for large documents, and you’ll use this feature often when you create long documents. We’ll cover creating a table of contents in later chapters, which is another useful tool that Word offers that will automatically generate organizational information for documentation.