
A text box is an object you can add to your document that lets you put and type text anywhere in your file. Text boxes can be useful for drawing attention to specific text and can also be helpful when you need to move text around in your document. Windows newer versions.
Contents
- 1 What is a text box used for?
- 2 Where is the text box style in Word?
- 3 How do I create a text box in a Word document?
- 4 What is a text box in a paragraph?
- 5 What is a text box answer?
- 6 What is the main advantage of using a text box?
- 7 Why is there no text box option in Word?
- 8 What is a text box in a book?
- 9 How do I edit a text box in Word?
- 10 Can you insert a text box in docs?
- 11 How do you set up a table of contents in Word?
- 12 Where is the text box on Google Docs?
- 13 What is labels and text box explain with example?
- 14 Which of the following is an example of TextBox?
- 15 What is a text box how is it different from a shape?
- 16 Can you measure a text box in Word?
- 17 How do I insert text without box in Word?
- 18 How do you link text boxes in Word?
- 19 Do text boxes show when you print?
- 20 How do you show hidden text boxes in Word?
What is a text box used for?
Alternatively referred to as a text field, a text box is a section or object on a page that allows a user to enter text. Text boxes are often used on the Internet for pages that require input from a user.
Where is the text box style in Word?
On the Format tab, click the More drop-down arrow in the Shape Styles group. A drop-down menu of styles will appear. Select the style you want to use. The text box will appear in the selected style.
How do I create a text box in a Word document?
Adding text boxes
- Click Insert, then select Drawing from the drop-down menu. The Drawing dialog box will appear.
- Click the Text box command.
- Click and drag in the drawing area to create the text box.
- Release the mouse, and a text box will appear.
- When you are satisfied, click Save & Close.
What is a text box in a paragraph?
Similar to a word processing document, a text box is an object that holds text (a single character, a single word, entire sentences, or paragraphs).You can cut, copy and paste selected text easily, and format the text as needed.
Answer: text box is a rectangular area on the screen where you can enter text. It is a common user interface element found in many types of software programs, such as web browsers, email clients, and word processors. When you click in a text box, a flashing cursor is displayed, indicating you can begin typing.
What is the main advantage of using a text box?
There are two main benefits to using text boxes instead of simply typing in your text. You can get greater control over the positioning of specific areas of text. You can take advantage of the text box formatting tools to add additional design elements.
Why is there no text box option in Word?
Provided you are still viewing the document in Print Layout view, you should be able to see any text boxes. If you still can’t see it, it could be possible that the text box is formatted for no line and no fill and that the text it contains is formatted as hidden (and you have the display of hidden text turned off).
What is a text box in a book?
A text box is a rectangular widget that includes text, or words forming meaning, inside the figure.Below, in the picture from The X-Men, we see a standard rectangle being used. This style is used by many and in this case serves for narration of the story.
How do I edit a text box in Word?
How to Edit a Textbox in Word
- Click anywhere in the Word text box to enter editing mode.
- Click and drag your mouse across a section of text to edit it.
- Click the “Home” tab to access text formatting tools.
Can you insert a text box in docs?
You can insert a text box or custom shape in Google Docs to help information stand out. A text box or shape can be drawn into Google Docs from the Insert menu. You can edit shapes or text boxes at any time by clicking directly on them.
How do you set up a table of contents in Word?
On the toolbar ribbon, select References. Near the left end, select Insert Table of Contents. (Or select Table of Contents > Insert Table of Contents. The table of contents is inserted, showing the headings and page numbering in your document.
Where is the text box on Google Docs?
To insert a text box in a Docs document, open the document and go to Insert > Drawing > New. In the drawing panel, select the text box icon from the action bar.
What is labels and text box explain with example?
Labels provide text information (as well as optional images) and are defined with class Label (a derived class of Control). A Label displays text that the user cannot directly modify.A textbox (class TextBox) is an area in which either text can be displayed by a program or the user can type text via the keyboard.
Which of the following is an example of TextBox?
Alternatively referred to as a text field, a text box is a section of a page that enables a user to enter text. Text boxes are often used on the Internet for pages that require input from a user. You may also see a text box in a word processing document.
What is a text box how is it different from a shape?
The main difference between a Shape and a Text Box is the default formatting that they start with. By default, PowerPoint Text Boxes start with: Vertical Alignment set to Top. Text set to Resize shape to fit text.
Can you measure a text box in Word?
Click the Insert tab of the ribbon, click the Text Box button, and choose Draw Text Box. Draw a text box of any size. The Text Box Tools tab should appear on the ribbon, with the Size group at the right end. Type in the measurements, and the box will take that size.
How do I insert text without box in Word?
Removing the Box from a Text Box
- Either click on the border of the text box or position the insertion point within the text box.
- Select the Text Box option from the Format menu.
- Click on the Colors and Lines tab, if necessary.
- In the Color drop-down list, select No Line.
- Click on OK.
How do you link text boxes in Word?
Connect text boxes
- Click Home > Draw Text Box, and drag the cross shaped cursor to draw a box where you want text.
- Click in the text box you want as the first text box in the story.
- On the Text Box Tools Format tab, in the Linking group, click Create Link.
- Click in the text box you want as the next in the story.
Do text boxes show when you print?
When printing a document, you are able to see color changes from where a text box overlaps on another area that might have a background color or shape with a color. All text boxes are set to have no fill, shape outline or shape effects.
How do you show hidden text boxes in Word?
Click File > Options > Display, and then under Always show these formatting marks on the screen, select the Hidden text check box.
In Microsoft Word, the user can create the text boxes in several built-in styles, predefined Textboxes offered in Word. If any of the built-in styles do not meet the user’s, interest there is a feature in Word that allows the user to draw the text box. There is an option where you can get more textboxes from Office.com and can save the selection to the text box gallery.
In this tutorial, we will explain:
- How to insert a Built-in Styles Text Box.
- How to insert text into Text Box.
- How to copy the Text Box to a new location.
- How to change the direction of text in the selected Text Box.
- How to Format the Text Box.
- How to change the default formatting for a Text Box.
- How to save a selected Text Box as a Building Block.
What is Text Box in Microsoft Word
A Text Box is a feature in Word that focuses on its content and displays essential text such as headings and quotes.
1] How to insert a Built-in Styles Text Box
![]()
Click the Insert tab on the menu bar.
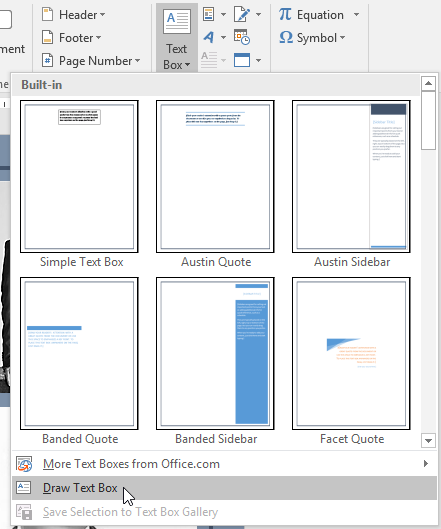
On the Insert tab in the Text group, click the drop-down arrow of the Text Box button.
You will see a list of text box built-in styles you can choose from; select the one you desire.
The text box you selected will appear in the document.
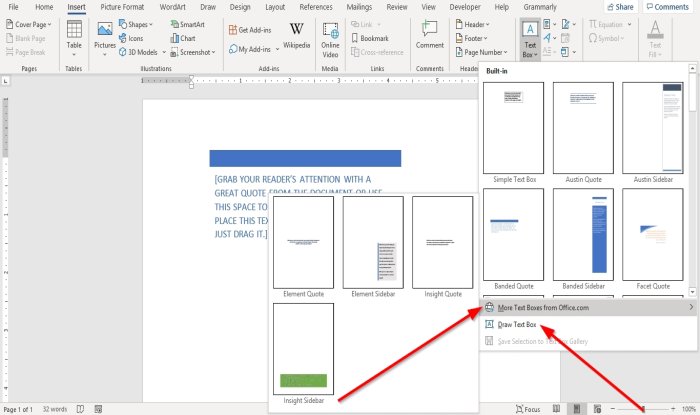
You can use More Text Boxes from Office.com to insert text boxes in the document.
In the Text Box drop-down list, you can also select Draw Text Box and draw a text box into the document.
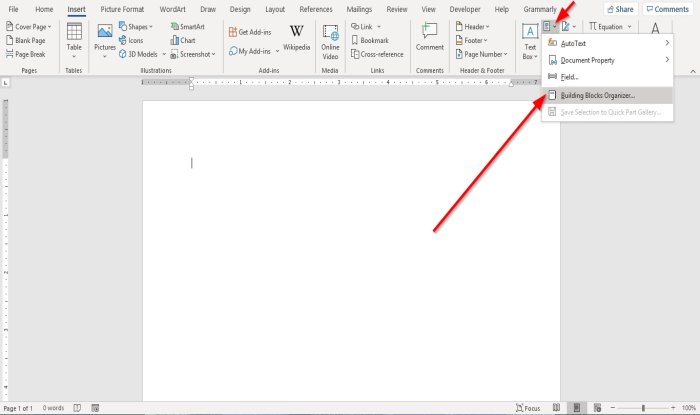
The other option to insert a Built-in Style text box is to your document is to click on the Explore Quick Parts button.
In the drop-down list, select Building Blocks Organizer.
A Building Blocks Organizer dialog box will appear.
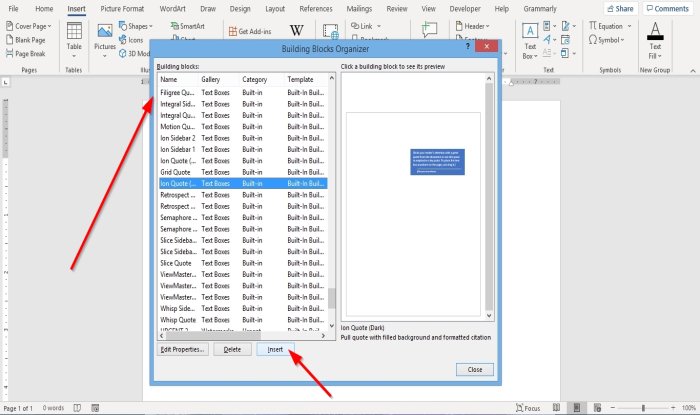
In the dialog box, scroll down until you see the text box gallery.
Click any text box of your choice and click Insert.
The text box is inserted into the document.
2] How to insert text into Text Box
For a built-in style text box, click into the text box and press the Delete Key to delete the default text inside it and type your text.
For the text box you draw, click inside the text box and enter your text.
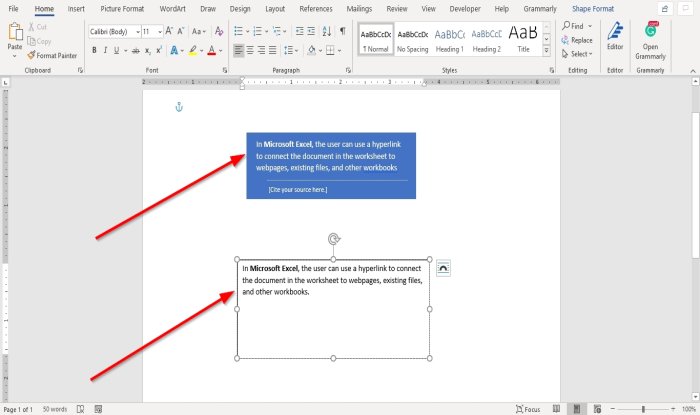
3] How to copy the Text Box to a new location
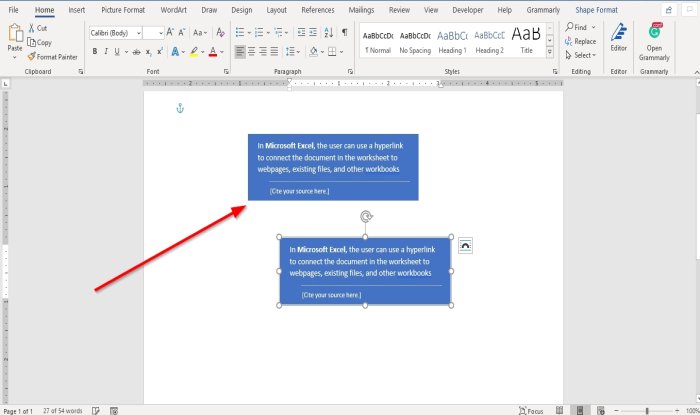
Place the cursor near the text box’s frame, hold the CTRL-key down, and drag the textbox.
You will notice that the text box is copied.
4] How to change the direction of text in the selected Text Box
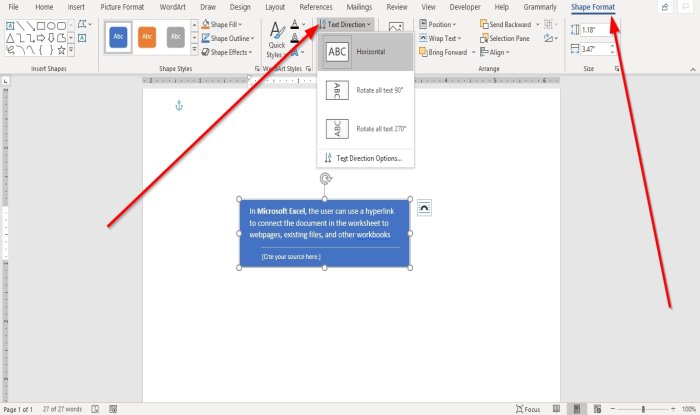
Go to the Shape Format tab.
On the Shape Format tab in the Text group, click Text Direction.
In the drop-down list, choose the direction you want the text to be in the text box.
5] How to Format the Text Box
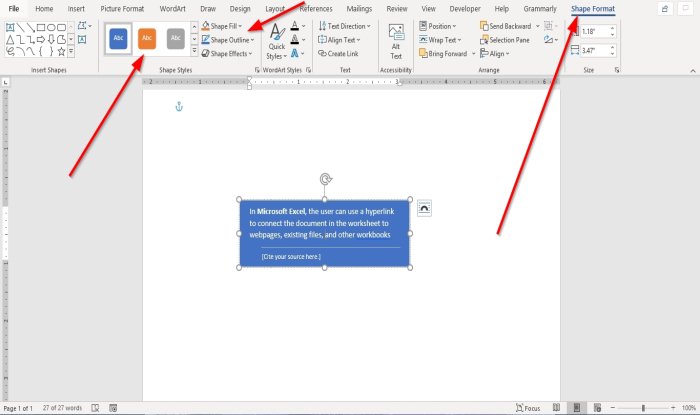
Click on the text box on the Shape Format tab in the Shape Styles group. You can choose the built-in styles you like.
You can format the text box by selecting Shape Fill, Shape Outline, and Shape Effects.
6] How to change the default formatting for a Text Box
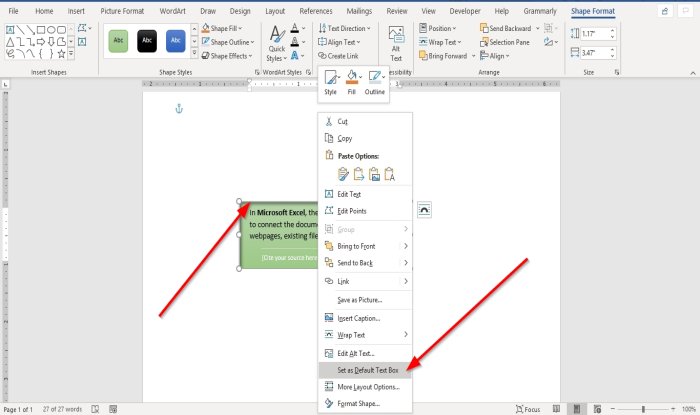
Right-click a formatted text box border and select Set as Default Text Box.
7] How to save a selected Text Box as a Building Block
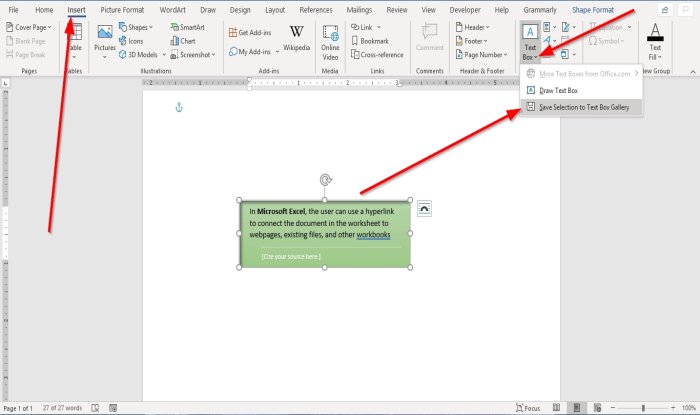
Go on the Insert tab in the Text group and select the Text Box button.
In the drop-down list, select Save Selection to Text Box Gallery.
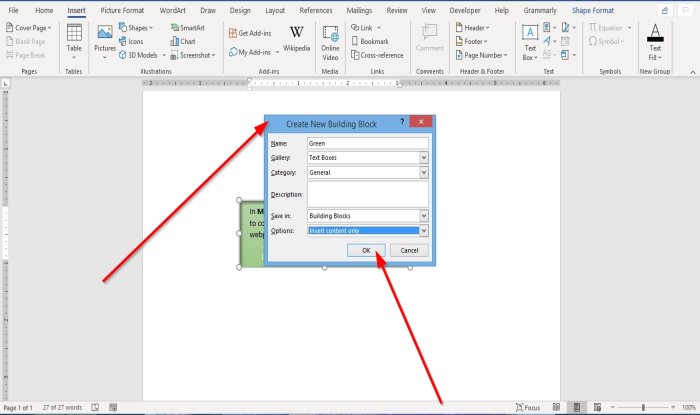
A Create New Building Block dialog box will appear, enter a name, select a category, or any changes you wish to make in the dialog box.
Click Ok.
If you want to see if the textbox you save is in the Building Block, click the Explore Quick Parts button in the Text group.
In the drop-down list, select Building Block Organizer.
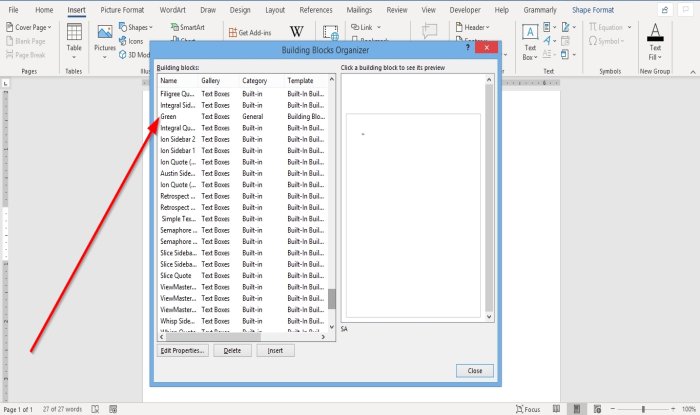
A Building Blocks Organizer dialog box will appear; Scroll down until you see the name of the text box you name.
I hope this helps; if you have questions, please comment below.
Read next: How to print hidden text in Word on Windows and Mac.
Achieve more control and flexibility with your documents
Updated on September 11, 2022
What to Know
- Select Insert > Text Box > choose a text box template. Select and drag box to the position you want.
- To resize text, select and drag circles around the edge. To rotate text, select and drag the circular arrow.
- Place the cursor inside the text box and type the information you want to appear.
This article explains how to use text boxes in Microsoft Word. Instructions apply to Word for Microsoft 365, Word 2019, Word 2016, and Word 2013.
How to Insert a Text Box in Word
Start by opening the document you want to add a text box to. Then follow the steps below.
-
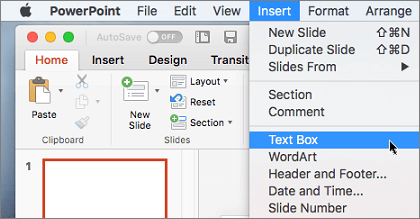
On the ribbon, select Insert.
-
In the Text group, select Text Box, then choose a text box template.
-
The new text box appears in the middle of the text, and the Shape Format tab is automatically selected.
-
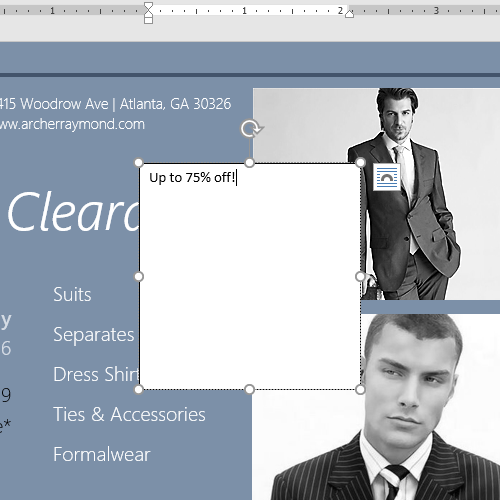
Select and drag the box to the position you want. To resize the text box, select and drag the circles around the edge. To rotate the text box, select and drag the circular arrow at the top of the box.
-
Place the cursor inside the text box and type the information you want to appear there.
Why Use Text Boxes?
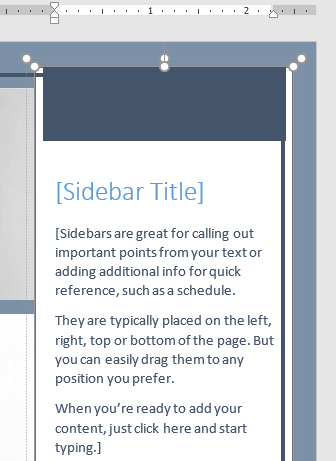
When you type text in Microsoft Word, you have options for making it look a particular way on the page (such as changing the page margins), but those options are limited. Text boxes expand your formatting repertoire by offering additional control and flexibility for how your text appears. You can place a text box anywhere within a document and format it with different colors and fonts. This feature is especially helpful for creating a blockquote or a sidebar.
Customize a Text Box
After you create a text box, you can customize it in a number of ways.
-
To bring up options, place the cursor inside the text box and right-click. Choose an option and follow the screen prompts to add a border, change the style, or adjust the way the text box interacts with the other text on the page.
Alternatively, use the controls on the Shape Format tab.
-
To go directly to the Layout Options menu, select the text box, then select the Layout Options icon (it looks like a horseshoe and is located to the right of the text box).
-
Change the text, make more adjustments, or move the box to another location at any time. To delete a text box, select its border, then press Delete on the keyboard.
Thanks for letting us know!
Get the Latest Tech News Delivered Every Day
Subscribe
Word for Microsoft 365 Word for Microsoft 365 for Mac Word 2021 Word 2021 for Mac Word 2019 Word 2019 for Mac Word 2016 Word 2016 for Mac Word 2013 Word 2010 Word for Mac 2011 More…Less
A text box is an object you can add to your document that lets you put and type text anywhere in your file. Text boxes can be useful for drawing attention to specific text and can also be helpful when you need to move text around in your document.
Add a text box
-
Place cursor where you want the text box to appear.
-
Go to Insert and in Illustrations select Drawing.
-
Select Text Box and use your cursor to create the text box.
-
Insert text in box and apply any styling needed.
-
Select Save andClose.
If you aren’t using a mouse
-
Press Alt + Period (.) and then press N.
-
Then press D to select drawings.
-
Press Alt + Period (.) and then press N.
-
Type the text that you want.
-
Press the Esc key 3 times.
-
Press Enter to save textbox.
Notes:
-
To format the text in the text box, select the text, and then use the formatting options in the Font group on the Home tab.
-
To format the text box itself, use the commands on the Shape Format contextual tab that appears when you select a text box.
-
To position the text box, select it, and then when the pointer becomes a
 four-headed arrow, drag the text box to a new location.
 -
You can also change or remove a border from a text box or shape.
-
If you have multiple text boxes, you can link them together so that text will flow from one box to another. Select one of the text boxes and on the Shape Format tab, select Create Link.
-
 four-headed arrow, drag the text box to a new location.
Editing in a text box
-
Double click the textbox.
-
In Drawing (Preview), select the textbox to place your cursor and edit text.
-
When finished select Save and Close to view updated text box.
Copy a text box
-
Select the border of the text box that you want to copy.
-
Press Ctrl+C.
Note: Make sure the pointer is on the border of the text box, not inside it. If the pointer is inside, pressing Ctrl+C will copy the text, not the text box.
-
Select a location and press Ctrl+V to paste the text box.
Delete a text box
-
Select the border of the text box that you want to delete, and then press Delete.
Note: Make sure the pointer is on the border of the text box and not inside it. If the pointer is inside the box, pressing Delete will delete the text inside the text box, not the box.
Add a text box
-
Go to Insert > Text Box, and then select Draw Text Box.
-
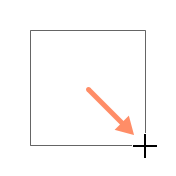
Click or tap in the document, and drag to draw the text box the size that you want.
-
To add text to a text box, select inside the text box, and then type or paste text.
Notes:
-
To format the text in the text box, select the text, and then use the formatting options in the Font group on the Home tab.
-
To format the text box itself, use the commands on the Format contextual tab, which appears under Drawing Tools when you select a text box.
-
To position the text box, select it, and then when the pointer becomes a
, drag the text box to a new location. -
You can also change or remove a border from a text box or shape.
-
If you have multiple text boxes, you can link them together so that text will flow from one box to another. Select one of the text boxes and on the Format tab, under Drawing Tools, and then select Create Link.
-
Copy a text box
-
Select the border of the text box that you want to copy.
-
Go to Home > Copy
.Make sure that the pointer is not inside the text box, but rather on the border of the text box. If the pointer is not on the border, pressing Copy will copy the text inside the text box and not the text box.
-
Go to Home and select Paste.
 .
.
Delete a text box
-
Select the border of the text box and then press DELETE.
Make sure that the pointer is not inside the text box, but rather on the border of the text box. If the pointer is not on the border, pressing DELETE will delete the text inside the text box instead.
Add a text box
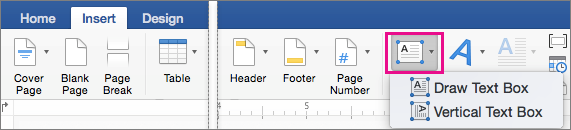
-
Go to Insert > Text Box and then select either Draw Text Box (where the text aligns horizontally on the page) or Vertical Text Box (where the text aligns vertically on the page).
-
Select in the document, and then drag to draw the text box the size that you want.
-
To add text to a text box, click or tap inside the text box, and then type or paste text.
-
To format the text in the text box, select it, and then Control + Click the text and select Font.
-
To add different effects to the text box, select the text box, and use the options on the Shape Format tab (such as changing the text direction or aligning the text at the top, middle or bottom of the text box).
-
To position the text box, select and hold it, and then when the pointer becomes a
, drag the text box to a new location.
-
Note: If you have drawn multiple text boxes, you can link them together so that text will flow from one box to another. You can only link an empty text box to the one that you’ve selected. To do this, select the text box that you want to link to another text box, and then go to Shape Format > Create Link.
Copy a text box
-
Select the text box you want to copy.
Make sure that the pointer is on the border of the text box and not inside the text box. If the pointer is not on the border, the text inside the text box is copied.
-
Press Control + Click, and then select Copy. Or, press
+ C. -
Select the location in your document where you want to paste the text box, press Control + Click, and then select Paste. Or, press
+ V.
 + C.
+ C.Remove a text box
-
Select the border of the text box that you want to delete, and then press DELETE.
Make sure that the pointer is on the border of the text box and not inside the text box. If the pointer is not on the border, pressing DELETE will delete the text inside the text box.
Add a text box
-
Go to Insert > Text Box.
-
Click in your file where you’d like to insert the text box, hold your mouse button down, then drag to draw the text box the size that you want.
-
After you’ve drawn the text box click inside it to add text.
Copy a text box
-
Select the text box you want to copy.
Make sure that the pointer is on the border of the text box and not inside the text box. If the pointer is not on the border, the text inside the text box is copied.
-
Press Control + Click, and then select Copy. Or, press
+ C. -
Select the location in your document where you want to paste the text box, press Control + Click, and then select Paste. Or, press
+ V.
Remove a text box
-
Select the border of the text box that you want to delete, and then press DELETE.
Make sure that the pointer is on the border of the text box and not inside the text box. If the pointer is not on the border, pressing DELETE will delete the text inside the text box.
Need more help?
Want more options?
Explore subscription benefits, browse training courses, learn how to secure your device, and more.
Communities help you ask and answer questions, give feedback, and hear from experts with rich knowledge.
Lesson 21: Text Boxes
/en/word2016/shapes/content/
Introduction
Text boxes can be useful for drawing attention to specific text. They can also be helpful when you need to move text around in your document. Word allows you to format text boxes and the text within them with a variety of styles and effects.
Optional: Download our practice document.
Watch the video below to learn more about text boxes in Word.
To insert a text box:
- Select the Insert tab, then click the Text Box command in the Text group.

- A drop-down menu will appear. Select Draw Text Box.
- Click and drag anywhere on the document to create the text box.
- The insertion point will appear inside the text box. You can now type to create text inside the text box.
- If you want, you can select the text and then change the font, color, and size by using the commands on the Format and Home tabs. To learn more about using these formatting commands, see our Formatting Text lesson.
- Click anywhere outside the text box to return to your document.


You can also select one of the built-in text boxes that have predefined colors, fonts, positions, and sizes. If you choose this option, the text box will appear automatically, so you will not need to draw it.
To move a text box:
- Click the text box you want to move.
- Hover the mouse over one of the edges of the text box. The mouse will change into a cross with arrows.
- Click and drag the text box to the desired location.

To resize a text box:
- Click the text box you want to resize.
- Click and drag any of the sizing handles on the corners or sides of the text box until it is the desired size.

Modifying text boxes
Word offers several options for changing the way text boxes appear in your document. You can change the shape, style, and color of text boxes or add various effects.
To change the shape style:
Choosing a shape style allows you to apply preset colors and effects to quickly change the appearance of your text box.
- Select the text box you want to change.
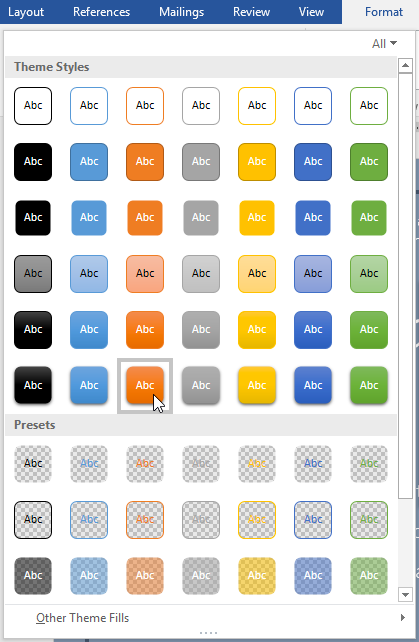
- On the Format tab, click the More drop-down arrow in the Shape Styles group.
- A drop-down menu of styles will appear. Select the style you want to use.
- The text box will appear in the selected style.


If you want to have more control over text box formatting, you can use any of the shape formatting options such as Shape Fill and Shape Outline. To learn more, see our Shapes lesson.
To change the text box shape:
Changing the shape of a text box can be a useful option for creating an interesting look in your document.
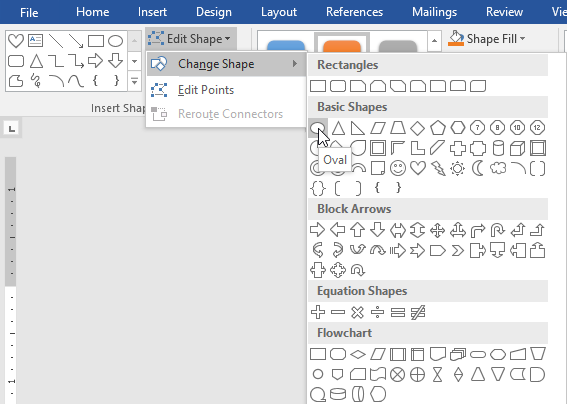
- Select the text box you want to change. The Format tab will appear.
- From the Format tab, click the Edit Shape command.
- Hover the mouse over Change Shape, then select the desired shape from the menu that appears.
- The text box will appear formatted as the shape.


Challenge!
- Open our practice document.
- Insert a Simple Text Box.
- In the text box, type Get an additional 25% off when you mention this ad!
- Change the font to Gadugi, 20 pt, Center Align.
- Change the shape of the text box to Double Wave from the Stars and Banners group.
- Change the text box style by selecting any style in the Intense Effect row.
- Drag the text box to the space below Buy 1, Get 1 Free* and Formalwear.
- When you’re finished, your document should look something like this:


/en/word2016/aligning-ordering-and-grouping-objects/content/