
Word 2016 is designed to help you create professional-quality documents. Word can also help you organize and write documents more efficiently.
When you create a document in Word, you can choose to start from a blank document or let a template do much of the work for you. From then on, the basic steps in creating and sharing documents are the same. And Word’s powerful editing and reviewing tools can help you work with others to make your document great.
Start a document
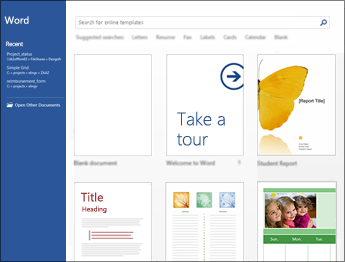
It’s often easier to create a new document using a template instead of starting with a blank page. Word templates come ready-to-use with pre-set themes and styles. All you need to do is add your content.
Each time you start Word, you can choose a template from the gallery, click a category to see more templates, or search for more templates online.
For a closer look at any template, click it to open a large preview.
If you’d rather not use a template, click Blank document.
Open a document
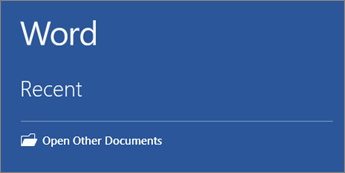
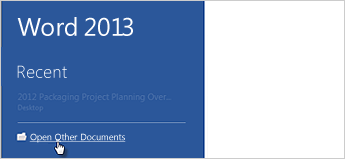
Every time you start Word, you’ll see a list of your most recently used documents in the left column. If the document you’re looking for isn’t there, click Open Other Documents.
If you’re already in Word, click File > Open and then browse to the file’s location.
When you open a document that was created in earlier versions of Word, you see Compatibility Mode in the title bar of the document window. You can work in compatibility more or you can upgrade the document to use Word 2016.
Save a document
To save a document for the first time, do the following:
-
On the File tab, click Save As.
-
Browse to the location where you’d like to save your document.
Note: To save the document on your computer, choose a folder under This PC or click Browse. To save your document online, choose an online location under Save As or click Add a Place. When your files are online, you can share, give feedback and work together on them in real time.
-
Click Save.
Note: Word automatically saves files in the .docx file format. To save your document in a format other than .docx, click the Save as type list, and then select the file format that you want.
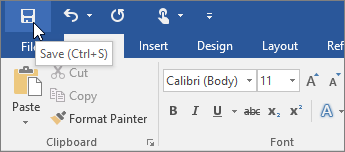
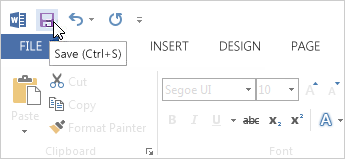
To save your document as you continue to work on it, click Save in the Quick Access Toolbar.
Read documents
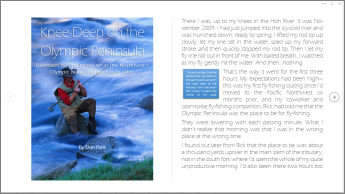
Open your document in Read Mode to hide most of the buttons and tools so you can get absorbed in your reading without distractions.
-
Open the document you want to read.
Note: Some documents open in Read Mode automatically, such as protected documents or attachments.
-
Click View > Read Mode.
-
To move from page to page in a document, do one of the following:
-
Click the arrows on the left and right sides of the pages.
-
Press page down and page up or the spacebar and backspace on the keyboard. You can also use the arrow keys or the scroll wheel on your mouse.
-
If you’re on a touch device, swipe left or right with your finger.
Tip: Click View > Edit Document to edit the document again.
-
Track changes
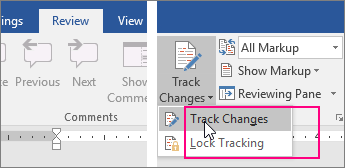
When you’re working on a document with other people or editing a document yourself, turn on Track Changes to see every change. Word marks all additions, deletions, moves, and formatting changes.
-
Open the document to be reviewed.
-
Click Review and then on the Track Changes button, select Track Changes.

Read Track changes to learn more.
Print your document
All in one place, you can see how your document will look when printed, set your print options, and print the file.
-
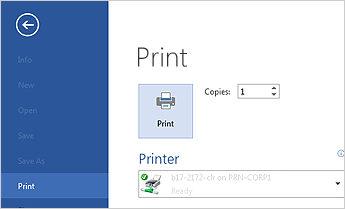
On the File tab, click Print.
-
Do the following:
-
Under Print, in the Copies box, enter the number of copies you want.
-
Under Printer, make sure the printer you want is selected.
-
Under Settings, the default print settings for your printer are selected for you. If you want to change a setting, just click the setting you want to change and then select a new setting.
-
-
When you’re satisfied with the settings, click Print.
For details, see Print a document.
Beyond the basics
For more on the fundamentals of using Word, see What’s new in Word 2016.
Top of Page
With Word for the web, you use your web browser to create, view, and edit the personal documents that you store on OneDrive. If your organization or college has a Microsoft 365 plan or SharePoint site, start using Word for the web by creating or storing documents in libraries on your site.Save changes
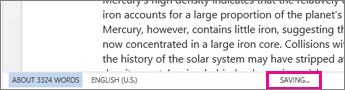
Word saves your changes automatically. Look on the status bar at the bottom left corner of Word for the web. It will either show Saved or Saving.
Share documents online
Because your document is online, you can share it by sending a link instead of an email attachment. People can read it in their web browser or mobile device.
Click File > Share > Share with People.

Comment in the browser
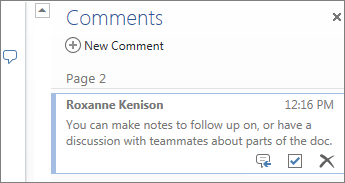
A comment balloon shows where comments have been made in the doc.

Reply to comments, and check off items you’ve addressed.
Edit in the browser
If you try to type in the document and nothing happens, you’re probably in Reading view. Switch to Editing view: click Edit Document > Edit in Word for the web.

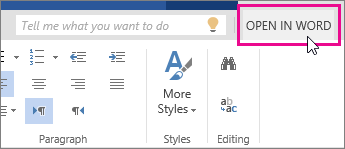
Type and format text, add pictures, adjust the layout of the page, and more. For more advanced editing, click Open in Word.
Work together on the same doc
To work together in Word for the web, you edit a document as you normally would. If others are also editing it, Word for the web alerts you to their presence. You can see everyone who is currently working in the document by clicking in the ribbon.

Clicking on an author’s name jumps you to where they’re working in the doc. And you’ll see the changes they make as they’re happening. They can be working in Word for the web, Word 2010 or later, or Word for Mac 2011.
Add a header or footer
Go to Insert > Header & Footer to add headers and footers to your document.
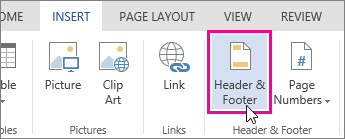
Click Options to choose how you’d like them to appear.

Add page numbers
Click Insert > Page Numbers and then choose from the gallery where you’d like the page numbers to appear.
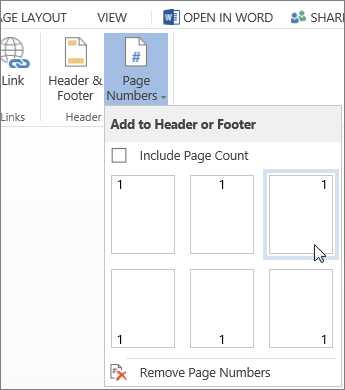
Select Include Page Count to show the current page number along with the total number of pages (page X of Y).
Find and replace text
Quickly search for every occurrence of a specific word or phrase in your document by clicking Home > Find (or type Ctrl+F). Results appear next to your document so you can see the term in context. Clicking on a search result jumps you to that occurrence.
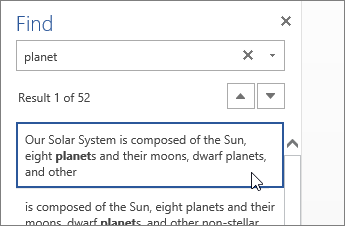
Click Replace (or type Ctrl+H) to find and replace text.
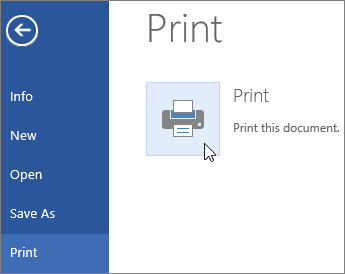
Print in Word for the web
Go to File > Print. Word for the web creates a PDF preview of your document that keeps all the layout and formatting of your document. Send the PDF to your printer and it will print the way you expect.
Microsoft Word 2013 is a word-processing program designed to help you create professional-quality documents. Word helps you organize and write your documents more efficiently.
Your first step in creating a document in Word 2013 is to choose whether to start from a blank document or to let a template do much of the work for you. From then on, the basic steps in creating and sharing documents are the same. Powerful editing and reviewing tools help you work with others to make your document perfect.
Choose a template
It’s often easier to create a new document using a template instead of starting with a blank page. Word templates are ready to use with themes and styles. All you need to do is add your content.
Each time you start Word 2013, you can choose a template from the gallery, click a category to see the templates it contains, or search for more templates online. (If you’d rather not use a template, just click the Blank document.)
For a closer look at any template, just click it to open a large preview.
Top of Page
Open a document
Every time you start Word, you’ll see a list of your most recently used documents in the left column. If the document you’re looking for isn’t there, click Open Other Documents.
If you’re already in Word, click File > Open and then browse to the file’s location.
When you open a document that was created in earlier versions of Word, you see Compatibility Mode in the title bar of the document window. You can work in compatibility more or you can upgrade the document to use features that are new or enhanced in Word 2013.
Top of Page
Save a document
To save a document for the first time, do the following:
-
Click the File tab.
-
Click Save As.
-
Browse to the location where you’d like to save your document.
Note: To save the document on your computer, choose a folder under Computer or click Browse. To save your document online, choose a location under Places or Add a Location. When your files are online, you can share, give feedback and work together on them in real time.
-
Click Save.
Note: Word automatically saves files in the .docx file format. To save your document in a format other than .docx, click the Save as type list, and then select the file format that you want.
To save your document as you continue to work on it, click Save in the Quick Access Toolbar.
Top of Page
Read documents
Open your document in Read Mode to hide most of the buttons and tools so you can get absorbed in your reading without distractions.
-
Open the document you want to read.
Note: Some documents open in Read Mode automatically, such as protected documents or attachments.
-
Click View > Read Mode.
-
To move from page to page in a document, do one of the following:
-
Click the arrows on the left and right sides of the pages.
-
Press page down and page up or the spacebar and backspace on the keyboard. You can also use the arrow keys or the scroll wheel on your mouse.
-
If you’re on a touch device, swipe left or right with your finger.
Tip: Click View > Edit Document to edit the document again.
-
Top of Page
Track changes
When you’re working on a document with other people or editing a document yourself, turn on Track Changes to see every change. Word marks all additions, deletions, moves, and formatting changes.
-
Open the document to be reviewed.
-
Click Review and then on the Track Changes button, select Track Changes.

Read Track changes to learn more.
Top of Page
Print your document
All in one place, you can see how your document will look when printed, set your print options, and print the file.
-
Click the File tab and then click Print.
-
Do the following:
-
Under Print, in the Copies box, enter the number of copies you want.
-
Under Printer, make sure the printer you want is selected.
-
Under Settings, the default print settings for your printer are selected for you. If you want to change a setting, just click the setting you want to change and then select a new setting.
-
-
When you’re satisfied with the settings, click Print.
For details, see Print and preview documents.
Beyond the basics
Go beyond the basics with your documents by creating a table of contents or saving a document as a template.
Top of Page
Important:
Office 2010 is no longer supported. Upgrade to Microsoft 365 to work anywhere from any device and continue to receive support.
Upgrade now
In this article
-
What is Word?
-
Find and apply a template
-
Create a new document
-
Open a document
-
Save a document
-
Read documents
-
Track changes and insert comments
-
Print your document
What is Word?
Microsoft Word 2010 is a word-processing program, designed to help you create professional-quality documents. With the finest document-formatting tools, Word helps you organize and write your documents more efficiently. Word also includes powerful editing and revising tools so that you can collaborate with others easily.
Top of Page
Find and apply a template
Word 2010 allows you to apply built-in templates, to apply your own custom templates, and to search from a variety of templates available on the web.
To find and apply a template in Word, do the following:
-
On the File tab, click New.
-
Under Available Templates, do one of the following:
-
To use one of the built-in templates, click Sample Templates, click the template that you want, and then click Create.
-
To reuse a template that you’ve recently used, click Recent Templates, click the template that you want, and then click Create.
-
To use your own template that you previously created, click My Templates, click the template that you want, and then click OK.
-
To find a template on Office.com, under Office.com Templates, click the template category that you want, click the template that you want, and click Download to download the template from Office.com to your computer.
-
Note: You can also search for templates on Office.com from within Word. In the Search Office.com for templates box, type one or more search terms, and then click the arrow button to search.
Top of Page
Create a new document
-
Click the File tab and then click New.
-
Under Available Templates, click Blank Document.
-
Click Create.
For more information about how to create a new document, see Create a document.
Top of Page
Open a document
-
Click the File tab, and then click Open.
-
In the left pane of the Open dialog box, click the drive or folder that contains the document.
-
In the right pane of the Open dialog box, open the folder that contains the drawing that you want.
-
Click the document and then click Open.
Top of Page
Save a document
To save a document in the format used by Word 2010 and Word 2007, do the following:
-
Click the File tab.
-
Click Save As.
-
In the File name box, enter a name for your document.
-
Click Save.
To save a document so that it is compatible with Word 2003 or earlier, do the following:
-
Open the document that you want to be used in Word 2003 or earlier.
-
Click the File tab.
-
Click Save As.
-
In the Save as type list, click Word 97-2003 Document. This changes the file format to .doc.
-
In the File name box, type a name for the document.
-
Click Save.
For more information about how to create a document that is compatible with Word 2003 or earlier versions, see Create a document to be used by previous versions of Word.
Top of Page
Read documents
-
Open the document that you want to read.
-
On the View tab, in the Document Views group, click Full Screen Reading
-
To move from page to page in a document, do one of the following:
-
Click the arrows in the lower corners of the pages.
-
Press PAGE DOWN and PAGE UP or SPACEBAR and BACKSPACE on the keyboard.
-
Click the navigation arrows at the top center of the screen.
Tip: Click View Options, and then click Show Two Pages
to view two pages, or screens, at a time.
-
 to view two pages, or screens, at a time.
For more information about how to view documents, see Read documents in Word.
Top of Page
Track changes and insert comments
-
To turn on change tracking, on the Review tab, in the Tracking group, click Track Changes.
-
To insert a comment, on the Review tab, in the Comments group, click New Comment.
For more information about how to track changes made while revising, see Track changes and insert comments.
Top of Page
Print your document
-
Click the File tab and then click Print.
-
Do the following:
-
Under Print, in the Copies box, enter the number of copies that you want to print.
-
Under Printer, make sure that the printer that you want is selected.
-
Under Settings, the default print settings for your printer are selected for you. If you want to change a setting, click the setting you want to change and then select the setting that you want.
-
-
When you are satisfied with the settings, click Print.
For more information about how to print a file, see Preview and print a file.
Top of Page
In this article, we will be discussing about the task pane feature in Microsoft word and its functions.
The task pane is a Microsoft Office feature that was initially released in Office 2003, and the other later versions. It enables users to have quick access to common features, information, and commands.
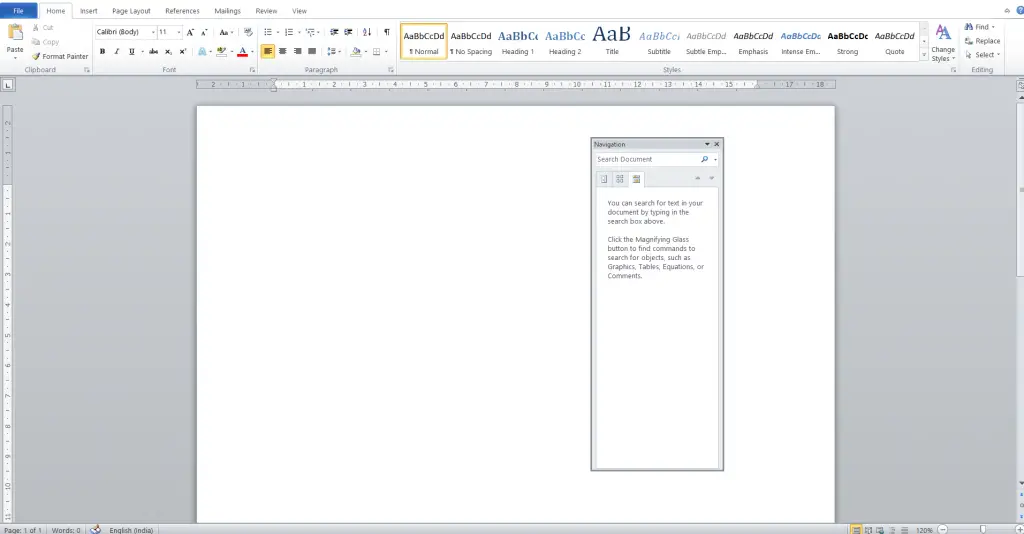
A task pane is a multipurpose window pane that appears on the right side of the window of an Office application.
Ctrl+F1 is the keyboard shortcut to open the task pane. You may also click the View option in the program menu, and then select Task Pane.
The following task panes appear in Microsoft word:
- The Start-up task pane.
- The Search task pane
- The Clipboard task pane
- The Insert Clip Art task pane
The Startup task pane in Microsoft word is the default task pane for the Office programs listed at the beginning of this article.
To move the Startup task pane to a new location, follow these steps:
- Start the Office program that you want.
Notice that the Startup task pane appears to the right of the document window.
- Click the title bar of the task pane, and then drag it to the location that you want. The task pane appears in the new location when you restart the Office program.
To stop the Startup task pane from appearing when you start an Office program, follow these steps:
- Open the word document.
- At the top of the task pane, click the drop down arrow and click the close option.
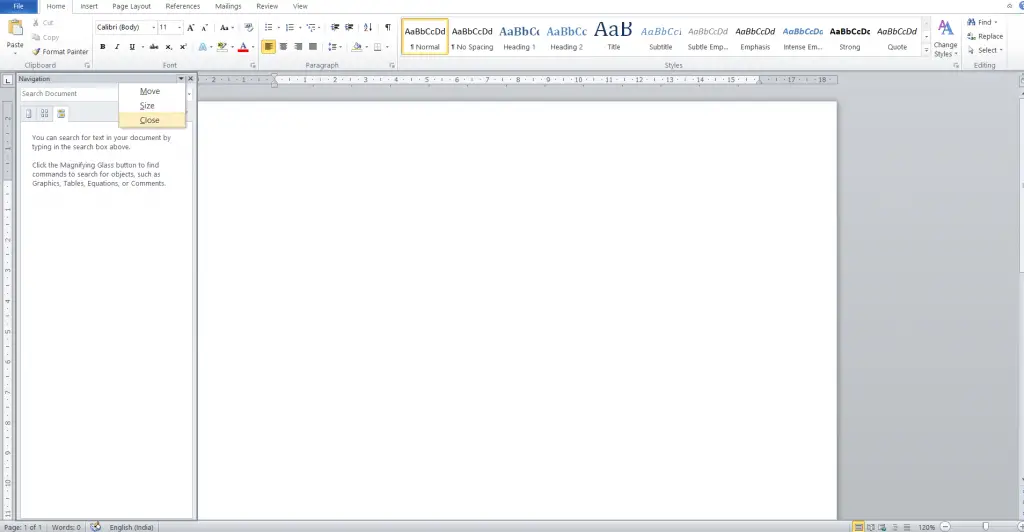
- The Startup task pane does not appear when you restart the Office program.
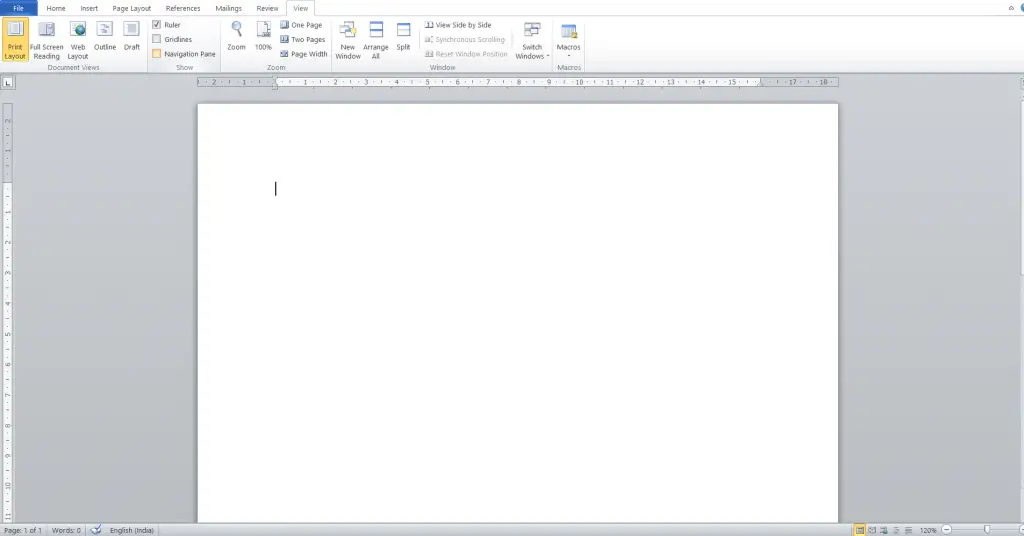
To make the Startup task pane to appear when you start an Office program, follow these steps:
- On the View tab, under Show, click to select the Startup Task Pane check box, and then click OK. The Startup task pane appears when you restart the Office program.
Task panes are interface surfaces that typically appear on the right side of the window within Word, PowerPoint, Excel, and Outlook. Task panes give users access to interface controls that run code to modify documents or emails, or display data from a data source.
How do I use the Task Pane?
To open a task pane, follow these steps: In the Office application window, select the View menu and select Task Pane. The New File task pane appears on the right side of the application window (the New File task pane is the default task pane for the Office applications).
Where is the Controls task pane in Word?
Open the Word document in which you want to open the Selection pane. Select the Layout or Page Layout tab. In the Arrange group, choose Selection Pane. The task pane opens to the right of the document.
What is Task Pane in Microsoft Excel?
The Task Pane is a rectangular window that appears docked on the right side of your Excel window. It acts as an open menu allowing you to select from a range of commands and functions. It displays a list of links and commands allowing you to perfrom different tasks depending on what you are doing at the time.
What are the advantages of using the Clipboard task pane?
By using the Office Clipboard, you can arrange the copied items the way that you want in the document. You’re not limited to only pasting the last item you copied or cut when you use the Clipboard task pane. The Clipboard task pane holds many of the last images and text you copied or cut.
What is a primary advantage of using the Clipboard task pane?
Explanation: Clipboard task pane allows the user to copy several items up to 24items before switching to word to paste them. Clipboard is a feature in computer that allows for more copy and paste option.
How do I turn on the Reviewing Pane in Word?
To turn on the Reviewing Pane, go to the Review tab and click on the Reviewing Pane drop-down list. See Figure 8 for an example of what the vertical reviewing pane looks like. The vertical pane will show up on the left side of your Word screen. The horizontal pane will appear at the below your document.
Which of the following is not available in Task Pane?
Solution(By Examveda Team) Master Slide is not available in Task Pane.
How do I bring up the Task Pane in Excel?
By default, the task pane is placed on the right side of the Excel window. If you want, you can move it anywhere you like, by clicking its title bar and dragging it. You can also use the ‘Task Pane Options’, an icon beside the ‘Close’ button.
How do you create a task pane in Excel?
In Excel, choose the Home tab, and then choose the Show Taskpane button in the ribbon to open the add-in task pane. Select any range of cells in the worksheet.
Which action will close the Clipboard task pane?
Click the “X” or “Close” button on the task pane to close the Clipboard, and then press “Ctrl-C” twice to test if the Clipboard pane opens.
Which of the following tasks can you perform using the Clipboard task pane?
The Clipboard task pane displays a list of the items that have been copied to the Office clipboard and lets you paste them into your documents, delete them from the Office clipboard, and clear the Office clipboard. It also lets you view and modify several options for customizing the behavior of the Office clipboard.
Which action will close the clipboard task pane?
How do I activate the Reviewing pane?
How do I activate the default reviewing pane without changing the view in Word?
Click Review | Show Markup | Balloons and choose any option except Show Revisions Inline. The Reviewing Pane dropdown button in the Tracking section of the Review tab of the ribbon can be used to toggle on and off the Reviewing Pane.
Which of the following paint is not available in Task Pane?
Is layout a section of Task Pane?
The layout is not a section of the task pane. Task pane is the area provided us for certain features and is generally present on the right side of the window of any Microsoft office application tools like Microsoft Word, Microsoft Excel, Microsoft Powerpoint, Microsoft Outlook, etc.
How do I view Task Pane?
On the Tools menu, click Options. The Options dialog box appears. On the View tab, under Show, click to select the Startup Task Pane check box, and then click OK. The Startup task pane appears when you restart the Office program.
How do I add a custom task pane to the app?
To add a custom task pane to an application
- Open or create a VSTO Add-in project for one of the applications listed above.
- On the Project menu, click Add User Control.
- In the Add New Item dialog box, change the name of the new user control to MyUserControl, and then click Add.
Using a Keyboard to Navigate and Select in Task Panes
by Avantix Learning Team | Updated August 26, 2021
Applies to: Microsoft® Word® 2010, 2013, 2016, 2019 and 365 (Windows)
This article is the third in a series of navigating and choosing commands in Word, Excel and PowerPoint using a keyboard. In this instalment, we’ll review working with task panes. You can use these keyboard navigation and selection strategies in Microsoft Word, Excel, PowerPoint, Access, Outlook, Project and Publisher.
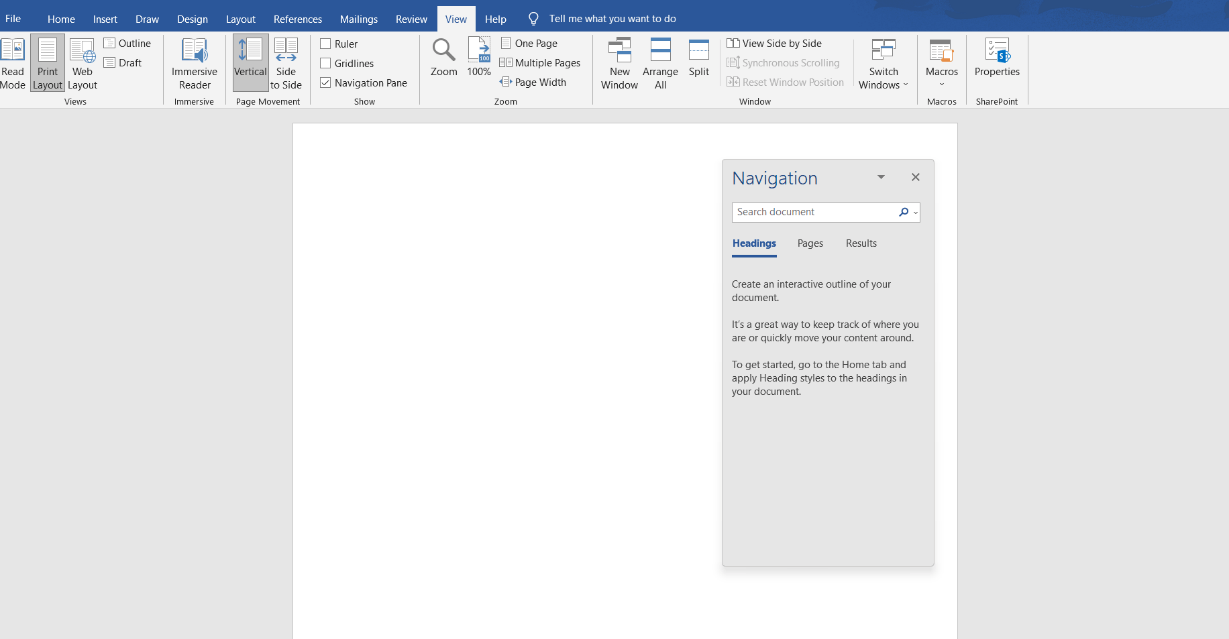
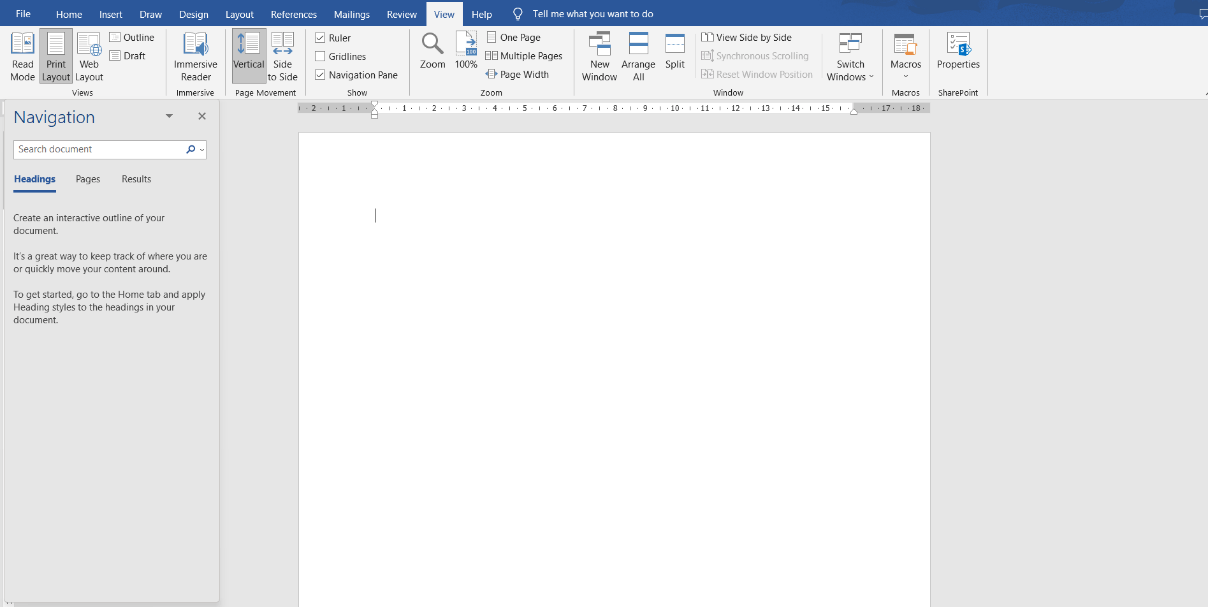
A task pane is a window in a Microsoft Office program that provides more options or commands. In Microsoft Word, examples include the Styles task pane and the Find or Navigation task pane. Some task panes open automatically when you select a specific command. You can also open a task pane using a keyboard shortcut or the Ribbon.
Recommended articles: Navigating the Ribbon in Word, Excel and PowerPoint Using a Keyboard and Navigating and Selecting in Dialog Boxes in Word, Excel and PowerPoint Using a Keyboard
Do you want to learn more about Microsoft Word, Excel or PowerPoint? Check out our virtual classroom or live classroom courses >
Below is the Styles task pane in Microsoft Word:
Controlling the focus
In order to work with the keyboard in a task pane, the task pane must have the focus (or be active).
If a task pane is open, you can switch to it by pressing F6 repeatedly until the task pane has the focus.
Cycling between areas in the program window
To move the focus to select the following areas of the window, keep pressing F6. This changes the focus in a clockwise direction as follows:
- Active tab of the Ribbon
- The document
- Task pane
- Another task pane (if open)
- Status bar at the bottom of the window
You can cycle in a counter clockwise direction by pressing Shift + F6.
Navigating and selecting in task panes
Once a task pane has the focus, you can use the keyboard to navigate and select:
- Move the focus between the task pane elements or areas by pressing Tab to move forward or Shift + Tab to move backward.
- Use the up and down arrow keys to navigate within a gallery area in a task pane that has the focus (such as the Styles gallery in the Styles task pane in Word).
- To select the first or last item in a gallery, press Home or End.
- Activate a command by pressing Enter.
- Press Shift + F10 to open a shortcut menu (comparable to right-clicking on an item). Use up and down arrows keys to navigate the menu and press Enter to select a menu item.
- Press Ctrl + Spacebar to display the menu for the task pane.
Closing a task pane
To close a task pane:
- Press F6 until the task pane has the focus.
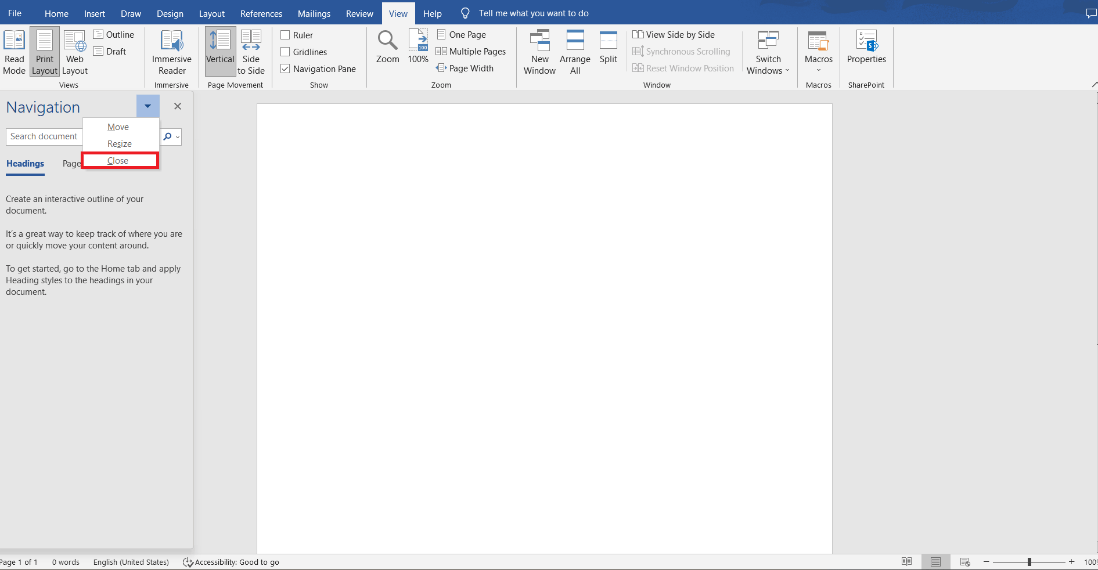
- Press Ctrl + Spacebar. A drop-down menu appears in the title bar of the task pane.
- Press C to close. You could also use the down arrow key until the command is selected and then press Enter.
Resizing a task pane
To resize a task pane:
- Press F6 until the task pane has the focus.
- Press Ctrl + Spacebar. A drop-down menu appears in the title bar of the task pane.
- Press S to resize. You could also use the down arrow key until the command is selected and then press Enter.
- Use the arrow keys to resize the task pane. Use Ctrl + arrow keys to resize one pixel at a time.
- When you finish resizing, press Escape.
Moving a task pane
To move a task pane:
- Press F6 until the task pane has the focus.
- Press Ctrl + Spacebar. A drop-down menu appears in the title bar of the task pane.
- Press M to move. You could also use the down arrow key until the command is selected and then press Enter.
- Use the arrow keys to move the task pane. Use Ctrl + arrow keys to move one pixel at a time.
- When you finish moving, press Escape.
Learning to use the keyboard to navigate and select can save time but is also particularly useful for those working with laptops or any user that has difficulty using a mouse.
This article was first published on December 31, 2014 and has been updated for clarity and content.
Subscribe to get more articles like this one
Did you find this article helpful? If you would like to receive new articles, join our email list.
More resources
3 Strikethrough Shortcuts in Microsoft Word
14+ Word Selection Shortcuts to Quickly Select Text
How to Create a Table of Contents in Microsoft Word
Related courses
Microsoft Word: Intermediate / Advanced
Microsoft Word: Designing Dynamic Word Documents Using Fields
Microsoft Word: Long Documents Master Class
Microsoft Word: Accessible Word Documents
Microsoft Excel: Intermediate / Advanced
Microsoft PowerPoint: Intermediate / Advanced
VIEW MORE COURSES >
Our instructor-led courses are delivered in virtual classroom format or at our downtown Toronto location at 18 King Street East, Suite 1400, Toronto, Ontario, Canada (some in-person classroom courses may also be delivered at an alternate downtown Toronto location). Contact us at info@avantixlearning.ca if you’d like to arrange custom instructor-led virtual classroom or onsite training on a date that’s convenient for you.
Copyright 2023 Avantix® Learning
Microsoft, the Microsoft logo, Microsoft Office and related Microsoft applications and logos are registered trademarks of Microsoft Corporation in Canada, US and other countries. All other trademarks are the property of the registered owners.
Avantix Learning |18 King Street East, Suite 1400, Toronto, Ontario, Canada M5C 1C4 | Contact us at info@avantixlearning.ca
Task panes are interface elements frequently appearing on the right side of the windows in Word, PowerPoint, Excel, and Outlook. Through task panes, users can access interface controls that can run code to edit documents or emails or display data from a data source. Beginning with Windows XP, Microsoft Office has a dockable dialogue windows feature called a task pane. A user can edit the data contained in a document using this dialogue. A feature of Microsoft Office called the task pane can be found in Office 2002 (Windows XP), Office 2003, and later editions. It makes regularly used features, information, and instructions easily available to consumers.
The task pane has one or two pages, each of which has been divided into portions for convenient viewing. Using a compatible version of Microsoft Office, users can open the task pane by pressing CTRL + F1 on their keyboard or by choosing View, Task Pane, from the menu. The task pane’s screen appearance can be changed to view, dock, undock, add pages, and utilize other similar MS Office functions.
Types of Task Pane
A task pane is a versatile windows pane on the right side of an Office application’s windows. The global task panes that are present in all Office programs are described in the list that follows:
- Startup task pane — Office programs’ default task pane is the Startup task pane.
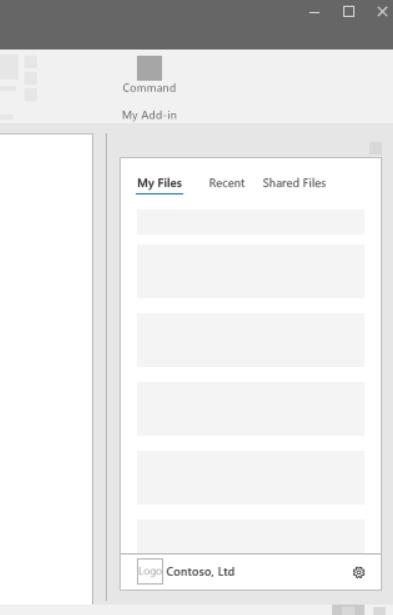
- New File Task Pane – it permits you to begin a new file in a specific application and offers the option to open recently used files and access several document templates.
- Office Clipboard Task Pane — enables you to see items you have cut and copied to the Office Clipboard.
- Clip Art Task Pane — enables you to browse the Office Clip Gallery and add clip art to documents created with Office applications.
- Search Task Pane — allows you to look for files using any Office application.
- Research Task Pane – This new task windows can use various research and reference services. Many of these references are available online through resources like Microsoft Encarta.
In more detail, let’s see how Startup task pan can be enabled or disabled in an Office program. Other task panes do have a similar type of enable or disable methodologies.
For Office programs, the Startup task pane is the default one. When you launch your Office software, it automatically shows up to the right of the document windows. This task pane’s starting location can be modified, and you can choose whether or not to prevent it from opening when an Office program does.
To relocate the Startup task windows to a new location, follow these procedures:
- Open the desired Office program.
Here we are taking MS Word as an example Office program. - Drag the task pane’s title bar to the desired location by clicking and holding down the mouse button when you restart the Office application and the task pane displays in the new location.
To Disable the Startup task pane from displaying when you launch an Office program, follow these procedures:
- Open the desired Office program (MS Word)
- At the top of the task pane, click the drop-down arrow and choose the close option.
- When you restart the Office application, the Startup task windows does not appear.
In rare circumstances, taking the earlier actions won’t disable this feature. Modify the Windows registry if this happens. The necessary methods for removing the task pane feature from the Windows registry are listed below.
- Close all running applications, including all instances of Microsoft Office.
- Select Start.
- Press Run.
- Type regedit into the Run windows and hit Enter.
- Open the following registry key in the Registry Editor.
HKEY_CURRENT_USERSoftwareMicrosoftOffice11.0CommonGeneral
- Find the «DoNotDismissFileNewTaskPane» key in the section above. To remove this registry key, select it and press the Delete key.
- Registry Editor should be closed.
After performing the procedures mentioned earlier, Microsoft Word shouldn’t open with the Office task pane the next time.
To enable the Startup task pane when you launch an Office program, follow these procedures:
- Click to check the Startup Task Pane box under Show on the View tab, and then click OK.
- When the Office program is restarted, the Startup task windows opens.