
Quick Access Toolbar, or QAT in Excel, is a toolbar available in Excel where we can position our important shortcuts and use them much easier whenever necessary. It is a customizable toolbar in a workbook on the left-hand side of the window.
Quick Access Toolbar is a customizable toolbar containing a set of commands visible at the top of the ribbon, which is independent. You can add or remove the buttons with your choice by customizing the toolbar, but you are not able to resize it. Instead, you can move the toolbar to two possible locations: one at the top of the ribbon and the other at the top of the workspace area. With your choice, you can create custom tabs and groups to choose your frequent and repeated usage commands.
Table of contents
- What is the Quick Access Toolbar (QAT) in Excel?
- How to use Quick Access Toolbar in Excel?
- Example #1 – Customizing QAT
- Example #2 – Changing the Position of QAT
- Example #3 – Customizing the toolbar by Options Command
- Example #4 – Changing the Order of the Commands
- Example #5 – Export a Customized Quick Access Toolbar
- Things to Remember
- Recommended Articles
- How to use Quick Access Toolbar in Excel?
How to use Quick Access Toolbar in Excel?
- QAT in excel is a shortcut toolAn Excel shortcut is a technique of performing a manual task in a quicker way.read more to avoid searching for the commands you frequently use in working on the documents.
- If you have mistakenly typed the word or made any other errors while making the document, you do not need to search the undo tool available on this toolbar. Instead, click on it at the top.
- It helps us to simplify accessing the commands of the document.
Example #1 – Customizing QAT
Click the appropriate tab or group on the ribbon to display the command you want to add to the toolbar.
- Choose the left-click command on the Excel Quick Access Toolbar shortcut menu. Then, customize QAT to more commands like “Open,” “Save,” “Undo,” “Redo,” etc., by clicking the left click on the “Commands.”

- If the command is already available in the toolbar in Excel, it shows a tick mark at the left of the tab. You can remove the command if you do not need it.
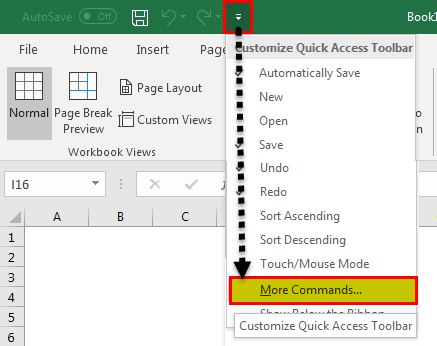
- Suppose you want to add more commands not displayed in the list. Do not worry. Click on the “More Commands” button to add or remove the commands at the bottom of the tab.

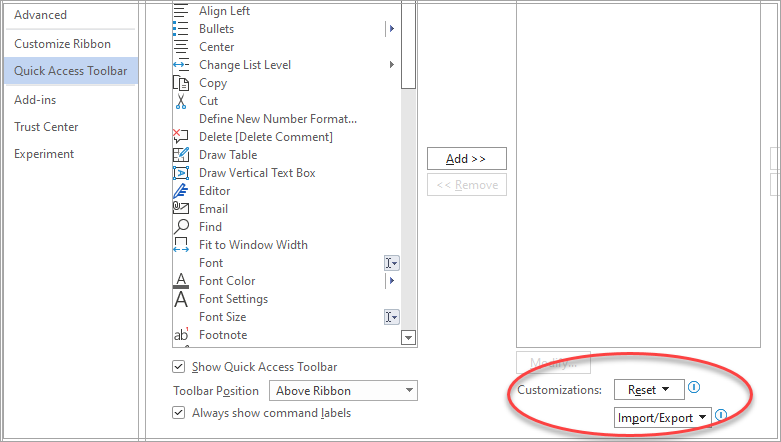
- The screen will display below if you choose the “More Commands” tab.

- If you select the commands from the dropdown menu, you can choose the menus you want to add. By default, it shows the popular commands mostly recommended by the users.
- You can select the reference tabs if it is difficult to find the commands to search for.

- To add or remove the tools in the toolbar, select the command by left click on which you have to insert, which is at the left side window. Then, select “Add.” As a result, the chosen command will display in the right side window. Then, click “OK” to finish the customizing process once you complete it.

- If you have to reset all customizations, select the “Reset” icon, then select “OK” to customize the toolbar to default.

- You can choose the customizations for a single workbook too. If you do not want other files to perform the customizations you selected, then select the “Customize Quick Access Toolbar” drop-down menu, then choose “XXXX” (filename) as shown below.


Example #2 – Changing the Position of QAT
- You can only place the toolbar in two positions: one at the top of the ribbon and the other at the top of the workspace area.
- You cannot resize the toolbar. But, the other option to resize the toolbar is changing your screen’s resolution.
Explanation
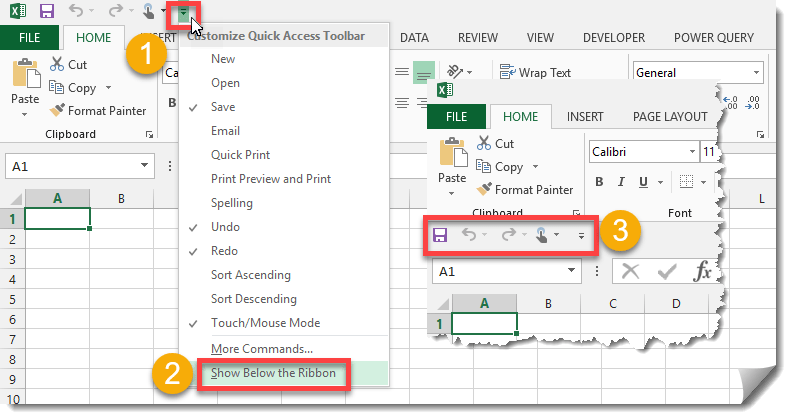
- To replace the position of the toolbar, right-click on the dropdown icon and select show below the ribbon to replace, as shown below.
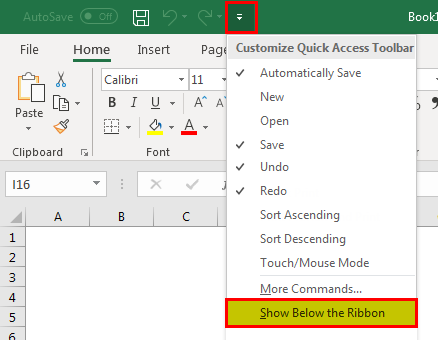
- Then, the status of the toolbar will change as below.
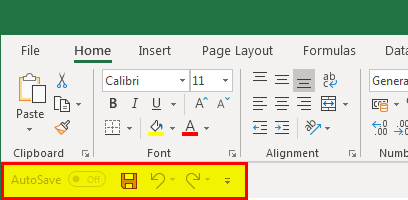
- If we want to replace it with its default position, we must perform the same again. This time, it shows, as shown above, the ribbon.
Example #3 – Customizing the toolbar by Options Command
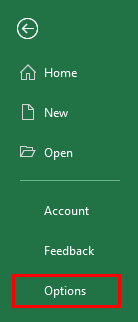
- Click the “File” tab and then click “Options” to customize the toolbar in Excel.
- Then, click the “Quick Access Toolbar, and make the changes you want as you wish to ease access to the commands.

Example #4 – Changing the Order of the Commands
- Choose the left-click command on the QAT shortcut menu, then click more commands on the “Customize Quick Access Toolbar.”
- Then click the toolbar on the menu to replace the position of the commands to ease of access.
- Under the “Customize Quick Access Toolbar,” an excel toolbarThe toolbar, also known as the quick access toolbar, is located on the left top-most side of the excel window and has only a few options by default, such as save, redo, and undo. Users can, however, customize it to their liking and add any option or button to make it easier to access the commands.read more, click the command you want to move, then click move up or move down.
- Then, click “OK” to see the customizations on your screen.
Example #5 – Export a Customized Quick Access Toolbar
You can export your ribbon and toolbars customizations into a file that can be imported and used by a team member on another PC.
Explanation
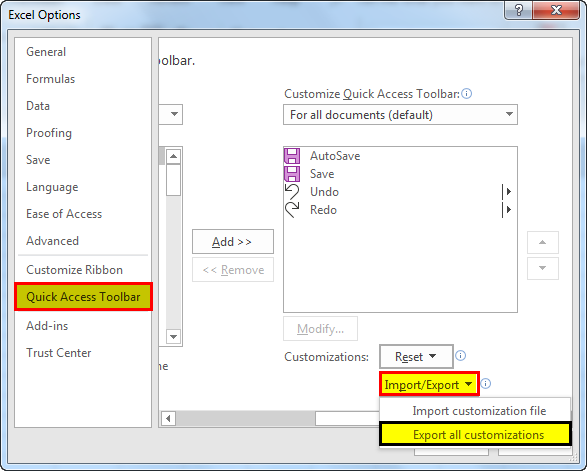
- Click the “File” tab. Then, under “Help,” click “Options,” click “Quick Access Toolbar.” Then, click “Import/Export” and “Export all customizations.”
- Then, share the exported file with the user who wants to perform the customizations.
Things to Remember
- We can add the multiple commands in this toolbar but remember that it is a shortcut tool for simplifying the job. So, please do not choose the list of commands you use in long intervals, making it uncomfortable when you search the command frequently.
- We must use regular usage commands to display the same icons, which makes it easy to retrieve the command while using a file.
Recommended Articles
This article guides the Quick Access Toolbar (QAT) in Excel. Here, we discuss how to customize the Quick Access Toolbar, change positions, change command order, and export the toolbar. You may learn more about Excel from the following articles: –
- Auto Format Excel
- “Save As” Excel Shortcut
- Make Gridlines in Excel
- Infographics in ExcelInfographics in excel is the way of showing the information or summary report through attractive charts, graphs, and images. In other words infographics are the art of visualizing the data using external elements or images. They are different from dashboards and require the architectural mind to build your own infographics in excel.read more
The customizable Quick Access Toolbar contains a set of commands that are independent of the currently displayed tab on the ribbon. You can move the Quick Access Toolbar from one of the two possible locations, and you can add buttons that represent commands to the Quick Access Toolbar.

Notes:
-
You cannot increase the size of the buttons representing the commands by an option in Microsoft Office. The only way to increase the size of the buttons is to lower the screen resolution you use.
-
You cannot display the Quick Access Toolbar on multiple lines.
-
Only commands can be added to the Quick Access Toolbar. The contents of most lists, such as indent and spacing values and individual styles, which also appear on the ribbon, cannot be added to the Quick Access Toolbar. However, you can Customize the ribbon in Office to personalize the ribbon the way that you want it. For example, you can create custom tabs and custom groups to contain your frequently used commands.
What do you want to do?
-
Show or hide the Quick Access Toolbar
-
Move the Quick Access Toolbar
-
Show or hide command labels on the Quick Access Toolbar
-
Add a command to the Quick Access Toolbar
-
Add a command to the Quick Access Toolbar that isn’t on the ribbon
-
Remove a command from the Quick Access Toolbar
-
Change the order of the commands on the Quick Access Toolbar
-
Customize the Quick Access Toolbar by using the Options command
-
Reset the Quick Access Toolbar to the default settings
-
Export a customized Quick Access Toolbar
-
Import a customized Quick Access Toolbar
-
When custom groups show a green or blue ball on the Quick Access Toolbar
Show or hide the Quick Access Toolbar
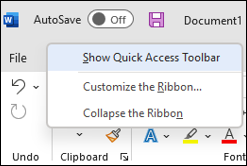
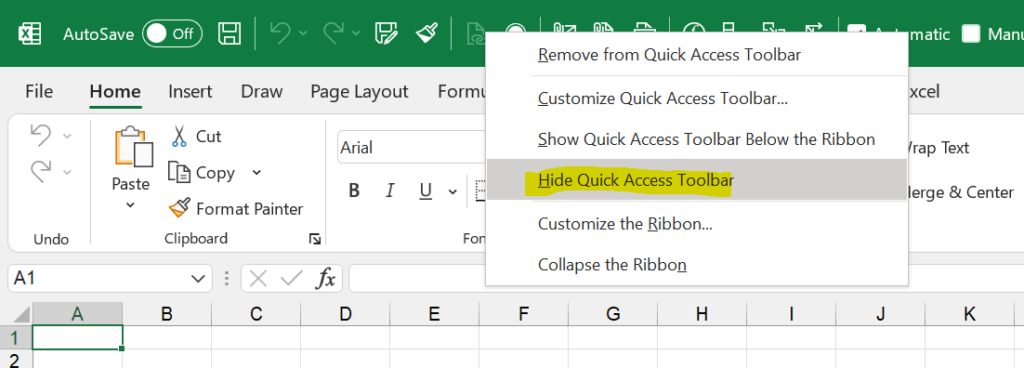
Right-click in the ribbon and do either of the following:
-
If the Quick Access Toolbar is shown, select Hide Quick Access Toolbar.

-
If the Quick Access Toolbar is hidden, select Show Quick Access Toolbar.
Note: You can also hide the Quick Access Toolbar in the Customize Quick Access Toolbar menu by selecting Hide Quick Access Toolbar.
Move the Quick Access Toolbar
Location
The Quick Access Toolbar can be located in one of two places:
-
Above the ribbon, on the title bar (default location)
-
Below the ribbon
Change the location
You can move the location of the Quick Access Toolbar from one location to another.
-
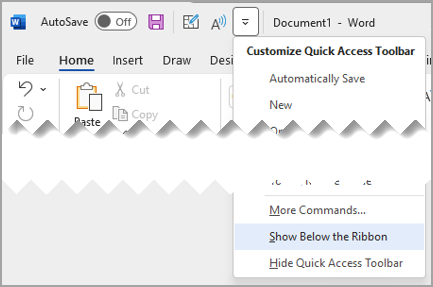
Select Customize Quick Access Toolbar.
-
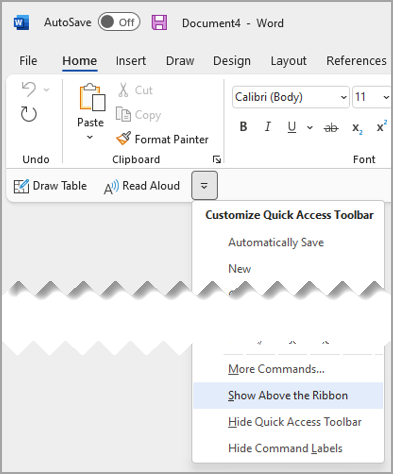
In the list, select Show Below the Ribbon.
or Show Above the Ribbon.
Notes:
-
You can set the location commands in Options.
-
Select File > Options > Quick Access Toolbar>Toolbar Position.
-
Show or Hide command labels on the Quick Access Toolbar
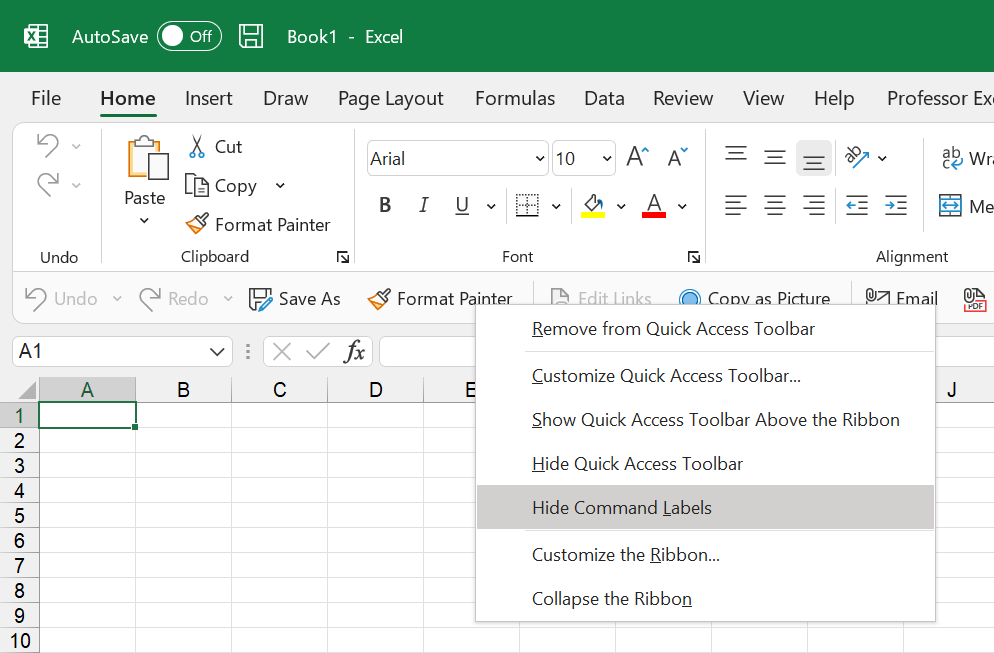
If the Quick Access Toolbar is set below the ribbon, you can show or hide the command labels.
Important: The Quick Access Toolbar MUST be set below the ribbon to show or hide the command labels.
-
Select Customize Quick Access Toolbar.
-
In the list, select either Show Command Labels
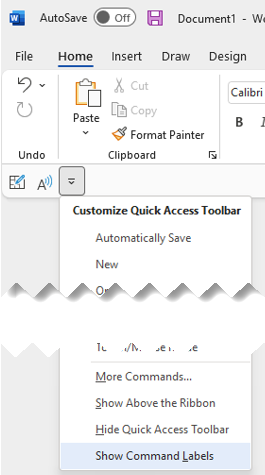
or Hide Command Labels.

Add a command to the Quick Access Toolbar
-
On the ribbon, select the appropriate tab or group to display the command that you want to add to the Quick Access Toolbar.
-
Right-click the command, and then select Add to Quick Access Toolbar on the shortcut menu.

Add a command to the Quick Access Toolbar that isn’t on the ribbon
-
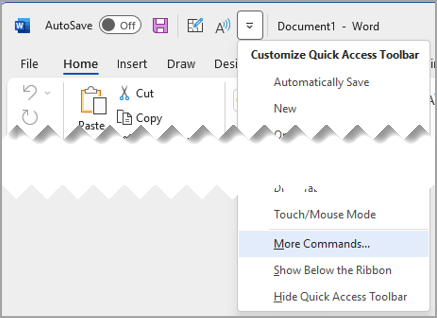
Select Customize Quick Access Toolbar > More Commands.
-
In the Choose commands from list, select Commands Not in the Ribbon.
-
Find the command in the list, and then select Add.
Tip: If you can’t find the command you want on the Commands Not in the Ribbon list, try setting Choose commands from to All commands.
Remove a command from the Quick Access Toolbar
-
Right-click the command you want to remove from the Quick Access Toolbar.
-
Select Remove from Quick Access Toolbar on the shortcut menu.
Change the order of the commands on the Quick Access Toolbar
-
Right-click the Quick Access Toolbar then select Customize Quick Access Toolbar on the shortcut menu.
-
Under Customize Quick Access Toolbar, select the command you want to move.
-
Select the Move Up or Move Down arrow.
Customize the Quick Access Toolbar by using the Options command
You can add, remove, and change the order of the commands on the Quick Access Toolbar by using the Options command.
-
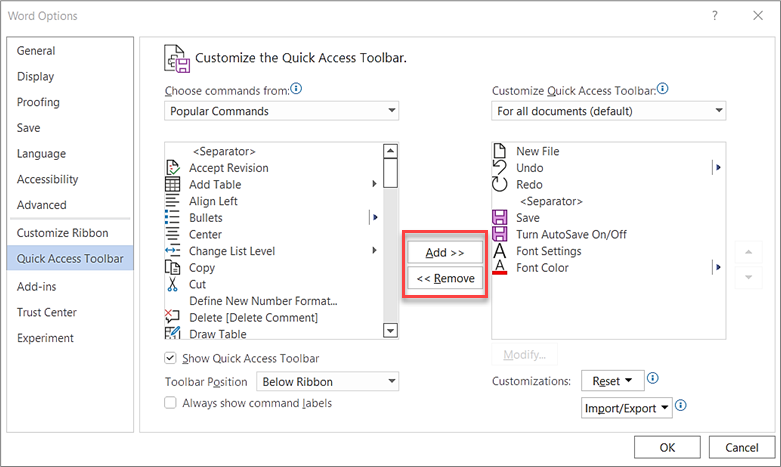
Select File > Options > Quick Access Toolbar.
-
Use the Add and Remove buttons to move items between the Customize the657 Access Toolbar list and the Choose command from list.
Notes: To find an item in the Choose commands from list, it may be helpful to first confirm its location and name within the app. Commands that are no longer visible in the app could still be listed here under All commands. To help identify this type of command, a more descriptive tooltip name may appear in parentheses next to the legacy command name in this form:
-
Address [Document Location]
-
Formatting [Paste Formatting]
-
Formulas [Paste Formulas]
-
Values [Paste Values]
Reset the Quick Access Toolbar to the default settings
-
-
Open the Quick Access Toolbar short-cut menu, and then select Customize Quick Access Toolbar.
-
In the Customize the Quick Access Toolbar window, select Reset > Reset only Quick Access Toolbar.
Export a customized Quick Access Toolbar
You can export your ribbon and Quick Access Toolbar customizations into a file that can be imported and used by a coworker or on another computer.
-
Select File > Options > Quick Access Toolbar.
-
Select Import/Export > Export all customizations.
For more information about how to customize the ribbon, see Customize the ribbon in Office.
Import a customized Quick Access Toolbar
You can import customization files to replace the current layout of the ribbon and Quick Access Toolbar. By being able to import the customization, you can keep Microsoft Office programs looking the same as your coworkers or from computer to computer.
Important: When you import a ribbon customization file, you lose all prior ribbon and Quick Access Toolbar customizations. If you think that you might want to revert to the customization you currently have, you should export them before importing any new customizations.
-
Select File > Options > Quick Access Toolbar.
-
Select Import/Export > Import customization file.
For more information about how to customize the ribbon, see Customize the ribbon in Office.
When custom groups show a green or blue ball on the Quick Access Toolbar
Icons represent custom groups of commands on the Quick Access Toolbar when an icon is chosen. If a custom group on the Quick Access Toolbar displays a green or blue ball for an icon, it means that an icon has not been selected for that custom group. You can add an icon for a custom group after the group has already been created and displays on the Quick Access Toolbar.
-
In the Quick Access Toolbar drop-down, select More Commands.
-
In the left navigation bar, select Customize Ribbon.
-
In the Customize the Ribbon column on the right, select the custom group.
-
Select Rename.
-
Select an icon.
-
Select OK > OK.
The name of the Quick Access Toolbar speaks for itself. Here are placed those tools, that the user uses most often. Moreover, here you can place tools that are not in the strip with bookmarks. For example, the «PivotTable Wizard», etc.
The Quick Access Toolbar – is the first best solution for users, who are migrating from older versions of Excel and do not have time to the learning of the new interface or its settings, but want to start working right away.
This panel is still useful in the mode of the folded main band of tools. Then there is not necessary to leave the convenient for viewing and working mode with folded strip each time.
Practical use of the Quick Access Toolbar
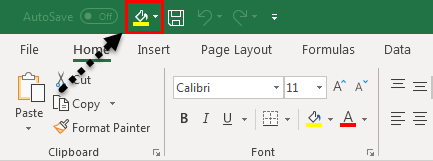
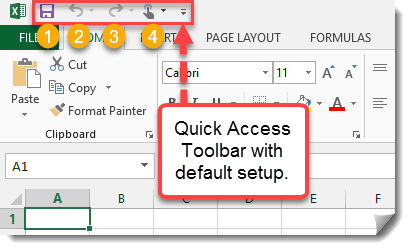
There is the Excel shortcut bar above of the wide tool bar. By default, there are 3 most frequently used tools:
- Save (CTRL + S).
- Cancel the input (CTRL + Z).
- Repeat input (CTRL + Y).
The amount of tools in the Quick Access Toolbar can be changed with using the setting.
- When downloading the program, the active cell on the blank sheet is located at A1 address. Type the letter «a» from the keyboard and press «Enter». The cursor will move down to the cell A2.
- Click the «Undo Input» tool (or the hotkey combination: CTRL + Z) and the text disappears, but the cursor returns to the starting position.
- If you perform to several actions on the worksheet (for example, fill in several letters with the letters), then the drop-down list of the action history for the «Cancel input» button will be available for you. Thus, you can cancel a lot of actions with one click, which is very convenient.


After of the canceling several actions, the history list for the «Repeat Input» tool is available.
Customize the Excel shortcut bar
The Quick Access Toolbar – is the flexible toolbar in Excel for simplifying and improving the user experience in the program.
You can place buttons of frequently used tools. Try adding the «Create» tool button yourself.
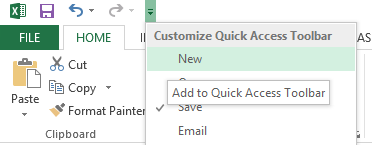
- On the right side, click on the drop-down list to call up the configuration options.
- From the list that appears, select the «New» option and add the tool for creating new Excel workbooks.
- Mark again the option «Create» from the list of settings to delete this tool.
The advanced Setup
In the panel setup options, using the drop-down list, only a few popular tools, but you can add to the panel any of tool available in Excel.
- To flexibly configure the contents of the Quick Access Toolbar, you must select the «Other Commands» option. The «Excel Options» window appears with the parameter «Quick Access Toolbar» already selected. To call this window you can and through the «File» option «Options», then select the necessary option.
- Select the tool in the left list, that you want to use often. Click on the «Add» button and press OK.
- To remove tools, select the tool from the right list and click on the «Delete» button, then OK.
Changing of the location
If necessary, this panel can be placed under the tool bar, not above it.
Open the drop-down list and select the «Place below the ribbon» option. This task can also be solved by using the context menu. To open the context menu, you need to right-click on the panel.
To return the panel back (by placing it over the tape), select the «Place over tape» option in the same way.
You probably know this situation: You just quickly want to use a function in Excel, but it takes you way too much time searching it within the menu bar. Admittedly, the ribbon structure of Excel can be quite confusing. But there is a solution: The Quick Access Toolbar. You can save the most important or frequently used buttons in this menu bar on top of the screen. That way, you can easily access your favorite functions. So let’s see how it works and learn some tips and tricks.
Please note: There will be updates end of 2021 for all Microsoft 365 subscribers (formerly Office 365). While most things remain the same, the layout slightly changes and a few buttons might be relocated. Please refer to this article for the upcoming changes.
The Ribbon
First of all, what is the Ribbon and what is the Quick Access Toolbar?
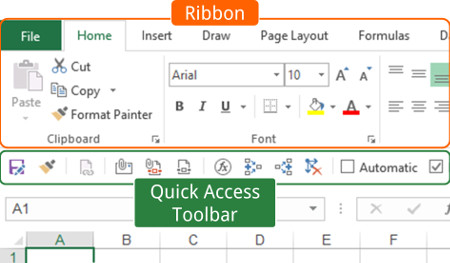
Excel is organized within two major menus:
- The Ribbon, the large menu bar on top of the worksheet.
- You can add buttons (which you frequently use) to the Quick Access Toolbar (QAT). The QAT is a small row of button above or below the ribbon.
Using these two menus cleverly, you can save a lot of time. Let’s take a close look at it.
The “QAT” is always on top of the screen. It doesn’t change when you go to another ribbon. That’s why it’s very useful: You can save your most important functions there and always “quickly” access them.
Add or remove buttons to the Quick Access Toolbar
Adding and removing buttons from the QAT is very easy: Just right click on any button on the ribbon and click on “Add to Quick Access Toolbar”. Yes, it’s that simple. If the button is greyed out it means that it is already in your “QAT”.
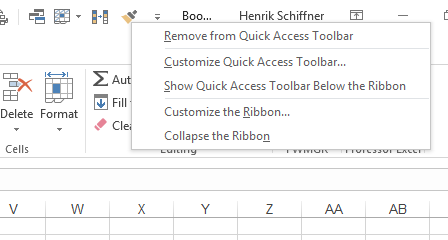
Removing a button works almost the same way: Right click on the button on the “QAT” and click on “Remove from Quick Access Toolbar”. Now it’s gone again.
How to organize the Quick Access Toolbar
Often, you slowly add more and more button to the Quick Access Toolbar. After some time, you might want to reorganize it or clean it up.
Excel offers a menu for (re-)moving button to the Quick Access Toolbar. You can also add more rare (but still very useful buttons), which are not on any ribbon.
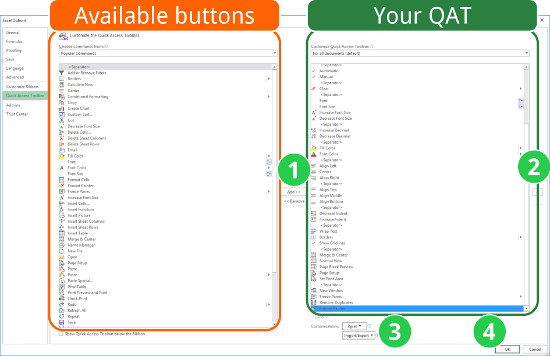
Right click on the Quick Access Toolbar. Then click on “Customize Quick Access Toolbar”. Now you will see the window on the right side. It has to parts: The available commands (orange) and your current Quick Access Toolbar (QAT, green).
You got the following options (the numbers correspond to the picture):
- Add or remove buttons. Select a button on the left hand side and press add. It will be inserted into your Quick Access Toolbar right under your currently highlighted item.
If you want to add a special button, change the drop-down menu on the top from “Popular commands” to “All commands”. - Move your buttons up or down with the small arrow buttons in order to re-organize their order.
- Furthermore, you can import or export existing Quick Access Toolbar. Attention: If you import such settings, the existing customization will be lost.
- Confirm by clicking OK.
Import and export customization files
Please take a look at the image above: Importing and exporting customization files can be done by clicking that button. These customization files include your current Quick Access Toolbar settings as will as your personal ribbon settings (if you got some).
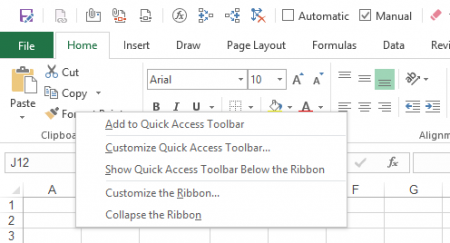
How do you get there? Right click on any ribbon or your Quick Access Toolbar and click on “Customize Quick Access Toolbar”.
Attention: If you import such settings, the existing customization will be lost.
Add a button for a VBA macro
Besides normal buttons you can also create buttons for your VBA macros. Excel allows you to add any “Sub” with no arguments. “Private Subs”, “Subs” with input arguments or functions don’t work.
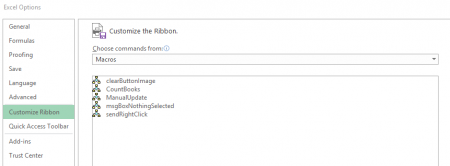
In order to add your individual button, right click on the QAT again. Next, click on “Customize Quick Access Toolbar”. Switch the top drop down menu from “Popular commands” to “Macros”. Now you see the list of your available macros (either in your current document or of your Excel add-in (“xlam”-file). Simply add them with the Add button.
Do you want to boost your productivity in Excel?
Get the Professor Excel ribbon!

Add more than 120 great features to Excel!
How to show the QAT under or above the ribbon
You got two options for the location of the “QAT”: Above or under the ribbon. Both positions have advantages and disadvantages:
| Advantages | Disadvantages | |
|---|---|---|
| QAT above the ribbon | Needs less space, as the space is otherwise just blank. | Half of the ribbon will be hidden when a new (special) ribbon (like “PivotTable”) opens. |
| QAT below the ribbon | Won’t be hidden when a new ribbon (like “PivotTable”) opens. | Needs more space on the screen than above the ribbon. |
You can easily change the position: Right click on any ribbon or the QAT and click on “Show Quick Access Toolbar above the Ribbon” (or below, depending on the current state).
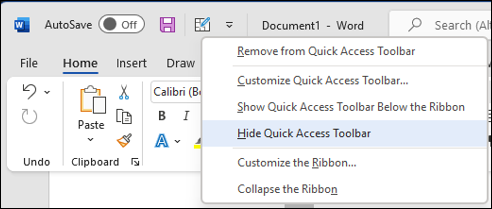
How to hide the Quick Access Toolbar completely
In newer Excel versions, you can hide the QAT completely. Just right-click on it and then on “Hide Quick Access Toolbar”.
You want to get it back? No problem. Now, right-click on any ribbon and then on the “Show Quick Access Toolbar” button.
How to show descriptions / names of the buttons in the Quick Access Toolbar?
Besides the buttons, you can also show the names next to them in the QAT. Just right-click on the QAT and then on “Show Command Labels”.
Hiding the button names works the same way: Right-click on the QAT and then on “Hide Command Labels”.
Please note: This only works with newer versions of Excel / Office and only if the QAT is located below the ribbon.
Access the Quick Access Toolbar with keyboard shortcuts
All you have to do is press the Alt key on the keyboard. Excel shows you then your options for accessing the QAT with keyboard shortcuts, usually shown with numbers. The first QAT got the number 1, the second one 2 and so on. Just press it and you can use keyboard shortcuts for your individual QAT. Quite cool, isn’t it?
Which buttons should you add to the Quick Access Toolbar?
The short answer: It depends. It highly depends on what you need in your daily life in Excel and what steps you already got covered with keyboard shortcuts. If you for example always use Ctrl + c for copying cells, it doesn’t make sense to add the copy button to the QAT.
But still, we got some advice for you:
- Slowly add – one by one – button of functions you usually take some time searching for.
- Nonetheless, you should make sure that you sometimes use these commands. Don’t add functions you only use once per year – therefore the space is too precious.
- There are some button with the same functions in all Microsoft Office programs. A good example is the format painter: It is available in Word, PowerPoint, Excel and even Outlook. So why don’t you put it in the same position in each program? That way, you can also remember the corresponding Alt-keyboard shortcut easily.
- Most important shortcuts should go to the left hand side of the QAT. That way, they won’t be covered if a new ribbon opens. Also the keyboard shortcuts for accessing them is shorter and therefore easier.
Download: Our Quick Access Toolbar for your reference
It’s contradicting: In the previous chapter we just said that you should make up your individual “QAT”. But nonetheless, we’ve created an example of what buttons might be useful. But of course, it highly depends on your daily work in Excel.
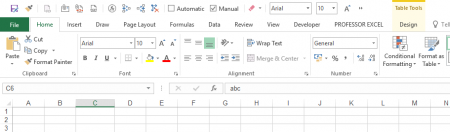
So this is our suggestion:

Explanation
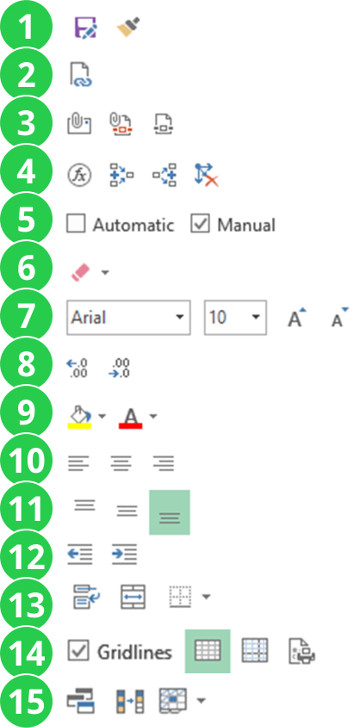
Let’s go through it by groups (each group is divided by a separator):
- The save-as and format painter buttons we use throughout Microsoft Office. Maybe the save-as button is not really necessary as there is a direct shortcut (just press F12). But the format painter is very useful.
You might notice, that there is no undo or redo button. The reason is, that we use these functions with the keyboard (Ctrl + z and Ctrl + y). - Edit links is for our daily work very helpful. It’s not only a button, it also shows if there are links in the workbook.
- The third group contains sharing and exporting functions:
- Attach the active workbook to a new email.
- Attach the active workbook as a PDF file to a new email.
- Save the selected worksheets as a PDF file to the disk.
- These formula auditing buttons are very helpful for error checking: Check the current formula step by step or trace precedents and dependents.
- Change between automatic and manual calculation. Also these buttons not only let you change the calculation method, they also show you the current option.
- Clear not only the cell contents but also the formatting with the additional deleting options.
- All important buttons for the font (type and size).
- Increase or decrease the number of decimals.
- These – and the following groups – are about formatting: Fill color and font color.
- The horizontal text alignment (left, center, right).
- The vertical text alignment (top, middle, bottom).
- Increase or decrease the indentation.
- Further cell formatting options:
- Wrap text.
- Merge selected cells.
- Define the cell borders.
- Sheet layout options:
- Hide or show the gridlines.
- Normal view.
- Print preview.
- Print setup.
- Miscellaneous:
- View current workbook in more windows.
- Remove duplicates.
- Freeze header rows or columns.
Download
If you like these suggestions, please feel free to download the whole customization file here. You can import it into your Excel as described above. But please be aware, that your current customization will be removed. So please export it first if you want to keep it.
Image by Free-Photos from Pixabay
What is the Quick Access Toolbar?
The Quick Access Toolbar is a set of icons that allows you to easily access the commands you use the most. By default the quick access toolbar only contains 4 commands but the commands it contains can be customized to suit the user.
- Save allows you to quickly save a file.
- Undo allows you to quickly undo the last command or action that was performed in the workbook.
- Redo allows you to quickly redo the last command or action that was undone in the workbook.
- Mouse/Touch Mode Toggle (only for touch screen devices) allows you to toggle between a mouse mode and a touch screen mode. In touch screen mode, commands in the ribbon are more spaced out so they’re easily accessed by touch.
Changing The Quick Access Toolbar Location
If you don’t like the default location above the ribbon then you can move the Quick Access Toolbar below the ribbon.
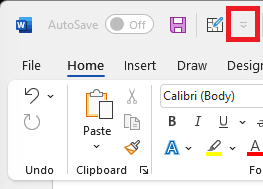
- Click on the small down arrow to the right of the Quick Access Toolbar to open the drop down menu.
- Select Show Below the Ribbon from the menu.
- Now the Quick Access Toolbar displays underneath the ribbon.
These are the only two places the Quick Access Toolbar can live and it’s restrained to being left aligned in both cases.
Adding Commands To The Quick Access Toolbar
You can add commands to your Quick Access Toolbar and you’re not restricted only to commands that appear in the ribbon, you can also add commands that don’t appear in the ribbon.
- Click on the small down arrow to the right of the Quick Access Toolbar to open the drop down menu.
- There is a selection of 12 common commands, including the 4 default commands, that can be added to the Quick Access Toolbar by checking them off in this menu.
- To choose from all of Excel’s available commands select More Commands from the menu.
- Select an option from the Choose commands from drop down menu. Commands are organised in several useful fashions, or you can choose to view All Commands.
- Select a command which you want to add to the Quick Access Toolbar.
- Press the Add button. You can also remove commands with the Remove button.
- Use the Up or Down arrow to rearrange the order of the Commands in your toolbar.
- Press the OK button.
Removing A Command From The Quick Access Toolbar
Removing a command from the Quick Access Toolbar is easy.
- Right click on the command you want to remove.
- Select Remove from Quick Access Toolbar from the menu.
Use Your Quick Access Toolbar Commands With Keyboard Shortcuts
If you like using keyboard shortcuts, you can use the commands with Alt + Number(s) keyboard shortcut. After pressing the Alt key, the numbers associated with the commands will be shown.
About the Author
John is a Microsoft MVP and qualified actuary with over 15 years of experience. He has worked in a variety of industries, including insurance, ad tech, and most recently Power Platform consulting. He is a keen problem solver and has a passion for using technology to make businesses more efficient.
In this tutorial, we will master the Quick Access toolbar with which you can save, undo, redo, print, and do more to your Excel workbook.
We will illuminate other important functions and their shortcut keys to run them, and save time and increase productivity.
What is the Quick Access toolbar?
The Quick Access toolbar is a bar located in the top-most part, above the main tabs, in the Excel application.
You can find useful tools like Save, Undo, and Redo by default that we regularly use while working in any Office application.
Moreover, you can add more tools you frequently use in this ribbon by customizing it.
Steps to customize the Quick Access toolbar
To add more tools like Print or Mouse Mode or Touch Mode, follow the steps below.
- Open an Excel file.
- Hover the mouse pointer to the top-most part of the program.
- Click on down-arrow to open a drop-down list.
- Choose a tool you wish to add to the toolbar.
- Uncheck the tools you want to remove from the bar.

You can see the several tools you can add to the toolbar to access them quickly.
- If you want to shift the toolbar below the ribbon, select Show below ribbon from the drop-down list.

If you want to add a tool that is absent in the drop-down list, follow the steps.
- Open the drop-down list by clicking the down arrow button.
- Click More Command in the list.
- The options window opens to add a tool in Excel in the Quick Access toolbar.
- If you cannot find the tools you want to add to the list, choose All commands in the Choose commands from box.
- Click on a tool you wish to add.
- Click Add in the middle.
- Click OK when you have finished.

Useful tools and their shortcut keys
There are many tools in Excel that we regularly use while working in a workbook. Some of the most commonly used tools are Save, Undo, Redo, Cut, Copy, Paste, and more.
It’s hectic and time-consuming to find and click on a button to use the command. It will be easier to use a shortcut key and get the job done. Most of the commands are similar to all Microsoft apps.
Let’s get started with some useful tools or functions that you might use regularly and learn their shortcut commands.
1. Save
- The Save option is available in the Quick Access toolbar above.
Shortcut
- Use CTRL+S on Windows and Mac to save a file after making changes.
2. Save As
To save a file in a new location in your system.
- Click on the File tab.
- Click Save As on the left.
- Choose a location to save.
- Click Save.
Shortcut
- Press F12 or Fn+F12 on Windows to Save As a file.
- Press ⌘+SHIFT+S on Mac to Save As a file.
If you are saving a file for the first time, pressing CTRL+S will be enough to Save As that file.
3. Select All
- Click on the triangle icon below the Name Box to select the entire worksheet.
Shortcut
- Press CTRL+A to select the entire sheet in Windows.
- Press ⌘+B to select all in Mac.
4. Copy a text
- Select a text or click on a cell.
- Go to the Home tab in a workbook.
- In the Clipboard section, click Copy to copy a text.
Shortcut
- Press CTRL+C to copy a text on Windows and Mac.
Copy a formula
- Click on the cell with a formula.
- Click in the formula bar with fx written beside.
- Select the formula and press CTRL+C to copy the formula.
5. Cut a text
- Select a text or click on a cell.
- Go to the Home tab in a workbook.
- In the Clipboard section, click Cut to cut a text.
Shortcut
- Press CTRL+X to cut a text on Windows and Mac.
6. Paste a text
- Select a text or click on a cell.
- Go to the Home tab in a workbook.
- In the Clipboard section, click Paste to paste a text.
Shortcut
- Press CTRL+V to paste a value on Windows and Mac.
7. Open a new workbook
To open an existing workbook from the device.
- Go to the File tab.
- Click Open.
- Choose from the list of files you see or click Browse if you cannot find the workbook you’re looking for.
Shortcut
- Press CTRL+O on Windows and Mac to open an existing workbook.
8. Create a new workbook
To create a new workbook in Excel.
- Go to the File tab.
- Click New.
- Select Blank Workbook or choose a template you like by clicking the More Template button.
Shortcut
- Press CTRL+N on Windows and Mac to create and open a new blank workbook.
9. Bold a text
- Select a text or click on a cell.
- Go to the Home tab in a workbook.
- In the font section, click on the capital B icon to bold a text.
Shortcut
- Press CTRL+B on Windows to bold a text.
- Press ⌘+B on Mac to bold a text.
10. Italic a text
- Select a text or click on a cell.
- Go to the Home tab in a workbook.
- In the font section, click on the capital I icon to italic a text.
Shortcut
- Press CTRL+I on Windows to italic a text.
- Press ⌘+I on Mac to italic a text.
11. Underline a text
- Select a text or click on a cell.
- Go to the Home tab in a workbook.
- In the font section, click on the capital and underlined U icon to underline a text.
Shortcut
- Press CTRL+U on Windows to underline a text.
- Press ⌘+U on Mac to underline a text.
12. Find
To find values in Excel.
- Go to the Home tab.
- In the Editing section, click Find & Select.
- Click Find to open the find window.
Shortcut
- Press CTRL+F to open the find window on Windows and Mac.
Read more here: [Detailed Guide] How to Find & Replace in Microsoft Excel?
13. Clear Values from cells
To clear values like texts, numbers, and formulas.
- Go to the Home tab.
- In the Editing section, pull down the Clear button.
- Click Clear Contents.
Shortcut
- Press Delete to clear contents from cells on Windows and Mac.
14. Undo
To undo or revoke recent changes made to a file.
- Click on the left arrow in the Quick Access toolbar in the top.
- This option will be visible only if changes are made recently.
Shortcut
- Press CTRL+Z in Windows and Mac to undo recent changes made to the file.
15. Redo
To redo recently undone changes.
- Click on the right arrow in the Quick Access toolbar in the top.
- This option will be visible only if changes are undone recently.
Shortcut
- Press CTRL+Y in Windows and Mac to redo changes made to the file.
Conclusion
This article was a detailed guide to learning the Quick Access toolbar and important tools and their shortcut keys. Hope this piece was informative to you. Stay tuned for more tutorials like this.
Reference- Wallstreet Prep.
The Quick Access Toolbar is a customizable toolbar that contains a set of commands that are independent of the tab on the ribbon that is currently displayed. You can move the Quick Access Toolbar from one of the two possible locations, and you can add buttons that represent commands to the Quick Access Toolbar.
Contents
- 1 What is the definition of quick access toolbar?
- 2 What is the use of quick access?
- 3 Why is quick access toolbar useful?
- 4 What is quick access shortcut?
- 5 How many keys are in Quick Access toolbar?
- 6 What is the use of quick access toolbar Brainly?
- 7 What is the function of Quick Access toolbar in Powerpoint?
- 8 How do I use the Quick Access toolbar in Excel?
- 9 How do I access the Quick Access toolbar?
- 10 How do I recover files from quick access?
- 11 How do I show quick access on my computer?
- 12 How many features does the quick access toolbar have?
- 13 What is Quick Access toolbar explain in detail Class 9?
- 14 What is the Quick Access toolbar containing a set of most often used commands?
- 15 How do I add spelling and grammar to the Quick Access toolbar?
- 16 What is a toolbar in Excel?
- 17 Where is quick access in Excel?
- 18 How do I use quick access in Windows 10?
- 19 What is the Quick Access menu in Windows 10?
- 20 Can I copy my quick access links to new computer?
What is the definition of quick access toolbar?
The Quick Access Toolbar is located to the right of the Microsoft Office. Button . It contains commands that are used most often, for example Redo, Undo and Save. Word 2007 allows you to customize the Quick Access Toolbar, meaning that you can add and remove commands as you like.
What is the use of quick access?
It gives you quick access to commonly used commands such as Save, Undo, Redo, etc. When you click the drop-down arrow next to toolbar it offers more commands. With a left click you can add any of these commands to Quick Access Toolbar. You can also remove the commands added to the tool bar.
Why is quick access toolbar useful?
The Quick Access Toolbar is a command line that appears either above or below the main ribbon tabs in Excel, PowerPoint and Word. The Quick Access Toolbar grants direct (quick) access to a set of desired commands in a toolbar that is always visible no matter which ribbon tab is selected.
What is quick access shortcut?
The Quick Access Toolbar is a convenient place to add your favorite commands because they will always stay visible no matter where you are on the Ribbon.You can right-click any command on the Ribbon and select Add to Quick Access Toolbar. The shortcut is the Alt key, followed by a number.
How many keys are in Quick Access toolbar?
The Quick Access Toolbar (QAT) consists of a combination of up to 20 Commands either specified by the application (known as the application defaults list) or selected by the user.
What is the use of quick access toolbar Brainly?
The Quick Access Toolbar, is located above the Ribbon (top-left) and provides access to commonly used features and commands, such as Save and Undo/Redo.
What is the function of Quick Access toolbar in Powerpoint?
Located just above the Ribbon, the Quick Access Toolbar lets you access common commands no matter which tab is selected. By default, it includes the Save, Undo, Redo, and Start From Beginning commands. You can add other commands depending on your preference.
How do I use the Quick Access toolbar in Excel?
Click File > Options > Quick Access Toolbar. Right-click anywhere on the ribbon and select Customize Quick Access Toolbar… from the context menu. Click the Customize the Quick Access Toolbar button (the down arrow at the far-right of the QAT) and choose More Commands in the pop-up menu.
How do I access the Quick Access toolbar?
Use the down menu arrow on the toolbar and click or tap “Show below the Ribbon.” Alternatively, you can right-click or press-and-hold any button on the ribbon or the toolbar to access the “Show Quick Access Toolbar below the Ribbon” option.
How do I recover files from quick access?
How do I restore Quick Access?
- Restore Quick Access Folder. Open the File Explorer from the Taskbar. In the File Explorer, click on the View tab.
- Reset Folders. Open the File Explorer app from the taskbar.
- Reset File Explorer from the Command Prompt. Type cmd in the search.
How do I show quick access on my computer?
In File Explorer, click on the View tab at the top to display the View ribbon. From there, click on the Options button. In the Folder Options window under the General tab, you’ll see that the option for “Open File Explorer to:” reads Quick access. Simply click on the entry for Quick access and change it to This PC.
How many features does the quick access toolbar have?
By default, the Quick Access Toolbar contains four commands: AutoSave, Save, Undo and Redo.
What is Quick Access toolbar explain in detail Class 9?
Computer Science Class 9 Englis…
The Quick Access Toolbar is located to the right of the Microsoft Office Button . It contains commands that are used most often, for example Redo, Undo and Save. Word allows you to customize the Quick Access Toolbar, meaning that you can add and remove commands as you like.
What is the Quick Access toolbar containing a set of most often used commands?
The Customize Quick Access Toolbar button (down pointing arrow) appears on the Quick Access Toolbar and opens the Customize Quick Access Toolbar menu. This menu contains a list of the default commands on the toolbar.
How do I add spelling and grammar to the Quick Access toolbar?
Select the Popular Commands category. Drag the scroll box to locate the Spelling and Grammar command. Click the command to select it, and click the Add button . The Spelling and Grammar command is added to the Quick Access Toolbar.
What is a toolbar in Excel?
Excel toolbar (also called Quick Access Toolbar. It enables users to save important shortcuts and easily access them when needed. read more) is presented to get access to various commands to perform the operations. It is presented with an option to add or delete commands to it to access them quickly.
Where is quick access in Excel?
The Quick Access Toolbar (QAT) is at the top of the Excel window, and comes with a few default commands installed.
How do I use quick access in Windows 10?
How to Use Quick Access in Windows 10
- Open File Explorer (folder icon on the taskbar).
- Navigate to the folder that you want to pin to Quick Access.
- Select that folder by clicking on it.
- Click the Home tab on the Ribbon. The Home tab is shown.
- In the Clipboard section, click the Pin to Quick Access button.
The quick access menu has the ability to show frequently or recently used items on the computer. To change these settings, open the Start button at the bottom left of your screen, then choose File Explorer. At the top left of File Explorer, there is the Quick access menu.
Can I copy my quick access links to new computer?
If you want to transfer your Quick Access Files to another computer, just copy the TemQA folder and paste it in the C Drive of the other computer. To restore the Quick Access Folder we are going to use the Command Prompt.
Written by Puneet for Excel 2007, Excel 2010, Excel 2013, Excel 2016, Excel 2019, Excel for Mac
KEY POINTS
The idea of using quick access toolbar is to have all the commands that you frequently use in one place so that you don’t need to move from tab to tab to find those commands.
- On the quick access toolbar, you can add options that you use frequently to access them easily.
- You can change its position from the title bar to below the ribbon.
- It is activated by default and you can’t hide it.
And in this tutorial, we will be exploring everything about the quick access toolbar. So, let’s get started.
What is the Quick Access Toolbar
The Quick Access Toolbar is a thin bar that can hold buttons for the commands, and it is located at the left side of the title bar and is always visible regardless of which ribbon tab is active. You can add and remove buttons from the quick access toolbar and can change its position as well.
Below is the default quick access toolbar that you can see on opening an Excel application for the first time.

It is a fixed toolbar that can’t be free-floating, and commands on the Quick Access toolbar always appear as small icons without any text (except the autosave switch).
This tutorial is a part of our Basic Excel Skills, and if you want to sharpen your existing Excel Skills, check out these Excel Tips and Tricks.
Default buttons on the quick access toolbar
Even before you customize it and add your buttons for your favorite commands, it has default buttons:

- Autosave: It is a switch that you can turn on to save a workbook to OneDrive and SharePoint on a real-time basis. That means Excel will save the workbook in one small intervals so that you won’t lose data.
- Save: This button saves the active workbook or works as “Save As” if the active workbook is not saved yet.
- Undo: This button undoes the effect of the last action.
- Redo: This button reverses the effect of the last undo.
What if the quick access toolbar is not available
The quick access toolbar is always visible in the Excel window. But when you are using Excel in full-screen mode only in that case, it will be hidden, and display it (temporarily), you need to click on the title bar or press the alt key.

Customizing the Quick Access Toolbar
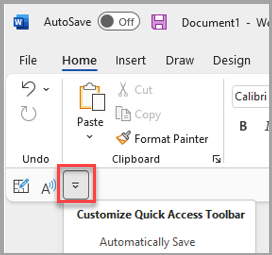
One of the most significant advantages of the quick access toolbar is you can customize it in so many ways. On the right side of the QAT, you have a small drop-down, and when you click on this drop-down find options to customize it.

In this drop-down, you have a list of some of the basic commands which you can add. You simply need to select the option that you want to add, and it will add a new button to the QAT.

Next to that list, you have a button to add more commands (we will discuss it in a few seconds), and in the end, there’s a button to show the quick access toolbar below the ribbon.

Add more commands to the Quick Access Toolbar
Once you click on the mode commands, it will take you to the Excel options where you have the whole bunch of these to customize the quick access toolbar.

- On the left side, you have options to select.
- And on the right side, you have the list of the commands that you have on the already quick access toolbar.
Steps to customize quick access toolbar
- Open the dropdown “Choose Commands from” and select the tab from where you want to add the command.

- After that, select the command that you want to add and click on the “Add” button. The moment you click on the add button, you’ll get that command in the quick access toolbar commands list.

- In the end, click OK, and you will have the new command that you have just added the quick access toolbar.


I’m sure you have seen that there are a lot of options in the “Choose commands from” drop-down that you can add to the quick access toolbar.

All the commands that you have in Excel but for the categorize under different groups.
- Popular Commands: Here, you can find all the popular commands that Excel has, and most of these are frequently used commands.
- Commands that are not in the ribbon: It is a list of commands that are not listed in the ribbon, but you can add them on the quick access toolbar.
- All Commands: It is a complete list of commands that Excel offers you to use.
To make it easy for you to find a command that you want to add to the quick access toolbar, you also have tab-wise commands that you can select.
The other way to add the command to the quick access toolbar is to go to that commands button and the ribbon and right-click on it and select “Add to quick access toolbar”.

And this will add a button on the quick access toolbar for the command you have selected.

Remove buttons from the quick access toolbar
If you want to remove an option from the quick access toolbar, just right-click on that button and select “Remove from Quick Access Toolbar“.

The second way is to open the more commands dialog box and select the command and click on the remove button.

And you can also untick commands from the dropdown menu that is listed there.

Rearranging the icons
From the Excel options, you can rearrange the icons that you have on the quick access toolbar. When you select a button, it activates the up and down arrow at the right side of the list, and you can use these arrow buttons to rearrange the selected command’s button.
![]()
Tips for using quick access toolbar like a PRO
Below are some of the tips that you can learn to use the quick access toolbar to its best.
Check Out: 100 Excel Tips and Tricks
1. Customize QAT for a Single Workbook
When you make customization in the quick access toolbar that applies to the entire Excel application. But there is also an option to have different customizations for different workbooks. From the Excel options, you can select the option.
- For all documents (default)
- For a workbook.

This dropdown shows all the active workbooks that you can select and apply the customization.
2. Move the quick access toolbar to the bottom of the ribbon
As the quick access toolbar is on the title bar that gives it less space to add more commands. But you can also move it below the ribbon, which gives it the most based to add commands.

For this, you simply need to click on the dropdown that you have and select “Show below the ribbon”.

You can also do this while customizing the quick access toolbar from the Excel options. There is a small box that you need to tick mark.

3. Undo and Redo Drop Down
Usually, for undo and redo, you need to press the shortcut key again and again, but with the buttons that you have on the quick access toolbar, you can undo and redo up to the last 100 activities.
Simply click on the dropdown and select the activity up to which you want to undo or redo.

4. Spell check button on the quick access toolbar
You can also add the spell check button on the toolbar which can be handy for you if you want to check your worksheet for spelling mistakes.

It’s there in the popular commands list.

5. Reset the quick access toolbar buttons
If you want to go back to the default settings and remove all the customization that you have made and the quick access toolbar, go to the More Commands ➜ Reset Button ➜ Reset only Quick Access Toolbar”.

There’s one thing that you need to take care that once you reset the settings for the quick access toolbar, you cannot restore them.
6. Add quick print to the QAT
If you do a lot of printing, then you can add a quick print button to the quick access toolbar. It’s like a one-click print command.

You can add it from the popular commands list.

7. Run macros from QAT
You can also run macros from the quick access toolbar by adding a button assigning a macro from the list. Just need to select macros from the choose commands and then select the macro you want to add and, in the end, click on the add button.

You can also select an icon, so the command from the modify button.

8. Import and export settings
You can also import and export customization that you have done with the quick access toolbar using the Import/Export button.

- Import Customization File: It asks you to locate the customization file to load. And when you load a customization file, it replaces all the previous settings and customizations you have on the Excel ribbon and quick access toolbar.
- Export All Customizations: It prompts you to enter a filename and location for the file to export.
This one problem with the import and export option is that you cannot export and import customization for quick access toolbar alone.
9. Other useful buttons you can add to the Quick Access Toolbar
Below are some of the useful commands that you can add to the quick access toolbar:
- Fill Series (Add Serial Number in Excel)
- Strikethrough
- Copy
- Paste
- Visual Basic Editor
- Auto Filter
- New Note
- AutoFormat
- Double Underline
- Subscript
- Superscript
There’s no Quick Access Toolbar in Excel Online (Excel Web Version)
The way I use Excel Quick Access Toolbar
I have all the commands that I frequently use on the quick access toolbar, and I have made the Excel ribbon to show only tab names, and the quick access toolbar is below the ribbon.

In this way, I can save a lot of space for the worksheet view, and the quick access toolbar has a lot more area to add more command buttons.
Keyboard Shortcuts for Quick Access Toolbar
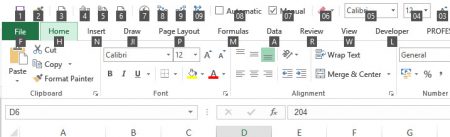
You can also use a keyboard shortcut to use buttons on the quick access toolbar. When you press ALT, Excel shows you all the keyboard shortcuts for the quick access toolbar.

As you can see in the above snapshot, commands on the quick access toolbar assigned numbers for shortcut keys.
Excel Keyboard Shortcuts
For example, the shortcut Alt + 1 executes the first command on the Quick Access toolbar, and then after the ninth command, the shortcuts change to 09, 08, and so on.
After the 18th command, the shortcuts change to 0A, 0B, and so on, and after Alt+0Z, Excel stops assigning shortcuts.
Excel Quick Access Toolbar (Table of Contents)
- Quick Access Toolbar in Excel
- Customize Quick Access Toolbar in Excel
- How to Insert Chart Quickly?
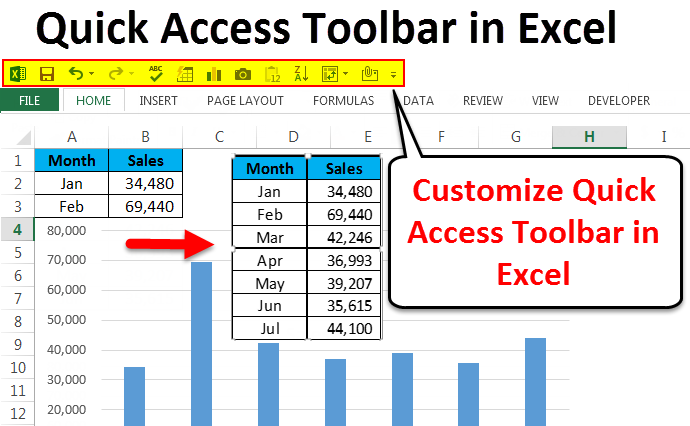
Quick Access Toolbar in Excel is a list of all the category and inbuilt tools available in Excel. There are 2 ways to access the Quick Access Toolbar. In the first way, go to the File menu’s Excel Option, and from there, we can find the Quick Access Toolbar, and another way is accessing this from the title bar’s customized quick access toolbar. If we select More Commands, it will directly take us to the Quick Access Toolbar. Now, if we see, it has all the list of tools available in Excel. And we can see some of the names of the tools on the right side of the list. If we want to get the quick access option of any tool we use more frequently, we add those tools from the available list to the customized list. This will be seen in the title bar.
Customize Quick Access Toolbar in Excel
We can add our own feature to Quick Access Toolbar in Excel. Adding those features easily than the other complicated things in excel. To add features, follow the below steps.
You can download this Quick Access Toolbar Excel Template here – Quick Access Toolbar Excel Template
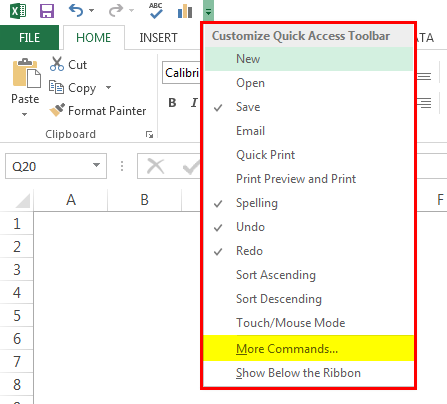
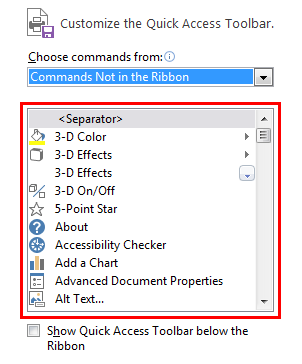
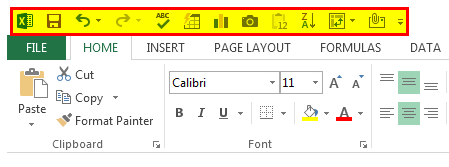
Step 1: On the top right corner, click on the down arrow, here we can see few features on the go like Email, Print Preview & Print, Quick Print, Spelling Check, Sorting, and many more, as shown in the below image.
To add other features click on More Commands…
Step 2: In the below window from the drop-down list, select Commands Not in the Ribbon.
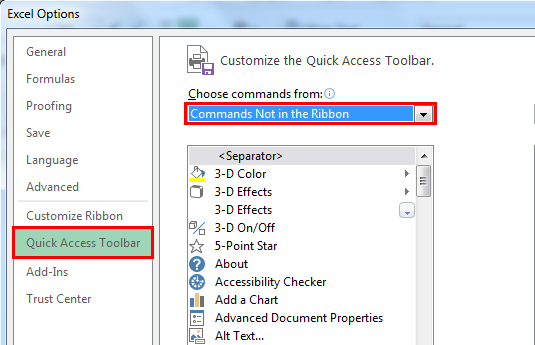
Step 3: This will show up all the features that are not there in the QAT currently.
Step 4: In order to add the feature to the QAT, select the feature that you want to use and click on Add.
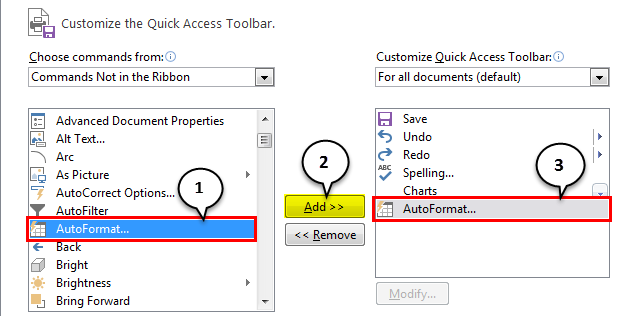
Like this, I have selected some of the important features of the QAT. Then, I will discuss each of them one by one.
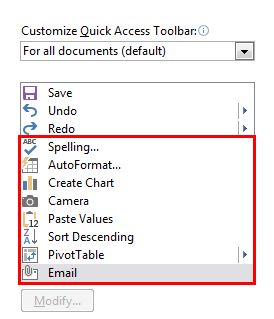
Now we can see all these enabled features in QAT.
AutoFormat
Designing our table is very important. Designing will take some of our productive time. Using AutoFormat QAT, we can do this in just a blink of an eye. I have simple data to format.
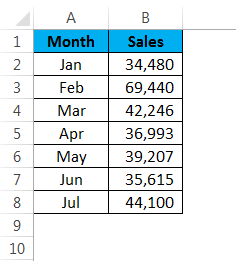
Place a cursor inside the table and click on AutoFormat from QAT.
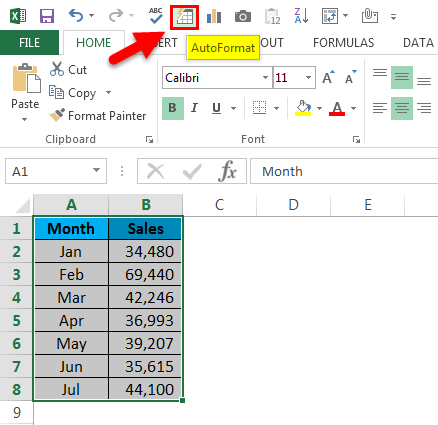
From the below window, you can select any one of the auto format tables.
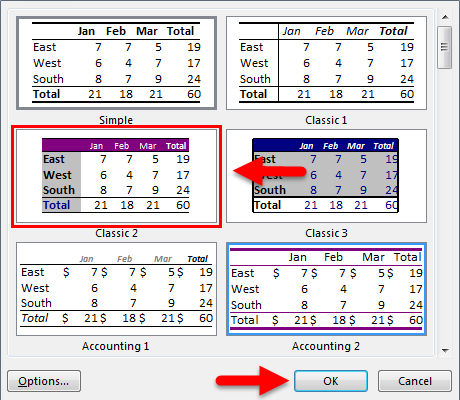
Now my data looks like this.
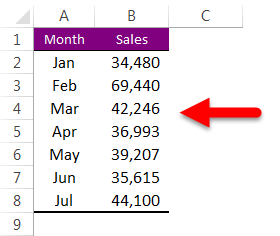
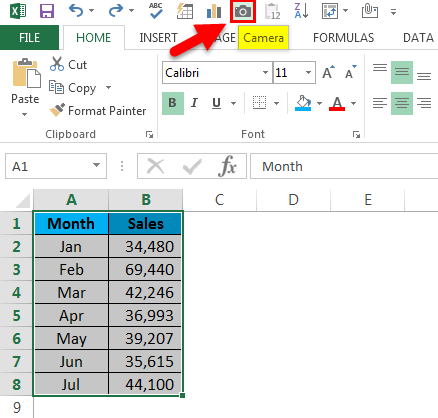
Camera Tool
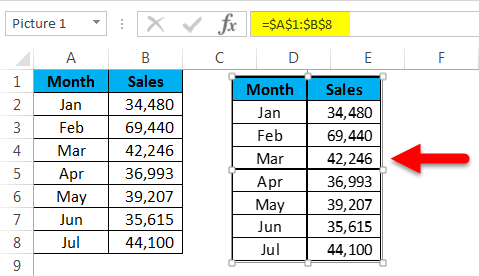
The camera tool works exactly the same way how it works on our mobile phones. We can capture live images of the excel data. In order to capture a live picture, select the data you want to capture and click on Camera.
As soon as you click on the camera, it will copy the range, but you need not paste; rather, you need to draw the picture where you want to show it. Then, it will paste the picture as a linked picture; if any changes happen, it will update the picture automatically.
How to Insert Chart Quickly?
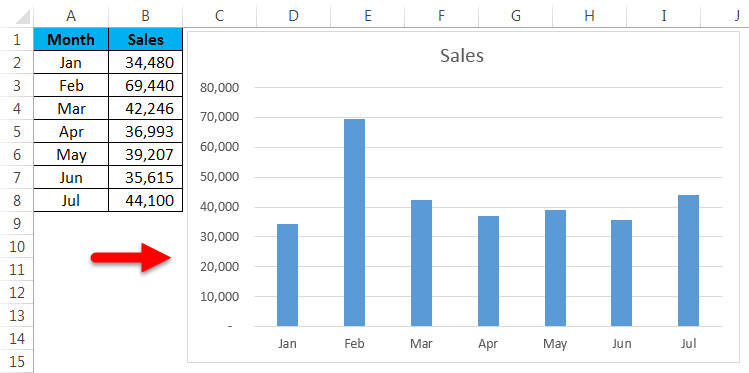
Inserting a simple chart will take some of our time. By using QAT, we can insert the chart instantly. Select the data and click on the Chart icon in the QAT.
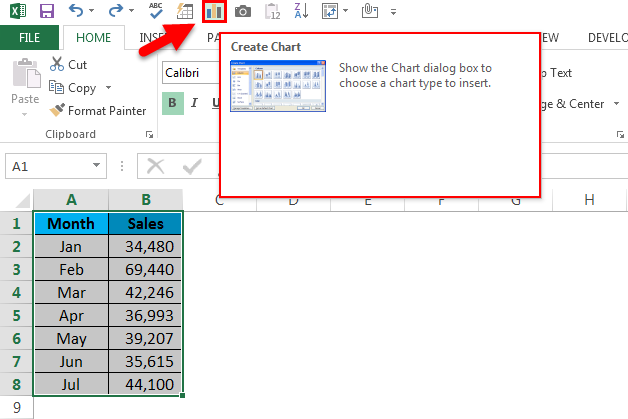
Now it will ask you to select a suitable chart for you. You can select any one of the available charts.
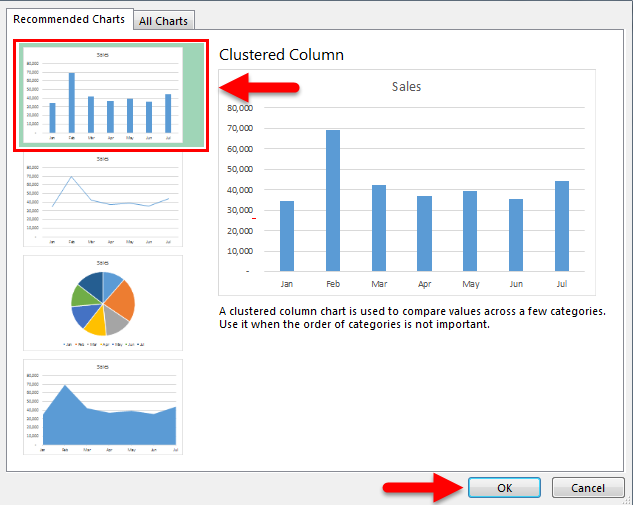
Based on the selection you make, it will insert the chart for you.
Sort Ascending & Descending
Sort is pretty much a regular job for all the excel users. Using this Quick Access Toolbar, we can sort the data according to your requirement, either Ascending or Descending.
Spell Check
After spending a considerable amount of time building the report, we need to write the executive summary for our report; we need to write some of the key findings. Then, we need to recommend some of the insights and maybe more things to be written. As human beings, we tend to make typing mistakes.
In order to do the spell check, press the spell check icon on the QAT; it will do the spell check in the entire worksheet and recommend the changes. Refer to our article on Spell check for more information.
Insert Pivot Table Quickly
We all use a pivot table for our analysis purpose. Inserting the pivot table is super quick now; we just need to select the data and click on the Insert Pivot Table icon on the Quick Access Toolbar.
Send File as Email Attachment
In order to send the current workbook as an email attachment, you need to configure your system to Outlook. Once the outlook is configured, click on the Email icon on the QAT.
Things to Remember About Quick Access Toolbar in Excel
- Based on the requirement of the user, we can customize the QAT.
- We can add Excel Add-Ins to QAT.
- In order to send an email system should be configured as an outlook email.
- Most of the QAT features have shortcut keys.
Recommended Articles
This has been a guide to Quick Access Toolbar in Excel. Here we discuss how to use the Quick Access Toolbar in Excel along with practical steps and a downloadable excel template. You can also go through our other suggested articles –
- Examples of Scrollbar in Excel
- Excel Quick Analysis
- Excel Tool for Data Analysis
- Excel vs Access