
Choose either landscape (horizontal) or portrait (vertical) orientation for all, or part, of your document.
Change the orientation of your entire document
-
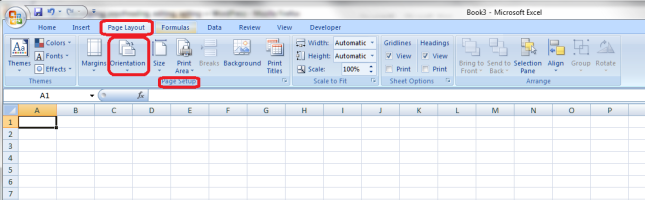
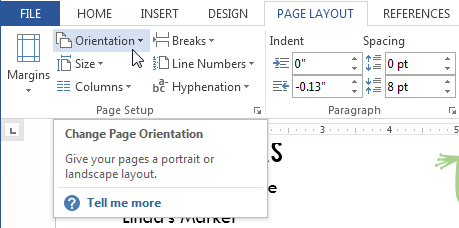
Click PAGE LAYOUT > Orientation.
-
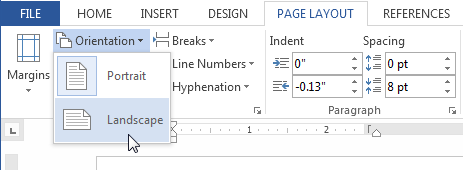
Click Portrait, or Landscape.
Want more?
Add section breaks
Add different page numbers or number formats to different sections
Video: Headers and footers
When you are deciding how to frame a picture, you use a vertical or portrait orientation for things like portraits and other vertically-oriented subjects.
And you use a horizontal or landscape orientation for horizontal subjects, like a landscape.
It is the same with Word. By default, a document uses portrait orientation, because most documents are primarily text, and text works well in this vertical format.
This is what it looks like when you print a portrait page.
But if your document contains something that is essentially horizontal, like tables with a lot of columns, you can change the orientation to landscape.
Go to the PAGE LAYOUT tab, click Orientation, and Landscape. And the content in the document turns 90 degrees.
Now with more horizontal space, you can adjust the column widths to give your table more breathing room.
This is what it looks like when you print a landscape page.
So as you work on a document, you can switch between the two orientations any time you want to see which one looks best with your content.
And when you do, Word automatically moves everything to fit on the pages.
So you can think of page orientation as a way to change the frame or container where your document sits in.
But there are other things that determine your document’s frame, too. Like Margins.
On the PAGE LAYOUT tab, let’s click Margins and choose Wide to give the document a nice sparse look with 2-inch side margins.
Now, watch what happens when we click Orientation and Landscape to switch to landscape.
The 2-inch side margins move 90 degrees to the top and bottom.
You can change to Wide again to move the 2-inch margins back to the side, but the document doesn’t look same in landscape.
So you need to consider Margins as well as Orientation when you are deciding on a frame for your document.
Also, the size of the paper is a factor. For example, if you are on the PAGE LAYOUT tab, click Size, and change to Legal size paper. You get a really wide frame, which works great with a wide table, but it is too wide for text.
Finally, you need to consider how all the different types of elements work together.
After spending a lot of time carefully, laying out your document in portrait orientation, switching to landscape could turn everything to scrambled eggs.
So, when you consider all the factors that go into choosing a frame for your document, it makes sense to choose an orientation before you start.
But if you want to change later, you can. Just be prepared to spend some time on reworking the layout.
However, there is another way. You can create a document with a mix of portrait and landscape pages.
To learn more about that, see the next video in this course, Use landscape and portrait in the same document.
In this article, we’re talking about the Portrait and Landscape orientations in Word and Excel, what they are, why you might want to use each one, and how to swap between them.
What are Portrait and Landscape?
Portrait and Landscape are the terms used for the orientation of the page in applications that deal with pages, such as Word and Excel. Orientation means the relative position of the page when you’re looking at it:

Portrait means that the page has the shorter sides at top and bottom. Think of a portrait in a gallery or museum. They are usually this way round. Landscape means that the page has the shorter sides on the left and right. Again, think of an art gallery. Which way round are views painted of the landscape? Exactly.
Why would I want to use the landscape orientation?
Word and Excel documents default to being in the portrait orientation. That’s the format of most books, reports, folders, etc. But landscape can be very useful if …
In Word
- Your layout is such that it comes out wider than it’s high – maybe a poster or a sign to put up in your office or building
- You have a wide table to insert into the document with lots of columns and it gets too squashed up and hard to read if you try to fit it onto a standard portrait A4 page
- You have a diagram to insert into the document that’s wider than it’s high
- You have a picture to insert into the document that’s wider than it’s high
In the last three incidences, you might only want one page of the document to appear in landscape. That’s easily done, and you can find out how to have portrait and landscape in one document here.
In Excel:
- Your spreadsheet is too wide to fit comfortably onto a portrait A4 page
How do you change between Portrait and Landscape in Word 2007 and Word 2010?
You swap between Portrait and Landscape using the Orientation menu in Word. This can be found in the Page Layout tab, in the Page Setup section:

Press the Orientation button (or the little arrow at the bottom) to access the menu:

Choose your orientation, and the whole document will change to that orientation, unless you’re only changing one section (see below)
How do you change one page in Word to be in Landscape?
To change one page in Word to be in Landscape, you need to set Section Breaks first, so that Word knows which pages you want to change. See this post on Section Breaks for instructions on how to do this and change just one page or section.
How do you change between Portrait and Landscape in Excel 2007 and Excel 2010?
Changing the orientation in Excel works in exactly the same way as doing it in Word. Find the Orientation menu by going into the Page Layout tab and Page Setup section:
Then press the Orientation button to make your selection.
How do you change between Portrait and Landscape when you’re printing?
Sometimes you don’t realise that you need to print your document in Landscape rather than Portrait (it’s usually this way around, I find) until you have printed out one copy and find that your lovely picture or table falls off the edge of the page.
You can change the orientation of the printing while printing – however, the orientation of your original document will NOT change if you use this method, and if you want it to change to Landscape permanently, you will need to go back and follow the instructions I give above.
If you want to change the orientation of your printing (in Word or Excel or when you’re printing off a web page or a map or anything!) …
First, select the Print option. When the Print dialogue box comes up, click the Properties button:

You will usually then be given a screen something like this which will have a Features tab:

Find choice buttons for Portrait / Landscape, select the one you want, and OK, and then your printout will be in that orientation.
—————–
In this article we have learned what the portrait and landscape orientations are, why they are useful, how to change them in Word and Excel and how to change orientation when you are printing.
If you have enjoyed this post, please share the link using the buttons below or sharing the Facebook, Twitter or LinkedIn alert that you followed to get here!
Other useful posts: Section breaks in Word
Please note, these hints work with versions of Microsoft Word currently in use – Word 2007 and Word 2010, for PC. Mac compatible versions of Word should have similar options. Always save a copy of your document before manipulating it. I bear no responsibility for any pickles you might get yourself into!
Find all the short cuts here …
Last Update: Jan 03, 2023
This is a question our experts keep getting from time to time. Now, we have got the complete detailed explanation and answer for everyone, who is interested!
Asked by: Dr. Nicholas Turcotte
Score: 4.8/5
(26 votes)
Use different orientations in the same document
- Select the pages or paragraphs whose orientation you want to change.
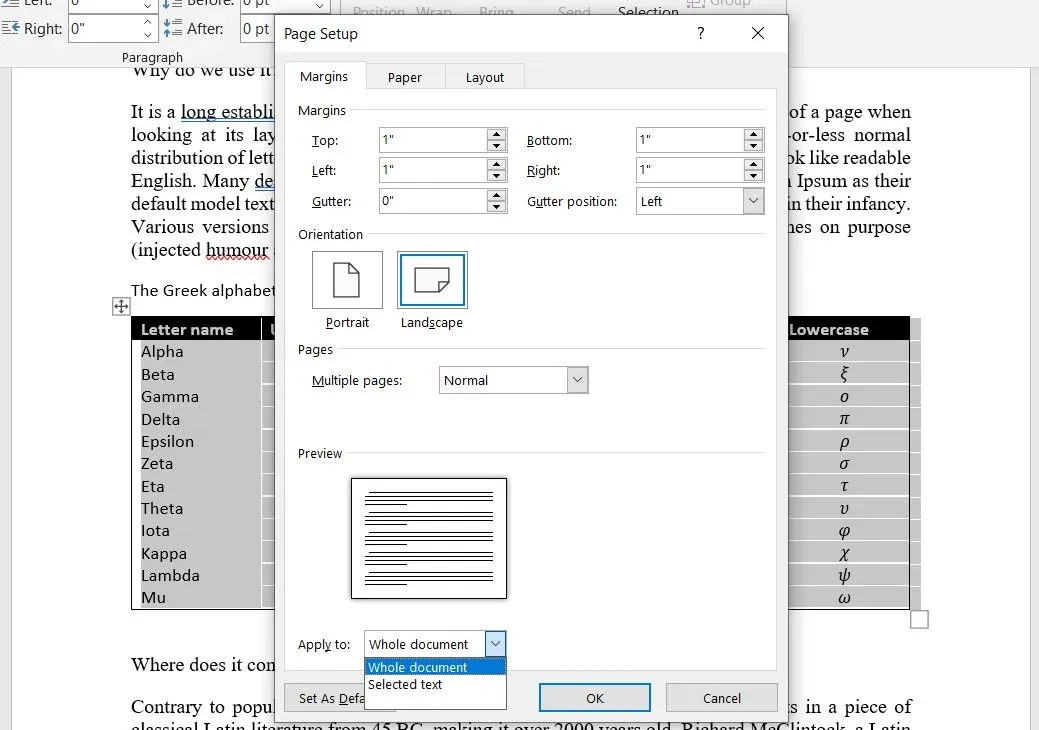
- Click PAGE LAYOUT > Page Setup dialog box launcher.
- In the Page Setup box, under Orientation, click Portrait or Landscape.
- Click the Apply to box, and click Selected text.
Can you have both portrait and landscape slides in Word?
You can put a portrait-oriented image or shape on a landscape slide. When projected on a screen, it will look the same on a landscape slide as it would on a portrait slide.
How do I have portrait and landscape in Word 2020?
1) Head to the spot in your document where you want all pages after the cursor in a different orientation. 2) Click Format > Document from the menu bar. 3) In the pop-up window, click the Page Setup button at the bottom. 4) Next to Orientation, select the view you want for pages after your cursor location and click OK.
How do I make one page landscape and the rest portrait in Word?
Select “Page Layout” > “Breaks” > “Next Page” just like in step 2 to create another section. Select “Page Layout” tab and select “Orientation” > “Portrait“. This will make the rest of the document display in portrait.
Can you change the orientation of one page in Word?
On the Layout tab in the Page Setup group, you can easily change the page orientation both for the entire document and for a single page. Microsoft Word inserts sections breaks before and after the selected page, and you can add more pages to this section later.
23 related questions found
How do you change the orientation of one page in Word 2010?
Microsoft Word 2010 and 2007 for Windows
In the Page Layout tab, from the Margins drop-down menu, select Custom Margins…. In the Page Setup window, click the Margins tab. Under «Orientation«, change the page orientation to the desired setting (Portrait or Landscape).
How do I make one page landscape in Word 2020?
How to Make One Page Landscape in Word
- Open your Word document and place the blinking cursor at the start of the page you wish to change to landscape mode.
- Click on the Layout menu in the ribbon bar.
- Select Breaks > Next Page in the Section Breaks section. …
- In the Layout menu, press Orientation > Landscape.
How do I change the orientation of one page in Word 2013?
To change page orientation:
- Select the Page Layout tab.
- Click the Orientation command in the Page Setup group. Clicking the Orientation command.
- A drop-down menu will appear. Click either Portrait or Landscape to change the page orientation. …
- The page orientation of the document will be changed.
How do I change orientation of one page in Word?
1: Select the entire page that you want to change the orientation, then click Page Layout> Margins and select Custom Margins. 2: In the Page Setup window, select the orientation you need in Oriention section, and choose Selected text in Apply to. Click OK.
How do you rotate a page 180 degrees in Word?
Press CTRL+R to display the Rotate dialog box. 7. In the dialog box, choose 180.
What is landscape and portrait?
Landscape orientation refers to horizontal subjects or a canvas wider than it is tall. Portrait format refers to a vertical orientation or a canvas taller than it is wide.
Which object can you not insert into a Word document?
What can you *NOT* insert into a Word document from the Insert tab? Q23.
How do I change the orientation of one page in Word 2016?
To change page orientation:
- Select the Layout tab.
- Click the Orientation command in the Page Setup group.
- A drop-down menu will appear. Click either Portrait or Landscape to change the page orientation.
- The page orientation of the document will be changed.
How do I make Word landscape?
Change page orientation to landscape or portrait
- Select the content that you want on a landscape page.
- Go to Layout, and open the Page Setup dialog box.
- Select Landscape, and in the Apply to box, choose Selected text.
Where do I find page layout in Word?
Click Page Layout tab
- Click Page Layout tab.
- Move to Page Setup group.
- Click the little square with an arrow in the right bottom of the group.
- The Page Setup window pops up.
How do I change the orientation of one page in Libreoffice?
To Change the Page Orientation for All Pages
- Choose Format — Page.
- Click the Page tab.
- Under Paper format, select “Portrait” or “Landscape”.
- Click OK.
Which tool will let you update the city’s name word?
You can use Word’s Find and Replace feature to quickly make revisions. In our example, we’ll use Find and Replace to change the title of a magazine so it is abbreviated.
How do you know if a picture is portrait or landscape?
The length of the longest side determines the orientation. For example, if the height of the image is longer than the width, it is a “portrait” format. Images where the width is longer are called “landscape.”
Is it better to take photos in portrait or landscape?
In photography, landscape format, when the image is wider than it is tall, is perfect for the majority of landscape photographs. However, portrait format creates a picture that is taller than it is wide. … You’ll automatically know which format, landscape or portrait, is best before you bring the camera to your eye.
How do you change from portrait to landscape?
Hold down a blank park of screen till the settings open up, then the auto rotation will really rotate screen.
Lesson 9: Page Layout
/en/word2013/formatting-text/content/
Introduction
One formatting aspect you’ll need to consider as you create your document is whether to make adjustments to the layout of the page. The page layout affects how content appears and includes the page’s orientation, margins, and size.
Optional: Download our practice document.
Page orientation
Word offers two page orientation options: landscape and portrait. Landscape means the page is oriented horizontally, while portrait means the page is oriented vertically. Compare our example below to see how orientation can affect the appearance and spacing of text and images.
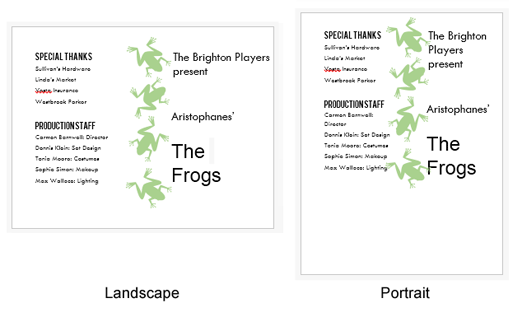 Landscape and portrait orientation
To change page orientation:
- Select the Page Layout tab.
- Click the Orientation command in the Page Setup group.
 Clicking the Orientation command
 - A drop-down menu will appear. Click either Portrait or Landscape to change the page orientation.
 Changing the page orientation
 - The page orientation of the document will be changed.
Page margins
A margin is the space between the text and the edge of your document. By default, a new document’s margins are set to Normal, which means it has a one-inch space between the text and each edge. Depending on your needs, Word allows you to change your document’s margin size.
To format page margins:
Word has a variety of predefined margin sizes to choose from.
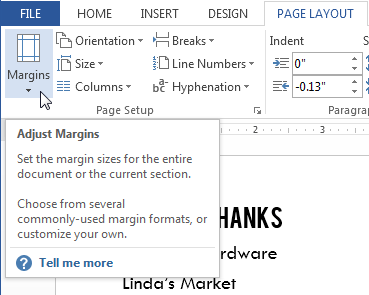
- Select the Page Layout tab, then click the Margins command.
 Clicking the Margins command
 - A drop-down menu will appear. Click the predefined margin size you want.
 Changing the page margins
 - The margins of the document will be changed.

To use custom margins:
Word also allows you to customize the size of your margins in the Page Setup dialog box.
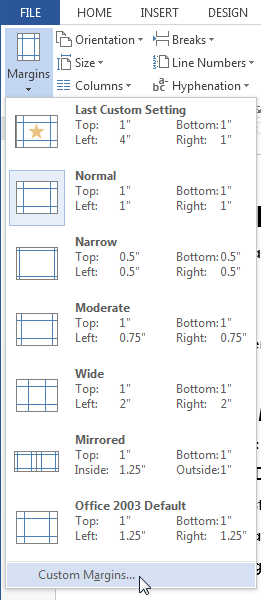
- From the Page Layout tab, click Margins. Select Custom Margins… from the drop-down menu.
 Selecting Custom Margins…
 - The Page Setup dialog box will appear.
- Adjust the values for each margin, then click OK.
 The Page Setup dialog box
 - The margins of the document will be changed.

Page size
By default, the page size of a new document is 8.5 inches by 11 inches. Depending on your project, you may need to adjust your document’s page size. It’s important to note that before modifying the default page size, you should check to see which page sizes your printer can accommodate.
To change the page size:
Word has a variety of predefined page sizes to choose from.
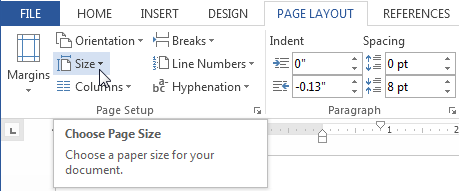
- Select the Page Layout tab, then click the Size command.
 Clicking the Size command
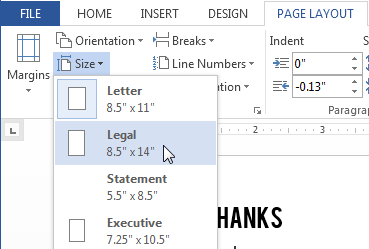
 - A drop-down menu will appear. The current page size is highlighted. Click the desired predefined page size.
 Changing the page size
 - The page size of the document will be changed.
To use a custom page size:
Word also allows you to customize the page size in the Page Setup dialog box.
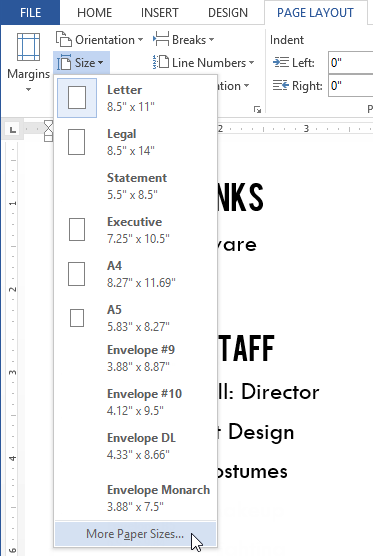
- From the Page Layout tab, click Size. Select More Paper Sizes… from the drop-down menu.
 Selecting More Paper Sizes…
 - The Page Setup dialog box will appear.
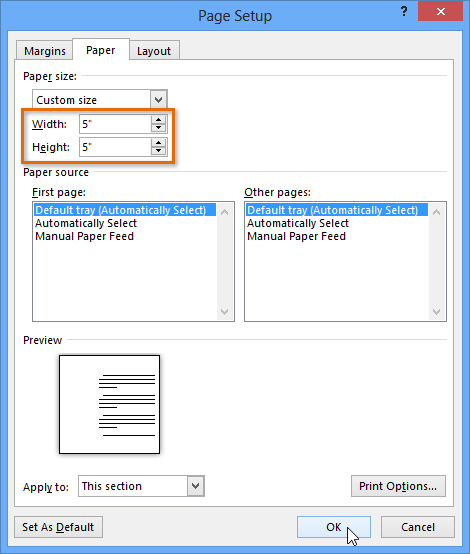
- Adjust the values for Width and Height, then click OK.
 Adjusting page size
 - The page size of the document will be changed.
Alternatively, you can open the Page Setup dialog box by navigating to the Page Layout tab and clicking the small arrow in the bottom-right corner of the Page Setup group.
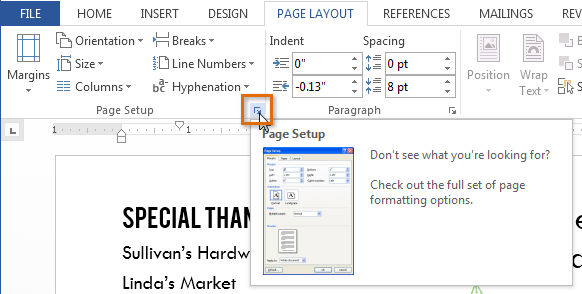 Opening the Page Setup dialog box
You can use Word’s convenient Set as Default feature to save all of the formatting changes you’ve made and automatically apply them to new documents. To learn how to do this, read our article on Changing Your Default Settings in Word.
Challenge!
- Open an existing Word document. If you want, you can use our practice document.
- Change the page orientation. If you are using the example, change the orientation to Landscape.
- Change the margins. If you are using the example, change the margins to Narrow.
- Try adjusting the margins using Custom Margins.
- Change the paper size. If you are using the example, try changing the paper size to Legal.
- Try customizing the page size.
/en/word2013/printing-documents/content/
There are times when you may need to change the page orientation within the same Word document to either portrait or landscape. Here’s how to do it!

Portrait and landscape orientation are handy in different situations. You can always switch between the two in Microsoft Word to get the most out of the application. If you have a large table, switching from portrait to landscape orientation will help display the data more clearly.
The default orientation is portrait, but you might also want to use the two simultaneously. We’ll show you how to mix landscape and portrait orientation in a Word document.
How to Use Landscape and Portrait Pages in the Same Word Document
When you’re working on a lengthy Word document with a mixture of tables, graphs, and text, it can be tough to fit everything in portrait orientation. Especially if the tables or graphs are large, the most suitable page layout is landscape. That way, your table data will appear clearer in your presentation.
But you may not want everything to be landscape—only some select pages, texts, or tables. Fortunately, you don’t have to make the tough call of choosing between nicely readable text and readable tables. You can use both for better results.
Here’s how you can use both landscape and portrait in Word:
- Right-click anywhere on your table and select Table Properties.
- In the Text Properties dialog box, select None under Text wrapping. In some cases, text wrapping might already be set to none, so you don’t have to do anything.

- Click OK to save the changes.
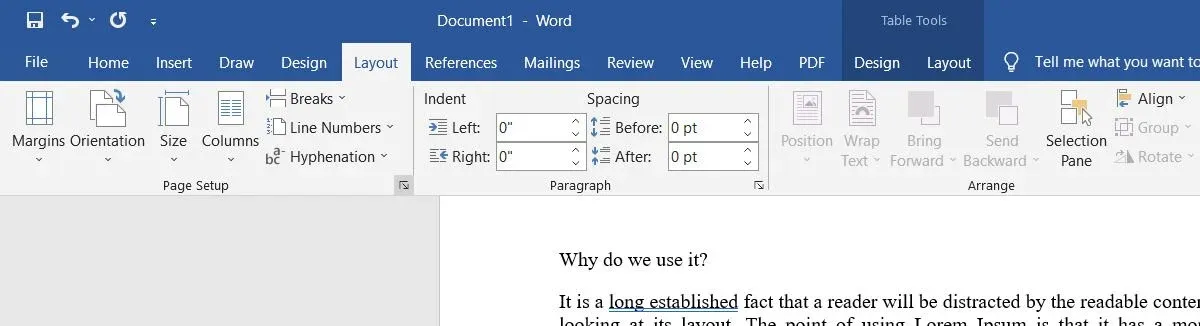
- Now, select your table and head over to the Layout tab in the upper menu.
- Under the Page Setup group, click the dialog box launcher. The dialog box launcher is displayed as a small box with a downward pointing arrow.

- Next, select Landscape under Orientation.

- Click the drop-down list next to Apply To and select Selected Text.
- Click OK to save your changes.

Your table will now be on its page in landscape orientation. The rest of the document will maintain the orientation settings. Under the hood, Word inserts section breaks before and after the selected text.
If you have already divided your document into sections, you don’t have to go through all the steps. Select the section(s) that should have a different orientation, go to page layout, and select Landscape orientation. You can also leverage these formatting tips for perfect tables in Microsoft Word.
Improve Your Microsoft Word Skills
Microsoft Word is one of the most powerful word processing applications available. But to unleash the full potential of Microsoft Word, you should be acquainted with skills on how to use the app’s rich collection of features.
Using both landscape and portrait orientation in your document is just one of the many Word-related skills you should have. You should also learn how to do a host of different things to create professional Word documents.