
Word for Microsoft 365 Outlook for Microsoft 365 Word 2021 Outlook 2021 Word 2019 Outlook 2019 Word 2016 Outlook 2016 Word 2013 Outlook 2013 Word 2010 Outlook 2010 Word Starter 2010 More…Less
You can control where Word and Outlook position automatic page breaks by setting pagination options.
Keep lines of a paragraph together on a page or in a column
-
Select the paragraphs that contain lines you want to keep together.
-
On the Home tab in Word, or on the FORMAT TEXT tab in an Outlook email, select the Paragraph Dialog Box launcher
 .
. -
Select the Line and Page Breaks tab.
-
Under Pagination, select Keep lines together.
-
Select OK.
 .
.Keep paragraphs together on a page or in a column
-
Select the paragraphs you want to keep together on a page.
-
On the Home tab in Word, or on the FORMAT TEXT tab in an Outlook email, select the Paragraph Dialog Box launcher
. -
Select the Line and Page Breaks tab.
-
Under Pagination, select Keep with next.
-
Select OK.
Always force a page break before a paragraph
-
Select the paragraph that you want to follow the page break.
-
On the Home tab in Word, or on the FORMAT TEXT tab in an Outlook email, select the Paragraph Dialog Box launcher
. -
Select the Line and Page Breaks tab.
-
Under Pagination, select Page break before.
-
Select OK.
Control widow and orphan lines
-
Select the paragraphs in which you want to control widows and orphans.
-
On the Home tab in Word, or on the FORMAT TEXT tab in an Outlook email, select the Paragraph Dialog Box launcher
. -
Select the Line and Page Breaks tab.
-
Under Pagination, select Widow/Orphan control.
-
Select OK.
Note: This option is turned on by default.
Suppress line numbers from a paragraph or paragraphs
-
Select the paragraph or paragraphs.
-
On the Home tab in Word, or on the FORMAT TEXT tab in an Outlook email, select the Paragraph Dialog Box launcher
. -
Select the Line and Page Breaks tab.
-
Under Formatting, select Suppress line numbers.
-
Select OK.
Remove hyphens from a paragraph or paragraphs
-
Select the paragraph or paragraphs.
-
On the Home tab in Word, or on the FORMAT TEXT tab in an Outlook email, select the Paragraph Dialog Box launcher
. -
Select the Line and Page Breaks tab.
-
Under Formatting, select Don’t hyphenate.
-
Select OK.
Text box options
You can use the text box options to more tightly wrap the text that surrounds the text box. To use these options, the text box border must be transparent (no line and no fill), and the Wrap Text must be set at Tight or Through.
-
Inside the text box, right-click, and then select Paragraph.
-
Select the Line and Page Breaks tab.
-
Under Textbox options, in the Tight wrap list, select one of the following:
-
All
-
First and Last Lines
-
First Line Only
-
Last Line Only
Note: To undo changes, select None.
-
-
Select OK.
Need more help?
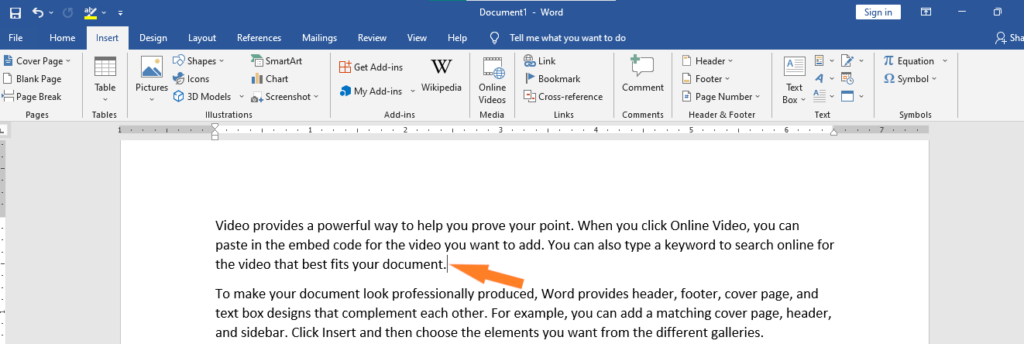
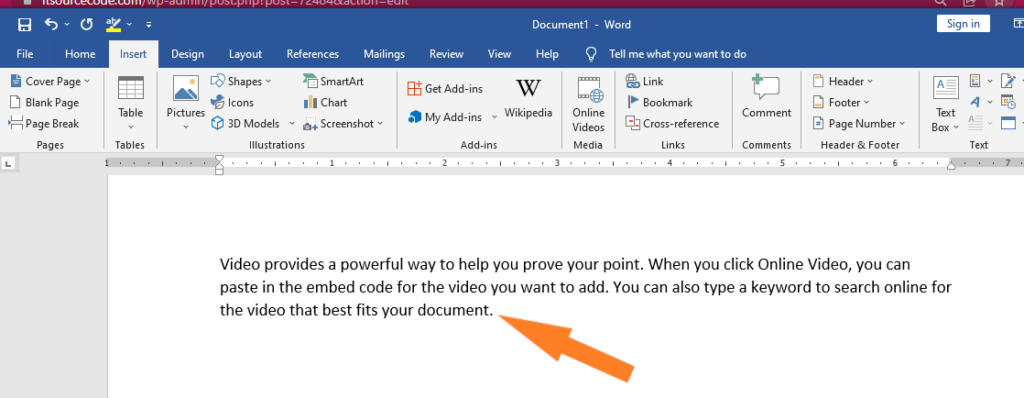
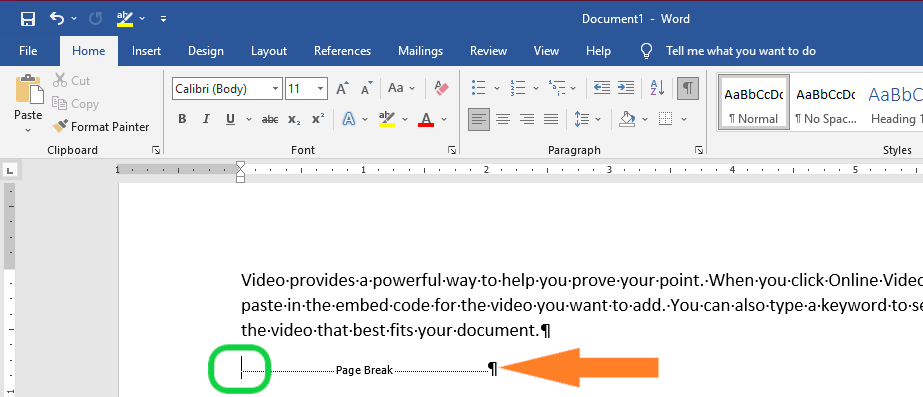
Use page breaks to control where a page ends and where a new page begins. Place the cursor where you want to start a new page. Select Insert > Page Break.
Contents
- 1 Why do we use page breaks in Word?
- 2 What is the difference between blank page and page break?
- 3 What is the difference between page break and next page in Word?
- 4 What does Next page section break do in Word?
- 5 What action will force a page break?
- 6 Where do you insert page breaks?
- 7 Why does Page Break add a blank page?
- 8 How can I remove a page break in Word?
- 9 How do you delete an empty page on Microsoft Word?
- 10 When should you use page breaks?
- 11 Should I use a page break or section break?
- 12 What is page break explain with suitable example?
- 13 How do I view page breaks?
- 14 What’s the difference between styles and style sets?
- 15 How do I remove a section break next page?
- 16 What is page break before in Word?
- 17 Why is my Word document not showing page breaks?
- 18 What is the page break referred to when it is created by Ctrl enter?
- 19 What is page break How do you insert in a document?
- 20 What is the difference between a soft page break and a hard page break?
Why do we use page breaks in Word?
Using page breaks, your text will retain the formatting of the previous page in your document. Using a page break will also ensure that the space between pages remains intact, whatever changes you make.
What is the difference between blank page and page break?
The difference is that Insert > Blank Page puts an entire blank page into your document, and Insert > Page Break doesn’t. Instead, it pushes whatever comes after the break to the top of the next page. See Add a page break for more about page breaks.
What is the difference between page break and next page in Word?
The page breaks partition only the body text of the document, whereas the section breaks partition both the body text of the document, as well as partition page margins, headers and footers, page numbers, and the like.The different kinds of section breaks include next page, continuous, even page, and odd page breaks.
What does Next page section break do in Word?
Next Page Section break starts the new section on the following page. Continuous Section break starts the new section on the same page. This type of section break is often used to change the number of columns without starting a new page. Even Page Section break starts a new section on the next even-numbered page.
What action will force a page break?
To insert a page break, press Ctrl+Enter.
Where do you insert page breaks?
Go to Layout > Breaks > Page.
- Click or tap in the document where you want a page break.
- Go to Insert > Page Break.
Why does Page Break add a blank page?
Under certain circumstances, the section break, or actually the blank paragraph containing the section break, may cause an extra page (this might happen below a table, for example). Formatting it as 1 pt font size, exact line spacing 1 pt, zero spacing before/after should fix it.
How can I remove a page break in Word?
Remove a page break from a Word document
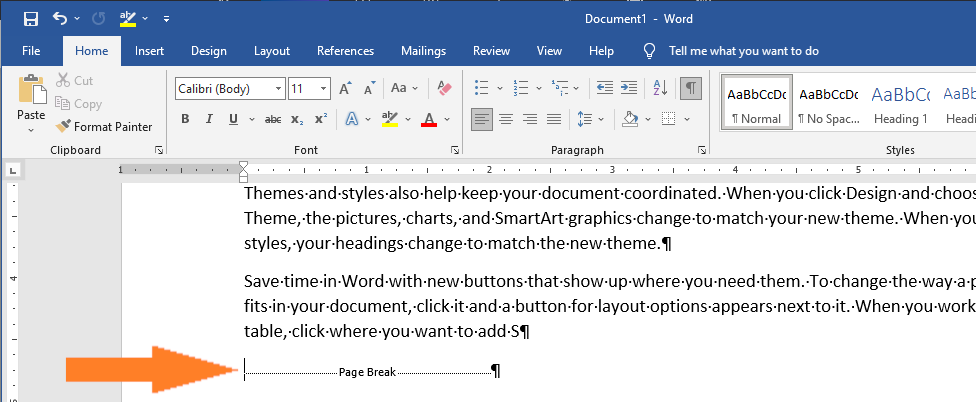
- On the Home tab, in the Paragraph group, click Show/Hide to show all formatting marks including page breaks.
- Double-click the page break to select it, then press Delete.
- Click Show/Hide again to hide the remaining formatting marks in the document.
How do you delete an empty page on Microsoft Word?
Here is the most basic approach: Go to your unwanted blank page in your Word document, click as close to the bottom of the page as you can, and press your Backspace key until the page is removed.
When should you use page breaks?
Page breaks allow you to move text to the next page before reaching the end of a page. You might use a page break if you’re writing a paper that has a title page or a bibliography to ensure it starts on a new page. In our example, our chart is split between two pages.
Should I use a page break or section break?
Use the Different First Page option if you want a different heading on your first page than on the rest of your document. However, if you need more than just a different heading on your first page, you need section breaks.
What is page break explain with suitable example?
Explanation. A page break is a marker in an electronic document telling the interpreter that the following material belongs to a new page. A split in a page allows a type feed to be sent to the printer when a paper is spilt into the printer. It is also one of the contributing elements to paging.
How do I view page breaks?
- Click Home > Show/Hide . This will display non-printing characters—paragraph markers, section breaks, page breaks, etc. —that you may want to see while you’re working on your document.
- Double-click the page break so that it’s selected, and then press Delete.
What’s the difference between styles and style sets?
Style sets include a combination of title, heading, and paragraph styles. Style sets allow you to format all elements in your document at once instead of modifying each element separately.
How do I remove a section break next page?
Removing a Section Break: Next, Even or Odd Page
- On the Home tab, in the Paragraph section, click SHOW/HIDE 
- Place your insertion point just before the section break.
- Press [Delete]
What is page break before in Word?
Page break before forces a paragraph to start at the top of a new page.The page-break-before option is intended to be incorporated into paragraph and character styles so all paragraphs of a particular style will start at the top of a new page. For instance, you might apply it to your top-level heading style.
Why is my Word document not showing page breaks?
If a page break is occurring and you do not see a manual page break with Show/Hide ¶ on, check the paragraph options: Select the first paragraph on the page following the page break. Click the Paragraph dialog box launcher on the bottom right corner in the Paragraph group. A dialog box appears.
What is the page break referred to when it is created by Ctrl enter?
Word automatically paginates a document as you enter text.The page break that is created when text wraps and flows onto the next page is called a ‘soft’ page break. At times, you may want to exert more control over pagination, which you can do by inserting a ‘hard’ page break, also called a ‘forced’ page break.
What is page break How do you insert in a document?
In Microsoft Word, you can use the keyboard shortcut Ctrl + Enter to insert a page break. If your printer is starting a new page or printing blank pages where it shouldn’t, page breaks may be in the document. To verify the document contains no hidden page breaks, enable formatting marks.
What is the difference between a soft page break and a hard page break?
A “hard” page break, inserted by the user, breaks the page at that location. “Soft” page breaks are created by word processing and report programs based on the current page length setting.
In this chapter, we’ll talk about what is Page break and how to add breaks between pages in MS Word . Microsoft Word starts a new page when the current page is full of text, but you can force Word to start text on a new page by adding a page break. Either the mouse or the keyboard can be used to add a page break.
Table of contents
- What Is Page Break In MS Word
- The Importance of Page Breaks
- What is the use of page section breaks in MS Word?
- Section breaks
- How to Insert a section break
- How to Delete Page Breaks
- Two Types of Page Breaks
- How to Remove a Page Break in Word
- Method 1: How to Remove Page Breaks in Word Using Delete
- Method 2: How to Remove a Page Break Using Find and Replace
- Keyboard Shortcuts Formatting Word Documents
- Summary
What Is Page Break In MS Word
A page break is a special mark that tells the computer to move to the next page. Further, it lets you move text to the next page before the page is full. If you’re writing a paper with a title page or a list of sources, you might use a page break to make sure it starts on a new page.
When you want to move to the beginning of the next page in your document, add a page break. Many users don’t know about the page break feature, so when they want to start a new page, they just hit the Enter key a lot.
You can control where a page ends and a new one starts by using page breaks. Insert a page break. Put the cursor where you want the new page to begin.
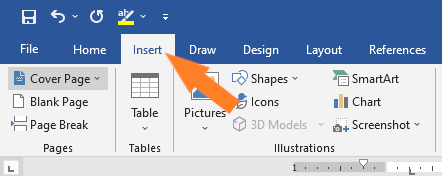
To move the cursor to where you want to start a new page, click there. Click the Tab that says “Insert.” If you need to make it bigger, click the Pages group. Click the Page Break button.
The Importance of Page Breaks
The Importance of Page Breaks is it helps keep paragraph together. If you don’t use Page Breaks every time you can, you might use the Enter key to move things down or the Backspace key to move things up and adjust the layout.
This can fix the problem, but it can also cause new ones when you add or remove more content because the new lines move everything back to where it was before. And you have to start over with everything.
Instead, you must learn to use the Ctrl + Enter keys instead of the Enter key when you need to add a page break.
What is the use of page section breaks in MS Word?
We use section breaks to break up the document into different parts. After putting in section breaks, you can format each section on its own.
For example, set up the first part of a report as a single column, and then set up the next part as two columns for the report’s body text.
In Microsoft Word, a page break is an invisible line that separates one page from the next. This mark makes it easy for text to move from one page to the next. Also, when you want to print the document, the page break tells the printer where the first page ends and the next one starts.
In short, a page break tells your document how to be laid out and lets you put the right information on the right page. Let’s learn how to put a page break in Word and then how to get rid of one.
Section breaks
Section breaks separate different parts of a document so that you can format each one separately. For instance, you might want one section to have two columns without making the whole document have more columns. There are different kinds of section breaks in Word:
- Next Page: This option adds a section break and moves the text after the break to the next page of the document. This is helpful if you want to make a normal-looking page after a page with column formatting.
- Continuous: With this option, there is no break between sections, so you can keep working on the same page. You can use this type of break to separate a paragraph from a column.
- Even Page and Odd Page: These choices insert a section break and shift the text to the following even or odd page after the break. When you need to start a new section on an even or odd page, these options may help.
How to Insert a section break
In our example, we will learn How To insert a section break. A two-column list will be separated from a paragraph by a section break. This will let us change the look of the paragraph so it doesn’t look like a column anymore.
- Place the insertion point where the break should be. In our example, we’ll put it at the beginning of the paragraph we want to separate from the column formatting.
- Insert the point of insertion where you wish to make the break. In our example, we will insert it at the start of the paragraph we wish to segregate from column formatting.
- The document will be split into sections.
- You can now format the text before and after the section break separately. Use the options you want for formatting. In our example, we’ll format the paragraph so that it only has one column, so that it no longer looks like columns.
- In the document, the text will be set up in a certain way.
Insert a Page Break with a Keyboard Shortcut
- Place your cursor where you want to insert the break.
- Press the shortcut Ctrl + Enter (PC) or Command + Return (Mac) on your keyboard.
The content after the break should move to the next page in your document.
Time needed: 1 minute.
Here the simple steps on How to Do a Page Break in Word.
- First, open your document in Microsoft Word, to insert a page break in your document,
In the document, place your cursor where the new page should begin. Everything to the right of your cursor will go on to the new page.

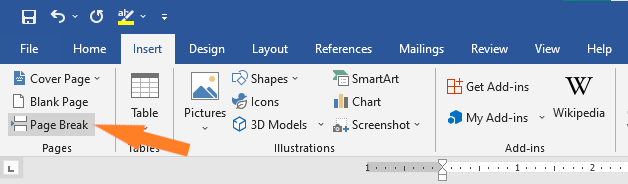
- Click the “Insert” tab in Word’s ribbon at the top, .

- On the “Insert” tab, in the “Pages” section to the extreme left, click “Page Break.”

- Word will add a page break to the selected location in your document. All your text that was to the right of your cursor has now moved to the new page.
And you are all set.

How to Delete Page Breaks
You can skip to step 2 if your formatting marks are already visible.
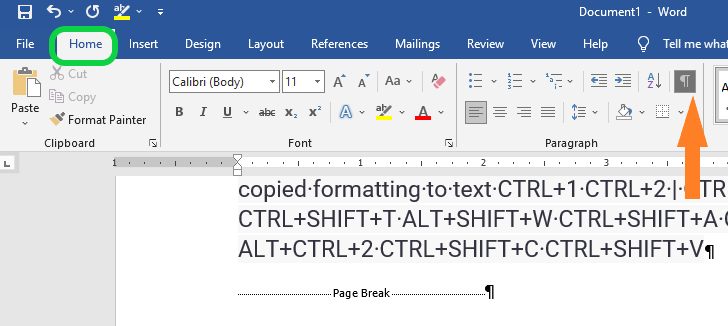
- Step 1: Select the Show/Hide button in the Home tab to reveal the formatting marks (see figure 1).
- Step 2:Place your cursor at the start of the page break.

- Step 3:Select the Delete key on your keyboard.
- Step 4:Reselect the Show/Hide button to hide the formatting marks (see figure 1).
The page break should be deleted.
Two Types of Page Breaks
There are two types of page breaks and a few extra document breaks in Word.
- Automatic page inserts page breaks as you move from one page to the next.
- Manual page breaks can be inserted anywhere in a document to separate and progress to the following page.
You cannot eliminate automatic page breaks, but you can modify their location. You have control over the position of manual page breaks because you manually insert them.
How to Remove a Page Break in Word
Anywhere in a Word document, you can add a manual page break to make the text start at the top of the next page. But how do you get rid of a break between pages in Word?
Here are two methods to get rid of page breaks in Microsoft Word.
Method 1: How to Remove Page Breaks in Word Using Delete
- Open your Word document.
- Go to Home and click the Show/Hide button to see all of the document’s hidden marks that can’t be printed, like page breaks, spaces, and spaces that don’t break.

- Double-click on a page break to select it, and press Delete to get rid of it.
- Now you can click the Show/Hide button again to hide the other formatting marks in the document.
- You can also put your cursor just before the page break marker and hit Delete instead of double-clicking.

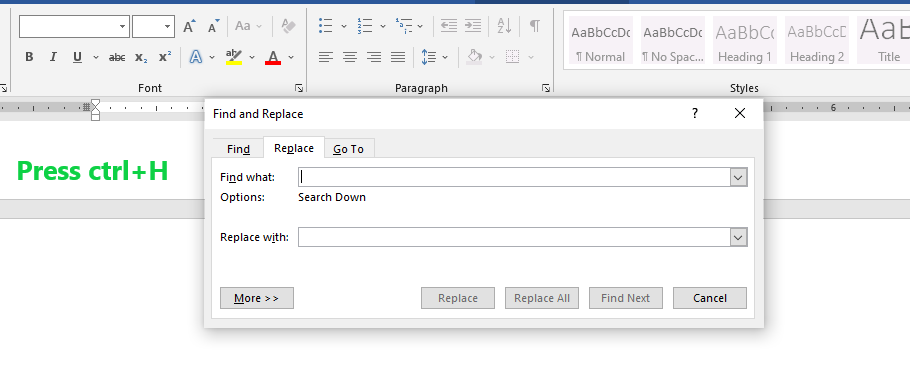
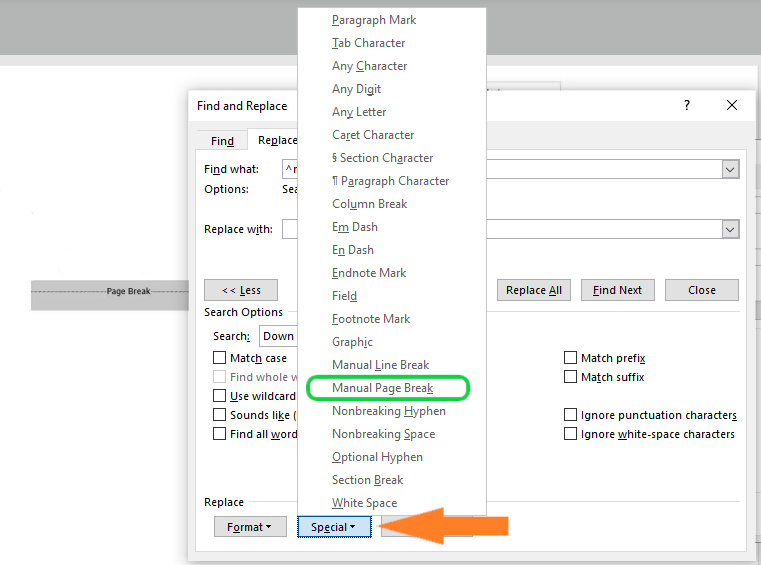
Method 2: How to Remove a Page Break Using Find and Replace
- To open the Find and Replace box, press Ctrl + H.

- Select “Replace” tab. Click on the text box that says “Find what,” and then click on “More” to see all the other options.
- Next, Click “Special” and choose “Manual Page Break” from the menu that comes up.

- Finally, Leave the Replace box empty and click Replace All to replace every page break in the document with a blank space.
Keyboard Shortcuts Formatting Word Documents
This table shows Keyboard Shortcuts Formatting Word Documents can also streamline the formatting process.
| Function | Shortcut |
| Insert line break | SHIFT+ENTER |
| Insert page break | CTRL+ENTER |
| Insert column break | CTRL+SHIFT+ENTER |
| Single line spacing | CTRL+1 |
| Double line spacing | CTRL+2 |
| 1.5 line spacing | CTRL+5 |
Summary
In summary, we’ve learned what page breaks are and how to insert and remove page breaks in MS Word, as well as what those terms mean. In addition, we know what different types of page breaks can be useful in our document to make it presentable and appear more professional.
Meanwhile, if you want to learn more about formatting pages, see the previous tutorial on how to check and change lines and paragraphs as well as how to adjust page margin in Microsoft Word, which are still part of formatting your documents. You can browse those guides if you are having a hard time exploring your documents.
We hope this tutorial helps you as you format your documents in MS Word.
PREVIOUS
NEXT
When you’re working on a long document, separating it into different parts makes it much easier to navigate. Microsoft Word eases your workflow by letting you insert document breaks, namely section and page breaks.


As you’ll see in this article by defining section and page breaks you can apply specific formatting elements in different parts of your document. You’ll also have better control over pagination.
Read on to learn how to use section and page breaks in Word to make your document more visually appealing and easier for readers to make their way around. Finally, we’ll show you some great sources for professionally designed Word templates.
How to Add Breaks in MS Word (Quick Start Video)
Are you ready to learn how how to insert breaks in MS Word? The short video below will give you a head start on inserting, viewing, and deleting MS Word section and page breaks:
To learn even more about breaks in Word (including the difference betwen section breaks and page breaks), study the written tutorial below.
Understanding Section and Page Breaks
Section and page breaks are types of breaks or partitions in a Word document. In this section, you’ll learn some basics:
1. Microsoft Word Section Break vs Page Break
A page break is a partition in the text of the document. At a page break, the succeeding text is automatically placed on top of a new page.


But, with a section break for Word the text is partitioned — along with the formatting associated with it:
- page numbers
- margins
- headers and footers
- paper size and/or orientation
Also, a Microsoft Word section break may or may not begin on a new page (more on that below).
2. Why Use Microsoft Section and Page Breaks?
Section and page breaks are useful for partitioning different parts of a document, especially a long one.
In a book, you’d use section breaks to divide it into chapters as well as delineate the front matter from the back matter. The title page, copyright page, table of contents, individual chapters, index, etc., would be separate sections.
For example, you usually want a new chapter of a book (or similar) document to begin on a new page. This is when a page break is most useful.
A section break for MS Word is useful for visually distinguishing parts of a document. An example of where you might use a section break is in a proposal where you want the summary to have a different layout. In this case, the summary section could have its own header, footer, and margins that are different from the rest of the document.
By using section breaks, each chapter can have a different running header, including the chapter title.


Microsoft Word Section breaks also let you use lower case numbers for page numbers on the introduction of the book and Arabic numerals on the rest of the pages.
Similarly, a section break in Microsoft Word lets you use a two-column format in the index section and a single column everywhere else.
You’ll also want to use section and page breaks when you want to control the pagination of your document. For example, the first page of your document may be a cover page. But you don’t want the cover page to be page 1 of your document. By inserting a section break after the cover page, you can make the next page be page 1.
You accomplish these results by inserting different types of section and page breaks in Word.
3. Types of Microsoft Word Section Breaks
There are four types of section breaks in MS Word:
- Next Page. This type of section break forces the text to the right of the cursor to a new section on the following page. All the formatting associated with the text is carried through to the new section as well.
- Continuous. A continuous section break creates a new section but keeps the text on the same page. This means two different sections can have their own formatting yet remain on the same page.
- Odd Page. This kind of section break moves the text to the right of the cursor to the top of the next odd-numbered page. If you’re on page 3, for example, and you insert an Odd Page Section Break, the next section will start on top of page 5 (page 4 will be blank). Book chapters usually begin on the next odd page of the book.
- Even Page. An Even Page section break moves the text to the right of the cursor to the top of the next even-numbered page. So, if you’re on page 6 and you insert an Even Page Section Break, the new section will begin on page 8 (leaving page 7 blank).
4. Types of Page Breaks
As for Microsoft Word page breaks, there are two kinds:


- Simple Page Breaks. A simple page break moves text to the right of the cursor to the top of the next page.
- Column Breaks. If your document is broken up into columns, a column break moves text to the right of the cursor to the top of the next column.
How to View Existing Breaks in an MS Word Doc
By default, section and page breaks are invisible in Word. You can only see their effects. You’ll see changes in formatting and pagination for each section. That’s because these breaks don’t appear when the document is printed.
As you’re editing and formatting your document, you may need to see page and section breaks. To view existing page and section breaks in Word, on the Home tab, then click on the Paragraph button.


How to Insert Section Breaks in Your Word Docs
To insert a page or section break, place the cursor where you want one section/page to end and the next section/page to begin.
Go to Insert > Break, then choose the specific type of page break or section break you want to insert.


Or, click on the Layout tab. Then click on the Breaks button on the ribbon and select the type of page or section break you wish to insert.


How to Remove/Delete Section and Page Breaks in Word
To remove a section or page break in Word, first display all the breaks.
Select the section or page break you want to remove by highlighting it. Click on either the Delete or Backspace key on your keyboard.


When you delete a section break, the text in the section adopts the formatting of the next section.
Tips for Using Section and Page Breaks in MS Word
Are you just getting comfortable with using Microsoft Word section and page breaks? Here are some extra tips to help you use them effectively:
1. Keep Your Section Breaks to a Minimum
Insert a section break in Word only when you have to (see above for when it’s a good idea to do so). Having more sections than necessary makes it more difficult to make global changes to your document, because you’d have to manually make those changes in each section.
2. Pay Attention to Which Section You’re In
If you’ve divided your document into sections, always be aware of what section you’re in when you make formatting changes. That’s because these changes will apply only to the section you’re currently in — that’s the section where your cursor is. If you want to make a formatting change to apply to the whole document, select the entire document first before making your changes.
3. Microsoft Word May Change a Continuous Section Break to the Other Section Break Types
You may be surprised that your continuous section break has been converted into a different type of section break. This happens when you’ve got a continuous section break. Then, in the next section, you try to apply a different header/footer, pagination, margins, or page size and orientation. Those formatting changes require a page break. And so, Word will automatically change the section break type to one that results in a page break.
Streamline Your Microsoft Word Workflow With Templates


There are other ways to streamline your MS Word workflow. One of them is using premium Word templates, like the ones you’ll find at Envato. Premium templates for Microsoft Word are created by professional designers to provide impressive layouts. These templates are customizable with your content, images, and branding. You can also adjust the design and layout as you please.
Envato Elements gives you unlimited downloads of Word templates as well as other inputs you need to complete your projects — fonts, graphics, stock photos, and more — all for one flat monthly subscription fee.


Or, go to GraphicRiver for Microsoft Word templates and other creative elements on a pay-per-use basis. It’s a terrific source for one-off projects.
Make Your Document Easier to Read and Navigate
Now you know how to use section and page breaks in Microsoft Word to better organize your document. Section breaks also let you have more granular control over the formatting of specific parts of your document. These make your document look better as well as easier to read and navigate through.
Use the steps you learned in this article to properly use section and page breaks. Also, use Word templates to make it much easier and faster to create impressive documents. Envato Elements provides unlimited downloads of templates for Word for one monthly subscription. For occasional projects, GraphicRiver is an excellent source of Word templates where you pay for each use.
Editorial Note: This tutorial has been updated to add a video by Andrew Childress.
Microsoft Word 2013 Tutorial
Page Numbers | Tutorial Main Menu | Training Homepage | Illustrations/Drawing
This section of the tutorial will cover document breaks, as well as the different kinds of page and section breaks that one may create.
In composing a document with multiple pages, particularly one with many chapter headings, it is sometimes difficult to format the text in such a way that some chapters do not begin at the bottom of a page (such as in the example of Fig. 3-6 below).
It also happens that when writing a paper, report, article, or book with multiple sections, difficulties with headers, footers, footnotes, and page numbers present themselves. As mentioned above in the section on Headers and Footers, Word 2013 does not automatically separate a document into sections. As a consequence, the program will duplicate the same headers and footers on each page, as well as continue page numbering and footnotes throughout the document.
For instance, when writing a paper with several sections, the header of the first section will automatically appear in the second as well (see Fig. 3-1 below).

Figure 3-1
In order to remedy this, it will be necessary to create a document break, which will indicate to Word how the document is to be partitioned. There are two types of document breaks, namely page breaks and section breaks. These two types are further subdivided into several different kinds of page and section breaks. The page breaks partition only the body text of the document, whereas the section breaks partition both the body text of the document, as well as partition page margins, headers and footers, page numbers, and the like.
Among the kinds of page breaks, there are simple page breaks, column breaks, and text wrapping breaks. The different kinds of section breaks include next page, continuous, even page, and odd page breaks. To learn more about the different kinds of page and section breaks, see their separate headings below, where they are covered in greater detail.
[Back to Top]
Inserting a Document Break

Figure 3-2
Step 1. To insert a document break, first select the place where you would like it to begin by clicking on it within the body of the document. If your section begins on the next page, as is the case in the example above (Fig. 3-2), it is best to point your cursor and click on the very beginning of the next section.

Figure 3-3
Step 2. Then in the drop-down menu, select the type of break that you want. The difference between each of these different kinds of breaks will be discussed below. For now, we will just select Continuous under Section Breaks. Note that you may not be able ordinarily to see the break itself, although its presence will be made evident in the next step.

Figure 3-4
Tip. If you want to quickly add a simple page break to your document, click on the INSERT tab above the ribbon menu, and then select the Page Break option.

Fig. 3-5
Step 3. Confirm that your break has in fact been inserted by double-clicking on the header area above the body text. On the left under the header area, you should see a grey box which says Header -Section 2-. If you see this, then the break has successfully been created.
Note. To learn how to insert or format headers now that you have made your document break, see Section 1: Headers and Footers. To learn how to insert or format page numbers, see Section 2: Page Numbers.
[Back to Top]
The Different Kinds of Document Breaks
Having covered the basics of how to create a document break, we will now turn our attention to the types of document breaks which may be created in Microsoft Word 2013.
The first type of document break is the page break, which partitions only the body text of the document. Of this type there are three kinds: simple page breaks, column page breaks, and text wrapping page breaks.
Simple Page Breaks
A simple page break will force all the text behind the cursor onto the next page. Below (Fig 3-6) is an example of what what two pages of a document might look like before inserting a simple page break.

Figure 3-6
As can be seen in the example above, Chapter One begins at the end of a page, causing the reader to turn the page two lines in. The work would read more easily if the beginning of the chapter began at the top of the next page, so a page break needs to be inserted into the document.
After the page break has been inserted, the pages will look like Fig. 3-7 below.

Figure 3-7
Column Breaks
If your document utilizes columns, when inserting a column break, any text to the right of the cursor where the break is inserted is forced into the next column. In the two examples below, Fig 3-8 shows the text before the column break, while Fig 3-9 is what the page looks like after the break has been created.
|
Figure 3-8 |
Figure 3-9 |


Text Wrapping Breaks
A text wrapping break moves any text to the right of the cursor to the next line. This kind of break may be particularly useful when your document contains images. Below are examples of a page before and after a text-wrapping break is created (Fig. 3-10 and 3-11, respectively).
|
Figure 3-10 |
Figure 3-11 |


[Back to Top]
The Different Kinds of Section Breaks
The second type of document break is the section break, which partitions both the body text of the document and its associated formatting, such as headers and footers, page numbers, footnotes, margins, etc. Of this type there are four kinds: next page section breaks, continuous section breaks, even page section breaks, and odd page section breaks.
Next Page Breaks
A next page break forces the text to the right of the cursor to the following page, as well as partitions the document into sections, allowing for a change in margins, headers and footers, as well as differently numbered pages and footnotes. This is most useful when your document must be divided into chapters or sections. Below is an example of a paper with two sections, before (Fig. 3-12) and after (Fig. 3-13) a next page break.

Figure 3-12
After the next page break is created, the new section may be formatted separately from the first, and vice versa, while still remaining part of the same document.

Figure 3-13
Note. When formatting page numbers which will begin anew for each section, it will be necessary to right-click on the page number itself, and select Format Page Numbers, to bring up the formatting window (Fig. 2-4).
[Back to Top]
Continuous Breaks
A continuous break allows for the partition of a document, allowing the user to change headers and footers, page numbers, margins, etc., yet without having to alter or otherwise move the body text of the document. This kind of section break is most useful when a document has already been composed in part or in full, but still requires different formatting such as to footnotes, headings, or pagination in separate sections of the work. This allows for one section of a document to end and another to begin on the same page.
Even Page Breaks
An even page break will shift all the text to the right of the cursor to the top of the next even page.
Odd Page Breaks
An odd page break will move the text to the right of the cursor to the top of the next odd page.
[Back to Top]