I would like to show you some basics you can do with
Mailings in MS Word. It´s quite handy feature you can use for creating envelopes, labels, personalized letters etc.
First question could be
what is this feature good for?
Mailing can really help you and save a lot of time when you are working with some database and data from this database has to be placed in some document. In this way you can create, let say, rule how and which data will be used.
Because I really like to explain on examples from real word, not a theory, I do it also now. There is a database of customers I want to wish Merry Christmas and Happy New Year, because they are top customers. I will send them a letter, but I do not like to write
Dear Sir/Madame, I want to be more personal so I will write their names. This I can do manually – copy/paste – what could be good way, but not in case I have 100 customers like that, or 1000 (if I am a big company), so there is a place for Mailing.
So
what I need to do, basically 2 things:
• Write a letter
• Database (e.g. in excel)
Word text
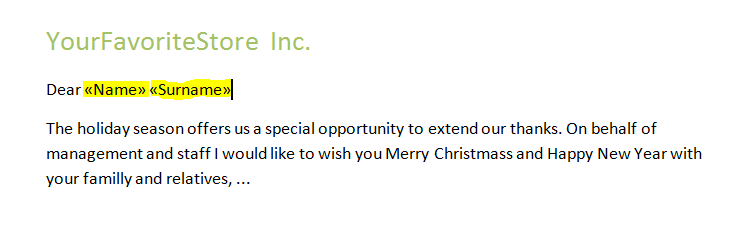
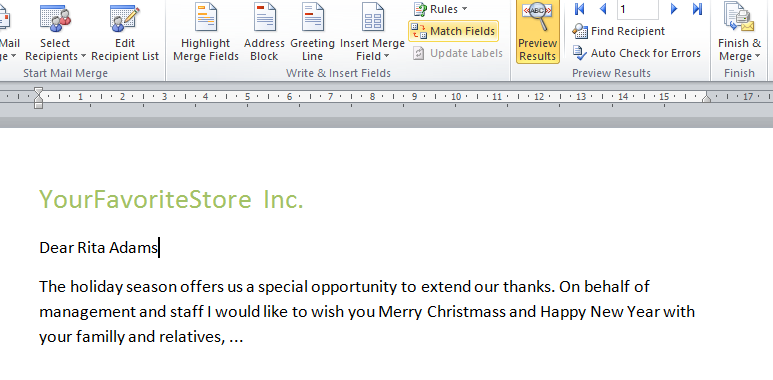
I will write the letter as normally I do, except words which won’t be «static», in this case name and surname will be such a dynamic words. See sample:
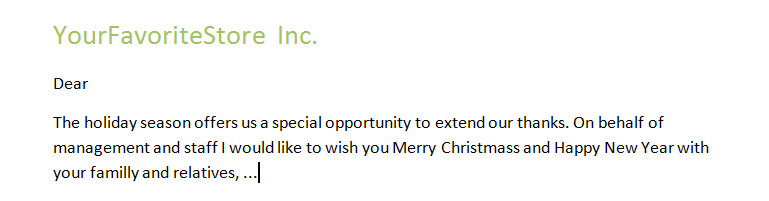
As you can see there is a part of letter where company is sending to customer, but there is missing name and surname next to «Dear». These 2 words will be added from database and will be changed dynamically.
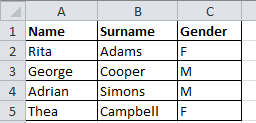
Database
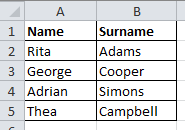
In this example it will be Excel table (which is very common type of DB, I guess) where are just 2 columns – Name and surname, see on the picture
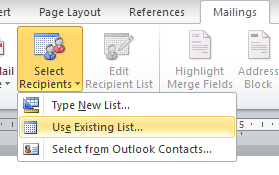
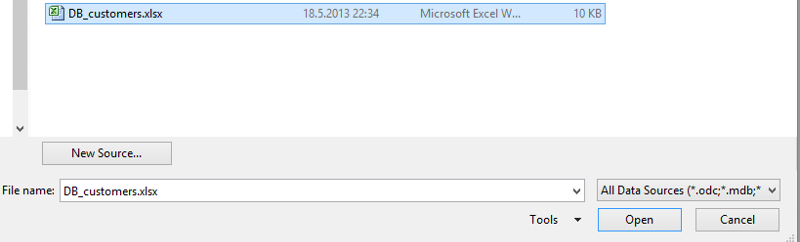
Now we can start to merge these two documents. In Word go to Mailings tab and click Select Recipients>Use Existing List … (because we have our own DB)
Then just browse your DB and click Open
Another window appears, which asks you in which sheet in this excel is your table (in my case it is in Sheet1)
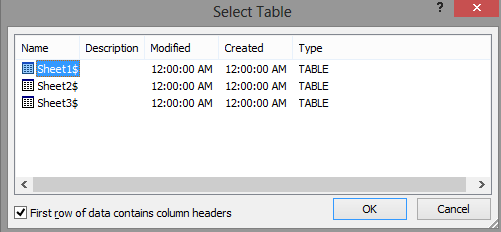
When you confirm sheet by OK it seems nothing happens, because there is no change in the document – visually. By these steps you connected Word with the database and you can work with it in next steps. This also enables more options in Mailing tab which were greyed out before

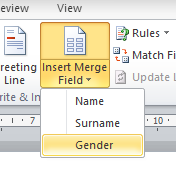
Now, finally, we can define Name and Surname fields to the letter. It’s a simple process, place the cursor where this Name and Surname should come and insert the fields – easy to say, but I will show you. After «Dear» word I do space and insert field for name by clicking Insert Merge field > Name
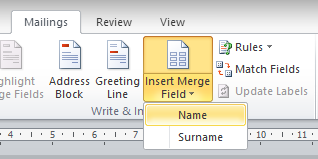
As you can see there are two options – Name and Surname – so this is a list of words from excel table headers. Click Name, put space and with the same procedure add also Surname. Result looks like this
And basically that’s it. You can switch between «code» and real words with Preview Results button
So with pressed Preview Results it will show you first record from the excel database
If you want to see next records just click Next/Previous records represented with blue arrows, or type number you want to jump on

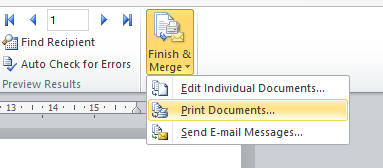
At the end you will probably want to print these letters. For this action press Finish & Merge button and choose Print documents …
You can choose if you want to print letter for each record in database (All), only the one you see (Current record) or range (From-To)
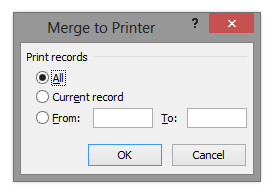
Then just choose printer and that´s it.
This is how mailing works in MS Word. But I would like to show some also something advanced. I will stay with this example, just expand database with gender. This would be useful if you want to write Mr. or Mrs, based on gender. Database is like
Again I will broswe for excel database and you can see Gender appears in the list
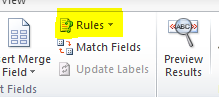
So Word has now connection with updated database and can read also Gender data. But how to tell Word to use «Dear Mr.» if man, and «Dear Mrs.» If woman? For this we have Rules field in Mailing tab
And suitable option under Rules in this case is «If … Then … Else …»
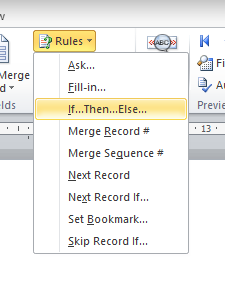
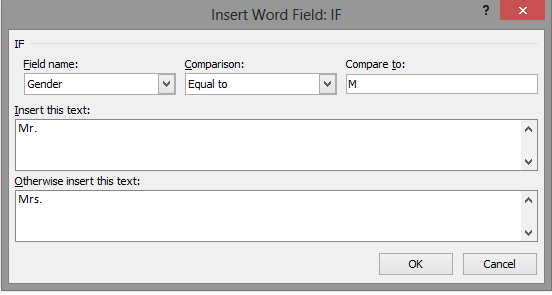
Place your cursor next to «Dear» and choose «If … Then … Else …» Rule. Table with contitions appears. Choose propriate Field name (in our example Gender), Comparison (in our example Equal to) and Compare to (in our example M). Then fulfill text which will be added if the conditions are correct (in our example Mr.) and another text if they are not (in our example Mrs.). See also on the picture
Then you click OK, and when you will switch record by record not only name and surname will change, but also Mr./Mrs.
Of course you can format also these «dynamic» fields in the same way as normal text in Word, so you can set color, font, font size, bold etc
.
This is not everything Mailings in Word can do, at least you see how many rules are available and each can do something. This tutorial wants to be a start point, to show you how to use this feature in MS Word.
— helpfinder —
While there are a lot of things I don’t like about Microsoft Word, there are many more things I love about it. In particular, I love the ability to automate many of the tasks that you do often. One of those tasks is sending reports or emails. Most of us are faced with a job where you have to send a report to an entire team of people, so you find yourself spending hours writing up email after email.

<firstimage=»https://www.makeuseof.com/wp-content/uploads/2011/03/gear1.jpg»>

While there are a lot of things I don’t like about Microsoft Word, there are many more things I love about it. In particular, I like how flexible the drawing tools are, the included templates for things like letters and resumes, and most of all, I love the ability to automate many of the tasks that you do often. One of those tasks is sending reports or emails.
Most of us are faced with a job where you have to send a report to an entire team of people. What makes this worse sometimes is that you have to send individually tailored emails to each person with specific information pertaining to them. Maybe 80 to 90% of the verbiage is the same, but that 10 or 20% specific to the person is unique — so you find yourself spending hours writing up email after email.
Sending Automated Emails
In the past, I wrote about how you could automate Google Analytics to send out scheduled reports, which you could then pass on to your boss or client. But the form of automation that I’m going to show you today is a little different. Instead of producing the data for you, Word is going to automatically fill in the details about the person on your contact list, while allowing you to quickly fill in the data or information that you want to send to that person. This makes the email feel personal and direct, but at the same time you aren’t spending hours writing up tens or hundreds of personal, direct emails.
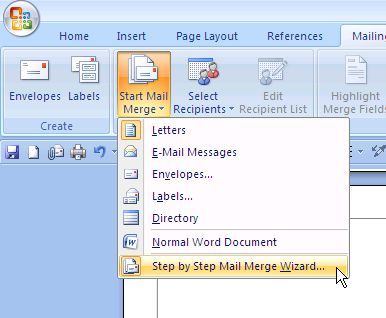
To get started, in Word (in my examples it’s Word 2007), click on «Mailings» and then click «Start Mail Merge.»
The Wizard isn’t necessary, but it’s nice because it helps you to remember everything you need to do. First, pick a template that you’d like to use for your generic report.

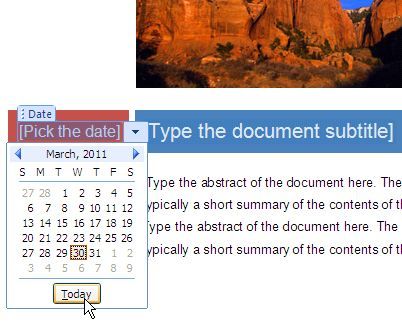
Word has a lot of good styles and layouts. Once you choose your template, just click OK. Now your entire report is written for you, all you have to do is fill in the text. When it comes to the date, make sure to choose «today» so that the document always uses today’s date every time you recreate it later.
When you choose your recipient list to receive these emails, you can use your current Outlook contacts, a current contact list that you’ve exported from somewhere else, or create a new list of contacts.
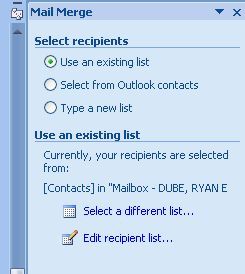
In my example, I’ve selected recipients from my current Outlook contacts.
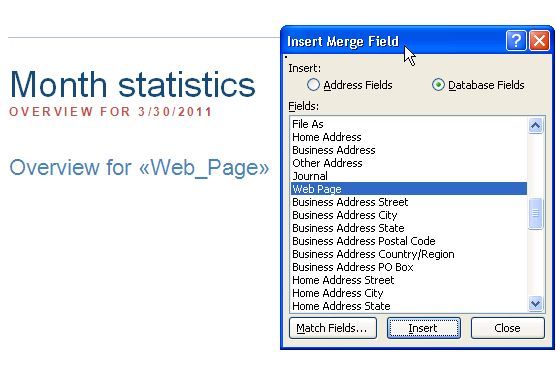
Now that you have your recipients selected, you’re going to tell the document what information to pull out of the Contacts information and automatically embed into the report. You do this by clicking on the «Insert Merge Field» button.
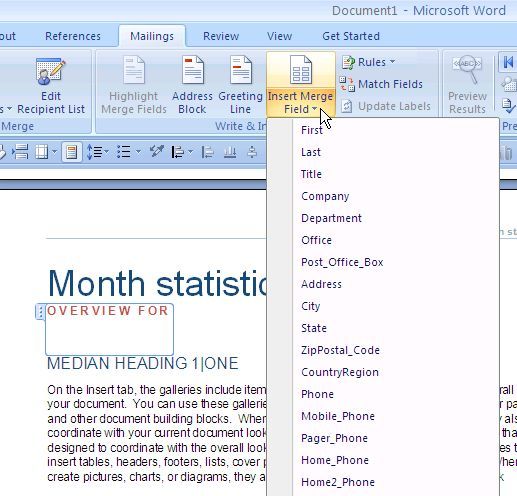
For example, I’m creating a report about a specific website for a client, so I’ve defined that website in their Contact details, and here I’m telling Word to use that URL in the report.
If you’re using Outlook, don’t forget that Outlook Contacts offers User Fields, where you can insert any information you want for that person.
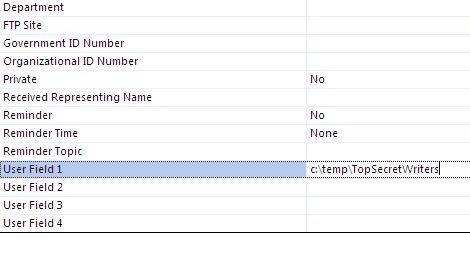
This is useful when the information you want to embed for that person isn’t found in the Contact List fields.
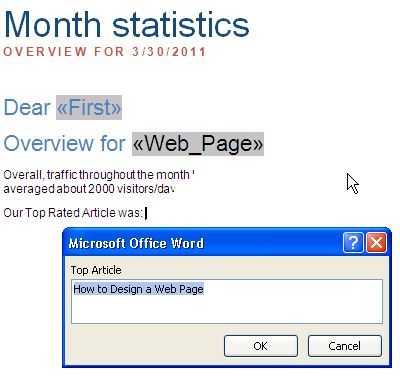
The coolest thing about the Microsoft Word Mailings is that you basically create «fill-in» fields for the parts of the report that are unique for each person.

So as you’re writing the generic message and you get to a place where you have to write something that would have specific data relevant to that person, just click on «Rules» and choose «Fill-in«. This lets you define the prompt question and a default answer. What will happen is when you load up your automated document, it will prompt you to fill in every single one of the fill-in fields for each recipient.
Once you’re finished creating your automated mailing, your document will consist of some fields that automatically fill in based on recipient Contact details, and other fields will fill in based on what you’ve specified for information.

For each document, you can quickly send out the email report from Word by clicking the Outlook button on the upper right part of the screen, choosing «Send Email» (or send as PDF attachment), and you’re done!
Using this technique, you’ll cut down your correspondence work by at least 50% or more. Up front it’ll take you some time to get the document set up perfectly, but every week or month that you need to issue the report, you’ll be very happy that you put in the effort.
Give Microsoft Word Mailings a shot and let us know how it went. Did it save you time? Share your own experiences with it in the comments section below!
Image credit: clix at sxc.hu
Project Online Desktop Client Publisher for Microsoft 365 Excel 2021 Word 2021 PowerPoint 2021 Project Professional 2021 Project Standard 2021 Publisher 2021 Excel 2019 Word 2019 PowerPoint 2019 Project Professional 2019 Project Standard 2019 Publisher 2019 Excel 2016 Word 2016 PowerPoint 2016 Project Professional 2016 Project Standard 2016 Publisher 2016 Excel 2013 Word 2013 PowerPoint 2013 Project Professional 2013 Project Standard 2013 Publisher 2013 Excel 2010 Word 2010 Project 2010 Project Standard 2010 Publisher 2010 More…Less
If you have Outlook installed as part of Microsoft Office, and set as your default email app, you can send your document as an email attachment. If you are using Excel, Publisher, or Word, you can also send your file as the body of an email message.
If Outlook is not your default email application you’ll need to configure it as the default in order to use this feature. For more information see: Make Outlook the default program for email, contacts, and calendar.
Send as an attachment
Excel, PowerPoint, and Word
-
Click File > Share, and then choose one of the following options:
Note: The options you see will vary depending on the Office program you’re using.
-
Upload to OneDrive Uploads your file to your OneDrive account where you can then share through a direct link or an email message.
-
Attach a copy instead Choose to attach a the file to an email, or attach a PDF of the file.
-
-
Enter the recipients’ aliases, edit the subject line and message body as necessary, and then click Send.
OneNote, Visio, Publisher, and Project
-
Click File > Share, and then choose one of the following options:
Note: The options you see will vary depending on the Office program you’re using.
-
Share with People (OneNote and Visio) Lets you enter name or email address for who you want to send to, set whether you want them to edit, require the user signs in before editing, and an optional message.
This option requires that your file is uploaded to OneDrive.
-
Send a Link (Visio) Allows everyone to work on the same copy of the file, see the latest changes, and keeps your email size small.
To send a link, the file must be saved to a Web server or shared folder.
-
Send as Attachment Opens an email message with a copy of the file in its original file format attached.
-
Send as PDF Opens an email message with a copy of the file in .pdf format attached.
-
Send as XPS Opens an email message with a copy of the file in .xps format attached.
-
-
Enter the recipients’ aliases, edit the subject line and message body as necessary, and then click Send.
Send as the body of an email message
If you are using Excel, Publisher, or Word, you can send your file as the actual email message content — not as an attachment. To do this, first you need to add the Send to Mail Recipient command to the Quick Access Toolbar. See Customize the Quick Access Toolbar to learn how to add commands.
-
Open the file you want to send.
-
In the Quick Access Toolbar, click Send to Mail Recipient to open an email message. Your file will appear in the body of the message.
-
Enter the recipients’ aliases, edit the subject line and message body as necessary, and then click Send.
Send as an attachment
Excel, PowerPoint, Project, Publisher, Visio, and Word
-
Click File > Share > Email, and then choose one of the following options:
-
Send as Attachment Opens an email message with a copy of the file in its original file format attached.
-
Send as PDF Opens an email message with a copy of the file in .pdf format attached.
-
Send as XPS Opens an email message with a copy of the file in .xps format attached.
-
Send as Internet Fax Opens a web page where you can choose from a list of providers that let you send a fax over the Internet.
Note: The options you see will vary depending on the Office program you’re using.
-
-
Enter the recipients’ aliases, edit the subject line and message body as necessary, and then click Send.
OneNote
-
Click File > Send, and then choose one of the following options:
-
Send as Attachment Opens an email message with both a copy of the file in its original file format and a copy of the file as a web page attached.
-
Send as PDF Opens an email message with a copy of the file in .pdf format attached.
-
-
Enter the recipients’ aliases, edit the subject line and message body as necessary, and then click Send.
Send as the body of an email message
If you are using Excel, Publisher, or Word, you can send your file as the actual email message content — not as an attachment. To do this, first you need to add the Send to Mail Recipient command to the Quick Access Toolbar. See Customize the Quick Access Toolbar to learn how to add commands.
-
Open the file you want to send.
-
In the Quick Access Toolbar, click Send to Mail Recipient to open an email message. Your file will appear in the body of the message.
-
Enter the recipients’ aliases, edit the subject line and message body as necessary, and then click Send.
Send as an attachment
The following instructions apply to Excel, PowerPoint, Project, Publisher, Visio, and Word.
-
Click File.
-
Click Save & Send.
-
Select Send Using E-mail, and then choose one of the following options:
-
Send as Attachment Opens an email message with a copy of the file in its original file format attached.
-
Send as PDF Opens an email message with a copy of the file in .pdf format attached.
-
Send as XPS Opens an email message with a copy of the file in .xps format attached.
Note: The PDF and XPS options are not available in Project 2010.
-
-
Enter the recipients’ aliases, edit the subject line and message body as necessary, and then click Send.
The following instructions apply to OneNote 2010:
-
Click File.
-
Click Send, and then choose one of the following options:
-
E-mail Page as Attachment Opens an email message with both a copy of the file in its original file format and a copy of the file as a web page attached.
-
E-mail Page as PDF
Opens an e-mail message with a copy of the file in .
pdf
format attached.
-
-
Enter the recipients’ aliases, edit the subject line and message body as necessary, and then click Send.
Send as the body of an email message
If you are using Excel, Publisher, or Word, you can send your file as the actual email message content — not as an attachment. To do this, first you need to add the Send to Mail Recipient command to the Quick Access Toolbar. See Customize the Quick Access Toolbar to learn how to add commands.
To send your file as the body of an email message, follow these steps:
-
Open the file you want to send.
-
In the Quick Access Toolbar, click Send to Mail Recipient
 to open an email message. Your file will appear in the body of the message.
 -
Enter the recipients’ aliases, edit the subject line and message body as necessary, and then click Send.
 to open an email message. Your file will appear in the body of the message.
See also
Attach files or insert pictures in Outlook email messages
Reduce the size of pictures and attachments
View, open, or save attachments
Need more help?
Want more options?
Explore subscription benefits, browse training courses, learn how to secure your device, and more.
Communities help you ask and answer questions, give feedback, and hear from experts with rich knowledge.
Find solutions to common problems or get help from a support agent.
![]()
Download Article
![]()
Download Article
This wikiHow teaches you how to use the «Mail Merge» feature in Microsoft Word. Mail Merge allows you to use a spreadsheet of contact information to assign automatically a different address, name, or other piece of information to each copy of a document. This is useful when personalizing newsletters or statements, as you don’t have to write by hand each person’s name or address at the top of each document.
Things You Should Know
- Create your contact sheet in Microsoft Excel. Add your headers beginning in column «A1» and moving right. Save your file and remember your save location.
- Open Word and go to Blank document > Mailings > Select Recipients > Use an Existing List…. Choose your Excel sheet.
- Go to the spot you want to insert contact information and click Insert Merge Field. Select the desired headers from your Excel document. Click Finish & Merge.
-
1
Open Microsoft Excel. Microsoft Excel’s app icon resembles a white «X» on a dark-green background. The Excel «New» page will open.
- If you already have a contact sheet in Excel, skip ahead to importing the Excel contacts instead.
-
2
Click Blank workbook. It’s in the upper-left side of the «New» page. This will open a new, blank Excel document.
Advertisement
-
3
Add your contact headers. Starting in cell A1 and moving right from there, enter the following headers:[1]
- FirstName — Your contacts’ first names will go in this column (cell A1).
- LastName — Your contacts’ last names will go in this column (cell B1).
- Tel — Your contacts’ phone numbers will go in this column (cell C1).
- StreetAddress — Your contacts’ street addresses will go in this column (cell D1).
- City — Your contacts’ cities of residence will go in this column (cell E1).
- State — Your contacts’ states of residence will go in this column (cell F1).
- ZIP — Your contacts’ ZIP codes will go in this column (cell G1).
- Email — Your contacts’ email addresses will go in this column (cell H1).
-
4
Enter your contacts’ information. Starting in column A, cell 2, begin entering the contact information for each of the people for whom you want to generate a mail merge.
- Make sure that this information is accurate before proceeding.
-
5
Save your document. To do so:
- Windows — Click File, click Save As, double-click This PC, click a save location on the left side of the window, type the document’s name into the «File name» text box, and click Save.
- Mac — Click File, click Save As…, enter the document’s name in the «Save As» field, select a save location by clicking the «Where» box and clicking a folder, and click Save.
- Keep in mind your selected save location—you’ll need to find the Excel spreadsheet later.
-
6
Close Excel. Click the X in the upper-right corner of Excel (Windows) or the red circle in the upper-left corner (Mac). You can now proceed to creating the mail merge in Microsoft Word.


Advertisement
-
1
Open Microsoft Word. The Word app icon looks like a white «W» on a dark-blue background. As with Excel, the «New» page will open.
- If you have an existing Microsoft Word document into which you want to import the Excel contacts, you’ll instead double-click it to open it and skip the next step.
-
2
Click Blank document. It’s a white box in the upper-left side of the page. A blank Microsoft Word document will open.
-
3
Click the Mailings tab. This tab is at the top of the Microsoft Word window. A toolbar will appear just below the row of tabs here.
-
4
Click Select Recipients. It’s in the «Start Mail Merge» section of the Mailings toolbar. Doing so prompts a drop-down menu.
-
5
Click Use an Existing List…. You’ll find this option in the drop-down menu. A new window will open.
- If you ever want to use Outlook contacts instead, you can select the Choose from Outlook Contacts option in the drop-down menu.
- You can also type a temporary list of contact information into Word by selecting the Type a New List option. This is useful when you only need to create a handful of contacts’ information.
-
6
Select your Microsoft Excel contact sheet. On the left side of the window, click the folder in which you saved the Excel sheet, then click the Excel sheet to select it.
-
7
Click Open. It’s in the bottom-right corner of the window.
-
8
Confirm the decision. Click the Excel sheet’s name in the pop-up window, then click OK at the bottom of the window. Your Excel sheet will be selected as the location from which your contacts will load.
- Make sure that the «First row of data contains column headers» checkbox at the bottom of this window is checked.


Advertisement
-
1
Go to the place in which you want to insert contact information. Find the place where you want to insert contact information (e.g., the top of the document) and click it to place the cursor there.
-
2
Click Insert Merge Field. It’s an option in the «Write & Insert Fields» section of the Mailings tab. A drop-down menu will appear.
- You may have to click the Mailings tab again before doing this.
-
3
Select a type of information. In the drop-down menu, click the name of one of the headers from your Excel document to insert it.
- For example, you would click FirstName in the drop-down menu if you wanted to insert a tag for contacts’ first names.
-
4
Add other information where necessary. This might include contacts’ addresses, last names, phone numbers, and so on.
-
5
Click Finish & Merge. It’s in the far-right side of the Mailings tab’s toolbar. This prompts a drop-down menu.
-
6
Select a merge option. Click one of the following:
- Edit Individual Documents — Opens each recipient’s document, allowing you to personalize further the documents.
- Print Documents… — Allows you to print out a copy of your document for each individual listed in your contact sheet.
- Send Email Messages… — Allows you to send out the documents as emails. The contacts’ email addresses will be selected as the destination email addresses.
-
7
Follow the on-screen instructions. Depending on your selected option, you will have an additional form to review (for example, if you selected Email, you’ll have to enter a subject and then click OK). Doing so will complete the mail merge process.


Advertisement
Add New Question
-
Question
How can I perform a mail merge on MS word?

Go to the Mailings tab and click on the tab «Start Mail Merge;» it should be on the left side of the Mailings panel. Then select recipients and either make a list, or find a file if you already made one by choosing «Use existing list.» Type your letter, and press «Add merge field» whenever you need to use something from your list. Make any additional changes needed, and press «Finish and merge,» and then print if you need to.
-
Question
If I don’t use Outlook can I still send a mail merge?
Yes. You can either copy and paste, print, or click finish and merge and then go to settings regarding where you want to send your documents, and choose your destination. Also you can save to somewhere else in your computer and send it from there.
-
Question
What are the features of Microsoft Excel?
There are hundreds of formulas available to use, as well as a tool for copying data entries, continuing data patterns (1,2,3, or Monday, Tuesday, Wednesday, etc.). Also you can convert data into charts or import and edit files from other programs.
See more answers
Ask a Question
200 characters left
Include your email address to get a message when this question is answered.
Submit
Advertisement
-
Mail Merge is especially useful when creating invoices, statements, reports, or any other form of mass-produced documentation for which you have to include personal names, addresses, or so on.
Thanks for submitting a tip for review!
Advertisement
-
Always double-check your contact information before importing it to Word. Failing to do so could result in anything from using the wrong name to sending documents to the wrong email addresses.
Advertisement
About This Article
Article SummaryX
1. Open a blank document in Microsoft Word.
2. Click the Mailings tab.
3. Click Select Recipients, then click Use an Existing List….
4. Select your Mail Merge file, then click Open.
5. Click OK when prompted.
Did this summary help you?
Thanks to all authors for creating a page that has been read 1,393,176 times.
Is this article up to date?
Mail Merge is most often used to print or email form letters to multiple recipients. Using Mail Merge, you can easily customize form letters for individual recipients. Mail merge is also used to create envelopes or labels in bulk.
This feature works the same in all modern versions of Microsoft Word: 2010, 2013, and 2016.
- In a blank Microsoft Word document, click on the Mailings tab, and in the Start Mail Merge group, click Start Mail Merge.
- Click Step-by-Step Mail Merge Wizard.
- Select your document type. In this demo we will select Letters. Click Next: Starting document.
- Select the starting document. In this demo we will use the current (blank) document. Select Use the current document and then click Next: Select recipients.
- Note that selecting Start from existing document (which we are not doing in this demo) changes the view and gives you the option to choose your document. After you choose it, the Mail Merge Wizard reverts to Use the current document.
- Select recipients. In this demo we will create a new list, so select Type a new list and then click Create.
- Write the letter and add custom fields.
- Press Enter on your keyboard and click Greeting line… to enter a greeting.
- In the Insert Greeting Line dialog box, choose the greeting line format by clicking the drop-down arrows and selecting the options of your choice, and then click OK.
- Note that the address block and greeting line are surrounded by chevrons (« »). Write a short letter and click Next: Preview your letters.