
How to Automatically Insert the Document Filename in Word
- Click the “Insert” tab on the Word ribbon.
- Click “Quick Parts” in the Text group.
- Click “Field” to open the Field dialog box.
- Click “FileName” from the “Field Names” list.
- Click a capitalization format in the “Format” list.
Contents
- 1 How do I insert FileName into a Word document?
- 2 How do I insert FileName and path in Word?
- 3 How do I insert watermark in Word?
- 4 How do I insert FileName in Word without extension?
- 5 Where is the document name displayed?
- 6 How do you automatically update File names in Word?
- 7 How do you create a file path?
- 8 What is document name in MS Word?
- 9 How do you display the file location?
- 10 How do you put a watermark in front of a Word document?
- 11 What is watermark in MS Word?
- 12 Why is my watermark not showing up in Word?
- 13 How do I insert filename in Excel without extension?
- 14 How do I save a document without an extension?
- 15 How do I get rid of extensions in Word?
- 16 When a File is saved in Word The file name is displayed in the?
- 17 How do you automate a file name?
- 18 What does a file path look like?
- 19 What is path example?
- 20 Does file path include filename?
How do I insert FileName into a Word document?
Insert File Name of the Document
Under Header & Footer Tools, on the Design tab, in the Insert group, click Quick Parts, and then click Field. In the Field names list, click FileName select the Format you want. In Field options put a check in the Add path to filename check box. Click OK.
How do I insert FileName and path in Word?
From the “Text” group, click [Quick Parts] > Select “Field…” Under “Field names,” select “FileName.” In the “Field properties” section, select a format. In the “Field options” section, check “Add path to filename.” The file name will now appear in the header or footer.
How do I insert watermark in Word?
On the Design tab, select Watermark.
- In the Insert Watermark dialog, select Text and either type your own watermark text or select one, like DRAFT, from the list. Then, customize the watermark by setting the font, layout, size, colors, and orientation.
- Select OK.
How do I insert FileName in Word without extension?
Insert the custom document property, FileBaseName , in your document:
- MS Word menu > Insert [tab] > Text [group] > Quick Parts > Field
- From “Field Names” choose “DocProperty”.
- From “Field Properties” > “Property”: Choose “FileBaseName” > OK.
Where is the document name displayed?
The title bar displays the document name, followed by the program name.
How do you automatically update File names in Word?
To enable this option follow the steps below:
- Click on the ‘Office’ button.
- Click on Word Options.
- Select the Advanced tab on the left-hand side.
- Check the option ‘update automatic links on open’ under the General section on the right-hand side.
- Click on Ok. Replies (2) Question Info.
How do you create a file path?
Hold down Shift on your keyboard and right-click on the file, folder, or library for which you want a link. Then, select “Copy as path” in the contextual menu. If you’re using Windows 10, you can also select the item (file, folder, library) and click or tap on the “Copy as path” button from File Explorer’s Home tab.
What is document name in MS Word?
docx – Word document. . docm – Word macro-enabled document; same as docx, but may contain macros and scripts. .
How do you display the file location?
To view the full path of an individual file:
- Click the Start button and then click Computer, click to open the location of the desired file, hold down the Shift key and right-click the file.
- On the menu, there are two options to choose from that will allow you to either copy or view the entire file path:
How do you put a watermark in front of a Word document?
You’ll need to open the header to select the watermark.
- Double-click near the top of the page to open the header.
- Click the watermark to select it. (Try moving the cursor over the watermark until the cursor displays a four-headed arrow.)
- Drag the watermark where you want it on the page.
What is watermark in MS Word?
A watermark is an image or text that appears behind the main text of the document. It is usually a lighter shade than the text, so you can read the document easily. Text Watermarks are often used to categorize or to show the purpose of a document with words such as DRAFT.
Why is my watermark not showing up in Word?
However, sometimes a watermark may not be displayed. The most common reason for this is that by default watermarks are displayed in the background, behind the document’s content.The solution is to change the z-order of the watermark to a positive value to make sure it is displayed in front of the content.
How do I insert filename in Excel without extension?
Insert filename in cell without extension by Excel formula
Select a blank cell, and enter the formula =TRIM(LEFT(SUBSTITUTE(MID(CELL(“filename”,A1),FIND(“[“,CELL(“filename”,A1))+1,255),”. xl”,REPT(” “,255)),255)) into it, and press the Enter key.
How do I save a document without an extension?
To create a file without an extension with Notepad, use quotation marks. The quotation marks ensure the integrity of the file name chosen without an extension. The file is saved with a name and a file type of “file” which has no extension.
How do I get rid of extensions in Word?
To disable or remove an add-in follow these steps:
- Click File > Options > Add-ins.
- Towards the bottom of the window, where it says Manage, click the Go button.
- In the dialog box, select the add-ins you want to disable or remove.
- To disable the add-in, just uncheck the box in front of its name.
When a File is saved in Word The file name is displayed in the?
When you open a Word document, Word displays its name in the title bar.
How do you automate a file name?
Rename multiple files one at a time
- Open File Explorer.
- Browse to the folder with the files to rename.
- Click the View tab.
- Select the Details view.
- Select the first file in the folder.
- Click the Home tab.
- Click the Rename button.
- Rename the file.
What does a file path look like?
A path is either relative or absolute. An absolute path always contains the root element and the complete directory list required to locate the file. For example, /home/sally/statusReport is an absolute path.For example, joe/foo is a relative path.
What is path example?
The definition of a path is a trail, route, course or a line of movement. An example of a path is what deer follow through the forest. An example of a path is what hikers follow up a mountain. An example of a path is the direction taken by a tornado. An example of path is the vapor left behind a plane in the sky.
Does file path include filename?
Paths include the root, the filename, or both. That is, paths can be formed by adding either the root, filename, or both, to a directory.
Вы открыли файл в Word, но забыли, где он сохранён? Возможно, Вам нужно открыть другие файлы из того же места на компьютере или сделать резервные копии документов? В Word есть несколько способов для определения расположения файлов.
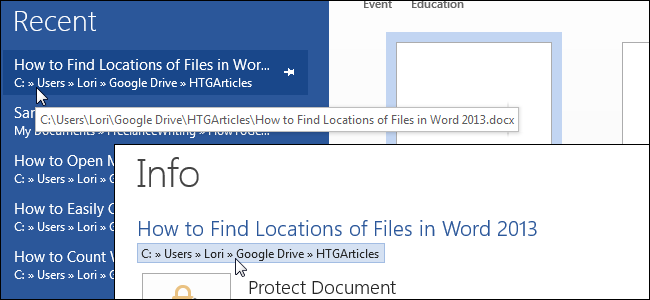
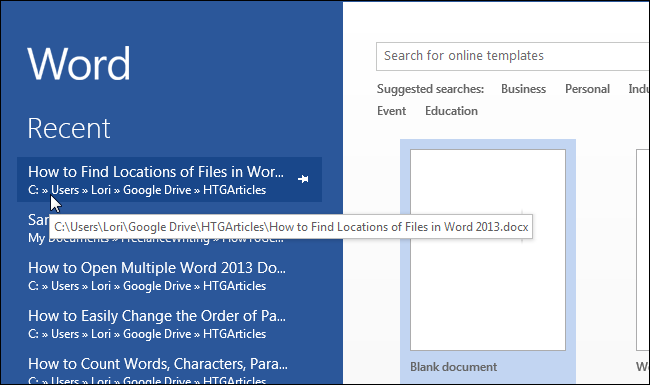
Если сначала Вы откроете приложение Word (не открывая файл), то в левой части начального экрана отобразится список Последние документы (Recent). Путь к каждому файлу указан под его именем. Если весь путь не виден, наведите указатель мыши на имя документа, полный путь отобразится во всплывающем окне.
Примечание: Иллюстрации для этой статьи взяты из Word 2013.
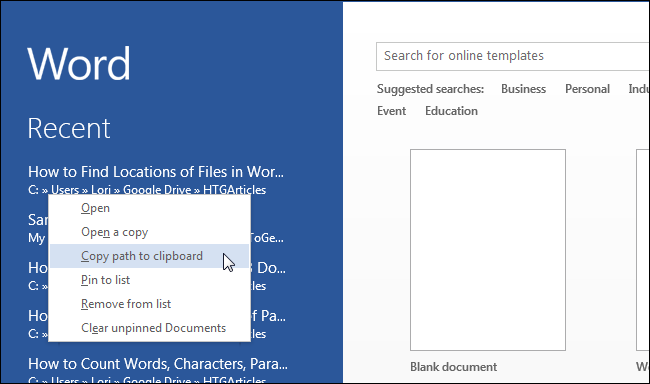
Ещё можно скопировать путь к файлу. Просто кликните правой кнопкой мыши по имени файла в списке Последние документы (Recent) и в появившемся меню выберите Копировать путь в буфер обмена (Copy path to clipboard). Полный путь к файлу будет скопирован. Если вставить его, например, в Блокнот, он будет выглядеть примерно так:
C:UsersLoriGoogle DriveHTGArticlesHow to Find Locations of Files in Word 2013.docx
Если файл уже открыт, воспользуйтесь другими способами, чтобы определить путь к нему. Откройте вкладку Файл (File).
Заголовок, который отображается в верхней части панели Сведения (Info) – это основная часть имени открытого файла (без расширения). Путь к этому файлу указан чуть ниже.
Можно скопировать путь к документу, кликнув по нему левой кнопкой мыши (не правой!) и выбрав из появившегося меню пункт – Копировать ссылку в буфер обмена (Copy link to clipboard).
Обратите внимание, что путь, скопированный из этого места и вставленный, например, в Блокнот, будет выглядеть по-другому:
file:///C:UsersLoriGoogle%20DriveHTGArticles

How%20to%20Find%20Locations%20of%20Files%20in%20Word%202013.docx
«%20» – это код пробела в Unicode. Он будет вставлен везде, где в пути к файлу есть пробел.
Кроме того, на панели Сведения (Info) справа внизу есть ссылка Открыть расположение файла (Open File Location). Если Вы наведёте на неё указатель мыши, появится всплывающая подсказка с указанием полного пути к документу.
Нажатие на Открыть расположение файла (Open File Location) открывает папку, содержащую этот файл, в окне проводника Windows.
Ранее в этой статье мы говорили о том, что можно определить расположение документа при помощи списка Последние документы (Recent) при запуске приложения Word (не открывая файл). Вы также можете открыть список последних документов, нажав на Открыть (Open) в левой части представления Backstage.
В правой части панели Открыть (Open) находится список Последние документы (Recent Documents). Под именем каждого файла указан путь, который можно скопировать, если кликнуть правой кнопкой мыши по пути либо по имени документа и в появившемся меню нажать Копировать путь в буфер обмена (Copy path to clipboard).
Наконец, можно использовать команду Сохранить как (Save As), чтобы выяснить путь к открытому в текущий момент файлу. Нажмите Сохранить как (Save As) в представлении Backstage.
Кликните по Компьютер (Computer).

В правой части экрана выберите папку, указанную под заголовком Текущая папка (Current Folder), либо папку под заголовком Последние папки (Recent Folders), либо нажмите кнопку Обзор (Browse) внизу списка.
Путь к текущему файлу будет указан в адресной строке в верхней части диалогового окна Сохранение документа (Save As). Кликните по адресной строке, чтобы увидеть полный путь. Он выделится, чтобы его можно было сразу скопировать.
Если Вы не планируете сохранять документ прямо сейчас, нажмите Отмена (Cancel), чтобы закрыть диалоговое окно. В противном случае кликните по Сохранить (Save), чтобы сохранить файл и закрыть диалоговое окно.
Оцените качество статьи. Нам важно ваше мнение:
Bill, a work colleague, asked:
How do I insert the file path and file name into a footer? It was easy in Word 2003 but I can’t find a way in Word 2007. This is just to remind me where the hell I put it!!
I walked Bill through the steps, and also got him to turn on field shading so he would always know when any apparent text was actually a field.
Here’s how to insert a file path and file name into your Word 2007 document:
- Place the cursor where you want to insert the file path/name (this might be the main body of the document, the header or the footer).
- Go to the Insert tab > Text group.
- Click the Quick Parts button, then click Field near the bottom of the drop-down list.

- On the Field window, scroll down the list of Field Names and select FileName, then select the Add path to filename check box. (Adding the file path to the file name is very useful for everyone, but especially for those who save their documents on large corporate networks.)

- Click OK.
- The field is inserted into your document. If it’s a new document that you haven’t saved yet, you’ll see DocumentX as the file path (where X is the document number):
- Save the document, then place your cursor anywhere in the field and press F9 to update the field (or right-click in the field and select Update field). The field updates with the correct file name and path.


If you want the file name/path field to update automatically, you’ll need to do any of these:
- Switch to Print Preview then back
- Add a macro — see http://support.microsoft.com/kb/832897 for details
- Switch to Draft mode, select all (Ctrl+A), then press F9 to update ALL fields in the document. Switch back to Page Layout mode when the update has finished.
- See https://cybertext.wordpress.com/2008/01/25/update-fields-in-headers-and-footers/ for other alternatives.
Update: You can add this footer to your footer ‘Quick Parts’ gallery so that you don’t have to go through these steps every time.
- Once you’ve done all the steps above, select the footer contents.
- Click the small drop-down arrow to the right of Footer in the Header and Footer group on the Design tab.
- At the bottom of the drop-down list, click Save Selection to Footer Gallery.
- Complete the details and click OK. (Hint: If you want your footer to show at the top of this list in future, add a space or underscore before the name.)
- When you next want to add this footer to a document, open the footer, then just choose it from the Footer list (step 2).


(Thanks to James’ comment on 1 June 2012 for these steps.)
Insert a Word Document’s File Name and Path using Fields
by Avantix Learning Team | Updated October 14, 2022
Applies to: Microsoft® Word® 2010, 2013, 2016, 2019, 2021 or 365 (Windows)
In Microsoft Word, you can insert a document’s file name and path using fields. The path can be displayed in the body of the document or in the header or footer. You can also customize the Quick Access Toolbar and display the file path.
Recommended article: How to View Word Count in Microsoft Word (4 Ways)
Do you want to learn more about Microsoft Word? Check out our virtual classroom or in-person classroom Word courses >
Insert a document file name and path in a Word document using the FileName field
To insert the FileName field and display the current document’s file name and path:
- Position the cursor where you want to display the file name and path. You can insert the field in the document or in a header or footer.
- Click the Insert tab in the Ribbon and click Quick Parts in the Text group. A drop-down menu appears.
- Select Field. A dialog box appears.
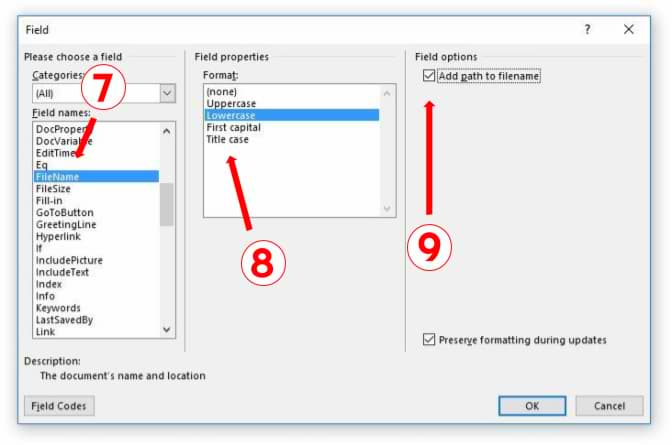
- Select FileName in the Field Names list. Options appear for the field.
- Select a format in the Format list.
- To display the full path, check or select the Add Path to filename check box.
- Click OK.
Below is the Field dialog box:

Hide Field Codes
A file name would normally appear similar to the following example:
C:UsersDavidDesktopABCCompanyProjectsARCProject.docx
If field codes appear instead, you can hide the field codes by pressing Alt + F9.
Update the FileName field
If the document’s name or path has changed, you’ll need to update the field.
To update the field, right-click the field and select Update or click the field and press F9. You can also press Ctrl + A and then press F9 to update all fields in your document.
Add a File Path button to the Quick Access Toolbar
You can also add a button in the Quick Access Toolbar to display the file path.
To customize the Quick Access Toolbar to display the file path:
- Click the arrow to the right of the Quick Access Toolbar (which is normally above the Ribbon by default) and choose More Commands. In the dialog box that appears, Quick Access Toolbar should be selected on the left.
- Click the arrow below Choose commands from and then select All Commands.
- Select Document Location in the list of commands.
- Click Add.
- Click OK. A document location or file path will now display in the Quick Access Toolbar.
Below is the Options dialog box where you can add buttons to the Quick Access Toolbar:

You may want to display the Quick Access Toolbar below the Ribbon by clicking the arrow to the right of the Quick Access Toolbar and selecting Show Below the Ribbon.
This article was first published on October 4, 2017 and has been updated for clarity and content.
Subscribe to get more articles like this one
Did you find this article helpful? If you would like to receive new articles, JOIN our email list.
More resources
How to Insert a Check Mark in Word (5 Ways)
How to View Word Count in Microsoft Word (4 Ways)
How to Superscipt or Subscript in Word (with Shortcuts)
How to Insert or Type an Em Dash in Word (4 Ways with Shortcuts)
10+ Great Microsoft Word Navigation Shortcuts for Moving Around Quickly in Your Documents
Related courses
Microsoft Word: Intermediate / Advanced
Microsoft Excel: Intermediate / Advanced
Microsoft PowerPoint: Intermediate / Advanced
Microsoft Access: Introduction
VIEW MORE COURSES >
Our instructor-led courses are delivered in virtual classroom format or at our downtown Toronto location at 18 King Street East, Suite 1400, Toronto, Ontario, Canada (some in-person classroom courses may also be delivered at an alternate downtown Toronto location). Contact us at info@avantixlearning.ca if you’d like to arrange custom instructor-led virtual classroom or onsite training on a date that’s convenient for you.
Copyright 2023 Avantix® Learning
Microsoft, the Microsoft logo, Microsoft Office and related Microsoft applications and logos are registered trademarks of Microsoft Corporation in Canada, US and other countries. All other trademarks are the property of the registered owners.
Avantix Learning |18 King Street East, Suite 1400, Toronto, Ontario, Canada M5C 1C4 | Contact us at info@avantixlearning.ca
In this article, we will talk about 6 quick ways to help you with viewing and getting the Full path of your Word document file.
From time to time, there is the need to view and get the full path of a Word document. For instance, you are working in a team, and you may need to share files with your colleagues. Then make the file path clear to see can greatly improve working efficiency. Or there are times when you need to access to others files stored on the same location where the current open document is.
Honestly, it’s not a complicated task, and there are ways out there.
Method 1: Add “Document Location” Command to “Quick Access Toolbar”
Normally, the commands in the Ribbon are ones we use most. However, there are many commands off the Ribbon and can be really useful sometimes. “Document Location” is one of those.
- At first, click “File” tab in Word and then “Options”.
- In the “Word Options” dialog box open, click “Quick Access Toolbar” first.
- Then choose “Commands Not in the Ribbon” from the drop-down list.
- Next find and click on the “Document Location” command.
- Click “Add” then.
- Finally, click “OK”.


Now you can see the full path of the file showing on the “Document Location” box.![]()
Method 2: Insert File Name to Header or Footer
You can also choose to insert a field displaying the file path to header or footer so they can appear on every page of the document.
- First and foremost, double click on the header area to enter it.
- Next, click “Insert” tab.
- Then click “Quick Parts” in “Text” group.
- And choose “Field” on the list.

- Now in the “Field” dialog box, choose “Document Information” for category.
- Next select “FileName” for “Field names”.
- Then in “Field options” part, you must check “Add path to filename” box.
- Next, click “OK” and double click on non-header area to exit.


Method 3: Check the Information in Backstage View
If you have opened a Word file, there is the relative information about it in the backstage view. You can see them by clicking “File” tab. By default, the “Info” id displayed. You can see the file path of the document on the right side.
Method 4: View through the Recent Files
- Click “File” tab.
- Then click “Recent”. You can see a list of recent document names on the right side.
- Just hover your cursor over the file name, and you will see the full path of where it’s stored. Normally, the document you currently open is on the top of the list, so you can easily find it. If you ever pin a document there, then the next file below is the document you are viewing. And there is also the “Recent Places” list, where you can directly go to open the file folder through the “Open” window.


Method 5: Use the “Save As” Window
Generally, the file you open has been saved before. So click “File” and then click “Save As”. On the “Save As” window, you can clearly see the full path.

Method 6: Make Use of VBA Codes
- At first, press “Alt+ F11” to open the VBA editor.
- Next just paste the following codes and click “Run”:
Sub DisplayFileFullPath()
  MsgBox ActiveDocument.FullName
End Sub

You will be greeted with a message box, in which is the full path of the file.

Comparison of 6 Methods
| Methods | Advantages | Disadvantages |
| Method 1: Add “Document Location” Command to “Quick Access Toolbar” | 1. You can see the file location directly on the “Quick Access Toolbar”.
2. You can copy the path. |
The command box size is fixed, so you can’t view the full path at a glance sometimes. |
| Method 2: Insert File Name to Header or Footer | 1. The file path will appear on every page of the document.
2. You can copy the path. |
You have to enter the header or footer before you are able to copy the path. |
| Method 3: Check the Information in Backstage View | You can copy the path. | Every time you have to switch back to backstage view to see the path. |
| Method 4: View through the Recent Files | 1. You can copy the path.
2. You can open other files stored in the same location. |
You have to switch back to backstage view. |
| Method 5: Use the “Save As” Window | You can copy the path. | You have to repeat steps every time you need to view a file path. |
| Method 6: Make Use of VBA Codes | You can add the macro to “Quick Access Toolbar” to quickly view the path next time. | You can’t copy the path from the message box. |
Prevent Word from Crashing down
Any software can fail. So does Word. But the truth is Word collapses due to user errors more often than not. Thus, to form a good habit of using Word is a critical way to avoid crashes. And if it ever breaks down, choose a proficient Word damage fix tool can be helpful.
Author Introduction:
Vera Chen is a data recovery expert in DataNumen, Inc., which is the world leader in data recovery technologies, including Excel problem recovery utility and pdf repair software products. For more information visit www.datanumen.com

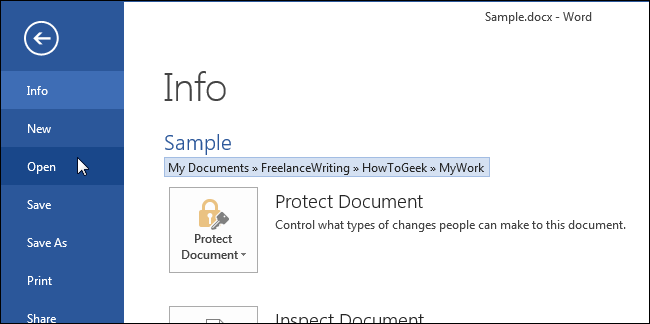
Have you opened a document in Word but forgotten where it’s stored? You may need to access other documents in the same location or back up your documents. There are several ways to use Word to find the location of a file.
There are several ways to find the location of a Word file. When you first open Word (without opening a file), the “Recent” list displays on the left side of the backstage, or start, screen. The path to each file is listed below the file name. If you can’t see the whole path, move your mouse over the file name and path in the “Recent” list. The full path displays in a popup.
NOTE: We used Word 2013 to illustrate this feature.

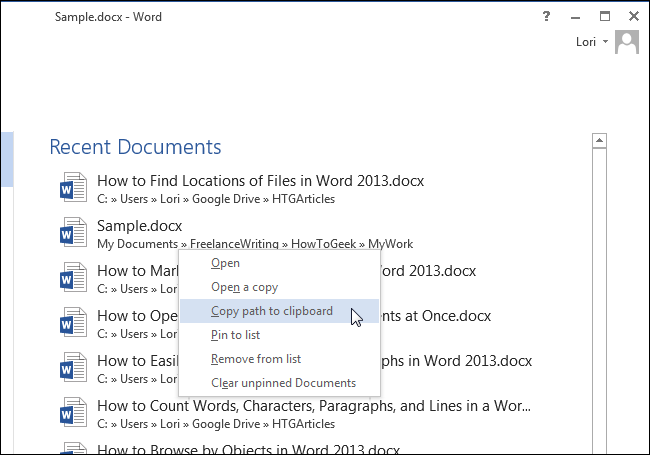
You can also copy the path for a file. Simply right-click on the file in the “Recent” list and select “Copy path to clipboard” from the popup menu. The full path to the file is copied and will look like the following if pasted somewhere else, such as Notepad:
C:UsersLoriGoogle DriveHTGArticlesHow to Find Locations of Files in Word 2013.docx
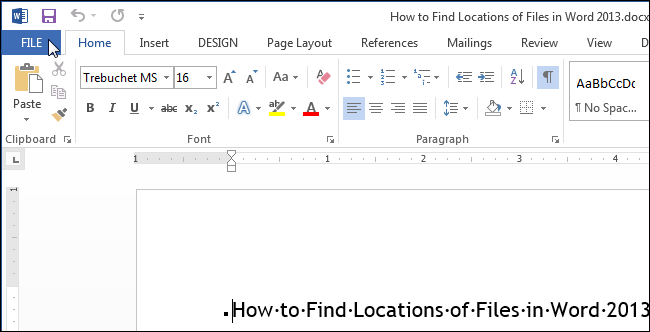
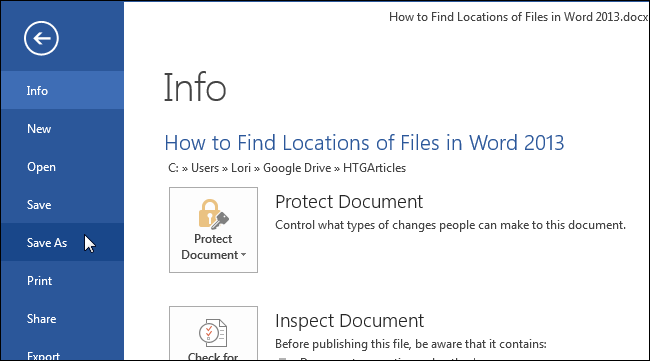
If the file for which you want to find the location is already open, there are other ways to find the location of the file. Click the “File” tab.
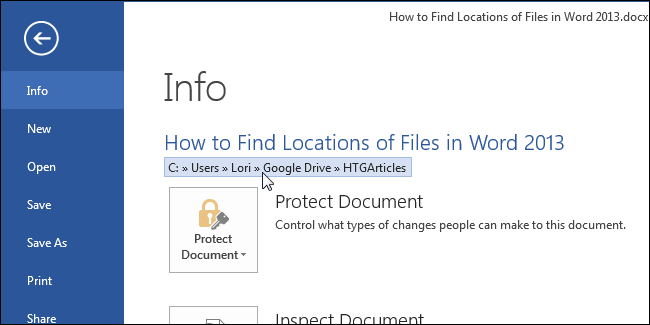
The title that displays at the top of the “Info” screen is extracted from the main portion of the file name (before the extension). The path to the currently open file is listed below that title.
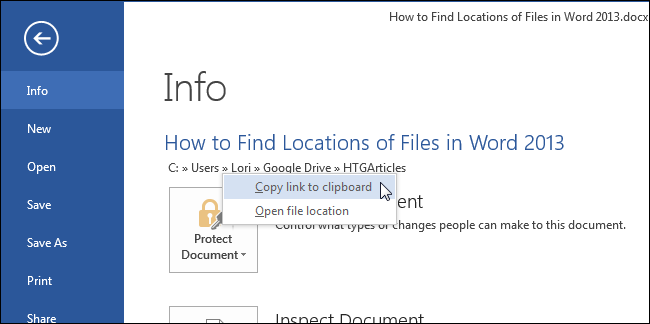
You can copy the path from this location, as well, by left-clicking on the path (not right-clicking) and selecting “Copy link to clipboard” from the popup menu.
Note that when you copy the path from this location, it pastes differently when pasted elsewhere, such as into Notepad, as shown below.
file:///C:UsersLoriGoogle%20DriveHTGArticlesHow%20to%20Find%20Locations%20of%20Files%20in%20Word%202013.docx
The “%20” is the Unicode equivalent of a space and this code is inserted everywhere there is a space in the copied path.
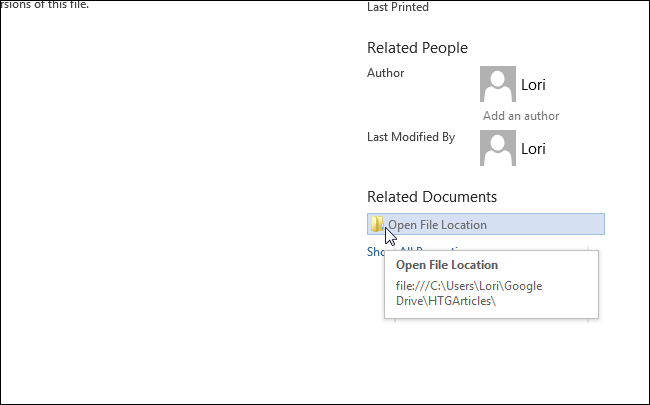
Also, in the bottom-right corner of the “Info” screen is the option to “Open File Location.” If you move your mouse over “Open File Location,” the full path to the currently open file displays in a popup.
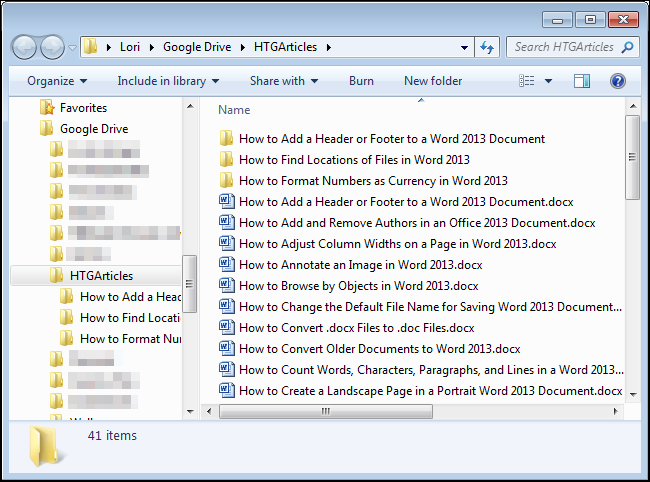
Clicking on “Open File Location” opens a Windows Explorer window directly to the folder containing the file.
Earlier in this article we mentioned finding the location of a file using the “Recent” list when you open Word (without opening a file). You can also access a list of recently opened documents by clicking “Open” in the list of items on the left side of the backstage, or start, screen.
On the right side of the “Open” screen is a list of “Recent Documents.” The path for each file is listed under the file name and can be copied by right-clicking on the file name or path for a file and selecting “Copy path to clipboard” from the popup menu.
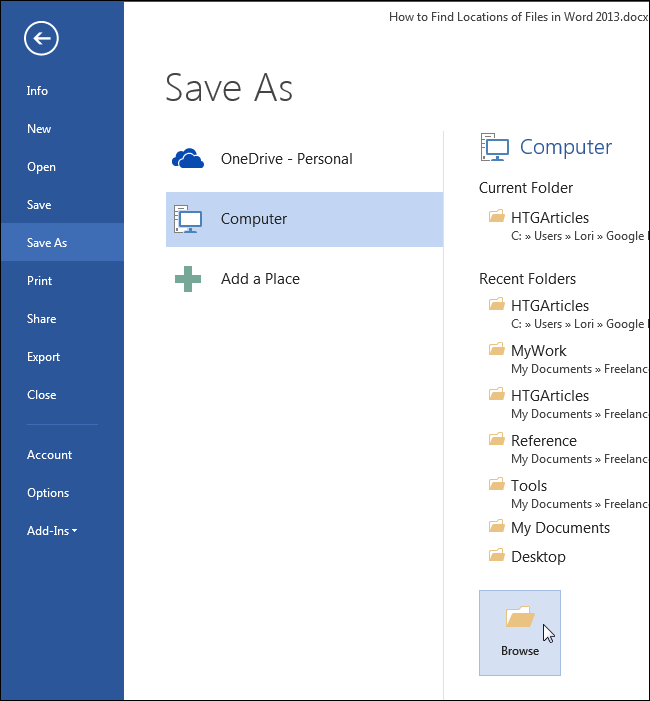
Finally, you can also use the “Save As” command to find out the path of the currently open file. On the backstage screen, click “Save As” in the list of items on the left.
On the “Save As” screen, click “Computer.”
Under “Computer” on the right side of the backstage screen, either select the “Current Folder,” a folder under “Recent Folders,” or click the “Browse” button at the bottom of the list.
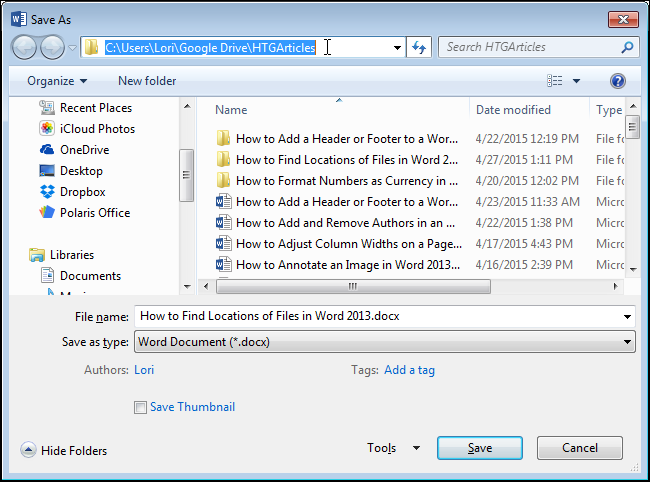
The path to the location of the currently open file displays in the address bar at the top of the “Save As” dialog box. To see the full path, click in the address bar. The full path displays and is highlighted, allowing you to copy the path, if desired.
If you don’t want to save the file at this time, click “Cancel” to close the dialog box. Otherwise, click “Save” to save the file and close the dialog box.
READ NEXT
- › How to Get a Refund on the PlayStation Store
- › Android’s Nearby Share Has (Unofficially) Arrived on Mac
- › Save Hundreds on Elegoo’s New PHECDA Laser Engraver Through Kickstarter
- › The New Winamp Is Here, but It’s Not What You’d Expect
- › Spotify Is Shutting Down Its Free Online Game
- › Five Types of Phone Damage That Aren’t Covered by Your Free Warranty
How-To Geek is where you turn when you want experts to explain technology. Since we launched in 2006, our articles have been read billions of times. Want to know more?
Using Word’s headers or footers for file-specific information
Word document headers and footers can be helpful for providing file- or document-specific information such as page numbers, dates, and author’s name. The header is a section of a document that appears in the top margin, while the footer appears in the bottom margin. Material placed in the header or footer will appear on each page of your document unless you choose to exempt the first page. Below, we’ll show you how to place the document’s file name, either with or without the full document path, within the header or footer of your document.
Placing a Word document’s file name and path in the header or footer
Inserting a file name and path is a simple task that can greatly benefit anyone using your document. Using the file name can help identify different versions of a document, or simply identify the electronic file name on a printed copy.
A great reason to use the file path is to ensure everyone working on a similar project knows where the file is located. For example, perhaps your department is working on a project, and you and another co-worker are tasked with modifying a document that relates to other project files. If project files are stored in the same project folder or directory, it can be helpful to include the file path, anyone with access to that directory can quickly navigate to all of the associated documents.
How to insert file name and path in your document
Navigate to the header or footer in one of two ways:
- Select Header or Footer from the Insert tab and choose the Edit option toward the bottom of the drop-down menu (Option 1), OR double-click in the header or footer space of the document (Option 2).
Option 1:

OR Option 2:

- Use the tab key to move the cursor to the desired location within your header or footer, or use the alignment tools on the Home tab as shown below.

- In the Insert group, within the Header and Footer tab, click the Document Info button.

- Choose File Name or File Path to have the appropriate information added to the header or footer of your document.


- To exit the header or footer, select the Close Header and Footer button on the ribbon or double click the body of the document.


Bonus: As you can see from the above menu, you can also easily insert Author and other Document information using the steps above and choosing and a different option from the menu. The Field… option also provides access to different properties.
Additional Productivity Resources
- We have more Microsoft Word tips in our Recent Posts and Categories sections. These are on the right side of your screen if viewing from a desktop.
- To learn about upcoming classes on Word, Outlook, PowerPoint, and other Microsoft applications, please visit our Course Schedule page.
- To schedule a custom class for any Microsoft application on your organization’s campus, please contact our Training Team.
Be sure to look through our other Software Tips for more on Microsoft Office.
Subscribe to Monthly Training Updates
Receive monthly productivity and training insights, software tips, and notices of upcoming classes!
Word: Insert File/Path Name into Document Footer or Header
Inserting your Word document’s file/path name into the footer or header will help you know where your document is located.
- Open Microsoft Word.
- Click the «Insert» tab.
- From the «Header & Footer» group, click [Header] or [Footer].
- From the drop-down menu, choose a Header or Footer style.
- Return to the «Insert» tab.
- From the «Text» group, click [Quick Parts] > Select «Field…»
- Under «Field names,» select «FileName.»
- In the «Field properties» section, select a format.
- In the «Field options» section, check «Add path to filename.» The file name will now appear in the header or footer.
Note:
If your saved document has moved locations, you can manually update the file/path name by clicking inside the field and pressing F9. If you want Microsoft to automatically update the field, see section «Method 2: Create a Macro
to Automatically Update the Field» of the Microsoft help page.
Keywords: header, filename, filenames, file names, path, pathname, pathnames, path names, add
Share This Post
-
Facebook
-
Twitter
-
LinkedIn