
Microsoft Excel makes it easy to import Extensible Markup Language (XML) data that is created from other databases and applications, to map XML elements from an XML schema to worksheet cells, and to export revised XML data for interaction with other databases and applications. Think of these XML features as turning Office Excel into an XML data file generator with a familiar user interface.
In this article
-
Why use XML in Excel?
-
XML data and schema files
-
Key XML and Excel scenarios
-
-
The basic process of using XML data in Excel
-
Working with XML maps
-
Using the XML Source task pane
-
Element types and their icons
-
Working with single-mapped cells
-
Working with repeating cells in XML tables
-
XML map security considerations
-
Importing XML data
-
Working with an inferred schema
-
Exporting XML data
-
Using the Excel macro-enabled Office Open XML Format file
-
Why use XML in Excel?
XML is a technology that is designed for managing and sharing structured data in a human-readable text file. XML follows industry-standard guidelines and can be processed by a variety of databases and applications. Using XML, application designers can create their own customized tags, data structures, and schemas. In short, XML greatly eases the definition, transmission, validation, and interpretation of data between databases, applications, and organizations.
XML data and schema files
Excel works primarily with two types of XML files:
-
XML data files (.xml), which contain the custom tags and structured data.
-
Schema files (.xsd), which contain schema tags that enforce rules, such as data type and validation.
The XML standard also defines Extensible Stylesheet Language Transformation (XSLT) (.xslt) files, which are used to apply styles and transform XML data into different presentation formats. You can apply these transforms before you import XML files into Excel and after you export XML files from Excel. If XSLT files are linked to XML data files that you import into Excel, you do have the option to apply or not apply the formatting before the data is added to the worksheet, but only when you open an XML file by using the Open command from within Excel. Choose the XML Files (*.xml) file type before you click the Open button to see the XML files in the folder.
Key XML and Excel scenarios
By using XML and Excel, you can manage workbooks and data in ways that were previously impossible or very difficult. By using XML maps, you can easily add, identify, and extract specific pieces of business data from Excel documents. For example, an invoice that contains the name and address of a customer or a report that contains last quarter’s financial results are no longer just static reports. You can easily import this information from databases and applications, revise it, and export it to the same or other databases and applications.
The following are key scenarios that the XML features are designed to address:
-
Extend the functionality of existing Excel templates by mapping XML elements onto existing cells. This makes it easier to get XML data into and out of your templates without having to redesign them.
-
Use XML data as input to your existing calculation models by mapping XML elements onto existing worksheets.
-
Import XML data files into a new workbook.
-
Import XML data from a Web service into your Excel worksheet.
-
Export data in mapped cells to XML data files independent from other data in the workbook.
Top of Page
The basic process of using XML data in Excel
The following diagram shows how the different files and operations work together when you use XML with Excel. Essentially, there are five phases to the process:
 Adding an XML schema file (.xsd) to a workbook
 Mapping XML schema elements to individual cells or XML tables
 Importing an XML data file (.xml) and binding the XML elements to mapped cells
 Entering data, moving mapped cells, and leveraging Excel functionality, while preserving XML structure and definitions
 Exporting revised data from mapped cells to an XML data file
Working with XML maps
You can create or open a workbook in Excel, attach an XML schema file (.xsd) to the workbook, and then use the XML Source task pane to map XML elements of the schema to individual cells or tables. After you map the XML elements to your worksheet, you can import and export XML data into and out of the mapped cells.
When you add an XML schema file (.xsd) to your workbook, you create an XML map. In general, XML maps are used to create mapped cells and to manage the relationship between mapped cells and individual elements in the XML schema. In addition, these XML maps are used to bind the contents of mapped cells to elements in the schema when you import or export XML data files (.xml).
There are two kinds of mapped cells that you can create: single-mapped cells and repeating cells (which appear as XML tables). To make designing your worksheet more flexible, you can drag the mapped cells anywhere on a worksheet and into any order — even one different from the XML schema. You can also choose which elements to map and not map.
The following rules about using XML maps are important to know:
-
A workbook can contain one or more XML maps.
-
You can only map one element to one location in a workbook at a time.
-
Each XML map is an independent entity, even if multiple XML maps in the same workbook refer to the same schema.
-
An XML map can only contain one root element. If you add a schema that defines more than one root element, you are prompted to choose the root element to use for the new XML map.
Using the XML Source task pane
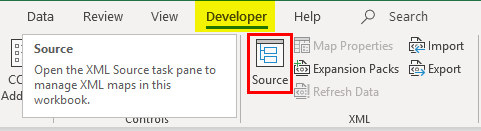
You use the XML Source task pane to manage XML maps. To open it, on the Developer tab, in the XML group, click Source. The following diagram shows the main features of this task pane.
1. Lists XML maps that were added to the workbook
2. Displays a hierarchical list of XML elements in the currently listed XML map
3. Sets options when working with the XML Source task pane and the XML data, such as how to preview the data and control headings
4. Opens the XML Maps dialog box, which you can use to add, delete, or rename XML maps
5. Verifies whether you can export XML data through the current XML map
Top of Page
Element types and their icons
The following table summarizes each type of XML element that Excel can work with and the icon that is used to represent each type of element.
|
Element type |
Icon |
|---|---|
|
Parent element |
|
|
Required parent element |
|
|
Repeating parent element |
|
|
Required repeating parent element |
|
|
Child element |
|
|
Required child element |
|
|
Repeating child element |
|
|
Required repeating child element |
|
|
Attribute |
|
|
Required attribute |
|
|
Simple content in a complex structure |
|
|
Required simple content in a complex structure |
|


Top of Page
Working with single-mapped cells
A single-mapped cell is a cell that has been mapped to a nonrepeating XML element. You create a single-mapped cell by dragging a nonrepeating XML element from the XML Source task pane onto a single cell in your worksheet.
When you drag a nonrepeating XML element onto the worksheet, you can use a smart tag to choose to include the XML element name as a heading above or just to the left of the single-mapped cell, or you can use an existing cell value as a heading.
You can also use a formula in a single-mapped cell, if the cell is mapped to an XML element with an XML Schema Definition (XSD) data type that Excel interprets as a number, date, or time.
Top of Page
Working with repeating cells in XML tables
XML tables are similar in appearance and functionality to Excel tables. An XML table is an Excel table that has been mapped to one or more XML repeating elements. Each column in the XML table represents an XML element.
An XML table is created when you:
-
Use the Import command (in the XML group on the Developer tab) to import an XML data file.
-
Use the Open command from within Excel to open an XML data file — and then select As an XML table in the Open XML dialog box.
-
Use the From XML Data Import command (from the From Other Sources command button, in the Get External Data group, on the Data tab) to import an XML data file — and then select XML table in existing worksheet or New worksheet in the Import Data dialog box.
-
Drag one or more repeating elements from the XML Source task pane to a worksheet.
When you create an XML table, the XML element names are automatically used as column headings. You can change these to any column headings that you want. However, the original XML element names are always used when you export data from the mapped cells.
Two options under the Options button in the XML Source task pane are useful when you work with XML tables:
-
Automatically Merge Elements When Mapping
When selected, Excel creates one XML table from multiple fields as they are dropped onto the worksheet. This option works as long as the multiple fields are dropped on the same row, one adjacent to the other. When this option is cleared, each element appears as its own XML table. -
My Data Has Headings
When selected, existing heading data is used as column headings for repeating elements that you map to your worksheet. When this option is cleared, the XML element names are used as column headings.
Using XML tables, you can easily import, export, sort, filter, and print data based on an XML data source. However, XML tables do have some limitations regarding how they can be arranged on the worksheet.
-
XML tables are row-based, meaning that they grow from the header row down. You cannot add new entries above existing rows.
-
You cannot transpose an XML table so that new entries will be added to the right.
You can use formulas in columns that are mapped to XML elements with an XML Schema Definition (XSD) data type that Excel interprets as a number, date, or time. Just as in an Excel table, formulas in an XML table are filled down the column when new rows are added to the table.
XML map security considerations
An XML map and its data source information are saved with the Excel workbook, not a specific worksheet. A malicious user can view this map information by using a Microsoft Visual Basic for Applications (VBA) macro. Furthermore, if you save your workbook as a macro-enabled Excel Office Open XML Format File, this map information can be viewed through Microsoft Notepad or through another text-editing program.
If you want to keep using the map information but remove the potentially sensitive data source information, you can delete the data source definition of the XML schema from the workbook, but still export the XML data, by clearing the Save data source definition in workbook check box in the XML Map Properties dialog box, which is available from the Map Properties command in the XML group on the Developer tab.
If you delete a worksheet before you delete a map, the map information about the data sources, and possibly other sensitive information, is still saved in the workbook. If you are updating the workbook to remove sensitive information, make sure that you delete the XML map before you delete the worksheet, so that the map information is permanently removed from the workbook.
Top of Page
Importing XML data
You can import XML data into an existing XML map in your workbook. When you import data, you bind the data from the file to an XML map that is stored in your workbook. This means that each data element in the XML data file has a corresponding element, in the XML schema, that you mapped from an XML Schema file or inferred schema. Each XML map can only have one XML data binding, and an XML data binding is bound to all of the mappings that were created from a single XML map.
You can display the XML Map Properties dialog box (Click Map Properties in the XML group on the Developer tab.), which has three options, all selected by default, that you can set or clear to control the behavior of an XML data binding:
-
Validate data against schema for import and export Specifies whether Excel validates data against the XML map when importing data. Click this option when you want to ensure that the XML data that you import conforms to the XML schema.
-
Overwrite existing data with new data Specifies whether data is overwritten when you import data. Click this option when you want to replace the current data with new data, for example, when up-to-date data is contained in the new XML data file.
-
Append new data to existing XML tables Specifies whether the contents of the data source are appended to the existing data on the worksheet. Click this option, for example, when you are consolidating data from several similar XML data files into an XML table, or you do not want to overwrite the contents of a cell that contains a function.
When you import XML data, you may want to overwrite some mapped cells but not others. For example, some mapped cells may contain formulas and you don’t want to overwrite the formula when you import an XML file. There are two approaches that you can take:
-
Unmap the elements that you don’t want overwritten, before you import the XML data. After you import the XML data, you can remap the XML element to the cells containing the formulas, so that you can export the results of the formulas to the XML data file.
-
Create two XML maps from the same XML schema. Use one XML map for importing the XML data. In this «Import» XML map, don’t map elements to the cells that contain formulas or other data that you don’t want overwritten. Use another XML map for exporting the data. In this «Export» XML map, map the elements that you want to export to an XML file.
Note: The ability to import XML data from a Web service by using a Data Retrieval Service Connection (.uxdc) file to connect to a data source is no longer supported in versions later than Excel 2003 through the user interface. If you open a workbook that was created in Excel 2003, you can still view the data, but you cannot edit or refresh the source data.
Working with an inferred schema
If you import XML data without first adding a corresponding XML schema to create an XML map, Excel tries to infer a schema for you based on the tags that are defined in the XML data file. The inferred schema is stored with the workbook, and the inferred schema allows you to work with XML data if an XML schema file isn’t associated with the workbook.
When you work with imported XML data that has an inferred schema, you can also customize the XML Source task pane. Select the Preview Data in Task Pane option from the Options button to display the first row of data as sample data in the element list, if you imported XML data associated with the XML map in the current session of Excel.
You cannot export the Excel inferred schema as a separate XML schema data file (.xsd). Although there are XML schema editors and other methods for creating an XML schema file, you may not have convenient access to them or know how to use them. As an alternative, you can use the Excel 2003 XML Tools Add-in Version 1.1, which can create a schema file from an XML map. For more information, see Using the Excel 2003 XML Tools Add-in Version 1.1.
Exporting XML data
You export XML data by exporting the contents of mapped cells on the worksheet. When you export data, Excel applies the following rules to determine what data to save and how to save it:
-
Empty items are not created when blank cells exist for an optional element, but empty items are created when blank cells exist for a required element.
-
Unicode Transformation Format-8 (UTF-8) encoding is used to write the data.
-
All namespaces are defined in the Root XML element.
-
Excel overwrites existing namespace prefixes. The default namespace is assigned a prefix of ns0. Successive namespaces are designated ns1, ns2 to ns<count> where <count> is the number of namespaces written to the XML file.
-
Comment nodes are not preserved.
You can display the XML Map Properties dialog box (Click Map Properties in the XML group on the Developer tab.) and then use the Validate data against schema for import and export option (active by default) to specify whether Excel validates data against the XML map when exporting data. Click this option when you want to ensure that the XML data you export conforms to the XML schema.
Using the Excel Macro-enabled Office Open XML Format File
You can save an Excel workbook in a variety of file formats, including the Excel macro-enabled Office Open XML Format File (.xlsm). Excel has a defined XML schema that defines the contents of an Excel workbook, including XML tags that store all workbook information, such as data and properties, and define the overall structure of the workbook. Custom applications can use this Excel macro-enabled Office XML Format File. For example, developers may want to create a custom application to search for data in multiple workbooks that are saved in the this format and create a reporting system based on the data found.
Top of Page
Need more help?
You can always ask an expert in the Excel Tech Community or get support in the Answers community.
See Also
Import XML data
Map XML elements to cells in an XML Map
Export XML data
Append or overwrite mapped XML data
What Is Excel Open XML File?
With Excel data, we can convert the data into XML format.
Data is the most important part of making decisions but it is important to know how we can import data from different sources. The source file varies from one situation to another.
We are familiar with common file extensions: “Text file and Excel file.” But several other sources are also available. This article will show us how to open Excel data into XML format and import XML data into Excel with neat formatting.
Table of contents
- What Is Excel Open XML File?
- What Is XML File?
- Example Of Converting Excel Data To XML File Format
- Import XML Data Into Excel
- Important Things To Note
- Frequently Asked Questions (FAQs)
- Recommended Articles
- XML stands for eXtensible Markup Language. It is a language that can be read only by computers.
- The XML files follow a certain script, so we need to follow a mandatory line of codes.
- When we open our XML file, it will open with TEXT File only, but remember, the format will be in XML Schema.
- We need to create at least two schema examples to apply the same logic to the whole data and export it as an XML file.
What Is XML File?
EXtensible Markup Language of storing data in the XML format. Like all the other external database rules, XML, too, has its own standard set of actions.
The following are the rules of the XML file:
- The first line of the data should always include the below line of code.
<?xml version="1.0" encoding="UTF-8" standalone="yes"?>
- XML format has the head and tail of the table name.
<TableName>

          Column1<Value>Column1

          Column2<Value>Column2

<TableName>

<TableName>

          Column1<Value>Column1

          Column2<Value>Column2

<TableName>
Like this, we can create an XML table to convert the excel data into an XML table format. Now we will see how to open excel data into XML format.
Example Of Converting Excel Data To XML File Format
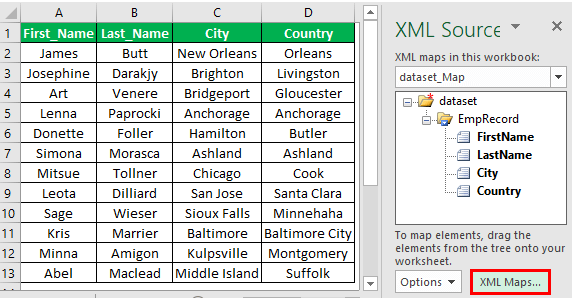
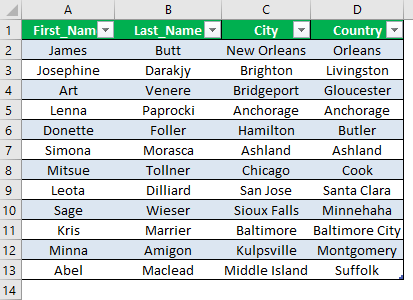
For example, look at the below data in the Excel worksheet.
| First_Name | Last_Name | City | Country |
|---|---|---|---|
| James | Butt | New Orleans | Orleans |
| Josephine | Darakjy | Brighton | Livingston |
| Art | Venere | Bridgeport | Gloucester |
| Lenna | Paprocki | Anchorage | Anchorage |
| Donette | Foller | Hamilton | Butler |
| Simona | Morasca | Ashland | Ashland |
| Mitsue | Tollner | Chicago | Cook |
| Loeta | Dilliard | San Jose | Santa Clara |
| Sage | Wieser | Sioux Falls | Minnehaha |
| Kris | Marrier | Baltimore | Baltimore City |
| Minna | Amigon | Kulpsville | Montgomery |
| Abel | Maclead | Middle Island | Suffolk |
We need to convert this into an XML excel formatExcel has made it very easy for us to import the data in XML to excel in the form of tables or databases. XML is basically an external data and it can be imported to excel from the data tab under the «get external data tab from data from other sources» section.read more like the below one.

Here, we need to create two sample lines formatting for our data. As we have discussed, our rules for creating a mandatory line of code are below.
<?xml version=”1.0″ encoding=”UTF-8″?>
<dataset>
Next, we need to enter the table name as per our wish, and the table name is <EmpRecord>
After the table name, we need to enter the column header name, <FirstName> next; we need to include the name and end this with the column header again.
Like this, we need to prepare a schema of XML data. For the above data, we have created the schema. Then, we can copy and paste the schema.
<?xml version="1.0" encoding="UTF-8"?>

<dataset>

         <EmpRecord>

<FirstName>James</FirstName>

<LastName>Butt</LastName>

<City>New Orleans</City>

<Country>Orleans</Country>

         </EmpRecord>

         <EmpRecord>

<FirstName>Josephine</FirstName>

<LastName>Darakjy</LastName>

<City>Brighton</City>

<Country>Livingston</Country>

        </EmpRecord>

</dataset>
We have created two samples. So, by using this, we can apply the same schema to our Excel file and extract data in the same format (XML) as provided above.
We must copy the above code to a text file and save the file as “XML.”
We must follow the below steps to open the Excel data into XML format.
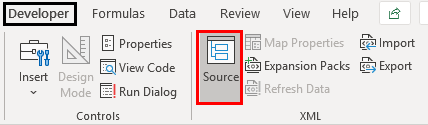
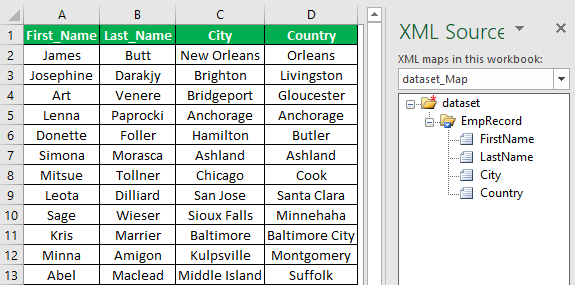
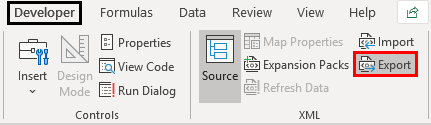
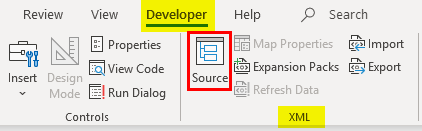
- Step 1: In the data workbook, we must go to the “Developer” tab and click on “Source.”
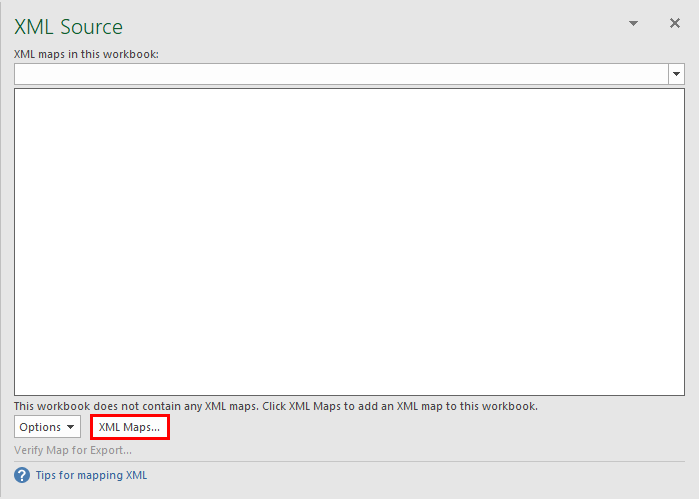
- Step 2: This will open up below the “XML Source” window to the right of the worksheet, and click on “XML Maps.”
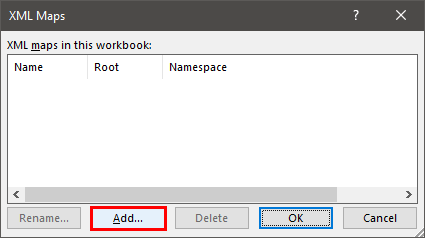
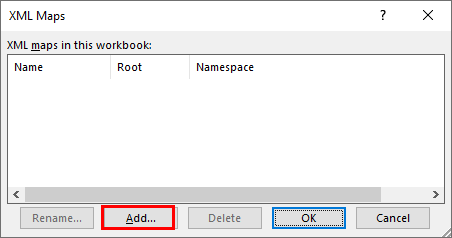
- Step 3: This will open up the “XML Maps” window, then click on the “Add” button to choose the XML schema file.
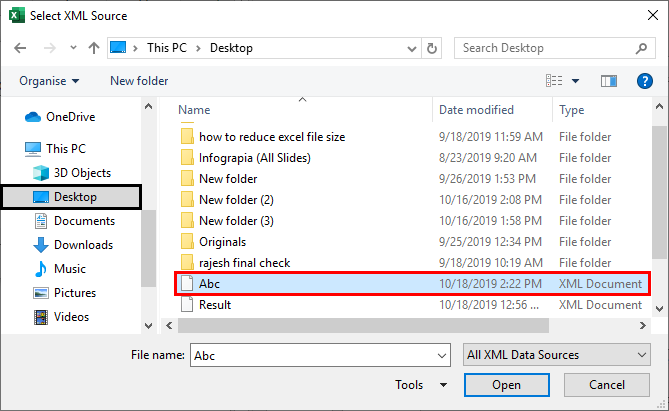
- Step 4: Now, choose the already saved XML file with the schema.
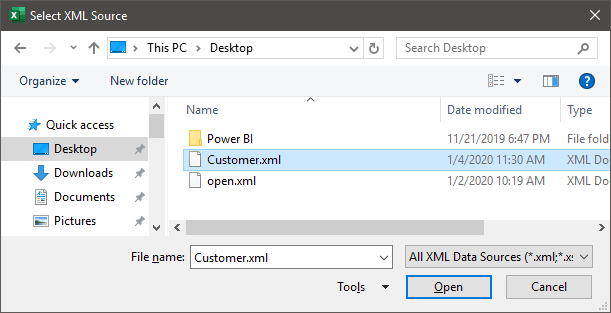
- Step 5: Click on “Open.” It will ask for our confirmation.
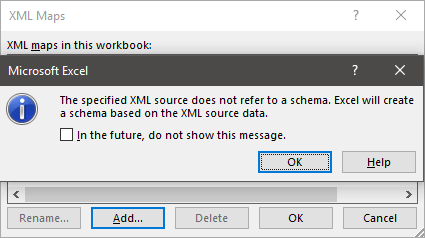
- Step 6: We need to click on “OK” two more times to get the schema headers to the left.
- Step 7: Now, drag and drop the first column header “FirstName” from the XML source to the actual table in the worksheet.
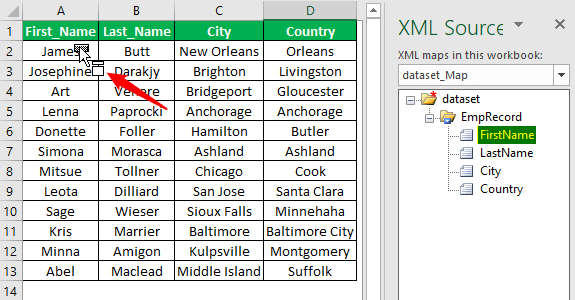
As a result, this will apply the “FirstName” column schema to the data table column.
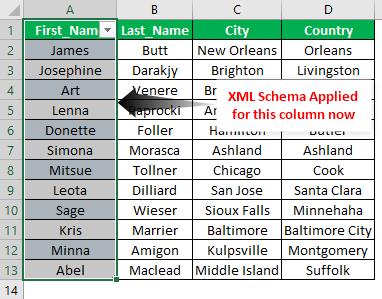
Now, we must repeat the same for the remaining columns. Drag and drop respective schema columns to individual columns of the data table.
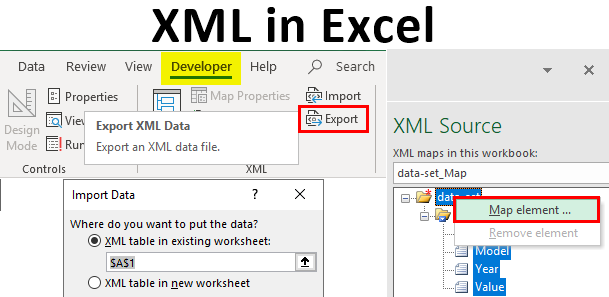
So, all the XML schema columns are applied. Then, under the “Developer” tab excelEnabling the developer tab in excel can help the user perform various functions for VBA, Macros and Add-ins like importing and exporting XML, designing forms, etc. This tab is disabled by default on excel; thus, the user needs to enable it first from the options menu.read more, click on the “Export” option.
It will ask us to save the file in the desired folder. We must give it a name and save it.
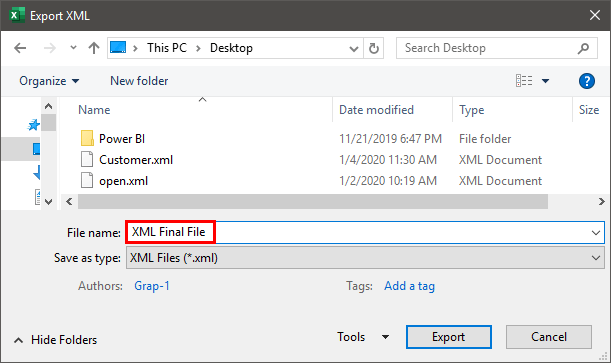
After choosing the folder, we must click on “Export.” The data will be extracted as the “XML Data” file.
Now open the file, and all the rows are in the XML format.
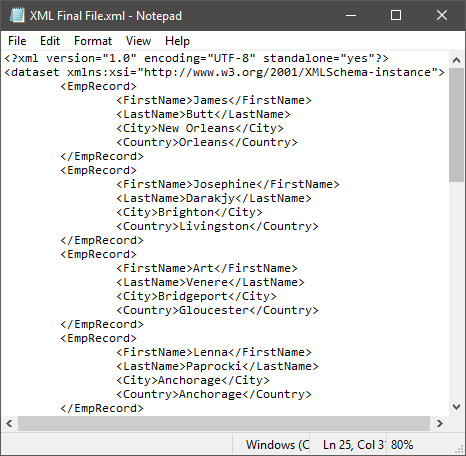
Like this, we can extract or open the Excel data to the XML file.
Import XML Data Into Excel
IImporting an XML file to Excel requires following certain steps. First, follow the below steps to import data from an XML file.
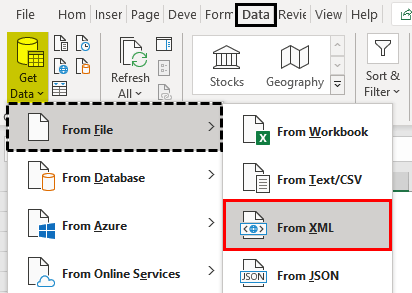
- Firstly, under the “Data” tab, we must click on “Get Data” → “From File” and choose “From XML.”

- Consequently, this will ask to choose the file from the stored location. Therefore, we need to select the file.

- Click on “Import.” It will import the data to an Excel file.

Like this, we can work with “XML files” in Excel.

Important Things To Note
- XML language is a computer language but it is not read by humans.
- XML stands for eXtensible Markup Language.
- We can import XML files in excel using the Import option under the Data tab.
Frequently Asked Questions (FAQs)
1. What is XML file?
XML, eXtensible Markup Language is a language read by computer to define text. XML is just like HTML. We can import XML files in excel.
2. How to import XML file in excel?
We can easily open XML file in excel using the below steps:
• Step 1: Go to Data → Get Data → From File → From XML
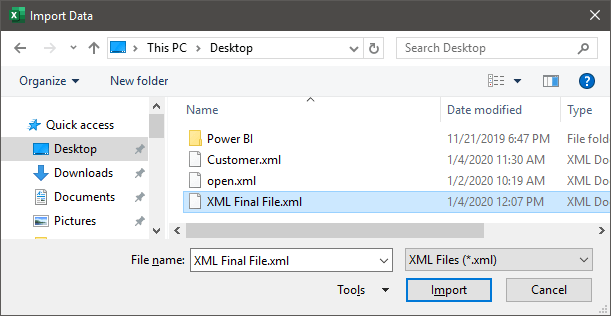
• Step 2: The Import Data window opens.
• Step 3: Select the file and click Import.
The XML file will be imported.
3. What are some important points to remember while using XML in excel?
While using XML in excel, it is important to know that
• XML has mandatory code lines.
• Whenever we import XML file, it will open with TEXT File only, but the format is in XML Schema.
Recommended Articles
This article has been a guide to Excel Open XML File. Here, we discuss exporting Excel data into XML format and importing XML data into Excel. You may learn more about Excel from the following articles: –
- MS Excel Uses
- Connections in Power BI
- Repair in Excel
- ENVIRON in VBA
XML in Excel (Table of Contents)
- Definition of XML & XSD
- How to Import XML File in Excel?
Introduction to Extensible Markup Language (.XML)
Designed for storing and transporting data. It is a markup language similar to HTML. XML File appears as below mentioned, where it is a note to John from Craig.
XML File type & structure appears as below mentioned:
<note>
<to> John</to>
<from> Craig</from>
<heading>Reminder</heading>
<body>Don’t forget me this weekend!</body>
</note>
- XML is just a piece of information wrapped in tags, just like the above-mentioned note.
- Usually, most of the XML applications work as expected even if you add new data (or it is removed).
- XML Simplifies tasks like data transport, data sharing, data availability & platform changes.
- The XML standard is a flexible & easy way to create information formats.
- XML helps out in electronically sharing structured data via the public Internet or through a corporate network.
- XML is a hierarchical structure.
Definition of XML & XSD
- XML Schema language is also referred to as XML Schema Definition (XSD).
- XSD defines the structure of the XML file, which needs to be created and also it indicates where the columns need to be mapped in the tabular excel data.
- It is also referred to as Extensible Stylesheet Language Transformation (XSLT) or (.xslt file).
- XSD implement data type and validation to file.
- XSD allows you to create elements, Data relationships & Data validation is defined in XML.
- XML data files (.xml), which contains custom tags and structured data.
How to Import XML File in Excel?
You can import the XML file in Excel from the source option in the Developer tab. If the Developer tab is not available in the Ribbon, you need to add the developer tab with the mentioned steps or procedure.
Go to “File” and select “Options.” and select “Customize the Ribbon”, or you can right-click on the Home tab and select “Customize Ribbon”, as shown below.
In Excel Options –
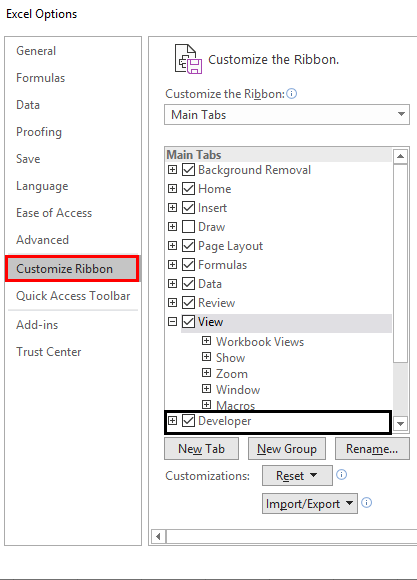
When you return to the main Excel page, you will see the Developer tab next to the view tab at the top. In that, if you need to select the source tool to map elements in your XML to your spreadsheet.
Let’s check out the steps available to convert an excel file to an XML data file & vice versa.
Step 1 – To Convert your Spreadsheet into XML, you need a Markup Schema
This markup schema defines each field that you’ll use in your XML file, i.e. the structure of the XML file. We have to do this outside Excel, in the other filetype.
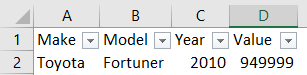
In the below-mentioned spreadsheet, I have four types of column & information, i.e. Car makes, Car model, its year of manufacture, and at last, Car cost or value. So, in our Excel schema will have four different tags, and we need to create them.
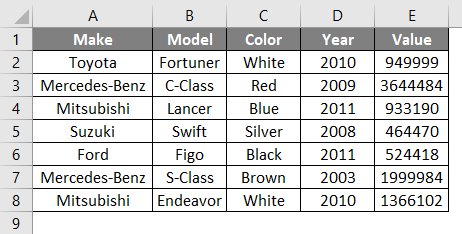
In the above spreadsheet, it contains four columns, each of which will become an element. The car data in the above cells of excel are not independent. For example, I have four cells in a row; all that row data is related to each other, it provides details about a car type and its information, i.e., the brand name, model name, and year of purchase it is cost or value at present.
Open Notepad and add the following two lines; they are the standard pieces of information that XML files need at the beginning. (Note: It is optional ).
<?xml version="1.0" encoding="UTF-8" standalone="yes"?>

<data-set xmlns:xsi="http://www.w3.org/2001/XMLSchema-instance">
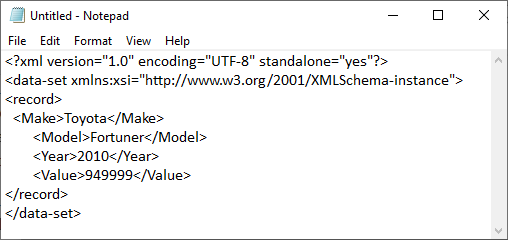
The element is declared from line three onwards. The record tags, i.e. < >, defines a single record described in our spreadsheet. Whereas other tags define the relevant pieces of information under that for that record. i.e.
<record>

<Make>Toyota</Make>

<Model>Fortuner</Model>

<Year>2010</Year>

<Value>949999</Value>

</record>
Finally, add the closing </record> tag at the end of the file in the note pad.
NOTE: The tags (< >) in the above notepad under the record refers to the column names; you have an option to give them any name you want apart from the original name mentioned in the excel tabular data! For example, instead of ‘’Value”, you can use “Cost”.
I just added the first-row data for the explanation purpose. You can add as many rows, based on your choice. Again, you can start with <record>, after the </record> tag. Once you entered the data in the notepad, you can save it as test.xml in the file name and save it on the desktop.
Later, you can create a new excel file with filename XML.xlsx
As you have noticed, we entered one car detail (one record) in the XML file (NOTEPAD). Now, you have created a markup schema and saved it on your desktop.
Step 2 – How to Add this Markup Schema to New Excel File
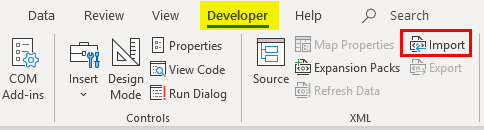
In the Developer tab, click on Source in the XML section.
XML window pane appears; click on XML Maps.
XML Maps window appears; in that, Click Add in the resulting window.
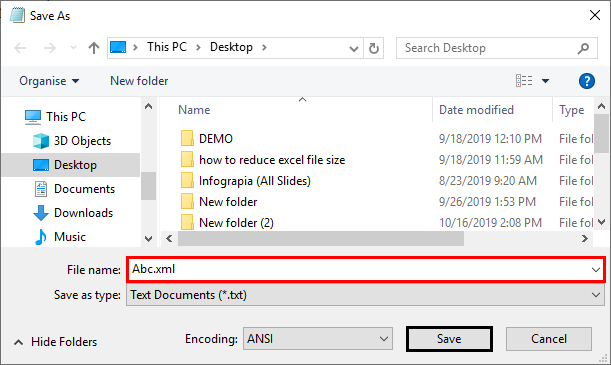
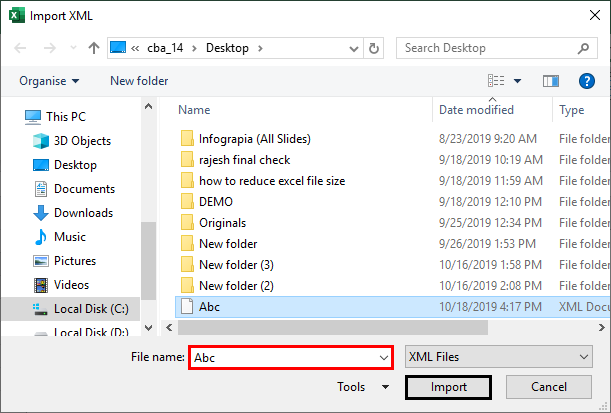
Then you can navigate to your XML file on the desktop, which you saved as Abc.xml, and you can select it.
Due to excel version issues in my system, I am uploading other .xml file with another option. The other option in the developer tab is to select Import in the Home tab.
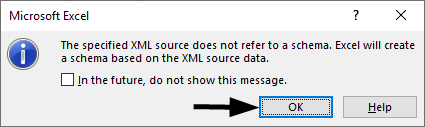
Once you select a .xml file on the desktop, a popup appears; click Ok.
Now to import this excel data, right-click on the XML file name and select the MAP Element option.
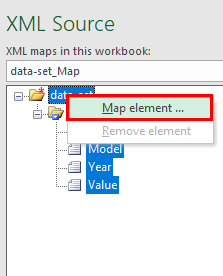
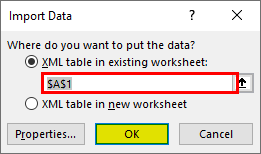
Then you will see the following popup, select the location to where you want your data.
Then you will see the table headers in your excel sheet.

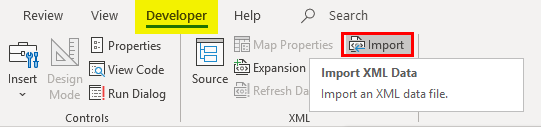
Now under the developer tab, click on Import.
It will open a window to select the file.
Output:
Another popup appears asking for cell reference, where you want the data to be placed.
The import .xml file type appears as shown earlier. Similarly, the Export feature in the developer option will be available in your spreadsheet contains XML file data; otherwise, an export option will be greyed out.
Here, I opened an excel file containing XML file data; I can export it and save it as a .xml file type anywhere with an export option in the Developer tab.
Things to Remember About XML in Excel
- Every bit of data you enter has to start and end with an identical tag, i.e. start with < Record> Data </Record> (End with).
- Tag names are case sensitive, i.e. capitalization in the end tag should be the same as the beginning tag.
- The XML file should always begin and end with a root tag. There can only be one root tag in a file. In the example above, the root tag is <Record>.
- You can have an empty tag, i.e. you can mention or put the slash at the end of the tag instead of the beginning: <Record> </Record>.
Recommended Articles
This is a guide to XML in Excel. Here we discuss How to Import & Export XML Data files along with practical examples and downloadable excel template. You can also go through our other suggested articles –
- Database Function in Excel
- Excel Hacks
- Excel Import Data
- Power Query in Excel
How to Convert Excel to XML – Step-by-Step Tutorial (2023)
We all know basic excel skills that help us work in excel spreadsheets with extensive data. But what if you need to transfer the excel file somewhere and change it into other formats?
The extensible markup language or XML comes in handy for this. Simply put, it is a markup language that helps store data in an excel spreadsheet and changes its format.
You can easily convert excel data into XML data – but how do you do that?
For that, download our FREE Exercise Workbook here and continue reading the article below. 😀
What is the XML file format?
The XML file format is a way to write text in a document using tags. These tags are customizable and represent the structure of the document.
It also tells how the XLS file can be converted to an XML file and transferred to another application.
XML format uses the DOM or Document Object Model as its basic structure and can help separate text in HTML.
For instance, XML data for a company employee might be:

The tags ‘Name, ID No., Post, Salary, and Status’ consist of the document’s data. You can customize the tags as we did here for an employee’s data.
Create the Excel File
To convert Excel to XML, you need to create an XLS file containing all the data. I have created an example below that lists the members of a company and their details.

Each field contains certain information about every employee.
How to Create the XML Schema?
The XML Schema will structure each spreadsheet field and its appearance in the XML file.
Our spreadsheet has five columns with different data types setting the base for our XML file.
1. To create the XML file, open any text editor and begin entering the standard XML elements.

Don’t fret just yet; We’ll explain all the alien-like items in this image one by one. 😄
The first line in the image is the standard XML line. It is used each time you create XML documents.
The version 1.0 encoding UTF specifies that it is an XML format.
The second line indicates the type of text. For example, this data was about employees of a company, hence <employee-data>. The remaining line is the default.
Since this statement starts with <employee-data>, it is the root element here. The remaining elements of the argument make up for the child element.

The third line, containing the record tag, indicates the beginning and end of a single field. It consists of the information in each field of the spreadsheet.
For instance, the first field is about Alice A. So it will include all the information about Alice on each tag.

The TAG NAME specifies the items in each column, whereas the data contains the corresponding value.
You don’t have to manually input the exact and each column name; they just need to be in the correct order. Excel can help us do the rest.

For the TAG NAME, say we want the first employee’s name.
So, we will write – <Name>Alice A.</Name> – Similarly, for her ID, we will write – <ID No.>2854</ID No.> – .
Pro Tip!
Must note the opening and closing tag identified by a forward slash (/).
These are to be used at the beginning and each of each statement. Also, the closing and opening tags must be in the correct order, as the data between the two tags make for the XML elements.

The last closing tag </employee-data> marks the end of the file. In the last step, save the XML data file as “employee-data.xml.”
Enable the Developer Tab
Now that your schema markup is prepared, let’s add it to Excel.
1. Make sure the developer tab is enabled on your Excel spreadsheet. If it is not visible, right-click on the ribbon and select Customize the ribbon.

2. A dialog box will appear on the screen. On the bottom right side, mark the develop option as shown and click ok.

3. Now, you should be able to view the developer’s tab on the ribbon like this:

That’s it – now what? Now we add the Schema file to Microsoft Excel. 😃
Open the XML Source Task Pane & Add XML Maps
1. Click on Developer from the ribbon, and you will see a number of options. Select the Source icon:

The XML source pane will appear on the Excel spreadsheet.
2. Click XML Maps at the bottom right corner.

It shows a dialog box that searches for the XML map in the workbook.
3. Click the add button and select the XML map stored on your desktop.
You will see a warning like this one below from Microsoft Excel upon adding the map.

There’s nothing to worry about.
4. Simply press ‘Ok’.
5. You will now see the XML map in the workbook.

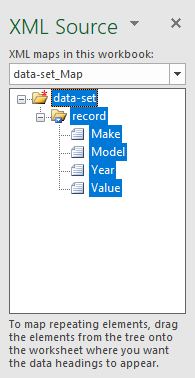
6. Click ‘Okay’ and move to the XML source pane, which looks like this.

7. Now, mark the data on the XML Map.
Assign XML Elements
Now that you have the XML schema and the XLSX ready, mark the XML tags to the spreadsheets’ data.
All you need to do now is drag one XML element from the source pane. Then drop it on the corresponding spreadsheets’ column name.
For instance, I will drop the “Name” XML element on the “Name” column, and a blue table will appear.

Apply the same process to the remaining columns. If you have been successful till now, your spreadsheet will look like this:

If you’ve achieved this form, it means all your data is perfectly mapped with XML tags.
Now that we’ve come this far, it is only fair we export it. So, onto the next step.
Export the XML File
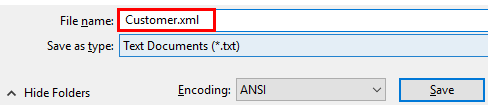
1. To convert Excel to XML file formats, open the developer tab and click the export command.

A dialog box will appear, asking the location to save the file. The file type should be set by default.
2. Select a location, enter the name and click export.
The file is now saved on your desktop with all your XML data. You can open the file from the XML section on a Wordpad or other apps.
The XML file will show up like this:

You might receive a warning from Microsoft office. Exporting the file may cause loss of pictures, formatting, or other non-XML objects.
That’s not an issue. Go ahead and hit ‘Ok’. 🙂
That’s it — Now What
Beginning to convert Excel to XML files can be challenging at the start. But once you get hold of it, you can do it with your eyes closed.
In the above article, we not only learned about creating an XML schema but also to convert an Excel file into XML format and export it.
But that’s only about creating and retaining your Excel file in different formats. There’s so much more to Excel that you’d still want to learn like the VLOOKUP, SUMIF and IF functions.
Want to learn them all? Click here to sign up for my free 30-minute email course to master these functions.
Kasper Langmann2023-01-19T12:23:02+00:00
Page load link
The XML file format is quite commonly used on the web, and there is a possibility that sometimes you may have to work with the data in the XML file.
Now you can’t use the XML file directly, as it’s not meant to be read by humans (but machines).
In such a case, it would help to know how to convert the XML file to Excel so you can easily work with the data and analyze it.
In this tutorial, I will show you two really simple ways to import an XML file into Excel using Power Query.
What is an XML File?
XML stands for Extensible Markup Language. An XML file can hold data in a format that can easily be read by apps and systems.
But it’s not as easy to read for humans, which is why we may have to transform it into a format that’s easier to use.
If it contains a lot of text data, then you can use a text editor to read the XML file, and if it contains data, then you can import that XML file into Excel and then work with the data.
XML is quite widely accepted as a file format to store and transmit data over the web.
A lot of popular file formats, such as Microsoft Office Open XML, LibreOffice, OpenDocument, XHTML, and SVG, also use the XML file format.
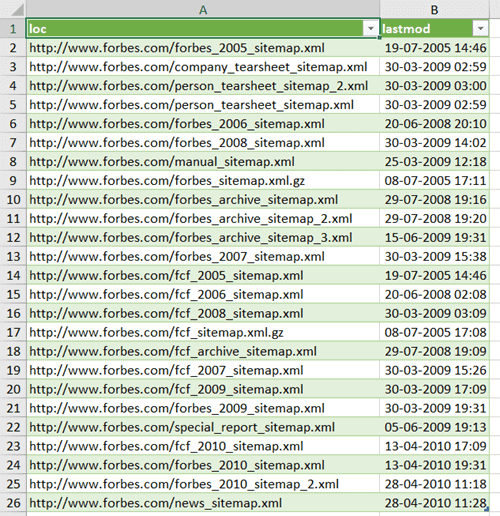
Most popular websites on the Internet have their sitemap in an XML format.
This is a file that contains the details of all the important pages and categories on a website. Here is an example of the sitemap from Forbes.
Now let’s see how to convert an XML file to Excel using Power Query.
Import XML File to Excel
If you already have an XML file (either downloaded on your system or a link to it on the web), you can easily convert it into data in an Excel file.
Thanks to Power Query (now called ‘Get & Transform’)
Import XML File that is Saved On your System
For the purpose of this tutorial, I’ll use an XML file that contains the sitemap for Forbes. You can download the file by going to this link, then right-click and save the file.
Once you have the XML file on your system, follow the below steps to get the XML file data into Excel:
- Open the Excel file where you want to get the data from the XML file
- Click the Data tab

- In the ‘Get & Transform’ data group, click on the ‘Get Data’ option

- Go to the ‘From file’ option
- Click on ‘From XML’

- In the input data dialog box that opens up, locate the XML file that you want to import and select it
- Click Import. This will import the XML file into power query and open the Navigator dialog box
- Select the data from the XML file that you want to import. In this case, I would click on ‘sitemap’ in the left pane

- [Optional] Click on the Transform Data button, if you want to transform the data before loading it into Excel (such as change the column names or remove some columns)
- Click on Load


The above steps would insert a new worksheet in the Excel file, and load all the data from the XML file into the new worksheet.
The great thing about using Power Query to fetch the data from an XML file into Excel is that in case the XML file updates and there are new records in it, you don’t have to repeat the same process.
You can simply right-click on any cell in the table and refresh the query.

Import XML File into Excel using the web URL
In the above example, we first downloaded the XML file on the system and then imported the data into Excel.
In case you have a web URL that contains the XML file (such as this one – https://www.forbes.com/sitemap_index.xml), you don’t even need to download the file. you can connect Power Query to that URL and extract the XML data into Excel.
Below are the steps to connect power query do a web URL that contains the XML data and import that data into Excel:
- Open the Excel file where you want to import the data
- Click the Data tab
- In the Get & Transform group, click on the ‘Get Data’ option
- Go to the ‘From Other Sources’ option
- Click on ‘From Web’

- In the ‘From Web’ dialog box, copy and paste the URL that has the XML data

- Click OK. This will open the Navigator dialog box where you can choose which XML data to import
- Click on ‘sitemap’, which is the XML data that I want in Excel

- [Optional] Click on the Transform Data button, if you want to transform the data before loading it into Excel (such as change the column names or remove some columns)
- Click on Load


The above steps would insert a new worksheet in the Excel file, and load all the data from the XML file into the new worksheet.
And again, in case the data updates in this URL, simply refresh the query to get the new data in Excel.
So these are two simple ways that you can use to convert an XML file into Excel.
If you have the XML file on your system, you can import the data easily using Power Query. And if you have a web URL of the XML file, then you can also fetch that data into Excel.
I hope you found this tutorial useful.
Other Excel tutorials you may also like:
- 8 Ways to Reduce Excel File Size (that actually work)
- How to Automatically Open Specific Excel File on Startup
- How to Recover Unsaved Excel Files [All Options + Precautions]
- Microsoft Excel Won’t Open – How to Fix it! (6 Possible Solutions)
- How to Convert Excel to PDF Using VBA
- Split Each Excel Sheet Into Separate Files (Step-by-Step)
- Combine Data from Multiple Workbooks in Excel (using Power Query)
December 10, 2002 — by Bill Jelen
Everyone is saying that XML is the most important new feature in Office 2003. But, unless you happen to be in a company with tons of XML schemas floating around, you probably haven’t been able to figure out how to duplicate that cool demo you saw Microsoft do during the Office 2003 launch. For those of you who subscribe to Woody’s newsletter, you now realize that Woody is going to serialize the explanation of XML, making us wait 4 weeks (or more) to get the whole story. So, before Woody can ever get to the point, I am going to walk through a long tip explaining how to make full use of XML in Office 2003.
The Great Promise
Microsoft says that you can now store data as XML and easily re-purpose the data. Open the same data file and it looks one way in Excel, open the data file and it looks another way in Word. It is very powerful. We also have the fact that since Office 2003 considers XML to be a native file format, anyone with any programming language can write native XML files. If you have QBasic or Rexx or anything, you can now create XML Excel (ExcelML?) files on the fly.
Only in Excel Professional
We are now faced with a class system in Office 2003. Full XML support is not available in these editions: (Codes in italics stand for where you can buy each: R=Retail, P=Preinstalled with new Computer, V=Volume-Licensing, A=Academic Licensing, S=School Resellers).
- Microsoft Office Small Business Edition 2003 (R, P, V, A)
- Microsoft Office Standard Edition 2003 (R, V, A, S)
- Microsoft Office Basic Edition 2003 (P)
- Microsoft Office Student and Teacher Edition 2003 (R, S)
Full XML support is available in these editions:
- Microsoft Office Professional Edition 2003 (R, P, V, A, S)
- Microsoft Office Professional Enterprise Edition 2003 (includes InfoPath)(V)
- Microsoft Excel 2003 (R)(The stand-alone Excel box is considered to be professional)
If you are unlucky enough to have one of the «lesser» versions of Office 2003, your cheapest upgrade path might be to buy the retail box version of Excel. Unless you work in a corporate environment, The only way to get InfoPath (the new tool that lets you create forms and XML Schemas) is to buy the retail box version.
What is XML? Is it like HTML?
XML stands for Extensible markup language. If you’ve ever looked at the «View Source» view of a webpage in Notepad, you are familiar with the structure of XML. While HTML allows for certain tags, like TABLE, BODY, TR, TD, XML allows for any tags. You can make up any sort of a tag to describe your data. Here is a screenshot of some XML data that I typed into notepad:
Here are some simple rules about XML:
- Every bit of data has to start and end with an identical tag: <tagname>Data</tagname>
- Tag names are case sensitive. <customer> and </customer> are NOT valid tags because the capitalization in the end tag is not the same as the capitalization in the begin tag.
- The XML file must begin and end with a root tag. There can only be one root tag in a file. In the example above, the root tag is <todaysorders>.
- You can have an empty tag — put the slash at the end of the tag instead of the beginning: <tagname></tagname>
- If you nest tags, you must close the inner tag before closing the outer tag. While HTML will allow this structure, <b>click <i>Cancel</i></b> this is not valid in XML. <item><a>data</a></item> will work, but <item><a>data</a></item>will not.
Alphabet Soup: Three File Types
Here are the three files we will encounter when working with XML.
- .XML is the data file shown above
- .XSD is an XML Schema definition. This is an all-important file. Data relationships are defined here. Data validation is defined here as well. In order to actually do the Microsoft demo, you need an XML Schema file. While anyone can type XML into notepad, we need a schema in order to do anything cool. I will show you how to create one below.
- .XSL is an XML StyleSheet Language file — these allow you to repurpose the data from one format to another.
By far, the biggest hurdle is how to create the Schema file. You can open an XML file in Excel but you can not do any transforms without a schema. Luckily, Excel will create a default schema for you, but it is NOT obvious how to use the schema. Let’s walk through the steps.
-
Open a blank Notepad. Copy this data from below and paste it into Notepad. Save the file as test.xml.
<todaysorders> <salesorder> <customer>ABC Co</customer> <address>123 Main</address> <city>Salem</city> <state>OH</state> <zip>44460</zip> <itemsku>12345</itemsku> <quantity>100</quantity> <unitprice>10.50</unitprice> </salesorder> <salesorder> <customer>YXZ Co</customer> <address>234 State</address> <city>Akron</city> <state>OH</state> <zip>44313</zip> <itemsku>23456</itemsku> <quantity>10</quantity> <unitprice>20.50</unitprice> </salesorder> </todaysorders> - In Excel, use File — Open. If the «Files of type:» box is set to All Microsoft Excel files, you will see test.xml. Click Open.
-
You are first presented with the Open XML dialog box. Later, we will want to use the powerful XML Source task pane, but we can not do that until we have a valid schema. For right now, choose to open as an XML list.

Open XML Dialog Box -
Next — we get the information box that the XML does not have a schema. This is a fantastic message — because Microsoft is now going to create a schema for you on the fly.
Schema Warning Message -
Here is our data in Excel. It is pretty cool. They turn on the awesome new Excel 2003 List feature (usual shortcut: Ctrl+L). With the List feature turned on, we have autofilters on every column and an Access-like asterisk row for adding new data.
XML Data in Excel Worksheet -
Now — here is the undocumented trick. A tip of the hat to Microsoft’s Excel XML guru Chad Rothschiller for showing us this cool trick. Start the Visual Basic Editor with Alt+F11. In the Visual Basic Editor, hit Ctrl+G to open the immediate pane. In the immediate pane, type:
Print ActiveWorkbook.XmlMaps(1).Schemas(1).XmlImmediate Window in VBE Remember the message in #4? Microsoft offered to build a schema on the fly for us. This little bit of code above will print the schema. Click enter and the schema will print in the immediate pane.
Schema in the immediate pane Open a blank notepad, copy the data from the immediate window and paste into the blank notepad. You can now see the complete schema for our simple dataset.
Save Schema File You can now save the notepad file as TodaysOrders.xsd
- Go back to Excel and close the test dataset.
-
From Excel, open test.xml again. This time, indicate that you want to use the XML Source task pane and then click OK to the Schema information box.
Choose Opening Option of XML Source -
You now get a blank worksheet, but the XML Source pane on the right lists all of the available fields.
XML Source Pane -
Choose the Options dropdown and select Preview data to see a sample of each element in the task pane.
Preview Data in Task Pane -
Add a nicely formatted title to your blank spreadsheet. Drag the Sales Order element and drop it in cell B6.
Drag and Drop Data Element - If you don’t see the list toolbar, choose View — Toolbars — List to show the toolbar.
-
From the toolbar, select Refresh XML Data
Refresh XML Data Button -
The sample XML data that we typed above is added to the spreadsheet.
Result XML Data on the Worksheet - Save the workbook as a regular Excel file, perhaps called OrderReport.xls


Refreshing Data Daily
If you can get your system to start writing out daily orders each day to Test.XML, then you are all set. Open OrderReport.xls, refresh the XML data, and you will have a nicely formatted report of your XML orders each day. This is pretty powerful — I set up the formatting once, open the file each day, click Refresh and I have a nicely formatted report with the data from the XML set.
Using Excel to Create XML Data
Can we use Excel to create new XML data? Now that we have a schema defined, yes we can! To our existing spreadsheet, we can have our telephone order-takers add new data to the Excel file throughout the day. At the end of the day, use File — SaveAs. Choose to save is as type: XML Data.

Confirm which map to use:
Repurposing the Data in Word
Now that we’ve created a schema and data, let’s open the data in Microsoft Word 2003. After opening TestAsData.xml in Word 2003, we get the default data view in Word.
You can format this document:
Hit Ctrl + Shift + X to toggle the fields off:
Using XSL Views to Repurpose Data
The above example using Drag and Drop does not actually create a Transform. If you create Transform files, you can easily transform the XML data into different views in Word. This is where the real power comes in. Before I show you how to create your own transform, let’s walk through how Microsoft set up the demo in the Office 2003 rollout.
To try this on your copy of Word 2003, download XML Sample Package. The zip file contains:
- One XML file: SampleMemo.xml
- One schema: Memo.xsd
- Three transform files: elegant.xsl, professional.xsl, contemporary.xsl
Follow these steps:
- Boot Word 2003
-
From the menu, select Tools — Templates and Add-Ins…
Templates and Add-Ins -
Click the XML Schema Tab and select Add Schema…
XML Schema Tab -
Navigate to where you unzipped the sample files. Select Memo.xsd and click Open.
Selecting XSD File to Add a Schema -
In the Schema Settings dialog, give the schema a friendly name in the Alias box. Maybe something like «Memo». Click OK.
Add an Alias to the Schema At this point, Word is now aware of the memo schema. Next we have to make Word 2003 aware of the Transforms. Note that Microsoft calls these «solutions».
-
You still should be on the Templates and Add-ins dialog. Click Schema Library…
Schema Library - In the Schema Library dialog, select Memo in the top listbox. This will enable the button in the lower part of the dialog for «Add Solution…».
-
Click Add Solution button.
Adding Solution -
Navigate to the folder with your .xsl files. Choose Contemporary.xsl and click Open.
Select Transform File -
In the Solution Settings dialog, give the transform file a friendly name, such as «Contemporary». Click OK.
Alias for the Transform File -
Repeat steps 8 through 10 to add Elegant.xsl and Professional.xsl. Click OK to close the schema libary. Click OK to close Templates and Add-Ins.
Finalize Schema Library At the Microsoft demo, all of these 11 steps were done behind the scenes. The public walked in and we watched as they showed us these steps.
-
We are going to open SampleMemo.xml in Word. Here is the notepad view of this file. It is plain XML data without any formatting.
Sample XML Data File Content -
From Word, open SampleMemo.xml. Behind the scenes, Microsoft scans the XML file to find that this is data using the Memo schema. It looks in the schema library to see if there is a match on the «memo» schema. When there is, it finds all of the XSL solutions that we’ve added. Since we have three, Word selects one to display, then offers us the others in the XML Document task pane. This is very amazing.
Here is the XML data views Pane:
XML Data Views Pane Here is the default view of the data (this is using the Elegant xsl).
Default View of the Data Click on Data Only and you get just the data without formatting.
Data Only View Click on Contemporary, and a few seconds later, you have a totally different formatted view of the data:
Formatted View of the Data -
You can show/hide the purple XML tags with Ctrl+Shift+X.
Show/Hide XML Tags

Creating Your Own XSL Transform Files
I can see the power. But so far, we’ve only used downloaded XSL files for someone else’s data. We really need a way to create an XSL file for our own data. Again, if you work for a company who is XML-Rich, someone probably already has these transforms set up. However, if you are the first person in your company to try the XML stuff, then you have to go through the relatively painful task of setting up your own transform files.
Here is how we are going to do this. First, I am going to create a fancy document in Word that shows how I want to display the XML data. I will put in easy-to-find placeholders where I want the XML fields to go. I will save this document as Word XML. Then, using Notepad, I am going to edit the document, paste in some XSL code, and save the file. This should create a custom XSL transform file.
-
In Word, build a nicely formatted sample. Below, I have built an Order confirmation. This has a logo, introductory text, the fields from the XML file and closing text. I’ve used various fonts and colors. The convention of using *** to highlight the fields is simply to help me as I look through the Word XML file in Notepad.
Template in Word -
I will save this file as Word XML.
Saving as Word XML - I will open two notepad windows. One has Sales Order.xml and the other has an existing elegant.xsl tranform code. (to be continued).


Did you know that Excel files are actually a zipped collection of XML files? You can easily explore and edit the complete structure of your Excel workbook. All you have to do: Rename and unzip the .xlsx file. Let’s take a look at it.
Some background information about the XML format
Before we jump in: Some background information. Excel files use the Open Office XML File Format. It’s an open standard so that also other software and developers can easily access your files. It’s documented well (the core document has more than 5,000 PDF pages). For your reference – here are the publicly available documents: http://www.ecma-international.org/publications/standards/Ecma-376.htm
Each Excel workbook contains of a bunch of folders and XML files. XML stand for Extented Markup Language. It works with opening and closing tags, e.g. <car name>BMW</car name> and looks similar to HTML. The good thing about this: You can (comparatively) easy read and understand the source code.
How to see the content of an Excel file, including the XML structure
It’s actually very simple to see all the content of your Excel file. Not the workbook itself in Excel, but rather its source code files. If you save your Excel workbook, it usually got the .xlsx ending. That means, your file is an Excel file which will open in Excel.
There is a trick:
- Save your workbook and close it.
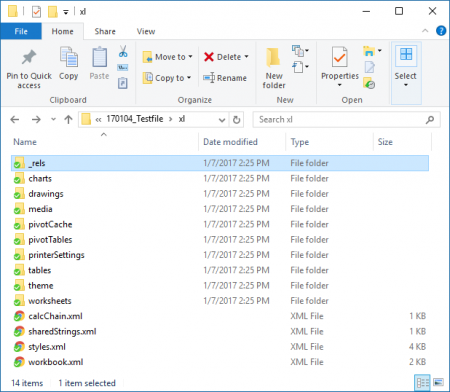
- Rename it: Replace the .xlsx ending of the file name by .zip.
- Unzip it.
So you basically just replace the .xlsx by .zip. That way, your file will open in a new Windows Explorer and you can see all it’s content. When you enter or extract the contents it now you got a new folder with some subfolders. Each contains some XML files. You can open them with the text editor or – and that usually looks better – when a browser, e.g. Chrome.
Contents
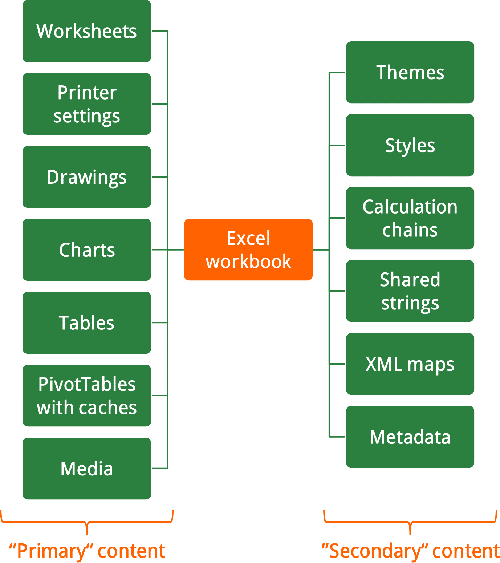
An Excel workbook can have various types of contents: The charts, tables, PivotTables, drawing, images and of course the actual worksheet or cell contents. This all must be saved somehow in the Excel file. But furthermore, there are many other information stored: Some meta data, calculation chains, themes and styles, named ranges and the relationship of all this data and files.
The image on the right side provides a rough overview of all the types of data saved in an Excel file. You can divide the content into the following two categories:
- “Primary” content: The actual content which you can see and access through Excel. For example, the cell contents, images, PivotTables, Tables and so on.
- “Secondary” content: Things you don’t exactly see, but still necessary for your Excel file to work.
Do you want to boost your productivity in Excel?
Get the Professor Excel ribbon!

Add more than 120 great features to Excel!
Basic XML contents
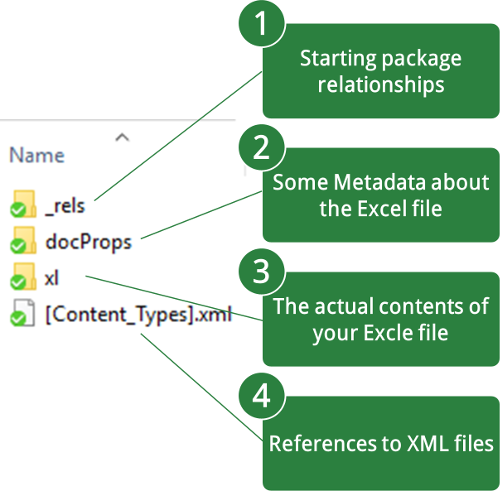
Each Excel workbook has some basic contents. A completely empty workbook already comes with these folders and files:
- _rels (Folder): “/_rels/.rels” is an XML file where the starting package-level relationships are stored.
- docProps (Folder): In most cases this folder has two files: app.xml and core.xml. Those files have some metadata. E.g. core.xml contains information about the auther, modified by, data created and date saved. app.xml on the other hand has some more information rather about the content of the file, e.g. if there are external links which need to be updated
- xl (Folder): This folder has most of the information. By default it has 3 subfolder: “_rels”, “theme” and “worksheets” as well as two more XML files styles.xml and workbook.xml.
- [Content_Types].xml: The XML file [Content_Types] is the only file on this level. It has references to the XML files within the folders above.
How a worksheet is saved
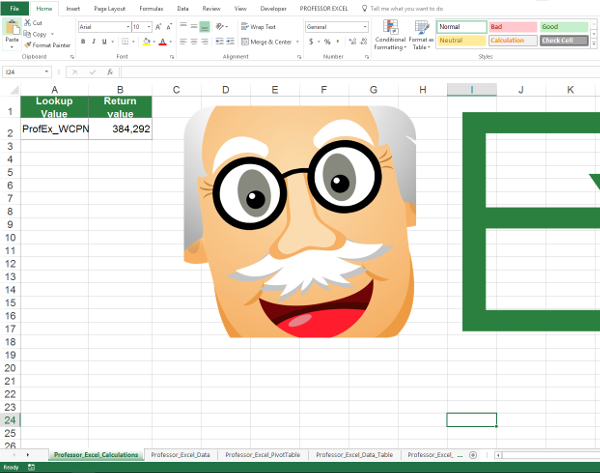
There is one XML file for each Excel worksheet. So, these worksheet XML files are saved within the folder “xl/worksheets”. So, let’s take a look at an example worksheet (see the screenshot on the right side).
This worksheet has some content in the cells A1, B1, A2 and B2. The cells A1, B1 and A2 only have text whereas the cell B2 has a formula (a VLOOKUP). There is also an image, the cell I24 is selected. So how does the underlying source code look like?
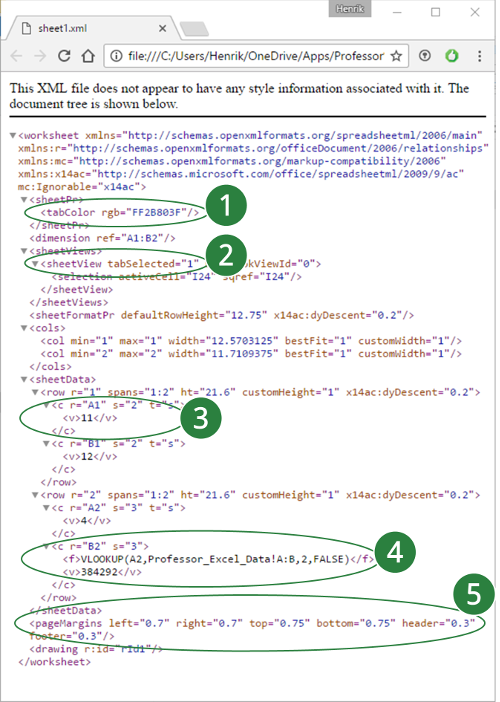
Actually, the XML file doesn’t look to complicated. Let’s take a look at some selected lines of code:
- The tab has a dark green color. It’s formatted with the tag “<tabColor”, followed by the RGB value.
- This sheet is selected. So it got the tag “<sheetView tabSelected” set to 1.
- Number 3 is quite interesting: It has the content of cell A1. As you can see in the screenshot above, the text in cell A1 says “Lookup Value”. But instead of this text, the XML code just says “11”. This number 11 refers to the 11th entry on the XML sheet “sharedStrings”. That way Excel makes sure that each text is only saved once in order to save space.
- The cell B2 has a VLOOKUP formula. That means, the complete formula is saved with the tag “<f>” and the calculated value – which you will see immediately when opening the workbook – is also stored under the tag “<v>”.
- The page margins are also saved.
The image is just inserted with the reference “<drawing r:id=”rId1″/>”.
Advanced contents
Besides the basic worksheets, Excel files can have much more content. So, this content could be
- PivotTables with their cache. The actual source for the PivotTable doesn’t have to be included in the workbook file.
- Named ranges: The named in the workbook.xml file in the xl folder.
- Drawing: Images and charts count as drawings. The image itself will be stored in the folder xl/media the charts in xl/charts.
- Tables: Data tables are saved with their headlines and range under xl/tables. The values are saved separately though. They are still in the corresponding worksheet XML file.
More information
You want to know more? There are some interesting websites available:
- Overview of the Open XML SDK: https://msdn.microsoft.com/en-us/library/office/gg278316.aspx
- Information about the Open Packaging Conventions: https://en.wikipedia.org/wiki/Open_Packaging_Conventions
- A good summary of the XML and Excel file structure: http://www.jkp-ads.com/Articles/XMLAndExcel00.asp
- Archive of the underlying Office Open XML File Formats: http://www.ecma-international.org/publications/standards/Ecma-376.htm
- Check out our big guide about the Excel file types.

Henrik Schiffner is a freelance business consultant and software developer. He lives and works in Hamburg, Germany. Besides being an Excel enthusiast he loves photography and sports.