
Word 2016 is designed to help you create professional-quality documents. Word can also help you organize and write documents more efficiently.
When you create a document in Word, you can choose to start from a blank document or let a template do much of the work for you. From then on, the basic steps in creating and sharing documents are the same. And Word’s powerful editing and reviewing tools can help you work with others to make your document great.
Start a document
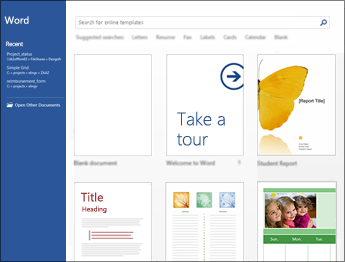
It’s often easier to create a new document using a template instead of starting with a blank page. Word templates come ready-to-use with pre-set themes and styles. All you need to do is add your content.
Each time you start Word, you can choose a template from the gallery, click a category to see more templates, or search for more templates online.
For a closer look at any template, click it to open a large preview.
If you’d rather not use a template, click Blank document.
Open a document
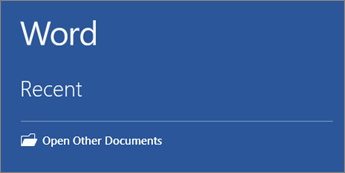
Every time you start Word, you’ll see a list of your most recently used documents in the left column. If the document you’re looking for isn’t there, click Open Other Documents.
If you’re already in Word, click File > Open and then browse to the file’s location.
When you open a document that was created in earlier versions of Word, you see Compatibility Mode in the title bar of the document window. You can work in compatibility more or you can upgrade the document to use Word 2016.
Save a document
To save a document for the first time, do the following:
-
On the File tab, click Save As.
-
Browse to the location where you’d like to save your document.
Note: To save the document on your computer, choose a folder under This PC or click Browse. To save your document online, choose an online location under Save As or click Add a Place. When your files are online, you can share, give feedback and work together on them in real time.
-
Click Save.
Note: Word automatically saves files in the .docx file format. To save your document in a format other than .docx, click the Save as type list, and then select the file format that you want.
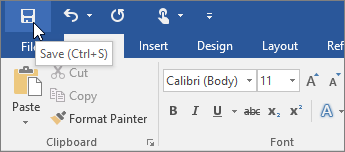
To save your document as you continue to work on it, click Save in the Quick Access Toolbar.
Read documents
Open your document in Read Mode to hide most of the buttons and tools so you can get absorbed in your reading without distractions.
-
Open the document you want to read.
Note: Some documents open in Read Mode automatically, such as protected documents or attachments.
-
Click View > Read Mode.
-
To move from page to page in a document, do one of the following:
-
Click the arrows on the left and right sides of the pages.
-
Press page down and page up or the spacebar and backspace on the keyboard. You can also use the arrow keys or the scroll wheel on your mouse.
-
If you’re on a touch device, swipe left or right with your finger.
Tip: Click View > Edit Document to edit the document again.
-
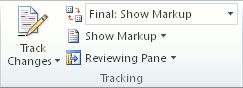
Track changes
When you’re working on a document with other people or editing a document yourself, turn on Track Changes to see every change. Word marks all additions, deletions, moves, and formatting changes.
-
Open the document to be reviewed.
-
Click Review and then on the Track Changes button, select Track Changes.

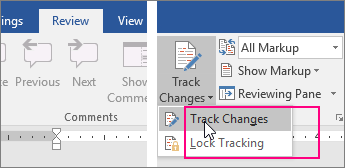
Read Track changes to learn more.
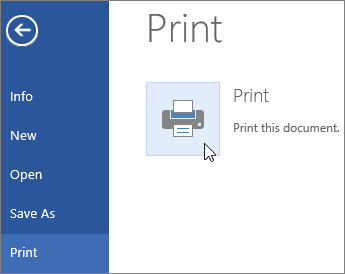
Print your document
All in one place, you can see how your document will look when printed, set your print options, and print the file.
-
On the File tab, click Print.
-
Do the following:
-
Under Print, in the Copies box, enter the number of copies you want.
-
Under Printer, make sure the printer you want is selected.
-
Under Settings, the default print settings for your printer are selected for you. If you want to change a setting, just click the setting you want to change and then select a new setting.
-
-
When you’re satisfied with the settings, click Print.
For details, see Print a document.
Beyond the basics
For more on the fundamentals of using Word, see What’s new in Word 2016.
Top of Page
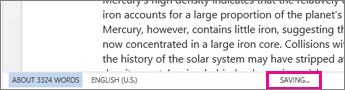
With Word for the web, you use your web browser to create, view, and edit the personal documents that you store on OneDrive. If your organization or college has a Microsoft 365 plan or SharePoint site, start using Word for the web by creating or storing documents in libraries on your site.Save changes
Word saves your changes automatically. Look on the status bar at the bottom left corner of Word for the web. It will either show Saved or Saving.
Share documents online
Because your document is online, you can share it by sending a link instead of an email attachment. People can read it in their web browser or mobile device.
Click File > Share > Share with People.

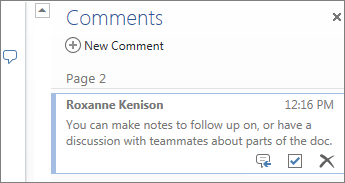
Comment in the browser
A comment balloon shows where comments have been made in the doc.

Reply to comments, and check off items you’ve addressed.
Edit in the browser
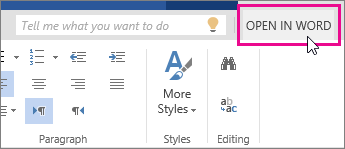
If you try to type in the document and nothing happens, you’re probably in Reading view. Switch to Editing view: click Edit Document > Edit in Word for the web.

Type and format text, add pictures, adjust the layout of the page, and more. For more advanced editing, click Open in Word.
Work together on the same doc
To work together in Word for the web, you edit a document as you normally would. If others are also editing it, Word for the web alerts you to their presence. You can see everyone who is currently working in the document by clicking in the ribbon.

Clicking on an author’s name jumps you to where they’re working in the doc. And you’ll see the changes they make as they’re happening. They can be working in Word for the web, Word 2010 or later, or Word for Mac 2011.
Add a header or footer
Go to Insert > Header & Footer to add headers and footers to your document.
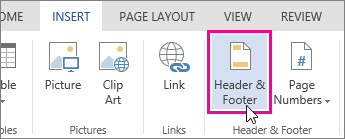
Click Options to choose how you’d like them to appear.

Add page numbers
Click Insert > Page Numbers and then choose from the gallery where you’d like the page numbers to appear.
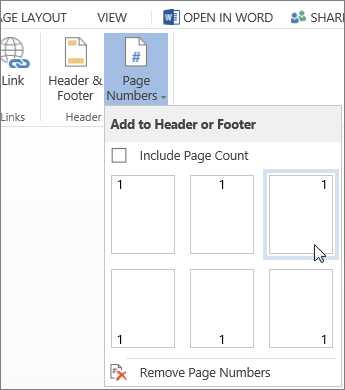
Select Include Page Count to show the current page number along with the total number of pages (page X of Y).
Find and replace text
Quickly search for every occurrence of a specific word or phrase in your document by clicking Home > Find (or type Ctrl+F). Results appear next to your document so you can see the term in context. Clicking on a search result jumps you to that occurrence.
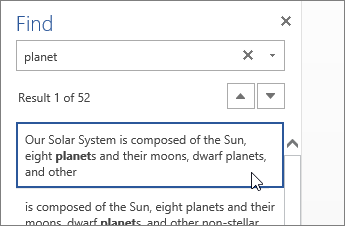
Click Replace (or type Ctrl+H) to find and replace text.
Print in Word for the web
Go to File > Print. Word for the web creates a PDF preview of your document that keeps all the layout and formatting of your document. Send the PDF to your printer and it will print the way you expect.
Microsoft Word 2013 is a word-processing program designed to help you create professional-quality documents. Word helps you organize and write your documents more efficiently.
Your first step in creating a document in Word 2013 is to choose whether to start from a blank document or to let a template do much of the work for you. From then on, the basic steps in creating and sharing documents are the same. Powerful editing and reviewing tools help you work with others to make your document perfect.
Choose a template
It’s often easier to create a new document using a template instead of starting with a blank page. Word templates are ready to use with themes and styles. All you need to do is add your content.
Each time you start Word 2013, you can choose a template from the gallery, click a category to see the templates it contains, or search for more templates online. (If you’d rather not use a template, just click the Blank document.)
For a closer look at any template, just click it to open a large preview.
Top of Page
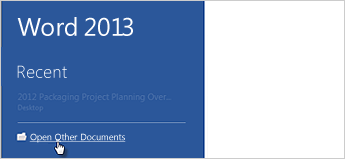
Open a document
Every time you start Word, you’ll see a list of your most recently used documents in the left column. If the document you’re looking for isn’t there, click Open Other Documents.
If you’re already in Word, click File > Open and then browse to the file’s location.
When you open a document that was created in earlier versions of Word, you see Compatibility Mode in the title bar of the document window. You can work in compatibility more or you can upgrade the document to use features that are new or enhanced in Word 2013.
Top of Page
Save a document
To save a document for the first time, do the following:
-
Click the File tab.
-
Click Save As.
-
Browse to the location where you’d like to save your document.
Note: To save the document on your computer, choose a folder under Computer or click Browse. To save your document online, choose a location under Places or Add a Location. When your files are online, you can share, give feedback and work together on them in real time.
-
Click Save.
Note: Word automatically saves files in the .docx file format. To save your document in a format other than .docx, click the Save as type list, and then select the file format that you want.
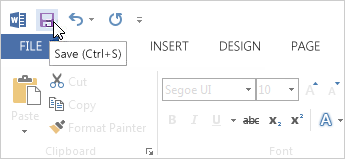
To save your document as you continue to work on it, click Save in the Quick Access Toolbar.
Top of Page
Read documents
Open your document in Read Mode to hide most of the buttons and tools so you can get absorbed in your reading without distractions.
-
Open the document you want to read.
Note: Some documents open in Read Mode automatically, such as protected documents or attachments.
-
Click View > Read Mode.
-
To move from page to page in a document, do one of the following:
-
Click the arrows on the left and right sides of the pages.
-
Press page down and page up or the spacebar and backspace on the keyboard. You can also use the arrow keys or the scroll wheel on your mouse.
-
If you’re on a touch device, swipe left or right with your finger.
Tip: Click View > Edit Document to edit the document again.
-
Top of Page
Track changes
When you’re working on a document with other people or editing a document yourself, turn on Track Changes to see every change. Word marks all additions, deletions, moves, and formatting changes.
-
Open the document to be reviewed.
-
Click Review and then on the Track Changes button, select Track Changes.

Read Track changes to learn more.
Top of Page
Print your document
All in one place, you can see how your document will look when printed, set your print options, and print the file.
-
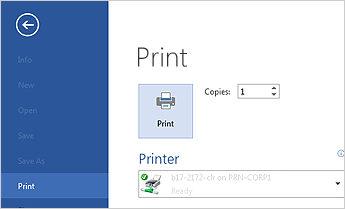
Click the File tab and then click Print.
-
Do the following:
-
Under Print, in the Copies box, enter the number of copies you want.
-
Under Printer, make sure the printer you want is selected.
-
Under Settings, the default print settings for your printer are selected for you. If you want to change a setting, just click the setting you want to change and then select a new setting.
-
-
When you’re satisfied with the settings, click Print.
For details, see Print and preview documents.
Beyond the basics
Go beyond the basics with your documents by creating a table of contents or saving a document as a template.
Top of Page
Important:
Office 2010 is no longer supported. Upgrade to Microsoft 365 to work anywhere from any device and continue to receive support.
Upgrade now
In this article
-
What is Word?
-
Find and apply a template
-
Create a new document
-
Open a document
-
Save a document
-
Read documents
-
Track changes and insert comments
-
Print your document
What is Word?
Microsoft Word 2010 is a word-processing program, designed to help you create professional-quality documents. With the finest document-formatting tools, Word helps you organize and write your documents more efficiently. Word also includes powerful editing and revising tools so that you can collaborate with others easily.
Top of Page
Find and apply a template
Word 2010 allows you to apply built-in templates, to apply your own custom templates, and to search from a variety of templates available on the web.
To find and apply a template in Word, do the following:
-
On the File tab, click New.
-
Under Available Templates, do one of the following:
-
To use one of the built-in templates, click Sample Templates, click the template that you want, and then click Create.
-
To reuse a template that you’ve recently used, click Recent Templates, click the template that you want, and then click Create.
-
To use your own template that you previously created, click My Templates, click the template that you want, and then click OK.
-
To find a template on Office.com, under Office.com Templates, click the template category that you want, click the template that you want, and click Download to download the template from Office.com to your computer.
-
Note: You can also search for templates on Office.com from within Word. In the Search Office.com for templates box, type one or more search terms, and then click the arrow button to search.
Top of Page
Create a new document
-
Click the File tab and then click New.
-
Under Available Templates, click Blank Document.
-
Click Create.
For more information about how to create a new document, see Create a document.
Top of Page
Open a document
-
Click the File tab, and then click Open.
-
In the left pane of the Open dialog box, click the drive or folder that contains the document.
-
In the right pane of the Open dialog box, open the folder that contains the drawing that you want.
-
Click the document and then click Open.
Top of Page
Save a document
To save a document in the format used by Word 2010 and Word 2007, do the following:
-
Click the File tab.
-
Click Save As.
-
In the File name box, enter a name for your document.
-
Click Save.
To save a document so that it is compatible with Word 2003 or earlier, do the following:
-
Open the document that you want to be used in Word 2003 or earlier.
-
Click the File tab.
-
Click Save As.
-
In the Save as type list, click Word 97-2003 Document. This changes the file format to .doc.
-
In the File name box, type a name for the document.
-
Click Save.
For more information about how to create a document that is compatible with Word 2003 or earlier versions, see Create a document to be used by previous versions of Word.
Top of Page
Read documents
-
Open the document that you want to read.
-
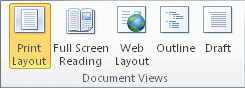
On the View tab, in the Document Views group, click Full Screen Reading
-
To move from page to page in a document, do one of the following:
-
Click the arrows in the lower corners of the pages.
-
Press PAGE DOWN and PAGE UP or SPACEBAR and BACKSPACE on the keyboard.
-
Click the navigation arrows at the top center of the screen.
Tip: Click View Options, and then click Show Two Pages
to view two pages, or screens, at a time.
-
 to view two pages, or screens, at a time.
For more information about how to view documents, see Read documents in Word.
Top of Page
Track changes and insert comments
-
To turn on change tracking, on the Review tab, in the Tracking group, click Track Changes.
-
To insert a comment, on the Review tab, in the Comments group, click New Comment.
For more information about how to track changes made while revising, see Track changes and insert comments.
Top of Page
Print your document
-
Click the File tab and then click Print.
-
Do the following:
-
Under Print, in the Copies box, enter the number of copies that you want to print.
-
Under Printer, make sure that the printer that you want is selected.
-
Under Settings, the default print settings for your printer are selected for you. If you want to change a setting, click the setting you want to change and then select the setting that you want.
-
-
When you are satisfied with the settings, click Print.
For more information about how to print a file, see Preview and print a file.
Top of Page

No word processor would be complete without a way to format text, and Microsoft Word has a full set of tools that let you stylize text in your document files. Instead of having only standard fonts, you can change text to represent styles such as sub-titles, titles, section headers and other non-standard content.
Text Editing Functions
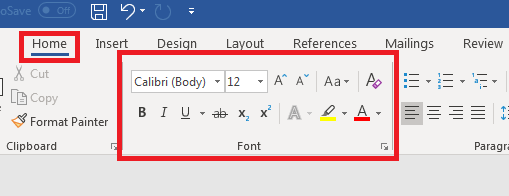
All basic text editing functions are found in the «Home» ribbon tab.
(Word text editing controls)
Notice that Word offers several stylizing features in the «Font» category in the «Home» tab. As you type content into a document, you’ll use these features and controls heavily.
The top row of font styles is the font type and the size of the characters. By default, Word opens a blank document using Calibri as the font for the body of a document. The default size is 11, but you can change this style with a simple click of the dropdown control. Alternatively, you can highlight text in your document, and then hover your mouse over the text and a list of standard font style choices will display.
When it comes to fonts in a Word document, only the fonts installed on your computer will show in the dropdown control. This is different from having fonts display in a web browser where developers pull fonts from a cloud location, so if content is meant for a website, you’ll need a way to implement the font using code or the browser will be unable to display the same font that you’ve used in your Word document.
You aren’t limited to one font size and style. If you have no content highlighted in the document, then the font changes will only take effect on new content typed into Word. If you have any content highlighted when you make these changes, Word will change the font and size of the highlighted content.

(Font style changes)
In the image above, the first line of text is the default font and size. The second line of text is a much larger size with a different style. This shows you that you can have several different font styles in a document without any restrictions. The dropdown control in the «Home» ribbon tab will show you all fonts available on your computer. Some third-party programs have their own fonts installed when you add the software to your computer. These fonts will then show in the Word font dropdown control.
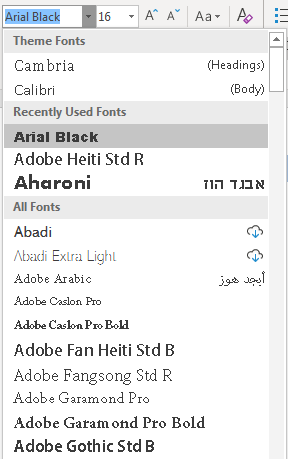
(Word dropdown font control with selection options)
Adobe Reader was installed on the computer in the image above, so several Adobe fonts are available in the Word dropdown. Not every application prefaces font names with the brand, so after you install some programs, you might just notice new fonts available. You can also download fonts from the Internet or purchase them from designers to add more fonts to your computer and Word availability.
Basic Font Styles
There are three basic font styles common with every text editing program: bold, underline and italics. Word offers other styles, but these three are the most common with standard content. All three buttons are under the font dropdown control.

(Bold, Italics and Underline controls)
The first «B» button sets any text to a bold style. The second «I» button sets text to italics, and then the «U» button sets an underline style. You can highlight any text and click one of these buttons to change to the style that you want. You can also click multiple buttons and have all three styles applied to text.
When you click one of these buttons and start typing, the style takes effect until you want to go back to the original style. Click the button again to stop the style from being applied to future text. Should you change your mind and want to remove a style, highlight the text and click the button to remove the style.
Alternatively, you can use the Ctrl+B keyboard shortcut for bold. Ctrl+I will apply italics style to selected text, and Ctrl+U will underline selected content.
Subscript and Superscript
Word supports subscript and superscript styles. These styles are used mainly for either math equations or referencing content within your documentation. The two controls are to the right of the font styles explained in the previous section (bold, italics and underline).

(Subscript and superscript controls)
The two font styles can be applied the same way as the others. Highlight the text that you want to stylize and click the button. You can remove the style by clicking the button again with the text highlighted.
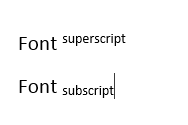
(Example subscript and superscript styles)
In the image above, notice that the superscript text is slightly above the «Font» text, and then the subscript text is slightly below. These two styles help you create math equations in a document or reference text similar to an academic paper references sources.
Adding a Hyperlink
When you create web pages, it’s not uncommon to add a link to another page on a website. You can do the same with Microsoft Word, except clicking a link will open the user’s browser and bring them to the linked web page.
To add a hyperlink, you can right click the text that should have a hyperlink applied and a context menu will display.
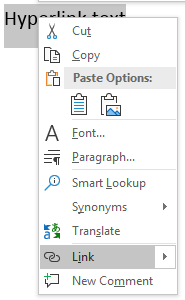
(Font style context menu)
In the image above, notice that the «Link» selection is highlighted. Click this link option and a window opens asking for the link location.
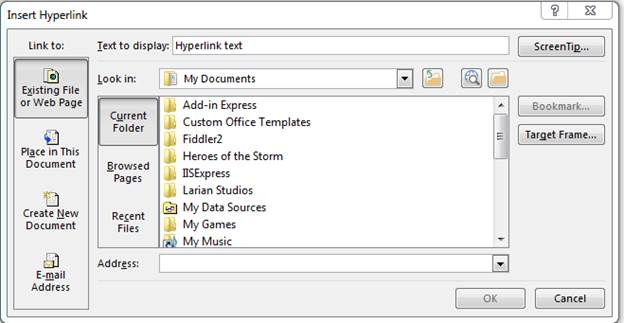
(Hyperlink configuration window)
The «Address» input text box is where you type the URL. You can also copy and paste a URL from your browser. Notice that the window also displays local directories from your computer. You aren’t limited to just URLs on the Internet. You can also link to files on your local computer or on a network drive. If this document is sent to another user, remember that any links to external documents on your computer won’t be accessible to a third party.
Highlighting and Font Color
Microsoft Word has a highlighter function that imitates when you run a physical highlighter over text on a sheet of paper. You have your choice of several different colors and using a highlighter will make specific sentences and words stand out.

(Highlighter and font color controls)
The first button is the highlighter control. Click the arrow icon next to this button and a list of color options appear. After you choose a color, click the highlighter button. Your cursor changes its icon and displays a highlighter icon indicating that any actions that you take will highlight text rather than prompt you to start typing.
Text highlighted with the tool will display a different background than the one in the document.
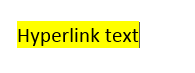
(Highlighted text)
The image above shows what text looks like when the highlighter tool has been used.
The default font color is black. Whenever you create a blank Word document, font color is black until you change it. Just like any other text in your document, you can change parts of it to be a different color. Any text selected can have its color changed using the font color tool.
Just like the highlighter tool, click the arrow to the right of the button and several color options are displayed. These color choices aren’t the only ones available. Click the «More Colors» option and another window opens where you can choose a custom color based on a more granular color palette.
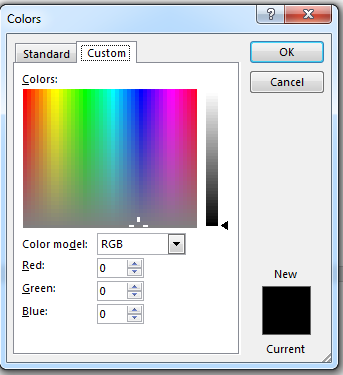
(Custom color choices)
The above image shows the color palette range. Just click somewhere on the palette and the color code will be automatically filled. Click «OK» when you choose your color, and any text highlighted will have its color changed. If you change the color with no text selected, the new color will take effect as you type your text.
These text changes are common when you create long documents. Even with small documents and notes, you’ll use these text edits to customize the way it displays on your screen or when you print it to hardcopy. Text editing tools are one of the most common features available in Word.
Selecting Text
Now that we’ve gone over the more exciting features of what word 2019 can do to enhance your text, let’s buckle down and get to the actual basics of how to enter and edit text.
The first step in editing text that appears on the screen in Word is to learn how to select it for editing. You can always click within a document to move the cursor to change text, or use Backspace and Delete to remove text. However, this can be time consuming. What if you want to remove a whole chunk of text? Or what if you want to move one paragraph to another location? Well, by selecting text, you can delete or move entire paragraphs or pages. You can also format your document. You can change the font size, color, style, or any number of other things. Being able to select text in Word is mandatory, even for the absolute beginner.
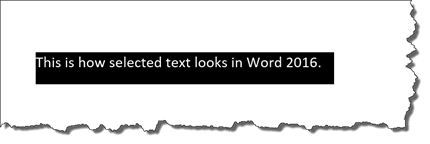
Whenever you select text in Word, the text appears highlighted, as shown below.
Selecting text is easy and done in three easy steps.
- Move the cursor to the beginning of the text that you want to select.
- Click and hold in the left button on your mouse.
- Drag it over the text you want to select. It will highlight the selected text, as shown above. Simply release the mouse button when you are finished selecting text.
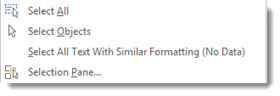
If you want to select the entire document, simply click on the Home tab and click Select on the far right in the Editing group.

Click the downward arrow beside Select and choose Select All.
This will highlight all your text for formatting. Also note that you can select objects or text with similar formatting as your selected text when clicking on ‘Select.’
Cutting Text
Once you’ve selected text, there are several things that you can do with it. Naturally, you can select text to format it. Perhaps you want to change the font type or size. We’ll cover how to do that later.
However, you can also cut selected text from a document as a way to either delete it from one location, then paste it elsewhere in the same or different document.
If you’d like to remove text from one location in the document to paste into another location, use the Cut command.
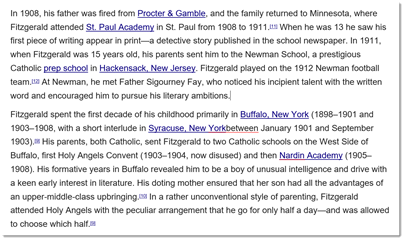
For example, below is an excerpt of the biography of F. Scott Fitzgerald.
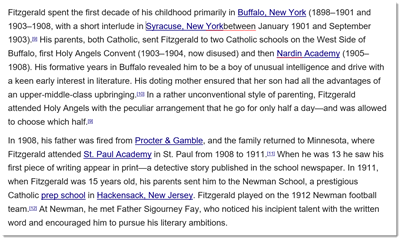
Let’s say we want to reverse the two paragraphs. In other words, we want the second paragraph to be the first paragraph.
We will use the Cut feature in Word to accomplish this.
1. Select the text or object to be cut and copied. We’ve selected the second paragraph.
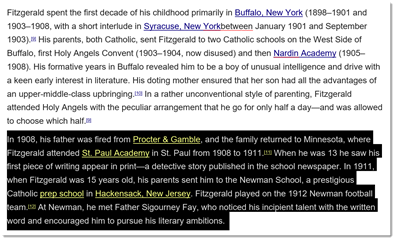
2. Click the Cut icon  in the Clipboard group under the Home tab. As you can see below, the paragraph is now cut from the document.

3. Now, click on the area in the document where you want to «paste» the text that you just cut. Using our example, it’s before the first paragraph. Once you see the cursor, go to the Ribbon. Under the Home tab, click Paste in the Clipboard group.
Delete and Cut should not be used interchangeably. When you cut an object, it is copied to the Clipboard. When you delete an object, it is simply removed from the document and the only way to restore it is by clicking the Undo Typing button. To delete text, select the text, then click Delete on your keyboard.
Copying Text
Once you select text, you can also copy it. Copying text means you copy the text you’ve selected, then you can paste it somewhere else in the document – or in another document. When you copy text, the text you’ve copied remains in the document.
There are three ways to copy text and objects to the clipboard.
1. Select the text or object to be copied and click the copy icon  in the Clipboard group under the Home tab.
2. Select the text or object to be copied, position the mouse pointer over it and right click. Then select Copy from the menu.
3. Select text or object to be copied and hit CTRL + C.
The Clipboard
Whenever you copy anything in Word, it is automatically sent to the Clipboard. The Clipboard does just as its name implies. It holds the text that you copy and paste for you to use. The Clipboard and its associated tools can be found on the Home tab at the far left end of the ribbon. The Clipboard group looks like this:
Click the arrow at the bottom of the Clipboard group to see its contents.
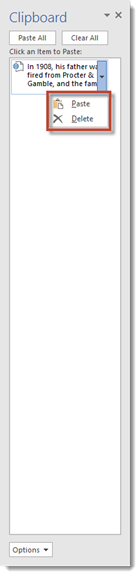
The clipboard will open as a long window to the left of your document. It can only hold 24 objects. When a 25th object is added, the first copied item is removed. To empty the Clipboard, click the Clear All button at the top of the Clipboard menu.

You can remove individual items from the clipboard by moving the mouse pointer over the item, then clicking the arrow button that appears to the right of the object. In the dropdown menu, select Delete.
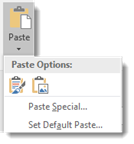
Paste
The Paste command allows you to copy an object from one location in the document to another, or from another Office Program into Word. You can use the Cut or Copy feature to move an item to the clipboard, then use Paste to place it elsewhere into a document. We’ve already covered Paste briefly earlier in this course.
There are three ways to Paste text or an object into a document:
1. Move the cursor to the point in your document where you want to place the item and click the Paste icon. It looks like this:

2. Move the mouse pointer to the place you wish to insert the item and click the right mouse button. Select one of the paste options from the dropdown menu. We’ll discuss the options in just a minute.
3. Move the cursor to the point in your document where you wish to place the item and press CTRL + V.
Ordinarily, Word pastes the most recently copied item. To paste an object that was copied earlier, position the cursor at the point in your document you wish to paste the item, then open the clipboard and click the item you wish to paste. You can also move the mouse pointer over the item to be pasted, and click the arrow that appears to the right of that item. Then select a paste option.
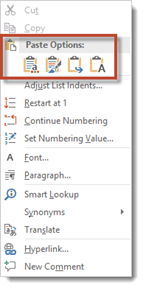
Paste Options is what you see when you right click your mouse to paste into a document. See below.
You also see Paste Options when you click the downward arrow below Paste on the Ribbon.

Paste Options allows you to specify the method of pasting that you want to use. This will be important if you want to keep or remove formatting for the selected text.
Let’s explain what we mean. This course is typed using Calibri font. Let’s say for example, that we want to paste a paragraph of this lesson into another lesson with a different font size, or into another document with a different font. Word gives us the option of preserving formatting, making the formatting match the area of the document where we paste our text, or pasting text only and not any images that we cut or copied.
Again, Paste Options only appears when you right click your mouse to paste – unless you select your Paste option from the Ribbon. Once you’ve copied or cut selected text, then right click, you’ll see this:
These are your paste options:
 Paste using original formatting of pasted text.
 Merge formatting. Paste using the formatting of the majority of the text in the document.
 Allows you paste text only. Any graphics or images will not be pasted, only text.
 Paste using the formatting of the destination text, or the text where you paste into.
 Paste a Picture.
Inserting Text
You can insert text anywhere in a document simply by moving the cursor to the desired location and typing.
Word automatically moves all text to the right of the cursor over as you type. However, if you’d rather replace the text as you type, Word gives you two options:
- Select the text you’d like to replace and start typing. This deletes the highlighted text and positions the cursor in its place.
- Use Overtype Mode. To turn on overtype mode, click on the File tab, then select Options.
You will then see this dialogue box.
Click on Advanced in the left column.
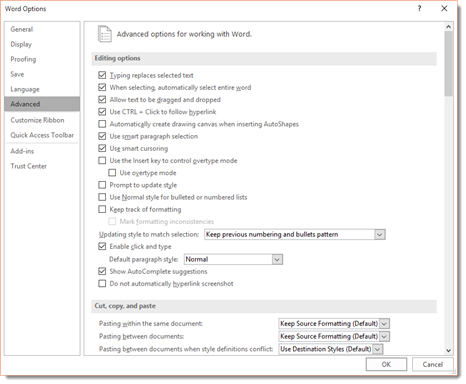
Put a Checkmark beside «Use the Insert key to control overtype mode» or the «Use overtype mode» box.

If you select the «Use the Insert key to control overtype mode» box, you can toggle overtype mode on or off by pressing the Insert key.
If you select only «Use overtype mode» you must manually turn it off by deselecting it.
AutoCorrect
AutoCorrect automatically corrects some errors you make. For example, by default, Microsoft Word will start the first letter of every new paragraph with a capital letter. It also may recognize certain words and make corrections for you without ever having to use Spell. However, you can customize AutoCorrect to find and correct certain errors — or to leave certain «errors» alone.
To customize AutoCorrect, click on the File tab, then click Options on the left.
Click Proofing in the column on the left.
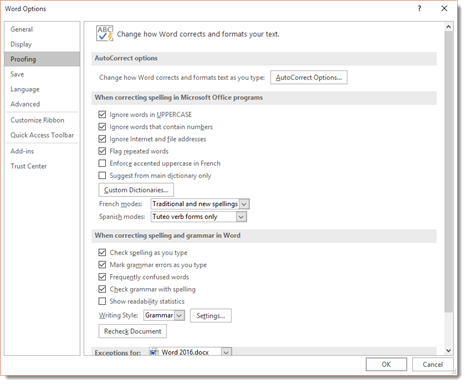
Next, click the AutoCorrect Options button. The screen you will see will look like the one below.
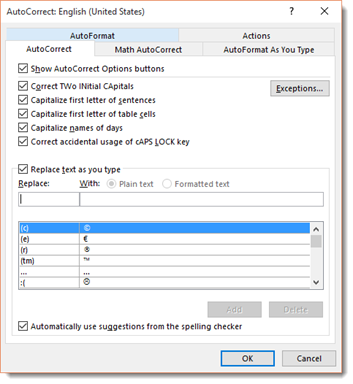
Click on the AutoCorrect options button, and you can specify words or even math that you want Word to correct as you type.
As you can see, by default, Word will automatically turn: (into a smiley face emoticon: J. It will also create a trademark symbol ™. These are default corrections that Word makes for you. You can add your own too.
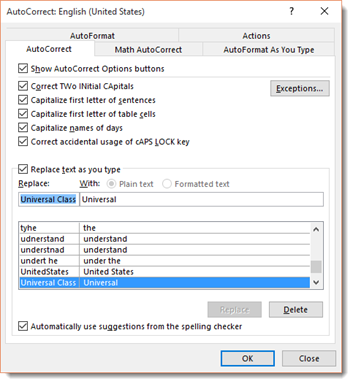
To add your own, type in what word or symbols you will enter in that you want Word to automatically correct. We’re going to type «Universal Class» and have it replaced by «Universal.» We’re doing this to have uniformity in our documents. Click the Add button when you’re finished.
Now, let’s click the Math AutoCorrect tab in the dialogue box.
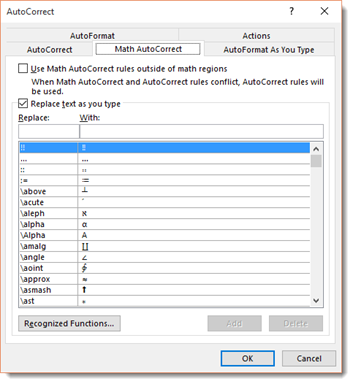
We’ll talk about mathematics later in this course. However, you can set AutoCorrect for mathematics just as you would with text.
Undo and Redo
But let’s say you accidently delete something or deleted it and then decided that you want it back. You grit your teeth and start to grumble, trying to remember the exact wording. It’s a lost cause, right? Wrong. The makers of Word anticipated this problem and supplied an easy solution. The Undo button!
The Undo button is on the Quick Access Toolbar. It looks like this:  . You can click the downward arrow beside the Undo button to determine how many steps backward you want to take with your undo.
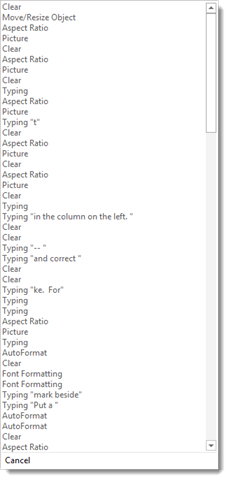
If you scroll down the list above to the bottom to AutoFormat, everything above AutoFormat will be undone too. You can undo up to 100 actions.
The Redo button is to the right of the Undo button. It looks like this:  . The redo button allows you redo an action that you just undid or to repeat the last action. If Word cannot redo the last action, the button will be faded.
Hyphenation
Word can hyphenate words at the end of lines for you, or you can choose to do it yourself. By default, hyphenation is turned off, which means Word won’t hyphenate words that are at the end of a line. Instead, it will just move the word to the next line.
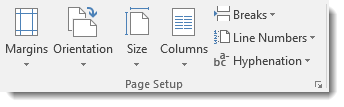
To use the hyphenation feature in Word, click on the Layout tab, then go to the Page Setup group on the ribbon. You’ll see Hyphenation, as shown below.
If you click the downward arrow beside Hyphenation, you’ll see that None is selected. This means no hyphenation (default.)
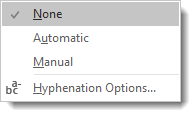
If you want Word to hyphenate words for you, select Automatic. This means that Word will hyphenate words that appear at the end of a line rather than moving it down to the next line to keep your text within the margins. Word will use its settings to decide how to hyphenate words. Just keep in mind, it does NOT mean Word will hyphenate words such as ‘how-to.’ It won’t.
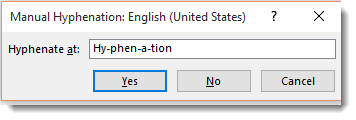
You can also select Manual. This box will pop up and ask you to specify how you want words hyphenated. Word will search your text for words that can be hyphenated and ask you how you wanted hyphenated. See the snapshot below:
You can also set options to tell Word the maximum amount of space to allow between the word and the right margin. This is called the Hyphenation Zone. To set the amount of space yourself, go to Hyphenation, click the downward arrow, then click on Hyphenation Options.
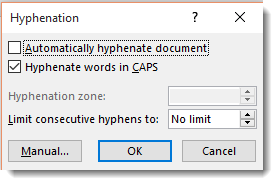
In this window, you can also select to automatically hyphenate the entire document, hyphenate words that are in CAPS, and manually set hyphens as we just learned to do.
Под редактированием документа подразумевается внесение изменений в содержимое текста, выявление и удаление ошибок и опечаток, а также проверка правописания. При этом пользователь может по несколько раз возвращаться к одному и тому же месту. Чтобы отредактировать текст в Ворде вам потребуются инструменты и средства, расположенные на первой вкладке программы.
Средства редактирования в Word
Для изменения тех или иных символов в документе Microsoft Word используются кнопки Delete и Backspace на клавиатуре. С их помощью удобно передвигаться от одной буквы к другой и удалять их.
Под редактированием строк подразумевается удаление, разделение одной строчки на несколько, слияние и вставка. Эти команды выполняют вышеуказанные кнопки и клавиша Enter.
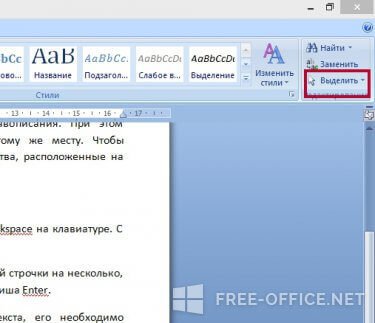
Чтобы удалить, вырезать, копировать или переместить фрагмент текста, его необходимо выделить. Выделение осуществляется при помощи инструмента, расположенного на главной вкладке Word (указанной на рисунке ниже) или манипулятора мышки. Большой фрагмент можно выделить следующим способом: щелчок левой кнопкой мышки в начале текста, затем клавиша Shift и щелчок в конце.
Отмеченный «кусочек» текста можно перемещать и копировать:
- при помощи команд контекстного меню или кнопками мышки;
- используя горячие клавиши (Ctrl+C/Ctrl+V);
- командами текстового редактора Word из вкладки «Главная».

Отменить ошибочно совершенное действие можно с помощью специальной пиктограммы.
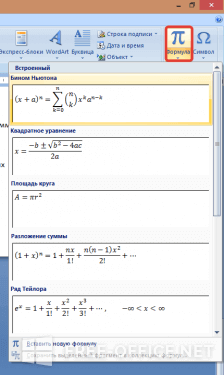
Редактирование в Word подразумевает и вставку формул, а также специальных символов, отсутствующих на клавиатуре. Перейдите на вкладку «Вставка/Символы».

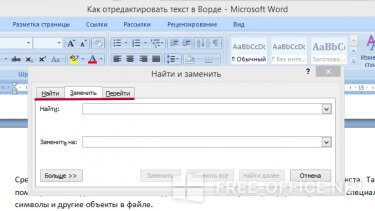
Средство «Найти и заменить» способно сэкономить время при правке большого текста. Также с помощью команды вы сможете находить и изменять параметры редактирования в Word, специальные символы и другие объекты в файле.
К редактированию в Word относят и проверку правописания. Эта функция находится в разделе «Рецензирование». Для начала проверки, установите курсор в начале странички и щелкните на соответствующую пиктограммку.
Показать видеоинструкцию
Видеоинструкция
Ответы на другие вопросы:

Екатерина Андреевна Гапонько
Эксперт по предмету «Информатика»
Задать вопрос автору статьи
Определение 1
Word — это самый популярный текстовый редактор, разработанный корпорацией Microsoft и предназначенный для создания просмотра и редактирования текстовых документов.
Введение
Программное приложение Microsoft Word — это текстовый редактор, предназначенный для реализации большого набора операций по обработке текста, таких как, ввод текстовой информации, осуществление вёрстки, осуществление проверки на правильность орфографии, выполнение вставок графики документы, распечатывание документов. В документах, наряду с текстовыми данными, могут присутствовать графические изображения, математические формулы, таблицы.
Набор инструментальных возможностей программного продукта Microsoft Word даёт возможность реализации следующих базовых операций
![]()
Сделаем домашку
с вашим ребенком за 380 ₽
Уделите время себе, а мы сделаем всю домашку с вашим ребенком в режиме online
Бесплатное пробное занятие
*количество мест ограничено
- Операция ввода и коррекции текстовых данных.
- Осуществление коррекции орфографических и грамматических ошибок в автоматическом режиме.
- Реализация внешнего оформления документов.
- Операция вставок таблиц, графики и рисунков.
- Операция создания шаблонов рабочих писем, визиток и другой документации.
- Осуществление расчётных операций несложных выражений в табличном формате.
- Операция по объединению документации.
- Задание паролей на документы.
- Вывод документов на печать.
- Обеспечение режима совместной обработки документации.
Редактирование текста в Word
Форматированием документов является операция коррекции их общего вида. Программа Word даёт возможность форматирования документации на следующем наборе уровней:
- Символьный уровень. Подразумевается корректирование гарнитурного оформления, вида письма, размеров и расцветок шрифтов, коррекция интервала между буквами в словах и тому подобное.
- Абзацный уровень. Имеется ввиду выравнивание текста по краям, по центру, в ширину, коррекция отступов с обеих сторон и от первой строки, коррекция отступов до абзаца и после него, определение межстрочных интервалов и тому подобное.
- Страничный уровень. Здесь задаются параметры страницы, её ориентации, может быть выполнено формирование рамки, организация колонтитулов первой страницы и тому подобное.
- На уровне разделов выполняется формирование разделов для следующих страниц или на текущей странице, деление на колонки и тому подобное.
- Документальный уровень. Здесь осуществляется нумерация страниц, создание заголовков и тому подобное.
«Редактирование текста в Word» 👇
Абзац считается текстовой составляющей, оканчивающейся не печатаемым знаком, или текстовым фрагментом, процедура ввода которого заканчивается применением клавиши ввода Enter. К категории «абзац» следует отнести:
- Абзац основного текста.
- Создание заголовков.
- Текстовая информация оглавления.
- Разные списки, имеющие нумерацию и маркирование и тому подобное.
При выполнении символьного форматирования применяется диалоговое окно «Шрифт» (Формат/Шрифт) или команды панели инструментов, предназначенные для форматирования. Форматирование абзаца может быть выполнено с помощью диалогового окна «Абзац», открывающегося командой Формат/Абзац.
Посмотреть итоги форматирования выделенного текстового фрагмента возможно в области задач. Эта операция осуществляется командой Формат/Показать форматирование.
Оформление стиля предназначено для создания требуемого внешнего вида документа, а также внешнего вида всех абзацев. То есть, фактически стили служат тоже для целей форматирования документации. Стиль состоит из командного набора форматирования и его можно сохранить для дальнейшего использования. Выполнять форматирование текстовых документов с помощью стилевого оформления получается значительно более оперативно, чем форматировать вручную каждый фрагмент текста, так как общая команда стиля автоматически исполнит форматирование целого набора текстовых характеристик. Стили могут быть поделены на следующие основные типы:
- Тип символьного стиля, который состоит из параметров символьного форматирования, включая размеры шрифтов, вид написания, местоположение и набор интервалов.
- Тип абзацного стиля, который состоит из параметров, задающих форматирование абзацев, то есть, это межстрочные интервалы, отступы, выравнивание, расположение табуляции. В состав стилей абзацев может входить стилевое оформление или характеристики символьного форматирования. Самое большое количество оформлений стиля, используемых в программе Word, предназначено именно для абзацев.
-
Тип табличного стиля, который состоит из параметров табличного форматирования. Когда выполняется вставка таблицы, то она изначально обладает стилем, именуемым как сетка таблицы.
Когда форматируется новый документ на базе шаблона Обычный, то документ получает копию набора стилей из главного стилевого набора, имеющего общее предназначение, то есть, это Обычный, Заголовки 1, 2, 3.
После окончания занесения текстовой информации в документ и внесения необходимых коррективов, можно использовать команду «Автоматическое форматирование» для изменения внешнего облика всего документа. Когда выполняется автоматическое форматирование документа, то все абзацы получают какой-либо стиль программы Word. Например, заголовку может быть присвоен стиль Заголовок 1 или Заголовок 2, абзацу, относящемуся к основному тексту, может быть присвоен стиль Основной текст и тому подобное. Присваивание абзацам, имеющимся в документе, шаблонных стилей Word позволяет быстро изменить внешний вид сформированного документа путём использования библиотечных стилей.
Выполнение проверки правописания является средством редактора, которое позволяет осуществить проверку и откорректировать ошибочно написанные слова в документе. Программа производит сравнение слова, имеющееся в документе, со словарным вариантом, а слова, которых нет в словаре, просто выделяются подчёркиванием. Далее можно просто оставить всё без изменений, исправить слово или добавить его в словарь.
Грамматическая проверка является проверкой текста на соответствие правилам стилистики и грамматики. Имеется следующий набор методов анализа правописания:
- Выполнение проверки на ошибки при наборе текста.
- Выполнение ручной проверки на грамматические и орфографические ошибки.
Находи статьи и создавай свой список литературы по ГОСТу
Поиск по теме

Introduction to Microsoft Word Editing Tools
The Microsoft word editing tools are defined as the editing toolbar, in which the content can be added or edited by using the toolbar, and it allows to access the toolbar that adds the functionality of it in their content, it provides access to the commonly used functionalities in word processing application and powerful documentation software, where making changes like editing, formatting, inserting or deleting text, copying or moving text, replacing text, resizing the window, linking with other web pages, creating a new document, etc, operations can performed and by moving the mouse over icons it will show a description about its functionality.
Tools for Microsoft Word Editing
Microsoft word provides commonly used functionalities that are given below:
1. Format text
The Formatted text has commands to perform formatting tasks which are found on the home tab in the font group. When we want to format the text then first we have to select the text which we want to format, if want to format a single word then double click on it, we can also select a line of text, and then select an option to change the font, font size and we can make the text bold or italic or underline. In formatting text, head style, can make words bold text or italic text, also can underline the text, highlight the text, can make an unordered list and ordered list, we can change alignment as left or right or at the center.
2. Insert hyperlink(link)
The hyperlink in a document has a different color than other texts and it is underlined. A hyperlink in a document helps the reader to jump from one place in the document to a different file or website or go to the new emails.
We can add or delete hyperlinks in the word document. If we want to add a link in the document, first we have to select text or image which want to link, then right-click on the selected text or image choose the ‘Hyperlink’ option, link or hyperlink is depend on the version, after that, we have to select the type of destination which we want to link, it has some information that has to fill correctly, choose an option ‘Existing file or Web page’, go to the ‘Address’ text box then enter URL, then choose ‘Place in this document and select a location within the document, so now click on ‘Create new document’ go to the text box ‘Name of the document’ and enter the name, there is an edit section in which we can choose whether we want to edit the document now or later.
Then choose ‘Email address’ and click on the text box of ‘Email address’ then we can enter the email address to which the reader can send an email. There is also a ‘Type of subject’ option we can subject type and then click on ‘Ok’. The text now shows up as a hyperlink in the document.
3. Edit and Remove links
For editing the link first select the link which we want to edit and then select the Insert/edit link option, update the web address and then click on the ‘Create link’. We can remove or delete the existing hyperlink, for deleting the hyperlink right-click on it and click on the ‘Remove hyperlink’.
4. Copy and paste from word
The copy and paste function from the word we can use to remove the hidden Microsoft characters which may affect how our document will appear. To select and copy the word content, click on the ‘Paste’ special function button, select or tick on the bullet ‘Paste from Microsoft word’ then paste our word text in the text box and then click on ‘Complete paste’.
5. Add a table
A table is a combination of rows and columns and the intersection of rows and columns is called a cell. To create or insert a table in the document click on the ‘Insert’ tab which is on the ribbon then click on ‘Table’, the insert table window will be opened, we have to select the size of the table in columns and rows, and then click on ‘Ok’. When the table is created the ‘Tab’ key can be used to move from one cell to the other, by pressing the tab key new row is created, if we want to move one cell back in the table then we can ‘Shift+Tab’ keys, the arrow keys allow we to go up, down, left, right.
6. Edit a table
Microsoft word editing tools allow us to edit a table, if we want to edit a table then first we have to select a cell in which we want to edit then click on the table icon it will give some options out of them select ‘Edit table’ so that we can change the general setting of the table. While editing if we want to add a new row then click on the insert below or insert above, for adding the column click on the insert left or insert the right column button. We can also delete columns or rows from the table.
7. Html editor
We can also edit our text by using Html editor, this function is also provided by Microsoft word editing tools. To get the Html view and to edit text, click on the ‘File’ tab then click on ‘Open’, then we can browse the web page file, double click on the file name, our web file opens as a plain text file which has Html code.
8. Resize the edit window
We can also resize the edit window, it has resized button. By clicking on the resize button we will get the full-screen view of the edit window, to return its normal view, click on the same button.
Conclusion
In this article, we conclude that Microsoft Word is a powerful word processing application that has wonderful tools to get reader’s attention, also it has various features where we can do formatting, editing, searching, insertion of images as per the user’s requirement, which keeps track of our various commands that we use to create the document.
Recommended Articles
This is a guide to Microsoft Word Editing Tools. Here we discuss the various tools for editing in Microsoft word in a detailed explanation. You may also have a look at the following articles to learn more –
- Video Editing Tools
- Microsoft Word Shortcut Keys
- Microsoft Word Features
- VMware Tools