
Содержание
- Names in formulas
- Learn more about using names
- Define a name for a cell or cell range on a worksheet
- Manage names by using the Name Manager dialog box
- Need more help?
- Define and use names in formulas
- Name a cell
- Define names from a selected range
- Use names in formulas
- Manage names in your workbook with Name Manager
- Name a cell
- Define names from a selected range
- Use names in formulas
- Manage names in your workbook with Name Manager
- Need more help?
Names in formulas
A name is a meaningful shorthand that makes it easier to understand the purpose of a cell reference, constant, formula, or table, each of which may be difficult to understand at first glance. The following information shows common examples of names and how they can improve clarity.
Example with no name
Example with a name
Learn more about using names
There are several types of names you can create and use.
Defined name A name representing a cell, range of cells, formula, or constant value. You can create your own defined name, or Excel can create a defined name for you, such as when you set a print area.
Table name A name for an Excel table, which is a collection of data about a particular subject stored in records (rows) and fields (columns). Excel creates a default Excel table name of Table1, Table2, and so on, each time you insert an Excel table. You can change a table’s name to make it more meaningful. For more information about Excel tables, see Using structured references with Excel tables.
All names have a scope, either to a specific worksheet (also called the local worksheet level) or to the entire workbook (also called the global workbook level). The scope of a name is the location within which the name is recognized without qualification. For example:
If you have defined a name, such as Budget_FY08, and its scope is Sheet1, that name, if not qualified, is recognized only in Sheet1, but not in other sheets.
To use a local worksheet name in another worksheet, you can qualify it by preceding it with the worksheet name. For example:
If you have defined a name, such as Sales_Dept_Goals, and its scope is the workbook, that name is recognized for all worksheets in that workbook, but not other workbooks.
A name must always be unique within its scope. Excel prevents you from defining a name that already exists within its scope. However, you can use the same name in different scopes. For example, you can define a name, such as GrossProfit, that is scoped to Sheet1, Sheet2, and Sheet3 in the same workbook. Although each name is the same, each name is unique within its scope. You might do this to ensure that a formula that uses the name, GrossProfit, is always referencing the same cells at the local worksheet level.
You can even define the same name, GrossProfit, for the global workbook level, but again the scope is unique. In this case, however, there can be a name conflict. To resolve this conflict, by default Excel uses the name defined for the worksheet because the local worksheet level takes precedence over the global workbook level. If you want to override the precedence and use the workbook name, you can disambiguate the name by prefixing the workbook name. For example:
You can override the local worksheet level for all worksheets in the workbook. One exception is for the first worksheet, which always uses the local name if there is a name conflict that cannot be overridden.
You define a name by using the:
Defined Names box on the formula bar This is best used for creating a workbook level name for a selected range.
Define name from selection You can conveniently create names from existing row and column labels by using a selection of cells in the worksheet.
New Name dialog box This is best used for when you want more flexibility in creating names, such as specifying a local worksheet level scope or creating a name comment.
Note: By default, names use absolute cell references.
You can enter a name by:
Typing Typing the name, for example, as an argument to a formula.
Using Formula AutoComplete Use the Formula AutoComplete drop-down list, where valid names are automatically listed for you.
Selecting from the Use in Formula command Select a defined name from a list available from the Use in Formula command in the Defined Names group on the Formulas tab.
You can also create a list of defined names in a workbook. Locate an area with two empty columns on the worksheet (the list will contain two columns, one for the name and one for a description of the name). Select a cell that will be the upper-left corner of the list. On the Formulas tab, in the Defined Names group, click Use in Formula, click Paste and then, in the Paste Names dialog box, click Paste List.
The following is a list of syntax rules for creating and editing names.
Valid characters The first character of a name must be a letter, an underscore character (_), or a backslash (). Remaining characters in the name can be letters, numbers, periods, and underscore characters.
Tip: You cannot use the uppercase and lowercase characters «C», «c», «R», or «r» as a defined name, because they are used as shorthand for selecting a row or column for the currently selected cell when you enter them in a Name or Go To text box.
Cell references disallowed Names cannot be the same as a cell reference, such as Z$100 or R1C1.
Spaces are not valid Spaces are not allowed as part of a name. Use the underscore character (_) and period (.) as word separators, such as, Sales_Tax or First.Quarter.
Name length A name can contain up to 255 characters.
Case sensitivity Names can contain uppercase and lowercase letters. Excel does not distinguish between uppercase and lowercase characters in names. For example, if you create the name Sales and then another name called SALES in the same workbook, Excel prompts you to choose a unique name.
Define a name for a cell or cell range on a worksheet
Select the cell, range of cells, or nonadjacent selections that you want to name.
Click the Name box at the left end of the formula bar.

Type the name you want to use to refer to your selection. Names can be up to 255 characters in length.
Note: You cannot name a cell while you are changing the contents of the cell.
You can convert existing row and column labels to names.
Select the range you want to name, including the row or column labels.
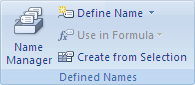
On the Formulas tab, in the Defined Names group, click Create from Selection.
In the Create Names from Selection dialog box, designate the location that contains the labels by selecting the Top row, Left column, Bottom row, or Right column check box. A name created by using this procedure refers only to the cells that contain values and excludes the existing row and column labels.
On the Formulas tab, in the Defined Names group, click Define Name.
In the New Name dialog box, in the Name box, type the name you want to use for your reference.
Note: Names can be up to 255 characters in length.
To specify the scope of the name, in the Scope drop-down list box, select Workbook or the name of a worksheet in the workbook.
Optionally, in the Comment box, enter a descriptive comment up to 255 characters.
In the Refers to box, do one of the following:
To enter a cell reference, type the cell reference.
Tip: The current selection is entered by default. To enter other cell references as an argument, click Collapse Dialog  (which temporarily shrinks the dialog box), select the cells on the worksheet, and then click Expand Dialog
  .
.
To enter a constant, type = (equal sign) and then type the constant value.
To enter a formula, type = and then type the formula.
To finish and return to the worksheet, click OK.
Tip: To make the New Name dialog box wider or longer, click and drag the grip handle at the bottom.
Manage names by using the Name Manager dialog box
Use the Name Manager dialog box to work with all the defined names and table names in a workbook. For example, you may want to find names with errors, confirm the value and reference of a name, view or edit descriptive comments, or determine the scope. You can also sort and filter the list of names, and easily add, change, or delete names from one location.
To open the Name Manager dialog box, on the Formulas tab, in the Defined Names group, click Name Manager.
The Name Manager dialog box displays the following information about each name in a list box:
One of the following:
A defined name, which is indicated by a defined name icon. 
A table name, which is indicated by a table name icon. 
The current value of the name, such as the results of a formula, a string constant, a cell range, an error, an array of values, or a placeholder if the formula cannot be evaluated. The following are representative examples:
«this is my string constant»
The current reference for the name. The following are representative examples:
A worksheet name, if the scope is the local worksheet level.
«Workbook,» if the scope is the global worksheet level.
Additional information about the name up to 255 characters. The following are representative examples:
This value will expire on May 2, 2007.
Don’t delete! Critical name!
Based on the ISO certification exam numbers.
You cannot use the Name Manager dialog box while you are changing the contents of a cell.
The Name Manager dialog box does not display names defined in Visual Basic for Applications (VBA), or hidden names (the Visible property of the name is set to «False»).
To automatically size the column to fit the longest value in that column, double-click the right side of the column header.
To sort the list of names in ascending or descending order, click the column header.
Use the commands in the Filter drop-down list to quickly display a subset of names. Selecting each command toggles the filter operation on or off, making it easy to combine or remove different filter operations to get the results you want.
To filter the list of names, do one or more of the following:
Names Scoped To Worksheet
Display only those names that are local to a worksheet.
Names Scoped To Workbook
Display only those names that are global to a workbook.
Names With Errors
Display only those names with values containing errors (such as #REF, #VALUE, or #NAME).
Names Without Errors
Display only those names with values that do not contain errors.
Display only names defined by you or by Excel, such as a print area.
Display only table names.
If you change a defined name or table name, all uses of that name in the workbook are also changed.
On the Formulas tab, in the Defined Names group, click Name Manager.
In the Name Manager dialog box, click the name that you want to change, and then click Edit.
Tip: You can also double-click the name.
In the Edit Name dialog box, in the Name box, type the new name for the reference.
In the Refers to box, change the reference, and then click OK.
In the Name Manager dialog box, in the Refers to box, change the cell, formula, or constant represented by the name.
To cancel unwanted or accidental changes, click Cancel  , or press ESC.
To save changes, click Commit  , or press ENTER.
The Close button only closes the Name Manager dialog box. It is not required for changes that have already been made.
On the Formulas tab, in the Defined Names group, click Name Manager.
In the Name Manager dialog box, click the name that you want to change.
Select one or more names by doing one of the following:
To select a name, click it.
To select more than one name in a contiguous group, click and drag the names, or press SHIFT and click the mouse button for each name in the group.
To select more than one name in a noncontiguous group, press CTRL and click the mouse button for each name in the group.
Click Delete. You can also press DELETE.
Click OK to confirm the deletion.
The Close button only closes the Name Manager dialog box. It is not required for changes that have already been made.
Need more help?
You can always ask an expert in the Excel Tech Community or get support in the Answers community.
Источник
Define and use names in formulas
By using names, you can make your formulas much easier to understand and maintain. You can define a name for a cell range, function, constant, or table. Once you adopt the practice of using names in your workbook, you can easily update, audit, and manage these names.

Name a cell
In the Name Box, type a name.

To reference this value in another table, type th equal sign (=) and the Name, then select Enter.
Define names from a selected range
Select the range you want to name, including the row or column labels.
Select Formulas > Create from Selection.
In the Create Names from Selection dialog box, designate the location that contains the labels by selecting the Top row, Left column, Bottom row, or Right column check box.
Excel names the cells based on the labels in the range you designated.
Use names in formulas
Select a cell and enter a formula.
Place the cursor where you want to use the name in that formula.
Type the first letter of the name, and select the name from the list that appears.
Or, select Formulas > Use in Formula and select the name you want to use.
Manage names in your workbook with Name Manager
On the ribbon, go to Formulas > Name Manager. You can then create, edit, delete, and find all the names used in the workbook.
Name a cell
In the Name Box, type a name.
Define names from a selected range
Select the range you want to name, including the row or column labels.
Select Formulas > Create from Selection.
In the Create Names from Selection dialog box, designate the location that contains the labels by selecting the Top row, Left column, Bottom row, or Right column check box.
Excel names the cells based on the labels in the range you designated.
Use names in formulas
Select a cell and enter a formula.
Place the cursor where you want to use the name in that formula.
Type the first letter of the name, and select the name from the list that appears.
Or, select Formulas > Use in Formula and select the name you want to use.
Manage names in your workbook with Name Manager
On the Ribbon, go to Formulas > Defined Names > Name Manager. You can then create, edit, delete, and find all the names used in the workbook.
In Excel for the web, you can use the named ranges you’ve defined in Excel for Windows or Mac. Select a name from the Name Box to go to the range’s location, or use the Named Range in a formula.
For now, creating a new Named Range in Excel for the web is not available.
Need more help?
You can always ask an expert in the Excel Tech Community or get support in the Answers community.
Источник
Name a cell
-
Select a cell.
-
In the Name Box, type a name.

-
Press Enter.
To reference this value in another table, type th equal sign (=) and the Name, then select Enter.
Define names from a selected range
-
Select the range you want to name, including the row or column labels.
-
Select Formulas > Create from Selection.
-
In the Create Names from Selection dialog box, designate the location that contains the labels by selecting the Top row, Left column, Bottom row, or Right column check box.
-
Select OK.
Excel names the cells based on the labels in the range you designated.
Use names in formulas
-
Select a cell and enter a formula.
-
Place the cursor where you want to use the name in that formula.
-
Type the first letter of the name, and select the name from the list that appears.
Or, select Formulas > Use in Formula and select the name you want to use.
-
Press Enter.
Manage names in your workbook with Name Manager
-
On the ribbon, go to Formulas > Name Manager. You can then create, edit, delete, and find all the names used in the workbook.
Name a cell
-
Select a cell.
-
In the Name Box, type a name.
-
Press Enter.
Define names from a selected range
-
Select the range you want to name, including the row or column labels.
-
Select Formulas > Create from Selection.
-
In the Create Names from Selection dialog box, designate the location that contains the labels by selecting the Top row,Left column, Bottom row, or Right column check box.
-
Select OK.
Excel names the cells based on the labels in the range you designated.
Use names in formulas
-
Select a cell and enter a formula.
-
Place the cursor where you want to use the name in that formula.
-
Type the first letter of the name, and select the name from the list that appears.
Or, select Formulas > Use in Formula and select the name you want to use.
-
Press Enter.
Manage names in your workbook with Name Manager
-
On the Ribbon, go to Formulas > Defined Names > Name Manager. You can then create, edit, delete, and find all the names used in the workbook.
In Excel for the web, you can use the named ranges you’ve defined in Excel for Windows or Mac. Select a name from the Name Box to go to the range’s location, or use the Named Range in a formula.
For now, creating a new Named Range in Excel for the web is not available.
What is a Defined Name?
In Excel, you have the option to assign a Name to a cell, or to a Range of cells. This name is reffered to as a Defined Name.
A Defined Name will give more flexibility than before, you can refer to it in your formulas, or chart series.
Also, the name can be located anywhere in your workbook, you don’t need to use cell or range references.
To create a Defined Name,
you have multiple ways:
- you can simply right click the cell or the range and select Define Name from the list:

Range Right Click Menu
This action will bring up the New Name Dialog Box:

New Name
All you have to do now is to type a relevant name to your chosen range into the “Name:” field and click the OK button.
- Or, you can choose Define Name from the Ribbon, from Formulas tab, the Defined Names group:

Formula Tab in Ribbon
This action will open the same New Name Dialog Box you’ve seen above: Add New Name
- Another way to create a Defined Name is to select the range, then simply type into the Name Box the name of your selected range. The Name Box is located to the left of the Formula Bar:

Name Box
Note: This method will create a name scoped to the workbook level! (also known as global name)
The Scope of a Defined Name:
All Defined Names have a scope, the scope can be:
- a specific worksheet (a local name, defined at worksheet level)
- the entire workbook (a workbook name, defined at workbook level).
If you create a Defined Name at worksheet level, you will not be able to use it in other worksheet, unless you provide a qualified reference (the worksheet name needs to be typed before the Defined Name):
=SUMPRODUCT(‘Sales’!Units_Sold*Price_Per_unit)
You Can Edit The Defined Names anytime!
All you have to do is to open the Name Manager, which is located in the same Formulas Tab, Defined Names group:

Name Manager
Select the name from the list and click the Edit button, or simply double click the name.
Syntax Rules for Defined Names:
The following list of rules is not absolutely necessary to know, but it may be useful to avoid errors when creating new names:
- Always make sure that the first character of a name is a letter, an underscore character (_), or a backslash (). Never start with a number.
- Avoid names that have the same structure as Cell references: AB2355 is not a valid name, for example. Keep in mind that the names are case insensitive, Excel will not make a difference between TotalSales and totalsales
- Do not use Spaces, always use an underscore character (_) or a period character (.) as a word delimiter! Or, just start the name with uper case letters, like: TotalSales
- A name can contain up to 255 characters. For me, is far more than necessary, I prefer short and meaningful names 🙂
Tip:
If your formulas are using cell references instead of Defined Names references, you can replace the cell references with the corresponding Defined Names very easy:
From Formulas Tab, Defined Names group, expand the Dropdown from Define Name button, and click on Apply Names. If the formula contains a range reference which has a Defined Name, the range from the formula will be replaced with the name.
For example, if the Defined Name: Units_Sold refers to range D1:D10, and you have a formula in your worksheet referring to the same range of cells:
=SUMPRODUCT($D$1:$D$10*Price_Per_unit), clicking on Apply Names will change the formula to:=SUMPRODUCT(Units_Sold*Price_Per_unit)
As you work with data in Excel, you’ll likely find yourself using data in many different categories. Let’s learn how to use Define Name in Microsoft Excel.
As you work with data in Excel, you’ll likely find yourself using data in many different categories. Values exist in ranges, and you may want to identify these ranges by name. Fortunately, that’s quite easy to do in Excel. Let’s learn how to use Define Name in Microsoft Excel.
How to Use Define Name in Excel
Naming ranges in Excel helps streamline your formulas. Instead of selecting the entire range and placing it in the formula, you can simply use the name of your choice. To use Define Name and give your range a name of its own, begin by clicking and dragging your cursor to select the cell range that you want to name. In this example, the range is C1:C5.
Then, find the Formulas tab and click on it. Formulas sits on Excel’s ribbon at the top of your screen. Here, you’ll see a variety of options. The one you’re looking for is the Define Name button near the center.

Click on it, and Excel will open the Define Name menu. Here, you can choose from pre-selected names already found inside your workbook. Or you can type in your own custom name in the box on the right side. Go ahead and type in a name, like Revenue, then click OK.

Excel will define a name for the selected range. To put it to use, click into an empty cell. Imagine that you want to sum the values in the named range. To do so, you can simply type the following formula:
=SUM(REVENUE)

Hit Enter on your keyboard, and Excel will sum the values. Since the range is named, Excel knows where to look based on the name. You can avoid clicking and dragging to select the range with this technique.
As you can see, Define Name in Excel is a quick and easy way to classify, name, and work with data ranges.

Defined Names
This page describes how to use Defined Names in your workbooks.

A Defined Name is a text descriptor that you can use to describe the meaning of or content of a cell, a range of cells,
a constant, or a formula. Once the Defined Name is established, you can use that Name wherever you would ordinarily use
the actual cell address or other content. This makes the formulas much easier to understand and maintain. For example, the formula
=G12*K15
isn’t very meaningful unless you happen to know the meaning of cells G12 and K15.
However, if you assign Defined Names to G12 and K15, you can
write your formula similar to the following:
=Income*TaxRate
Clearly, using the Defined Names makes the formula much easier to understand and maintain.

There are two ways of creating a Defined Name (not including doing so with VBA
code). The first method is to select the cell or range of cells to which you
want to assign a Name. Then, click in the Name Box and type the Name. The Name Box is the white
rectangle to the left of the «A» column heading and above the «1» row heading. If you type in the Name Box a Name that is already defined,
Excel will display the range referenced by that Name. It will not overwrite and change the existing Defined Name. The second way to create a Name
is to select the cell or range of cells to which you want to assign a Name, go to the Insert menu, choose Name, then
Define. This will display the Defined Names dialog box. There, type in the Name you want to use. In that dialog, you can also
change the cell(s) to which an existing Name refers.
A Defined Name must begin with a letter or an underscore ( _ ) and consist of only letters, numbers, or underscores. Spaces are not permitted in
a Defined Name. Moreover, a Defined Name may not be the same as a valid cell reference. For example, the name
AB11 is invalid because AB11 is a valid cell reference. Names are not
case sensitive.
 |
CAUTION: If you are working on a workbook that will be used in both Excel 2003 and Excel 2007, be aware that many Names that are valid in Excel 2003 are invalid in Excel 2007. This is due to the increased number of columns in Excel 2007. For example, in Excel 2003, the Name ABC1 is valid because it is not a cell reference. However, in Excel 2007, ABC1 is, in fact, a valid cell reference, so the Name is invalid. |
The user interface for working with Defined Names in Excel 2003 and earlier is relatively primitive. Jan Karel Pieterse has created a nice
add-in, available for free at www.jkp-ads.com/officemarketplacenm-en.asp, that
greatly improves on the basic Defined Name manager. The Defined Name Manager in Excel 2007 and later has been greatly improved over
previous versions.
A Defined Name is not limited to referencing a cell or range of cells. A Name can refer to a constant, either a numerical value or
a text value. It can also refer to a formula. For example, you could have a Defined Name of MaxRows with a value of 25, and then use
that name anywhere you would otherwise use that number. Using a Name has the advantage that if you use it in multiple locations and later
need to change the value, you need change it only in the definition and the new value will be used in all other locations.
When you use a Define Name in a formula or cell, you don’t include parentheses as you would with a function. For example, if you have
a Name defined as MyName with a value of Chip Pearson, you would enter in the
cells =MyName, not =MyName(). Using the parentheses would cause
a #REF error.
A Defined Name may also contain a formula. For example, you can define a Name named TheSum and
assign the formula =SUM($A$1:$A$100) to the Name. Then, you can use =TheSum
anywhere you want to get the sum of A1:A100. As noted before, you do not use parentheses in the reference to
the name. =TheSum() will cause a #VALUE error. You can use any formula you want
in a Name, but you cannot pass parameters to the formula defined by the Name.
If you use a formula in a Defined Name, that formula is evaluated as if it were an
array formula. There is no way to force a formula in a Defined Name to be
evaluated as a non-array formula.
Typically, a Defined Name has global scope. This means that the Name may be defined on any one worksheet and then referenced on any worksheet
in the workbook. For example, if you have a cell, say A1 on Sheet1, that
contains the last printed date, and you name that cell LastPrintDate, you can use the
Name
LastPrintDate on any worksheet and it will always refer back to A1 on
Sheet1.
It is possible, though, to have Names that are scoped to only a single worksheet, and any or all of the worksheets may have a sheet scoped
names with the same name. When that Name is used on a worksheet, the value of the Name on the worksheet that is using it is evaluated.
If you have several sheet scoped names, on different worksheets, those names need not refer to the same cell reference. That is, the name
SheetLastPrinted on Sheet1 may refer to A1
on Sheet1, and the name SheetLastPrinted
on Sheet2 can refer to K10 on Sheet2.
When the name SheetLastPrinted is used on Sheet1, the value
is taken from A1 on Sheet1. If the
Name is used on
Sheet2, the value is taken from K10 on Sheet2.
To create sheet scoped Names, select the cell to be named, open the Defined Name Dialog (Insert menu, Name, then
Define), and enter the name as Sheet1!TheName (where Sheet1 is the
name of the sheet on which the Name should be scoped. The presences of the sheet name causes Excel
to make the name sheet scoped. Repeat this process on all worksheets that need to use the sheet scoped name. When defining the Names, enclose
the sheet name within apostrophes if the sheet name contains spaces or other non-numeric characters.
E.g.,
‘Sheet One’!TheName.
One of the very useful features of Defined Names is to circumvent some restrictions of Conditional Formatting and Data Validation.
In Condition Formatting, if you use the Formula Is method, all cells in the formula must be on the same worksheet as the
cell to which Conditional Formatting is applied. For example, if you are applying Conditional Formatting to cell
A1 on Sheet1, you will not be able to use a formula like
=Sheet2!A10>100, because the formula refers to a cell on another sheet. You can get around this
limitaiton by assigning a Name to the cell on the other sheet — e.g., assign the name TestVal to
Sheet2!A10 — and then use the defined name in the Conditional Formatting dialog:
=TestVal>10.
This same method can be used for the values list in a List type Data Validation constraint. If your list of valid values is in the
range Sheet2!A1:A10, you cannot reference that range as the source of the validation list if the cell being
validated is on a different worksheet. However, if you assign a Defined Name to that range, e.g.,
ValidList, you can use =ValidList as the values list for Data Validation.
In Excel 2003 and earlier, the defined name box cannot be resized, and it truncates the display of names at about 16 characters. So,
if you have two long names like SomeLongDefinedNameOne and SomeLongDefinedNameTwo,
you cannot tell which is which in the Name Box dropdown. However, using a bit of code, you can expand the width of the drop down list. This
code will not widen the name box itself, as it appears on the formula bar, but widens the drop down list. The code to do this
is shown below.
Private Declare Function FindWindow Lib "user32" Alias "FindWindowA" _
    (ByVal lpClassName As String,  _
    ByVal lpWindowName As String) As Long

Private Declare Function FindWindowEx Lib "user32" Alias "FindWindowExA" _
    (ByVal hWnd1 As Long, ByVal hWnd2 As Long, _
    ByVal lpsz1 As String, ByVal lpsz2 As String) As Long

Private Declare Function SendMessage Lib "user32" Alias "SendMessageA" _
    (ByVal hwnd As Long, ByVal wMsg As Long, _
    ByVal wParam As Long, lParam As Any) As Long

Sub WidenNameBoxDrop2()
    Dim Res As Long
    Const CB_SETDROPPEDWIDTH = 352
    Const cWidth = 400 '< Change To Desire Width in Pixels
    Res = SendMessage( _
        FindWindowEx( _
            FindWindowEx( _
                FindWindow("XLMAIN", Application.Caption) _
                    , 0, "EXCEL;", vbNullString) _
              , 0, "combobox", vbNullString), _
            CB_SETDROPPEDWIDTH, cWidth, 0)
End Sub
Put all of the code shown above in some code module, and then in your Auto_Open procedure or in the
Workbook_Open procedure call the WidenNameBoxDrop2 procedure. For example,
Sub Auto_Open()
    WidenNameBoxDrop2
End Sub
In Excel 2007 and later, the Name Box is sizable, so the code given above in not necessary.
You can apply Names to existing formulas. If your formula uses regular cell references and you later assign Names to those cells, you
can automatically update the formula to use the Defined Names. For example, suppose you have the formula
=A5+D5. If you later assign the Name CellOne to A5
and CellTwo to D5, you can select the cell with the formula, go to the
Insert menu, choose Name, and then Apply. Choose the appropriate names in the list, or simply select them
all, and click OK. Excel will alter the formula to =CellOne+CellTwo.
You can use VBA code to work with defined names. To add a name, use
ThisWorkbook.Names.Add Name:="SomeName", _
    RefersTo:=Worksheets("Sheet2").Range("A1:A10")
This will assign the Name SomeName to the range A1:A10 on
Sheet2. If you add a Name that already exists, the Name is automatically deleted and recreated with the
new reference. It is not necessary to delete the Name before recreating it.
By default, names created manually or with VBA code are visible — they will appear in the Name Box drop down and in the Names dialog.
You can, however, make the name hidden so that it isn’t visible to the user. A hidden Name can be used in any manner just like a normal,
visible Name. To make a name hidden, you set the Visible parameter to False. For example,
ThisWorkbook.Names.Add Name:="SomeName2", _
    RefersTo:=Worksheets("Sheet2").Range("B1:B10"), _
    Visible:=False
The name SomeName2 can be used exactly as a visible name, but will not appear to the user. The only way to
hide a Defined Name is via VBA code. There is nothing in the Excel user interface that allows you to hide a Name.
To delete a name using VBA code, use code like the following:
ThisWorkbook.Names("TheName").Delete
Using Defined Names in VBA code is different than using them in worksheet cells. You must get the value of the Name using the
RefersTo or RefersToRange properties. If a Name doesn’t refer to a cell or
range of cells (e.g., it refers to a constant), an attempt to use RefersToRange will fail. To get the
value of a Name that contains a constant, use the RefersTo property.
V = ThisWorkbook.Names("TheName").RefersTo
If the name refers to a range of 2 or more cells, you can assign it to a Range type variable. For example,
Dim R As Range
Set R = ThisWorkbook.Names("BigName").RefersToRange
Debug.Print R.Address
If the name refers to a constant, you’ll need to strip out some characters to get the actual value. For example, if the
name MyName refers to the text constant Chip Pearson, the
RefersTo property will return the text =»Chip Pearson». You need to
strip out the leading equals sign and the enclosing quotes. You can do this with code like the following:
Dim S As String
S = ThisWorkbook.Names("MyName").RefersTo
S = Mid(S, 3, Len(S) - 3)
Debug.Print S
If the name refers to a numeric constant, there will be a leading equal sign but no quotes. Thus, you’ll need to strip off
the leading equals sign. The code below illustrates this.
Dim S As String
S = ThisWorkbook.Names("MaxPages").RefersTo
S = Mid(S, 2)
Debug.Print S
We can put all this together into a function that will return what the given name refers to, be it a range, text constant, or
numeric constant.
Function GetNameRefersTo(TheName As String) As String
    Dim S As String
    Dim HasRef As Boolean
    Dim R As Range
    Dim NM As Name
    Set NM = ThisWorkbook.Names(TheName)
    On Error Resume Next
    Set R = NM.RefersToRange
    If Err.Number = 0 Then
        HasRef = True
    Else
        HasRef = False
    End If
    If HasRef = True Then
        S = R.Text
    Else
        S = NM.RefersTo
        If StrComp(Mid(S, 2, 1), Chr(34), vbBinaryCompare) = 0 Then
            ' text constant
            S = Mid(S, 3, Len(S) - 3)
        Else
            ' numeric contant
            S = Mid(S, 2)
        End If
    End If
    GetNameRefersTo = S
End Function
 |
This page last updated: 6-June-2009. |