
If you don’t want content reviewers to accidentally modify your document, you can make the document read only before sending it for review. Another method is to restrict formatting and editing.
Making your document a read-only file means that the document can be read or copied but not modified. If one of the reviewers tries to make changes to a read-only file, the changes can be saved only by giving the document a new name or saved to a new location.
Note: Making your document read only doesn’t prevent someone from making a new copy of the document and saving it with a different name or in a different place.
Restrict editing
You can restrict the editing of a document, so that the document opens in view-only mode.
-
Select File > Info.
-
Select Protect Document.

Change the viewing mode
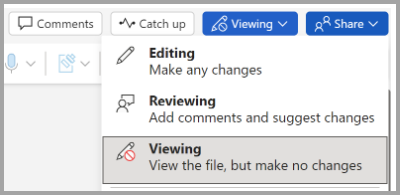
You can switch from View only to other modes granted by the document owner (Editing, Reviewing).
-
Select the Viewing tab to open the options.
-
Select Editing or Reviewing.
Note: The only options that can be selected are the one(s) that the document owner has granted.
Restrict editing
-
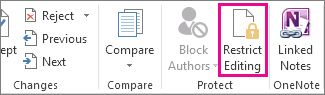
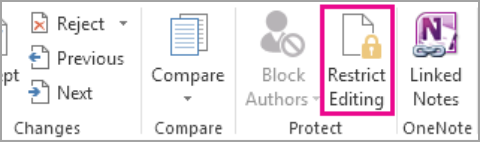
Click Review > Restrict Editing.

-
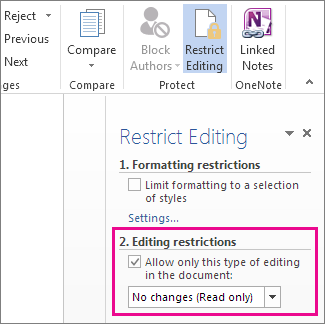
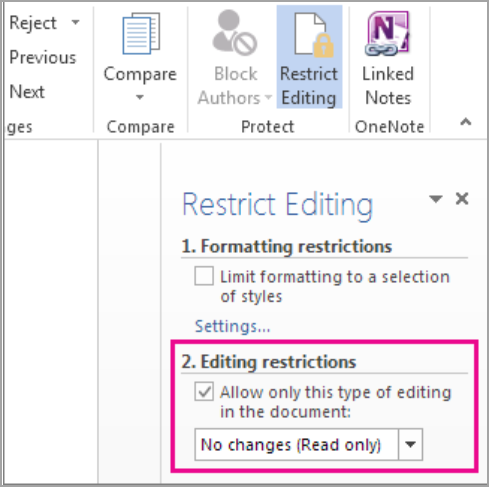
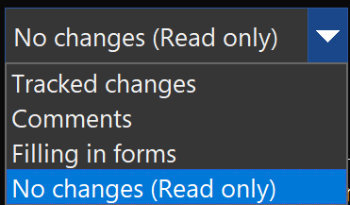
Under Editing restrictions, check Allow only this type of editing in the document, and make sure the list says No changes (Read only).
-
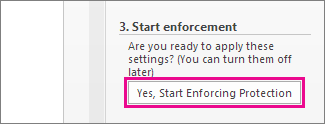
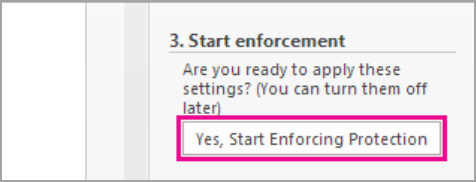
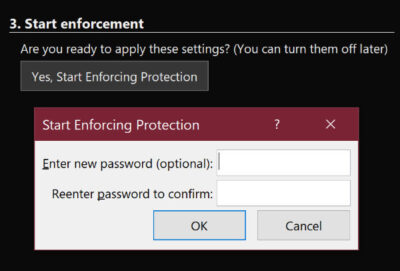
Click Yes, Start Enforcing Protection.
-
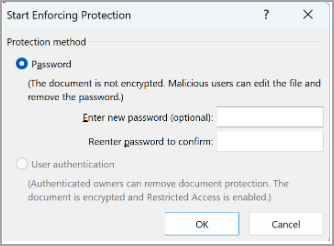
In the box that opens, type a password you’ll be able to remember, and then type the password again to confirm it.
The password’s optional. But if you don’t add a password, anyone can click Stop Protection and edit the document.
Set to ‘Always open as Read-Only’
1. Select File > Info > Protect Document.
2. Select Always open Read-Only.
Open a document shared as read only
When you open a document that is shared as Read Only, you have two options.
To open the document as read only
Select Yes
To open the document in editing mode
Select No
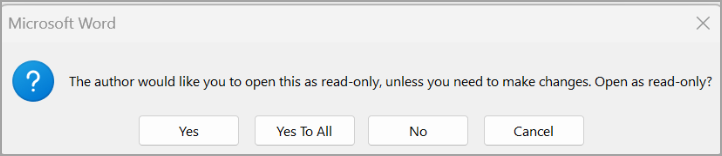
Note: You can close and reopen the document or save a copy of the document to open in edit mode.
Restrict Editing
-
Click Review > Protect > Restrict Editing.
-
Under Editing restrictions, select Allow only this type of editing in the document, and make sure the list says No changes (Read only).
-
Select Yes, Start Enforcing Protection.
-
In the box that opens, type a password you’ll be able to remember, and then type the password again to confirm it. The password is optional. But if you don’t add a password, anyone can select Stop Protection and edit the document.
See also
Add or remove protection in your document, workbook, or presentation
Save as read only
-
Click the Microsoft Office Button
, and then click Save or Save As if you have previously saved the document. -
Click Tools.
-
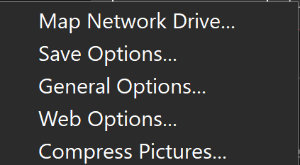
Click General Options.
-
Click the Read-only recommended check box.
-
Click OK.
-
Save the document. You might need to save it as another file name if you have already named the document.
 , and then click Save or Save As if you have previously saved the document.
Remove read only
-
Click the Microsoft Office Button
, and then click Save or Save As if you have previously saved the document. -
Click Tools.
-
Click General Options.
-
Clear the Read-only recommended check box.
-
Click OK.
-
Save the document. You might need to save it as another file name if you have already named the document.
Top of page
Restrict formatting and editing
You can stop content reviewers from accidentally modifying your document when you restrict formatting and editing.
-
On the Review tab, in the Protect group, click Protect Document.
-
Under Restrict Reviewing Options, click Restrict Formatting and Editing.
-
In the Restrict Formatting and Editing task pane, under Formatting restrictions, Editing restrictions, and Start enforcement, make the selections that meet your formatting and editing needs.
Unrestrict formatting and editing
-
On the Review tab, in the Protect group, click Protect Document.
-
To clear the check mark, click Restrict Formatting and Editing under Restrict Reviewing Options.
Top of page
TheTechieSenior.com is reader supported. We may earn a commission if you buy through links on this site. As an Amazon Associate, we earn from qualifying purchases. Learn more here.
Writers often send their works-in-progress to beta readers. Freelance writers may send articles for approval. In either of those cases, it could be appropriate for you to make Word documents Read-only. We’ll show you how. We’ll also show you how to password protect your Word documents.
Table of Contents
What is Read-only in Microsoft Word?
Read-only is a protective measure that you can set for your documents which can deter readers from changing the file without permission.
Document protection in Word for Windows offers similar, but slightly different options than Word for Macs. We’ll look at those differences shortly.
Can Microsoft Word Read-only files be edited?
It is important to understand that setting a document to Read-Only does not prevent that document being edited.
When a Read-only document is first opened on the recipient’s computer, it opens with a bar across the top advising that the document is in Read-only mode.
There is a button in the bar that allows the recipient to open the file with Read-only mode turned off and edit the file.
When you set a document to Read-only, the document that you protect by making it Read-only can’t be edited by anyone but you unless they choose to override the Read-only mode as described above.
Changes can be made if the document is saved under a new file name. Saving under a new name creates a new document. Changes can be made to that copy.
You can password protect the file which will limit those who can edit the file to those who have the password.
You can mark a file as Final, but like Read-only, the recipient can still choose to edit the file.
How to make Word documents read-only
MS Word for Windows and Macs both allow you to apply Read-only protection to your entire document.
You can set a file to be Read-only without requiring a password. Remember, if the document is not password protected, the Read-only setting can be changed by anyone.
Passwords are entirely optional but highly recommended if you want to discourage changes being made to your original file by an unauthorized reader.
In the sections that follow, we’ll look first at Read-only mode in Microsoft Word for Macs, then Ms Word for Windows.
Make Word documents Read-only in Microsoft Word for Macs
The following instructions will help you make a document Read-only in Word for Macs.
With the document open, use either of the following methods.
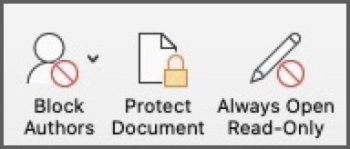
- Open the Review tab.
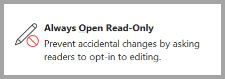
- In the Protect section (toward the right), click Always Open Read-Only.

- Save the document.
OR
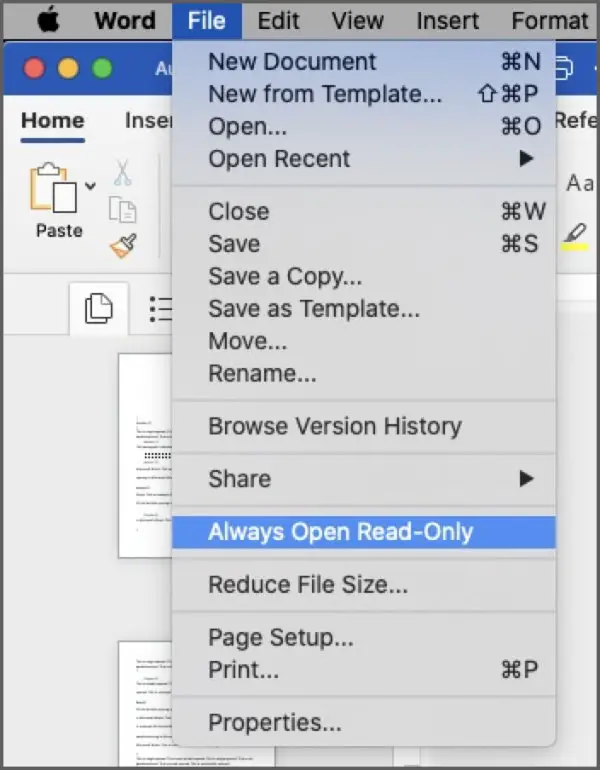
- Open the File Menu.
- Select Always Open Read-Only.
- Save your document.
The next time the document is opened, it should open in Read-only mode.
Password protect a document in Word for Macs
To password protect a document in Microsoft Word for Macs, use either of the following methods to open the Protect Document panel.
- Open the Review tab.
- Click the Protect Document button.
OR
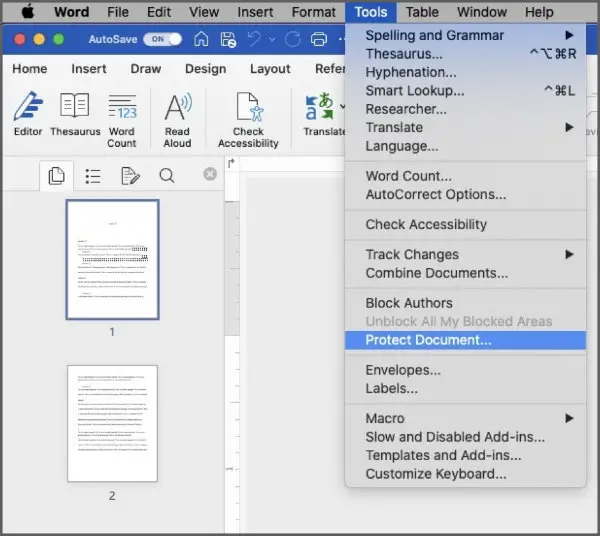
- Open the Tools menu.
- Select Protect Document….
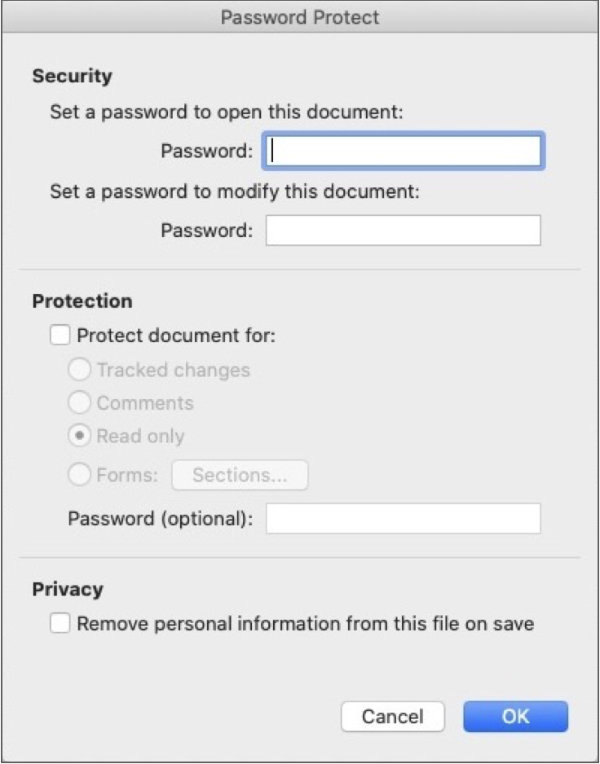
Either of the above methods will open the same Password Protect settings panel.
- In the first section of the settings panel, type a password in the first box if you want to require a password to open the file.
- Type a password in the second box if you want to require a password to modify the document.
- Click OK.
- Save your document.
When anyone opens the file, it should require a password to access it. Since you created the password, you will have to provide the recipient of the document with the password.
Make sections of a document Read-only in MS Word for Macs
It is possible to set a document as Read-only, but allow part of the document to be modified.
You might need to leave one part of a document editable if you have a form in a document. Your reader could fill the form in without being able to change the surrounding text.
Another example might be a writer who sends a document out asking for alternate ideas in one paragraph. She could set that one paragraph to be editable and the remainder of the file to be Read-only.
In Word for Macs, that is done through the use of sections.
Divide your document so that the part for which modification is allowed is in a section of its own. If you want non-contiguous paragraphs to be modifiable, place each of those paragraphs in its own section.
Let’s assume you have set a paragraph in a section of its own. To make that section of a Read-only document editable, first follow the steps above to make the entire document Read-only.
Then, click the Protect Document button in the Review tab.
OR
Select Protect Document… from the Tools menu.
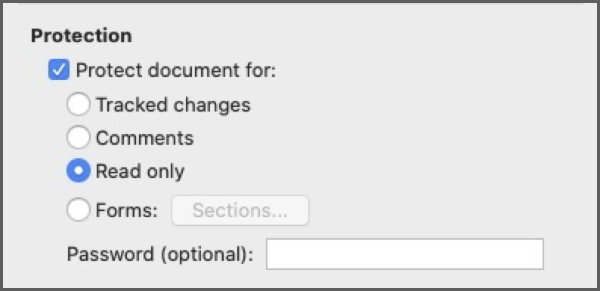
- In the Protection section, check the box labeled Protect document for….
- The last item in that section is Forms with a Sections… button beside it.
- Click the Sections button. Note: If your document has no sections, Forms and the Sections… button will be greyed out and unavailable. If your document includes sections, but no forms, only the Sections button will be active.
- You will see a list of sections in your document. Every section that is checked and highlighted is protected. To make a section editable, uncheck the box next to it. Click the Ok button to save your section selection.
- Fill in the appropriate Password fields if you want your document password protected also.
- Click the next Ok button to save your document protection settings.
- Save your document.
You should now have a document that is Read-only, but with a section that is editable.
If you look closely you will see a thin cursor at the beginning of the unprotected section. If you don’t want to make changes at that point you can move the cursor further into the editable section.
You can click anywhere in the protected document and possibly see your mouse or trackpad cursor flash there and disappear. That is because the only place you can type is inside the unprotected section.
No matter where you think your cursor is outside the editable area, when you start typing, you will notice you are actually typing inside the section you just set as editable.
Make Word documents Read-only in Microsoft Word for Windows
You can use either of the following methods to apply Read-only protection to your document in Word for Windows.
With your document open:
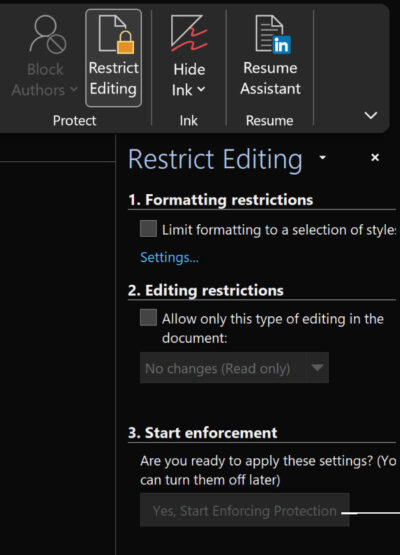
- Open the Review tab.
- Look for Restrict Editing in the Protect section.
- A Restrict Editing settings panel will open. You should see three numbered sections in the panel.

- In the section labeled 2. Editing restrictions, tick the box next to Allow only this type of editing in the document.
- In the drop-down box in section 2, select No changes (Read-only).

- An Exceptions setting will open. We’ll cover that shortly, but you can ignore it for now.
- In section 3, click Yes, Start Enforcing Protection. If you want to insure no one else can edit your file, enter the same password in the next two boxes and click the OK button.

Otherwise, leave the password boxes empty and click the OK button to set your file Read-only but without password protection. - Save your document.
Password protect a document in Microsoft Word for Windows
To password protect a Word document in Windows…
- Open the File menu and toward the bottom, select Info.
- Choose Protect Document, then Encrypt with password.
- Type your password in both boxes and exit the settings panel.
You can also use the Save As… process to require a password to open a document in Word for Windows. When you save your file using Save As…, near the Save button at the bottom of the Save As panel, there is a button or link labeled Other Options. Click that button to open a small list of options. One of them is General Options.
The General Options panel provides a place to fill in a password that will be required whenever the file is opened in the future.
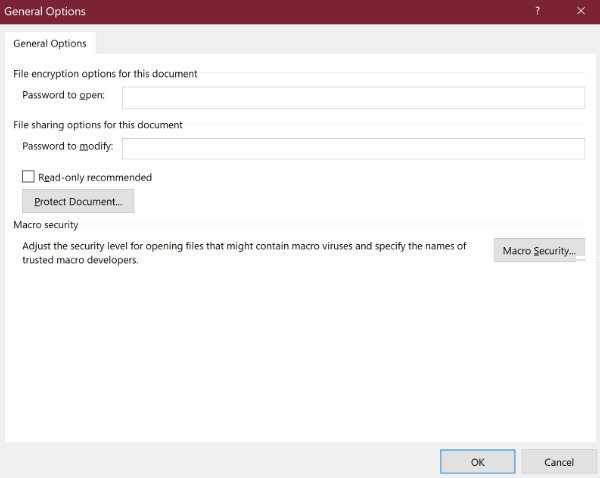
You will see a place to fill in a password for file encryption and a second password for sharing capabilities.
If you want the file to be Read-only, in addition to requiring a password, tick the box for Read-Only recommended.
As with any of the settings listed in this article, save your document after you’ve finished.
Make parts of a document Read-only in MS Word for Windows
Unlike Word for Macs which uses sections to allow portions of a protected document to be editable, Word for Windows allows you to set specific paragraphs as modifiable without the need for specifically creating sections.
- The first step is to make your entire Word document Read-only. Use the instructions above to do that.
- Select the paragraph that you wish to keep editable.
- In the Review tab, click Restrict Editing.
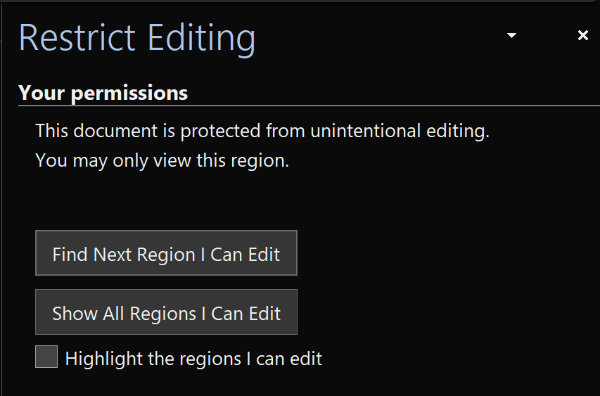
Later, to see which paragraphs are editable, open Restrict Editing again. Individual parts of the document that have been marked as Exceptions are now called Regions. You should see a panel with two buttons. One allows you to move to the next editable region (paragraph, etc.). The other allows you to see all of the regions you are allowed to edit.
Make your Microsoft Word document more difficult to change
As for myself, if I really didn’t want the recipients of my work to be able to edit it, I’d prefer to convert the file to PDF before I send it.
PDFs can be set as Read-only. While an unprotected PDF can be edited with the right software, it is not nearly as straight-forward as editing a Read-only Word file.
Making your document a read-only file means that the document can be read or copied but not modified. If one of the reviewers tries to make changes to a read-only file, the changes can be saved only by giving the document a new name or saved to a new location.
Contents
- 1 Why does a document become read-only?
- 2 What happens when a file is read-only?
- 3 How do I open a read-only document?
- 4 Why are my Word documents opening in read only mode?
- 5 How do I make my Word document not read only?
- 6 Can’t save because the file is read only?
- 7 Can I copy read only files?
- 8 Can you print read only documents?
- 9 What does read only PDF mean?
- 10 How do I change a file from read only to edit?
- 11 Is for open file for reading only?
- 12 Why do my Excel files open as read only?
- 13 How do I turn off restricted editing in Word?
- 14 How can I protect my documents?
- 15 Why can’t I edit my Word document?
- 16 Why is word saving as read only?
- 17 Is locked for editing Excel?
- 18 How do I remove read only from a WPS spreadsheet?
- 19 What does the term read only mean?
- 20 Is PDF read only?
Why does a document become read-only?
The content is in protected view
This is also commonly the case with email attachments or files you’ve downloaded. To help protect your computer, files from these potentially unsafe locations are opened in Protected View. By using Protected View, you can read a file and see its contents while reducing the risks.
What happens when a file is read-only?
A read-only file is any file with the read-only file attribute turned on. It can be opened and viewed like any other file but writing to it (saving changes) won’t be possible. In other words, the file can only be read from, not written to.
How do I open a read-only document?
To open a document as read-only, follow these steps once you start Word:
- Press Ctrl+O. Word displays the Open dialog box.
- Locate the file you want to open and then click once on the file name.
- Click on the down-arrow at the right side of the Open button.
- Choose Open Read-Only from the drop-down menu.
Why are my Word documents opening in read only mode?
The content is in protected view
This is also commonly the case with email attachments or files you’ve downloaded. To help protect your computer, files from these potentially unsafe locations are opened in Protected View. By using Protected View, you can read a file and see its contents while reducing the risks.
How do I make my Word document not read only?
Remove read only
- Click the Microsoft Office Button. , and then click Save or Save As if you have previously saved the document.
- Click Tools.
- Click General Options.
- Clear the Read-only recommended check box.
- Click OK.
- Save the document. You might need to save it as another file name if you have already named the document.
Can’t save because the file is read only?
Click Tools at the bottom of the Save As menu and choose General Options. Under General, find the Read-only Recommended check box and uncheck it. Click OK and finish saving the document.
Can I copy read only files?
File copying will never fail because the source is read only. File copying will fail if the existing destination file is read only. The simple remedy is to clear the read only attribute on the destination file before copying.
Can you print read only documents?
When using read-only PDF files, you cannot make any changes to the text, margins or graphics. However, you can print these PDF files. Make sure you have Adobe Acrobat Reader loaded onto your computer before trying to open and print any PDF documents.
What does read only PDF mean?
Saving a PDF document in read-only format prevents readers from editing its content. If your business has a copy of Adobe Acrobat, take advantage of its security settings to configure your PDF files so that anyone can read them but only certain individuals who know the password can make edits.
How do I change a file from read only to edit?
Read-only Files
- Open Windows Explorer and navigate to the file you want to edit.
- Right-click the file name and select “Properties.”
- Select the “General” tab and clear the “Read-only” check box to remove the read-only attribute or select the check the box to set it.
Is for open file for reading only?
Open a file as read only with the main menu
- Click on File -> Open…
- Select the Word file.
- Click on the arrow on the “Open” button.
- Click on “Open as read only”
Why do my Excel files open as read only?
Excel spreadsheets may be Read Only due to their location. If the spreadsheet is on a network folder and you do not have appropriate network permissions to make make changes in the folder, the spreadsheet is Read Only.Spreadsheets sent as email attachments and previewed within the email program are also Read Only.
How do I turn off restricted editing in Word?
On the Review tab, in the Protect group, click Protect Document, and then click Restrict Formatting and Editing. In the Restrict Formatting and Editing task pane, click Stop Protection.
How can I protect my documents?
You can protect a document by using a password to help prevent unauthorized access.
- Click the File tab.
- Click Info.
- Click Protect Document, and then click Encrypt with Password.
- In the Encrypt Document box, type a password, and then click OK.
- In the Confirm Password box, type the password again, and then click OK.
Why can’t I edit my Word document?
If you receive or open a document and can’t make any changes, it might be Open for viewing only in Protected View.Select Protect document. Select Enable Editing.
Why is word saving as read only?
Go to Word>Preferences>Security and check that “Read-only recommended” is not checked. If it is, you have have to uncheck it and save each document (the setting is saved with the document, so if it is wrong, you need to re-save the document to change it).
Is locked for editing Excel?
Excel file is locked for editing
- Step 1: Try this first, if the file is locked by you.
- Step 2: Talk to the other user.
- Step 3: Make sure everyone uses a version that supports co-authoring.
- Step 4: Put the file in OneDrive or SharePoint in Microsoft 365.
- Step 5: Make sure to use one of these file formats.
How do I remove read only from a WPS spreadsheet?
Way 2: Excel file is in read-only recommended
- Double-click on the Excel file, and select No to open it.
- Click on File >> Save As >> Browse.
- On the bottom of Save As dialog, click on Tools, and select General Options.
- On the General options, uncheck the check box of Read-only recommended, and then click on OK.
What does the term read only mean?
: capable of being viewed but not of being changed or deleted a read-only file/document.
To create a read-only version of a PDF, open the file using Adobe Acrobat. Open Document Security dialog box by clicking File -> Properties and choose Security tab in Document Properties pop-up window. By default, PDF has no security settings, and Security Method shows No Security.This very file is read-only.
![]()
Download Article
![]()
Download Article
Is your Word document opening in read-only mode? You’ll need to turn off this protected view mode before you can make changes to the file. Fortunately, this is really easy to do! This wikiHow article will walk you through changing a read-only Microsoft Word document into one that’s unlocked and ready to edit.
Things You Should Know
- Word files may be read-only due to Protected View, password protection, or file permissions in Windows or macOS.
- If you’re using Windows, right-click the file, select «Properties,» click the «Properties» tab, then remove the Read-only attribute.
- On a Mac, click the file, go to «File» > «Get Info» > «Sharing & Permissions,» and allow «Read & Write» permission.
-
1
Understand which documents are likely to be protected. Any Microsoft Word document which you download from the Internet (e.g., an email attachment or a file from a website) will have read-only protection assigned to it whenever you open it. You can disable this protection when first opening the document.
-
2
Open the Word document. Double-click the Word document for which you want to remove the read-only protection.
- If the Word document is currently open, close it and re-open it.
Advertisement
-
3
Look for a pale yellow banner. If you see a yellow banner with the phrase «Files from the Internet can contain viruses» written across the top of the Word document, your document qualifies to have its read-only status removed using this method.
- If you don’t see this banner even after closing and re-opening the Word document, try one of the other methods in this article.
-
4
Click Enable Editing. This button should be on the right side of the banner. Doing so will refresh the Word document and remove the read-only protection. You should now be able to edit the document.


Advertisement
-
1
Open the Word document. Double-click the Word document from which you want to remove the protection. It will open in Word.
-
2
Click the Review tab. This tab is in the upper-right corner of the Word window. Doing so opens the Review toolbar at the top of the Word window.
-
3
Click Restrict Editing. You’ll find this option on the far-right side of the Review toolbar. Clicking it prompts a pop-out menu to appear on the right side of the window.
-
4
Click Stop Protection. It’s at the bottom of the pop-out menu. You should see a pop-up window appear at this point.
- If you or another user on your computer’s account created the protection without a password, clicking Stop Protection will automatically remove the protection.
-
5
Enter the password when prompted. Type the document’s password into the «Password» text box, then click OK. This will immediately remove the Word document’s read-only lock if the password is correct.
- If you don’t know the password, you’ll have to copy and paste the file’s contents instead.
-
6
Save your changes. Press Ctrl+S (Windows) or ⌘ Command+S (Mac) to do so. From now on, the file won’t be read-only protected unless you re-enable editing protection.


Advertisement
-
1
Go to the Word document. Find the folder in which the Word document is stored.
- If the file isn’t actually on your computer (e.g., it’s on a flash drive or a CD), move the file onto your computer before proceeding.
-
2
Open the Word file’s properties. This will vary depending on your computer’s operating system:
- Windows — Click once the Word file, right-click the Word file, and click Properties in the drop-down menu.
- Mac — Click the Word file, click the File menu item in the top-left side of your Mac’s screen, and click Get Info.
-
3
Find the «Permissions» section. On a Windows computer, you’ll find the proper options in the «Attributes» section near the bottom of the Properties window.
- On a Mac, you’ll have to click the Sharing & Permissions heading near the bottom of the window.
-
4
Disable the read-only protection. Again, this process will differ depending on whether you’re using Windows or a Mac:
- Windows — Uncheck the «Read-only» box near the bottom of the window, click Apply, and click OK.
-
Mac — Click the Read option to the right of your name, then click Read & Write in the menu which appears.
- You may first have to click the lock in the bottom-left corner of the Get Info window and then enter your Mac’s password before you can do this.
- If this option is greyed out, unchecked, or otherwise not set to «Read-only», you’ll have to try copying and pasting instead.
-
5
Try to edit the file. Open the Word document by double-clicking it, then try to edit it. Keep in mind that you may first have to remove the online read-only lock before doing so.


Advertisement
-
1
Understand how this works. If your primary goal is to edit the Word document, you can copy the Word document’s text and paste it into a new Word document and then save the new document onto your computer. While doing this won’t remove the read-only protection from the original document, it will create an editable copy.
-
2
Open the protected Word document. Double-click the Word document to do so.
-
3
Click anywhere on the document. This will place your mouse cursor on the document’s page.
-
4
Select the whole document. Press either Ctrl+A (Windows) or ⌘ Command+A (Mac) to do so. You should see the entire document become highlighted.
-
5
Copy the selected text. Press either Ctrl+C (Windows) or ⌘ Command+C (Mac). This will copy the document’s text to your computer’s clipboard.
-
6
Open a new Word document. Click File in the upper-left side of the Word window, click New on the left side of the window, and click Blank document to open a blank Word document.
- On a Mac, click the File menu item, then click New Blank Document at the top of the drop-down menu.
-
7
Paste in the copied text. Press either Ctrl+V (Windows) or ⌘ Command+V (Mac) to paste the locked Word document’s text into the blank document.
- This may take a few seconds if the original document was particularly large or contained images.
-
8
Save the document as a new file. Press Ctrl+S (Windows) or ⌘ Command+S (Mac), then enter your document’s name and click Save. You’ll be able to edit the document you just created like usual.


Advertisement
Add New Question
-
Question
My documents are in Microsoft Office as PDF files and they are read only. How do I turn read only off?

Save it as a new document, delete the old one, and rename the new one. This should allow you to edit it.
Ask a Question
200 characters left
Include your email address to get a message when this question is answered.
Submit
Advertisement
Video
-
Another way to remove the read-only protection from a Microsoft Word document is by converting the Word document into a PDF with the SmallPDF online converter, downloading the converted PDF, and then converting the PDF back into a Word document with SmallPDF.
Thanks for submitting a tip for review!
Advertisement
-
It’s much easier to copy the protected document’s text and paste it into a new document than it is to try to crack Microsoft’s security.
Advertisement
About This Article
Article SummaryX
1. Open the document in Word.
2. Click Enable Editing.
Did this summary help you?
Thanks to all authors for creating a page that has been read 978,826 times.
Is this article up to date?
 Please Note:
This article is written for users of the following Microsoft Word versions: 2007 and 2010. If you are using an earlier version (Word 2003 or earlier), this tip may not work for you. For a version of this tip written specifically for earlier versions of Word, click here: Read-Only Files.
![]()
Written by Allen Wyatt (last updated March 22, 2023)
This tip applies to Word 2007 and 2010
By definition, a read-only file is one which you can open and look at, but which you cannot change and save under the same file name. There are times when read-only files are beneficial, but what do you do if files are turning into read-only files on their own?
The first thing to check out is those items over which you have control. For instance, has someone set the options in Word so that read-only is the recommended way to save files? You can check this by displaying the Save As dialog box and then clicking Tools | General Options. The Read-Only Recommended check box is used to control this feature.
Another possible cause is that you are sharing the Word documents across a network. Let’s say you have three users trying to access a file. User A opens the file first and has no problems. Other users try to open the file, and they receive a notice that the file is read-only. The solution to this is easy—simply wait for User A to finish using the document.
A possible cause is that the folder in which the file is located is read-only. You can check this by using the Windows Explorer to check the attributes of the directory. Don’t forget to check the attributes of any other directories up the line from the one where you are having a problem.
If the problem files are on a network, it could also be caused by interference from some third-party program. For instance, I know of a site that used a mixed Windows/UNIX network. They used a software package called Samba to enable the Windows system to talk with the UNIX server. When a user would create a document under Word and save it on the server, there would be no problem. However, if another user later opened the same file, then the ownership rights for the file were changed to the second user. When the first user went back to access the file, they received a read-only message on the file. In this case, the error was traced to the Samba software, which was making the changes in the file rights.
If the read-only problem is with a specific file, you can open the file, select all the contents (press Ctrl+A), open a new document, and paste the contents into the new document (Ctrl+V). Then you can save the new document and discard the old.
WordTips is your source for cost-effective Microsoft Word training.
(Microsoft Word is the most popular word processing software in the world.)
This tip (11596) applies to Microsoft Word 2007 and 2010. You can find a version of this tip for the older menu interface of Word here: Read-Only Files.
Author Bio
With more than 50 non-fiction books and numerous magazine articles to his credit, Allen Wyatt is an internationally recognized author. He is president of Sharon Parq Associates, a computer and publishing services company. Learn more about Allen…
MORE FROM ALLEN
Creating Endnotes
Endnotes are often used in scholarly or legal documents, and they can be added easily. This tip shows how to add them …
Discover More
Squaring Table Cells
Inserting a table is fast and easy in Word. You may want to make sure that the cells in the table are as square as …
Discover More
Adjusting Shadow Settings
Insert a graphic into a document and Word allows you to add a shadow behind the graphic. You can also adjust the …
Discover More