
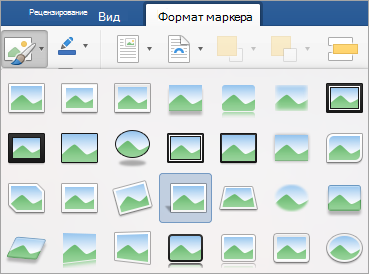
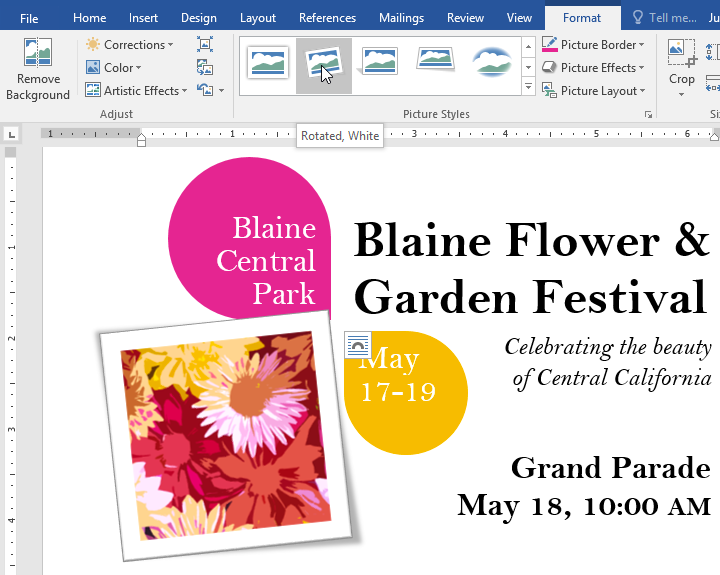
To apply a picture style:
- Select the picture.
- Select the Format tab.
- Click the More drop-down arrow to display all of the picture styles.
- Hover over a picture style to display a live preview of the style in the document.
- Select the desired style.
Contents
- 1 How do you apply Picture Style in Word 2020?
- 2 How do you apply a picture style in Word 2016?
- 3 What is Picture Style in Word?
- 4 Can you Format all pictures in Word at once?
- 5 How do you insert a picture?
- 6 Where do I find picture tools in Word?
- 7 How do I apply the perspective shadow white style to a picture in Word?
- 8 What are the other way of inserting images?
- 9 How do you apply the bevel perspective left white style in Word?
- 10 How do I apply shadow image effect in Word?
- 11 How do you change picture format in Word?
- 12 How do we format pictures using the picture Tools?
- 13 How do I insert multiple pictures into a Word document?
- 14 How do I format multiple pictures in Word?
- 15 How do I insert a picture in Word without resizing?
- 16 How do I copy and paste a picture into a Word document?
- 17 How do I insert a picture in Word without moving the text?
- 18 Why can’t I insert a picture into Word?
- 19 How do I add an artistic effect to a picture in Word?
How do you apply Picture Style in Word 2020?
Quickly apply a style
Click the picture, and then click the Format Picture tab. Click Quick Styles, and then click the style that you want.
Click the contextual Format tab under Picture Tools on the Ribbon. Click the More button to display the full Picture Styles gallery. Point to a style to see a preview of the style (You will need to enable “Live Preview”). Click the style you want from the gallery to apply it to the selected graphic.
What is Picture Style in Word?
Office allows you to edit images in Excel, Word, or PowerPoint documents with special formatting such as cropping capabilities, special borders, reflections, 3D rotations, etc.
Can you Format all pictures in Word at once?
Step 1: Open the Word document that contains your images. Step 2: Right-click on the first image and select Size and Position. Step 3: In the Layout box that opens, click on the Size tab. Then, uncheck the box next to Lock aspect ratio.
How do you insert a picture?
Insert pictures
- Do one of the following: Select Insert > Pictures > This Device for a picture on your PC. Select Insert > Pictures > Stock Images for high quality images or backgrounds. Select Insert > Pictures > Online Pictures for a picture on the web.
- Select the picture you want, and then select Insert.
Where do I find picture tools in Word?
Click View > Toolbars > Picture. The Picture toolbar shows or disappears. The Picture toolbar contains a collection of icon buttons to allow the user to insert and manage pictures and clip art in the document.
How do I apply the perspective shadow white style to a picture in Word?
Click the photo to select it. Under Picture Tools, click the Format tab. In the Picture Styles group, point to the Drop Shadow style, which is the fourth style in the first row. After you see a preview of the style, click to apply the style.
What are the other way of inserting images?
Comparison of 5 Methods
| Methods | Advantages |
|---|---|
| 1. Use “Insert” Tab 2. Paste a Picture 3. Drag and Drop | It’s convenient when you don’t need an updated picture. |
| Choose “Link to File” | You can always get an updated picture. |
How do you apply the bevel perspective left white style in Word?
In the Picture Styles group on the PICTURE TOOLS FORMAT tab, click the More button to open the Picture Styles gallery. In the gallery, click the Bevel Perspective Left, White style to apply it to the selected picture.
How do I apply shadow image effect in Word?
Apply Picture Effects
- Select the picture.
- Select Picture Tools > Format and select Picture Effects.
- Select the one you want: Shadow, Reflection, Glow, Soft Edges, Bevel, or 3-D Rotation.
How do you change picture format in Word?
Start by inserting the image into your Word document (Insert > Pictures) and selecting the image.
- To begin formatting your selected image, click Format > Crop (or Format > Crop > Crop).
- Move the crop outline tools around your image to reduce the image area to its final size.
- Formatting Image Colors.
How do we format pictures using the picture Tools?
Insert a picture onto your slide and select it. On the Picture Tools Format tab, apply a style from the Picture Styles gallery. Right-click the picture and choose Change Picture. You can also click the Change Picture button on the Picture Tools Format tab.
How do I insert multiple pictures into a Word document?
Inserting Multiple Graphics in a Document
- Place the insertion point at the place in the document where you want the graphics inserted.
- Display the Insert tab of the ribbon.
- Click the Picture tool.
- Use the controls in the dialog box to locate the folder that contains the images.
- Press Ctrl+A.
- Click Insert.
How do I format multiple pictures in Word?
To do so, hold down the Ctrl key and click each picture. Remember, if you can’t create a multi-picture selection, check the text wrapping options–they should all be With Text Wrapping. With all of the pictures selected, click the contextual Format tab.
How do I insert a picture in Word without resizing?
CTRL+Arrow key(s). and have the ability to move it around. text-area from the drawing options and then insert a picture into it. EXACTLY its original size.
How do I copy and paste a picture into a Word document?
Right click image and choose copy/copy image. Open your document and right click the place where you want to add the image. Select Paste Options in menu and click it. After that image will be there.
How do I insert a picture in Word without moving the text?
To insert an image into Word without moving any text is to set the image’s default wrapping to no wrapping before entering it into the document.
- Click the location in your document where you want to insert a picture.
- On the Insert tab, click Pictures.
- Select the option you want to use for inserting pictures.
Why can’t I insert a picture into Word?
Click the Microsoft Office Button, and then click Word Options. Click Advanced. Under Display document content, clear the Picture Placeholders check box. Click OK.
How do I add an artistic effect to a picture in Word?
Click on the image you want to edit, then click on the “Picture Format” tab in the top-bar. In the Picture Format tab, click on “Artistic Effects”, found in the “Adjust” section. Once you click on it, a drop-down menu will appear with all of the effects that you can apply.
Содержание
- сайт уроков по программам word, excel, access и power point.
- Рубрики
- Добавление эффекта к рисунку
- Удаление эффекта из рисунка
- Удаление эффекта из рисунка
- Дополнительные сведения
Чтобы гармоничнее интегрировать изображения в документ, в программе Microsoft Word предусмотрены специальные стили отображения рисунков, которые можно применить к любому изображению. Стили отличаются друг от друга формой, толщиной, цветом рамки, наличием или отсутствием отражения и многими другими параметрами.
Разработчики программы Microsoft Word подготовили для пользователей набор экспресс-стилей для того, чтобы они могли использовать уже готовые стилевые решения. Чтобы применить к изображению какой-либо стиль, достаточно выполнить ряд простых действий:
- нужно щелкнуть мышью по изображению, чтобы появилась дополнительная группа Работа с рисунками (Picture Tools);
- перейти на вкладку Формат (Format) и в группе элементов управления Стили рисунка (Picture Styles) выбрать нужный стиль.
Чтобы посмотреть, как будет выглядеть тот или иной стиль изображения, достаточно навести на него мышь.
После этого стиль изображения изменится (рис. 7.10). Однако вариантов экспресс-стилей предлагается пользователю не так уж много. Давайте научимся самостоятельно применять к изображениям различные эффекты и изменять границы рисунков.

Рис. 7.10. Пример применения стилей к изображениям
Чтобы изменить цвет и форму границы рисунка, достаточно нажать кнопку Границы рисунка (Picture Border) группы элементов управления Стили рисунка (Picture Styles) вкладки Формат (Format). После этого откроется контекстное меню, в котором можно выбрать цвет, толщину и внешний вид границы рисунка. Для применения того или иного вида границы достаточно просто щелкнуть мышью по нужному атрибуту.
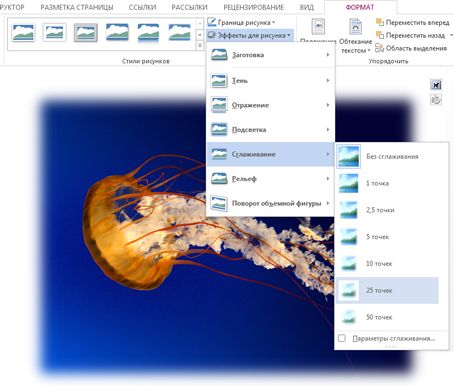
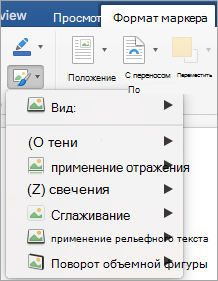
Для применения к изображению различных эффектов нужно воспользоваться кнопкой Эффекты для рисунка (Picture Effects) группы элементов управления Стили рисунка (Picture Styles) вкладки Формат (Format). После нажатия кнопки Эффекты для рисунка (Picture Effects) откроется контекстное меню, содержащее различные эффекты.
Всего существует семь различных групп эффектов.
- Заготовка (Preset). Представляет собой уже готовые шаблоны эффектов тени и формы.
- Тень (Shadow). Различные варианты длины, направления и интенсивности теней.
- Отражение (Reflection). Добавляет к изображению различные эффекты отражения.
- Свечение (Glow). Добавляет к изображению различные по интенсивности и цвету свечения контура.
- Сглаживание (Soft Edges). Сглаживает пикселы изображения.
- Рельеф (Bevel). Добавляет изображению псевдотрехмерность за счет рельефности.
- Поворот объемной фигуры (3-D Rotation). Изменяет форму изображения на псевдообъемную фигуру.
Для предварительного просмотра какого-либо эффекта достаточно просто навести на него указатель мыши. Для применения какого-либо эффекта к изображению необходимо щелкнуть по эффекту в контекстном меню мышью. Различные эффекты могут быть применены к одному изображению одновременно.
сайт уроков по программам word, excel, access и power point.
Рубрики
В программе Microsoft Word на вкладке “Работа с рисунками / Формат” есть стили рисунков.
К примеру, стиль “прямоугольник с размытыми краями”, который удобно применять к картинкам в инструкциях, чтобы текст был читаемым, без отвлечения на соседние элементы.
Проблема стиля в том, что элементы расположенные с краю достаточно близко, тоже размываются, поэтому хотелось бы сделать размытие меньше.
Поэтому для редактирования стиля, примененного к картинке, нажимаем на кнопку (стрелочку) “Формат фигуры”.
Переходим на закладку “Свечение и сглаживание” и уменьшаем размер сглаживания до 3пт.
Изменяя настройки на закладках, можно изменяя стандартные стили, создать свой стиль.
Чтобы сделать рисунок более привлекательным, можно добавить такие эффекты, как тени, свечения, отражения, сглаживания, рельеф и поворот объемной фигуры.

Добавление эффекта к рисунку
Выберите рисунок, для которого вы хотите добавить или изменить эффект.
Примечание: Чтобы добавить один и тот же эффект в несколько рисунков, щелкните первый рисунок и затем, нажав и удерживая клавишу CTRL, щелкните другие рисунки. Если вы используете Word, скопируйте рисунки на полотно, если это еще не сделано. Откройте вкладку Вставка, щелкните значок Фигуры и выберите пункт Новое полотно. (После добавления или изменения эффекта необходимо вернуть рисунки обратно в исходное место в документе.)
На панели Работа с рисунками на вкладке Формат в группе Стили рисунков щелкните Эффекты для рисунка.
Наведите указатель мыши на один из параметров Эффекты для рисунка, чтобы отобразить меню различных способов применения каждого эффекта. При наведении указателя мыши на один из эффектов в меню, он отображается как рисунок для предварительного просмотра в документе.
Чтобы настроить добавляемый эффект, нажмите кнопку Параметры в нижней части меню каждого эффекта. Например, в меню Тень щелкните Параметры тени для выполнения пользовательских настроек для эффекта тени.
Если вкладка Работа с рисунками или Формат не отображается, дважды щелкните рисунок, чтобы убедиться, что он выбран. Если рядом с именем файла в верхней части окна программы отображаются слова [Режим совместимости], сохраните документ в формате DOCX или XLSX (вместо прежнего формата файла DOC или XLS) и попробуйте еще раз.
Удаление эффекта из рисунка
Для каждой категории эффекта рисунка в верхней части его меню отсутствует параметр . Выберите этот параметр, чтобы отключить ненужный эффект.
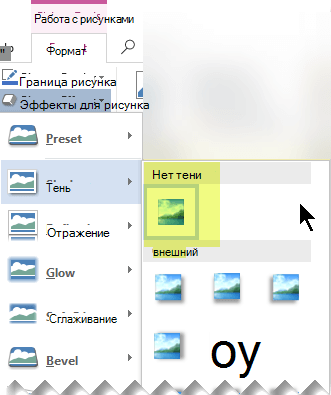
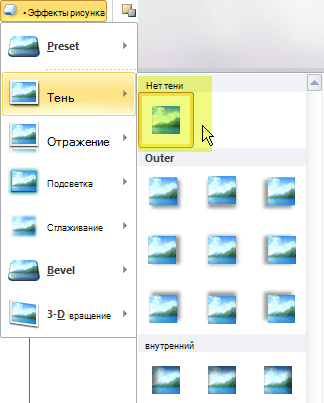
Например, чтобы удалить тень, наведите указатель мыши на пункт эффекты рисунка > тень > Нет тени.
Выберите рисунок, для которого вы хотите удалить эффект.
В разделе Работа с рисункамина вкладке Формат в группе Стили рисунков нажмите кнопку эффекты для рисунка.
Выберите категорию эффектов для рисунков , которую вы хотите удалить. В появившемся меню первый вариант не <>имя эффекта (например, без тени или отражения). Выберите этот параметр, чтобы удалить этот тип эффекта из рисунка.
Чтобы сделать рисунок более привлекательным, можно добавить такие эффекты, как тени, свечения, отражения, сглаживания, рельеф и поворот объемной фигуры.
Щелкните рисунок, для которого вы хотите добавить или изменить эффект.
Примечание: Чтобы добавить один и тот же эффект в несколько рисунков, щелкните первый рисунок и затем, нажав и удерживая клавишу CTRL, щелкните другие рисунки. При использовании Word нужно скопировать рисунки на полотно, если их там еще нет. Откройте вкладку Вставка, щелкните значок Фигуры и выберите пункт Новое полотно. (После добавления или изменения эффекта необходимо вернуть рисунки обратно в исходное место в документе.)
На панели Работа с рисунками на вкладке Формат в группе Стили рисунков щелкните Эффекты для рисунка.
Если вкладка Работа с рисунками или Формат не отображается, дважды щелкните рисунок, чтобы убедиться, что он выбран. Если рядом с именем файла в верхней части окна программы отображаются слова [Режим совместимости], сохраните документ в формате DOCX или XLSX (вместо прежнего формата файла DOC или XLS) и попробуйте еще раз.
Выполните одно или несколько из указанных ниже действий.
Чтобы добавить или изменить встроенную комбинацию эффектов, наведите указатель на пункт Заготовка и затем щелкните нужный эффект.
Для настройки встроенного эффекта щелкните Параметры объема и измените необходимые параметры.
Чтобы добавить или изменить тень, наведите указатель на пункт Тень и затем щелкните нужную тень.
Для настройки тени щелкните Варианты тени и измените необходимые параметры.
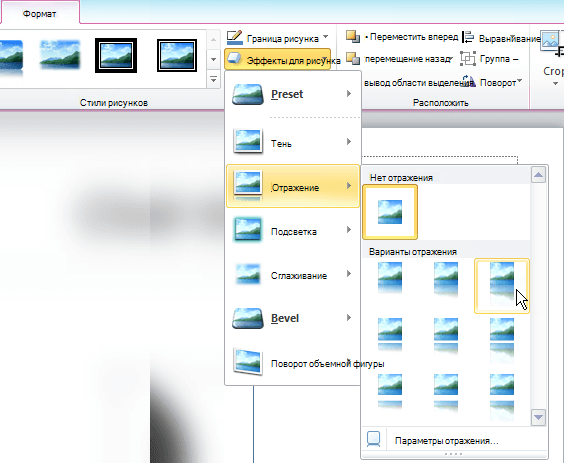
Чтобы добавить или изменить отражение, наведите указатель на пункт Отражение и затем щелкните нужный вариант отражения.
Для настройки отражения щелкните Параметры отражения и измените необходимые параметры.
Чтобы добавить или изменить свечение, наведите указатель на пункт Свечение и затем щелкните нужный вариант свечения.
Для настройки цветов свечения выберите команду Другие цвета свечения, а затем выберите необходимый цвет. Для изменения цвета, который не входит в цвета темы, выберите команду Дополнительные цвета, а затем выберите необходимый цвет на вкладке Стандартная или создайте собственный цвет на вкладке Спектр. Пользовательские цвета и цвета на вкладке Стандартная не обновляются при последующем изменении тема документа.
Для настройки вариантов свечения щелкните Параметры свечения и измените необходимые параметры.
Для добавления или изменения сглаживания щелкните Сглаживание, а затем выберите нужную степень сглаживания.
Для настройки сглаживания щелкните Параметры сглаживания и измените необходимые параметры.
Чтобы добавить или изменить рельеф, наведите указатель на пункт Рельеф и затем щелкните нужный рельеф.
Для настройки рельефа щелкните Параметры объема и измените необходимые параметры.
Чтобы добавить или изменить поворот объемной фигуры, наведите указатель на пункт Поворот объемной фигуры и затем щелкните нужный вариант поворота.
Для настройки поворота выберите команду Параметры поворота объемной фигуры и измените необходимые параметры.
Чтобы получить дополнительные сведения о параметрах, описанных в этих областях, нажмите кнопку справка  в верхней части диалогового окна ” Формат рисунка “.
Удаление эффекта из рисунка
Для каждой категории эффекта рисунка в верхней части его меню отсутствует параметр . Выберите этот параметр, чтобы отключить ненужный эффект.
Например, чтобы удалить тень, наведите указатель мыши на пункт эффекты рисунка > тень > Нет тени.
Выберите рисунок, для которого вы хотите удалить эффект.
В разделе Работа с рисункамина вкладке Формат в группе Стили рисунков нажмите кнопку эффекты для рисунка.
Выберите категорию эффектов для рисунков , которую вы хотите удалить. В появившемся меню первый вариант не <>имя эффекта (например, без тени или отражения). Выберите этот параметр, чтобы удалить этот тип эффекта из рисунка.
Выполните любое из описанных ниже действий.
Быстрое применение стиля
Щелкните рисунок и откройте вкладку Формат рисунка.
Щелкните Экспресс-стилии выберите нужный стиль.
Добавление и изменение тени, отражения, свечения, краев, рельефа или объемного поворота
Щелкните рисунок и откройте вкладку Формат рисунка.
Нажмите кнопку эффекты для рисунка, наведите указатель на тип эффекта и выберите нужный эффект.
Чтобы настроить эффект, нажмите кнопку Параметры в нижней части меню “эффекты”.
Дополнительные сведения
Выполните любое из описанных ниже действий.
Применение и изменение стиля
Щелкните рисунок и откройте вкладку Формат рисунка.
В разделе Стили рисунков выберите нужный стиль.

Чтобы посмотреть другие стили, наведите указатель мыши на нужный стиль и щелкните  .
.
Добавление и изменение тени, отражения, свечения, багетной рамки или объемного вращения
Щелкните рисунок и откройте вкладку Формат рисунка.
В разделе Стили рисунков нажмите кнопку Эффекты, наведите указатель на тип эффекта и выберите нужный вариант.
Для тонкой настройки эффекта в разделе Стили рисунков нажмите кнопку Эффекты, наведите указатель на тип эффекта и выберите пункт Параметры [название эффекта].
Lesson 19: Formatting Pictures
/en/word/pictures-and-text-wrapping/content/
Introduction
There are many ways to format pictures in Word. For instance, you can change the size or shape of an image to better suit your document. You can also enhance its appearance using Word’s image adjustment tools.
Optional: Download our practice document.
Watch the video below to learn more about formatting pictures.
To crop an image:
When you crop an image, part of the picture is removed. Cropping can be useful if you’re working with an image that’s too big and you want to focus on only part of it.
- Select the image you want to crop. The Format tab will appear.
- From the Format tab, click the Crop command.

- Cropping handles will appear on the sides and corners of the image. Click and drag any handle to crop the image. Because the cropping handles are near the resizing handles, be careful not to drag a resizing handle by mistake.
- To confirm, click the Crop command again. The image will be cropped.
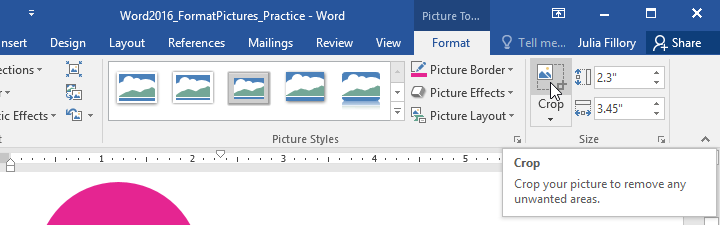
The corner handles are useful for simultaneously cropping the image horizontally and vertically.
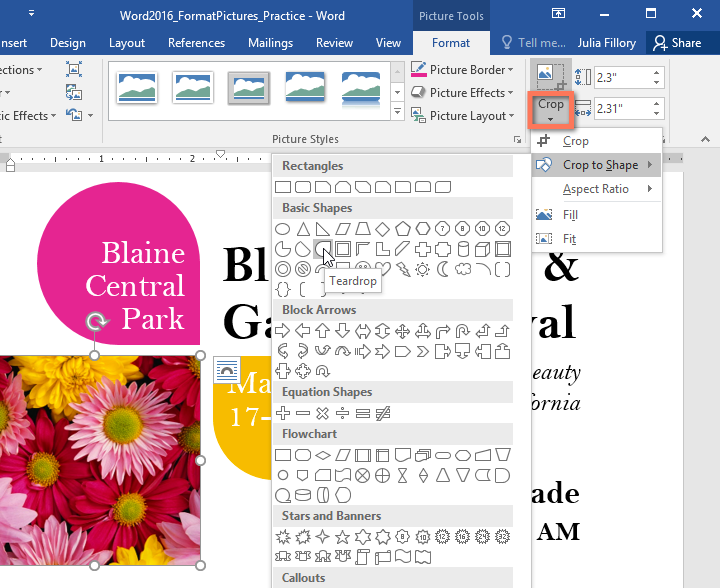
To crop an image to a shape:
- Select the image you want to crop, then click the Format tab.
- Click the Crop drop-down arrow. Hover over Crop to Shape, then select the desired shape from the drop-down menu.
- The image will be cropped to the chosen shape.
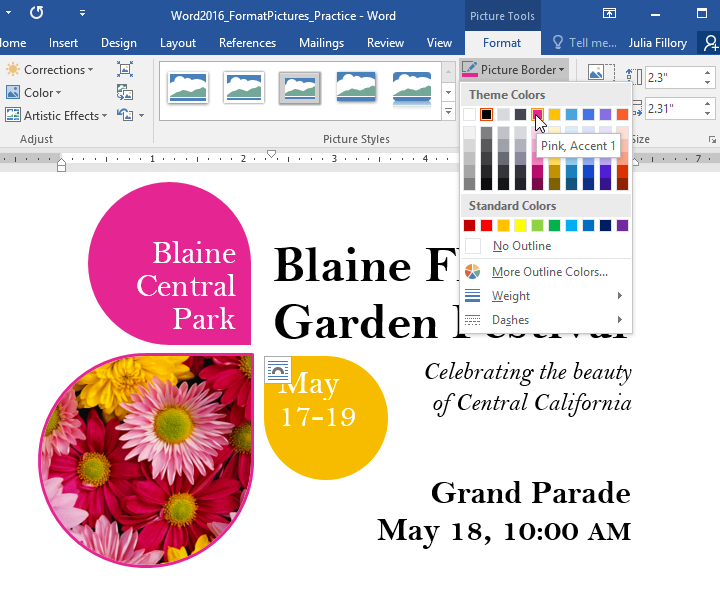
To add a border to a picture:
- Select the picture you want to add a border to, then click the Format tab.
- Click the Picture Border command. A drop-down menu will appear.
- From here, you can select a color, weight (thickness), and whether the line is dashed.
- The border will appear around the image.
Making image adjustments
With Word’s image adjustment tools, you can easily change properties like color, contrast, saturation, and tone. Word also offers built-in picture styles, which can be used to add a frame, drop shadow, and other predefined effects.
When you’re ready to adjust an image, simply select it. Then use the options below, which can be found on the Format tab.
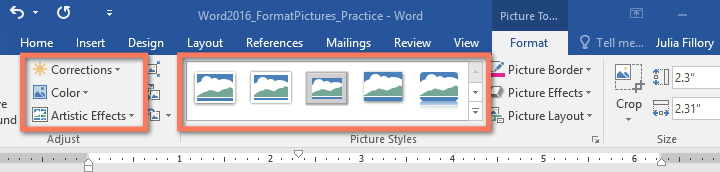
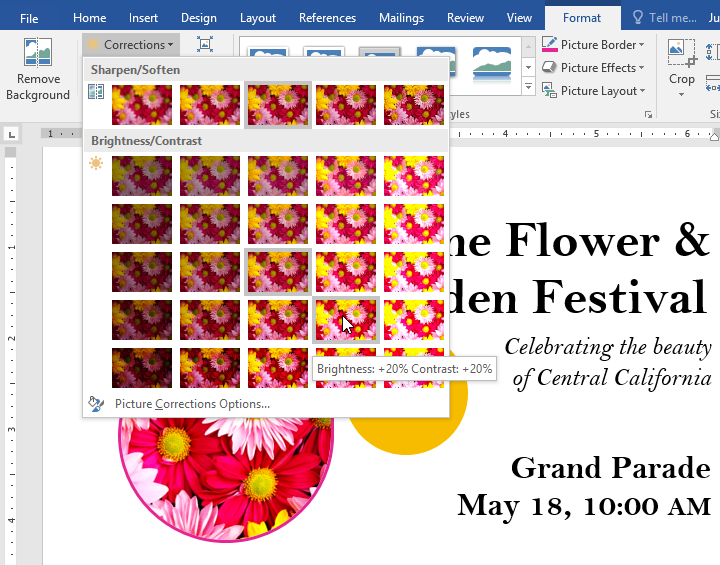
Corrections
From here, you can sharpen or soften the image to adjust how clear or blurry it appears. You can also adjust brightness and contrast, which affect the image’s lightness and general intensity.
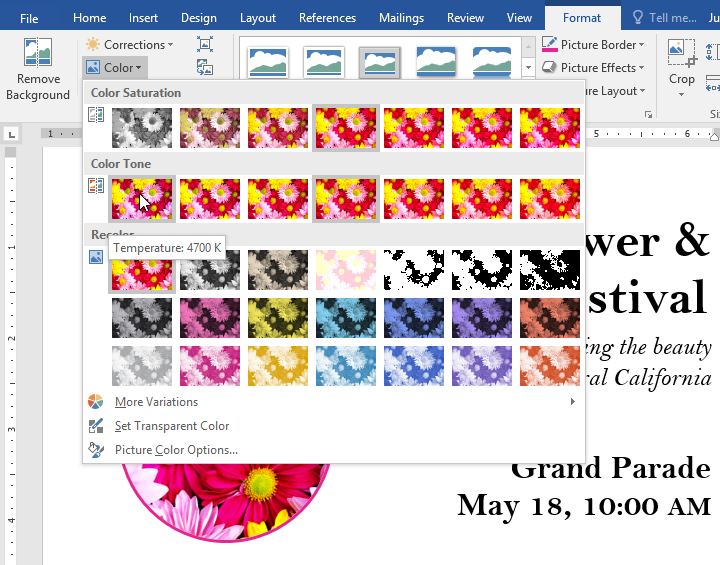
Color
Using this command, you can adjust the image’s saturation (how vibrant the colors appear), tone (the color temperature of the image, from cool to warm), and coloring (the overall tint of the image).
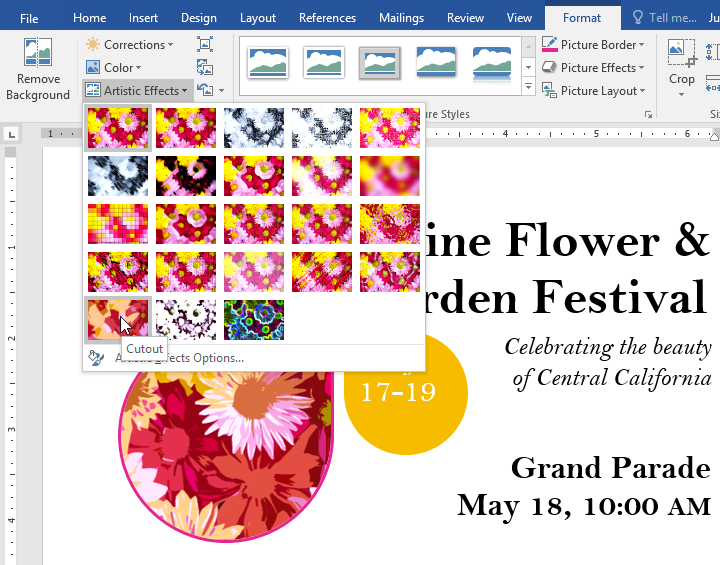
Artistic Effects
Here, you can apply special effects to your image, such as pastel, watercolor, or glowing edges. Because the results are so bold, you may want to use these effects sparingly (especially in professional documents).
Picture Styles group
This group contains different predefined styles that make image formatting even easier. Picture styles are designed to frame your image without changing its basic settings or effects.
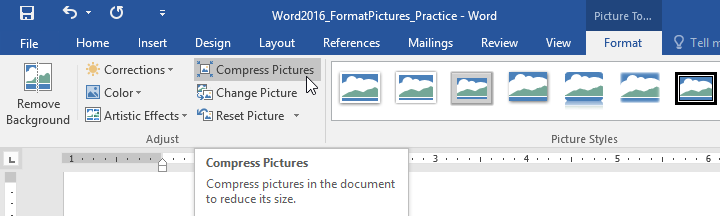
Compressing pictures
If you plan to email a document that contains pictures, you’ll need to monitor its file size. Large, high-resolution images can cause your document to become very large, which may make it difficult to attach to an email. Additionally, cropped areas of pictures are saved within the document by default, which can add to the file size.
Thankfully, you can reduce your document’s file size by compressing your pictures. This will lower their resolution and delete cropped areas.
Compressing a picture may noticeably affect its quality (for instance, the image may become blurry or pixelated). Because of this, we recommend saving an extra copy of your document before compressing pictures. Also, be prepared to use the Undo command if you’re dissatisfied with the results.
To compress a picture:
- Select the picture you want to compress, then navigate to the Format tab.
- Click the Compress Pictures command.
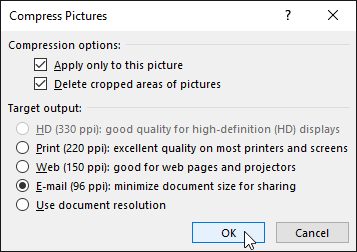
- A dialog box will appear. Check the box next to Delete cropped areas of pictures. You can also choose whether to apply the settings to this picture only or to all pictures in the document.
- Choose a Target output. If you are emailing your document, you may want to select Email, which produces the smallest file size.
- Click OK.
Challenge!
- Open our practice document.
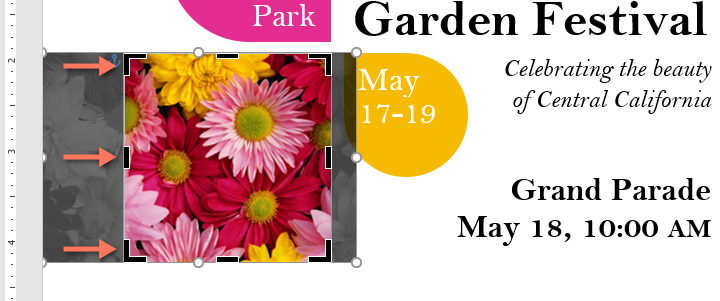
- Scroll to page 2 and select the picture of the sailboats.
- In the Format tab, change the style to Simple Frame, White.
- With the picture still selected, use Crop to Shape and crop to the Double Wave shape in the Stars and Banners category. Hint: The shape names will appear when you hover over them.
- Select the picture of the anchor.
- In the Format tab, use the Color drop-down menu to re-color the anchor to Gold, Accent color 2 Light.
- When you’re finished, your page should look like this:


/en/word/shapes/content/
In my previous blog, we talked about all the settings in the Adjust section under the Picture Format ribbon menu. I showed you how to remove the background of an image, adjust the brightness/contrast, change colors, artistic effects, and more. In this blog, we will explore the next section of the Picture Format tool bar and cover all the settings in Picture Styles.
Let’s get started
First, you need to add your photo to the document. Click the Insert tab at the top of your ribbon menu and select Picture then locate the image you would like to include from your local device or choose from Microsoft’s gallery. See How to Add and Format Text Around and Image for help.
Picture Styles
With your image selected, click the arrow down to select a Style. There are several types of image effects to sample. Try them all!
Instantly create an effect, like Relaxed Perspective with a white border.
Picture Border
You can change the border around your image with the Picture Border tool. Change the color, the weight, and style or use dashes to bring more attention to the image. You can also use the right-hand side Format Picture tools to work with the styles. You will have to play with this section to see what you like and what fits with the message you want to send to the reader.
Remember from our previous blog, if you do not like the results of your edited photo, you can always go back to the Adjust section and Revert your photo back to its original image.
Picture Effects
In this section, you will find tools to enhance your images. The next seven images will show you the tool and what it can do to your images. Again, you will have to play with all these tools to find the best look for your story.
Preset
There are several different Preset effects you can add to your image, try them all out.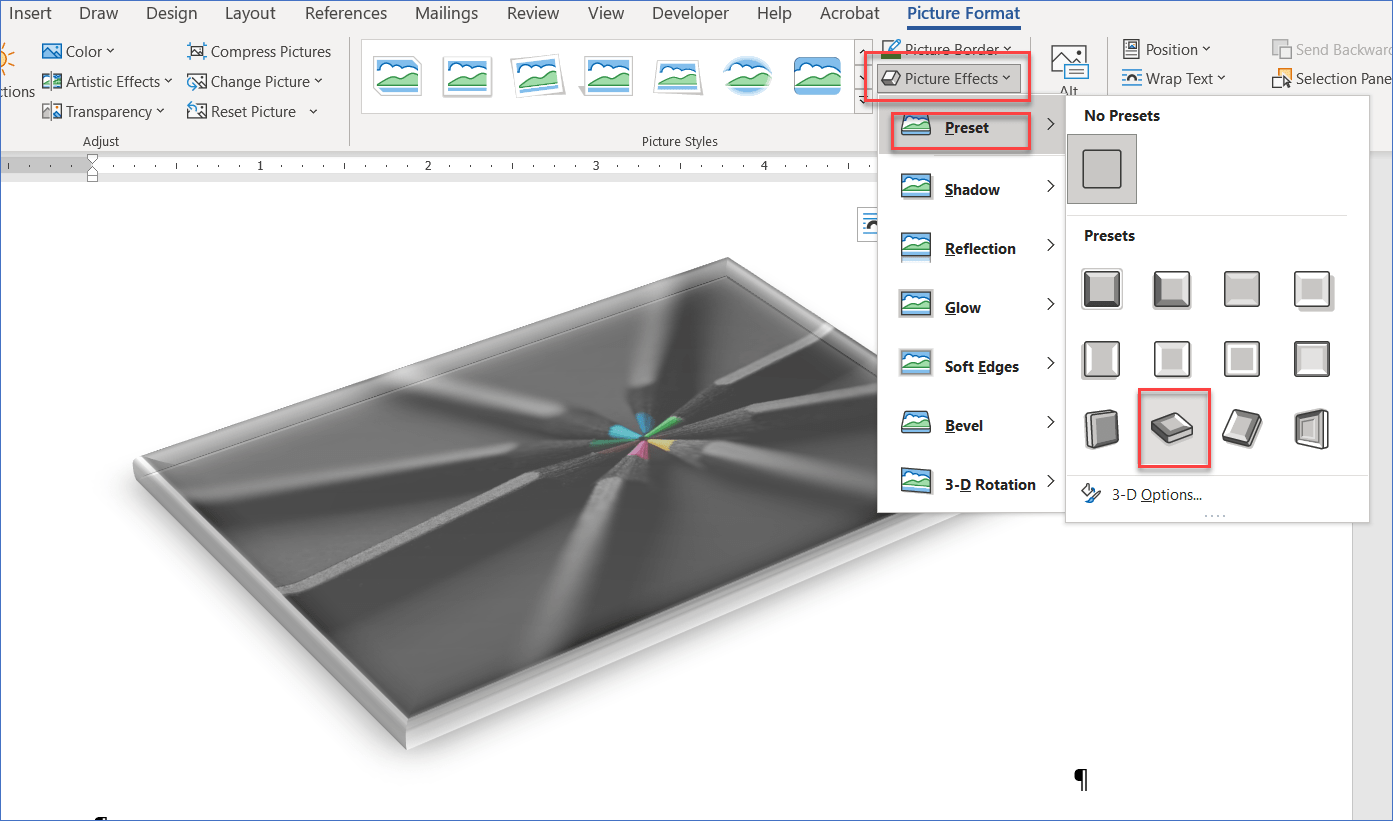
Shadow
You can place a Drop Shadow around your image to make it stand off the page. You can add inner shadows as well as perspective shadows.
Reflection
In this next image, I applied a picture style and added a reflection of the image.
Glow
In this next image, I applied the glow effect to the image. You can select from any glow color you perfer. 
Soft Edges
Apply a Soft Edge or feather to your image.
Bevel
I use bevel to create downloadable buttons then set up a URL, so the reader can view more, or download something.
3D Rotation
Show some perspective with 3D Rotation.
Speaking of 3D, Microsoft Word gives you access to high-quality content from the Stock 3D Model library. Go back to the Insert Tab in the menu ribbon and select 3D Models, then click on Stock 3D Models and search for your favorite image.


3D Stock allows you to rotate your image to create the 3D effect you desire. Simply click and drag the rotation handle to the desired position.
Picture Layout
Picture Layout is another way to demonstrate flow charts and other text and images you would like to highlight in your document. This is a complex topic for another blog day. Feel free to play around in this section to build organizational charts.

Alt Text
I covered this in another blog, Automatic Alt Text for Images in Microsoft Word last year. As a quick recap, Alt Text or Alternative Descriptions are written copy that describes the image. This text also helps screen-reading tools describe images to visually impaired readers. It will appear in place of an image in case the image does not load and it allows search engines to better rank your website.

That concludes the Picture Styles section in the Picture Format tool bar. Stay tuned, in my next blog, we will cover the Arrange section in the Picture Format menu. For more tips and tricks for Microsoft Office 365 visit and subscribe to our blog.
After you insert a picture in your document, click it, and then click the Picture Tools Format tab. In Word, you can choose color variations, crop, compress at different levels, and apply some special effects.
Similarly, Where do I find picture tools?
The picture formatting tools are on the Picture Tools tab on the ribbon, which appears only when you have clicked on a picture to select it. In that tab, the sizing and cropping tools are all the way at the right end.
Additionally, Where is the picture tools in Word? After inserting an image the toolbar may be displayed automatically. If it is not, right click the image and select Show Picture Toolbar. Insert an image with this button. Using the button is the same as going to the Insert menu and selecting Picture / From File.
Related Contents
- 1 What is the use of picture tool?
- 2 How do I view a picture toolbar in Word?
- 3 How do I open the picture bar?
- 4 Where are picture tools in Powerpoint?
- 5 What are the picture tools available in Windows 10 file explorer?
- 6 How do I change the picture tools in Word?
- 7 Where is Microsoft Picture Manager?
- 8 Where is the picture format tab in Word for Mac?
- 9 What are image editing tools?
- 10 What is the purpose of photo editing?
- 11 How can you bring up the image toolbar if not already visible?
- 12 Which of the following is correct option to open Picture toolbar?
- 13 How do I open the image bar in Windows 10?
- 14 How do I use an image toolbar?
- 15 Where is the Tools menu in PowerPoint?
- 16 How do I edit a picture in PowerPoint?
- 17 How do you apply a picture style in PowerPoint?
- 18 How do I get image tools in File Explorer?
- 19 Where is the Tools menu in File Explorer Windows 10?
- 20 What is the File Explorer in Windows 10?
What is the use of picture tool?
They contain a series of formatting settings that you can apply to a picture all at once. There are 24 different picture styles that you can preview and apply in just seconds. You can save so much time with styles, you may actually go out to lunch! Select the picture to display the Picture Tools on the Ribbon.
How do I view a picture toolbar in Word?
Click View > Toolbars > Picture. The Picture toolbar shows or disappears. The Picture toolbar contains a collection of icon buttons to allow the user to insert and manage pictures and clip art in the document.
How do I open the picture bar?
Click View > Toolbars > Picture. The Picture toolbar shows or disappears. The Picture toolbar contains a collection of icon buttons to allow the user to insert and manage pictures and clip art in the document.
Where are picture tools in Powerpoint?
Just click the shape to which you want to add a picture, then under DRAWING TOOLS, on the FORMAT tab, click Shape Styles > Shape Fill > Picture, and select the picture that you want. Click the picture that you want within the shape. Click PICTURE TOOLS > FORMAT > Size and click the arrow under Crop.
What are the picture tools available in Windows 10 file explorer?
3 handy image tools you can use in File Explorer
- Start a slideshow. The first feature is the ability to quickly start a slideshow. …
- Set as background. There are several ways you can set an image as your desktop background, here’s one more. …
- Rotate images. One last feature under Manage is the ability to rotate photos.
How do I change the picture tools in Word?
You can customize the image sharpness, brightness, saturation, tone, and contrast levels, either manually or using one of several preset filters. To access the image formatting tools, right-click on your image and press Format Picture at the bottom. This will bring up the Format Picture menu on the right-hand side.
Where is Microsoft Picture Manager?
Expand Office Tools and select Microsoft Office Picture Manager. Click the drop-down arrow next to Microsoft Office Picture Manager and click Run from my computer.
Where is the picture format tab in Word for Mac?
Click the Picture Format tab that will appear at the top. Then, click Background Removal button on the left of your ribbon. You’ll see that the tab you will work in, is the Background Removal tab. The rest of the Main Tabs are the basics you normally need for a document and you’re likely familiar with them already.
What are image editing tools?
Image editing tools are used to edit existing bitmap images and pictures. However, these tools are similar to painting and drawing tools as they can also create images from scratch. They are capable of converting any image data type file format.
What is the purpose of photo editing?
An image editing application for digital photos. It is used to crop and touch up photos, as well as organize them into albums and slide shows. Photo editors typically do not have the myriad filters and features of a full-blown image editor such as Adobe’s Photoshop or Corel’s Paint Shop Pro.
How can you bring up the image toolbar if not already visible?
Choose Edit >Toolbar. In the Customize Toolbar dialog, if you see your missing tool in the Extra Tools list in the right column, drag it to the Toolbar list on the left. Click Done.
Which of the following is correct option to open Picture toolbar?
Insert—> Toolbars—> Picture.
How do I open the image bar in Windows 10?
Switch to your toolbar by selecting its tab at the top of the source window. Go to menu Edit > Paste. The image will appear on your toolbar as a new button.
How do I use an image toolbar?
After inserting an image the toolbar may be displayed automatically. If it is not, right click the image and select Show Picture Toolbar. Insert an image with this button. Using the button is the same as going to the Insert menu and selecting Picture / From File.
When you open a PowerPoint document, the ribbon appears as a row of labels, or what we call tabs. When you go to a tab, the ribbon for that tab opens and you can see the tools and functions that were formerly in menus and toolbars in earlier versions of PowerPoint. , you can click it to get more information or options.
How do I edit a picture in PowerPoint?
Select the image you want to modify in your PowerPoint presentation. On the Picture Format tab, in the Size group, click Crop. Click and drag the handles to modify the cropping. When you’re done, click anywhere outside the image and the mask.
How do you apply a picture style in PowerPoint?
Quickly apply a style
Click the picture, and then click the Format Picture tab. Click Quick Styles, and then click the style that you want.
How do I get image tools in File Explorer?
Picture tools
Open a folder with photo files inside, then click on one. A new yellow tab, Picture Tools, will appear above the Manage Ribbon tab. Click it, and you can quickly access tools to rotate a photo left or right, start a slideshow with the default photo viewer, or set a photo as your desktop background.
You can open the tools menu in Windows 10 by right-clicking the Start button or pressing “Windows + X”. Or, if you’re using a touchscreen, hold down the start button a little longer than usual and then lift your finger off the screen again.
What is the File Explorer in Windows 10?
Advertisements. File Explorer is the file management application used by Windows operating systems to browse folders and files. It provides a graphical interface for the user to navigate and access the files stored in the computer.