
Insert a header or footer

-
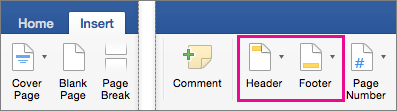
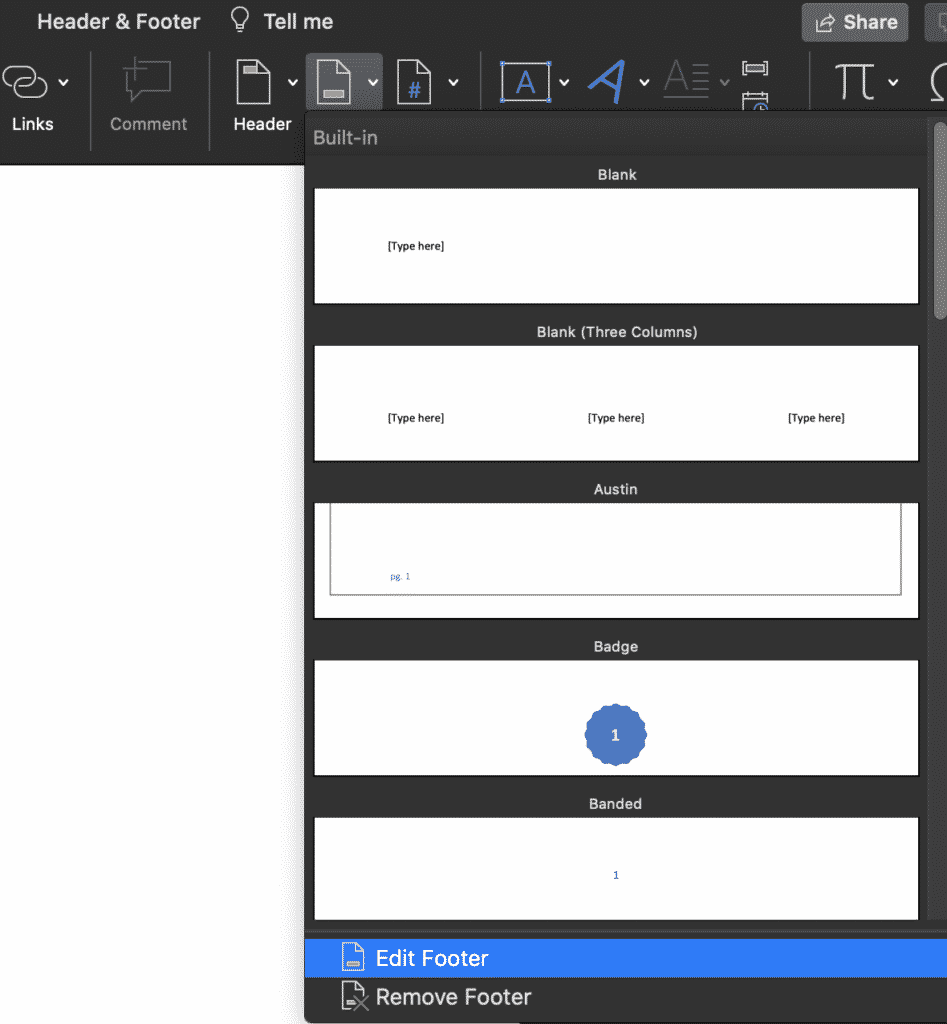
Go to Insert > Header or Footer.
-
Choose the header style you want to use.
Tip: Some built-in header and footer designs include page numbers.
-
Add or change text for the header or footer. For more info on things you can do with headers, see Edit your existing headers and footers. To edit a header or footer that’s been already created, double-click on it.
-
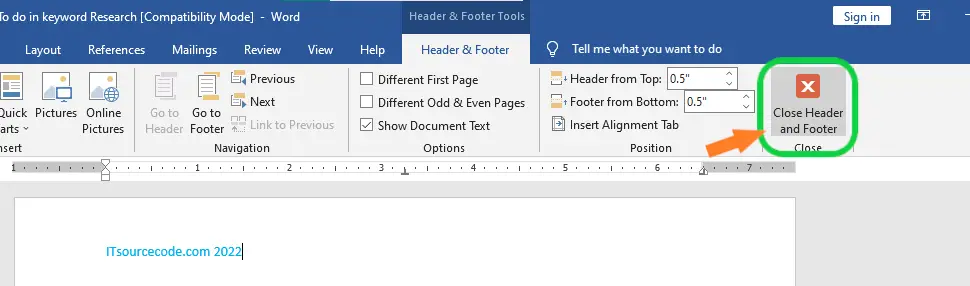
To eliminate a header—like deleting it on the title page—select it and then check the Different First Page box.
-
Select Close Header and Footer or press Esc to exit.
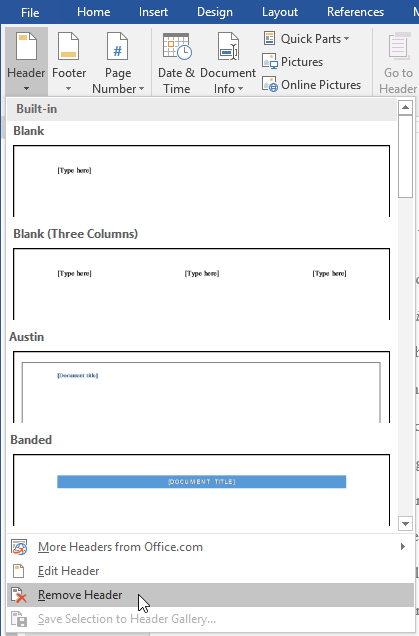
To delete, select Insert > Header (or Footer) > Remove Header (or Remove Footer).
Add a standard or customized header or footer
-
Go to Insert > Header or Footer.

-
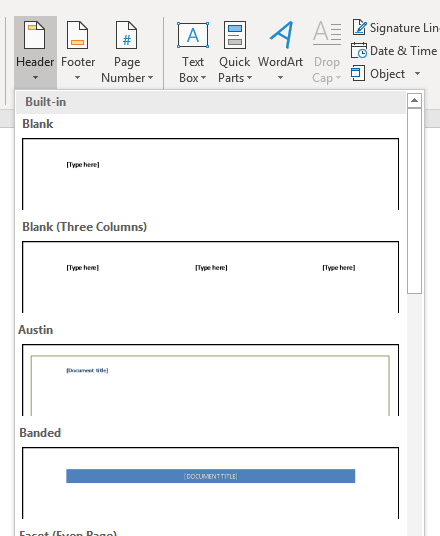
Choose from a list of standard headers or footers, go to the list of Header or Footer options, and select the header or footer that you want.
Or, create your own header or footer by selecting Edit Header or Edit Footer.
-
When you’re done, select Close Header and Footer or press Esc.
Important:
Office for Mac 2011 is no longer supported. Upgrade to Microsoft 365 to work anywhere from any device and continue to receive support.
Upgrade now
-
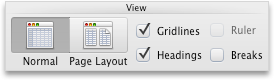
On the Layout tab, under View, click Page Layout.
-
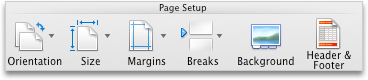
On the Layout tab, under Page Setup, click Header & Footer.
-
Choose from a list of standard headers or footers by going to the Header or Footer pop-up menu, and clicking the header or footer that you want.
Or, create your own header or footer by clicking Customize Header or Customize Footer and following the instructions.
Note: When you customize your header or footer, you can add images, page numbers, date, time, sheet name, file name and path, and more.
-
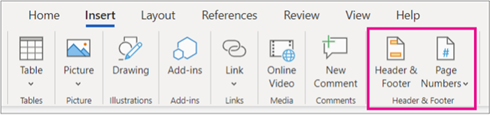
Go to Insert > Header & Footer.
-
Add or header or footer text.
-
Use the Options menu for additional customization.
-
To exit, select Close Header and Footer or press Esc.
-
To delete, select Insert > Header (or Footer) > Remove Header (or Remove Footer).
For more on headers and footers, see Headers and footers in Word.
Need more help?
This chapter describes what header and footer are in MS Word and how to add a header and footer in Word. Headers and footers are sections of a document that contain special information, such as page numbers and the total number of pages, the title of the document, the company logo, and any images. The header and footer appear at the top and bottom of each page, respectively.
Table of contents
- What is the header and footer in MS Word?
- Header
- Footer
- Why header and footer used in MS Word
- Advantages of header and footer in MS Word
- How to Use Header and Footer in MS Word
- Different Headers for Different Sections
- How to Remove Header and Footer in Word
- How do I change single-page header or footer of Word
- Shortcut key for header and footer in MS Word
- Summary
Headers and footers are handy for including information on each page of a document, such as your name, the document’s title, and page numbers.
Text that goes at the top of a page is called a header. Most of the time, this is where you put information about the document, like its name, the chapter heading, page numbers, the date it was made, and so on.
A footer is a section at the bottom of a document page that contains information shared with other pages. Footers may contain page numbers, creation dates, copyrights, or references that occur on a single page or all pages.
Header and footer are typically used in Word documents because they include additional information such as page numbers, dates, an author’s name, and footnotes, which can aid in the organization and readability of lengthy publications. Text supplied in the document’s header or footer will appear on each page.
By utilizing the header and footer sections, you can make your document look professional and polished. The header is a piece of the document that appears at the top margin, whereas the footer is a section that appears at the bottom margin.
One of the advantages of header and footer in Word document is that they repeat important information on every page or section. This makes it easier for people to find what they need quickly in a long document. This is shown by page numbers, which are important in any long document.
Header and footer are helpful because they give quick information about your document or data in a predictable way and set up different parts of a document. Simply, they make it much easier to read and understand calculations, graphs, and pivot tables.
The main difference between a header and a footer is their placement inside the document. Thus, what functions for the header also functions for the footer. Therefore, let’s begin by placing anything into the Word header.
Steps on How to Use Header and Footer in MS Word. In this example, we want the actual article to appear at the top of each page, so we will include it in the header.
- Step 1: Double-click anywhere on the document’s top or bottom margins. Here we will double-click the upper margin in our example.

- Step 2: The header or footer tab will be displayed. The insertion point will be displayed in either the header or footer.

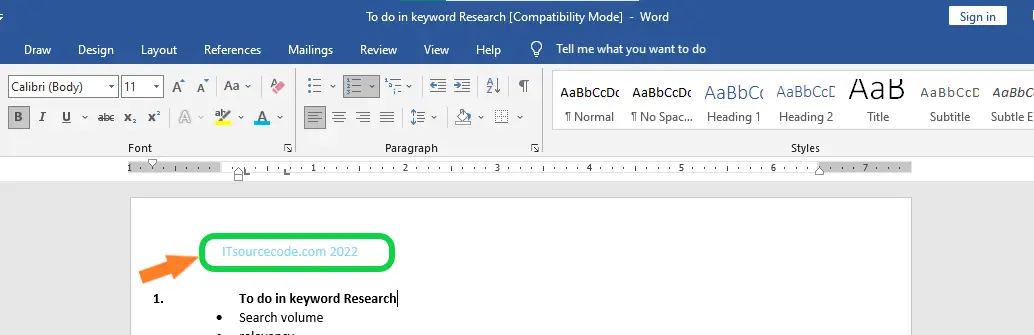
- Step 3: Fill in the blanks with the required information in the header or footer. We’ll type the website name and the date in our example.

- Step 4: Close the Header and Footer when you’re finished. Alternatively, press the Esc key.

- Step 5:The text of the header or footer will load.

Additionally, here are the instructions to have Different Headers for Different Sections. To accomplish this, you must first create sections in your document. To make sectioning:
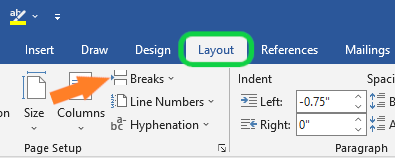
- Select the location where you wish to create a section by positioning the cursor there.
- Select the Layout tab, then click Breaks.

- In the bottom half of the menu, the Section Breaks are displayed.
- Choose “Continuous” from the list. This will make a Section Break right where the cursor was.

Once you divide your document into sections, you can give each section a different header.
To have different section headings:
- Go to the Header & Footer Tools tab by double-clicking on the header.
- Click the Link to Previous button to turn it off. If you keep this option turned on, this section will use the same header and footer as the last one.
So there you go! With these, each page in your document can have its own header.
The following are Remove Header and Footer from the first page of word document.
- Double-click the first page header or footer area.
- Check Different First Page to see if it’s selected. If not:
- Select Different First Page.
- Content of the header or footer on the first page is removed.
- Add your new content into the header or footer.
- Select Close Header and Footer or press Esc to exit.
Breaks between pages and between sections are different. If you want to change single-page header or footer of Word there is already a page break before the page where you want to change the header or footer, remove the page break and replace it with a section break, as shown below.
- Click or press where you want a new page to begin without a header or footer.
- To make a section break, go to Layout > Breaks > Next Page.
- To open the Header & Footer tab, double-click the header or footer section.
- Select Link to Previous to disable the connection between parts.
- Choose Header or Footer and do one of these:
- Choose Remove Header or Remove Footer .
- Change or add to the information in the header or footer. If you want to delete or change both the header and the footer, you’ll need to repeat steps 3 through 5.
- To get back to your document’s body, choose Close Header and Footer or press ESC.
The table shows the Shortcut key for header and footer in MS Word.
| Shortcut Key | Description |
| Alt+N, H, E. | To open the Header & Footer ribbon, You can add a header or footer picture or modify their location with the Header & Footer ribbon. |
| Alt+V, H. | Hold down the Alt key and press the V key at the same time. You can hold down the Alt key while you press H, or you can let go of it. |
| Alt+N, O | Press it to make a footer. |
Summary
In summary, we’ve learned what is header and footer in MS Word are and how to add header and footer in a document, as well as what those terms mean. In addition, we know why we need a header and footer to make our document presentable and creative.
Meanwhile, if you want to learn more about formatting text, see the previous tutorial on how to check and change lines and paragraphs as well as how to adjust page margin in Microsoft Word, which are still part of formatting your documents. You can browse those guides if you are having a hard time exploring your documents.
We hope this tutorial helps you as you format your documents in MS Word.
PREVIOUS

NEXT

Lesson 16: Headers and Footers
/en/word2016/columns/content/
Introduction
The header is a section of the document that appears in the top margin, while the footer is a section of the document that appears in the bottom margin. Headers and footers generally contain additional information such as page numbers, dates, an author’s name, and footnotes, which can help keep longer documents organized and make them easier to read. Text entered in the header or footer will appear on each page of the document.
Optional: Download our practice document.
Watch the video below to learn more about headers and footers in Word.
To create a header or footer:
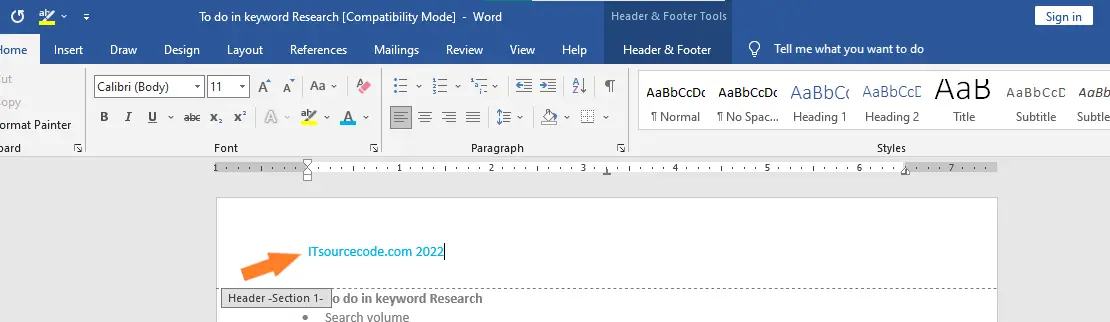
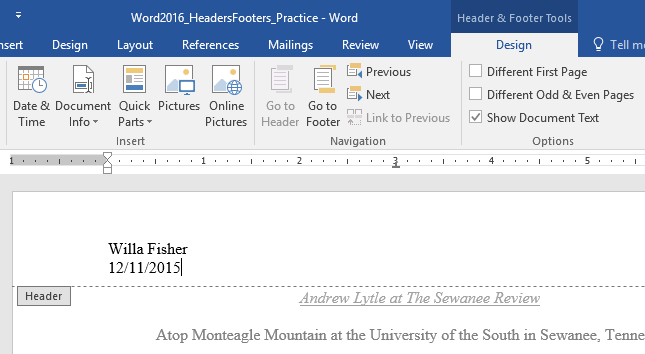
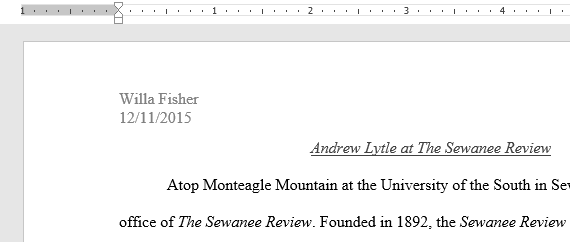
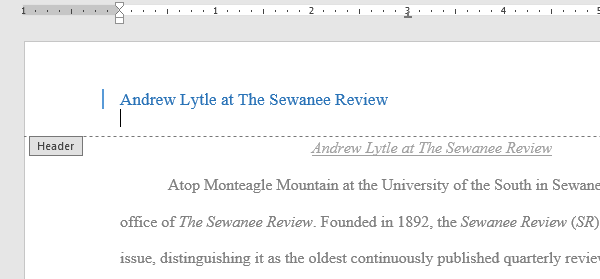
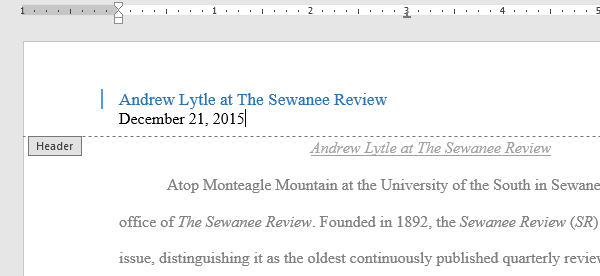
In our example, we want to display the author’s name at the top of each page, so we’ll place it in the header.
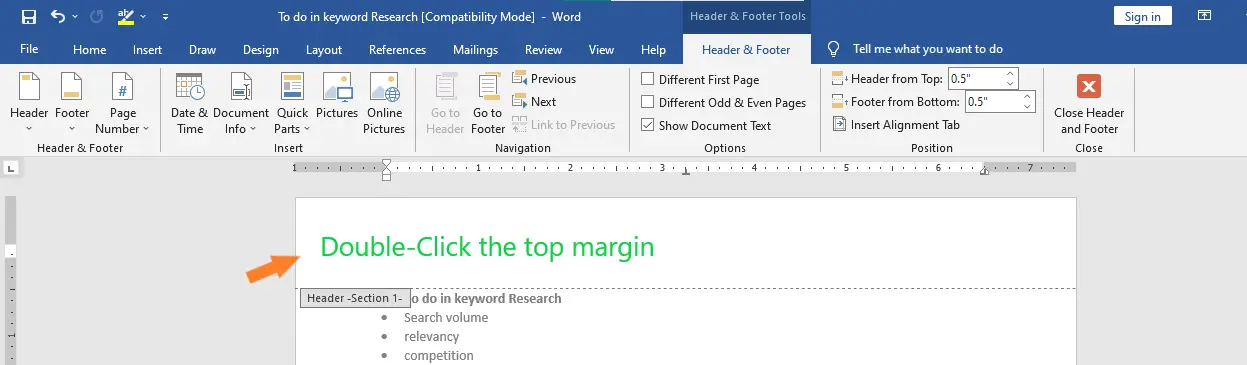
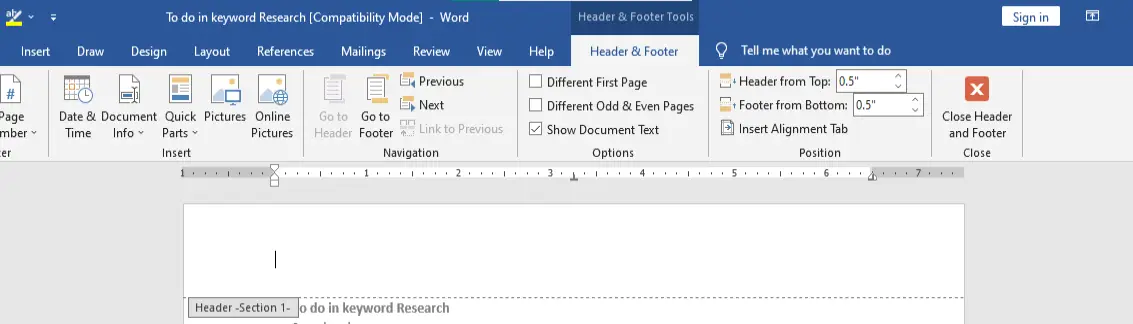
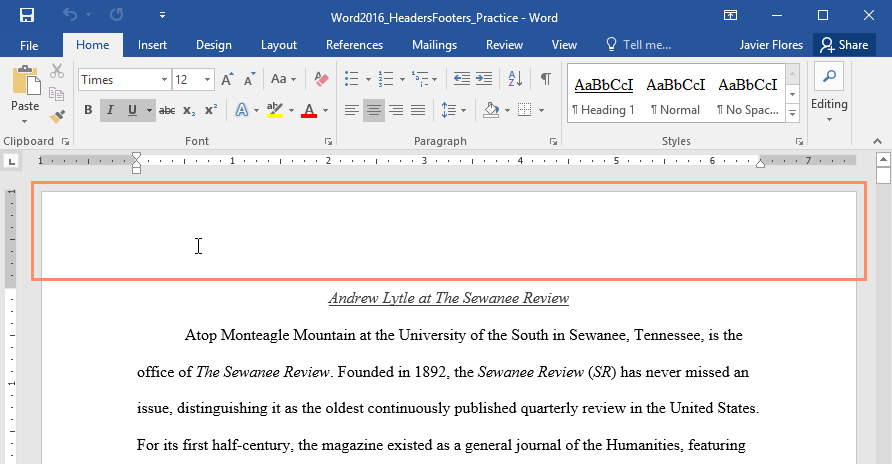
- Double-click anywhere on the top or bottom margin of your document. In our example, we’ll double-click the top margin.

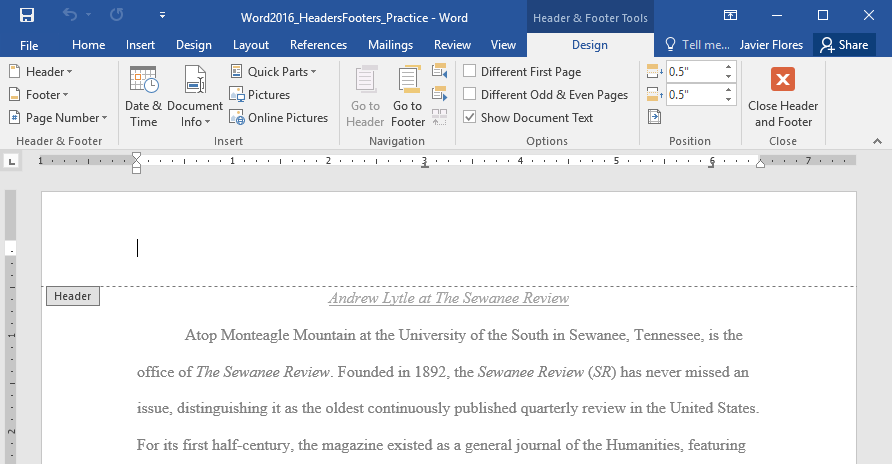
- The header or footer will open, and a Design tab will appear on the right side of the Ribbon. The insertion point will appear in the header or footer.
- Type the desired information into the header or footer. In our example, we’ll type the author’s name and the date.
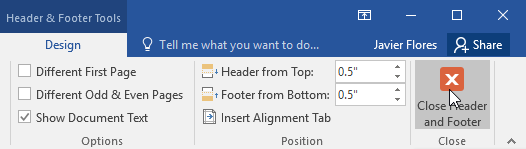
- When you’re finished, click Close Header and Footer. Alternatively, you can press the Esc key.
- The header or footer text will appear.
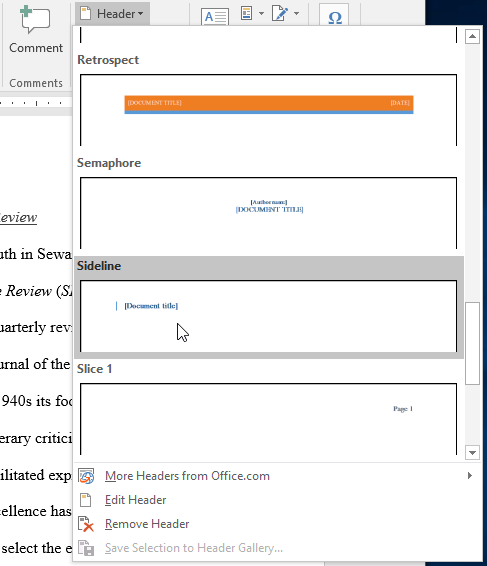
To insert a preset header or footer:
Word has a variety of preset headers and footers you can use to enhance your document’s design and layout. In our example, we’ll add a preset header to our document.
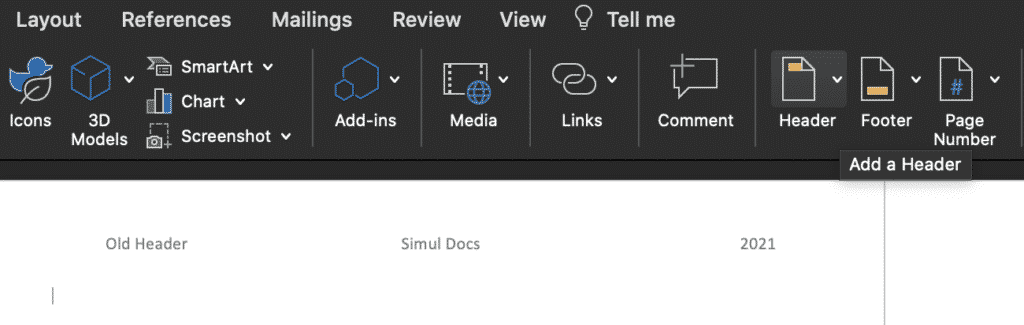
- Select the Insert tab, then click the Header or Footer command. In our example, we’ll click the Header command.

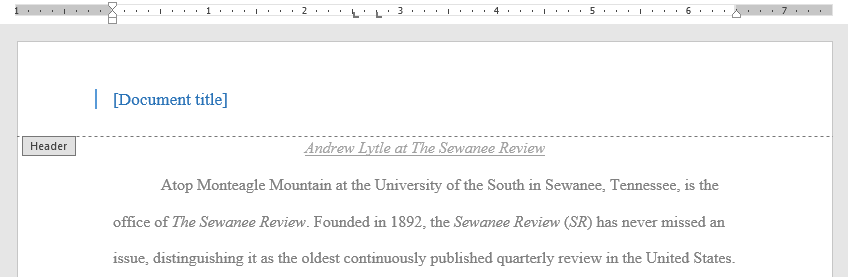
- In the menu that appears, select the desired preset header or footer.
- The header or footer will appear. Many preset headers and footers contain text placeholders called Content Control fields. These fields are good for adding information like the document title, author’s name, date, and page number.

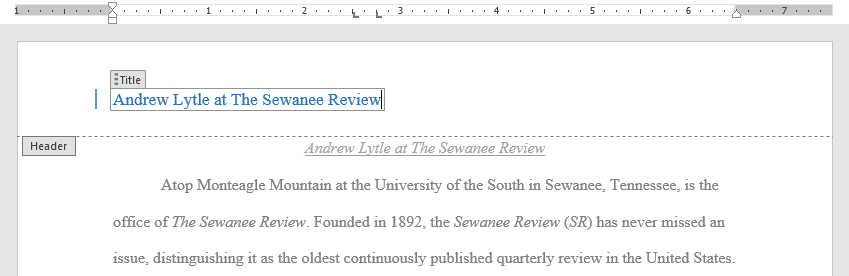
- To edit a Content Control field, click it and type the desired information.

- When you’re finished, click Close Header and Footer. Alternatively, you can press the Esc key.

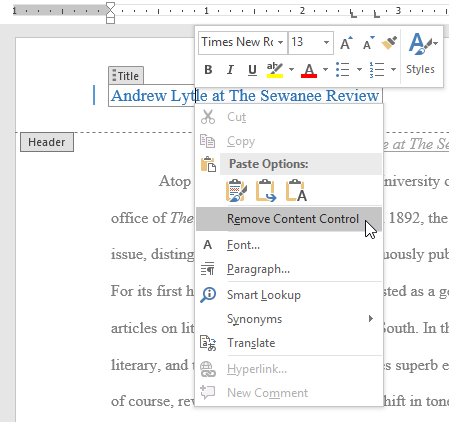
If you want to delete a Content Control field, right-click it and select Remove Content Control from the menu that appears.
Editing headers and footers
After you close the header or footer, it will still be visible, but it will be locked. Simply double-click a header or footer to unlock it, which will allow you to edit it.
Design tab options
When your document’s header and footer are unlocked, the Design tab will appear on the right side of the Ribbon, giving you various editing options:
- Hide the first-page header and footer: For some documents, you may not want the first page to show the header and footer, like if you have a cover page and want to start the page numbering on the second page. If you want to hide the first-page header and footer, check the box next to Different First Page.
- Remove the header or footer: If you want to remove all information contained in the header, click the Header command and select Remove Header from the menu that appears. Similarly, you can remove a footer using the Footer command.
- Page Number: You can automatically number each page with the Page Number command. Read our Page Numbers lesson to learn more.
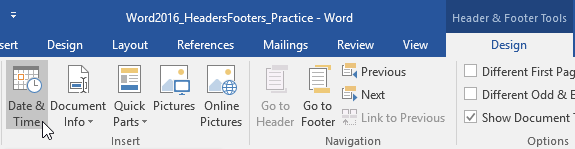
- Additional options: With the commands available in the Insert group, you can add the date and time, document info, pictures, and more to your header or footer.

To insert the date or time into a header or footer:
Sometimes it’s helpful to include the date or time in the header or footer. For example, you may want your document to show the date when it was created.
On the other hand, you may want to show the date when it was printed, which you can do by setting it to update automatically. This is useful if you frequently update and print a document because you’ll always be able to tell which version is the most recent.
- Double-click anywhere on the header or footer to unlock it. Place the insertion point where you want the date or time to appear. In our example, we’ll place the insertion point on the line below the author’s name.
- The Design tab will appear. Click the Date & Time command.
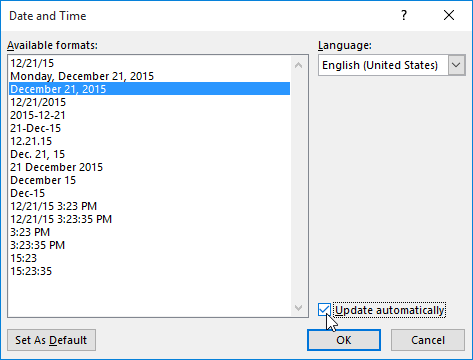
- The Date and Time dialog box will appear. Select the desired date or time format.
- Check the box next to Update Automatically if you want the date to change every time you open the document. If you don’t want the date to change, leave this option unchecked.
- Click OK.
- The date will appear in the header.
Challenge!
- Open our practice document. If you’ve already downloaded our practice document in order to follow along with the lesson, be sure to download a fresh copy by clicking the link in this step.
- Open the header.
- Choose Align Right on the Home tab and type your name.
- Below your name, use the Date & Time command on the Design tab and insert the date. You can use whichever format you like.
- In the footer section, insert the preset footer Grid. If your version of Word doesn’t have a Grid preset, you can choose any available preset.
- Close the header and footer.
- When you’re finished, your page should look something like this:


/en/word2016/page-numbers/content/
If you are looking for a better understanding of what a header and a footer in Microsoft Word is, look no further.
In this tutorial, you’ll learn things like how to activate and add content to a header or footer in Word.
Without further ado, let’s get started.
Headers and Footers in Microsoft Word appear at the top and bottom margin of each page, respectively. They are separate sections from the body of your document (text area) and both sections can’t be activated at the same time. They (Header and Footer) usually appear inactive when the text area is active. And the text area also falls behind and inactive when the Header and Footer area is active.
Once you activate the Header and Footer section, you can place text and graphics on one page, and it’ll appear on every page within the document. That’s why Headers and Footers in Microsoft Word are used for page numbers, titles, dates, watermarks, logos or letterheads in general.
A little bit of misunderstanding concerns how to insert headers and footers into Word. You may be surprised to learn that Headers and Footers are not inserted – they are already there by default. They are only empty. So, when you say you are creating or inserting a header or footer in Word, you are doing neither. Instead, you are just adding content to the empty header or footer that already exists.
Let’s see how you can activate and add content to the Header and Footer area in Word.
How to Activate the Header and Footer layer
As I mentioned before, the Header and Footer section or layer already exist in your document. However, you first of all must activate this section if you need to add some content on it
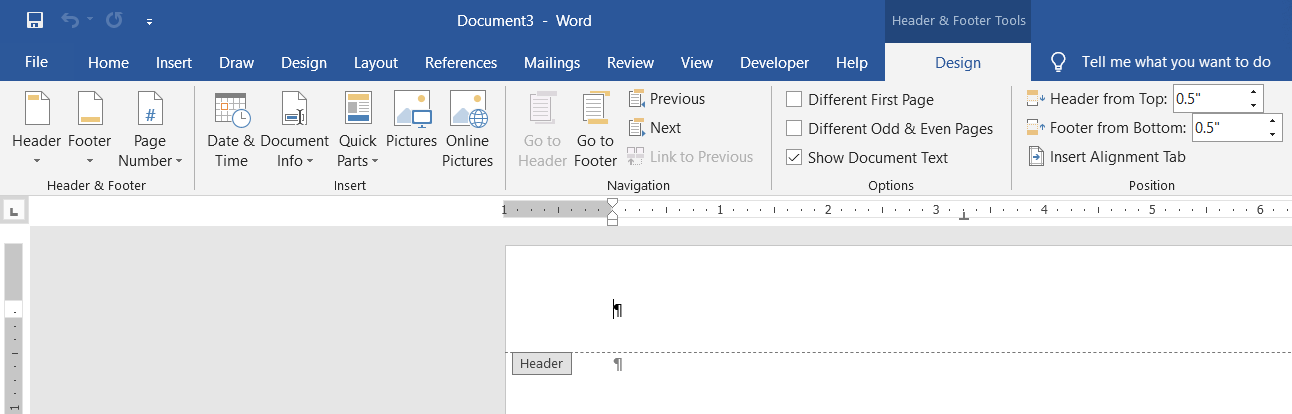
To activate the Header and Footer section of your Word document, double-click over the top or bottom area of any page. The Header and Footer area will get activated, introducing the Header & Footer Tools tabs with the design tab active. When the Header and Footer layer is active, the main body of your document will remain visible but is grayed out to indicate that you cannot edit it whilst the Header and Footer sections is active.

How to insert a Header or Footer in Word
Even though the Header and Footer sections already exist in your Word document, there are predefined headers and footers that you can use to insert content into your blank header or footer.
To insert a header in Word:
- Go to the Insert tab.
- In the Header & Footer group, click on the Header button to display a gallery of predefined headers.

- From this gallery, search for the Header style you prefer, and then click on it to insert it into your document. In this example, we’ll insert the Three Columns header.
- However, if any of the built-in Header styles doesn’t catch your interest, at the bottom of the drop-down, click on More Headers from Office.com to explore more options.

- As soon as you click on the Header you want to insert, the header section will become active where you can type anything you want, and you can apply any type of formatting you want.
This is how you may insert a header in Microsoft Word.
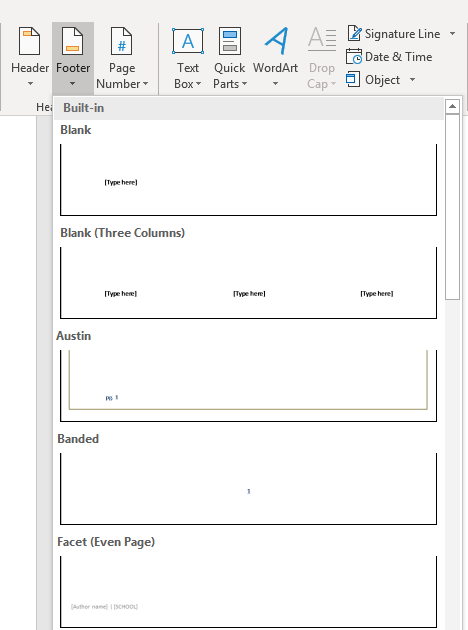
To insert a Footer in Word:
- Go to the Insert tab.
- In the Header & Footer category, click on the Footer button to display a gallery of sample footers.

- From this gallery, search for the Footer style you want, and then click on it to insert it into your document. In this example, we’ll insert the Three Columns footer.
- However, if any of the sample footers doesn’t catch your interest, at the bottom of the drop-down, click on More Footers from Office.com to explore more footer options.

- As soon as you click on the footer you want to insert into your document, the footer section will become active where you can type anything you want, and you can apply any type of formatting you want.
This is how you may insert a footer into Microsoft Word.
Disclosure: This page may contain a few affiliate links, which means if you buy something through them, we may get a commission (without any extra cost to you).
You can get a lot out of headers and footers in Microsoft Word. We show you how to use them in a document.

Headers and footers are simple to use in Microsoft Word, but there is much more to them than catches the eye. Learn how to get more out of headers and footers in Word.
In Microsoft Word, the top margin of a page is called its header, and the bottom margin is called the footer. Headers and footers are especially useful for including information that you want to display on every page, or specific pages. This information could be the page number, the chapter title, or anything else.
The main difference between a header and a footer is where they’re positioned in the document. So, what works for the header also works for the footer. That being said, let’s start with inserting something to the header in Word.
- Go to the Insert tab.
- Select Header. This will bring up a dropdown menu with some options in it. These are all presets for the header, provided by Microsoft. For now, select the first option which is Blank. This will take you to the header and also activate the Header & Footer Tools in the Design tab.


If you’ve more than a single page in your document, you’ll notice that once you add something in the header, it’s going to appear on top of every page in your document. This makes the header an excellent location to place document info.
A quicker way to access the header is to double-click on the top margin of the page. Double-clicking the bottom margin will bring up the footer.
The Header & Footer Tools tab activates whenever you’re editing the header or the footer of a page. This tab allows you to change options related to the header and also insert components other than plain text to it.
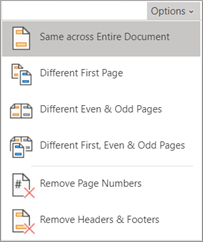
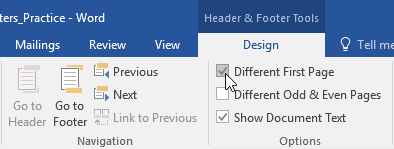
Different First Page
So far, anything that you add to the header will appear on every other page but what if you don’t want the header on your first page to appear on every page in the document? You might want to have other content in the header of other pages or anything else. This can effortlessly be resolved:
- Double-click on the header.
- In the Header & Footer Tools tab, in the Options section, check Different First Page.
Once you check this option, the stuff you put in the header of the first page won’t appear on other pages and conversely, if you change the header of any other page it won’t affect the first page.
Different Odd and Even Pages
You probably have seen this one in different documents and even books. As a familiar example, you could have the document title in the odd page header and the heading title on the even pages. You need to check only one option to have different headers on odd & even pages:
- Double-click on the header.
- In the Header & Footer Tools tab, check Different Odd & Even Pages.
Now, when you edit the header of an odd page it will apply to all odd pages but it won’t affect the even pages. This also works the other way around.
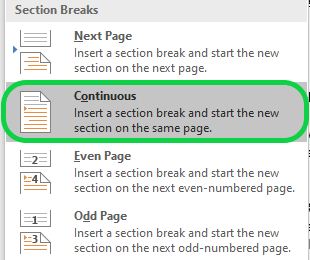
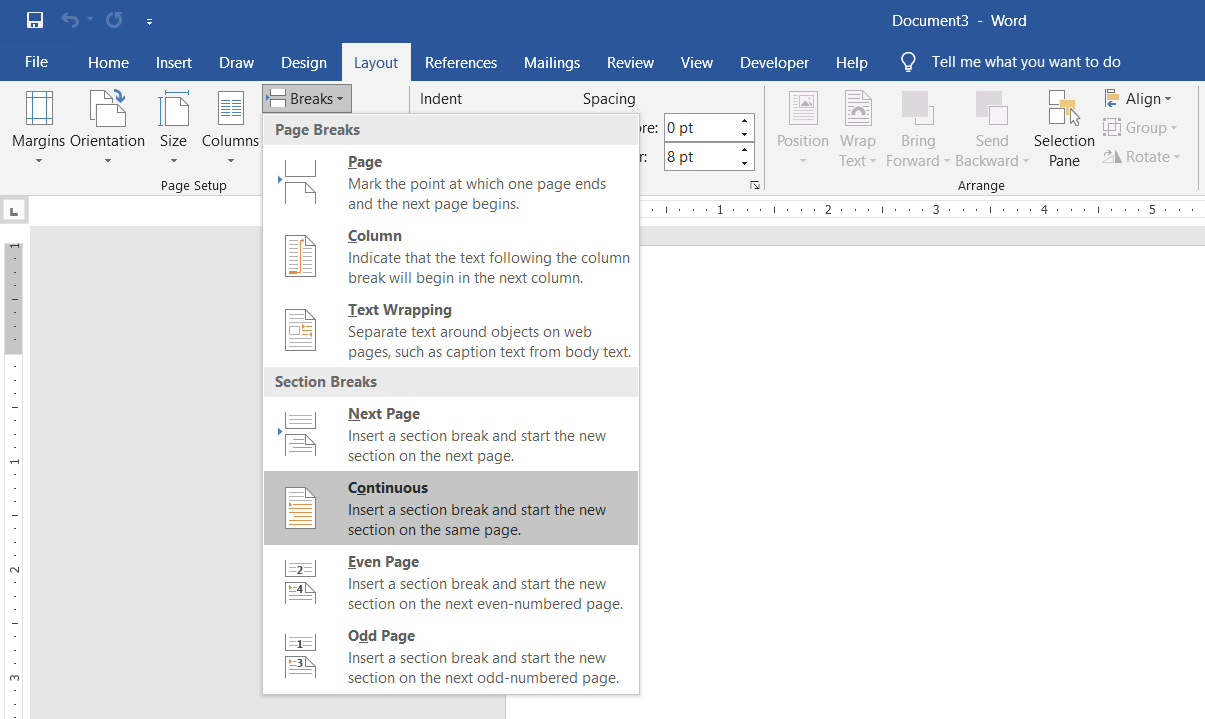
You can also have different headers for different sections. To do this, you need to create sections in your document first. To create sections:
- Select where you want to create a section by placing your cursor there.
- Go to the Layout tab and then click on Breaks.
- In the bottom half of the menu, you can see the Section Breaks.
- Select Continous from the menu. This will create a Section Break right where you had placed the cursor.

Once you create sections in your document, you can have different headers for each section. You can read our article on creating and removing page breaks to learn more about breaks.
To have different headers for a section:
- Double-click on the header and go to the Header & Footer Tools tab.
- Click on Link to Previous and disable it. Keeping this option enabled will use the same header and footer as the previous one for this section.
There you have it! With these, you can have unique headers for any page in your document.
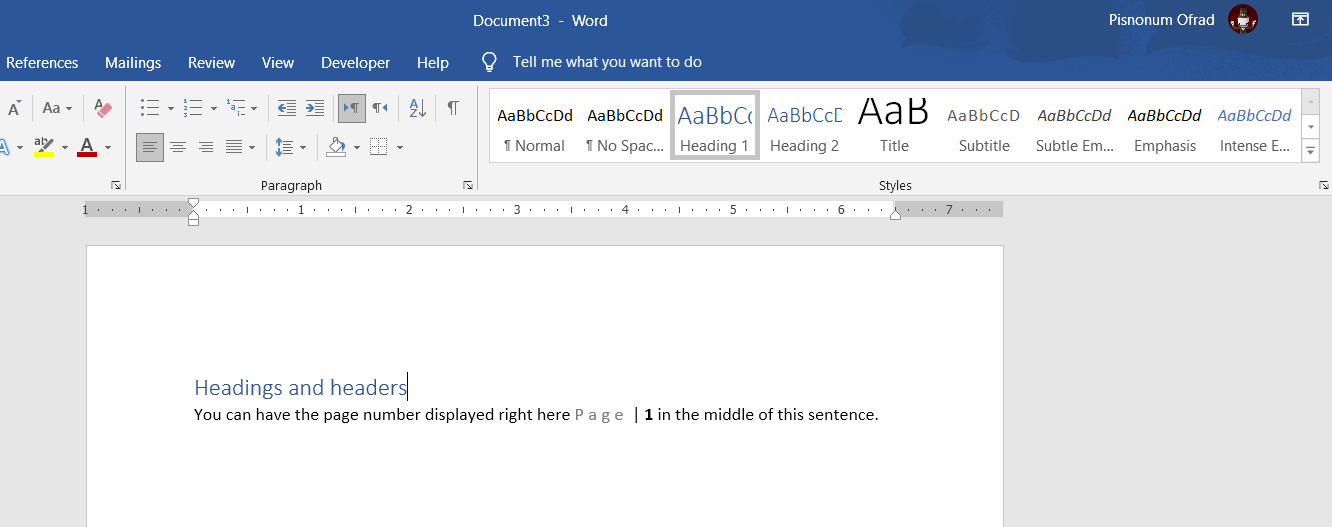
Numbering Pages in Word
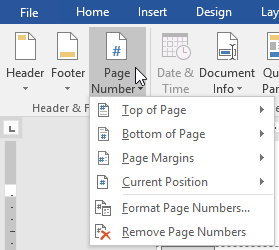
Headers and footers in Word provide a display area for page numbers in your document. Adding page numbers to longer documents makes them easier to navigate for readers. To add page numbers:
- Go to the Insert tab.
- In the Header & Footer section click Page Number.
- In the menu, you will have four choices for the location. Choose one and then select the styling you want.

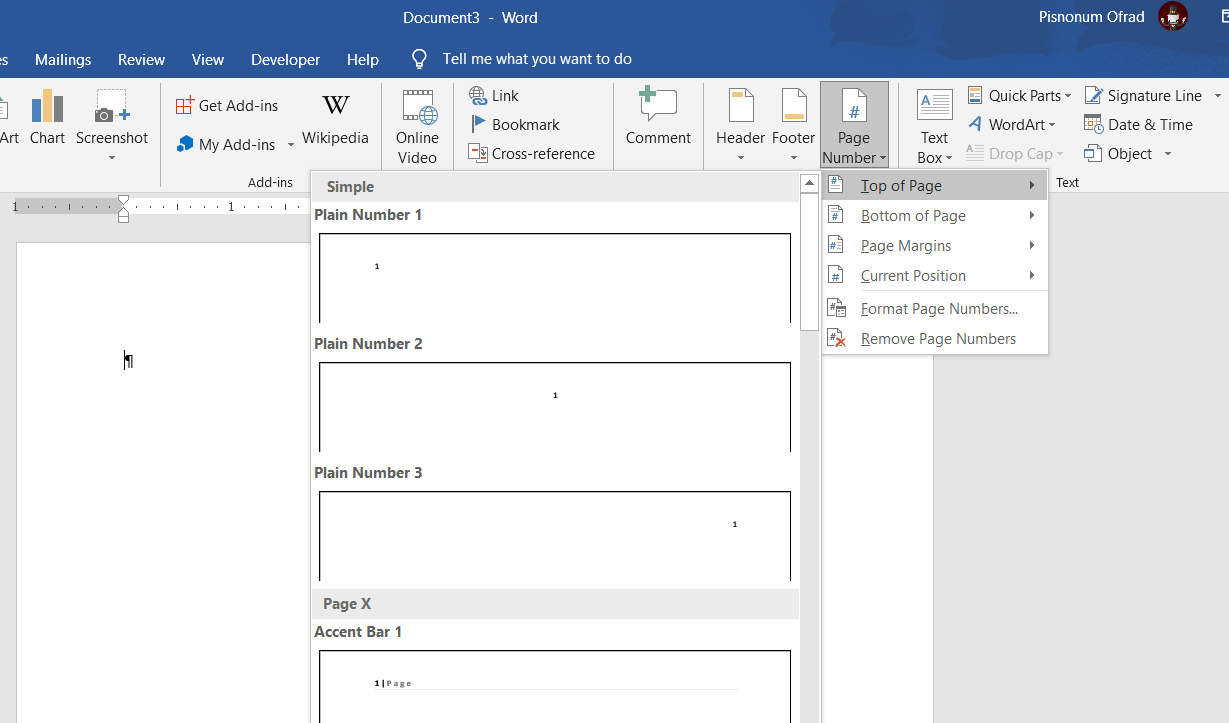
Top of Page and Bottom of Page will display the page number in the header and the footer respectively, but you can show the page number in areas other than these two.
Selecting Page Margins will display the page number on the right or left side of the page. What’s more, is that you can show the page number anywhere within the page. To do this:
- Place your cursor where you want to display the page number.
- Go to Insert and then select Page Number.
- From the menu, select Current Position then select a style.

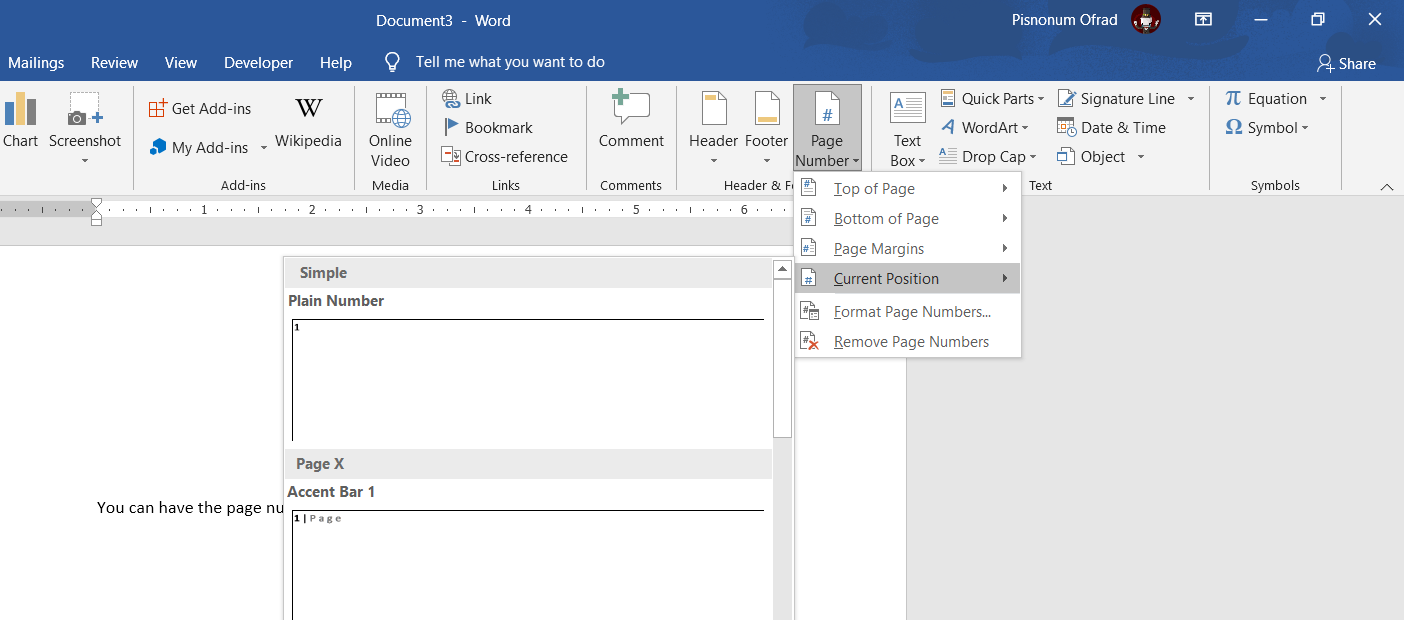
This will add the page number right where your cursor was. Keep in mind that this won’t show the page number on every page, it will appear only where the cursor was.
For an in-depth guide on numbering pages in Word documents, read our article on how to number your Word document.
You can make your document more dynamic by utilizing Fields in Microsoft Word. Fields are dynamic components that add auto-updating variables to your document. For example, you could insert a field in your header to display a heading on every page. This way you don’t have to type the heading on top of each page.
Note: Headers and headings are similar in name, but they’re different in nature. A header is the top margin of the document while a heading is a document element that allows you to define different sections and build a table of content for your document.)
Let’s work on the example we mentioned to add the heading to the top of each page. To do this, you’ve to first create some headings for your document.
- Go to the Home tab.
- In the Styles section, select a heading. For now, let’s go with Heading 1.
- Next, type something in your heading so that it’s not blank.

Once you’ve your headings set out, it’s time to display their names in the header.
- Double-click the header and then go to the Header & Footer Tools tab.
- Click on Quick Parts and then select Field… . Here you can see the various fields you can add to the header.
- From the Categories menu, select Links and References.
- In the Field names select StyleRef.
- Finally, in the Style name box, select Heading 1.
- Check the additional options that you might want in Field options and once you’re done, click OK.

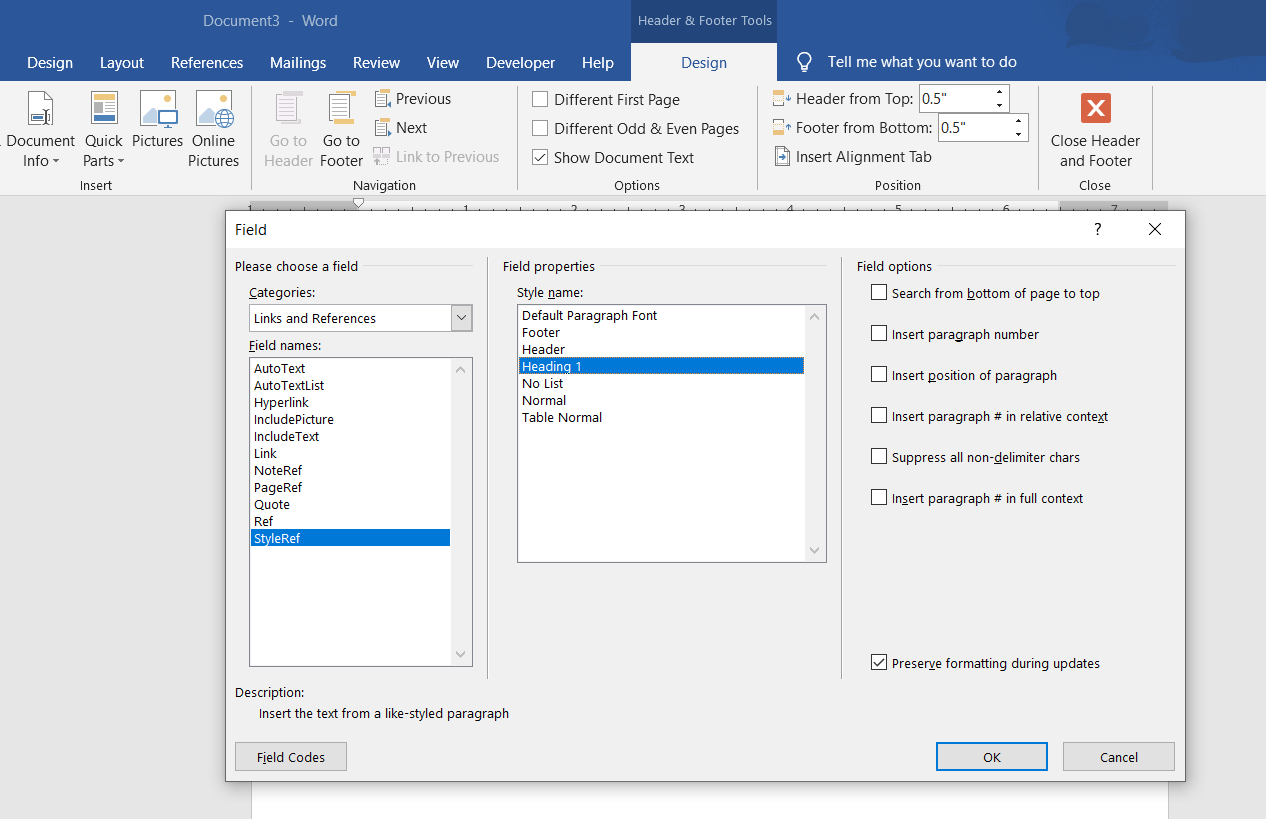
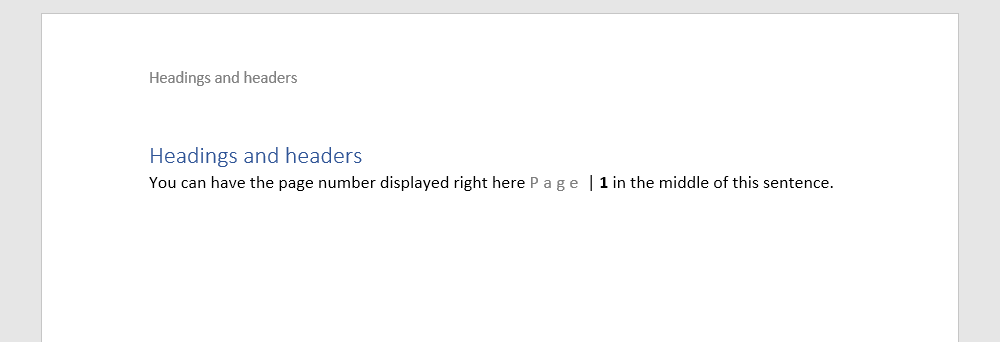
Now you can see the headings displayed in the header of the page. It will show the same heading until a new heading is used on a page.
There are many fields that you can use in your document. Fields aren’t exclusive to the header or the footer and you can use them anywhere else in your document as well. You can access fields from the Insert tab:
- Go to the Insert tab.
- On the right side, click Quick Parts and then select Fields.


Now that you’ve read through all these, you can achieve a lot more from the top and bottom margins of your document. However, this is just one of the many things you can do to improve your document.
Using Headers and footers in Microsoft Word make displaying important information about your document easy.
A footer is the text or image that sits in bottom margin on every page of your Word document. If you are trying to add a footer to your Word Document check out our post on how to do so here.
Once your footer has been inserted, you may be looking to edit the text within it or change the style of the footer. The style of footer you selected will determine where the information sits or how it is laid out, the style will also determine how much information can be placed into the footer.
In this article, we will show you how to edit the text in your footer and how to update the style of footer to better suit your document’s requirements.
Updating the text in your Footer
- Open Word
- Click the Insert Tab
- Click Footer
- Under the Footer drop-down, click Edit Footer
- Your text cursor will now be placed in your Footer to edit as required
Update the Style of your Footer
- Open Word
- Click the Insert Tab

- Click Footer
- Under the Footer drop-down, select the new style of Footer you would like to use
If you are updating the style of your footer, some of the information in your current footer may be lost.
We always suggest pulling the information out of your footer and into the document body before selecting your new style of footer to avoid loosing any text or images.
Looking for a simple solution to your collaboration problems?
Collaborating together in a Microsoft Word document is something most of us will do during our working careers. Some more than others, some may even collaborate daily, which is why collaborating with ease is so important.
When it’s your turn to review and edit a shared Word Document you usually received an email in your inbox ‘for your review’, you open the email, click the attachment and a Word Document pops up.
You start reading the text, making some edits, add a few comments and then press save.
Where do you save the document? Does this live deep in your company shared drive somewhere, under Client>2020>reports>Q3Report>Draft>Final? Your guess is as good as anyone else’s, so you save it here hoping that’s the right spot and move on.

Without realising it you have accidentally saved your find in the wrong spot, making it near impossible to source later. You also forgot to turn on tracked changes when you made your edits (don’t worry, you’re not alone, most of us do this monthly). With no tracked changes, there is no way of knowing what edits you made, to then re-do them or highlight them for your manager. So you are forced to start all over again.
It’s painful and time-consuming and happens to the majority of people collaborating in Word.
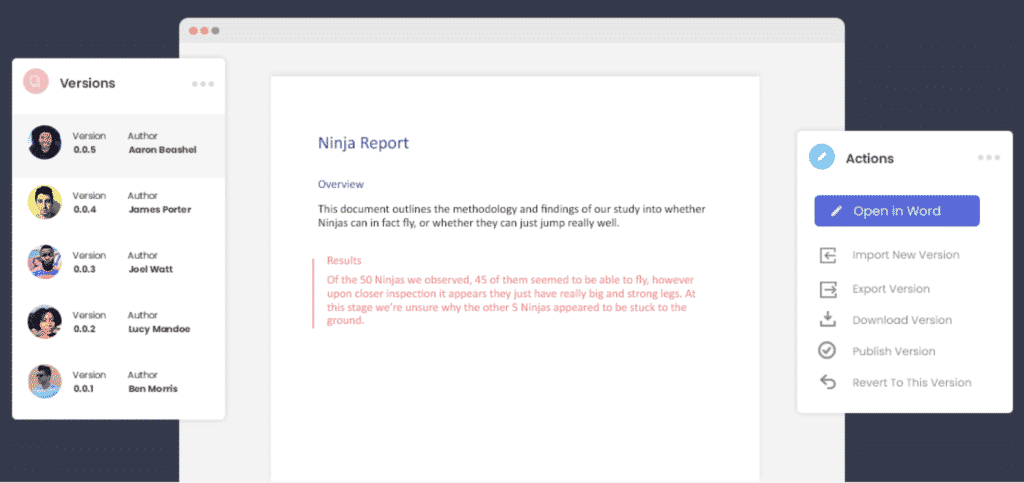
Luckily, there are some new purpose built tools on the market that were built with seamless collaboration in mind. Tools such as Simul Docs.
Simul Docs was built to ensure you never forget to turn on tracked changes again, in fact, Simul will track your changes automatically. Open a document, start making changes and Simul will begin tracking them. It sounds simple, and it is, but it is something that makes a huge difference when collaborating in Word.

Not sure where to save your document?
Simul has you covered.
Simul will keep track of every, single version your team creates. If the document is opened and a change made, Simul will automatically save this as a new version. Because, if there are new edits or changes you probably don’t want to miss them.
Automatically saving new versions is one thing, but Simul thought they would take it one step further, just to make sure you never have to stress about where your files are again. Simul manages version control on your behalf. When a new version is created, Simul will save it and give it a new version number such as 0.0.2 or 0.0.3, depending on how many versions of the document currently exist.

As your team continues collaborating, Simul will continue saving and managing your version control. Keeping track of every change and every file, while storing them neatly in a Versions List for you to review at any time.
If you want to pull a document out of Simul and save it or forward it on in an email, no worries, you can do that directly from Simul as well.
Simul allows you to access your documents from anywhere, anytime. without the need for shared drive or server access. If you have an internet connection (or not, because Simul is happy for you to work offline too), you can access all of your files.
Is there honestly anything Simul Docs can’t do?
We haven’t found it yet.
![]()
Download Article
![]()
Download Article
This wikiHow teaches you how to create your own custom headers and footers in Microsoft Word. You can start with one of Word’s pre-made header and footer templates or start yours from scratch. Both headers and footers can include custom text, page numbers, images, and special formatting.
Things You Should Know
- Click Insert > Header or Footer > Edit Header or Edit Footer.
- Create your header. You can add page numbers, date, and logos. Then, hit Close Header & Footer to preview it on the document.
- Double click the header or footer to make edits or change the settings.
-
1
Click the Insert tab. It’s at the top of Word.
- If you’ve already inserted a header or footer and want to edit it, simply double-click it now.
-
2
Click Header or Footer. It’s in the «Header & Footer» panel at the top of Word. A menu will expand.
- On the menu, you’ll see different header and footer styles that you can use as a starting point—all are fully editable. You can select one of these now to add it to your document if you’d like. To edit the header or footer after placing it, just double-click it on the page.
- You can also browse more pre-made headers and footers by clicking More Headers from Office.com.
Advertisement
-
3
Click Edit Header or Edit Footer. Depending on the option you selected, you’ll see the link at the bottom of the menu. This opens a Design tab in the toolbar that’s specifically for creating custom headers and footers.
- Every time you double-click a header or footer to edit it, the Design tab (Windows) or Header & Footer tab (Mac) will automatically open.
-
4
Click Page Number to add page numbering. You can select from a number of numbering styles and locations from the menu.
- Click the Format Page Numbers menu to choose a different number format, such as roman numerals. You can also choose to add other numbering elements here, such as chapter numbers and headings.[1]
- Click the Format Page Numbers menu to choose a different number format, such as roman numerals. You can also choose to add other numbering elements here, such as chapter numbers and headings.[1]
-
5
Add text to the header or footer. If you’d like to add specific text, such as your name, to the header or footer, you can easily type it at the desired location. If you chose one of Word’s pre-made header or footer templates, you can edit the placeholder text by clicking the text and typing over it.
-
6
Insert other features into the header or footer. The «Insert» panel on the Design or Header & Footer tab contains a bunch of different features you can add to your header or footer:
- Date & Time: This allows you to select a date and/or time format to place in the header or footer.
-
Document Info: Use this option to include certain information about your document in the header or footer, such as the document’s title, author name, and file path.[2]
- Quick Parts: Quick Parts are reusable text and properties that you can add to any part of your document, including headers and footers.
-
Pictures or Online Pictures: You can use either of these options to place an image into your header or footer.[3]
For best results, stick to a small image, such as a decorative horizontal bar or logo.
-
7
Click Close Header & Footer. It’s the red-and-white «X» icon on the far right side of the Design tab. This closes the header and footer editor, which shows you how it will really look on your document.
- If you added a header and want to add a footer as well (or vice-versa), return to the Insert tab and select Header or Footer as necessary.


Advertisement
-
1
Double-click the header or footer. If you don’t want the header or footer you created to appear on the first page (or until a certain page you specify), use this method. Start by double-clicking the header or footer on the first page to open it for editing.
-
2
Check the box next to «Different First Page.» It’s in the Options panel on the Design tab (PC) or Header & Footer tab (Mac), which opens automatically. This removes the header or footer from the first page, making the second page of your document the new Page 1.
- If you’d like, you can select Different Odd & Even Pages to place different headers/footers on even and odd pages. For example, if you want odd pages to contain the title of your document and even pages to display a page number.
- The Show Document Text option just toggles the actual text of your document on or off so can see what the header or footer looks like without the document.
-
3
Click Close Header & Footer. It’s the red-and-white «X» icon on the far right side of the Design or Header & Footer tab. This saves your changes.


Advertisement
Add New Question
-
Question
How can I put my name in a footer on the left on every page and put the page number on the right, having it change on each page?

Malsha Ranawaka
Community Answer
There are pre-designed footers like this available. If this is not in your list, simply select a footer design that has two text fields on the left and right. Then go to «edit footer» mode and put the name on the left. Select the text field on the right. In the «Header & Footer Tools» tab, select «Quick Parts.» From the dropdown, select «Fields.» This will open a dialog box. Select «Page» from the field names list. Select a page number format and click «OK.» You will get an updating page number field on the right.
-
Question
How do I insert a line above the footer?
Malsha Ranawaka
Community Answer
Go to Edit Footer, and place your cursor somewhere in the first line of words you have in the footer. Select the «Home» tab. In the «Paragraph» section, select the «Borders» dropdown. From the dropdown menu, select «Top Border», and you will get a border above the footer.
-
Question
How do I edit a horizontal line in MS Word 2007?
Malsha Ranawaka
Community Answer
Double click on the line, or right click it and select «Format Horizontal Line» to get the dialog box with edit options.

See more answers
Ask a Question
200 characters left
Include your email address to get a message when this question is answered.
Submit
Advertisement
Video
-
Browse through Microsoft Word’s collection of templates before you start adding your own header and footer to documents. The pre-set templates can save you a lot of time.
Thanks for submitting a tip for review!
Advertisement
About This Article
Article SummaryX
1. Click the Insert tab.
2. Click Header or Footer.
3. Click a header or filter option, or select Edit Header/Footer to start from scatch.
4. Click Page Number to add automatic numbering.
5. Add text.
6. Insert dates, document info, quick parts, and/or images.
7. Click Close Header & Footer.
Did this summary help you?
Thanks to all authors for creating a page that has been read 324,648 times.
Is this article up to date?

Microsoft Word gives you the option to place a header and footer at the top and bottom of your pages. You can place anything in this section, but Word uses header and footer information in all pages. You can use these settings to create titles above your pages and page numbers at the bottom of your pages.
Header and Footer Buttons
The header and footer settings buttons are in the «Insert» tab. Click the tab and find the «Header & Footer» category located in the tab.
(Header and footer buttons)
The arrows under each button indicate that clicking it will display a set of options. Headers are generally reserved for leaving titles at the top of pages. When you read a paper novel, you see the book’s title at the top of a page. Some books have the chapter name at the top of a page. This is what a header does in a Word document.
Footers are generally used for information regarding page numbers or information that you want to mark at the bottom of each page. If you choose to add page numbers to the bottom of your pages in a footer setting, Word will automatically increment each page number. You don’t need to manually type a page number in each footer. Word knows that a page number setting should display the page number.
In this lesson, we’ll discuss header and footer configurations to customize long documents with several sections, chapters and pages.
Setting a Word Document Header
When you click the «Header» button, Word opens another window asking if you want to create a header for your document. If you click the button a second time, a list of preset header configurations is shown in a dropdown list.
(Header options dropdown styles)
You can add any one of these header options to the document, and Word will automatically format it using the style shown in the example. Choose the «Banded» option and notice that a header is added to the top of the currently active page.

(Header added to document)
After you choose a header style, it’s shown at the top of the current page with a tab at the bottom-left corner that says «Header.» Whenever you type any content in a document header, Word automatically displays this tab to let you know that the content you’re adding to the document is the header and not the body of the page.
Word displays a prompt where you can type your custom header. In the image above, the template location is labeled «Title.» Remember that headers are generally used for titles that will be displayed on every page, so typing content in the header template will be shown in each page as static content. When you add static content to a header or footer, this same content persists across all pages. Not only does the content remain the same, but the style also persists across all pages.
In the image above, the title «Test Document» is added to the header. The content is set at all capital letters due to the style presets created by Word. You can still customize header settings, but any changes that you make will affect all pages in your file. To test the new header settings, add a new page to the document.
Before you add a page break, click the document body. Notice that the «Header» tab disappears, and you’re returned to the page body as the active part of the document. To add a page break, go to the «Pages» category in the «Insert» tab. Click the «Page Break» button and a new page is added to the document. Depending on the view layout, you see a new page added to the right or to the bottom of the current page. Notice that the header persists, and you see the same text and style in the footer of the new page.
Creating Footer Settings
Headers give you the benefit of adding static content at the top of your pages, but footers are usually reserved for content that changes from page to page. Most commonly, footers contain page numbers. Word supports a number of preset footer styles. You can place a page number to the left, center or right of the page. Word also supports styles that make footer settings more attractive than just having a number at the bottom of a page.
The «Footer» button is located next to the «Header» button, and clicking it displays the same action. A dropdown list of styles is displayed where you can choose the one that you prefer for your document.
(Footer dropdown options)
You’ll notice that several footer options and styles are the same as the options displayed for the header dropdown. These preset styles can be added to your footer so that you don’t need to create one on your own.
The most common footer is page numbers. In the footer dropdown options, you can see the page number examples with the styles applied so that you can sample what your footer will look like.
A better option to create a page number in a footer is using the «Page Number» Word function. Next to the «Footer» button is the «Page Number» button. Click this button and then choose a location for the page number. In this example, the bottom of the page is chosen. Then, choose a style and location for the page number. In this example, the right side of the bottom of the page is chosen, and Word opens the footer and places a page number to the right side of the page.

(Page number footer added to a document)
Similar to the «Header» tab that displays when you edit the header section, Word displays a «Footer» tab as you change the content in a footer. This lets you know that you aren’t editing the body of a document but rather the footer. Notice in the image above that the page number «2» displays. This number is automatically generated based on the page where it’s displayed.
If you look at the first page in your document, you’ll notice that the page number is «1.» You can test the footer feature by adding a new page break on page two. A new page is created, and at the bottom of the page will show the number «3.» Word takes care of the page numbers, so should you add or delete a page in your document, the numbers will reflect the right page.
You can further format page numbers by clicking the «Page Number» button again and selecting «Format Page Numbers.» This selection opens a configuration window.

(Page Number Format configuration window)
It’s standard to start page number counts on page two, and this window lets you configure at which page the first number displays. You can start at any page, but it’s common to start after the table of contents if you have a large document. You can also change the number format from the top dropdown. For instance, you can use roman numerals as page numbers.
You can also include chapter numbers if you’re creating an ebook or a large document that has a table of contents. These footer configurations help customize the way Word displays page numbers and other information across the document.
Setting headers and footers is common for large documents, and you’ll use this feature often when you create long documents. We’ll cover creating a table of contents in later chapters, which is another useful tool that Word offers that will automatically generate organizational information for documentation.