
Содержание
- Coding and recoding data in Excel
- Dataset to recode variables
- Goal of this tutorial
- Recoding the data using a coding table
- Excel VBA Tutorial – How to Write Code in a Spreadsheet Using Visual Basic
- Introduction
- Prerequisites
- Learning Objectives
- Important Concepts
- What is VBA?
- Why use VBA in Excel?
- Getting Set Up to Write VBA in Excel
- Developer Tab
- VBA Editor
- Excel VBA Examples
- Example #1: Display a Message when Users Open the Excel Workbook
- How is it doing that?
- When could I use this?
- Real World Examples
- Example #2: Allow User to Execute another Procedure
- How is it doing that?
- When could I use this?
- Real World Examples
- Example #3: Add Numbers to a Range with a For-Next Loop
- How is it doing that?
- When could I use this?
- Real World Examples
- Conclusion
Coding and recoding data in Excel
This tutorial will help you re-code your data based on a reference coding table in Excel using the XLSTAT software.
Dataset to recode variables
The dataset contains 20 clients and their age, city of residence and gender. We will recode the variable City using a coding table.
 Goal of this tutorial
 Goal of this tutorial
The goal of this tutorial is to recode the variable City into the cardinal points North, South, East, West.
Recoding the data using a coding table
After opening XLSTAT, select the XLSTAT / Preparing data / Code command, or click on the corresponding button of the Preparing data toolbar.
Once you’ve clicked on the relevant button, the dialog box appears.
Select the variable you want to recode. Here we choose the variable «City» by selecting the whole column. Then select the coding table that contains both the old values and new values. Note that you should include the heading in the selection.
The output should be displayed as a new column in the table, so select the option Range and select a cell next to the table such as E1.
To avoid having text written above the results we untick the option Display the report header.
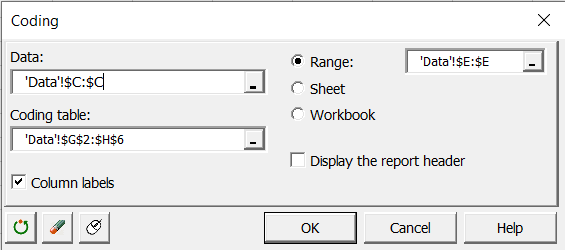
When ready click on the OK button. The results will now be displayed next to the table. You can verify that the code has been properly used.

This video shows you how to proceed with this tutorial. 
Источник
Excel VBA Tutorial – How to Write Code in a Spreadsheet Using Visual Basic

Introduction
This is a tutorial about writing code in Excel spreadsheets using Visual Basic for Applications (VBA).
Excel is one of Microsoft’s most popular products. In 2016, the CEO of Microsoft said «Think about a world without Excel. That’s just impossible for me.” Well, maybe the world can’t think without Excel.
- In 1996, there were over 30 million users of Microsoft Excel (source).
- Today, there are an estimated 750 million users of Microsoft Excel. That’s a little more than the population of Europe and 25x more users than there were in 1996.
We’re one big happy family!
In this tutorial, you’ll learn about VBA and how to write code in an Excel spreadsheet using Visual Basic.
Prerequisites
You don’t need any prior programming experience to understand this tutorial. However, you will need:
- Basic to intermediate familiarity with Microsoft Excel
- If you want to follow along with the VBA examples in this article, you will need access to Microsoft Excel, preferably the latest version (2019) but Excel 2016 and Excel 2013 will work just fine.
- A willingness to try new things
Learning Objectives
Over the course of this article, you will learn:
- What VBA is
- Why you would use VBA
- How to get set up in Excel to write VBA
- How to solve some real-world problems with VBA
Important Concepts
Here are some important concepts that you should be familiar with to fully understand this tutorial.
Objects: Excel is object-oriented, which means everything is an object — the Excel window, the workbook, a sheet, a chart, a cell. VBA allows users to manipulate and perform actions with objects in Excel.
If you don’t have any experience with object-oriented programming and this is a brand new concept, take a second to let that sink in!
Procedures: a procedure is a chunk of VBA code, written in the Visual Basic Editor, that accomplishes a task. Sometimes, this is also referred to as a macro (more on macros below). There are two types of procedures:
- Subroutines: a group of VBA statements that performs one or more actions
- Functions: a group of VBA statements that performs one or more actions and returns one or more values
Note: you can have functions operating inside of subroutines. You’ll see later.
Macros: If you’ve spent any time learning more advanced Excel functionality, you’ve probably encountered the concept of a “macro.” Excel users can record macros, consisting of user commands/keystrokes/clicks, and play them back at lightning speed to accomplish repetitive tasks. Recorded macros generate VBA code, which you can then examine. It’s actually quite fun to record a simple macro and then look at the VBA code.
Please keep in mind that sometimes it may be easier and faster to record a macro rather than hand-code a VBA procedure.
For example, maybe you work in project management. Once a week, you have to turn a raw exported report from your project management system into a beautifully formatted, clean report for leadership. You need to format the names of the over-budget projects in bold red text. You could record the formatting changes as a macro and run that whenever you need to make the change.
What is VBA?
Visual Basic for Applications is a programming language developed by Microsoft. Each software program in the Microsoft Office suite is bundled with the VBA language at no extra cost. VBA allows Microsoft Office users to create small programs that operate within Microsoft Office software programs.
Think of VBA like a pizza oven within a restaurant. Excel is the restaurant. The kitchen comes with standard commercial appliances, like large refrigerators, stoves, and regular ole’ ovens — those are all of Excel’s standard features.
But what if you want to make wood-fired pizza? Can’t do that in a standard commercial baking oven. VBA is the pizza oven.

Why use VBA in Excel?
Because wood-fired pizza is the best!
A lot of people spend a lot of time in Excel as a part of their jobs. Time in Excel moves differently, too. Depending on the circumstances, 10 minutes in Excel can feel like eternity if you’re not able to do what you need, or 10 hours can go by very quickly if everything is going great. Which is when you should ask yourself, why on earth am I spending 10 hours in Excel?
Sometimes, those days are inevitable. But if you’re spending 8-10 hours everyday in Excel doing repetitive tasks, repeating a lot of the same processes, trying to clean up after other users of the file, or even updating other files after changes are made to the Excel file, a VBA procedure just might be the solution for you.
You should consider using VBA if you need to:
- Automate repetitive tasks
- Create easy ways for users to interact with your spreadsheets
- Manipulate large amounts of data
Getting Set Up to Write VBA in Excel
Developer Tab
To write VBA, you’ll need to add the Developer tab to the ribbon, so you’ll see the ribbon like this.

To add the Developer tab to the ribbon:
- On the File tab, go to Options > Customize Ribbon.
- Under Customize the Ribbon and under Main Tabs, select the Developer check box.
After you show the tab, the Developer tab stays visible, unless you clear the check box or have to reinstall Excel. For more information, see Microsoft help documentation.
VBA Editor
Navigate to the Developer Tab, and click the Visual Basic button. A new window will pop up — this is the Visual Basic Editor. For the purposes of this tutorial, you just need to be familiar with the Project Explorer pane and the Property Properties pane.

Excel VBA Examples
First, let’s create a file for us to play around in.
- Open a new Excel file
- Save it as a macro-enabled workbook (. xlsm)
- Select the Developer tab
- Open the VBA Editor
Let’s rock and roll with some easy examples to get you writing code in a spreadsheet using Visual Basic.
Example #1: Display a Message when Users Open the Excel Workbook
In the VBA Editor, select Insert -> New Module
Write this code in the Module window (don’t paste!):
Sub Auto_Open()
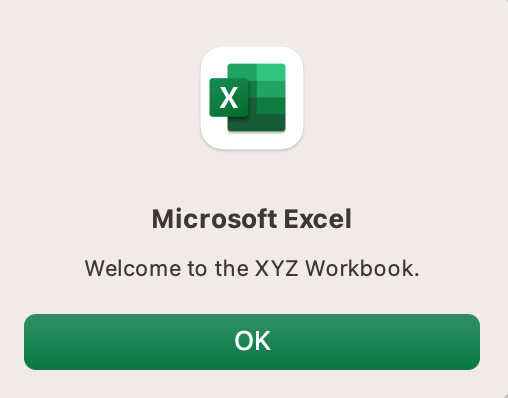
MsgBox («Welcome to the XYZ Workbook.»)
End Sub
Save, close the workbook, and reopen the workbook. This dialog should display.
How is it doing that?
Depending on your familiarity with programming, you may have some guesses. It’s not particularly complex, but there’s quite a lot going on:
- Sub (short for “Subroutine): remember from the beginning, “a group of VBA statements that performs one or more actions.”
- Auto_Open: this is the specific subroutine. It automatically runs your code when the Excel file opens — this is the event that triggers the procedure. Auto_Open will only run when the workbook is opened manually; it will not run if the workbook is opened via code from another workbook (Workbook_Open will do that, learn more about the difference between the two).
- By default, a subroutine’s access is public. This means any other module can use this subroutine. All examples in this tutorial will be public subroutines. If needed, you can declare subroutines as private. This may be needed in some situations. Learn more about subroutine access modifiers.
- msgBox: this is a function — a group of VBA statements that performs one or more actions and returns a value. The returned value is the message “Welcome to the XYZ Workbook.”
In short, this is a simple subroutine that contains a function.
When could I use this?
Maybe you have a very important file that is accessed infrequently (say, once a quarter), but automatically updated daily by another VBA procedure. When it is accessed, it’s by many people in multiple departments, all across the company.
- Problem: Most of the time when users access the file, they are confused about the purpose of this file (why it exists), how it is updated so often, who maintains it, and how they should interact with it. New hires always have tons of questions, and you have to field these questions over and over and over again.
- Solution: create a user message that contains a concise answer to each of these frequently answered questions.
Real World Examples
- Use the MsgBox function to display a message when there is any event: user closes an Excel workbook, user prints, a new sheet is added to the workbook, etc.
- Use the MsgBox function to display a message when a user needs to fulfill a condition before closing an Excel workbook
- Use the InputBox function to get information from the user
Example #2: Allow User to Execute another Procedure
In the VBA Editor, select Insert -> New Module
Write this code in the Module window (don’t paste!):
Sub UserReportQuery()
Dim UserInput As Long
Dim Answer As Integer
UserInput = vbYesNo
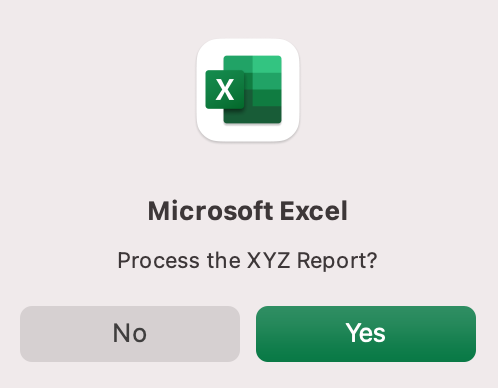
Answer = MsgBox(«Process the XYZ Report?», UserInput)
If Answer = vbYes Then ProcessReport
End Sub
Sub ProcessReport()
MsgBox («Thanks for processing the XYZ Report.»)
End Sub
Save and navigate back to the Developer tab of Excel and select the “Button” option. Click on a cell and assign the UserReportQuery macro to the button.
Now click the button. This message should display:
Click “yes” or hit Enter.
Once again, tada!
Please note that the secondary subroutine, ProcessReport, could be anything. I’ll demonstrate more possibilities in example #3. But first.
How is it doing that?
This example builds on the previous example and has quite a few new elements. Let’s go over the new stuff:
- Dim UserInput As Long: Dim is short for “dimension” and allows you to declare variable names. In this case, UserInput is the variable name and Long is the data type. In plain English, this line means “Here’s a variable called “UserInput”, and it’s a Long variable type.”
- Dim Answer As Integer: declares another variable called “Answer,” with a data type of Integer. Learn more about data types here.
- UserInput = vbYesNo: assigns a value to the variable. In this case, vbYesNo, which displays Yes and No buttons. There are many button types, learn more here.
- Answer = MsgBox(“Process the XYZ Report?”, UserInput): assigns the value of the variable Answer to be a MsgBox function and the UserInput variable. Yes, a variable within a variable.
- If Answer = vbYes Then ProcessReport: this is an “If statement,” a conditional statement, which allows us to say if x is true, then do y. In this case, if the user has selected “Yes,” then execute the ProcessReport subroutine.
When could I use this?
This could be used in many, many ways. The value and versatility of this functionality is more so defined by what the secondary subroutine does.
For example, maybe you have a file that is used to generate 3 different weekly reports. These reports are formatted in dramatically different ways.
- Problem: Each time one of these reports needs to be generated, a user opens the file and changes formatting and charts; so on and so forth. This file is being edited extensively at least 3 times per week, and it takes at least 30 minutes each time it’s edited.
- Solution: create 1 button per report type, which automatically reformats the necessary components of the reports and generates the necessary charts.
Real World Examples
- Create a dialog box for user to automatically populate certain information across multiple sheets
- Use the InputBox function to get information from the user, which is then populated across multiple sheets
Example #3: Add Numbers to a Range with a For-Next Loop
For loops are very useful if you need to perform repetitive tasks on a specific range of values — arrays or cell ranges. In plain English, a loop says “for each x, do y.”
In the VBA Editor, select Insert -> New Module
Write this code in the Module window (don’t paste!):
Sub LoopExample()
Dim X As Integer
For X = 1 To 100
Range(«A» & X).Value = X
Next X
End Sub
Save and navigate back to the Developer tab of Excel and select the Macros button. Run the LoopExample macro.
This should happen:
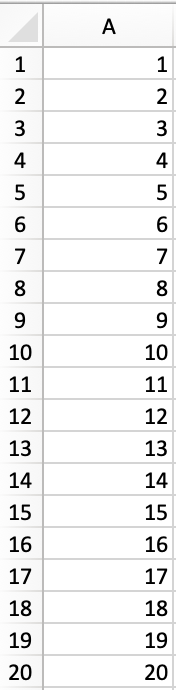
Etc, until the 100th row.
How is it doing that?
- Dim X As Integer: declares the variable X as a data type of Integer.
- For X = 1 To 100: this is the start of the For loop. Simply put, it tells the loop to keep repeating until X = 100. X is the counter. The loop will keep executing until X = 100, execute one last time, and then stop.
- Range(«A» & X).Value = X: this declares the range of the loop and what to put in that range. Since X = 1 initially, the first cell will be A1, at which point the loop will put X into that cell.
- Next X: this tells the loop to run again
When could I use this?
The For-Next loop is one of the most powerful functionalities of VBA; there are numerous potential use cases. This is a more complex example that would require multiple layers of logic, but it communicates the world of possibilities in For-Next loops.
Maybe you have a list of all products sold at your bakery in Column A, the type of product in Column B (cakes, donuts, or muffins), the cost of ingredients in Column C, and the market average cost of each product type in another sheet.
You need to figure out what should be the retail price of each product. You’re thinking it should be the cost of ingredients plus 20%, but also 1.2% under market average if possible. A For-Next loop would allow you to do this type of calculation.
Real World Examples
- Use a loop with a nested if statement to add specific values to a separate array only if they meet certain conditions
- Perform mathematical calculations on each value in a range, e.g. calculate additional charges and add them to the value
- Loop through each character in a string and extract all numbers
- Randomly select a number of values from an array
Conclusion
Now that we’ve talked about pizza and muffins and oh-yeah, how to write VBA code in Excel spreadsheets, let’s do a learning check. See if you can answer these questions.
- What is VBA?
- How do I get set up to start using VBA in Excel?
- Why and when would you use VBA?
- What are some problems I could solve with VBA?
If you have a fair idea of how to you could answer these questions, then this was successful.
Whether you’re an occasional user or a power user, I hope this tutorial provided useful information about what can be accomplished with just a bit of code in your Excel spreadsheets.
Источник
Introduction
This is a tutorial about writing code in Excel spreadsheets using Visual Basic for Applications (VBA).
Excel is one of Microsoft’s most popular products. In 2016, the CEO of Microsoft said «Think about a world without Excel. That’s just impossible for me.” Well, maybe the world can’t think without Excel.
- In 1996, there were over 30 million users of Microsoft Excel (source).
- Today, there are an estimated 750 million users of Microsoft Excel. That’s a little more than the population of Europe and 25x more users than there were in 1996.
We’re one big happy family!
In this tutorial, you’ll learn about VBA and how to write code in an Excel spreadsheet using Visual Basic.
Prerequisites
You don’t need any prior programming experience to understand this tutorial. However, you will need:
- Basic to intermediate familiarity with Microsoft Excel
- If you want to follow along with the VBA examples in this article, you will need access to Microsoft Excel, preferably the latest version (2019) but Excel 2016 and Excel 2013 will work just fine.
- A willingness to try new things
Learning Objectives
Over the course of this article, you will learn:
- What VBA is
- Why you would use VBA
- How to get set up in Excel to write VBA
- How to solve some real-world problems with VBA
Important Concepts
Here are some important concepts that you should be familiar with to fully understand this tutorial.
Objects: Excel is object-oriented, which means everything is an object — the Excel window, the workbook, a sheet, a chart, a cell. VBA allows users to manipulate and perform actions with objects in Excel.
If you don’t have any experience with object-oriented programming and this is a brand new concept, take a second to let that sink in!
Procedures: a procedure is a chunk of VBA code, written in the Visual Basic Editor, that accomplishes a task. Sometimes, this is also referred to as a macro (more on macros below). There are two types of procedures:
- Subroutines: a group of VBA statements that performs one or more actions
- Functions: a group of VBA statements that performs one or more actions and returns one or more values
Note: you can have functions operating inside of subroutines. You’ll see later.
Macros: If you’ve spent any time learning more advanced Excel functionality, you’ve probably encountered the concept of a “macro.” Excel users can record macros, consisting of user commands/keystrokes/clicks, and play them back at lightning speed to accomplish repetitive tasks. Recorded macros generate VBA code, which you can then examine. It’s actually quite fun to record a simple macro and then look at the VBA code.
Please keep in mind that sometimes it may be easier and faster to record a macro rather than hand-code a VBA procedure.
For example, maybe you work in project management. Once a week, you have to turn a raw exported report from your project management system into a beautifully formatted, clean report for leadership. You need to format the names of the over-budget projects in bold red text. You could record the formatting changes as a macro and run that whenever you need to make the change.
What is VBA?
Visual Basic for Applications is a programming language developed by Microsoft. Each software program in the Microsoft Office suite is bundled with the VBA language at no extra cost. VBA allows Microsoft Office users to create small programs that operate within Microsoft Office software programs.
Think of VBA like a pizza oven within a restaurant. Excel is the restaurant. The kitchen comes with standard commercial appliances, like large refrigerators, stoves, and regular ole’ ovens — those are all of Excel’s standard features.
But what if you want to make wood-fired pizza? Can’t do that in a standard commercial baking oven. VBA is the pizza oven.
Yum.
Why use VBA in Excel?
Because wood-fired pizza is the best!
But seriously.
A lot of people spend a lot of time in Excel as a part of their jobs. Time in Excel moves differently, too. Depending on the circumstances, 10 minutes in Excel can feel like eternity if you’re not able to do what you need, or 10 hours can go by very quickly if everything is going great. Which is when you should ask yourself, why on earth am I spending 10 hours in Excel?
Sometimes, those days are inevitable. But if you’re spending 8-10 hours everyday in Excel doing repetitive tasks, repeating a lot of the same processes, trying to clean up after other users of the file, or even updating other files after changes are made to the Excel file, a VBA procedure just might be the solution for you.
You should consider using VBA if you need to:
- Automate repetitive tasks
- Create easy ways for users to interact with your spreadsheets
- Manipulate large amounts of data
Getting Set Up to Write VBA in Excel
Developer Tab
To write VBA, you’ll need to add the Developer tab to the ribbon, so you’ll see the ribbon like this.
To add the Developer tab to the ribbon:
- On the File tab, go to Options > Customize Ribbon.
- Under Customize the Ribbon and under Main Tabs, select the Developer check box.
After you show the tab, the Developer tab stays visible, unless you clear the check box or have to reinstall Excel. For more information, see Microsoft help documentation.
VBA Editor
Navigate to the Developer Tab, and click the Visual Basic button. A new window will pop up — this is the Visual Basic Editor. For the purposes of this tutorial, you just need to be familiar with the Project Explorer pane and the Property Properties pane.
Excel VBA Examples
First, let’s create a file for us to play around in.
- Open a new Excel file
- Save it as a macro-enabled workbook (. xlsm)
- Select the Developer tab
- Open the VBA Editor
Let’s rock and roll with some easy examples to get you writing code in a spreadsheet using Visual Basic.
Example #1: Display a Message when Users Open the Excel Workbook
In the VBA Editor, select Insert -> New Module
Write this code in the Module window (don’t paste!):
Sub Auto_Open()
MsgBox («Welcome to the XYZ Workbook.»)
End Sub
Save, close the workbook, and reopen the workbook. This dialog should display.
Ta da!
How is it doing that?
Depending on your familiarity with programming, you may have some guesses. It’s not particularly complex, but there’s quite a lot going on:
- Sub (short for “Subroutine): remember from the beginning, “a group of VBA statements that performs one or more actions.”
- Auto_Open: this is the specific subroutine. It automatically runs your code when the Excel file opens — this is the event that triggers the procedure. Auto_Open will only run when the workbook is opened manually; it will not run if the workbook is opened via code from another workbook (Workbook_Open will do that, learn more about the difference between the two).
- By default, a subroutine’s access is public. This means any other module can use this subroutine. All examples in this tutorial will be public subroutines. If needed, you can declare subroutines as private. This may be needed in some situations. Learn more about subroutine access modifiers.
- msgBox: this is a function — a group of VBA statements that performs one or more actions and returns a value. The returned value is the message “Welcome to the XYZ Workbook.”
In short, this is a simple subroutine that contains a function.
When could I use this?
Maybe you have a very important file that is accessed infrequently (say, once a quarter), but automatically updated daily by another VBA procedure. When it is accessed, it’s by many people in multiple departments, all across the company.
- Problem: Most of the time when users access the file, they are confused about the purpose of this file (why it exists), how it is updated so often, who maintains it, and how they should interact with it. New hires always have tons of questions, and you have to field these questions over and over and over again.
- Solution: create a user message that contains a concise answer to each of these frequently answered questions.
Real World Examples
- Use the MsgBox function to display a message when there is any event: user closes an Excel workbook, user prints, a new sheet is added to the workbook, etc.
- Use the MsgBox function to display a message when a user needs to fulfill a condition before closing an Excel workbook
- Use the InputBox function to get information from the user
Example #2: Allow User to Execute another Procedure
In the VBA Editor, select Insert -> New Module
Write this code in the Module window (don’t paste!):
Sub UserReportQuery()
Dim UserInput As Long
Dim Answer As Integer
UserInput = vbYesNo
Answer = MsgBox(«Process the XYZ Report?», UserInput)
If Answer = vbYes Then ProcessReport
End Sub
Sub ProcessReport()
MsgBox («Thanks for processing the XYZ Report.»)
End Sub
Save and navigate back to the Developer tab of Excel and select the “Button” option. Click on a cell and assign the UserReportQuery macro to the button.
Now click the button. This message should display:
Click “yes” or hit Enter.
Once again, tada!
Please note that the secondary subroutine, ProcessReport, could be anything. I’ll demonstrate more possibilities in example #3. But first…
How is it doing that?
This example builds on the previous example and has quite a few new elements. Let’s go over the new stuff:
- Dim UserInput As Long: Dim is short for “dimension” and allows you to declare variable names. In this case, UserInput is the variable name and Long is the data type. In plain English, this line means “Here’s a variable called “UserInput”, and it’s a Long variable type.”
- Dim Answer As Integer: declares another variable called “Answer,” with a data type of Integer. Learn more about data types here.
- UserInput = vbYesNo: assigns a value to the variable. In this case, vbYesNo, which displays Yes and No buttons. There are many button types, learn more here.
- Answer = MsgBox(“Process the XYZ Report?”, UserInput): assigns the value of the variable Answer to be a MsgBox function and the UserInput variable. Yes, a variable within a variable.
- If Answer = vbYes Then ProcessReport: this is an “If statement,” a conditional statement, which allows us to say if x is true, then do y. In this case, if the user has selected “Yes,” then execute the ProcessReport subroutine.
When could I use this?
This could be used in many, many ways. The value and versatility of this functionality is more so defined by what the secondary subroutine does.
For example, maybe you have a file that is used to generate 3 different weekly reports. These reports are formatted in dramatically different ways.
- Problem: Each time one of these reports needs to be generated, a user opens the file and changes formatting and charts; so on and so forth. This file is being edited extensively at least 3 times per week, and it takes at least 30 minutes each time it’s edited.
- Solution: create 1 button per report type, which automatically reformats the necessary components of the reports and generates the necessary charts.
Real World Examples
- Create a dialog box for user to automatically populate certain information across multiple sheets
- Use the InputBox function to get information from the user, which is then populated across multiple sheets
Example #3: Add Numbers to a Range with a For-Next Loop
For loops are very useful if you need to perform repetitive tasks on a specific range of values — arrays or cell ranges. In plain English, a loop says “for each x, do y.”
In the VBA Editor, select Insert -> New Module
Write this code in the Module window (don’t paste!):
Sub LoopExample()
Dim X As Integer
For X = 1 To 100
Range(«A» & X).Value = X
Next X
End Sub
Save and navigate back to the Developer tab of Excel and select the Macros button. Run the LoopExample macro.
This should happen:
Etc, until the 100th row.
How is it doing that?
- Dim X As Integer: declares the variable X as a data type of Integer.
- For X = 1 To 100: this is the start of the For loop. Simply put, it tells the loop to keep repeating until X = 100. X is the counter. The loop will keep executing until X = 100, execute one last time, and then stop.
- Range(«A» & X).Value = X: this declares the range of the loop and what to put in that range. Since X = 1 initially, the first cell will be A1, at which point the loop will put X into that cell.
- Next X: this tells the loop to run again
When could I use this?
The For-Next loop is one of the most powerful functionalities of VBA; there are numerous potential use cases. This is a more complex example that would require multiple layers of logic, but it communicates the world of possibilities in For-Next loops.
Maybe you have a list of all products sold at your bakery in Column A, the type of product in Column B (cakes, donuts, or muffins), the cost of ingredients in Column C, and the market average cost of each product type in another sheet.
You need to figure out what should be the retail price of each product. You’re thinking it should be the cost of ingredients plus 20%, but also 1.2% under market average if possible. A For-Next loop would allow you to do this type of calculation.
Real World Examples
- Use a loop with a nested if statement to add specific values to a separate array only if they meet certain conditions
- Perform mathematical calculations on each value in a range, e.g. calculate additional charges and add them to the value
- Loop through each character in a string and extract all numbers
- Randomly select a number of values from an array
Conclusion
Now that we’ve talked about pizza and muffins and oh-yeah, how to write VBA code in Excel spreadsheets, let’s do a learning check. See if you can answer these questions.
- What is VBA?
- How do I get set up to start using VBA in Excel?
- Why and when would you use VBA?
- What are some problems I could solve with VBA?
If you have a fair idea of how to you could answer these questions, then this was successful.
Whether you’re an occasional user or a power user, I hope this tutorial provided useful information about what can be accomplished with just a bit of code in your Excel spreadsheets.
Happy coding!
Learning Resources
- Excel VBA Programming for Dummies, John Walkenbach
- Get Started with VBA, Microsoft Documentation
- Learning VBA in Excel, Lynda
A bit about me
I’m Chloe Tucker, an artist and developer in Portland, Oregon. As a former educator, I’m continuously searching for the intersection of learning and teaching, or technology and art. Reach out to me on Twitter @_chloetucker and check out my website at chloe.dev.
Learn to code for free. freeCodeCamp’s open source curriculum has helped more than 40,000 people get jobs as developers. Get started
 Have you ever thought about the main purpose of Visual Basic for Applications?
In Excel VBA Programming for Dummies, Excel authority John Walkenbach provides the following interesting answer to this question:
VBA’s main purpose is to manipulate data.
For purposes of this VBA tutorial, the key term within the above statement is “data”. If the main purpose of Visual Basic for Applications is to manipulate data, having a good understanding of what are the different VBA data types is essential for mastering VBA.
My purpose with this post is to help you understand VBA data types and how to work with them. In this guide, I cover and thoroughly explain the most relevant aspects of the different VBA data types, including the following:
In this particular post, I don’t cover the topic of variable declaration in detail. This is covered in this blog post about variable declaration.
How Data Is Stored And Why VBA Data Types Are Important
Data is generally stored in the computer’s memory. If you have a basic understanding of computers, you’re probably familiar with how this works.
However, for VBA purposes, there is an important distinction to be made between objects and variables. As Walkenbach explains in Excel VBA Programming for Dummies:
- Some data is stored in objects.
- Other data is stored in variables.
I explain what “objects” and “variables” are in this VBA Tutorial for Beginners. To summarize:
- An object is what is manipulated by Visual Basic for Applications.
Some examples of objects are Excel workbooks, worksheets, cell ranges and cells.
- A variable is a storage location paired with a name. You generally use variables to represent a particular value. In other words, variables act as placeholders for values.
You can create variables in Visual Basic for Applications by declaring them. You determine the name and characteristics of any variable you create. One of the characteristics that you can determine is the VBA data type.
The ability to determine the characteristics of the variables you create in VBA is probably the main reason why understanding VBA data types is important. Let’s see why this is the case:
VBA data types determine the way in which data is stored in the memory.
There are several VBA data types. These data types have different nominal allocation requirements. This means that different types use a different amount of bytes.
The general rule that you should apply when determining which data type to use is set forth by John Walkenbach in Excel VBA Programming for Dummies:
In general, choose the data type that uses the smallest number of bytes but can still handle all the data you want to store (…).
The reason for this is that there is an inverse relation between execution speed and the amount of bytes used by the relevant data. In other words, the more bytes your data uses, the slower your VBA application runs.
As this makes it clear, in order to be able to make appropriate decisions about the VBA data types that you want to use, you must understand the basic characteristics of each of the main types. Mastering this topic is very important, particularly as you start creating and developing more complex VBA applications. The main reason for this is that inadequate choices of VBA data types can result in slower execution of those applications and, in general, an inefficient use of the memory.
Introduction To Why You Shouldn’t Always Allow VBA To Handle Data Types Automatically
Programming languages are usually classified as strongly typed or weakly typed.
Strongly typed languages usually require that you define the data type for every variable that you use. Visual Basic for Applications isn’t one of these languages. Therefore, VBA is able to handle the details related to data types automatically.
More precisely, if you don’t declare the VBA data type for a particular variable, Visual Basic for Applications uses the default type. The default VBA data type is called Variant, and I explain it below.
The question is:
Should you allow Visual Basic for Applications to automatically set the VBA data types for the variables you use?
Generally, no. You should get used to declaring the VBA data types of the variables you create always.
However, the answer to the question isn’t as straightforward as the statement above may make it seem.
Allowing Visual Basic for Application to automatically deal with VBA data types for variables has advantages. The main advantage is, evidently, that by allowing VBA to handle data types, you don’t have to do it yourself. This may sound more convenient, but wait…
As I mentioned above, inappropriate choices of VBA data types can result in problems down the road, including slower application execution. More precisely, if you always rely on the default Variant data type, you’ll likely start noticing that your VBA applications run relatively slow and require more memory than necessary. I explain the reason for this below.
Therefore, if you’re committed to becoming a powerful VBA user, you must have a good grasp of VBA data types and, when required, be able to choose the most appropriate one.
So, should you always deal with VBA data types yourself?
Generally, declaring the variables that you use in order to determine their VBA data type explicitly is a good practice. However, if you don’t want to do this, you can carry out your own cost-benefit analysis considering the following criteria:
- As explained in Excel VBA Programming for Dummies, “letting VBA handle your data typing results in slower execution and inefficient memory use.”
- Despite the above, Microsoft explains how using the Variant data type allows you to handle data more flexibly.
- How noticeable are the issues of slower execution and inefficient memory use generally depends on the size and complexity of the relevant VBA application. Therefore, in small applications or applications that don’t use many variables, allowing Visual Basic for Applications to handle the VBA data types directly shouldn’t generate big issues.
- However, when you’re working with big and/or complex applications, letting VBA deal with data types automatically isn’t very advisable. In these cases, you want to conserve as much memory as possible. A good knowledge of VBA data types is essential in achieving an efficient use of memory when developing VBA applications.
In the words of John Walkenbach:
Letting VBA handle data types may seem like an easy way out – but remember that you sacrifice speed and memory.
In addition to the above, as explained in Mastering VBA for Microsoft Office 2013, not declaring the variables makes your VBA code harder to read and debug.
There are additional reasons to always declare your variables when working with Visual Basic for Applications. Let’s take a look at 2 further reasons, explained by Walkenbach in Excel 2013 Power Programming with VBA and Excel VBA Programming for Dummies.
Reason #1: Possible Misinterpretation Of Intended VBA Data Type When Using Variant VBA Data Type
According to Mastering VBA for Microsoft Office 2013, one of the disadvantages of using the Variant VBA data type is that VBA can misinterpret the data sub-type that you intended. This can lead to “rather obscure bugs”.
Let’s take a look at a very simple example, involving strings and numbers, to illustrate this point.
Take a look at the following piece of very simple VBA code.

This Excel VBA Data Types Tutorial is accompanied by an Excel workbook containing the data and macros I use (including the Variant_Concatenation macro above). You can get immediate free access to this example workbook by subscribing to the Power Spreadsheets Newsletter.
The 3 main statements of the Variant_Concatenation macro above carry out the following actions:
- “ExVar = “1”” assigns 1 to the variable ExVar. Since ExVar hasn’t been declared, it is of the Variant VBA data type.
- “ExVar = ExVar + ExVar + ExVar” performs an operation. The + operator is applied to the variable ExVar.
- “MsgBox ExVar” displays a dialog box with the expression that is currently stored by the variable ExVar.
The question is, what is the value displayed in the message that appears within the dialog box at the end of the Variant_Concatenation macro?
At first glance, it may appear that the dialog box should display the number 3. After all, the second line seems to be adding ExVar three times, and ExVar has previously been assigned 1. 1 + 1 + 1 = 3, right?
Well…
Even though the reasoning above makes sense, the rules that apply in Visual Basic for Applications can be slightly different to what we’re used to. Let’s take a look at the actual dialog box that is displayed when I run the Variant_Concatenation macro:

111? Where’s the 3 that we were expecting?
If you’re familiar with VBA, you may have noticed some of the issues that the piece of VBA code that appears above has. Note how, when assigning 1 to the variable ExVar, the number 1 is enclosed in quotation marks (“”).

This means that the number 1 is actually a string instead of a number. When you’re working with variables that contain strings and you use the + operator, Visual Basic for Applications concatenates all the strings.
Therefore, if “1” is a string, “1 + 1 + 1” is not equal to 3. The correct answer, in that case, is the one that appears in the dialog box above: 111.
Microsoft explains this particular characteristic of the Variant VBA data type by stating that, when a Variant variable contains digits, the interpretation depends on the context. Therefore, depending on such context, those digits may be interpreted as either a string (as in the example above) or the actual value.
This particular problem is not caused exclusively by the use of the Variant VBA data type. The assignment of the variable could’ve probably been better structured. Nonetheless, this is a further reason to avoid relying on the Variant data type always.
If you still want to rely on the Variant VBA data type, there are ways to determine the VBA data sub-type of any Variant variable. I show how you can apply these methods to the Variant_Concatenation macro in a section below.
Reason #2: Shortcut For Inserting Variables In VBA Code When Working With Declared Variables
Let’s take a look at the following piece of VBA code. The purpose of this macro is to delete blank rows in Excel. Notice how the variable iCounter is properly declared.

Imagine that you’re creating the first version of this macro. And you’re typing at the following point:

Theoretically, you must type the whole name of the variable: “iCounter”. However, since the variable has been declared at the beginning of the Sub procedure, you can use the keyboard shortcut “Ctrl + Spacebar” once you’ve written the first couple of characters (usually 2 or 3 are enough). When you do this, the Visual Basic Editor does one of the following:
- If it knows exactly to what particular word (this applies to variables, reserved words or functions) you’re referring to, it completes the entry.
This is what happens in the case above. The following image shows what happens once I use the “Ctrl + Spacebar” shortcut:

- If it isn’t sure about what word you’re referring to, it displays a list of possible words from which you can select.
For example, let’s assume for a second that the Delete_Empty_Rows macro that appears above has 2 declared variables: iCounter and iCounter1. In that case, the Visual Basic Editor looks as follows:


How To Remind Yourself To Declare VBA Data Types
You may be convinced that it is a good idea to always declare VBA data types when creating variables. However…
We all forget things sometimes.
Therefore, it’s not surprising that, from time to time and despite our best efforts to the contrary, we forget to determine the VBA data type of a variable. Additionally, since Visual Basic for Applications is able to handle VBA data types automatically, you may not even notice this happening.
Fortunately, you can force yourself to declare all the variables that you use. To do this, you simply need to use the Option Explicit statement.
When enabled, the Option Explicit statement requires that you explicitly define all the variables in the VBA module where that particular statement appears.
How do you enable the Option Explicit statement?
Easy, simply type “Option Explicit” at the top (before any other code) of the relevant VBA module. You only need to do this once per module. However, you’ll need to include the statement in any separate modules to which you want the Option Explicit option to apply.
If you want to take it a step further, you can have the Visual Basic Editor automatically insert the Option Explicit statement at the beginning of any future VBA modules. You can do this by customizing the code settings of the VBE in order to enable the Require Variable Declaration option. I explain how to do this in this VBE tutorial.
If the Option Explicit statement is enabled, you’ll simply not be able to run VBA code that contains undeclared variables.
Enabling the Option Explicit statement has an additional advantage: it helps you to spot typos or misspellings that, otherwise, might have been difficult to see. Let’s see how this works in practice by checking a macro that deletes empty rows.
For this example, I’ll use the macro whose VBA code appears in the image below, named Delete_Empty_Rows_2. I explain this macro in detail (and show how it works in practice) in this post.

In this particular macro, 2 variables are declared at the beginning: aRow and BlankRows. Both variables are of the Range VBA data type.
Now, let’s focus on the BlankRows variable. The image below shows how this particular variable is used several times in this particular Sub procedure.

Imagine that, while typing the VBA code, a typo somehow manages to squeeze in (just one). Instead of typing “BlankRows” (the appropriate name), you type “BlamkRows” (similar, but not the same).

As you may imagine, such typos may be difficult to spot in some situations. If you don’t notice the mistake, the macro may not work as originally intended.
However, if you have enabled the Option Explicit statement, Visual Basic for Applications displays a prominent warning. Take a look at the screenshot below and notice how easy is to notice that “BlankRows” is misspelled.

Variant VBA Data Type
Variant is the default VBA data type. In other words, this is the data type that Visual Basic for Applications uses when you don’t determine the type yourself at the moment of declaring a variable. You can, however, also declare a Variant variable explicitly.
In Excel VBA Programming for Dummies, John Walkenbach likens the Variant VBA data type with a chameleon. In other words, data that is of the Variant type “changes type depending on what you do with it.” This allows you to work with data more flexibly.
This sounds great! Who wouldn’t want this?
Well…
Not having to worry about VBA data types sounds great in theory but isn’t as simple in practice. Variant is, as a general rule, not the most efficient data type. This inefficiency is caused, funnily enough, by its chameleon-like characteristics.
More precisely, in order for Variant to behave like a chameleon and change of type depending on the context, Visual Basic for Applications must carry out certain checks for determining like which type should Variant behave. As you can imagine, carrying out these checks repeatedly requires more time and memory.
As explained in Mastering VBA for Microsoft Office 2013, the Variant VBA data type requires more memory than any of the other data types, excluding very long strings. More precisely:
- Variant variables with numbers require 16 bytes of memory.
- Variables of the Variant data type with characters usually require 22 bytes of memory plus the memory required by the string.
And this is one of the reasons why I generally suggest that you get used to declaring the VBA data type of your variables and use other VBA data types different from Variant. When you do this, Visual Basic for Applications doesn’t need to be constantly carrying checks (as it does with Variant). This usually results in faster, snappier and better VBA applications, and more efficient memory management.
Let’s take a look at a few additional characteristics of the Variant VBA data type:
- When it comes to numeric data, you can store numbers within the following ranges:
For negative numbers: -1.797693134862315E308 to -4.94066E-324.
For positive numbers: 4.94066E-324 to 1.797693134862315E308.
- Variant’s ability to handle different types of VBA data isn’t absolute. In particular, Variant variables can’t contain fixed-length string data.
I explain what fixed-length string data is below. In that same section, I also explain the String data type, which is the one you’ll have to use in such cases.
- Variables of the Variant VBA data type can contain 4 additional special values:
Value #1: Empty, meaning that no value has been assigned to the variable. You can see an example of this below.
Value #2: Error, which is used for purposes of indicating errors in the relevant procedure.
Value #3: Nothing, which you can use when disassociating a variable from an object it was previously associated to.
Value #4: Null, which indicates that the variable contains no valid data.
Byte VBA Data Type
The Byte VBA data type is the one that requires less memory: only 1 byte.
Variables whose VBA data type is Byte can be used to store numbers between 0 and 255.
Boolean VBA Data Type
If you’ve ever studied Boolean algebra, you may remember that the states of the variables are TRUE and FALSE.
The Boolean VBA Data Type follows this logic. In other words, variables whose VBA data type is Boolean can only be set to one of the following 2 values:
- TRUE.
- FALSE.
In general Boolean algebra, TRUE and FALSE are usually denoted by 1 and 0 respectively. However, in Visual Basic for Applications, conversions between Booleans and numeric VBA data types work slightly different:
- When converting a Boolean variable to a numeric VBA data type, TRUE becomes –1 and FALSE becomes 0.
- When converting a numeric VBA data type into a Boolean, 0 becomes FALSE and all other values (regardless of whether they’re negative or positive) become TRUE.
Boolean variables require 2 bytes of memory.
Currency VBA Data Type
As you’d expect, the Currency VBA data type is generally used in connection with monetary matters. However, as I explain below, you can use it for other purposes as well.
The Currency VBA data type is exact. The Single and Double data types that I explain below are rounded.
Currency variables can be used to store both positive and negative numbers. They’re stored as numbers in an integer format that is scaled by 10,000. As a consequence, these variables give fixed-point numbers whose length is up to:
- 15 digits to the left side of the decimal point.
- 4 digits to the right side of the decimal point.
As a consequence of the above, this data type allows for a range of values between -922,337,203,685,477.5808 and 922,337,203,685,477.5807.
Due to the fact that the Currency VBA data type is exact and these variables give fixed-point numbers, Currency is particularly useful for monetary calculations or fixed-point calculations where accuracy is very important.
The Currency data type takes up 8 bytes of memory.
Date VBA Data Type
This is another VBA data type whose name is self-explanatory.
Indeed, you won’t be surprised to confirm that Date variables can be used to store values that represent dates, times or both.
However, if you’ve been working with Excel for a while, you may have noticed that the way Excel and Visual Basic for Applications work with numbers isn’t necessarily the easiest to understand. Therefore, I provide a short introduction to this topic below.
As explained in Mastering VBA for Microsoft Office 2013, “VBA works with dates and times as floating-point numbers”. Let’s take a quick look at what this means:
Introduction To Floating-Point And Fixed-Point Numbers
Floating-point is a way of representing numbers. Under this formula, a number is represented in an approximate way to a certain number of significant digits. This is then scaled using an exponent.
However, the most critical point to understand is that the reason why this formula is called “floating-point” is due to the fact that the decimal point “floats”.
Computers can also store numbers as fixed-point numbers. You can see an example of this in the Currency VBA data type explained above. In the case of fixed-point numbers, the decimal points doesn’t “float”. It remains fixed in a certain location and, therefore, the number has always a fixed number of digits after or before the decimal point.
Working with floating-point numbers, generally, demands more computational resources. Therefore, the suggestion made in Mastering VBA for Microsoft Office 2013 is to use fixed-point numbers “whenever practical”.
Date Variables
Now that you have a basic understanding of floating-point and fixed-point numbers, let’s take a closer look at what the Date VBA data type can do.
In general terms, Date variables can store values representing:
- Dates between January 1, 100 and December 31, 9999.
- Times between midnight (00:00:00) and 23:59:59.
These values are stored as floating-point numbers, as follows:
- The date appears to the left of the decimal point.
- The time appears to the right of the decimal point.
The following are examples of how variables of numeric VBA data types are converted to the Date type:
- 0 represents midnight.
- 0.5 is midday.
- Negative integers are dates before December 30, 1899.
Date VBA variables require 8 bytes of memory.
Decimal VBA Data Type
Decimal is one of VBA’s numeric data types.
More precisely, the Decimal VBA data type can be used to store integers scaled by a power of 10. This scaling factor varies depending on how many digits there are to the right side of the decimal point. The maximum number of these digits that a Decimal variable can hold is 28.
Considering the above, the following are the largest and smallest values for a Decimal variable:
- If there are no decimal places at all: +/-79,228,162,514,264,337,593,543,950,335.
- With the maximum number of decimal places (28), the largest value is +/-7.9228162514264337593543950335 and the smallest (excluding 0) is +/-0.0000000000000000000000000001.
In other words, the Decimal VBA data type gives you the largest amount of digits in order to represent a particular number. Therefore, it’s more appropriate for cases where you are performing calculations with large numbers that need to be very precise and can’t be subject to rounding errors.
The precision of the Decimal data type, comes at a cost in the form of a large memory requirement. The Decimal VBA data type requires 12 bytes, which is larger than the other numeric data types.
As explained by Microsoft, you can’t declare the Decimal VBA data type directly (just as you do with the other data types). Strictly speaking, Decimal is a sub-type of Variant. Therefore, in order to use Decimal, you must use the CDec conversion function.
Double VBA Data Type
The Double VBA data type is one of the non-integer numeric data types. This means that, just as decimal, it can be used to hold both integers and fractions.
More precisely, you can use Double to store floating-point numbers within the following ranges:
- For negative numbers: -1.79769313486231E308 to -4.94065645841247E-324.
- For positive numbers: 4.94065645841247E-324 to 1.79769313486232E308.
I provide a brief introduction to floating-point numbers above. You may however be wondering, why is this type of VBA data called double?
“Double” stands for “double-precision floating-point”. This makes reference to the number format which determines how the computer handles the number. There is also a Single VBA data type (explained below).
Double VBA variables require 8 bytes of memory.
Integer VBA Data Type
You can use the Integer VBA data type for storing integers between -32,768 to 32,767.
Integer variables only require 2 bytes. Due to its low memory requirements, the Integer VBA data type is usually the most efficient and better performing option for purposes of storing integers that fall within its range.
As explained by Microsoft, you can also use the Integer data type for purposes of representing enumerated values. Enumerated values:
- Usually contain a finite set of unique natural numbers. Each of these numbers has a particular meaning.
- Are commonly used for purposes of selecting among different options.
Long VBA Data Type
“Long” makes reference to “Long Integer”. As implied by its name, you can use the Long VBA data type for storing integer values that are within a “longer” range than the range of the Integer data type.
More precisely, by using the Long VBA data type you can store numbers between -2,147,483,648 and 2,147,483,647. If this range is still not enough for your purposes, you may want to use the Double VBA data type.
Long variables require 4 bytes of memory. As you’d expect, this is more than Integer variables (2), but less than Double variables (8).
Object VBA Data Type
You can use the Object VBA data type for purposes of storing addresses that refer to objects. In general, Object variables are a convenient way to refer to objects.
Variables of the Object type take up 4 bytes of memory.
Single VBA Data Type
I anticipated the existence of the Single VBA data type when introducing the Double type above. “Single” refers to “single-precision floating-point”, the number format that determines how the computer handles the number.
You can use the Single VBA data type for storing numbers within the following ranges:
- For negative values: -3.402823E38 to -1.401298E-45.
- For positive values: 1.401298E-45 to 3.402823E38.
Single variables require 4 bytes, half of those required by the Double VBA data type (8).
String VBA Data Type
For purposes of programming, a string is generally defined as a sequence of characters that represents the characters themselves (not a numeric value or other similar thing). Within Visual Basic for Applications, the String VBA data type is generally used to store text. However, this doesn’t mean that you should only use letters within String variables. In addition to letters, String variables can contain numbers, spaces, punctuation and special characters.
There are 2 different kinds of Strings. The amount of characters and memory required varies depending on the type.
Type #1: Variable-Length Strings
Variable-length String variables can contain anything from 0 up to approximately 2 billion characters. They take up 10 bytes of memory plus the memory that is required for the string itself.
Type #2: Fixed-Length Strings
Fixed-length String variables can contain between 1 and approximately 64,000 characters. These particular String variables require the amount of memory required by the string.
According to Mastering VBA for Microsoft Office 2013, fixed-length String variables “are rarely used in most programming”. The main exception is when managing databases where a rule specifying a maximum string length applies.
You may wonder what happens if the data that is assigned to a fixed-length String variable is different from the fixed length. Visual Basic for Applications handles this matter differently depending on whether the data assigned is shorter or longer than the fixed length:
- If the data assigned is shorter, VBA adds trailing spaces in order to reach the fixed length.
- If the assigned data is longer, Visual Basic for Applications truncates the data after the fixed length is reached. For these purposes, characters are counted from left to right.
For example, if you assign the string “Tutorial” to a fixed-length String variable with a length of 3 characters, Visual Basic for Applications only stores “Tut”.
Other VBA Data Types
The above sections explain the most common VBA data types. From time to time, you may encounter some other data types, such as the ones I briefly introduce below.
LongLong VBA Data Type
The LongLong VBA data type is only valid on 64-bit platforms. This makes reference to how your computer is handling information.
According to tech website TweakTown, 92.8% of new Windows computers utilize 64-bit operating systems. You can find more information about the 32-bit and 64-bit versions of Windows here, including how to check which version your computer is running.
You can use the LongLong VBA data type to store numbers between -9,223,372,036,854,775,808 and 9,223,372,036,854,775,807.
LongLong variables require 8 bytes of memory.
LongPtr VBA Data Type
LongPtr isn’t (strictly speaking) a VBA data type. More precisely, the way LongPtr behaves depends on which platform is the relevant procedure running.
- In 32-bit platforms, LongPtr becomes Long.
- In 64-bit platforms, LongPtr becomes LongLong.
Both the range of values that can be stored using a LongPtr variable and the memory requirements vary accordingly.
As explained by Microsoft, one of the main uses of LongPtr is for pointers and handlers.
User-Defined VBA Data Types
Visual Basic for Applications allows you to create your own VBA data types. As you’d expect, these data types are known as user-defined data types.
In order to create a user-defined data type, you use the Type statement. These data types can contain 1 or more elements from the following:
- Data types.
- Arrays.
- User-defined data types that have been defined previously.
User-defined VBA data types are highly dependent on their different components. For example:
- The number of bytes required by a particular user-defined VBA data type depends on its elements.
- The range of each of those elements is the one that applies to the relevant data type.
I may explain further details of user-defined VBA data types in future VBA tutorials. Please make sure to enter your email address below if you want to join the Power Spreadsheets Newsletter and be notified whenever I publish new material.
How To Decide Which VBA Data Type To Use
Now that you know about the main different VBA data types, you may be wondering…
How do I decide which VBA data type to use for a particular variable?
You already know the basic rule for choosing data types proposed by John Walkenbach. Under this general rule, your choice of data type is determined by the answers to the following 2 questions:
- Which VBA data type(s) is(are) able to handle the data that you want to store?
- Out of the VBA data type(s) that can handle the data you want to store, which data type uses the smallest number of bytes?
These guidelines may still feel a little bit general. Therefore, below are some general suggestions provided by Richard Mansfield in Mastering VBA for Microsoft Office 2013:
- If the relevant variable will only contain logical values (TRUE and FALSE), use the Boolean VBA data type.
- If the variable will always contain a string, use the String VBA data type.
- If the variable will contain an integer use either the Integer or the Long VBA data type. The choice between Integer and Long depends on how big the relevant numbers are.
Remember that neither Integer nor Long variables can be used to store fractions. Which takes us to the following point…
- If the variable you’re declaring may contain fractions, use the Single or Double VBA data types. The decision to choose one or the other depends on the range of values the variable may store.
- If you’ll be using the variable in operations where you can’t have rounding errors (you require no-rounding fractions), use the Currency or Decimal VBA data types. As in the previous cases, the exact choice of variable depends on the size of the exact numbers you’ll be storing.
You’ll notice that, in several of the above cases, which data type you should use depends on the range of values that you want the variable to be able to handle. Learning how to choose the appropriate VBA data type (considering factors such as the range) is critical and, as computers become more powerful and VBA develops, there may be further changes to the available data types.
For example, loop counters used to be declared using the Integer VBA data type, which can’t be larger than 32,767. Recent versions of Microsoft Excel can have 1,048,576 rows. This clearly exceeds the range that Integer variables can handle. Therefore, a more appropriate choice is using the Long VBA data type.
As you practice with Visual Basic for Applications, you’ll start becoming better and more comfortable deciding which VBA data type to use.
However, if you’re still not sure how these rules apply to a particular situation, this is a case where the Variant VBA data type may be of help. Let’s take a look at…
How To Find Out The VBA Data Sub-Type Of A Variant Variable
Remember that the Variant VBA data type behaves like a chameleon. Variant changes its sub-type depending on what particular action you’re carrying out with it.
Despite the downsides of relying on the Variant VBA data type that I have explained throughout this VBA tutorial, Variant can be quite helpful for purposes of testing a particular variable and determining what is the most appropriate data type to use.
Let’s take a look at 3 ways you can do this. In all examples, I use the Variant_Concatenation macro that I used above to illustrate how the Variant data type may result in possible misinterpretations of your intended VBA data type.
This Excel VBA Data Types Tutorial is accompanied by an Excel workbook containing the data and macros I use. You can get immediate free access to this example workbook by subscribing to the Power Spreadsheets Newsletter.
Testing A Variable Using The Variant VBA Data Type
I may cover the topic of debugging in future VBA tutorials. In this section I simply show you how to use the Locals Window and the Step Into command for purposes of determining which particular data type to use.
You can do this in the following 6 simple steps, as explained in Mastering VBA for Microsoft Office 2013.
Step #1: Display The Locals Window
For purposes of this process, the Locals Window of the Visual Basic Editor must be visible. This window displays all the variables in the relevant procedure, as well as their values.
You can usually see the Locals Window at the bottom of the VBE.

If you can’t see the Locals Window in your VBE, you can ask the Visual Basic Editor to display it by clicking on “Locals Window” within the View menu.

Step #2: Step Into The Relevant VBA Sub Procedure
You can step into a procedure by using the “F8” keyboard shortcut or by choosing “Step Into” in the Debug menu of the Visual Basic Editor.

Once you’ve stepped into the procedure, the Visual Basic Editor takes you to the first line of code in the macro.

Step #3: Step Through Procedure And Find Out Variant Sub-type of Variable
Every time you click the Step into command or the “F8” keyboard shortcut, the Visual Basic Editor executes a line of code and steps into the next. Do this for purposes of stepping through the VBA Sub procedure and finding out what is the Variant VBA sub-type that Visual Basic for Applications automatically assigns to the relevant variable.
The following 2 screenshots show how this works in the case of the Variant_Concatenation macro that’s been used as example:
- Notice how, initially, the ExVar variable contains the special value Empty. This means that the variable hasn’t been initialized.

- In the following screenshot you can see how the ExVar variable is of the String sub-type just one step later.


Bear in mind that just because a variable of the Variant VBA data type is behaving in a certain way, it doesn’t mean that this is the most appropriate data type to use. Remember that one of the possible downsides of using this particular data type is that the Visual Basic Editor may misinterpret your intended VBA data type.
Step #4: Test The Procedure
Step a couple of times into the procedure following the steps I described above. Your purpose is to determine that the variable is being assigned the same VBA data sub-type in a consistent manner. Once you’ve determined that this is the case, you can proceed to the step #5.
Step #5: Declare Variable With VBA Data Type
Once you’ve determined that the relevant variable is behaving appropriately and that it is being assigned the same data sub-type in a consistent manner, declare the variable using the VBA data type you’ve found.
Step #6: Test VBA Code
Once you’ve determined the VBA data type that you consider appropriate for the variable, test your VBA code in order to make sure that the data type is the right one.
Finding Out The VBA Data Sub-Type Of A Variant Variable Using The TypeName Function
Visual Basic for Applications allows you to determine the VBA data type of a variable by using the TypeName function. When applied, the TypeName function returns a string displaying the VBA data sub-type information of a particular Variant variable.
Let’s see how you can apply the TypeName function to the Variant_Concatenation macro.
For these purposes, I start with the VBA code of the original macro that I use in the previous examples:

And I add several message boxes that display the VBA data type of the ExVar variable at different stages of execution of the macro. The new macro is called “Variant_Concatenation_TypeName”. The relevant statements (which are highlighted in the image below) are of the form “MsgBox TypeName (varname)”, where:
- “MsgBox” makes reference to the MsgBox function.
- “varname” is the Variant variable whose VBA data sub-type you want to find out (in this case ExVar).

You already know that, since the ExVar variable isn’t declared, its VBA data type is Variant. Additionally, based on the previous section where we used the Step Into command for purposes of testing the variable, you know that the ExVar variable is not initialized at first (is Empty) and, after the assignment is made, it behaves like a string variable.
The expectations described above match what the message boxes display once the Variant_Concatenation_TypeName variable is executed. More precisely:
- The first message box to appear returns Empty, as expected.

- The second and third message boxes confirm that (now) the ExVar variable is of the String VBA data sub-type.


Finding Out The VBA Data Sub-Type Of A Variant Variable Using The VarType Function
You can also use the VarType function for purposes of finding out the VBA data type of a particular variable.
The way VarType works is very similar to the way the TypeName function works. More precisely, the VarType function returns an integer that indicates what is the VBA sub-type of a Variant variable. The following are the values that can be returned by VarType:
- 0: Empty.
- 1: Null.
- 2: Integer.
- 3: Long.
- 4: Single.
- 5: Double.
- 6: Currency.
- 7: Date.
- 8: String.
- 9: Object.
- 10: Error.
- 11: Boolean.
- 12: Variant. This particular value is only used with arrays.
- 13: Data access object.
- 14: Decimal.
- 17: Byte.
- 36: Variant containing user-defined types.
- 8192: Array.
The syntax of VarType is also very similar to that of TypeName. More precisely, the syntax of VarType is “VarType (varname)”, where “varname” is the Variant variable whose VBA data sub-type you want to find.
Therefore, I simply create a new macro called “Variant_Concatenation_VarType”. The VBA code is almost the same as that in the previous example (Variant_Concatenation_TypeName). The only difference is that, instead of using TypeName, I use VarType.

You probably expect that, when the Variant_Concatenation_VarType macro is executed, the first message box returns the value that corresponds to Empty, while the second and third message boxes display the value corresponding to String.
This is indeed what happens:
- The first message box to be displayed returns the number 0. This corresponds to Empty.

- The second and third message boxes display the number 8. This number makes reference to strings.


Conclusion
The main purpose of Visual Basic for Applications is to manipulate data. Therefore, in order to master VBA and macros, you must have a good understanding of what are the different VBA data types.
After reading this VBA tutorial you probably have a good understanding of the different VBA data types that you can use, and how to determine which type to use in each situation. Choosing which data type to use may seem awkward or a little bit difficult at first, but don’t worry…
As with most aspects of Visual Basic for Applications, the more you practice, the better you’ll become. Therefore, make sure you start using the knowledge about VBA data types that you’ve gained by reading this post in your day-to-day activities.
Books Referenced In This Excel Tutorial
- Mansfield, Richard (2013). Mastering VBA for Microsoft Office 2013. Indianapolis, IN: John Wiley & Sons Inc.
- Walkenbach, John (2013). Excel VBA Programming for Dummies. Hoboken, NJ: John Wiley & Sons Inc.
- Walkenbach, John (2013). Excel 2013 Power Programming with VBA. Hoboken, NJ: John Wiley & Sons Inc.
Table of Contents
Definitive Guide To ADO in Excel and VBA
There are several methods to work with external data and files in Excel. ADO (ActiveX Data Objects) is one of the best and most frequently used tools to work with external data and files. In Excel, we can use the combination of ADO with VBA (Visual Basic for Applications) to work with external data sets in memory. ADO always comes in handy when we need to perform complex, multi-layered procedures and checks on external datasets.
What is ActiveX Data Objects (ADO)?
ADO in Excel and VBA is a tool in that helps developers to write VBA code to access data without knowing how the database is implemented; developers should be aware of the database connectivity only. Being a developer, you don’t need to know the SQL to access a database when using ADO, although you can run SQL commands directly using ADO. So, in short, ADO helps developers accomplish two major tasks:
- Connect to a data source
- Specify the datasets with which to work
Using the ADODB connection, we connect our VBA application with the databases e.g., SQL, MS Access, Microsoft List, Excel workbook, etc.,
Understanding the fundamental syntax of ADO (Connection String and Recordset)
While dealing with external data and files, we must connect the data source before doing anything. To establish the connection, we must provide VBA a few pieces of information. The required information will be provided to VBA in the form of the connection string.
What is a connection string?
A connection string is nothing but a text string that contains a series of variables (also called arguments), which VBA uses to identify the data source and open the connection for further use.
Let’s understand the connection string and its arguments that point to an MS Access database and MS Excel Workbook. You can find several other connection strings at ConnectionStrings.com – Forgot that connection string? Get it here!
Connection Sting – MS Access database
“Provider=Microsoft.ACE.OLEDB.12.0; ” & _
“Data Source= C:MyDatabase.accdb;” & _
“User ID= Administrator;” & _
“Password= AdminPassword”
Connection Sting – MS Excel workbook
“Provider=Microsoft.ACE.OLEDB.12.0; ” & _
“Data Source= C:MyExcelWorkbook.xlsx;” & _
“Extended Properties=Excel 12.0”
ADO connection string can have multiple arguments basis the data source type. Let’s understand the arguments which commonly used i.e., Provider, Data Source, Extended Properties, User ID, and Password (the same have been used in the previous example for MS Access and Excel).
Live Project – Data Entry Application in Excel and VBA using ADO
Data Entry Application in Excel and Access
Provider: With the help of Provider argument in the connection string, VBA identifies the type of data source we are going to work with. Suppose we are going to work with MS Access or MS Excel datasets, then the Provider syntax will be:
Provider=Microsoft.ACE.OLEDB.12.0
Data Source: This argument helps VBA to find the source of database or workbook that contains the data needed. For this parameter, we need to pass the full path of the database or workbook. For example:
Data Source=C:MydirectoryMyDatabaseName.accdb
Extended Properties: Extended Properties is required when we connect to an Excel Workbook. With the help of this argument, VBA identifies that data source is something else than a database. You can use this argument below:
Extended Properties=Excel 12.0
User ID: The User ID argument is optional and only used if the data source is protected with a user id and password. For example:
User Id = Admin
Password: This argument is optional and only need if the password is required to connect to the data source. For example:
Password = MyPassword
Note: You can skip User ID and Password arguments if the data source is not protected.
What is a Recordset?
A Recordset object is a group of records that can either come from a data source or as the output of a query to the table. The Recordset provides several methods and properties to examine the data that exists within the data source.
In addition to building a connection to the data source, we need to define the dataset (Recordset) with which we need to work. We can define the Recordset to open an existing table or query using the 4 common arguments: Source, ConnectString, CursorType, and LockType.
Recordset.Open Source, ConnectString, CursorType, LockType
Let’s understand all these 4 parameters.
Source in Recordset
The source data is typically a table, a SQL statement, or a query that retrieves records from the data source. Please see the below example of Source in different scenarios.
Providing MS Access table name ‘Product’ to Source
Recordset.Open “Product”
SQL statement to Source. In below code, MySQL is a variable holding SQL statement.
MySQL=”Select * from [Product] where Region=”North’”
Recordset.Open MySQL
ConnectString in Recordset
ConnectString is the argument that we have already discussed while understanding the ConnectionString. We just need to pass the ConnectionString here so that Recordset can identify the data source.
So, suppose we are going to connect with MS Access table ‘Product’ in Recordset then the code will be like:
Recordset.Open Product, ConnectionString
CursorType in Recordset
A cursor is a mechanism that enables the Recordset to move over the records in a database. It allows developers to retrieve each row at a time and manipulate its data. In simple language, a cursor is nothing more than a point to a row on which you are performing the data manipulation work.
The CursorType that are commonly used in Recordset code:
- adOpenForwardOnly: This is the default cursor type available in Recordset. If we don’t pass any CursorType in the code, then Recordset will automatically consider adOpenForwardOnly. This cursor is very efficient and allows us to move through the Recordset from beginning to end (one way only). This cursor is ideal for reporting purposes where we need to extract the data. This cursor does not allow to perform any changes to data.
- adOpenDynamic: When we need to loop through the data, moving up and down in the datasets, and want to identify any edits made to the dataset then adOpenDynamic can be used in Recordset. As it performs almost all the activities required in database operation, this cursor takes a lot of memory and resources of the system and should be used only when needed.
- adOpenStatic: This CursorType is ideal for quick return as it uses a static copy of data from the database. This is different from adOpenForwardOnly CursorType as it allows the developer to navigate the returned records. In addition to these, this CursorType allows data to be updateable by setting the LockType except adLockReadOnly (we will see LockType in upcoming part of this blog).
LockType: A LockType is a mechanism that helps developer to apply restrictions on a table or datasets to avoid unauthorized access or changes to the Recordset. We usually use two LockType in ADO:
- adLockReadOnly: This is the default LockType in Recordset which indicates that there is no need to edit the data returned. If we don’t provide the LockType to Recordset then VBA considers this internally.
- adLockOptimistic: This LockType is ideal when we need to edit the data returned to Recordset. We can use this if we want to perform Add, Update and Delete method in the database.
Referencing the ADO object library in VBA
Now, we have strong fundamentals of ADO and the codes/arguments. Let’s create our own ADO procedures to perform some basic operations. It will help us get more clarity and understanding of ADO in real projects.
To use the ADO in the Excel project, we need to add the reference of the ADO object library in the Visual Basic Application (VBA) window. Once we add the reference of ADO in the Excel project, Excel will start understanding the objects, properties, and methods of ADO.
Note: we can use ADO library without giving the reference of ADO in Excel with Late Binding technique, but it will increase the complexity of code and you will not be able to get the help while writing the code. So, we would recommend you start using the Early Binding i.e., giving the reference of ADO and then writing the code. Once you have expertise in the code then you can move to Late Binding technique.
To start adding the reference of ADO, just open the MS Excel application and create a new workbook and save the file with a Macro enabled extension e.g., .xlsm. Open the Visual Basic Editor window using the Shortcut key ALT + F11.
Once Visual Basic Editor window will appear on screen then click on Tools (available in the application menu) -> References….
Once you click on References.. then it will open the References dialog box as shown in the picture below. In the available references list, just scroll down until you find the latest version of the Microsoft ActiveX Data Objects Library. Just tick the Checkbox and click on the OK button available in the dialog box to add the ADO reference to the current Excel file.
Note: you can see several versions of the ADO library in Reference dialog box. We would recommend you select the latest version from the list or if you are developing a project for your client then check the version of MS Excel and available ADO on client system and then go with that library to make your code compatible.
After clicking on OK button, we can open the Reference dialog box again to ensure that whether the ADO reference is selected or not. If that is selected, then it will start appearing on top of the list as check marked (as you can see in above image).
VBA code to Use ADO and get data from MS Access database
Writing the code to get the data from Customer table of MS Access database.
Sub GetCustomerData ()
       Dim MyConnect as String
       Dim MyRecordset as ADODB.Recordset
       MyConnect= “Provider=Micorosft.ACE.OLEDB.12.0;” & _
                          “Data Source= D:TheDataLabsSales.accdb”
       Set MyRecordset= New ADODB.Recordset
       MyRecordset.Open “Customer”, MyConnect, adOpenStatic, adLockReadOnly
      ThisWorkbook.Sheets(“Customer”).Range(“A2”).CopyFromRecordset MyRecorset
      With ActiveSheet.Range (“A1:C1”)
             .value = Array (“Name”, “Gender”, “Address”)
             .EntireColumn.AutoFit
      End With
End Sub
Now we are done with putting all the code together in a procedure to get the data from Customer table and provide the output in MS Excel worksheet “Customer”.
Understand VBA Codes line by line
For better clarity, let’s take a moment to understand the VBA code.
Sub GetCustomerData ()
With the help of this line, we are declaring a procedure named ‘GetCustomerData’.
Dim MyConnect as String
Declaring a string variable to hold the Connection sting so that VBA can identify the data source.
Dim MyRecordset as ADODB.Recordset
Declaring a Recordset object variable to hold the data that will be returned by the procedure.
MyConnect= “Provider=Micorosft.ACE.OLEDB.12.0; Data Source= D:TheDataLabsSales.accdb”
Here, we are defining the connection string for the ADO procedure. As we are connecting the ‘Sales’ MS database to get the data from the Customer table hence, we are passing the Provider parameter as Micorosft.ACE.OLEDB.12.0 and Source as D:TheDataLabsSales.accdb. The same has been already discussed in the Connection String section of the post.
Set MyRecordset= New ADODB.Recordset
With the help of the line of code, we are setting the reference of ADODB Recordset to MyRecordset object variable.
MyRecordset.Open “Customer”, MyConnect, adOpenStatic, adLockReadOnly
This line of code helps us in opening the Recordset to return static and read-only data.
ThisWorkbook.Sheets(“Customer”).Range(“A2”).CopyFromRecordset MyRecorset
Here, we are using Excel’s CopyFromRecordset method to get the data from the Recordset and provide the output in the range starting from the “A2” to the spreadsheet named ‘Customer’.
With ActiveSheet.Range (“A1:C1”) …. End With
These lines of Code help us in getting the column header and putting the header name in active sheet range A1 to C1. We need these lines of code because the CopyFromRecordset method does not return column headers or field names.
Live Project in Excel
Using ADO with Microsoft Visual Basic, we have developed the Data Entry Application Project in MS Excel and MS Access to transfer the data. Refer the below link.
Data Entry Application in Excel and Access
Interested in developing Data Entry Form without Using ADO
Easy-To-Follow: Create a Fully Automated Data Entry Userform in Excel and VBA in 5 Easy Steps
How to Create a Multi-User Data Entry Form in Excel (Step-by-step Guide)
Advance Data Entry Form
Read more topics
If you have any question on ‘Definitive Guide To ADO in Excel and VBA’ then please leave your comment in comment section. Thanks!
Data functions are the nuts and bolts of the digital world. In development, they allow programmers to exchange directly with a database and modify object in-line. In Excel, they query, create, and modify arrays. In math, they allow statisticians to address datasets using Sigma (Σ) and Pi (∏) notation.
But what exactly is a data function, and why is it present in such a variety of fields?
This article will clearly define data functions and explain them in different use cases. The goal is to help you understand (1) how data functions are used in your field and (2) how important they are to the computational world as a whole.
Definition: Data Function
Defining data functions in a meaningful way is no easy task because they are present in different contexts with varying goals. Examples are critical to understand. However, we can generalize their purpose to establish a definition.
In short, a data function is a query, modification, or computation that directly or indirectly impacts values in a data table. Data functions are different from other functions because they operate exclusively with tabular data, rather than un-arranged values. They often appear in math, computer programming, data tools, and spreadsheet software.
To concretize the definition, imagine the following. If I calculate (5+10)*(6+10) in general, this is not a a data function. However, if I calculate ∏(x+10), where nmin=5 and nmax=6, then the Pi notation specifically addresses an array of two data values for variable x. Since an array is the simplest form of a data table, the formula interacts with tabular data and is a data function.
The meaning is subtle and may seem silly in this example, but it becomes critical when computations grow in complexity. Let’s turn our attention to specific use cases now.
Don’t forget, you can get the free 67 data skills and concepts checklist to cover all the essentials (including data functions).
Data function in Math (Statistics)
Math contains the simplest instance of data functions. As shown in the above example, a given function f(x) is a data function when it addresses a list of data points in a series, rather than loose variables or numbers. The most common formulas used to address this topic are Sigma and Pi notation. Every data function in statistics can be represented by some form of these structures.
Let me be clear: it is for this purpose that the entire field of statistics exists — to analyze data sets. You may not have realized it, but even common statistical measures such as average are formally written as data function.
- Average = 1/n * ∏x, where nmin=lowest number in series and nmax=highest number in series.
Note that median and mode are not actual statistical calculations. While they describe a dataset by identifying the middle value and the most common value, they are not really statistics because they do not create a computational relationship between all the values in the set.
Moreover, Sigma and Pi do not have subtraction and division counterparts. Why? Because any case of subtraction or division can be written in terms of addition and multiplication. For example, x – 10 can be written as x + (10 * -1), and x/10 can be written as x * (1/10).
Written succinctly, data functions in math fall under the purview of statistics and use Sigma and Pi notation.
Data functions in Excel appear in two ways. On the one hand, any formulas that involved data structured in a tabular form can be considered a data function. Since the majority of Excel do just that, most can be considered data functions.
On the other hand, the data analysis add-on and the table data function are often what readers look for.
Data Analysis Function in Excel
The data analysis function is actually an add-on that you can add by navigating to Tools > Excel Add-ins > Analysis ToolPak. Check the box, restart Excel, and you should have it. This function will allow you to run common statistical analysis on datasets.
How to Use Table Data Function in Excel
If you’re looking for the table data function, you’re a little outside of our definition for data functions. What Excel calls table data function is nothing more than a “What If” scenario tool that let’s us view the results of a formula by entering multiple criteria. Though not technically a data function, the table data function useful to understand for comparative purposes.
For example, imagine a formula that multiplies the values of two cells. We can create a scenario that shows what the outcome of this formula would be given a list of various inputs. The following image shows how this could look like. Cell C2 shows the product of cells A2 and B2. By linking cell F2 to cell C2, we can set up the table data function to show what the results would be if input 1 were not 10 but 1, 2, 3, 4, and 5.
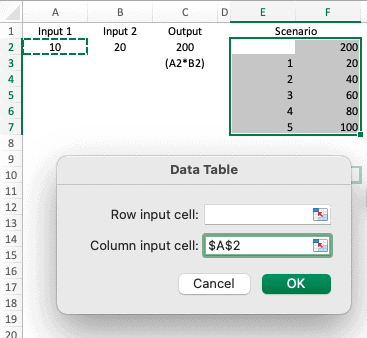
Data function in Computers
The use case with the highest level of detail is the machine on which you’re reading this sentence: a computer (and if you’re on mobile, yes, a phone is a computer).
The four functions of a computer are input, process, storage, and output. Data storage takes place on a hard drive, where information exists in sequences of 1s and 0s. You may have heard this referred to as binary code.
However, for binary to be readable to humans, it is shown in tabular form as tables. When the computer translates storage to output (the screen), it is using a data function to do so. Why? Because the computer queries tabular data from the hard drive and shows it on the display.
Tibco & Spotfire
You will often hear the term data function in the context of Tibco and Spotfire software, which are enterprise data management tools. I won’t go into detail here since they’re not an open source platform and only benefit a limited number of users (that pay).
However, data functions in Tibco and Spotfire are scripts written by users to enhance the software’s calculating capacity — far from the true definition of a data function.
Data function in R
Data functions in R are more granular than the examples we’ve seen above. The Data() function is one of the most common functions because it’s a basic way to load data from underlying tables into the r workspace.
In short, the Data() function accepts a character argument that corresponds to a pre-defined table. In this way, it’s just a query function. In addition, Data() can accept multiple criteria. Here’s the full formula syntax:
data(…, list = character(), package = NULL, lib.loc = NULL,
     verbose = getOption("verbose"), envir = .GlobalEnv,
     overwrite = TRUE)
“…” corresponds to the name of the data table. If there is only one table available, it can be as simple as that. However, additional arguments allow you to specify details:
- List =, allows you to specify a subset of the data table if it has been pre-defined
- Package =, allows you to specify in which r package the data table and list are found
- Lib.loc =, allows you to specify a directory in r where the data table, list, and package are found, or allows you to ignore with NULL, which tells r to search all known directories
- Verbose =, allows you to get additional, automatic diagnostic info about the data table
- Envir =, allows you to specify in which environment the data should be uploaded
- Overwrite =, allows you to overwrite current value in the environment to make way for new ones
As you can see, Data() in r is a data function because it deals with querying data from an underlying table, not just unstructured numbers.
We’re highlighting the Data() function as an example, but it’s far from being the only r function that works with underlying data tables. In reality, we can’t cover them all, but a large portion of functions across many of programming languages can be categorized as data functions.
Data function in C++
While in r the Data() function deals with querying, or downloading data, the Data() function in C++ deals with creating and modifying an array (aka a small dataset).
In short, the Data() function in C++ identifies a character in a string and writes them into an array. To understand how this works requires knowledge of C++, but you can think of it like linking a cell in a table to a standalone cell with text in it in Excel.
The data() portion of this syntax writes a constant character(s) into the target array. The syntax looks like this:
const char* data() const;
Data function in JavaScript
The .data() function in JavaScript allows either querying or modifying underlying datasets, and it’s very straightforward.
It exists as 4 different types:
- .data( key, value ) – a data entry statement that allows the programmer to give a name (key = STRING) to the value, and a data point (value = any data type except undefined)
- .data( obj ) – a data entry statement that allows the programmer to attach a specific object to any document object model (DOM) necessary
- .data( key ) – a data return function that shows the value of the key entered in a previous statement
- .data() – an empty data return function that accepts no arguments and will simply return the values previously associated of the adjacent element
It’s important to note that these data functions start with a period because they are added on to individual elements in-line. For example, imagine you have an element $( “body” ) to which you add .data( “AnalystAnswers.com”, 52 ); creating the resulting $( “body” ).data( “AnalystAnswers.com”, 52 ); You have now named the body element AnalystAnswers.com and given it a numeric value of 52.
All four items are data functions because they deal with creating or modifying tabular data, directly or indirectly.
Conclusion
If you found this article helpful, you can find more free content at the AnalystAnswers.com homepage!