
This chapter describes what header and footer are in MS Word and how to add a header and footer in Word. Headers and footers are sections of a document that contain special information, such as page numbers and the total number of pages, the title of the document, the company logo, and any images. The header and footer appear at the top and bottom of each page, respectively.
Table of contents
- What is the header and footer in MS Word?
- Header
- Footer
- Why header and footer used in MS Word
- Advantages of header and footer in MS Word
- How to Use Header and Footer in MS Word
- Different Headers for Different Sections
- How to Remove Header and Footer in Word
- How do I change single-page header or footer of Word
- Shortcut key for header and footer in MS Word
- Summary
Headers and footers are handy for including information on each page of a document, such as your name, the document’s title, and page numbers.
Text that goes at the top of a page is called a header. Most of the time, this is where you put information about the document, like its name, the chapter heading, page numbers, the date it was made, and so on.
A footer is a section at the bottom of a document page that contains information shared with other pages. Footers may contain page numbers, creation dates, copyrights, or references that occur on a single page or all pages.
Header and footer are typically used in Word documents because they include additional information such as page numbers, dates, an author’s name, and footnotes, which can aid in the organization and readability of lengthy publications. Text supplied in the document’s header or footer will appear on each page.
By utilizing the header and footer sections, you can make your document look professional and polished. The header is a piece of the document that appears at the top margin, whereas the footer is a section that appears at the bottom margin.
One of the advantages of header and footer in Word document is that they repeat important information on every page or section. This makes it easier for people to find what they need quickly in a long document. This is shown by page numbers, which are important in any long document.
Header and footer are helpful because they give quick information about your document or data in a predictable way and set up different parts of a document. Simply, they make it much easier to read and understand calculations, graphs, and pivot tables.
The main difference between a header and a footer is their placement inside the document. Thus, what functions for the header also functions for the footer. Therefore, let’s begin by placing anything into the Word header.
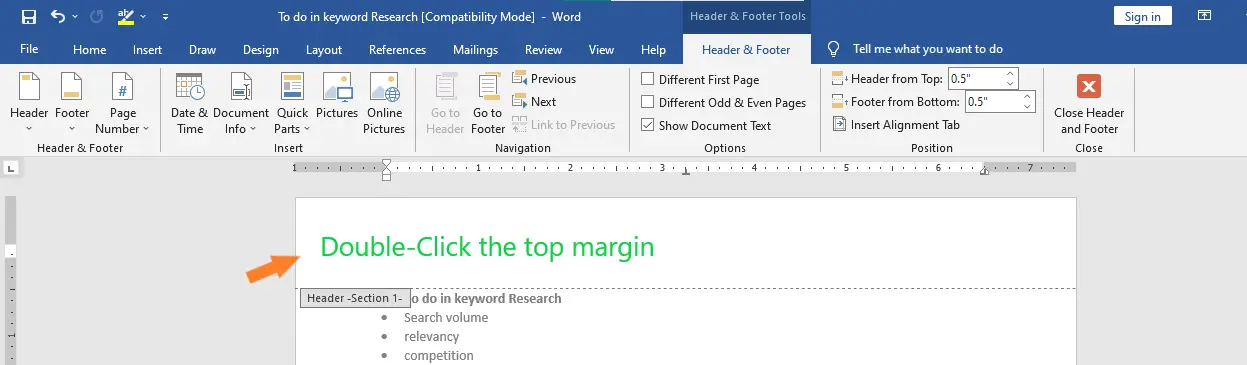
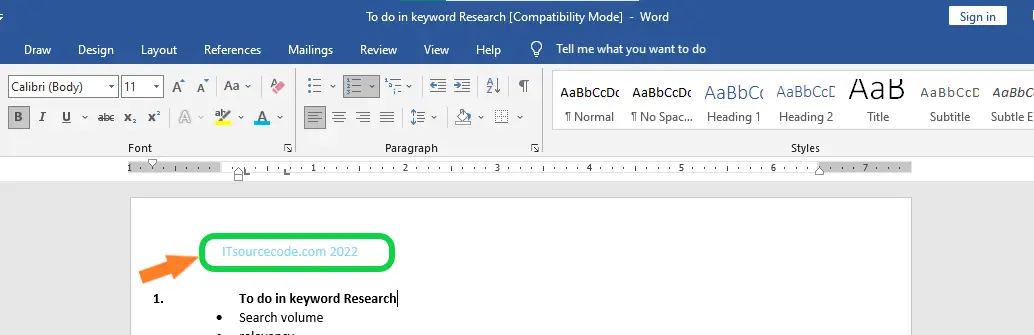
Steps on How to Use Header and Footer in MS Word. In this example, we want the actual article to appear at the top of each page, so we will include it in the header.
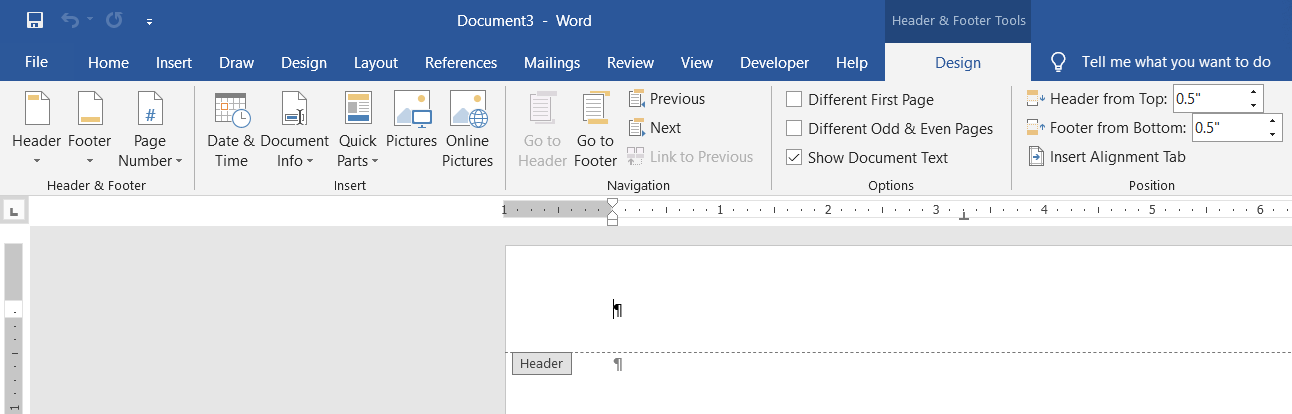
- Step 1: Double-click anywhere on the document’s top or bottom margins. Here we will double-click the upper margin in our example.

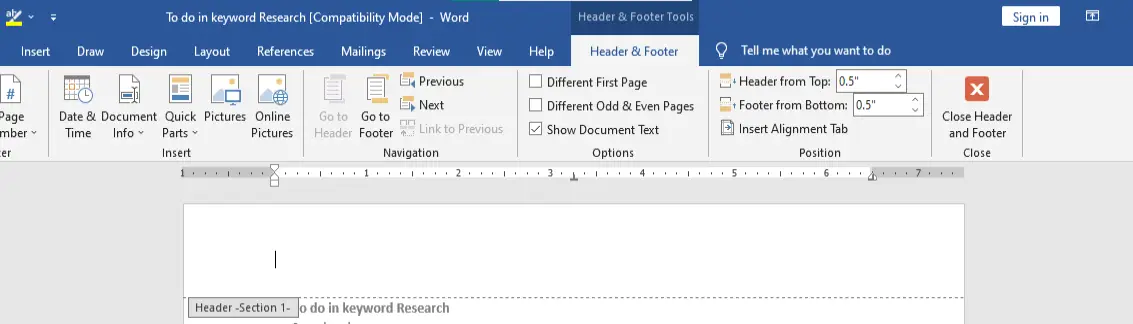
- Step 2: The header or footer tab will be displayed. The insertion point will be displayed in either the header or footer.

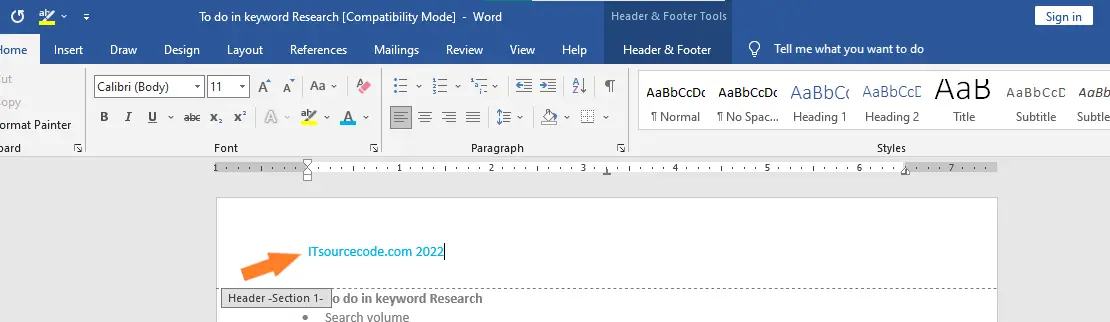
- Step 3: Fill in the blanks with the required information in the header or footer. We’ll type the website name and the date in our example.

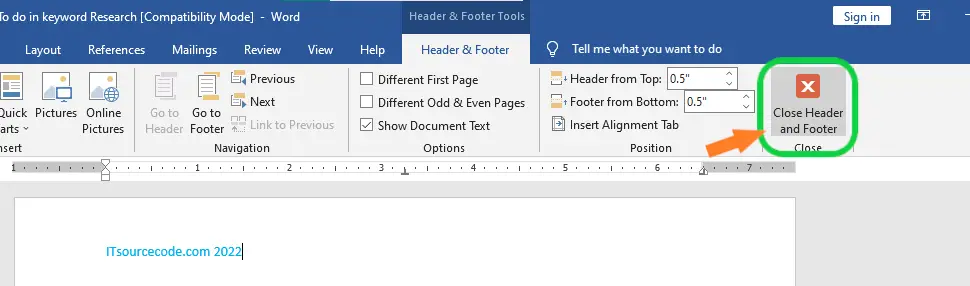
- Step 4: Close the Header and Footer when you’re finished. Alternatively, press the Esc key.

- Step 5:The text of the header or footer will load.

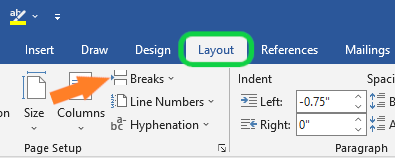
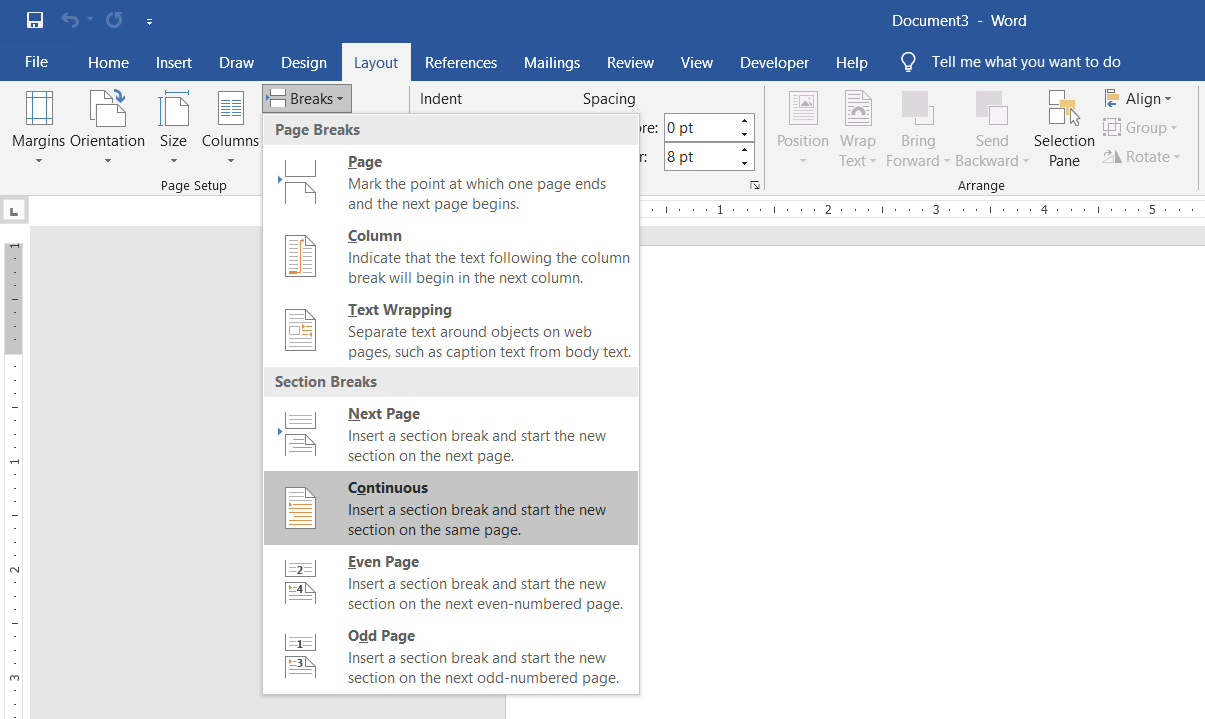
Additionally, here are the instructions to have Different Headers for Different Sections. To accomplish this, you must first create sections in your document. To make sectioning:
- Select the location where you wish to create a section by positioning the cursor there.
- Select the Layout tab, then click Breaks.

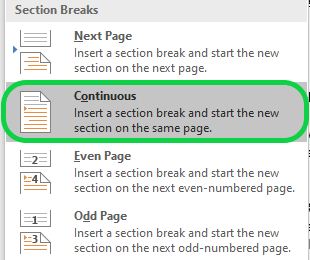
- In the bottom half of the menu, the Section Breaks are displayed.
- Choose “Continuous” from the list. This will make a Section Break right where the cursor was.

Once you divide your document into sections, you can give each section a different header.
To have different section headings:
- Go to the Header & Footer Tools tab by double-clicking on the header.
- Click the Link to Previous button to turn it off. If you keep this option turned on, this section will use the same header and footer as the last one.
So there you go! With these, each page in your document can have its own header.
The following are Remove Header and Footer from the first page of word document.
- Double-click the first page header or footer area.
- Check Different First Page to see if it’s selected. If not:
- Select Different First Page.
- Content of the header or footer on the first page is removed.
- Add your new content into the header or footer.
- Select Close Header and Footer or press Esc to exit.
Breaks between pages and between sections are different. If you want to change single-page header or footer of Word there is already a page break before the page where you want to change the header or footer, remove the page break and replace it with a section break, as shown below.
- Click or press where you want a new page to begin without a header or footer.
- To make a section break, go to Layout > Breaks > Next Page.
- To open the Header & Footer tab, double-click the header or footer section.
- Select Link to Previous to disable the connection between parts.
- Choose Header or Footer and do one of these:
- Choose Remove Header or Remove Footer .
- Change or add to the information in the header or footer. If you want to delete or change both the header and the footer, you’ll need to repeat steps 3 through 5.
- To get back to your document’s body, choose Close Header and Footer or press ESC.
The table shows the Shortcut key for header and footer in MS Word.
| Shortcut Key | Description |
| Alt+N, H, E. | To open the Header & Footer ribbon, You can add a header or footer picture or modify their location with the Header & Footer ribbon. |
| Alt+V, H. | Hold down the Alt key and press the V key at the same time. You can hold down the Alt key while you press H, or you can let go of it. |
| Alt+N, O | Press it to make a footer. |
Summary
In summary, we’ve learned what is header and footer in MS Word are and how to add header and footer in a document, as well as what those terms mean. In addition, we know why we need a header and footer to make our document presentable and creative.
Meanwhile, if you want to learn more about formatting text, see the previous tutorial on how to check and change lines and paragraphs as well as how to adjust page margin in Microsoft Word, which are still part of formatting your documents. You can browse those guides if you are having a hard time exploring your documents.
We hope this tutorial helps you as you format your documents in MS Word.
PREVIOUS

NEXT

- Home
- Word Tips
- Headers
Header in Microsoft Word
What Is a Header in Microsoft Word?
A header in Microsoft Word is the information that appears at the top of every page of your document.
In academic writing, the header may contain information such as the title (maybe shortened) of the paper, or chapter, or section.
The content of the header depends on the instructions you have been given. For example, you may have to follow APA style or the Chicago style, or a modified style your instructor has given you.
You may just have one header only (e.g. containing the title and the page number), or several headers (e.g. a different title for every chapter and the page number).
For example, a more complex piece of academic writing, like a thesis, could have the following:
- a Title page with no header
- preliminary pages (Abstract, Acknowledgements, Table of Contents, List of Tables and List of Abbreviations) with different headers in each section
- page numbers in the headers that change from Roman numerals in the preliminary pages, to Arabic numbers in the content pages
- different chapter or section headings in different parts of the academic paper.
For an example of different headers, see this thesis submitted at the University of Sydney.
You can easily add, change or delete a header in Microsoft Word. You can easily format different headers in separate parts of your academic paper.
Why Create Headers?
Headers will make your academic writing look more professional and improve your chances of success because:
- headers make it easier for your reader (e.g. your instructor) to find their way around your academic paper.
For example, if reference is made to a page number (e.g. see page 88), they can quickly find that page by looking at the page number in the header. - A header can easily re-orientate a reader.
For example, after reading several pages, a quick look at the title in the header will remind what the topic is about. - They make you look professional! Just look at any substantial professional writing—it will have headers.
When to Create a Header or Headers
You will have a header (or headers) because:
- it is a requirement of the academic writing style (e.g. APA, Chicago) you are using and/or
- it is a requirement of your institution’s writing style and/or
- your instructor has instructed to do so.
Failure to follow requirements or instructions could result in a lesser grade, or even rejection of your work.
Where to place a header or headers
A header in a Word document is placed at the top of the page.
The header part is some reserved space on the top of each page.
To see how much space there is, do the following:
- select the Layout tab from the ribbon
- select Margins from the Page Setup group
You will see the space allocated to the Top (i.e. Header), Bottom (i.e. Footer), Left and Right margins.
The standard Microsoft Word setting is 1 inch or 2.54 cm.
If you wish to vary, you can choose one of the presets (e.g. Narrow, Moderate, Wide, Mirrored) or you can create your own custom margins including the header.
Your academic writing may have different headers in different parts of the document.
An example in Figure 1 shows:
- a Title page with no header
- a Table of Contents with a header containing «Table of Contents» and Roman numeral page numbers i and ii
- the main text with the header containing the Chapter title and Arabic numeral page number 1
 Figure 1: Example of Different Running Heads in an Academic Paper
To create a different header in Microsoft Word:
- divide your academic paper into sections (each section will have your unique header)
- break the link between the new header and the previous header (remove Link to Previous)
Then add the information you want to the header in each section.
If you need to know how to create sections, see section break in Microsoft word.
The following example shows how to set up the headers in an academic paper (or any other document) that have the following:
- title page (i.e. a cover page)
- prelims (preliminaries) which are the pages before the main text such as
abstract, table of contents, list of figures, list of tables, acknowledgements, declarations - main text.
Note: your document may vary, such as no title page, or different prelims or no prelims.
The principle remains the same — when you want to change the header on the next page:
- insert a section break at the end of the current page
- break the connection between the new header and the previous header (i.e. remove the Link to Previous)
1. Insert a Section Break Between the Title (or Cover) and Preliminary Pages
To create a section break at the end of the Title (or Cover) page (See Figure 2):
- select Layout from the ribbon
- select Breaks
- select Next Page
Please note: if you already have a page break at the end of the Title (Cover) page, either:
- delete it or
- insert a Continuous section break.
Otherwise you will insert an extra blank page.
 page and the rest of the text") Figure 2: Insert a Section Break at the End of the Title (or Cover) Page.
Figure 2: Insert a Section Break at the End of the Title (or Cover) Page.
2. Remove the Link Between the Headers
Now you have a header for section 1, and a header for section 2.
Remove the dependencies between the section 1 header and section 2 header as follows:
- place your cursor in the header of section 2 (e.g. Table of Contents in Figure 3)
- double click (or tap) in the header section to open the Header & Footer tab
- deselect (click or touch) Link to Previous in the Navigation group
 Figure 3: Remove Linkage Between the Header in the Table of Contents Section and the Title Page Header
Creating Multiple Headers in Complex Documents
Often academic writing (e.g. thesis, dissertations) contain many different sections, each with its own header.
The principle remains the same — insert a Section Break Next Page, then remove Link to Previous.
Consider a thesis that has several sections, with each section having a different header:
|
Title |
No header — Insert Section Break Next Page at the bottom of the page. |
|
Declaration |
Remove Link to Previous (i.e. Section 1) — Enter «Declaration» into the Header — Insert Section Break Next Page at the end of this section. |
|
Abstract |
Remove Link to Previous (i.e. Section 2) — Enter «Abstract» into the Header — Insert Section Break Next Page at the end of this section. |
|
Statement of Contribution |
Remove Link to Previous (i.e. Section 3) — Enter «Statement of Contribution» into the Header — Insert Section Break Next Page at the end of this section. |
|
Acknowledgements |
Remove Link to Previous (i.e. Section 4) — Enter «Acknowledgements» into the Header — Insert Section Break Next Page at the end of this section. |
|
Table of Contents |
Remove Link to Previous (i.e. Section 5) — Enter «Table of Contents» into the Header — Insert Section Break Next Page at the end of this section. |
|
List of Tables |
Remove Link to Previous (i.e. Section 6) — Enter «List of Tables» into the Header — Insert Section Break Next Page at the end of this section. |
|
List of Figures |
Remove Link to Previous (i.e. Section 7) — Enter «List of Figures» into the Header — Insert Section Break Next Page at the end of this section. |
|
List of Abbreviations |
Remove Link to Previous (i.e. Section |
|
Chapter 1 — Introduction |
Remove Link to Previous (i.e. Section 9) — Enter «Chapter 1 — Introduction» into the Header — Insert Section Break Next Page at the end of this section. |
|
Chapter 2 — Literature Review |
Remove Link to Previous (i.e. Section 10) — Enter «Chapter 2 — Literature Review» into the Header — Insert Section Break Next Page at the end of this section. |
|
Chapter 3 — Method and Results |
Remove Link to Previous (i.e. Section 11) — Enter «Chapter 3 — Method and Results» into the Header — Insert Section Break Next Page at the end of this section. |
|
Chapter 4 — Discussion |
Remove Link to Previous (i.e. Section 12) — Enter «Chapter 4 — Discussion» into the Header — Insert Section Break Next Page at the end of this section. |
|
Chapter 5 — Conclusion |
Remove Link to Previous (i.e. Section 13) — Enter «Chapter 5 — Conclusion» into the Header — Insert Section Break Next Page at the end of this section. |
|
References |
Remove Link to Previous (i.e. Section 14) — Enter «References» into the Header — Insert Section Break Next Page at the end of this section. |
|
Appendix |
Remove Link to Previous (i.e. Section 15) — Enter «Appendix» into the Header — Insert Section Break Next Page at the end of this section. |

This example has shown how easy it is to add a header in Microsoft Word for each section.
No matter how complex your document is, you can easily create different headers.
Summary
Headers in your academic writing improves the professional look of your writing. It also provides a quick reference point for the reader and reminds them of the main topic you are writing about..
Adding one single header in a Word document (starting with page number 1) on the first page is quite easy.
Adding a different header in a Word document require some extra steps.
These steps are simple to do, and you will make your academic and professional writing so much better.
Like This Page? Please Share It.
Insert a header or footer

-
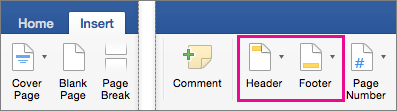
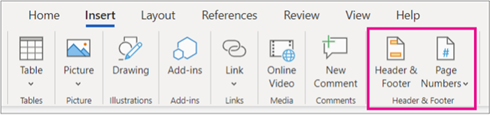
Go to Insert > Header or Footer.
-
Choose the header style you want to use.
Tip: Some built-in header and footer designs include page numbers.
-
Add or change text for the header or footer. For more info on things you can do with headers, see Edit your existing headers and footers. To edit a header or footer that’s been already created, double-click on it.
-
To eliminate a header—like deleting it on the title page—select it and then check the Different First Page box.
-
Select Close Header and Footer or press Esc to exit.
To delete, select Insert > Header (or Footer) > Remove Header (or Remove Footer).
Add a standard or customized header or footer
-
Go to Insert > Header or Footer.

-
Choose from a list of standard headers or footers, go to the list of Header or Footer options, and select the header or footer that you want.
Or, create your own header or footer by selecting Edit Header or Edit Footer.
-
When you’re done, select Close Header and Footer or press Esc.
Important:
Office for Mac 2011 is no longer supported. Upgrade to Microsoft 365 to work anywhere from any device and continue to receive support.
Upgrade now
-
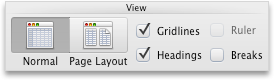
On the Layout tab, under View, click Page Layout.
-
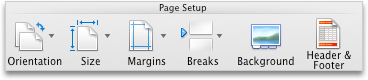
On the Layout tab, under Page Setup, click Header & Footer.
-
Choose from a list of standard headers or footers by going to the Header or Footer pop-up menu, and clicking the header or footer that you want.
Or, create your own header or footer by clicking Customize Header or Customize Footer and following the instructions.
Note: When you customize your header or footer, you can add images, page numbers, date, time, sheet name, file name and path, and more.
-
Go to Insert > Header & Footer.
-
Add or header or footer text.
-
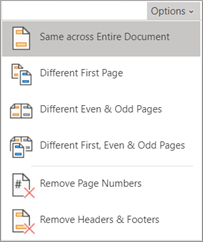
Use the Options menu for additional customization.
-
To exit, select Close Header and Footer or press Esc.
-
To delete, select Insert > Header (or Footer) > Remove Header (or Remove Footer).
For more on headers and footers, see Headers and footers in Word.
Need more help?
Want more options?
Explore subscription benefits, browse training courses, learn how to secure your device, and more.
Communities help you ask and answer questions, give feedback, and hear from experts with rich knowledge.

Headers and footers in Microsoft Word refer to tiny pieces of information, such as page numbers, that can be very important when producing a document. Headers and footers can also include dates, book titles, chapter titles and the name of the author. A header will appear along the top of a Microsoft Word document, and a footer will appear along the bottom of a document.
A header or footer is similar to the way pages appeal in a hard cover or paperback book. There are often chapter titles, or the title of the book at the top and bottom of the pages, as well as page numbers and other information. Depending on the version of Microsoft Word that is used, a simple header or footer, such as a page number can be inserted by the document creator going to the Header or Footer tab under “Insert.”
The date and time is another header or footer that can be inserted into a Word document by going to the “Insert” tab. Date and time can also be set automatically to be included in documents by checking the box that reads “Update automatically.” To insert file names or paths, a user can also go to the “Insert” tab and choose “Quick Parts,” followed by “Field.”
MORE FROM REFERENCE.COM
You can get a lot out of headers and footers in Microsoft Word. We show you how to use them in a document.

Headers and footers are simple to use in Microsoft Word, but there is much more to them than catches the eye. Learn how to get more out of headers and footers in Word.
In Microsoft Word, the top margin of a page is called its header, and the bottom margin is called the footer. Headers and footers are especially useful for including information that you want to display on every page, or specific pages. This information could be the page number, the chapter title, or anything else.
The main difference between a header and a footer is where they’re positioned in the document. So, what works for the header also works for the footer. That being said, let’s start with inserting something to the header in Word.
- Go to the Insert tab.
- Select Header. This will bring up a dropdown menu with some options in it. These are all presets for the header, provided by Microsoft. For now, select the first option which is Blank. This will take you to the header and also activate the Header & Footer Tools in the Design tab.


If you’ve more than a single page in your document, you’ll notice that once you add something in the header, it’s going to appear on top of every page in your document. This makes the header an excellent location to place document info.
A quicker way to access the header is to double-click on the top margin of the page. Double-clicking the bottom margin will bring up the footer.
The Header & Footer Tools tab activates whenever you’re editing the header or the footer of a page. This tab allows you to change options related to the header and also insert components other than plain text to it.
Different First Page
So far, anything that you add to the header will appear on every other page but what if you don’t want the header on your first page to appear on every page in the document? You might want to have other content in the header of other pages or anything else. This can effortlessly be resolved:
- Double-click on the header.
- In the Header & Footer Tools tab, in the Options section, check Different First Page.
Once you check this option, the stuff you put in the header of the first page won’t appear on other pages and conversely, if you change the header of any other page it won’t affect the first page.
Different Odd and Even Pages
You probably have seen this one in different documents and even books. As a familiar example, you could have the document title in the odd page header and the heading title on the even pages. You need to check only one option to have different headers on odd & even pages:
- Double-click on the header.
- In the Header & Footer Tools tab, check Different Odd & Even Pages.
Now, when you edit the header of an odd page it will apply to all odd pages but it won’t affect the even pages. This also works the other way around.
You can also have different headers for different sections. To do this, you need to create sections in your document first. To create sections:
- Select where you want to create a section by placing your cursor there.
- Go to the Layout tab and then click on Breaks.
- In the bottom half of the menu, you can see the Section Breaks.
- Select Continous from the menu. This will create a Section Break right where you had placed the cursor.

Once you create sections in your document, you can have different headers for each section. You can read our article on creating and removing page breaks to learn more about breaks.
To have different headers for a section:
- Double-click on the header and go to the Header & Footer Tools tab.
- Click on Link to Previous and disable it. Keeping this option enabled will use the same header and footer as the previous one for this section.
There you have it! With these, you can have unique headers for any page in your document.
Numbering Pages in Word
Headers and footers in Word provide a display area for page numbers in your document. Adding page numbers to longer documents makes them easier to navigate for readers. To add page numbers:
- Go to the Insert tab.
- In the Header & Footer section click Page Number.
- In the menu, you will have four choices for the location. Choose one and then select the styling you want.

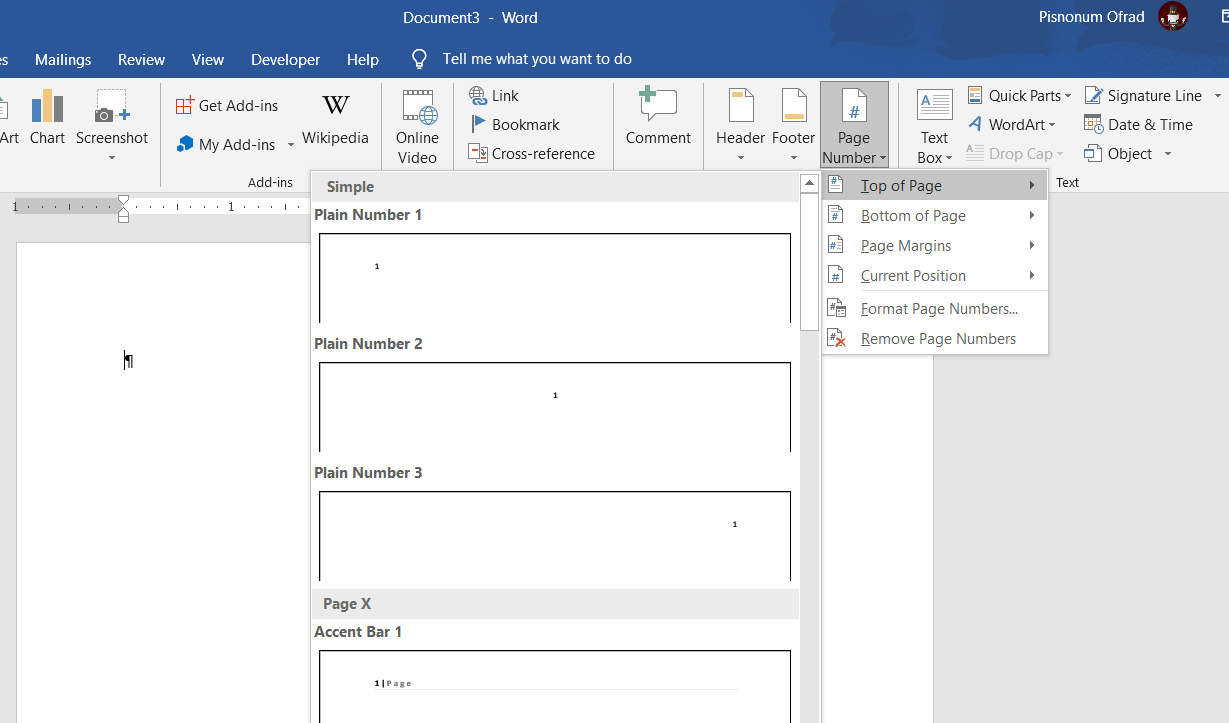
Top of Page and Bottom of Page will display the page number in the header and the footer respectively, but you can show the page number in areas other than these two.
Selecting Page Margins will display the page number on the right or left side of the page. What’s more, is that you can show the page number anywhere within the page. To do this:
- Place your cursor where you want to display the page number.
- Go to Insert and then select Page Number.
- From the menu, select Current Position then select a style.

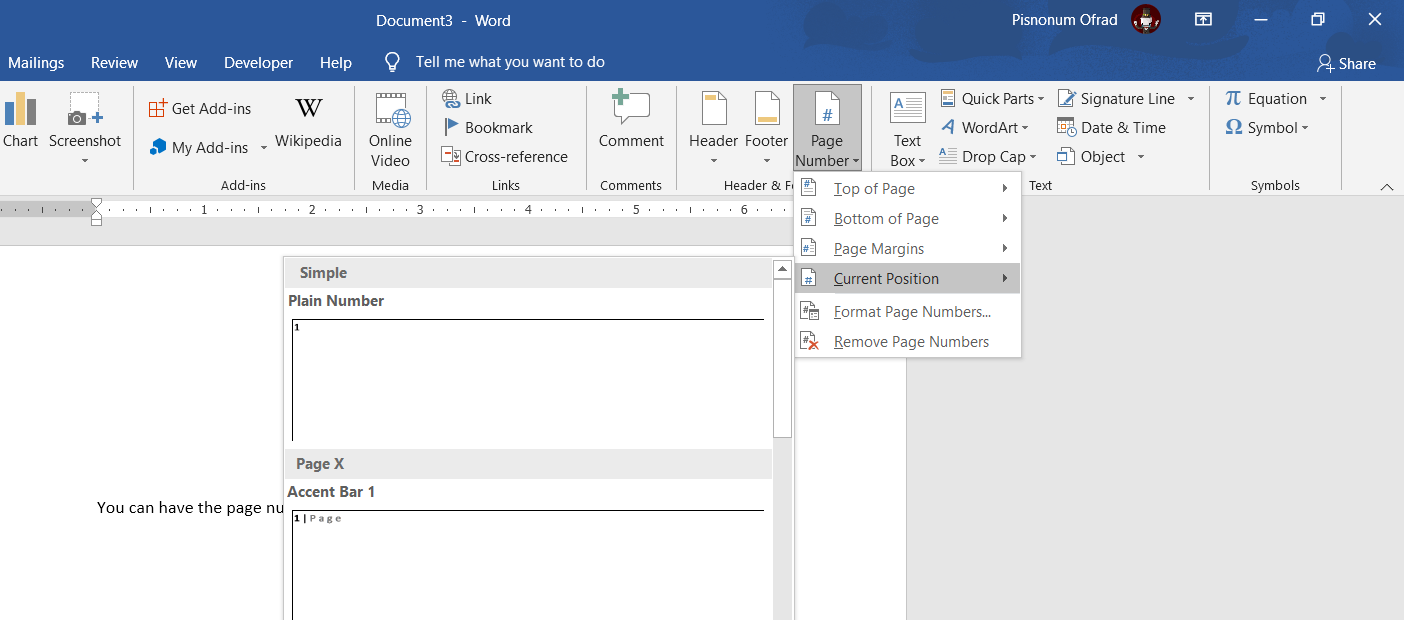
This will add the page number right where your cursor was. Keep in mind that this won’t show the page number on every page, it will appear only where the cursor was.
For an in-depth guide on numbering pages in Word documents, read our article on how to number your Word document.
You can make your document more dynamic by utilizing Fields in Microsoft Word. Fields are dynamic components that add auto-updating variables to your document. For example, you could insert a field in your header to display a heading on every page. This way you don’t have to type the heading on top of each page.
Note: Headers and headings are similar in name, but they’re different in nature. A header is the top margin of the document while a heading is a document element that allows you to define different sections and build a table of content for your document.)
Let’s work on the example we mentioned to add the heading to the top of each page. To do this, you’ve to first create some headings for your document.
- Go to the Home tab.
- In the Styles section, select a heading. For now, let’s go with Heading 1.
- Next, type something in your heading so that it’s not blank.

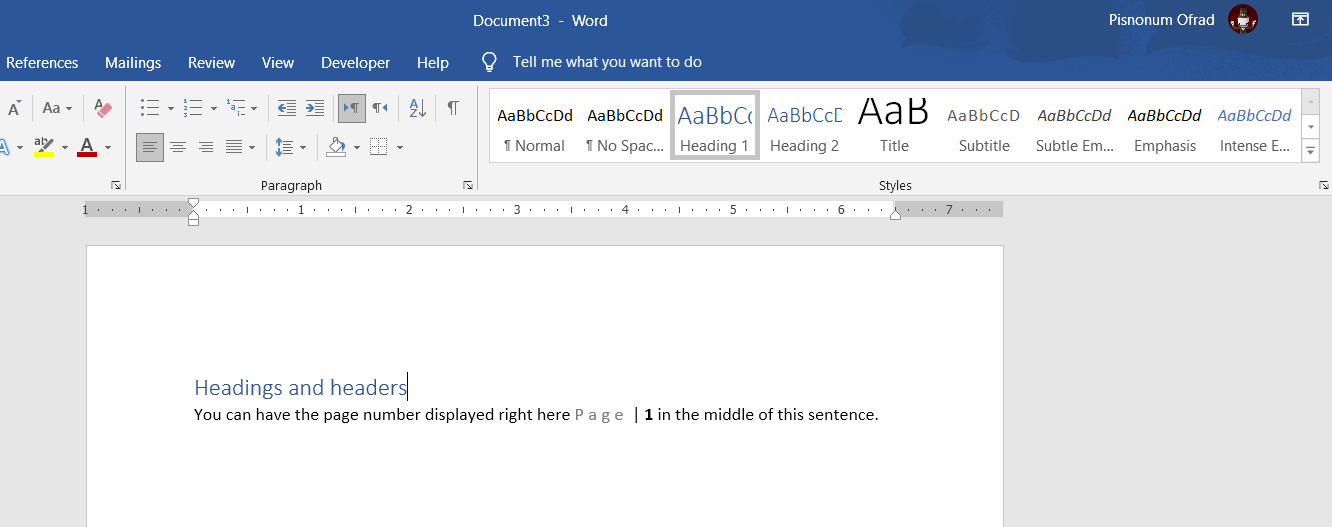
Once you’ve your headings set out, it’s time to display their names in the header.
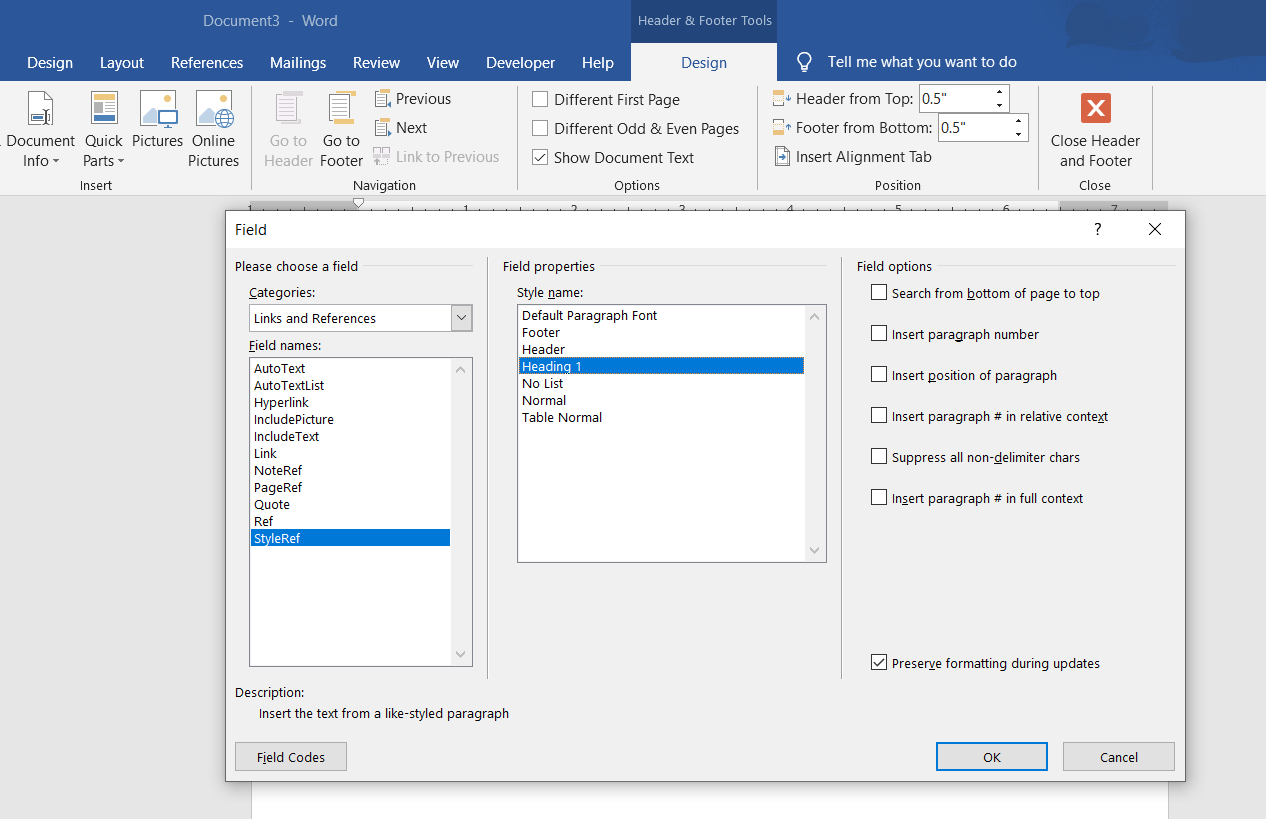
- Double-click the header and then go to the Header & Footer Tools tab.
- Click on Quick Parts and then select Field… . Here you can see the various fields you can add to the header.
- From the Categories menu, select Links and References.
- In the Field names select StyleRef.
- Finally, in the Style name box, select Heading 1.
- Check the additional options that you might want in Field options and once you’re done, click OK.

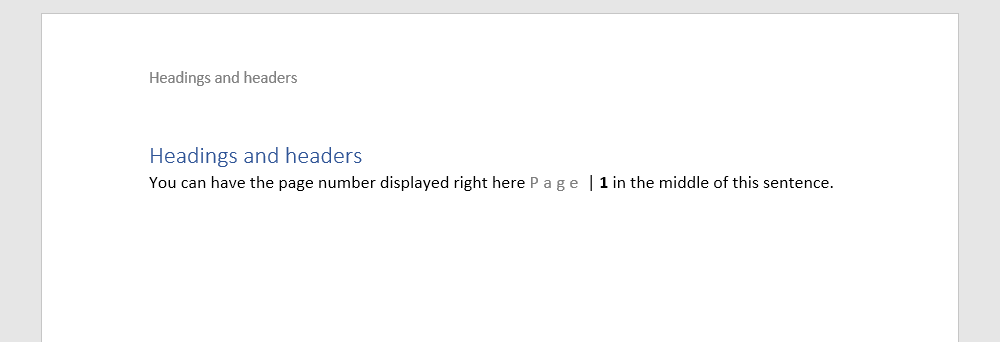
Now you can see the headings displayed in the header of the page. It will show the same heading until a new heading is used on a page.
There are many fields that you can use in your document. Fields aren’t exclusive to the header or the footer and you can use them anywhere else in your document as well. You can access fields from the Insert tab:
- Go to the Insert tab.
- On the right side, click Quick Parts and then select Fields.


Now that you’ve read through all these, you can achieve a lot more from the top and bottom margins of your document. However, this is just one of the many things you can do to improve your document.