
Insert a watermark

-
On the Design tab, select Watermark.
-
Choose a pre-configured watermark, like DRAFT, CONFIDENTIAL, or DO NOT COPY.
-
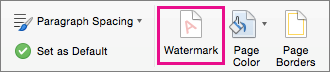
For placing a logo or image, Select Watermark > Custom Watermark > Picture watermark > Select Picture. On the same menu you can create a custom text watermark.
Want more?
Insert a picture watermark
Use a custom text watermark
See all our content about watermarks
On the Design tab, select Watermark.
-
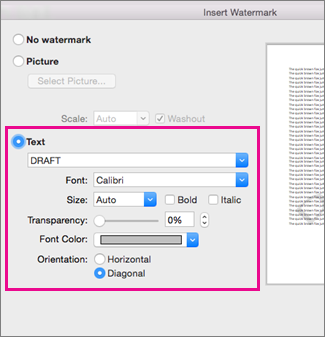
In the Insert Watermark dialog, select Text and either type your own watermark text or select one, like DRAFT, from the list. Then, customize the watermark by setting the font, layout, size, colors, and orientation.

If you don’t see the watermark, click View > Print Layout. This also shows how the printed watermark will look.
-
Select OK.
Important:
Office 2010 is no longer supported. Upgrade to Microsoft 365 to work anywhere from any device and continue to receive support.
Upgrade now
-
On the Page Layout tab, select Watermark.
-
Choose a pre-configured watermark, like DRAFT or CONFIDENTIAL.
Important:
Office for Mac 2011 is no longer supported. Upgrade to Microsoft 365 to work anywhere from any device and continue to receive support.
Upgrade now
-
On the Layout tab, under Page Background, select Watermark.
-
Choose Text.
-
Type or edit your text for the watermark, or select a text watermark from the drop down menu, and then select the text formatting that you want.
Tips:
-
If the text watermark makes it difficult to read the text on the page, increase the transparency of the watermark text, or select a lighter color for the watermark text.
-
You can use the Size drop down menu to change the size of the watermark text.
-
In Word for the web, you can see watermarks that are already in a document, but you can’t change them or insert new ones.
If you have the Word desktop application, use the Open in Word command to open the document and insert or change a watermark there. When you’re done and you save the document, it will continue to be stored where you opened it in Word for the web. When you reopen it, you’ll see the watermarks in the doc.
Need more help?
Want more options?
Explore subscription benefits, browse training courses, learn how to secure your device, and more.
Communities help you ask and answer questions, give feedback, and hear from experts with rich knowledge.
-
You can open the document by double-clicking the file on your computer. Alternatively, open Word first, and then create a new document or choose an existing one to work on.

Advertisement
-
Click the Design tab at the top of the window. This opens your Design tools.

-
Click Watermark on the toolbar. You’ll see it in the «Page Background» area toolbar in the upper-right part of the window.

Advertisement
-
Use the settings in the dialog box to design your watermark. You can choose one of the sample watermarks, such as Confidential, Do Not Copy, or Sample for a fast, easy watermarking option, or click Custom watermark… at the bottom of the menu to choose any of these custom options:
- Click Picture watermark to use an image. Select a photo and customize the size by selecting an option from the Scale menu. Leave «Washout» checked to make the image more transparent.
- Click Text watermark to add a text watermark to the background of your document. You can choose a preset word/phrase or type your own text.
- Click the Font: drop-down to choose a font face.
- Click the Size: drop-down to adjust the size of the font or allow Word to adjust the size automatically.
- Check the box next to «Semitransparent» for a more transparent text effect.
- Click on either Horizontal or Diagonal to set the orientation of the watermark.

-
Click OK to apply the watermark to the document. The watermark now appears behind the text and images in your Word document.

Advertisement
Add New Question
-
Question
Why is it under the text?

Because that’s just how Word’s watermarks default on the page.
-
Question
How can I add a watermark on each page of my report?
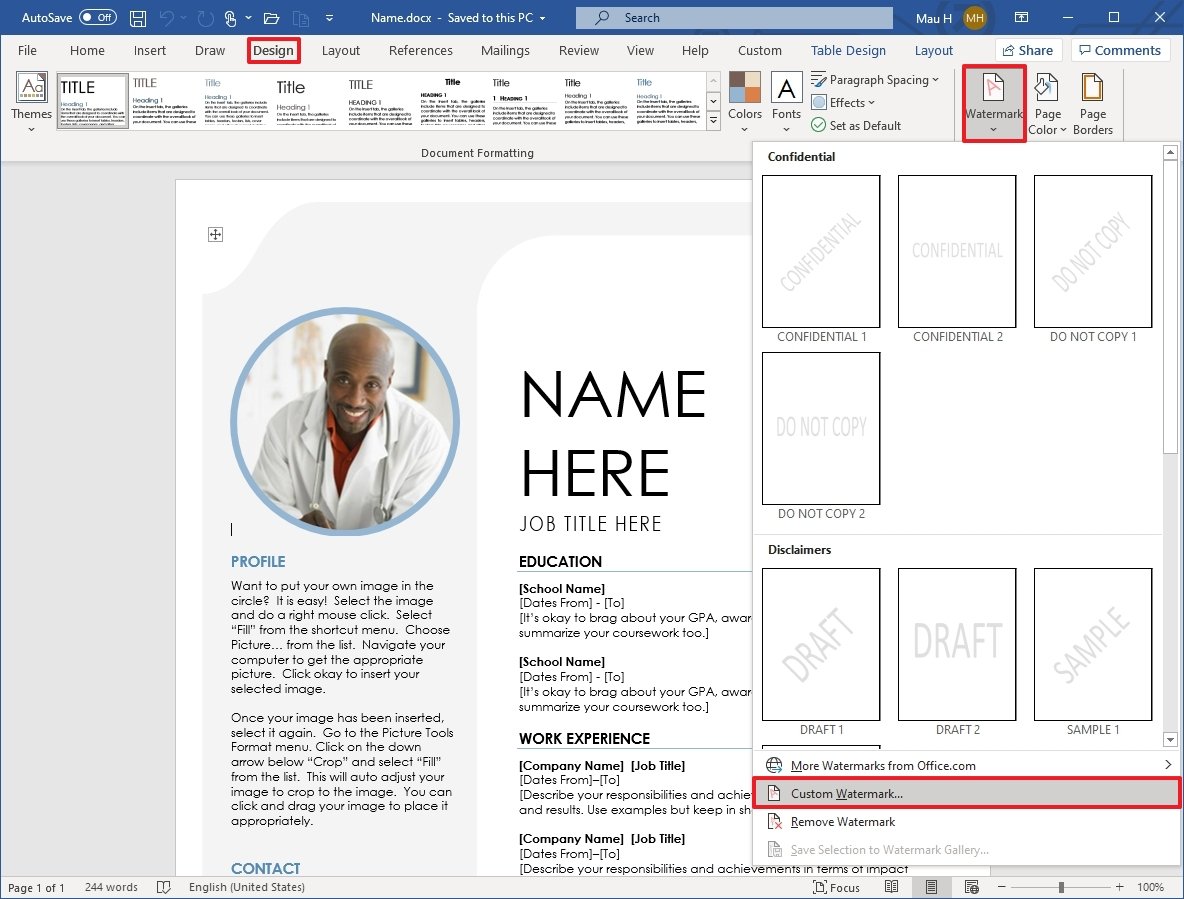
If you go to the «Design» tab, you will find a «Watermark» option all the way to the right. Choose from featured watermarks, get some from Office.com, add your own custom watermark, or remove a watermark.
-
Question
How do I move a watermark picture to place it where I want on the page?
Click «Picture». Click the button that says «Add watermark». Move your watermark with your clicker.
See more answers
Ask a Question
200 characters left
Include your email address to get a message when this question is answered.
Submit
Advertisement
Video
Thanks for submitting a tip for review!
About This Article
Article SummaryX
1. Create or open a Word document.
2. Click on Design.
3. Click on Watermark.
4. Customize the watermark.
5. Click on OK
Did this summary help you?
Thanks to all authors for creating a page that has been read 414,952 times.
Is this article up to date?

(Image credit: Windows Central )
In Microsoft Office (like in many other suites of apps), a watermark is a semitransparent text or image you can place in the background. Usually, you use them to highlight something important about the document. For example, you can use it to remind the user that the content is confidential or draft. You may insert a watermark to make sure the user knows that the content should not be copied. Or other times, you may want to add a washout mark to include the company’s logo in the file.
Regardless of the reason, whether you have the version of Office from Microsoft 365, Office 2019, or an older version, the desktop version of Microsoft Word includes the ability to insert a watermark on any document. The feature allows you to insert predefined styles or create custom watermarks using text and images.
In this Windows 10 guide, we will walk you through the steps to add or remove (and create custom) a watermark to a Microsoft Word document in Office.
- How to add simple watermark to a Word document
- How to add custom watermark to a Word document
- How to edit watermark on a Word document
- How to create and save custom watermark in Word
- How to remove watermark to a Word document
How to add simple watermark to a Word document
To add a watermark to a Word document using a predefined template, use these steps:
- Open Word.
- Click the Blank document option in the Home section. (Or open the document you want to customize.)
- Click the Design tab.
- In the «Page Background» section, click the Watermark option.
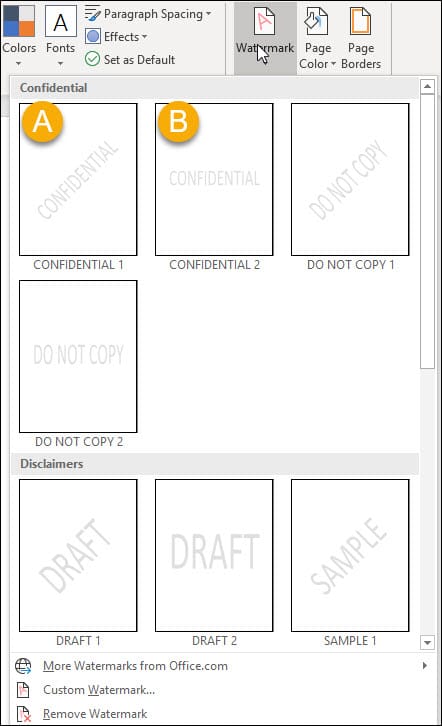
- Select one of the Confidential watermark choices:
- Confidential.
- Do not copy.

- Select one of the Disclaimers watermark choices:
- Draft.
- Sample.
- Click the File menu.
- Select the Save button.
Once you complete the steps, the watermark will be applied to the document.
How to add custom watermark to a Word document
In Microsoft Office, you can also insert custom watermarks using images and text.
Using image
To set a custom image as a watermark in Word, use these steps:
- Open Word.
- Click the Blank document option in the Home section. (Or open the document you want to customize.)
- Click the Design tab.
- In the «Page Background» section, click the Watermark option.
- Click the Custom Watermark option.
- Select the Picture watermark option.
- Click the Select Picture button.
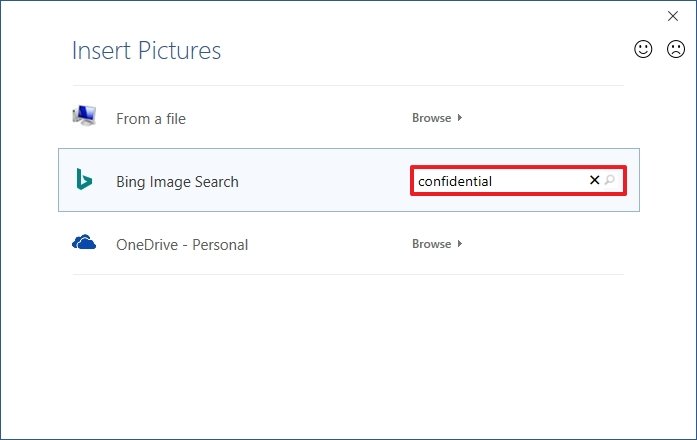
- Select the source to import the watermark picture, including:
- From a file.
- Bing Image Search.
- OneDrive.
Quick note: If you want to use an image from Bing, use the text box to search for a picture.
- (Optional) Select the scale option for the image.
- Check the Washout option if you want the image to be semitransparent.
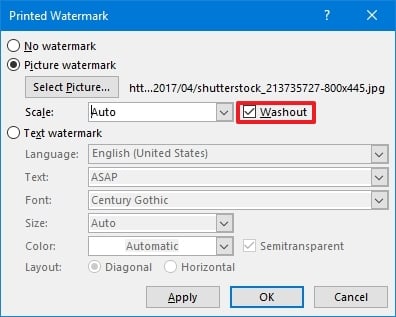
- Click the Apply button to preview the watermark.
- Click the OK button.
- Click the Close button.
- Click the File menu.
- Select the Save button.
After you complete the steps, the custom image you selected will appear as the document’s watermark.
Using text
To set custom text as a watermark in Word, use these steps:
- Open Word.
- Click the Blank document option in the Home section. (Or open the document you want to customize.)
- Click the Design tab.
- In the «Page Background» section, click the Watermark option.
- Click the Custom Watermark option.
- Select the Text watermark option.
- In the Text box, type the text as you want it to appear in the document.
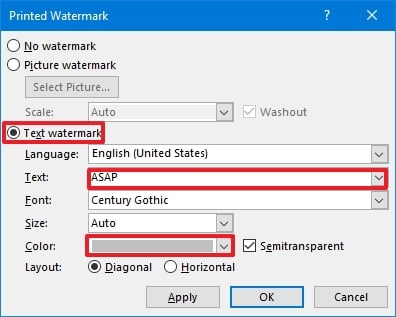
- Use the Font drop-down menu to select the font style for the watermark.
- Use the Size drop-down menu to specify the size for the font.Quick tip: Usually, the default size is enough for most cases.
- Use the Color drop-down menu to change the color of the watermark.
- Check the Semitransparent option.
- Select the layout of the watermark:
- Diagonal.
- Horizontal.
- Click the Apply button to preview the watermark.
- Click the OK button.
- Click the Close button.
- Click the File menu.
- Select the Save button.
Once you complete the steps, the text you entered will be displayed as the watermark for the Microsoft Word document.
While the ability to add watermarks is available in previous versions of Microsoft Office, you should consider switching to Microsoft 365. The subscription-based service provides a free upgrade of the most popular office app. You also get many other benefits, such as sharing the apps with other family members and friends, and services like Microsoft Teams, Family Safety, Microsoft Editor, and 1TB of OneDrive storage.
 Get subscribed
Microsoft 365 (formerly Office 365) gives you full access to all the apps and perks. You can also install Word, Excel, PowerPoint, Outlook, and other apps on up to five devices, and depending on the subscription, you can share the account with up to six people.
How to edit watermark on a Word document
After adding a watermark to the document, you can also adjust the look and feel of the element. Here’s how:
- Open Word.
- Open the document with the watermark.
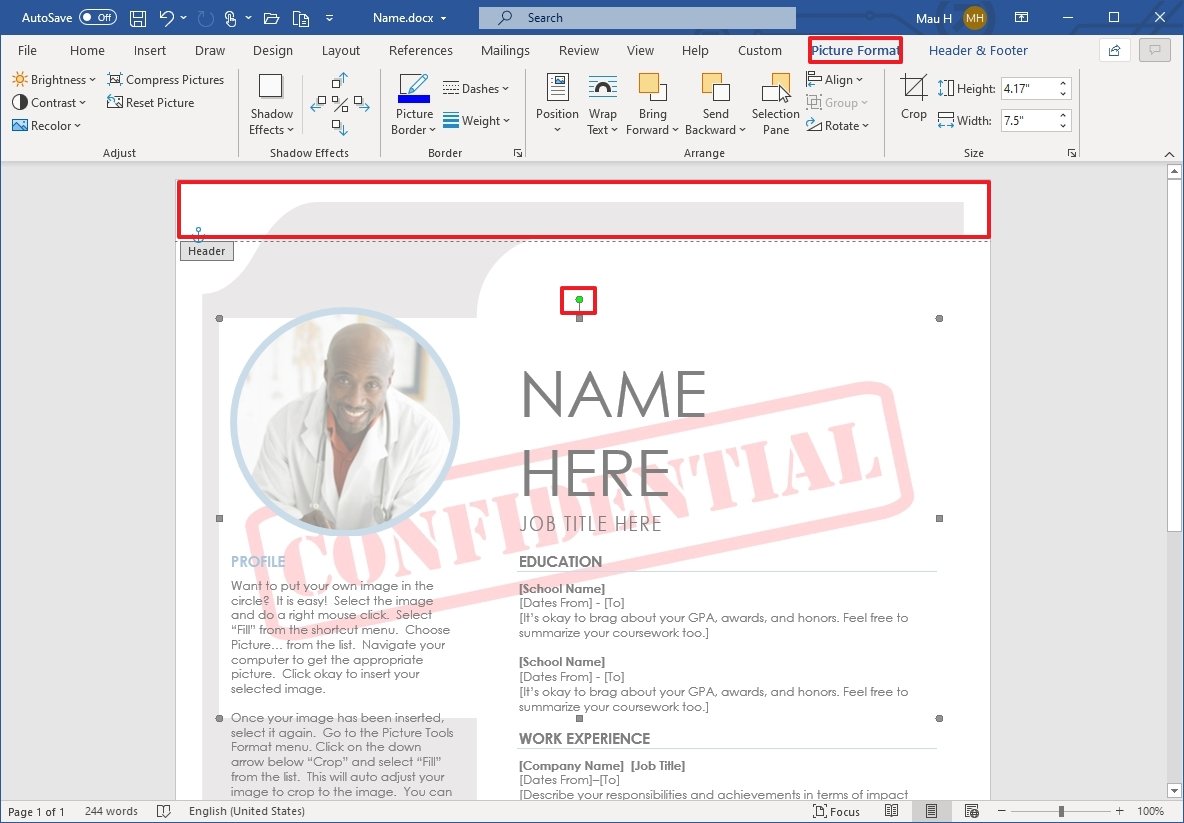
- Double-click the header of the document.
- Select the watermark element.
- In the Picture Format tab, you will find all the available tools to adjust the element, including brightness, contrast, shadow effect, and more.Quick note: If you are adjusting the text style, you will see the WordArt tab with relevant options, such as to edit the text, change the spacing, 3D effects, alignment, and more.
- (Optional) Use the dots to resize the shape.
- (Optional) Use the green dot to rotate the shape.
- (Optional) Click and drag the element to move around.
- Click the File menu.
- Select the Save button.
After you complete the steps, the changes will be reflected in the document.
How to create and save custom watermark in Word
You can also create custom watermarks that you can save and use in other documents.
To create and save a custom watermark in Word, use these steps:
- Open Word.
- Click the Blank document option in the Home section.
- Click the Design tab.
- In the «Page Background» section, click the Watermark option.
- Click the Custom Watermark option.
- Select the Picture watermark or Text watermark option.
- If you selected the Picture watermark option, click the Select Picture button to choose an image. (See above instructions.)
- If you selected the Text watermark option, use the available settings to create a text-based watermark. (See above instructions.)
- Click the OK button. 10 Double-click the header of the document.
- Select the watermark element.
- Use the available options in the Picture Format or WordArt tab, depending on the watermark type you are using.
- (Optional) Use the dots to resize the shape.
- (Optional) Use the green dot to rotate the shape.
- (Optional) Click and drag the element to move around.
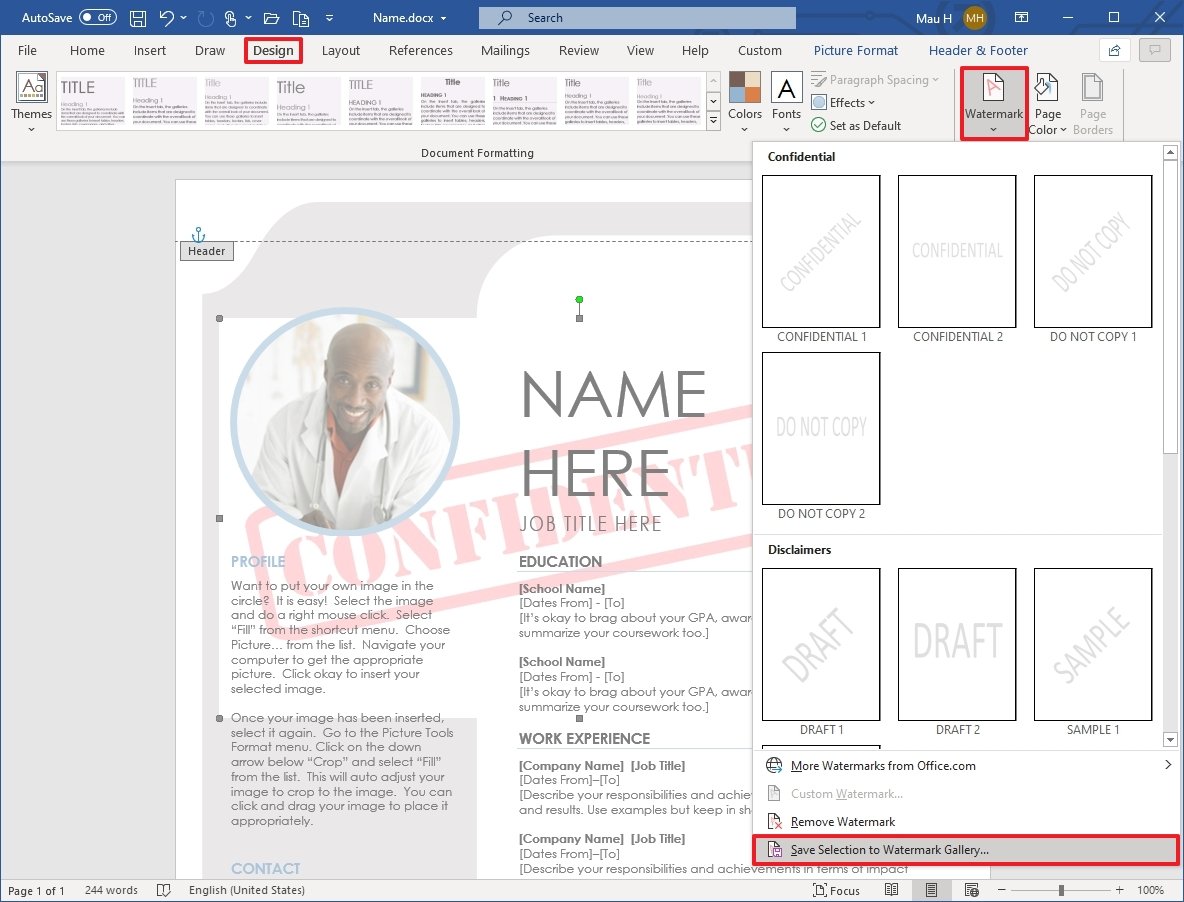
- Click the Design tab.
- In the «Page Background» section, click the Watermark option.
- Click the Save Selection to Watermark Gallery option.
- Confirm a name for the watermark.
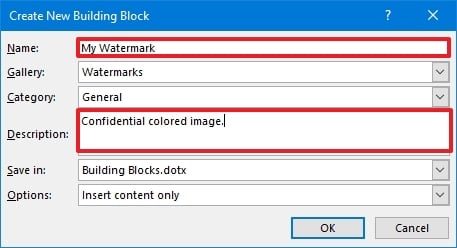
- (Optional) Confirm a description for the element.
- Click the OK button.
Once you complete the steps, the watermark will save, and you will be able to reuse it in future documents.
How to remove watermark to a Word document
To remove a watermark from a Word document, use these steps:
- Open Word.
- Click the Blank document option in the Home section. Or open the document you want to customize.
- Click the Design tab.
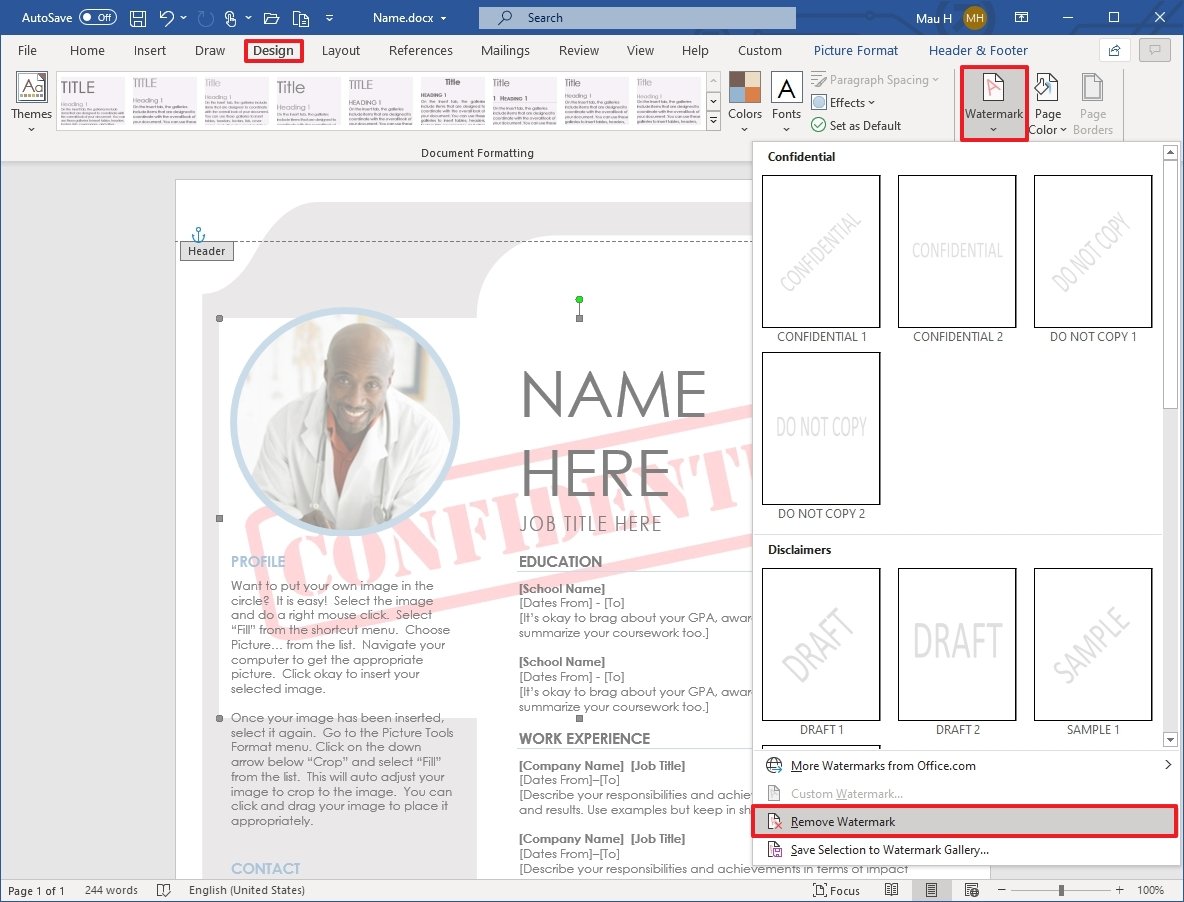
- In the «Page Background» section, click the Watermark option.
- Click the Remove Watermark option.
- Click the File menu.
- Select the Save button.
After you complete the steps, the image or text will no longer appear as the watermark.
More Windows 10 resources
For more helpful articles, coverage, and answers to common questions about Windows 10, visit the following resources:
- Windows 10 on Windows Central — All you need to know
- Windows 10 help, tips, and tricks
- Windows 10 forums on Windows Central
All the latest news, reviews, and guides for Windows and Xbox diehards.
Mauro Huculak is technical writer for WindowsCentral.com. His primary focus is to write comprehensive how-tos to help users get the most out of Windows 10 and its many related technologies. He has an IT background with professional certifications from Microsoft, Cisco, and CompTIA, and he’s a recognized member of the Microsoft MVP community.
If you often use Word, you probably have seen or received a document with the words “Do Not Copy” or “Confidential” printed lightly in the background of a document. That’s a watermark, which is a text or a picture that appears behind the contents of a document.
Usually, a watermark will lay down the constraints of a document or identify a company. Adding a watermark to a Word document is an easy and straightforward process. In this post you’ll learn how to add a watermark to your Word documents.
Why Would I Want to Watermark a Word Document?
Adding a watermark to your documents can be very useful, especially when you want to communicate the nature of your business. Many people add a watermark to maintain the uniqueness of a document. In some instances, a watermark may be required for security or legal reasons.
You can also watermark a document with your company’s logo to enhance the visibility of your brand. At times you may want an urgent customer response regarding an invoice or a query. In such cases, sending an mail with a document marked as “Urgent” can help to better convey your message.
Also, when you share a document online, there is a chance that its contents may be duplicated (stolen) or its credibility compromised. Marking the document as “Do Not Copy” or adding your company’s logo can help you to maintain the originality of your work. This can also help to prevent your work from being used for commercial purposes without your consent.
To add a text watermark to a Word document, simply follow the steps below. Note that you can add a watermark to a new or an existing document. In this post we’ll add a watermark to an existing document.
1. Open an existing Word document and make sure the view is set to “Print Layout” or “Full-Screen Reading.” You won’t be able to set a watermark if the view is set to “Web Layout” or “Outline View.”

2. Click the “Page Layout” tab, then navigate to the “Page Background Group” section and click the “Watermark” button.

This will open up a gallery of predefined text watermarks such as Confidential, Do Not Copy, Draft, and Urgent – all in different styles. You’ll find more if you scroll down.

3. Click on your desired watermark to have it added to your Word document. Your selected watermark will now appear on your document in your preferred alignment.
How to Add a Custom Watermark to Your Word Document
At times you may want to set a picture or a company’s logo as your watermark. You may also want to create a unique text other than the predefined ones provided by Word. To do so, follow the steps below.
1. Click the “Custom watermark” option at the bottom of the watermark menu.

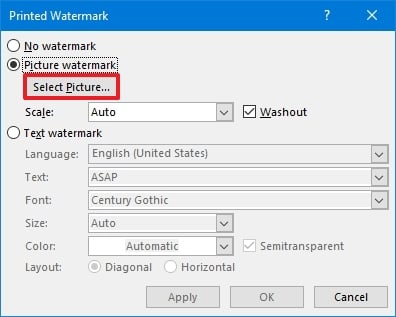
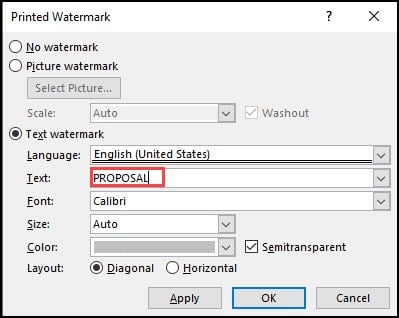
2. This will open the “Printed Watermark” dialogue box. Here you will find many options for customizing your watermark.

3. If you want to add a unique text watermark, click the “Text Watermark” radio button and enter your desired texts in the “Text” box as illustrated above. You can also change the color, size, and font of your watermark to match your style and preferences. There is also a semitransparent button that you can check to make your watermark appear dull or faint.
4. If you want to add your company logo as your watermark, click the “Picture Watermark” button, then click “Select Picture,” and the system will direct you to your gallery to select your desired image.

5. Select your desired picture, then click the “Insert” button. You’ll be taken back to the “Printed Watermark” dialogue box. Lastly, click the “Apply” button to apply the changes. You should now be able to see a custom watermark on your document.
Wrapping Up
Adding a watermark to your Word documents not only allows you to exercise full control over your content but also lets you portray a higher level of professionalism. By following this guide you should be able to add both built-in and custom watermarks to your Word documents. Should you run into any problems, be sure to let us know and we’ll be happy to help.

Kenneth Kimari
Kenn is a tech enthusiast by passion, Windows blogger by choice, and a massive coffee imbiber. He likes watching sci-fi movies in his free time and tearing gadgets apart so he can fix them.
Subscribe to our newsletter!
Our latest tutorials delivered straight to your inbox
Recently, I sent an article to a friend for review. Instead of discussing the document, he wanted to know about the “ghost text.” In this tutorial, I show how to insert a watermark in Microsoft Word that reads Draft. And with a little more effort, you can create a custom text or picture watermark.
Why Use a Watermark
Like many people, if I send a confidential business document that is confidential or a draft, I include a watermark. These watermarks add context to the item and convey its status or importance. Moreover, they can also add an implied layer of protection. For example, few people would misinterpret your draft as your final document or forward a confidential document.
There is another group of users that create custom watermarks using an image. This differs from using a logo on a letterhead template because the image spans a more significant portion of the page than the header area.
These semitransparent items appear in the page background, and your text sits on top. The document text is readable, but you can see the watermark.
Default Text Watermarks
By default, Microsoft Word has six predefined watermarks. These simple text variations include:
- Confidential
- Do Not Copy
- Draft
- Sample
- ASAP
- Urgent
The above items are the easiest watermarks to insert into your document. And, like all watermarks, you don’t have to worry about wrapping text around an image. Instead, the watermark sits on a different layer.
However, a secondary list of text watermarks is found in the drop-down Text box menu where you create a custom watermark. In addition to the list above, you also have:
- Copy
- Original
- Personal
- Top Secret
How to Add a Watermark to the Document
Time needed: 5 minutes.
You can either create the watermark first or add it later. I prefer writing my document first because I find the watermark can be distracting. For this tutorial, I am using Microsoft 365 for Windows, but the process is similar to earlier versions.
- Write your document.
- From the main menu, click View and select Print Layout.
- From the main menu, click the Design tab.
- To the far right is the Page Background group.

- Click the Watermark button. If you see a small definition box, click the button again.
- A drop-down panel appears with default examples. Each example includes a slanted page layout and a horizontal page layout.
- Click the watermark version you prefer. Your selection will show underneath your text in light gray.

I Can’t See My Watermark
You’re probably not in Print Layout mode if you can’t see your watermark. Your selected watermark is there but won’t show until you change your page layout.
- From the main menu, click View.
- From the Views group, click Print Layout.
You should now see your watermark.
Forget Finding Watermarks on Office.com
Looking at the menu above, you’ll see a menu option labeled “More watermarks from Office.com. This leads you to believe that more are available. However, as you mouse over the option, it shows “No Online Content Available“. I don’t know why the item remains as it’s been this way for a long time.
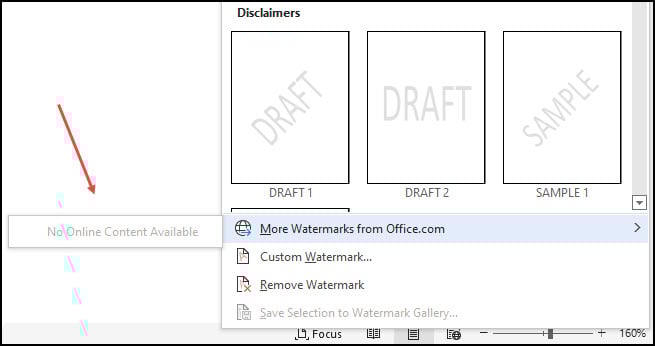
The good news is that it is easy to create custom watermarks that can work with your Microsoft Word document.
Adding Custom Text
The default items fit most uses. However, there are times when you need something different. Perhaps, a wording change or orientation. In either case, Microsoft Word can accommodate your needs.
- Follow Steps 1-5 in the previous section.
- Scan past the default thumbnails and choose Custom Watermark.
- The Printed Watermark dialog box opens.
- Clear the value from the text box and enter your watermark text. Or, you can click the control to the right, and select a predefined option from the drop-down menu.
- Adjust the Font, Size, Color, and Layout options to suit your style.
- Click Apply.
- Click Close.
Your customized version should show on every page. In my case, it overwrote my previous Draft watermark with My Custom Watermark. As you can see, you’re only allowed one watermark per page.
You might want to create a custom Word keyboard shortcut if you use watermarks often. For example, you could assign Alt + W to open the Printed Watermark dialog box shown above. Or, you could use a custom building block assigned to DRAFT.
Another way that you can access your watermark is by using the Building Block Organizer. You will see your entry grouped in the Watermark Gallery.
Adding an Image
Perhaps, words aren’t enough. Sometimes you want to spruce things up with an image. This could be a simple picture or a logo representing your brand. You can upload images from your computer, Bing Image Search, or Microsoft OneDrive.
The idea is not to select a picture that competes with your document or consumes your printer ink. Microsoft Word allows most image file formats except for SVG.
Also, a watermark is restricted to either one image or one text element. You can’t combine them.
- Find a suitable image. Simplest is preferred.
- Follow steps 1-3 from above.
- On the Printed Watermark dialog, click the radio button for the Picture watermark.
- Click the Select Picture button.
- The Insert Picture panel opens.
- Select an insert option and go to your picture location.
- Click Apply.
- Click Close.
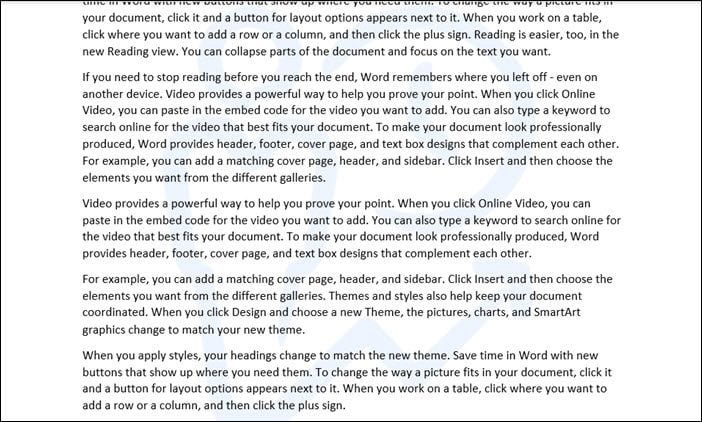
As with the other examples, your inserted image will appear in the background. By default, Word will do auto-scaling for the best fit. In the example below, my original logo image was only 25 px.
Can I Move a Watermark?
Yes, you can move a watermark, but the procedure is not intuitive.
- Scroll to the top of the document which has your watermark.
- Click in the header or blank area at the top. This will open the Header area.

- Scroll back down to your watermark.
- Your mouse cursor will turn into one with 4 arrows. You may have to move it around a little bit. This indicates you’re in Move mode.
![]()
- Click and drag the item to the new document location.
- Click Close Header and Footer from the top menu.
Saving to Watermark Gallery
You probably noticed that Microsoft Word offers a menu option to save your mark to a gallery. But, again, this step requires you to utilize the document header.
- Scroll to the top of your document and click in the Header area. If you didn’t define one, this is the top white section.
- Scroll down to your watermark.
- Click the Design tab from the main menu.
- Click the Watermark button.
- Select Save Selection to Watermark Gallery…
- The Create New Building Block dialog opens.
- Provide a name and optionally a description.
- Click OK.
Now, when you go to your watermarks, you’ll see a new entry. Simply, click the custom watermark.

Just as it’s easy to insert a watermark in Word, it’s also easy to remove one. The issue is there isn’t an object you can click or highlight to delete. Instead, you have to reverse your steps.
To remove a watermark,
- Open your Word document.
- Click the Design tab.
- In the Page Background group, double-click the Watermark button.
- Underneath the examples, click the entry Remove Watermark.
Whether your preference is text or images, Microsoft Office 365 and Word give you plenty of options without relying on WordArt. For example, watermarks can be a valuable enhancement to any Microsoft Word document. They help convey a document’s status, such as the “Draft” watermark or promote your branding with an image. And when you finally get out of “Draft” mode, there is a Remove Watermark option in the built-in menu.