
-
First install Vim.
-
To install the packages, first install ‘vundle’ using following command. Use ‘git-shell’ to run this command in Windows.
git clone https://github.com/VundleVim/Vundle.vim.git ~/.vim/bundle/Vundle.vim

(in Windows : use 'git-shell' to run below command)
git clone https://github.com/VundleVim/Vundle.vim.git C:/Users/<Username>/.vim/bundle/Vundle.vim
-
Copy and paste the .vimrc file in the home directory.
-
In Windows, paste in the .vimrc file at C:/Users/<Username>/; and change the line “set rtp+= …” in .vimrc with correct location of “Vundle.vim” i.e. “set rtp+=C:/Users/<Username>/.vim/bundle/Vundle.vim”.
-
Use double quote to comment/uncomment the packages in .vimrc file e.g. ” Plugin ‘mattn/emmet-vim’ will not install the package “emmet-vim”. Or add some more packages in .vimrc file as required.
-
After selecting the packages, open vim and run the command -> :PluginInstall and it will install the all the plugins.
-
Use :help <plugin name> to see the list of operations.
1.1. Starting Vim
| Commands | Descriptions |
|---|---|
| :w | save file |
| :w <filename> | save file as <filename> and keep the current file open |
| :sav <filename> | save file as <filename> and open <filename> |
| :q | quit (if already saved) |
| :q! | quit without saving |
| :e <filename> | open new/existing <filename> in new buffer |
| :wq | save and quit |
| :bn | go to next buffer i.e. file |
| :b <filename> | go to buffer with <filename> |
| :bd | close current file without exiting vim |
| :bd! | close current file without exiting vim and ‘no modification’ |
| :vim * | open all files in the directory (all in same buffer) |
| :vim file1 file2 file3 | open file1, file2 and file3 in vim |
| :n | go to next file |
| :n <filename> | go to file name |
| :prev | go to previous file |
| ctrl-Z | suspend vim |
| fg | bring forground vim |
1.2. Undo/Redo
| Commands | Descriptions |
|---|---|
| u | undo |
| crtl-r | redo |
1.3. Insert
| Commands | Descriptions |
|---|---|
| i | insert mode at cursor |
| I | insert mode at beginning of the line (i.e. first character of line) |
| s | delete character under the cursor and enter into insert mode |
| S | delete the line and go to insert mode from the beginning of same line |
| a | insert mode after the cursor |
| A | insert mode at the end of line |
| o | insert mode on below line |
| O | insert mode at bottom line |
| C | delete from cursor to end of line and go to insert mode |
| r | replace current character |
| R | replace characters until Esc is pressed (i.e. same as insert button in keyboard) |
1.4. Copy/Paste/Delete
| Commands | Descriptions |
|---|---|
| y | yank (copy) |
| yiw | copy the word |
| yw | copy the word after the cursor |
| yy or Y | copy the line |
| y$ | copy till end of the line from current location of cursor |
| “+y | copy to clipboard e.g. “+yiw will copy the word in clipboard |
| <F3>y | same as above (use <F3> for clipboard, remapped in .vimrc) |
| <F3>p | paste from clipboard (see above line as well) |
| p | paste after cursor (remapped as ]p in .vimrc ) |
| ]p | paste with indentation |
| P | paste before cursor |
| ctrl-P | paste from clipboard (remapped in .vimrc) |
| shift insert | paste from clipboard (remapped in .vimrc) |
| d<command> | delete<command> |
| diw | delete word (and stay at normal mode) |
| ciw | delete word (and go to insert mode) |
| dw or cw | delete word after the cursor |
| dd or cc | delete line |
| D or C | delete till end of line |
| x | delete character (delete) |
| X | delete character (backspace) |
| . | repeat previous operation |
1.5. Paste in search or colon commands
- Following commands can be used at command mode during search or color commands e.g. :w ctrl r ctrl w etc.
| Commands | Descriptions |
|---|---|
| ctrl r “ | paste the last copied data |
| ctrl r ctrl w | paste the word under cursor |
| ctrl r % | print the naem of current file |
| shift insert | paste the data from clipboard |
1.6. Search
| Commands | Descriptions |
|---|---|
| / | forward then use n/N for next/previous match |
| ? | backward |
| * (asterisk) | word under cursor forward (exact match) |
| g* | word under the cursor (partial match) |
| # | word under cursor backward (exact match) |
| g# | word under cursor backward (partial match) |
| /<word1> | search for exact match for “word1” |
| :set ignorecase | use this option for avoiding case-matches |
| :set noignorecase | use this option for case-matches |
1.7. Replace
- Use ‘c’, ‘g’, ‘gc’ and other combination to perform the desired replacement.
| Commands | Descriptions |
|---|---|
| :s /word1/word2 | substitute word1 with word2 in current line (only first occurrence) |
| :s /word1/word2/c | substitute word1 with word2 in current line after confirmation (only first occurrence) |
| :s /word1/word2/g | substitute word1 with word2 in current line (all occurrence) |
| :s /word1/word2/gc | substitute word1 with word2 in current line ater confirmation (all occurrence) |
| :1,4 s /word1/word2 | substitute word1 with word2 in lines 1 to 4 (only first occurrence in each line) |
| :%s /word1/word2/g | replace all occurrences |
| :%s /word1/word2/gc | replace all occurrence after confirmation |
| :%s /ctrl-r ctrl-w/word2/gc | replace all occurance of the word under cursor after confirmation (exact match) |
| :s /<word1>/word2 | substitute exactly matched “word1” with word2 in current line |
1.8. Indentation
| Commands | Descriptions |
|---|---|
| >> | Right indent the current line |
| 5>> | Right indent 5 lines |
| << | De-indent line |
| 5== | Re-indent 5 lines |
| >% | Increase indent of a braced or bracketed block (place cursor on brace first) |
| =% | Reindent a braced or bracketed block (cursor on brace) |
| <% | Decrease indent of a braced or bracketed block (cursor on brace) |
| ]p | Paste text, aligning indentation with surroundings |
| =i{ | Re-indent the ‘inner block’, i.e. the contents of the block |
| =a{ | Re-indent ‘a block’, i.e. block and containing braces |
| >i{ | Increase inner block indent |
| <i{ | Decrease inner block indent |
| Commands | Descriptions |
|---|---|
| :retab | convert existing tabs to spaces |
1.9. Mouse settings
| Commands | Descriptions |
|---|---|
| :behave mswin | mouse functionality will work as windows |
| :behave xterm | mouse functionality will word as x-windows |
1.10. Command/Visual Mode
| Commands | Descriptions |
|---|---|
| Esc or crtl-[ | command mode |
| v | visual mode |
| crtl-v | visual block mode |
1.11. Cursor movement
Note
To run the ‘ctrl-]’ and ‘ctrl-T’ command, we need to create the tags first. In the below command, the ‘tags’ will be created for all the python files in the directory, which will be stored in a file ‘tags’,
(run the following command in shell)
ctags -R *.py
| Commands | Descriptions |
|---|---|
| h | left |
| j | down |
| k | up |
| l | down |
| w | forward to the beginning of next word |
| 3w | forward 3 words |
| W | forward to the beginning of next word (only spaces are the end of word) |
| b | backward to the beginning of next word |
| B | backward to the beginning of next word (only spaces are the end of word) |
| e | forward to end of next word |
| E | forward to end of next word (only spaces are the end of the word) |
| gg | go to first line of page |
| G | go to end line of page |
| 10G | go to 10th line |
| 10gg | go to 10th line |
| 0 | go to first character of line |
| $ | go to end character of line |
| ^ | go to first non-black character of line |
| M | go to middle of the screen |
| fa | go to next a in current line |
| Fa | go to previous a in current line |
| ta | go to end of next a in current line |
| Ta | to to end of previous a in current line |
| ctrl-o | go to previous location e.g. we went to line 10 from line 18, ctrl-o will go to line 18 again |
| ctrl-i or Tab | go to next location i.e. go to line 10 again from line 18. |
| gd | go to the local declaration of the word under cursor |
| gD | go to the global declaration of the word under cursor |
| g* | search for the word under the cursor |
| g# | same as g* but in backward direction. |
| gf | go to the filename under the cursor, use ctrl-o to go back |
| ctrl-] | go to tag definition (a tag can be a function or variable name etc.); use ctrl-o to go back |
| ctrl-T | go back to previous loation from where ctrl-] was exectued |
1.12. Screen movements
| Commands | Descriptions |
|---|---|
| ctrl-d | move half screen down |
| ctrl-f | page down |
| ctrl-e | move one line down |
| ctrl-u | move half screen up |
| ctrl-b | page up |
| ctrl-y | move one line up |
| z<Enter> | move current line to the top of screen (with cursor at the beginning) |
| zt | move current line to the top with without changing the location of cursor |
|
|
move current line to the center of screen (with cursor at the beginning) |
| zz | move current line to the center of screen (without moving cursor) |
| z- | move current line to the center of screen (with cursor at the beginning) |
| zb | move current line to the center of screen (without moving cursor) |
1.13. Unix Shell
| Commands | Descriptions |
|---|---|
| :shell | go to unix shell |
| exit | type exit in unix shell to come back in Vim |
1.14. Registers
| Commands | Descriptions |
|---|---|
| “ayy | copy line in register ‘a’ |
| “ap | paste content of register ‘a’ |
| Capital letters append the new value to previously stored values | |
| “Ayy | copy line and append to previous value in register “a” Then use “a to paste the value in register ‘a’ |
| “=3*2<Enter>p | paste the result i.e. 6 at the current cursor location |
| :registers | display the values in all the registers |
| :registers abc | display the values of registers a, b and c |
1.15. Multiple Files
| Commands | Descriptions |
|---|---|
| :arg grep -l ‘import’ *.py | open all files in current folder which contains word ‘import’ |
1.16. Mark
| Commands | Descriptions |
|---|---|
| ma | mark the line with name ‘a’ (use a-z or 0-9) |
| Next go to some other line and excute following command | |
| d’a | delete till line which is marked as ‘a’ |
| :marks | show the list of marks |
| ‘a | go to mark a |
1.17. Sorting
| Commands | Descriptions |
|---|---|
| !10G (press enter) sort (press enter) | it will sort first ten lines according to name |
| !G (press enter) sort (press enter) | it will sort all the lines according to names |
| !!ls | go to terminal, run ls command and print the output on the file (i.e. print list of file in current directory) |
| !!dates | go to terminal, run date command and print the output on the file |
1.18. Printing the code
| Commands | Descriptions |
|---|---|
| :hardcopy <filename.pdf> | open the printing-instructions-window |
| :TOhtml and then save the file | Save in html format, use :colorscheme default for white background |
1.19. Mapping
- Please read the comments in .vimrc file for more commands and details
- comment/uncomment the command using double quote as per requirement.
| Commands | Descriptions |
|---|---|
| :map | display the key-mappings, |
1.19.1. Copy/paste from clip board
Use <F3> and then normal copy/paste command from clipboard.
| Copy/paste to clip board | |
|---|---|
| <F3> is remapped | nnoremap <F3> “+ |
| <ctrl-P> is remapped | nnoremap <C-P> “+]p (paste with indentation) |
| <F3>yiw or <F3>yy etc. | copy the word or line etc. in clipboard |
| <F3>p | paste the data from clipboard |
1.19.2. Disable arraow keys
Below code can be used in .vimrc file
| “Key mappings : disable arrow keys |
|---|
| no <left> <Nop> |
| no <down> <Nop> |
| no <up> <Nop> |
| no <right> <Nop> |
| ino <down> <Nop> |
| ino <left> <Nop> |
| ino <right> <Nop> |
| ino <up> <Nop> |
1.19.3. Code execution
| “python commands |
|---|
| ” Execute : F9 (Below code is used in .vimrc file) |
| :autocmd FileType python :nmap <F9> :! clear <CR> :! python % <Enter> |
| “C/C++ commands |
|---|
| “Compile : F9 (Below code is used in .vimrc file) |
| :autocmd FileType c,cpp :nmap <F9> :! rm -r out <CR> :! clear <CR> :! g++ % -o out <Enter> |
| “Run : Ctrl+F9 (Below code is used in .vimrc file) |
| :autocmd FileType c,cpp :nmap <C-F9> :! clear <CR> :! ./out <CR> |
1.20. Buffer
| Commands | Descriptions |
|---|---|
| :bn | go to next buffer i.e. file |
| :b <filename> | go to buffer with <filename> |
| :bd | close current file without exiting vim |
| :bd! | close current file without exiting vim and ‘no modification’ |
1.21. Split windows
| Commands | Descriptions |
|---|---|
| :split | split window in two part and display current file in both window |
| :split <filename> | open <filename> in split window |
| :5 split <filename> | open <filename> in new split window with width of 5 line |
| :new | split window in two part with second window as blank |
| crtl-w j | go to below split window |
| crtl-w k | go to above split window |
| crtl-ww, crtl-w w | go to next split window |
| crtl-w + | increase the width of split window by one line |
| 5 crtl-w — | decrease the width of split window by 5 line |
| crtl-w = | make all split window of equal size |
| crtl-w _ | maximize the current split window |
1.22. Auto completion
| Commands | Descriptions |
|---|---|
| ctrl-p,ctrl-n | auto complete by looking previous/next words (use ctrl-p or ctrl-n to change the words from list) |
1.23. Text files
| Commands | Descriptions |
|---|---|
| :set textwidth=50 | change the line after 50 character |
| :1,5 center 50 | textwidth = 50 and center the lines 1 to 5 |
| :1,5 right 50 | textwidth = 50 and right justify the text on lines 1 to 5 |
| :1,5 left 4 | left margin = 4 for lines 1 to 5 |
| Use $ for end of the line as shown below, | |
| :1,$ center 50 | textwidth=50 and cneter all the line |
| or use % sign for the file (results is same as above, | |
| :% center 50 | |
| :set wrap | turn the wrap words on |
| :set nowrap | turn off the wrap words |
1.24. Macros
| Commands | Descriptions |
|---|---|
| qa | start recording and store in reg ‘a’. Then perform certain operations. press ‘q’ again to stop recording. |
| @a | execute macro |
| 3@a | repeat macro 3 times |
1.25. More commands
| Commands | Descriptions |
|---|---|
| ctrl + g | name of current file |
| ctrl + u | move half screen up |
| ctrl + d | move half screen down |
| J | join line below with current line |
| 3J | join below two line with this line (not 3) |
| z= | spell suggestion |
| ~ | change case of letter |
| :digraphs | to see the list of symbols e.g. copyright etc. |
1.26. Block Visual Mode
Add same items in the beginning/end/middle of all the lines
| Commands | Descriptions |
|---|---|
| crtl-v | select the block with cursor movement |
| press I (insert before) or A (insert after) or c (replace) |
type the text -> press Esc -> block will be replaces by text |
1.27. Zoom Screen
| Commands | Descriptions |
|---|---|
| Zoom in | crtl-+ |
| Zoom out | ctrl– |
1.28. Save session
| Commands | Descriptions |
|---|---|
| :mksession name.vim | save session |
| :mksession! name.vim | override session |
| :source name.vim | load session |
1.29. Folding
Use space (remapped in .vimrc) at the line below the function definition for folding/unfolding the code.
1.30. Plugins
First install ‘vundle’ using following command. Use ‘git-shell’ to run this command in Windows.
- git clone https://github.com/VundleVim/Vundle.vim.git ~/.vim/bundle/Vundle.vim
- After that copy and paste the .vimrc file in the home directory (in Windows paste in the director C:/Users/<Username>/)
- Use double quote to comment/uncomment” the packages in .vimrc file e.g. ” Plugin ‘mattn/emmet-vim’ will not install the package “emmet-vim”. Or add some more packages in .vimrc file as required.
- After selecting the packages, open vim and run the command -> :PluginInstall and it will install the all the plugins.
- Use :help <plugin name> to see the list of operations.
1.30.1. NERDTree
| Commands | Descriptions |
|---|---|
| NERDTree | turn on the directory structure |
| NERDTree! | disable the directory structure |
| m | then use various operations for delete, and create files. |
| e.g | |
| m-a meher | create a file with name meher |
| m-a meher/ | create a folder with name meher |
1.30.2. Surround
| Commands | Descriptions | Results |
|---|---|---|
| ysiw” | add “” to the word | Meher -> “Meher” |
| ds” | delete surround quotes | “Meher” -> Meher |
| cs[( or cs]) | change surround [] by () | [2+3]/2 -> (2+3)/2 |
| cst<h1> | change <p> tag to <h1> | <p>Meher Krishna</p> -> <h1>Meher Krishna</h1> |
1.30.4. vim-table-mode
Follow the below steps to create the ‘rst-table’ in Vim,
- Enable/Disable table mode using ‘:TableModeEnable/TableModeDisable’ or using ‘:TableModeToggle’,
- Type column-names e.g. |Col1 | Col2| and press enter
- Then press | twice to create the table. Do the same to add more lines in the table.
- Also, go above the |Col1 | Col2| and press | twice (required for correct rst-table-format)
1.30.5. vim-extline
This is used to underline the text, which is required for making Headings in .rst document.
- Type the symbols (in insert mode) e.g. = and then press ctrl-l ctrl-l to complete it.
- Or press ctrl-l and then press the symbol,
- Or press ctrl-l and then press a number e.g. 1, 2 etc. This is autocomplete the underline base on heading levels.
- Some more commands are listed below,
| Commands | Descriptions |
|---|---|
| ctrl-l ctrl-l | Auto-line update |
| ctrl-l ctrl-h | Horizontal line update |
| ctrl-l ctrl-u | Change to underlined title |
| ctrl-l ctrl-o | Change to overlined title |
| ctrl-l ctrl-i | Change to underlined and overlined title |
| ctrl-l = or = ctrl-l | Force Section heading (with = as underline) |
| ctrl-l 2 | Force Section heading (level 2) |
1.30.6. ConqureShell
Use :ConqueTermSplit to start the terminal in the Vim.
1.30.7. Airline
Airline theme plugin for better view e.g. display name of file, line number, column number etc.
Here is how to cut-and-paste or copy-and-paste text using a visual selection in Vim. See Cut/copy and paste using visual selection for the main article.
Cut and paste:
- Position the cursor where you want to begin cutting.
- Press
vto select characters, or uppercaseVto select whole lines, orCtrl-vto select rectangular blocks (useCtrl-qifCtrl-vis mapped to paste). - Move the cursor to the end of what you want to cut.
- Press
dto cut (oryto copy). - Move to where you would like to paste.
- Press
Pto paste before the cursor, orpto paste after.
Copy and paste is performed with the same steps except for step 4 where you would press y instead of d:
dstands for delete in Vim, which in other editors is usually called cutystands for yank in Vim, which in other editors is usually called copy
Copying and cutting in normal mode[]
In normal mode, one can copy (yank) with y{motion}, where {motion} is a Vim motion. For example, yw copies to the beginning of the next word. Other helpful yanking commands include:
yyorY– yank the current line, including the newline character at the end of the liney$– yank to the end of the current line (but don’t yank the newline character); note that many people like to remapYtoy$in line withCandDyiw– yank the current word (excluding surrounding whitespace)yaw– yank the current word (including leading or trailing whitespace)ytx– yank from the current cursor position up to and before the character (tilx)yfx– yank from the current cursor position up to and including the character (findx)
Cutting can be done using d{motion}, including:
dd— cut the current line, including the newline character at the end of the line
To copy into a register, one can use "{register} immediately before one of the above commands to copy into the register {register}. See pasting registers for more information on register syntax.
Pasting in normal mode[]
In normal mode, one can use p to paste after the cursor, or P to paste before the cursor.
The variants gp and gP move the cursor after the pasted text, instead of leaving the cursor stationary.
To select a register from which to paste, one can use "{register}p to paste from the register {register}. See pasting registers.
Pasting in insert mode[]
The contents of a register can be pasted while in insert mode: type Ctrl-r then a character that identifies the register. For example, Ctrl-r then " pastes from the default register, and Ctrl-r then 0 pastes from register zero which holds the text that was most recently yanked (copied). See pasting registers.
Copying and cutting in command-line mode[]
Command-line mode occurs after typing : to enter a command. By default, while in the command line, typing Ctrl-f opens the command-line window where commands can be edited using normal mode. For example, part of one command can be copied then pasted into another command. See using command-line history.
Pasting in command-line mode[]
There are two approaches to pasting in command-line mode. The first is to open the command-line window with Ctrl-f, then use normal-mode commands to paste. See the previous section.
The second approach is to type Ctrl-r then a character to paste the contents of the register identified by the character. See Pasting in insert mode above.
Copy, cut, and paste from the system clipboard[]
Main article: Accessing the system clipboard
Unlike most text editors, Vim distinguishes between its own registers and the system clipboard. By default, Vim copies to, cuts to, and pastes from its own default register, called the unnamed register ("", also called quotequote) instead of the system clipboard.
Assuming Vim was compiled with clipboard access, it is possible to access the "+ or "* registers, which can modify the system clipboard. In this case, one can copy with e.g. "+y in visual mode, or "+y{motion} in normal mode, and paste with e.g. "+p.
If your installation of Vim was not compiled with clipboard support, you must either install a package that has clipboard support, or use an external command such as xclip as an intermediary. See Accessing the system clipboard for detailed information.
Multiple copying[]
Main article: Pasting registers.
Deleted or copied text is placed in the unnamed register. If wanted, a register can be specified so the text is also copied to the named register. A register is a location in Vim’s memory identified with a single letter. A double quote character is used to specify that the next letter typed is the name of a register.
For example, you could select the text hello then type "ay to copy «hello» to the a register. Then you could select the text world and type "by to copy «world» to the b register. After moving the cursor to another location, the text could be pasted: type "ap to paste «hello» or "bp to paste «world». These commands paste the text after the cursor. Alternatively, type "aP or "bP to paste before the cursor.
Windows clipboard[]
When using Vim under Windows, the clipboard can be accessed with the following:
- In step 4, press Shift+Delete to cut or Ctrl+Insert to copy.
- In step 6, press Shift+Insert to paste.
Different instances[]
How does one copy and paste between two instances of Vim on different Linux consoles?
After copying text, open a new buffer for a new file:
:e ~/dummy
- Paste the text to the new buffer.
- Write the new buffer
:w. - Switch to the previous buffer
:bpto release *.swp. - Now switch to the other console.
- Put the cursor at the desired place.
- Read the dummy file
:r ~/dummy
Increasing the buffer size[]
By default, only the first 50 lines in a register are saved, and a register is not saved if it contains more than 10 kilobytes. :help ‘viminfo’
In the example below, the first line displays the current settings, while the second line sets:
'100Marks will be remembered for the last 100 edited files.<100Limits the number of lines saved for each register to 100 lines; if a register contains more than 100 lines, only the first 100 lines are saved.s20Limits the maximum size of each item to 20 kilobytes; if a register contains more than 20 kilobytes, the register is not saved.hDisables search highlighting when Vim starts.
:set viminfo?
:set viminfo='100,<100,s20,h
See also[]
- Quick yank and paste
- Cut/copy and paste using visual selection
- In line copy and paste to system clipboard
- Accessing the system clipboard
[]
I know how to copy a word, but I seem to overwrite what is in my clipboard because, when I try to copy over a word, it does not seem to be working.
To copy a word, I can use
bye
How to copy over a word?
![]()
ib.
27.4k10 gold badges79 silver badges100 bronze badges
asked Oct 17, 2011 at 17:02
![]()
codecompletingcodecompleting
9,15113 gold badges60 silver badges100 bronze badges
2
Perhaps you just want to do this:
viwp
which will visually select a new word, and paste over it.
Now, if you don’t want to lose your register when doing this, you can also put in your vimrc:
xnoremap p pgvy
answered Oct 17, 2011 at 17:39
![]()
3
Copy the source word as usual (e.g., with yiw) and use
viw"0p
to paste over the destination word.
Since the p command in Visual mode (see :help v_p) does not alter
the numbered register 0 containing the text from the most recent
yank command, the same copied word can be pasted over and over again.
answered Oct 18, 2011 at 6:06
![]()
ib.ib.
27.4k10 gold badges79 silver badges100 bronze badges
Do this once:
ciw<C-r>0
Then to replace words always using the text you yanked do:
.
You can use search with it like this:
/foo<Cr>
.n.n.n
It works because:
ciw replaces inner word and
<C-r>0 uses the most recently yanked register to replace it, which . then also uses.
Sadly, this does not work if you visually select text you wish to replace and use ..
Note that if you originally used visual selection to select the text to replace and did c<C-r>0 then after that . will replace the same length of characters as was included in the visual selection.
answered Oct 19, 2011 at 18:31
![]()
Heikki NaskiHeikki Naski
2,5801 gold badge19 silver badges13 bronze badges
When you delete a word it is put in the " register which is the default register for pasting, so when you delete the word you want to replace, it will take the previous word’s place in the " register. However, the previous word will be in register 0, the one before in 1 and so on – you can at any time see this by running :reg and see the registers’ contents. So, to replace a word you can first copy the first word (yiw), then “change” the word you want to replace (ciw) and then insert from register 0 by hitting ctrl-r, 0. (You could also first delete the word (diw) and then paste from register 0: "0p.
answered Oct 17, 2011 at 18:39
![]()
betabeta
2,33022 silver badges37 bronze badges
The easy solution is to do it the other way around: first paste the new word, then delete the old one.
answered Oct 17, 2011 at 17:04
![]()
JJJJJJ
32.7k20 gold badges89 silver badges102 bronze badges
1
You could use register 0, which contains the just-overwritten «clipboard» text. For your example, you could yank the text to paste, put the cursor somewhere in the word «bye», and type
ciw [cut in word; deletes the word under the cursor and goes to insert mode there]
ctrl-r 0 [register 0; paste text from register 0]
You can see what’s in all the registers with :disp. As Daenyth says, you can yank into a particular register with "x[del/cut/yank command] and paste with "xp from command mode, or ctrl-r x from insert / replace.
![]()
answered Oct 17, 2011 at 17:16
![]()
KevinKevin
53.2k15 gold badges98 silver badges129 bronze badges
2
You can yank into a register by prepending it with "a (where a is the name of the register). See How to use vim registers
b"aye
![]()
answered Oct 17, 2011 at 17:06
![]()
DaenythDaenyth
35.2k13 gold badges83 silver badges121 bronze badges
Introduction
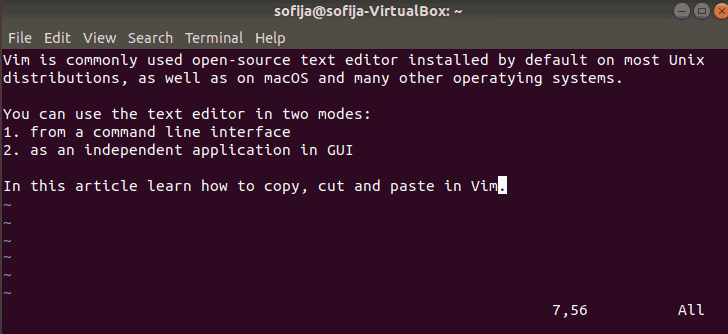
Vim is a commonly used open-source text editor installed by default on most Unix distributions. You can use the text editor in two modes, from a command-line interface or as an independent application in a GUI.
While working in Vim, copying, cutting and pasting text are frequently used shortcuts.
In this tutorial learn how to copy, cut and paste in Vi / Vim editor.

Copy, Cut and Paste in Normal Mode
Before you start, make sure you are in normal mode (text editing/command mode). The best way to do so is to press Esc. This mode allows you to move through the text easily.
Copying in Vim
Copying text in Vim is also referred to as yanking. Use the y key on the keyboard when performing this operation.
There are a number of yank commands, mainly differing on the amount of text you want to copy.
Once in normal mode, move the cursor to the needed place and use the appropriate command.
- To copy an entire line, place the cursor at the beginning of the line and type:
yy- To copy three (3) lines, move the cursor from where you want to begin copying and type:
3yy- To copy a word with its trailing whitespace, copy the cursor at the beginning of the word and type:
yaw- To copy a word without its trailing white-space, navigate the cursor at the beginning of the word and type:
yiw- To copy everything right of the cursor to the end of the line, use the command:
y$- To copy everything left of the cursor to the start of the line, type:
y^- To copy everything between the cursor and a specified character in the line, use the command:
ytxThe command stands for “yank till x”. Replace x with the character to which you want to copy to. The character x will not be included.
- To copy everything between the cursor and a specified character in the line (including that character), use the command:
yfxThis instructs Vim to “find x”.
Cutting in Vim
Cutting text is referred to as deleting in Vim. Use the d key when performing this operation.
If you are using Vim in normal mode, you can easily cut or delete text using the d command. Here are some ways you can cut content:
- To cut the entire line in which the cursor is located type:
dd- To cut three (3) lines, starting from the one where the cursor is located use:
3dd- To cut everything right of the cursor to the end of the line use the command:
d$Pasting in Vim
Once you have selected text in Vim, no matter whether it is using the yank or the delete command, you can paste it in the wanted location.
In Vim terminology, pasting is called putting and the function is utilized with the p command.
You can paste (or put) text by moving the cursor to the wanted position and pressing:
pUsing this command pastes the selected text after the cursor.
To add text before the cursor, type the capitalized command instead:
PNote: Refer to our tutorial on how to show lines in Vim to learn how to display absolute, relative and hybrid line numbers.
Copy, Cut and Paste in Visual Mode
Alternatively, you can copy and edit text using the visual selection feature. This mode allows you to select text by navigating around.
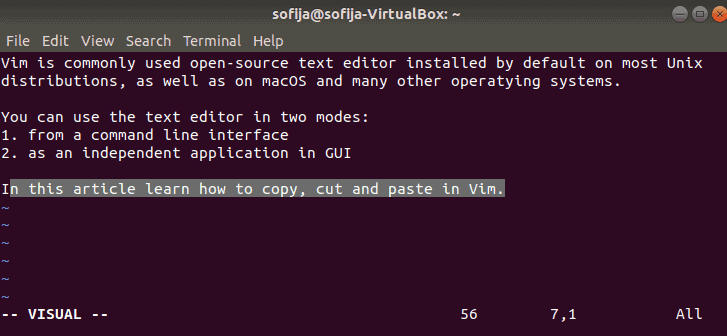
Use Esc to exit out of the previously used mode and enable visual selection by pressing:
v(lowercase) to start selecting individual charactersV(uppercase) to select the entire lineCtrl+vto select by block
After you have selected the wanted text you can press:
yto yank (copy) the contentdto delete (cut) the contentpto put (paste) the content
Once you have edited in Vim, make sure to save the file before you exit.
Conclusion
Now you know how to copy, cut and paste in Vim. You may often find yourself needing to make configuration changes to your packages. Most of these can quickly be done in Vim using cut & copy paste.
Next, you can explore the many options VIM to offer, such as Vim color schemes.
19.10.2020
Linux, Команды
При работе с текстовыми файлами копирование, вырезание и вставка текста — одна из наиболее часто выполняемых задач.
Vim или его предшественник Vi предустановлен на macOS и почти во всех дистрибутивах Linux. Знание основ Vim полезно в ситуации, когда ваш любимый редактор недоступен.
В этой статье показано, как копировать, вырезать и вставлять в редакторе Vim / Vi.
Копирование, вырезание и вставка в нормальном режиме
Когда вы запускаете редактор Vim, вы находитесь в обычном режиме. В этом режиме вы можете запускать команды Vim и перемещаться по файлу.
Чтобы вернуться в нормальный режим из любого другого режима, просто нажмите Esc .
В Vim есть собственная терминология для копирования, вырезания и вставки. Копирование называется yank ( y ), вырезание называется delete ( d ), а вставка называется put ( p ).
Копирование (Янкинг)
Чтобы скопировать текст, поместите курсор в желаемое место и нажмите клавишу y а затем команду перемещения. Ниже приведены некоторые полезные команды восстановления:
yy— Янкнуть (скопировать) текущую строку, включая символ новой строки.-
3yy—3yy(копирование) трех строк, начиная с строки, в которой находится курсор. -
y$— копировать (копировать) все от курсора до конца строки. -
y^— Янкинг (копирование) всего от курсора до начала строки. -
yw— Янкнуть (копировать) до начала следующего слова. -
yiw—yiw(скопировать) текущее слово. -
y%— Янкнуть (копировать) на соответствующий символ. По умолчанию поддерживаются пары(),{}и[]. Полезно для копирования текста между совпадающими скобками.
Резка (Удаление)
В обычном режиме d — клавиша для вырезания (удаления) текста. Переместите курсор в желаемое положение и нажмите клавишу d , а затем команду перемещения. Вот несколько полезных команд для удаления:
dd— Удалить (вырезать) текущую строку, включая символ новой строки.-
3dd— Удалить (вырезать) три строки, начиная с линии, в которой находится курсор, -
d$— Удалить (вырезать) все от курсора до конца строки.
Команды движения, применяемые для восстановления, также действительны для удаления. Например, dw удаляет до начала следующего слова, а d^ удаляет все от курсора до начала строки.
Склеивание (Вставка)
Чтобы поместить извлеченный или удаленный текст, переместите курсор в желаемое место и нажмите p чтобы вставить (вставить) текст после курсора, или P чтобы поместить (вставить) перед курсором.
Копирование, вырезание и вставка в визуальном режиме
Визуальный режим Vim позволяет выбирать текст и управлять им.
-
Поместите курсор на линию, с которой вы хотите начать копирование или резку.
-
Визуальный режим имеет три подтипа.
- Нажмите
vчтобы войти в визуальный режим. - Нажмите
Vчтобы войти в визуальный линейный режим, в котором текст выделяется построчно. - Нажмите
Ctrl+vчтобы войти в режим визуального блока. В этом режиме текст выделяется прямоугольными блоками.
Переход в визуальный режим также отмечает начальную точку выбора.
- Нажмите
-
Переместите курсор в конец текста, который вы хотите скопировать или вырезать. Вы можете использовать команду перемещения или клавиши со стрелками вверх, вниз, вправо и влево.

-
Нажмите
yчтобы скопировать, илиdчтобы вырезать выделение. -
Переместите курсор в то место, куда вы хотите вставить содержимое.
-
Нажмите
Pчтобы вставить содержимое перед курсором, илиpчтобы вставить его после курсора.
Выводы
В этом руководстве мы показали вам, как копировать, вырезать и вставлять в Vim.
Если вы новичок в Vim, посетите сайт Open Vim, где вы можете попрактиковаться в Vim с помощью интерактивного руководства.
Не стесняйтесь оставлять комментарии, если у вас есть вопросы.
For X11-based systems (ie. Linux and most other UNIX-like systems)
there are two clipboards which are independent of each other:
- PRIMARY — This is copy-on-select, and can be pasted with the middle mouse
button. - CLIPBOARD — This is copied with (usually)
^C, and pasted with^V(It’s
like MS Windows).
OS X and Windows systems only have one clipboard.
For X11 systems there are also number of tools that synchronize these clipboards
for you; so if they appear to be the same, you may have one of them running.
Vim has two special registers corresponding to these clipboards:
*uses PRIMARY; mnemonic: Star is Select (for copy-on-select)+uses CLIPBOARD; mnemonic: CTRL PLUS C (for the common keybind)
On Windows & OS X there is no difference between + and *, since these systems
only have a single clipboard, and both registers refer to the same thing (it
doesn’t matter which one you use).
You can use these registers as any register. For example, using the PRIMARY
clipboard * with the y and p commands:
"*yy"*p
You could maybe use this as more convenient keybinds:
noremap <Leader>y "*y
noremap <Leader>p "*p
noremap <Leader>Y "+y
noremap <Leader>P "+p
If you want to «automatically» interface with the system’s clipboard instead of
referring to it manually all the time, you can set the clipboard variable:
- Set it to
unnamedto use*(PRIMARY, on select) - Set it to
unnamedplusto use+(CLIPBOARD,^C)
Now, just using yy will go to the system’s clipboard, instead of Vim’s unnamed
register, and p will paste the system’s clipboard.
You can also assign to these registers just like any register with let:
:let @+=42:let @*=42
The clipboard setting has some more options (such as exclude filters); but
these are the basics. See :help 'clipboard' for the full story 
gVim
If you use gVim, you can get copy-on-select behaviour when using
:set guioptions+=a.
This is enabled by default on X11 systems (copies to PRIMARY), but not on MS
Windows & OSX (as selecting any text would override your clipboard).
No +clipboard?
Vim requires the +clipboard feature flag for any of this to work; you can
check if your Vim has this by using :echo has('clipboard') from within Vim (if the
output is 0, it’s not present, if it’s 1, it is), or checking the output of
vim --version for +clipboard.
Most Linux distributions ship with a «minimal» Vim build by default, which
doesn’t have +clipboard, but you can usually install it:
- Debian & Ubuntu: Install
vim-gtk3. - Fedora: install
vim-X11, and runvimxinstead ofvim(more info). - Arch Linux: install
gvim(this will enable+clipboardfor normalvimas well).
You could also use xclip, xcopy, or xsel to copy text to the clipboard;
see the following questions for solutions:
- Define custom commands for the * and + registers
- How can I copy over an ssh session without +clipboard?
SSH
You can also use a clipboard on remote machines if you enable X11 forwarding
over SSH. This is especially useful with the above tip since you can then use
xclip to access your desktop’s clipboard. The Vim on the machine you’re
ssh-ing to will still need the +clipboard feature.
This requires the ForwardX11Trusted setting, and should only be
done with trusted servers, as this gives the server almost complete control
over your X11 session:
$ ssh -XY myhost
To make these settings persistent (so you don’t need to add -XY every time),
you could do something like this in your ~/.ssh/config:
# Do **NOT** set this globally; it gives the server complete control over
# your X11 session.
Host myhost
    ForwardX11 yes
    ForwardX11Trusted yes
Neovim
Neovim revamped the clipboard support. The built-in interface was removed and
replaced with a system that call an external utility such as xclip, xsel, or
pbcopy/pbpaste.
It should automatically pick up these utilities and use them. On OS X pbcopy
and pbpaste should be available by default, on Linux you probably want to
install xclip, as that’s the most widely available (there are actually two
versions of xsel with incompatible flags. This is really stupid).
Also see :help clipboard in Neovim.