
This article is for people with visual or cognitive impairments who use a screen reader program such as Microsoft’s Narrator, JAWS, or NVDA with the Microsoft 365 products. This article is part of the Microsoft 365 screen reader support content set where you can find more accessibility information on our apps. For general help, visit Microsoft Support home or Fixes or workarounds for recent office issues.
Use Word with your keyboard and a screen reader to insert a picture or image from your computer or an online source. We’ve tested it with Narrator, JAWS, and NVDA, but it might work with other screen readers as long as they follow common accessibility standards and techniques. You’ll also learn how to add alt texts to the pictures to make them more accessible.
 Need instructions on how to insert pictures to a Word document, but not using a screen reader? See Insert pictures.
Notes:
-
New Microsoft 365 features are released gradually to Microsoft 365 subscribers, so your app might not have these features yet. To learn how you can get new features faster, join the Office Insider program.
-
To learn more about screen readers, go to How screen readers work with Microsoft 365.
In this topic
-
Insert an image or picture from your computer
-
Insert an image from an online source
-
Place a picture in line with text
-
Add alt text to an image
Insert an image or picture from your computer
-
In your Word document, place the insertion point where you want to insert an image.
-
Press Alt+N, P, D. The Insert Picture dialog box opens. The focus is on the File name text field.
-
Use the Tab key and the arrow keys to navigate to the location of the picture on your computer. When you hear the name of the picture, followed by «Selected,» press Enter. The original picture is embedded into your document.
Tip: If your picture has a large file size, it can make your document too large. To reduce the size of your document, you can link to the picture instead of embedding it. In the Insert Picture dialog box, press the Tab key until you hear with Narrator and NVDA: «Insert, split button.» With JAWS, you hear: «Leaving menus, Insert button.» Press the Down arrow key until you hear «Link to file,» and then press Enter.
Insert an image from an online source
If you don’t have the perfect picture on your computer, you can search for and insert a picture from a web location straight from Word.
-
In your Word document, place the insertion point where you want to insert an image.
-
Press Alt+N, P, O. The Bing image search dialog box opens. The focus is on the search text field.
-
Type your search words to describe the picture you’re looking for, and then press Enter. The search results are listed, and the focus is on the first matching image.
Tip: To browse for more images from your OneDrive, press the Tab key until you hear «OneDrive,» and press Enter.
-
Use the arrow keys to browse the search results. Your screen reader describes each image as you move through the search results.
-
To select an image, press Spacebar.
-
To insert the selected image, press the Tab key until you hear «Insert,» and press Enter. Word downloads and inserts the image into your document.
Place a picture in line with text
To be read correctly by a screen reader, the picture has to be in line with the text. By default, Word inserts a picture in line with text, but you can check it to make sure that the screen readers can read the pictures.
-
In your Word document, move the focus to the picture you want. When the focus is on the picture, you hear the file name or number of the picture, followed by «Image.»
-
Press Shift+Right arrow key once to select the picture. Then press Shift+F10. The context menu opens.
-
Press the Up arrow key until you hear «Wrap text,» and then press the Right arrow key once. You hear: «In line with text.» Press Enter. If you don’t hear «In line with text,» press the Up arrow key until you reach the In line with text button, and press Enter.
Add alt text to an image
Add alt text to the images to make your document accessible to all audiences. For more information on alt text, refer to Everything you need to know to write effective alt text.
-
In your Word document, move the focus to the picture that you want to add alt text to. When the focus is on the image, you hear the page you’re on, the file name or the number of the image, followed by «Image.» Press Shift+Right arrow key once to select the image.
-
Press Shift+F10 to open the context menu.
-
Press the Up arrow key until you hear «Edit alt text,» and press Enter.
-
The Alt Text pane opens, and the focus is on the alt text field. Type alt text for the image.
-
When you’re ready, press Esc to return to the body of the document.
See also
Use a screen reader to insert a hyperlink in Word
Use a screen reader to align text and paragraphs in Word
Keyboard shortcuts in Word
Basic tasks using a screen reader with Word
Set up your device to work with accessibility in Microsoft 365
Use a screen reader to explore and navigate Word
What’s new in Microsoft 365: Release notes for Current Channel
Use Word for Mac with your keyboard and VoiceOver, the built-in MacOS screen reader, to insert a picture or image into a document. You’ll also learn how to add alt texts to the pictures to make them more accessible.
Need instructions on how to insert pictures to a Word document, but not using a screen reader? See Insert pictures.
Notes:
-
New Microsoft 365 features are released gradually to Microsoft 365 subscribers, so your app might not have these features yet. To learn how you can get new features faster, join the Office Insider program.
-
This topic assumes that you are using the built-in macOS screen reader, VoiceOver. To learn more about using VoiceOver, go to VoiceOver Getting Started Guide.
In this topic
-
Insert an image or picture from your computer
-
Insert an image from an online source
-
Place a picture in line with text
-
Add alt text to an image
Insert an image or picture from your computer
-
In your Word document, place the insertion point where you want to insert an image.
-
Press F6 until you hear the currently selected tab on the ribbon, for example, «Home, selected, tab.» Press Control+Option+Right or Left arrow key until you hear «Insert tab,» and press Control+Option+Spacebar.
-
Press the Tab key until you hear «Pictures, menu button,» and press Control+Option+Spacebar.
-
Press Control+Option+Right arrow key until you hear «Picture from file,» and then press Control+Option+Spacebar.
-
A dialog box opens with the focus on a recent images folder. To access the images in this folder, press Control+Option+Right arrow key. To browse to another location, use the Tab key, Shift+Tab, and the arrow keys.
-
When on the correct location, use the Up or Down arrow key to browse the files or subfolders. To open a subfolder, press the Right arrow key.
-
When you’ve located the correct image file, press Return. The picture is inserted into the document.
Insert an image from an online source
If you don’t have the perfect picture on your computer, you can search for and insert a picture from a web location straight from Word for Mac.
-
In your Word document, place the insertion point where you want to insert an image.
-
Press F6 until you hear the currently selected tab on the ribbon, for example, «Home, selected, tab.» Press Control+Option+Right or Left arrow key until you hear «Insert tab,» and press Control+Option+Spacebar.
-
Press the Tab key until you hear «Pictures, menu button,» and press Control+Option+Spacebar.
-
Press Control+Option+Right arrow key until you hear «Online pictures,» and then press Control+Option+Spacebar.
-
The Bing image search pane opens. The focus is on the search text field. Type your search words to describe the picture you’re looking for, and then press Return. The search results are listed, and the focus is on the first matching image.
-
Press Control+Option+Right or Left arrow key to browse the search results. VoiceOver describes each image as you move through the search results.
-
To select an image, press Control+Option+Spacebar.
-
To insert the selected image, press the Tab key until you hear «Insert,» and press Control+Option+Spacebar. Word downloads and inserts the image into your document.
Place a picture in line with text
To be read correctly by a screen reader, the picture has to be in line with the text.
-
In your Word document, move the cursor before the picture you want, press and hold Shift, and then press the Right arrow key once to select the picture. You hear: «Grouped object, you’re currently on a grouped object.»
-
Press F6 until you hear: «Picture format.»
-
Press the Tab key until you hear «Position button,» and then press Control+Option+Spacebar.
-
Press Control+Option+Left arrow key until you hear «In line with text,» and press Control+Option+Spacebar.
Add alt text to an image
Add alt text to the images to make your document accessible to all audiences. For more information on alt text, refer to Everything you need to know to write effective alt text.
-
In your Word document, select the picture that you want to add alt text to. To select a picture in Word, place the cursor before the image, hold down Shift, and then press the Right arrow key. You hear: «Grouped object, you’re currently on a grouped object.»
-
Press Control+Option+Shift+M. The context menu opens. Press Control+Option+Right arrow key until you hear «Edit alt text,» and press Control+Option+Spacebar.
-
The Alt Text pane opens, and the focus in on the alt text field. Type alt text for the image.
-
When you’re ready, press Shift+Tab until you hear «Close alt text button,» and press Control+Option+Spacebar. The Alt Text pane closes, and the focus moves back to your document.
See also
Use a screen reader to insert a hyperlink in Word
Use a screen reader to align text and paragraphs in Word
Keyboard shortcuts in Word
Basic tasks using a screen reader with Word
Set up your device to work with accessibility in Microsoft 365
Use a screen reader to explore and navigate Word
What’s new in Microsoft 365: Release notes for Current Channel
Use Word for iOS with VoiceOver, the built-in iOS screen reader, to insert a picture or image into a document. You’ll also learn how to add alt texts to the pictures to make them more accessible.
Notes:
-
New Microsoft 365 features are released gradually to Microsoft 365 subscribers, so your app might not have these features yet. To learn how you can get new features faster, join the Office Insider program.
-
This topic assumes that you are using the built-in iOS screen reader, VoiceOver. To learn more about using VoiceOver, visit Apple accessibility.
-
We recommend you read and edit documents in Print Layout View. VoiceOver might not work reliably in other view modes.
In this topic
-
Insert an image or picture from your phone
-
Insert a picture from the camera
-
Place a picture in line with text
-
Add alt text to an image
Insert an image or picture from your phone
-
While editing your Word document, place the insertion point where you want to insert an image.
-
Tap near the top of the screen with four fingers, swipe right until you hear «Show ribbon,» and double-tap the screen. You hear the currently selected tab, for example, «Home tab.»
-
Double-tap the screen, swipe right or left until you hear “Insert tab,” and double-tap the screen. You hear: “Insert tab.”
-
Swipe right until you hear “Insert pictures button,” and double-tap the screen. The Photos app opens.
-
Swipe right until you hear the image location you want, and then double-tap the screen to select.
-
To browse the images, swipe right or left. As you move, VoiceOver announces the images by the image types and dates.
-
When on the picture you want to insert into the document, double-tap the screen. The picture is inserted and the focus returns to your document with the image selected.
Insert a picture from the camera
You can open the device camera straight from Word for iOS, take a photo, and then insert the photo into the document.
-
While editing your Word document, place the insertion point where you want to insert a picture.
-
Tap near the top of the screen with four fingers, swipe right until you hear «Show ribbon,» and double-tap the screen. You hear the currently selected tab, for example, «Home tab.»
-
Double-tap the screen, swipe right or left until you hear “Insert tab,” and double-tap the screen. You hear: “Insert tab.”
-
Swipe right until you hear “Insert pictures button,” and double-tap the screen. The Photos app opens.
-
Swipe right until you hear “Insert picture from camera, button,” and then double-tap the screen. The Camera app opens.
Note: If you hear «Word would like to access the camera,» swipe right until you hear «OK, button,» and double-tap the screen.
-
Swipe right until you hear «Take picture, button,» point the camera in the right direction, and double-tap the screen.
-
Swipe right or left until you hear «Use photo, button,» and then double-tap the screen to insert the photo. The focus returns to your document.
Place a picture in line with text
To be read correctly by a screen reader, the picture has to be in line with the text.
-
While editing your Word document, slide one finger around the document body until you hear the image you want. When the image is in focus, VoiceOver announces the image file name, followed by «Image,» and the image layout. Double-tap the screen. You hear: «Selected.»
-
Tap near the bottom of the screen with four fingers, swipe left until you hear «Show ribbon,» and double-tap the screen. You hear: «Picture tab.»
-
Swipe right until you hear «Wrap text button,» and double-tap the screen. Swipe left until you hear «In line with text,» and double-tap the screen.
Add alt text to an image
Add alt text to the images to make your document accessible to all audiences. For more information on alt text, refer to Everything you need to know to write effective alt text.
-
While editing your Word document, to select a picture, slide one finger around the document body until you hear the image you want to add alt text to. When the image is in focus, VoiceOver announces the image file name, followed by «Image,» and the image layout. Double-tap the screen. You hear: «Selected.»
-
Tap near the bottom of the screen with four fingers, swipe left until you hear «Show ribbon,» and double-tap the screen. You hear: «Picture tab.»
-
Swipe right until you hear «Alt text button,» and double-tap the screen.
-
To add alt text, swipe right until you hear «Description, text field,» double-tap the screen, and then use the on-screen keyboard to type alt text for the image.
-
When you’re ready, tap near the top of the screen with four fingers, swipe right until you hear «Done button,» and double-tap the screen. The focus moves back to the document body.
See also
Use a screen reader to insert and change text in Word
Use a screen reader to set line spacing and indenting in Word
Basic tasks using a screen reader with Word
Set up your device to work with accessibility in Microsoft 365
Use a screen reader to explore and navigate Word
What’s new in Microsoft 365: Release notes for Current Channel
Use Word for Android with TalkBack, the built-in Android screen reader, to insert a picture or image into a document. You’ll also learn how to add alt texts to the pictures to make them more accessible.
Notes:
-
New Microsoft 365 features are released gradually to Microsoft 365 subscribers, so your app might not have these features yet. To learn how you can get new features faster, join the Office Insider program.
-
This topic assumes that you are using the built-in Android screen reader, TalkBack. To learn more about using TalkBack, go to Android accessibility.
In this topic
-
Insert an image or picture from your phone
-
Insert a picture from the camera
-
Place a picture in line with text
-
Add alt text to an image
Insert an image or picture from your phone
-
While editing your Word document, place the insertion point where you want to insert an image.
-
Swipe left until you hear «More options button,» and double-tap the screen. You hear the currently selected tab, for example, «Home tab.» Double-tap the screen, swipe right or left until you hear “Insert tab,” and double-tap the screen.
-
Swipe right until you hear “Pictures menu,” and double-tap the screen. The Pictures menu opens.
-
Swipe right until you hear “Photos button,” and double-tap the screen. The default gallery app opens.
Note: If you’re signed in and using your organization’s phone and account, you might have to switch to your personal account or select a gallery app before you can insert an image into a document.
-
Do one of the following:
-
To navigate through the pictures in the currently selected image storage location, swipe right until you hear the image you want.
-
To navigate to another storage location, for example, Downloads or Images, swipe left until you hear «Show roots button,» and then double-tap the screen. Swipe right until you hear the location you want, and then double-tap the screen. Swipe left or right until you hear the image you want.
TalkBack announces the images by their filenames, sizes, and dates.
-
-
When on the image you want to insert, double-tap the screen. The image preview opens.
-
Swipe right until you hear «Done,» and then double-tap the screen. The image is inserted and the focus returns to your document with the image selected.
Insert a picture from the camera
You can open the device camera straight from Word for Android, take a photo, and then insert the photo into the document.
-
While editing your Word document, place the insertion point where you want to insert a picture.
-
Swipe left until you hear «More options button,» and double-tap the screen. You hear the currently selected tab, for example, «Home tab.» Double-tap the screen, swipe right or left until you hear “Insert tab,” and double-tap the screen.
-
Swipe right until you hear “Pictures menu,” and then double-tap the screen. The Pictures menu opens.
-
Swipe right until you hear “Camera button,” and then double-tap the screen. The Camera app opens.
Note: If you hear «Allow Word to take pictures and record video, Allow button,» double-tap the screen.
-
To take a picture, swipe right until you hear «Capture,» point the camera to the right direction, and then double-tap the screen.
-
The image is captured, and the editing view opens. Swipe right until you hear «Confirm,» and double-tap the screen.
-
The image preview opens. Swipe right until you hear «Done,» and then double-tap the screen. The image is inserted and the focus returns to your document with the image selected.
Place a picture in line with text
To be read correctly by a screen reader, the picture has to be in line with the text.
-
While editing your Word document, slide one finger around the document body until you hear the image you want. When the focus is on the image, you hear the file name or number of the image, followed by «Image.» Double-tap and hold the screen with one finger. You hear: «Cut button.»
-
Swipe down-then-left. Then slide one finger near the lower-right corner of the screen until you hear «Not checked, More options switch,» and double-tap the screen. The focus moves to the Picture tab on the ribbon.
-
Swipe right until you hear «Wrap text menu,» and double-tap the screen.
-
Swipe right until you hear «In line with text,» and double-tap the screen.
Add alt text to an image
Add alt text to the images to make your document accessible to all audiences. For more information on alt text, refer to Everything you need to know to write effective alt text.
-
While editing your Word document, slide one finger around the document body until you hear the image you want to add alt text to. When the focus is on the image, you hear: «Selected, Image.» Double-tap the screen.
-
Slide one finger near the lower-right corner of the screen until you hear «Not checked, More options switch,» and double-tap the screen.
-
The focus moves to the Picture tab on the ribbon. Swipe right until you hear «Alt text menu,» and double-tap the screen.
-
Swipe right until you hear «Edit box, for, describe this object for someone who is blind,» and double-tap the screen. Use the on-screen keyboard to type alt text for the image. To close the on-screen keyboard, swipe down-then-left.
-
To move the focus back to the document body, swipe down-then-left.
See also
Use a screen reader to insert and change text in Word
Use a screen reader to set line spacing and indenting in Word
Basic tasks using a screen reader with Word
Set up your device to work with accessibility in Microsoft 365
Use a screen reader to explore and navigate Word
What’s new in Microsoft 365: Release notes for Current Channel
Use Word for the web with your keyboard and a screen reader to insert a picture or image into a document. We have tested it with Narrator in Microsoft Edge and JAWS and NVDA in Chrome, but it might work with other screen readers and web browsers as long as they follow common accessibility standards and techniques. You’ll also learn how to add alt texts to the pictures to make them more accessible.
Need instructions on how to insert pictures to a Word document, but not using a screen reader? See Insert pictures.
Notes:
-
If you use Narrator with the Windows 10 Fall Creators Update, you have to turn off scan mode in order to edit documents, spreadsheets, or presentations with Microsoft 365 for the web. For more information, refer to Turn off virtual or browse mode in screen readers in Windows 10 Fall Creators Update.
-
New Microsoft 365 features are released gradually to Microsoft 365 subscribers, so your app might not have these features yet. To learn how you can get new features faster, join the Office Insider program.
-
To learn more about screen readers, go to How screen readers work with Microsoft 365.
-
When you use Word for the web with a screen reader, switch to the full screen mode. Press F11 to toggle the full screen mode on and off.
-
When you use Word for the web, we recommend that you use Microsoft Edge as your web browser. Because Word for the web runs in your web browser, the keyboard shortcuts are different from those in the desktop program. For example, you’ll use Ctrl+F6 instead of F6 for jumping in and out of the commands. Also, common shortcuts like F1 (Help) and Ctrl+O (Open) apply to the web browser – not Word for the web.
In this topic
-
Insert a picture from your computer
-
Insert a picture from the web
-
Place a picture in line with text
-
Add alt text to an image
Insert a picture from your computer
-
In your Word document, place the insertion point where you want to insert the picture.
-
Press Alt+Windows logo key+N, P, P. The Windows Open dialog box opens. The focus is on the File name text field.
-
Use the Tab key and the arrow keys to navigate to the location of the picture on your computer. When you hear the name of the picture, followed by «Selected,» press Enter. The original picture is embedded into your document.
Insert a picture from the web
If you don’t have the perfect picture on your computer, you can search for and insert a picture from a web location straight from Word for the web.
Note: When using photos, images, or clip art, you’re responsible for respecting copyright. For images, the license filter in Bing can help.
-
In your Word document, place the insertion point where you want to insert the image.
-
Press Alt+Windows logo key+N, P, F.
-
The Bing image search dialog box opens. The focus is on the search text field. Type your search words to describe the picture you’re looking for, and then press Enter. The search results are listed, and the focus is on the first matching image.
-
Use the arrow keys to browse the search results. Your screen reader describes each image as you move through the search results.
-
To select an image, press Spacebar.
-
To insert the selected image, press the Tab key until you hear «Insert,» and press Enter. Word downloads and inserts the image into your document.
Place a picture in line with text
To be read correctly by a screen reader, the picture has to be in line with the text.
-
In your Word document, move the focus to the picture you want. When the picture is in focus and selected, you hear: «Image.»
-
Press Shift+F10. The context menu opens.
-
Press the Up arrow key until you hear «Wrap text,» and then press the Right arrow key once. You hear: «In line with text.» Press Enter. If you don’t hear «In line with text,» press the Up arrow key until you reach the In line with text button, and press Enter.
Add alt text to an image
Add alt text to the images to make your document accessible to all audiences. For more information on alt text, refer to Everything you need to know to write effective alt text.
-
In your Word document, move the focus to the image that you want to add alt text to. When the image is in focus and selected, you hear: «Image.»
-
Press Alt+Windows logo key+J, P, E. The Format Picture pane opens, and the focus moves to the Alternative Text section.
-
Press the Tab key until you hear «Description,» and then type alt text for the image.
-
To return the focus to document body, press Esc.
See also
Use a screen reader to insert and change text in Word
Use a screen reader to check spelling and grammar in Word
Keyboard shortcuts in Word
Basic tasks using a screen reader with Word
Use a screen reader to explore and navigate Word
What’s new in Microsoft 365: Release notes for Current Channel
Technical support for customers with disabilities
Microsoft wants to provide the best possible experience for all our customers. If you have a disability or questions related to accessibility, please contact the Microsoft Disability Answer Desk for technical assistance. The Disability Answer Desk support team is trained in using many popular assistive technologies and can offer assistance in English, Spanish, French, and American Sign Language. Please go to the Microsoft Disability Answer Desk site to find out the contact details for your region.
If you are a government, commercial, or enterprise user, please contact the enterprise Disability Answer Desk.
«I am running Microsoft 365 on my Windows 10 computer. I need to insert PNG images into my document, but after I try to insert the pictures it is showing a box with a red x mark and the message «This image cannot currently be displayed.»
Many users experience an odd issue with their Word document regarding a picture or an object is not showing up in Word. Whenever you open the Microsoft Word file, you can see white spaces or rectangles instead of the images that you have inserted earlier. This is a common issue in MS Word 2007 and 2010. Though the problem can also occur in the later versions of Microsoft Word.
Many MS Office users complained that they can’t insert pictures in a Word document. In a Word document, when I select insert, then picture, and select picture from my folder, it fails to insert. It only shows me a blank outline of the image but can’t insert the picture in Word.
Moreover, it can also happen with a Word file that contains an object or graphic image. If this is the case, let us understand why such an error is caused and how to fix the Word Document not showing pictures issue with a few easy methods.
Table of Contents
Why does Word say “This image cannot currently be displayed”?
How do I Fix this “Image Cannot Currently be Displayed” Error?
- Use the «In line with text» wrapping style option
- Change the view of the MS Word Application
- Enable the Show drawings and text boxes on-screen option
- Enable Print drawings created in Word option
- Disable Use of draft quality
- Disable Picture Placeholders
- Change the problematic Video driver settings
Why does Word say “This image cannot currently be displayed”?
“The images that cannot be displayed currently”
The main reason behind the issue “This image cannot currently be displayed” in Word is using the “wrapping style” option instead of the «In Line with text» Option with the pictures in the Word document.
a) Word Wrapping Style
Generally, Text Wrapping is used to manage well the text surrounding the image. However, in some cases using the “Wrapping style” option with your image might make Microsoft Word not show the images. Using the inline option might fix the error. Along with the Word Wrapping style, the following are a few other reasons that can also cause Word not to show images.
b) Picture Placeholder is Enabled
In some cases even after selecting the inline with text option, your image might not show up in the Word document. It might be because the Picture Placeholder option is enabled. Generally, the Picture placeholder is used when the Word document has numerous images or items.
In conditions where word files have a lot of images can be hard to process for a low-spec computer. If you enable the Picture Placeholder option, it will cease all the images to display. Yet images will be in the same position, they just won’t be displayed. This is the best way to reduce the load on the computer. Disabling the picture placeholder might fix your error. In the following sections, you find the instructions on how to change the settings.
c) Other Settings
Following are a few other settings that can be a reason behind the missing photos in the Word file:
- Word document view is set to Draft view or Outline View.
- If you Show drawings and text boxes on-screen preference in the Options menu is disabled.
- When Print drawings are created in Word choice is deactivated.
- If you have enabled the Use draft quality option.
d) Glitches in Windows Video Driver
Finally, your images on the Word document might not show up content or pictures due to any glitches Windows video driver. However, this is highly rare and there is no possibility of this happening.
In the following section, you will find every little detail on how to fix the error.
How do I Fix this “Image Cannot Currently be Displayed” Error?
Try the below-explained troubleshoots to solve your Word document not showing pictures problem. The following steps are according to Word in Office 365. The steps will be slightly different for Word 2007 and 2010 but the results will be the same. The difference in Word 2007 is that there is no File option, instead, you have to use the Microsoft Office button.
1. Use the «In line with text» wrapping style option
- Click on the inserted image
- Switch to the Right-click on the image
- Click on Wrap Text
- Select In line with Text option
2. Change the view of the MS Word Application
If you are using Draft or Outline view, then select one of the following views:
- Print Layout
- Full-Screen Reading
- Web Layout
In MS Word 2016 or Office 365 just go to View and select on Print Layout.
For Word 2010: Click File, and then click Print.
3. Enable the Show drawings and text boxes on-screen option
- Go to File and select Options
- Click on the Advanced tab
- Scroll down to see Show document content
- Enable Show drawings and text boxes on-screen option
- Hit OK
- If you are using Word 2007, click on the Microsoft Office Button and click Word Options. As in Word 2007, instead of File, there is a Microsoft Office button.
4. Enable Print drawings created in Word option
- Hit the File tab and go to Options
- Jump to Display
- In Printing options, enable Print drawings created in Word option
- Apply changes
5. Disable Use draft quality
- Hit the File tab and go to Options
- Jump to Display
- In Printing options
- Uncheck Use the draft quality option
- Opt OK
6. Disable Picture Placeholders
- Go to File and select Options
- Click on the Advanced tab
- Scroll down to see Show document content
- Uncheck Show Picture Placeholders Preference

- Hit OK
7. Change the problematic Video driver settings
For Windows 10:
- Go to Desktop and right-click
- Select Graphics Properties and then in the next window select Video
- Change your Windows video driver color quality settings and screen resolution.
- Try updating the video driver as well if a new update is available
If none of the above fixations help you, then there might be a possibility that your word file is damaged and as a result of that, it is not showing some content. In such situations, you have to adapt to a Word repair tool to fix the error. To do so, try to repair your DOC file / DOCX file using the Remo Word Repair utility. The Remo Repair Word is capable of solving any issues related to the Word document, regardless of the reason behind the corruption.
The best possible way to avoid any kind of error on Word doc is by creating multiple copies as a backup. However, you should know for a fact that even those copies are exposed to issues. Hence, it is strongly suggested to have Remo Repair on your Hands to fix any word-related issues.
Some documents have digital photographs and images created and saved in other programs that make documents entertaining or convey information better than words. These types of images are referred to as pictures.
Insert an image
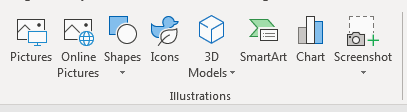
To insert a picture in a Word document, on the Insert tab, in the Illustrations group, click the Pictures button, then choose the option you prefer:

- Select This Device to choose an image stored on the local computer, laptop, shared locations, or network server:

Select an image in the Insert Picture dialog box and click the Insert button.
- Select Stock Images to choose Stock Images, Icons, Cutout People, Stickers, and Illustrations from the stock image library:

Select one or several objects (see the number near the Insert label) and click the Insert button.
- Select Online Pictures to find and insert images from Bing, Microsoft’s search engine, or OneDrive:
Select one or a few objects (see the number near the Insert label) and click the Insert button.


Note: Another option is to insert the image as a linked object that creates a link between the document and the external image but does not embed the image in the Word document. Using linked objects can help minimize the file size of the final document while preserving images, photographs, and other objects that can take up storage space. However, if image files are not available when you open a Word document, the images are not displayed. This option is not recommended to create documents distributed to other users, as they may not access the images.
When you click on a picture, Word shows the Picture Format tab:

Using features from that tab, you can:
- Adjust picture characteristics:
- Remove the background by designating either the areas you want to keep or those you want to remove
- Sharpen, soften, and adjust the brightness of images for better printing or on-screen presentation
- Apply different color masks to achieve antiquing, sepia tone, grayscale, and a variety of other color effects
- Choose one of 23 special effects, such as pencil sketch, blurring, charcoal sketch, paint strokes, and others
- Apply effects such as shadows, reflections, and borders; or apply combinations of these effects
- Choose a picture transparency
- Compress the pictures in the document
- Format picture by using predefined picture styles or choosing some of the proposed features such as shape and orientation, borders, and other effects
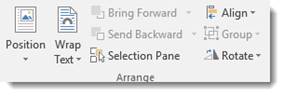
- Arrange the picture to specify its relationship to the page and other elements on the page
- Crop the parts of the picture or crop the picture to a shape
- Resize, scale, and rotate the picture by using its sizing handles or appropriate fields in the Layout dialog box (see below)
- Position the object in any of several predefined locations on the page
- Specify how other text should wrap around the object.
Resize an image
To resize a picture, select it and do one of the following:
- On the Picture Format tab, in the Size group, change the Height and Width for the picture in the appropriate fields:

- Click and drag the side sizing handles to stretch it horizontally or vertically:


Scale an image
To scale a picture, select it and do one of the following:
- On the Picture Format tab, in the Size group, click the dialog box launcher:
- Click and drag one of the corner sizing handles to maintain the image’s current shape. The image will change size while keeping the same proportions:
- Open the Layout dialog box by one of the methods:
- On the Picture Format tab, in the Size group, click the dialog box launcher.
- Right-click the selected picture and choose Size and Position… in the popup menu:


In the Layout dialog box, on the Size tab, in the Scale section:

- Rescale the picture by changing the height and width percentages.
- Select the Lock aspect ratio check box (selected by default) to scale the picture by height and width using the same percentage.
Deselect the Lock aspect ratio check box to scale height and width separately.
- Select the Relative to original picture size check box (selected by default) to scale the picture height and width as percentages of the original size.
Note: See the picture’s original size in the Original size section.
Rotate an image
To rotate a picture, do one of the following:
- Click and drag the rotation handle at the top of the border:

- Open the Layout dialog box by one of the methods:
- On the Picture Format tab, in the Size group, click the dialog box launcher.
- Right-click the selected picture and choose Size and Position… in the popup menu.
In the Layout dialog box, on the Size tab, select or type a rotation in the Rotation field.

Hide and display images on the page
The picture can be hidden using the Selection pane (see how to open it). For example, Picture 6:

To hide the picture, click the Showing icon ![]() to the right of the object name. After clicking that icon, it will change to a simple icon indicating that the object is Hidden
to the right of the object name. After clicking that icon, it will change to a simple icon indicating that the object is Hidden ![]() from view. To show the object once again, click the Hidden icon
from view. To show the object once again, click the Hidden icon ![]() , and it will reappear.
, and it will reappear.
Note: You can hide all images in the document by changing global Word options:

See Hiding pictures for more details.
Copy the formatting
To copy the formatting of one picture to another picture, do the following:
1. Select the formatted picture, which formatting you need to copy.
2. On the Home tab, in the Clipboard group, click the Format Painter button:

3. Click another picture to apply the color adjustments, color corrections, or picture style from the first picture.
Add an Alternative text for images
The Alternative text (Alt text) for pictures is a common requirement. By default, Word generates Alt text for all inserted pictures (see how to turn off that feature).
Alt text is:
- Read aloud when a screen reader will encounter such an image.
- Shown if there are some problems with displaying an image.
You can see the generated Alt text at the bottom of the object immediately after inserting it in a document:

or

To change or add Alt text to a picture, do the following:
1. Select the picture.
2. Open the Alt text pane by doing one of the following:
- On the Picture Format tab, in the Accessibility group, click the Alt Text button:

- Right-click and choose Edit Alt Text… in the popup menu:
- On the Review tab, in the Accessibility group, click the Check Accessibility button, then choose Alt Text:


3. On the Alt Text pane:

- Modify or enter an Alt text you need.
Alt text should briefly describe the purpose or content of the image, photo, icon, table, or equation. It is recommended to use no more than 15 words.
- Select the Mark as decorative check box if the picture is purely decorative and does not provide helpful information for the document content.
Note: If the option for automatic generation of Alt text for pictures is turned on (see how to turn on and turn off that feature), after modifying a generated Alt text, you can regenerate it by clicking the Generate a description for me:

See also how to create picture captions.
 Please Note:
This article is written for users of the following Microsoft Word versions: 2007, 2010, 2013, and 2016. If you are using an earlier version (Word 2003 or earlier), this tip may not work for you. For a version of this tip written specifically for earlier versions of Word, click here: Making Pictures Show in Word.
![]()
Written by Allen Wyatt (last updated April 29, 2020)
This tip applies to Word 2007, 2010, 2013, and 2016
Have you ever placed a picture in your Word document, only to have the picture not be visible when you are later working in the document? This seems to be a common occurrence, and there are several reasons for this.
Word uses a «layered» approach to documents. Each document has several different layers. You are probably most familiar with the text layer, in which your text actually resides. There are two other layers, as well. First is the header/footer layer, which contains both the header and footer information that appears on every page in your final document. The other layer is the drawing layer, which contains graphic objects.
In reality, text can appear in all three layers of your document. For instance, headers and footers are composed primarily of text—text obviously appears in the text layer, and text boxes can appear in the graphics layer.
Similarly, graphics can appear on all three layers. People don’t normally place graphics on the header/footer layer, but they can. Graphics are much more common on both the text layer and the graphics layer. If you place an inline graphic in your document, it is on the text layer; if you place a floating graphic in your document, then it is on the graphics layer.
What does this discussion about layers have to do with whether pictures show up in Word? There are a number of ways to view your document, each accessible from the ribbon tools or by clicking on one of the View buttons that may be visible on the status bar, just below your document. Most people do their writing and editing in Draft or Print Layout views. If you are using Draft view, Word displays only the contents of the text layer of your document. Thus, any pictures residing in the header/footer layer or, more commonly, on the drawing layer are not visible. In order to see the pictures on these other layers, you need to switch to Print Layout view. Of course, some pictures are visible when working on your document in Draft view. Why? Because some pictures—inline pictures—are stored on the text layer, and this is the layer being displayed.
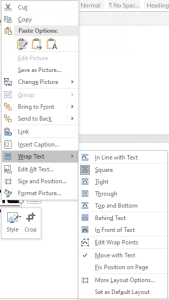
You can switch a drawing from the drawing layer to the text layer (or vice versa) by changing whether it is floating or inline. The easiest way to do this is to right-click on the picture to display a Context menu. The Text Wrapping option (Word 2007) or the Wrap Text option (Word 2010, 2013, and 2016) provide different options, including In Line with Text.
Note that you can switch a drawing to the text layer (make it In Line with Text) only if it is a picture that you placed in your document. If it is a graphic object that you created with the Shapes tool on the Insert tab of the ribbon, you cannot do this; the In Line with Text option is not available. Graphic objects such as these can only reside on the drawing layer. This is why Word switches to Print Layout view whenever you choose to insert drawing objects in your document—it knows that these are only visible in Print Layout view.
Despite the foregoing explanation, there are other settings in Word that can affect the visibility of graphics in a document. If you cannot see a drawing that you believe should be visible, you may want to check these:
- Display the Word Options dialog box. (In Word 2007 click the Office button and then click Word Options. In Word 2010 and later versions display the File tab of the ribbon and then click Options.)
- Click Advanced at the left side of the screen.
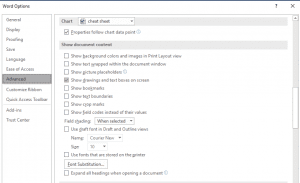
- Scroll through the advanced options until you see the Show Document Content section. (See Figure 1.)
- Note the Show Picture Placeholders check box. This check box controls whether Word displays any drawings, regardless of the layer on which they reside. If selected, then Word shows a «placeholder» for the graphic, but not the graphic itself. Set this check box according to your desires.
- Note the Show Drawings and Text Boxes On Screen check box. This check box controls whether drawings are displayed or not when using Print Layout and Web Layout views; set it according to your desires.
- When done, click OK to close the dialog box.
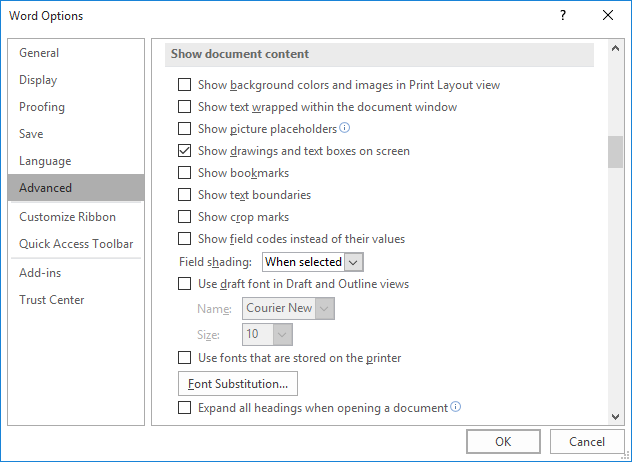
Figure 1. The advanced options of the Word Options dialog box.
Another thing to remember is that Word treats different types of graphics differently when displaying them. For instance, if you are placing an EPS graphic in your document, and the graphic was not saved with a «preview,» then Word won’t display it, but will instead display a gray box that shows where the graphic will print. This type of behavior illustrates that graphic filters can affect what you see in a document.
WordTips is your source for cost-effective Microsoft Word training.
(Microsoft Word is the most popular word processing software in the world.)
This tip (5964) applies to Microsoft Word 2007, 2010, 2013, and 2016. You can find a version of this tip for the older menu interface of Word here: Making Pictures Show in Word.
Author Bio
With more than 50 non-fiction books and numerous magazine articles to his credit, Allen Wyatt is an internationally recognized author. He is president of Sharon Parq Associates, a computer and publishing services company. Learn more about Allen…
MORE FROM ALLEN
How Excel Treats Disk Files
Workbooks are loaded from disk files, but workbooks aren’t the only type of files that Excel can load. This tip provides …
Discover More
Determining the Number of Paragraphs in a Document
When using a macro to process a document in some way, you often need to know the number of paragraphs in the document. …
Discover More
Debugging a Macro
Part of writing macros is to make sure they work as you expect. This involves a process known as debugging. Here’s how …
Discover More
Asked by: Bernadine Simonis
Score: 5/5
(52 votes)
Click the Microsoft Office Button, and then click Word Options. Click Advanced. Under Display document content, click to clear the Picture Placeholders check box. Click OK.
How do you fix images not showing up when you paste it in Microsoft Word?
Let’s try the following suggestions, please:
- Open Office Word.
- Click on File > Options.
- Under Display tab, check the box for Print drawings created in Word.
- Under Advanced tab, look for Show document content. Uncheck the Show picture placeholders box and check the Show drawings and text boxes on screen box.
Why are my pictures not showing up on Microsoft Word 365?
1. Go to File > Options > Advanced > Show document content, check the box of Show background colors and images in Print Layout view, and uncheck the box of Show picture placeholders. 2. Run Word in the safe mode to have a check.
Which view in MS Word can’t display graphics?
On the View tab of the Ribbon or on the status bar, choose Print Layout view. Wrapped graphics don’t display in Draft view. Go to Office Button | Word Options | Advanced: Show document content and make sure that “Show drawings and text boxes on screen” is checked and that “Show picture placeholders” is not checked.
Why is word not letting me insert a picture?
If you can’t select Pictures from the Insert tab on the ribbon, your message is probably in plain text format. In Word, click on But it wont let me move pictures. Navigate to the location of the image file, select it, then select “Insert.” The image will now be inserted.
31 related questions found
Why are images not displaying in Word?
Microsoft Word – Pictures Not Showing. If you are using Word and you see white rectangles instead of images in your documents, you might have “Show picture placeholders” set. Scroll down, and then under “Show document content” uncheck “Show picture placeholders”. Click OK.
How do I unhide a picture in Word?
Open Microsoft Word. Go to File > Options > Advanced Tab. In the Advanced tab, enable the Show picture placeholders check box under the Show document content group. Click OK on the dialog to save the setting and come back to your document.
How do I fix a picture in Word?
Select a picture. Select the Layout Options icon. To bring your picture in front of the text and set it so it stays at a certain spot on the page, select In Front of Text (under With Text Wrapping), and then select Fix position on page.
Why is my text not showing in Word?
If all your text appeas/disappears when you click on the «Show/Hide» button, the suggests you have applied the hidden text attribute to all of your document. Either you did this by selecting the whole document, <CTL><A>, and applying the hidden text attribut, <CTL><H>.
How do I reset Microsoft Word to default settings?
Unfortunately, there is no button in Word to reset the program to its default settings. However, you can rename Word’s global template to see if that fixes its problems. If Word continues to have issues or it runs very slow, another option is to delete Word’s registry key.
Where is show picture placeholders in Word?
To turn on picture placeholders, follow these steps:
- Display the Word Options dialog box. …
- Click Advanced at the left side of the dialog box.
- Scroll down to the Show Document Content section. …
- Click to turn on the Show Picture Placeholders check box.
- Click on OK.
How do I add a tooltip in Word?
Adding a ScreenTip
- Press Ctrl+K. Word displays the Insert Hyperlink dialog box. …
- Click on the ScreenTip button. …
- In the ScreenTip Text box, enter the text you want to use for your ScreenTip.
- Click on OK to close the dialog box.
- Set any other hyperlink values, as desired.
- When completed, click on OK.
How do I fix pictures not displaying?
How do I fix a broken image icon in Chrome?
- Check if the Show all images option is selected. …
- Try a different browser. …
- Switch on JavaScript. …
- Switch off your extensions. …
- Check your antivirus. …
- Clear Google Chrome’s Cache. …
- Reset the Browser. …
- Use Google’s DNS.
How do I enable shapes in Word?
(Word for the web doesn’t support shapes.) To add a shape, select Insert on the ribbon, select Shapes, and then choose a shape. After you add a shape, you can move it and resize it; add text, bullets, or numbering; and you can change the fill color or outline.
Where is the Protect option in Microsoft Word 2010?
1From the File tab menu, choose Info.
Click the Protect Document button to open the Protect Document menu. You have several choices, including Mark As Final, Encrypt with Password, and Restrict Editing.
How do you make a picture transparent in Word 2016?
Make part of a picture transparent
- Select the picture, and go to Picture Format > Color or Picture Tools > Format > Color.
- Select Set Transparent Color.
- When the pointer changes, select the color you want to make transparent.
Where is layout options in Word?
The layout options and compatibility options in Word 2007 and later versions are found near the bottom of the Word Options dialog box > Advanced category. This illustration shows the options found in Word 2013, 2016, 2019, and Word for Microsoft 365.
How can I freely move a picture in Word?
Double-click the picture to add it to your Word document. Back on Word’s editing screen, right-click the image that you just added and select Wrap Text > In Front of Text from the menu. Your picture is now freely movable. Drag and drop it anywhere you want in your document.
How do I view hidden pictures?
Go to the folder you want to search by tapping the folder’s location (e.g., Internal storage) and then tapping the folder, then search for images that have been hidden. Hidden files, including pictures, will appear transparent when compared to other non-hidden files.
How do I find hidden shapes in Word?
Follow these steps:
- Display the Word Options dialog box. …
- Click Advanced at the left side of the dialog box.
- Scroll through the options until you can see the Show Document Content section. …
- Make sure the Show Picture Placeholders check box is cleared.
How do I find hidden links in Word?
Office 365 — Word — how to find and highlight all hyperlinks in documents
- Press Alt + F9 to display the fields.
- Ctrl + F to open the search box.
- Search: ^d hyperlink.
- In main doc – find all.
- Check «Highlight all items found …»
- Click on the Find All button.
- Close the dialog.
Where is the Office button in Word?
The Office button is found in the top-left corner of Excel, Word, and other Office 2007 program windows and looks like the picture. When the Office button is clicked, many of the same options you’d see in the file menu, such as New, Open, Save, Print, etc., can be found.
Why are my images not showing up in my PowerPoint?
Make sure you have the latest Office Updates installed. Try going to File > Save As and save your file to a different location. Close PowerPoint and reopen the file to see if your pictures display properly. … For example, you may be prompted to install a graphics filter to view the picture or clip.
What is gutter margin?
A gutter margin adds extra space to the side margin, top margin, or inside margins of a document that you plan to bind. A gutter margin helps ensure that text isn’t obscured by the binding. … In the Gutter box, enter a width for the gutter margin. In the Gutter position box, click Left or Top.

Documents wouldn’t be complete if you couldn’t add images and graphics. You can even add graphs that you’ve created in Microsoft Excel to Word documents, because any Microsoft product works well with the developer’s other products. Whether it’s graphs or pictures, you can copy and paste them to your documents but usually you’ll need to format them to work with other text in the document.
Adding Pictures to a Document
Word supports insert images from either the Internet or your local computer. If you’re able to copy an image, you can paste it to your document. You can use your own images stored on your computer, or you can copy an image from the Internet and use it in your document. Before you copy an image from the Internet, ensure that the owner offers free use without attribution or payment. Some image owners require payment before you can use them either on your site or in private documents.
To copy an image from the Internet, open your browser and go to the web page that contains the image that you want to copy. Right click the image and select «Copy» (the wording in the context menu is slightly different across browsers). When you copy an image from a web page, it gets copied to your clipboard, which runs in the background of your computer and isn’t visible from the desktop.
Go back to your document and click the section of the document where you want to paste the image. Right click the document and select «Paste.» The image is pasted to your document, but it still must be formatted for your text. We’ll discuss formatting a picture after explaining how to insert an image from Microsoft Word’s long list of freely usable clipart available from Microsoft Office software.
(Illustration controls menu)
Notice from the list of options that you can add pictures located online or locally, but you can also add shapes, icons, models charts and even screenshots. Word has several options for image insertion into your documents. Inserting the different types of images and shapes is the similar for each control.
First, let’s take a look at the «Picture» option. A window opens asking you to select an image. Double click the image and it displays in your document. What if you need ideas for an image or don’t have one of your own? You can use Microsoft’s online search for images located in the cloud.
Click the «Online Pictures» button. This time, a window opens with an online search prompt.
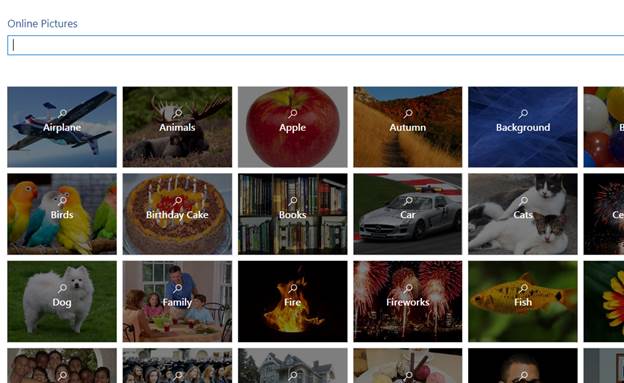
(Online picture search)
Word’s online picture search is powered by Bing, so you might notice some images should you also perform a Bing search. Notice how the images are categorized. You can click one of these categories to view a list of available images related to the category. For instance, click the «Apple» category.
(Apple category image search)
When you click the «Apple» category, several images display. Clipart, photography and even the Apple technology company’s logo is displayed. Microsoft’s online image search gives you a large sample of possible images that you can use, but you aren’t limited to just category searches.
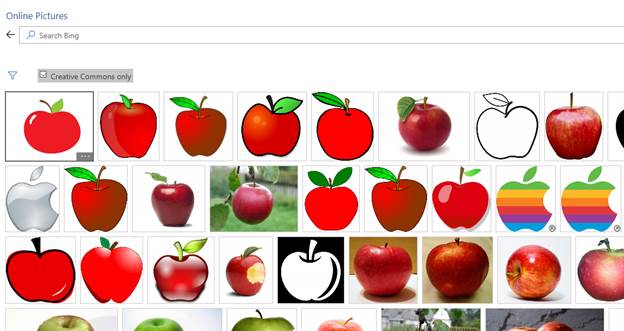
At the top of the image search, you see a «Search Bing» input text box. Type any phrase into this text box and press «Enter.» Word searches Bing to find images related to your search and displays them.
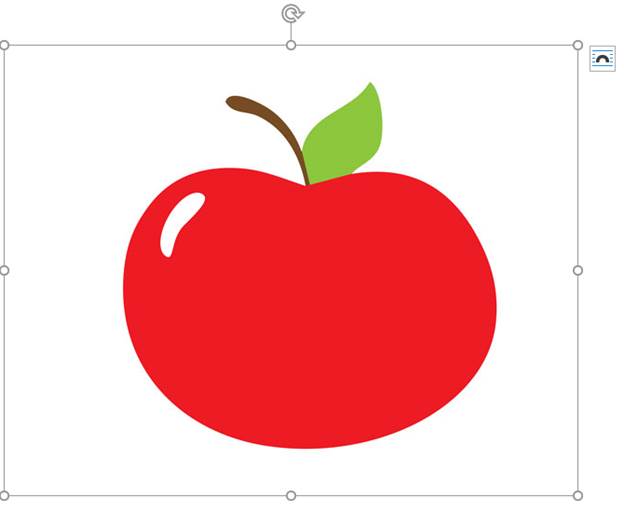
Double click an image that you want to include in your document, and Microsoft transfers it from the online search window to your document. In this example, an apple image is added to the document.
(Apple image added to document)
Notice that the image has a border around it with an arrow at the top and an icon in the upper-right corner. These prompts are significant as they provide ways to configure the way the image looks in your document.
The borders around the image with circles located on each line lets you resize the image. Using the corner circles, you can resize the image on all sizes to avoid skewing the way the image looks in the document.
The arrow at the top lets you rotate it. You can rotate it to the left or right. Click the arrow and then move your cursor in the direction that you want to set the rotation. After you rotate the image, release your hold on the mouse and it will display in your document.
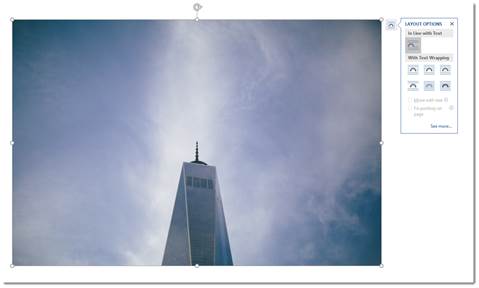
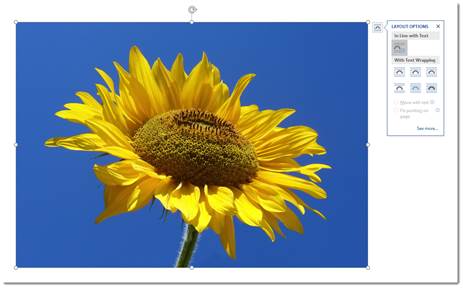
The most important part of formatting an image is setting text to flow around it. Word has several options for this style. You can get to it by clicking the «Layout Options» icon in the upper-right corner of the image. A menu opens that displays the text formatting and wrapping of content around the image.
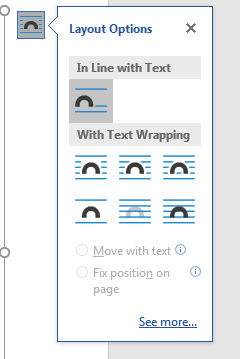
(Layout text options)
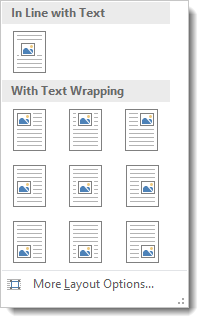
The default layout is highlighted in the image above. It’s «Inline with text» sets an image to work similarly like text on the page. The text that you place in the document does not wrap around the image but rather treats it like text albeit large text within the paragraph. This default is enough for an image placed within text without the need for text wrapping, but you have other options that can be seen in the menu.
The way text wraps around an image can be seen in the icons in the Layout Options menu. You can even have text flow over or under an image. Hover your mouse over each option and review the text that displays in the popup. The text that displays indicates the way text will align with the image. For instance, select «Tight» and text will wrap and flow around the image without creating a carriage return and line feed within the document. This option will show text similarly to when you view a web page with an image that has text flow around it without creating any page breaks.
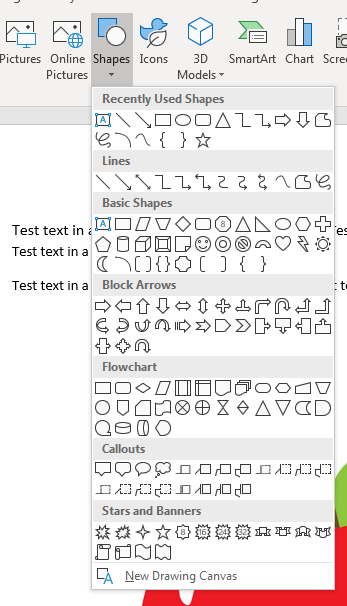
Inserting Shapes
Microsoft Word has a number of shapes that you can add to your documents. These shapes are beneficial for workflows and charts that require simple shapes. Click the «Shapes» menu option and a list of shapes that can be included in your documents is displayed.
(List of shapes available in Word)
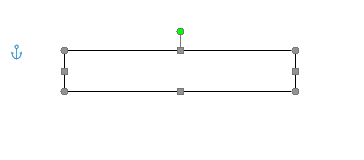
Any of these shapes can be added to your Word document by clicking the menu item. After you click the menu item, your cursor changes to prompt you to draw the same. For instance, click the rectangular icon in the «Recently Used Shapes» section. The cursor changes to a cross icon prompting you to draw the rectangle. Go to your document and draw the rectangle on your document and it’s drawn once you release the cursor.
(Inserted shape)
Notice that the inserted shape also has points along each line and at the corners. These points are where you can resize and reshape the rectangle. Each shape that you add to your document can be resized by clicking these points and dragging the mouse to make the shape larger or smaller. The anchor is used to lock the object to the document and text surrounding it. In the image above, no text is surrounding the shape, but should you have text around it, you can use the anchor to determine the way text is formatted around the shape.
View the other options in the Illustrations category and you can insert these additional images and shapes. For instance, the «Icons» button will open a window similar to the «Online Pictures» button where you can search and view icon images to insert into your document. The other options in this menu list work similarly. You just need to determine what type of image that you want to add to your file.
Use these menu items to insert any images that you want to add to your documentation. You can use either Word images included with your installation or ones that you store on your local hard drive.
Crop a Picture
When you crop a picture, you cut away the outer edge of the picture to create a new version.
Let’s crop the picture below.
Click on the image to select it. You will see a bounding box around the image.
Right click on the image, and you’ll see the Crop option in the menu. We’ve highlighted it below.
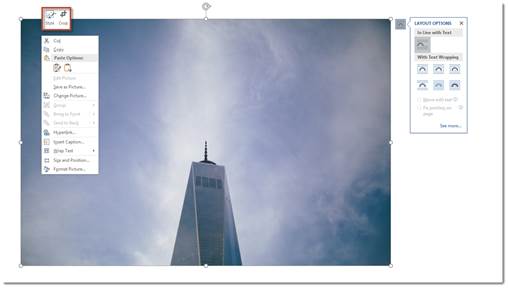
Click Crop.
You’ll now see crop marks around the image – at all four corners and on each side. These are the black marks. Click and drag your mouse on any of these marks. Click and drag inward on the image until you have cropped away the area you want to get rid of in the image.
The area you’re cropping away is shaded in gray.
Click outside of the image and gray area to remove the cropped area.
NOTE: You can also click on the Insert tab after you’ve selected the image, and go to Crop>Crop.
Color
You can easily adjust the color of any image you place in your documents.
To do this, double click on the image.
You’ll then see the Picture Tools Format Tab.

Click the Color button.
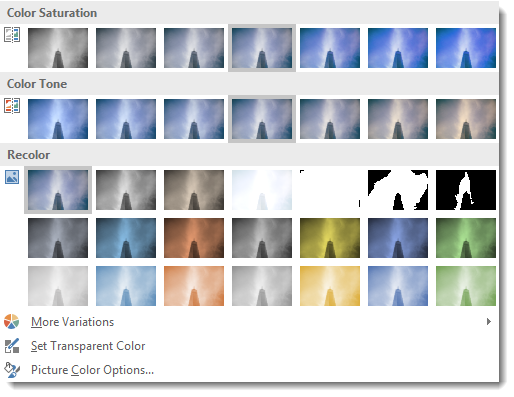
Choose the color effect you want to apply to your image.
Color Correction
You can also adjust and modify the colors in your image through color correction. Once again, go to the Picture Tools Format tab by double clicking your image.
Click the Corrections button.
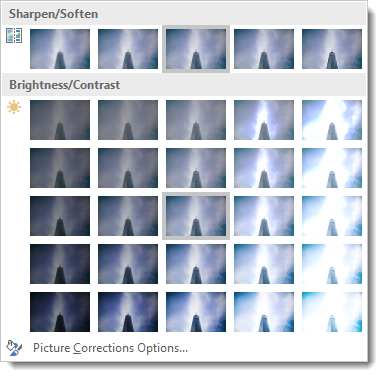
Choose a color correction.
Artistic Effects
Just as you can use Photoshop and other photo editing software programs to add effects to your images, you can also use Word for this.
Double click your picture to bring up the Format tab, then click the Artistic Effects button.

Choose the artistic effect that you want to apply to your image.
Removing Backgrounds from Images
Although Microsoft Word is a word processing program, it also offers some photo editing tools, as we’ve already seen in this lesson. Perhaps one of the most useful photo editing tools found in Word is the background removal tool. This tool allows you to remove backgrounds from your images.
We are going to remove the background from our image:
To use this tool, double click on the image for which you want to remove the background. Click on the Remove Background button in the Adjust group under the Picture Tools Format tab.
When you click the Remove Background button, you will see the Background Removal tab appear on the Ribbon. Your image’s background – and possibly your image – will also change colors. Don’t worry. This is temporary.
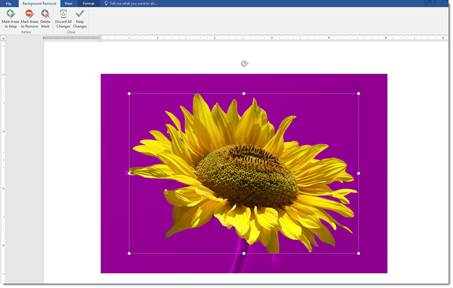
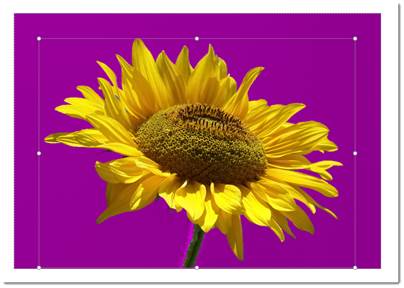
The areas that appear in purple are the areas that Word has determined are background areas that it needs to remove. If there is purple on any areas of your image that you want to keep, you can drag the handles of the bounding box that appears over the image. Drag the handles outward to keep more of the image.
In the snapshot above, you can see that the stem of the flower and part of a petal appear purple. If we leave them purple, they will be removed from the image. We can drag the hands of the bounding box to fix this, as pictured below.
After you adjust the bounding box, if there are still areas of your image that are purple that are not supposed to be purple, go to the Background Removal tab in the Ribbon. Remember, any areas that are purple are considered background areas by Word.
Click the Mark Areas to Keep button.
Your cursor will turn into a pencil.
Simply click on an area that you want to keep.
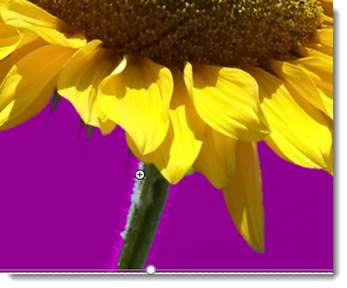
As shown in the snapshot above, a plus sign appears where you clicked. If you look at our previous snapshot, you can see this area used to be purple, but by clicking on it, it’s restored to its original color.
We can now click on all areas we want to keep.
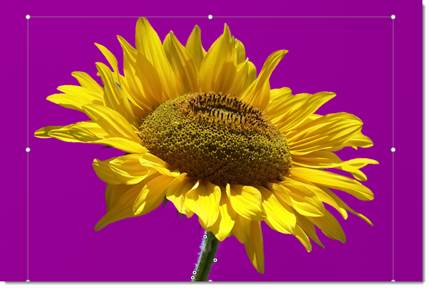
You can also mark areas of your image for removal. It’s quite possible that Word will not detect all background areas, so those areas will not appear purple. To mark areas you want the tool to remove, go to the Ribbon and click Mark Areas to Remove.
Click on the areas to remove just as you clicked on the areas you wanted to keep. However, this time, those areas will turn purple.
When you’re finished, click the Keep Changes button in the Ribbon.
Wrap and Position Text around Images
Word can also wrap paragraphs around a picture, charts and graphs as in the example below.
To wrap text around a picture or art object, double click on the image. The Format tab will appear in the Ribbon. Go to the Arrange group.
In the Arrange group, click Position to view the dropdown menu.
In the dropdown menu, you will see thumbnail-sized illustrations of documents with images in them. The location of the image in the illustration shows you where your image will be placed in relation to your text.
To wrap text around an image, click the Wrap Text button to wrap the text around an image. When you click the button, the following dropdown menu will appear:
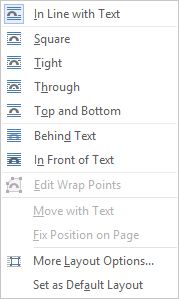
-
Square means your image sits on the same plane as the text. The text flows around the image in a square pattern.
-
Tight text flows around the image, hugging its shape. If you insert a circular shape, the text will take a circular pattern around the text.
-
Through means that the text will flow around the image as best as possible.
-
Top and Bottom means text will appear on top of the image and at the bottom.
-
Behind Text means the image is behind the text. The image looks like it is part of the paper.
-
In Front of Text means the image is on top of your text. It’s the same as if you printed a document and dropped a photograph on top of it.
You can lock an image to text so that if you move the text, the image moves also. To do this, click the Text Wrapping button, choose More Layout Options. Under the Position tab select Move Object with Text.
NOTE: You can also wrap text around an image as soon as you insert it into your document without having to go to the Ribbon. Look at the text wrap icon in the snapshot below. Clicking on it reveals the Layout Options menu.

WordArt
WordArt is a very popular feature in Word. To use WordArt, go to the Text group under the Insert tab.
The WordArt button looks like this:
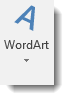
When you click the downward arrow, you’ll see the WordArt menu:

Select the way you want your text to look and click on it.
You can now format WordArt the same way you did shapes and images.
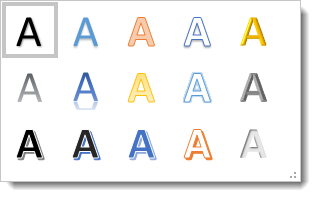
Insert Video
You can insert videos into your documents just as easily as you can insert images. To insert a video, go to the Insert tab and click the Online Video button in the Media group.
You can insert videos by searching for them on Bing, from a video embed code that you find on video webpages such as YouTube, and even from YouTube itself.
Let’s search for a video of a cat on Bing.
Type «cat» into the Bing Video Search field.
You will then see the search results appear.
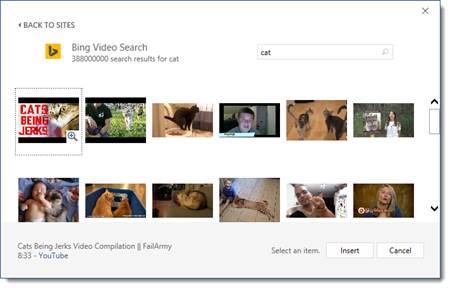
Click on a thumbnail of a video to select it, then click the Insert button.
The video is inserted into your document.
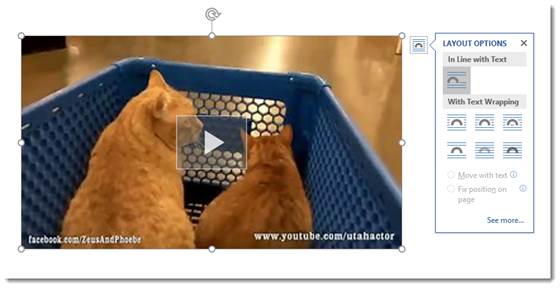
You can then rotate, resize, and position the video just as you would an image.
Formatting ClipArt and Pictures Using the Picture Tools and Format Ribbon
Whenever a picture is inserted or selected, the Format tab will automatically appear as a tab in the Ribbon. It provides you with a few of the most commonly used features available in image editing software like Photoshop. You can change the contrast, add artistic effects, remove backgrounds, or crop them. To view the Format tab, select a picture by double clicking on it.

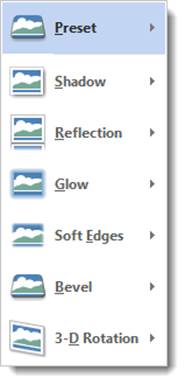
In the center of this ribbon, you’ll see styles you can add to pictures. You can add frames, drop shadows, reflections, etc.

You can also add your own formatting to your images. Remember, a style is just a chunk of formatting heaped together.
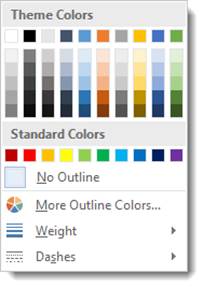
To add formatting to your picture, you can click the Picture Border, Picture Effects, or Picture Layout, as shown below. These are located in the Styles group under the Format tab.
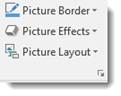
When you add a picture border, you can choose the color of the border, the weight (or thickness) of the line, and even the type of line (dashed, etc.).
If you remember, earlier in this course you learned how to add text effects such as shadows and reflections. You can also add these to your pictures by clicking on Picture Effects.
If you choose Picture Layout, you can format your picture with a caption or more information.
Here are the choices when you click Picture Layout:
Choose the layout you want to use. We chose:

Word also provides a box where we can enter the caption:
NOTE: You can also right click on an image and select Add Caption. The method above gives your image additional formatting.
Using the Screenshot Tool
The screenshot feature was new with Word 2010. It gives you the ability take a screenshot and have it appear instantly in your documents. To use this feature, position the cursor in the place you want the screenshot to appear. Select the Insert tab and click the Screenshot button. It looks like this:

Be aware though, that this feature is somewhat limited, allowing you to only take screenshots of active windows. Windows that have been minimized to the taskbar will not be available. When we click the Screenshot button, we’ll see a list of the windows that are available, as in the following example.
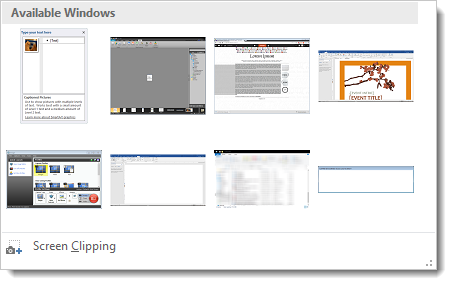
Selecting an available window will take a screenshot of the entire thing and insert it into your document. You can then use the Format ribbon to crop the screenshot or change other attributes.
If you do not want to take a screenshot of the entire window, you can select the Screen Clipping command at the bottom of the window.
When you select the Screen Clipping command, the entire window will be opaque. Click the left mouse button and drag the pointer over the area you want to capture. This selected area will become clear. Release the mouse to capture the screenshot, and it will automatically appear in your document.
Using SmartArt and SmartArt Tools
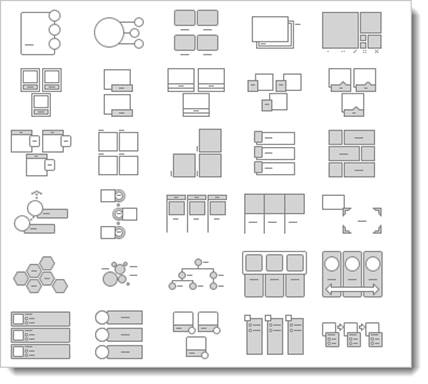
According to Microsoft, SmartArt is a quick and convenient way to create a visual representation of the information in your document. That’s a mouthful, isn’t it? What they really mean is it’s a quick and convenient way to create flow charts. The following is an example of an available SmartArt template.
The SmartArt button is located on the Illustrations section of the Insert tab. It looks like this:

Click it and a dialogue box opens. It gives you a different categories of SmartArt to choose froom. There are lists, processes, cycles, hierarchys, etc.
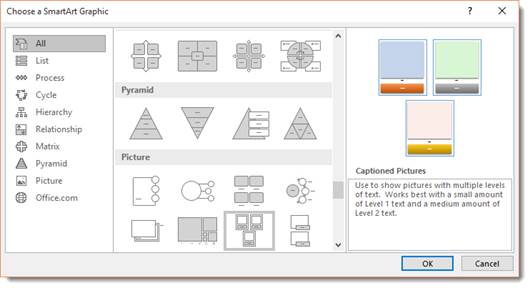
If you have access to Word, take a moment to explore the different SmartArt graphics available in each section. Seeing them all for yourself will give you the best exposure to all of the possibilities. You can even click «Office.com» and find SmartArt graphics that were created by other Office users.
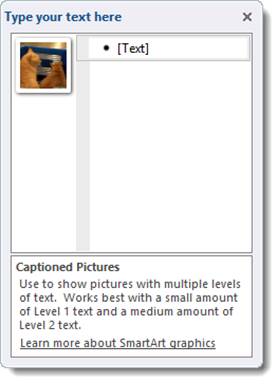
When you’ve found a SmartArt graphic that you like, select it and click OK.
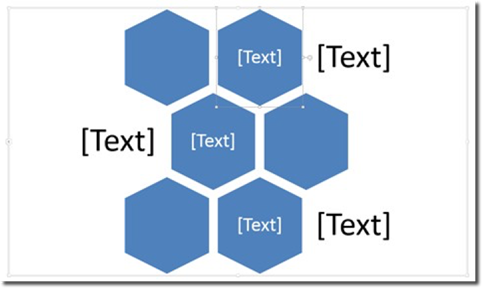
When the graphic opens in your document, or when it is selected, a pane opens up beside it. You can either click the areas marked [Text] in the graphic or in the pane. Click on these, then type your text. In some templates, you can also insert pictures.
Inserting Charts
To insert a chart, navigate to the Insert tab and click the Chart button. It looks like this:

The Insert Chart dialogue will open.

The chart types are arranged along the left side of the window.
Select the chart you want to use, then click OK.
If Microsoft Excel is installed on your computer, it will also open with your chart. You can input data into Excel which will then be conveyed by your chart.
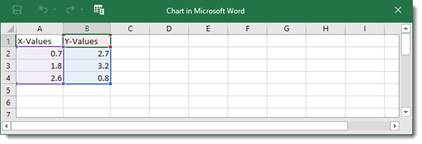
Chart Types
Word brings with it some new chart types to help you better illustrate data that you include in your documents.
These chart types include:
- Treemap. A treemap chart displays hierarchically structured data. The data appears as rectangles that contain other rectangles. A set of rectangles on the save level in the hierarchy equal a column or an expression. Individual rectangles on the same level equal a category in a column. For example, a rectangle that represents a state may contain other rectangles that represent cities in that state.
- Waterfall. As explained by Microsoft, «Waterfall charts are ideal for showing how you have arrived at a net value, by breaking down the cumulative effect of positive and negative contributions. This is very helpful for many different scenarios, from visualizing financial statements to navigating data about population, births and deaths».
- Pareto. A Pareto chart contains both bars and a line graph. Individual values are represented by bars. The cumulative total is represented by the line.
- Histogram. A histogram chart displays numerical data in bins. The bins are represented by bars. It’s used for continuous data.
- Box and Whisker. A Box and Whisker chart, as explained by Microsoft, is «A box and whisker chart shows distribution of data into quartiles, highlighting the mean and outliers. The boxes may have lines extending vertically called ‘whiskers’. These lines indicate variability outside the upper and lower quartiles, and any point outside those lines or whiskers is considered an outlier.»
- Sunburst. A sunburst chart is a pie chart that shows relational datasets. The inner rings of the chart relate to the outer rings. It’s a hierarchal chart with the inner rings at the top of the hierarchy.
Using the Chart Tools
Whenever you insert a new chart into your document, the Chart Design and Chart Format tabs will open, as pictured below.
This is the Chart Design tab. By default, it’s the tab you’ll see.

You can also click on the chart Format tab, to the right of the Chart Design tab.

Let’s take a look at the chart tools available on the Design tab.

Just like in the text ribbon, you have a choice of Chart Quick Styles. You can apply them just like you would with text, paragraphs, and pictures.
Use the Chart Layouts group on the Ribbon to add chart elements or change the layout.
Now look at the Type and Data Sections. The data section lets us select an existing data set, or edit one.
With these, we can change the chart type, switch rows to columns or vice versa, select, and edit data. Say, for example, that after we entered our data, we realized that maybe a pie chart wasn’t the right way to convey it. We’ve decided instead to use a graph chart. To do so, we’d click the Change Chart Type button and select a new chart.
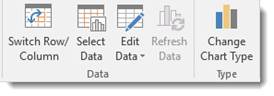
Now let’s take a look at the Format tab for charts:

Use the Current Selection group to change the formatting of the current selection.
Use the Insert Shapes group to add and insert shapes. Use the Shape Styles section to change the style of your shapes. You can also change WordArt styles that appear in your chart.
The Arrange group lets you arrange your data and images, including text wrap and position.
The Size group allows you to adjust the size of your chart (in inches).
- На главную
- Категории
- Программы
- Microsoft Word
- Работа с картинками в Word
Возможности Microsoft Word не ограничиваются созданием и редактированием текстовых документов. Программа имеет неплохой набор инструментов для работы с графикой – можно не только добавлять рисунки и фото в текст, но и изменять их.
2020-09-24 19:39:47167

Возможности Microsoft Word не ограничиваются созданием и редактированием текстовых документов. Программа имеет неплохой набор инструментов для работы с графикой – можно не только добавлять рисунки и фото в текст, но и изменять их.
Как в Word вставить картинку
Некоторые графические элементы – таблицы, диаграммы, фигуры, надписи – легко создать непосредственно в Word или импортировать из других программ.
В документ можно вставить изображение любого формата, включая bmp, gif, jpeg, tiff, qtif, emf, wmf. Это легко и просто осуществить несколькими способами.
Способ 1
- Открыть папку, в которой расположен рисунок.
- Выделить его, кликнув левой кнопкой мышки.

- Нажать на клавиатуре комбинацию клавиш Ctrl+C.
- Перейти в документ. Установить курсор в той части страницы, куда будет добавлено изображение.
- Нажать сочетание клавиш Ctrl+V.

Способ 2
- Открыть рисунок в графическом редакторе (Microsoft Office, встроенное средство Windows или любом другом) и скопировать его. Либо найти нужное изображение в интернете, открыть его в новой вкладке. Клацнуть по нему правой кнопкой мышки и выбрать опцию «Копировать картинку».
- В документе установить курсор, щелкнуть правой кнопкой мышки и выбрать параметр вставки. Но проще всего использовать комбинацию Ctrl+V.

Способ 3
- Установить курсор в том месте, куда будет добавлено изображение.
- Перейти на вкладку «Вставка» и выбрать «Рисунок
- В открывшемся окне указать путь расположения графического объекта.
- Выделить его и нажать кнопку «Вставить» или дважды щелкнуть по нему левой кнопкой мышки.
Способ 4
Можно добавить изображение из коллекции Microsoft, которая очень обширна:
- Поставить курсор в нужном месте документа.
- Во вкладке «Вставка» выбрать инструмент «Картинка».
- Справа отобразится панель поиска. Отметить галочкой пункт «Включить контент сайта Office».
- В поисковую строку ввести название, нажать «Enter» или кнопку «Начать».
- Выбрать изображение и кликнуть по нему.
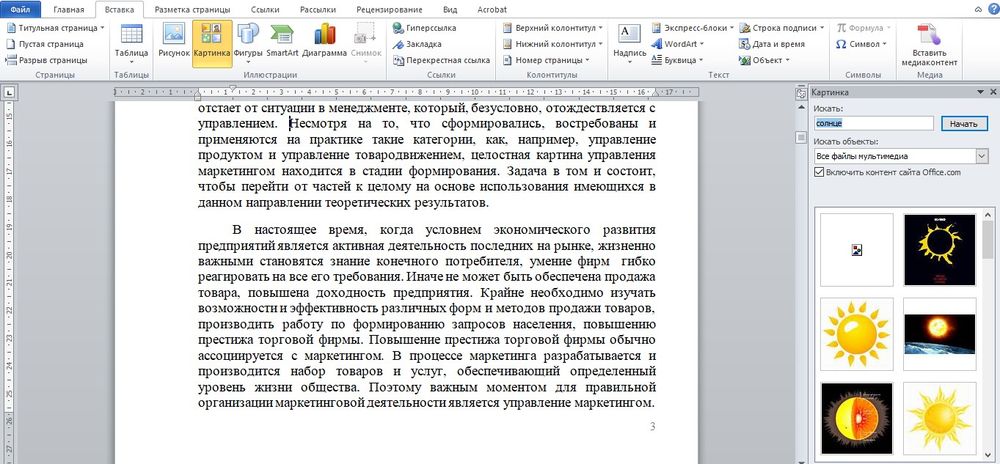
Таким же образом добавляется любая фигура, диаграмма, снимок, SmartArt.
Редактирование
После вставки картинки (но только если она выделена) на верхней панели появляется вкладка «Формат» – работа с рисунками.
Здесь можно задать яркость, контрастность, установить цвет, наложить тени, отражение или свечение, выбрать положение объекта на странице и многое другое.
Набор инструментов для работы с графикой во всех версиях Microsoft Word отличаются незначительно.
Как в Word повернуть картинку
Для поворота объекта следует выполнить следующие шаги:
- Выделить изображение, перейти во вкладку «Формат».
- В разделе «Упорядочить» найти опцию «Повернуть».
- Кликнуть по ней левой кнопкой мышки для вызова меню.
- Выбрать вариант поворота или отражения объекта.
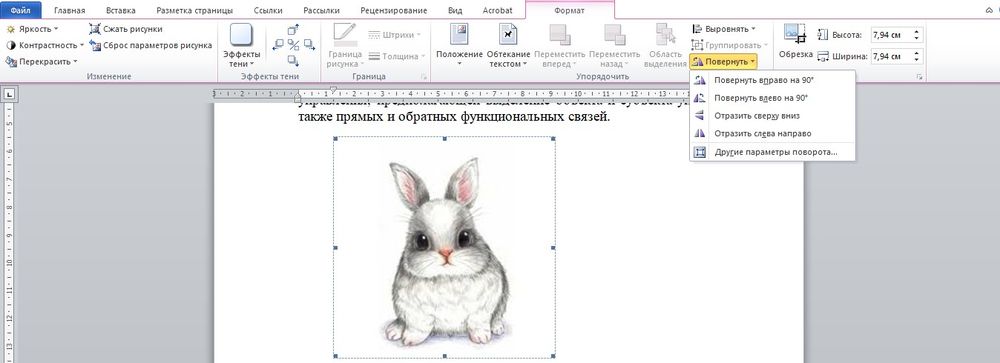
При редактировании обычно не приходится задействовать другие параметры поворота.
Как в Word обрезать картинку
Делается это в несколько кликов:
- Выделить рисунок.
- В разделе «Размер» вкладки «Формат» найти опцию «Обрезка».
- Кликнуть по ней левой кнопкой мышки. Возле курсора появится инструмент обрезки.
- Навести его на любую из точек выделения, нажать левую кнопку и потянуть в нужную сторону.
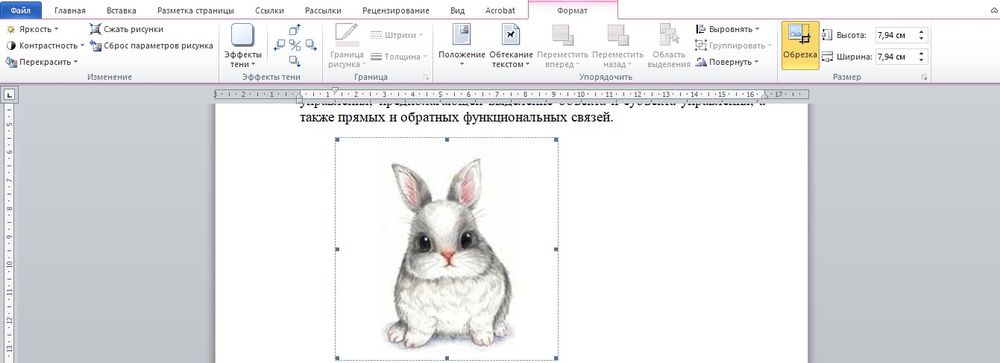
Для более точной обрезки необходимо:
- Открыть параметры раздела «Размер», клацнув по значку со стрелкой в правом нижнем углу.
- В диалоговом окне перейти на вкладку «Рисунок».
- Указать значения для обрезки изображения со всех сторон.
- Нажать «Ок».

Как в Word наложить картинку на картинку
При вставке изображений стандартным способом они располагаются только один над другим или рядом. Наложить несколько объектов друг на друга возможно несколькими способами.
Чтобы два рисунка гармонично выглядели, один из них должен быть на прозрачном фоне, то есть в формате png.
С помощью «Обтекания текстом»
- Вставить изображения по очереди удобным способом.
- Выделить то, которое будет фоном, клацнув по нему левой кнопкой.
- Во вкладке «Формат» выбрать инструмент «Обтекание…» — «За текстом».
- Повторить действия со вторым рисунком, только выбрать вариант «Перед текстом».
- Перетащить левой кнопкой второй объект на фон.
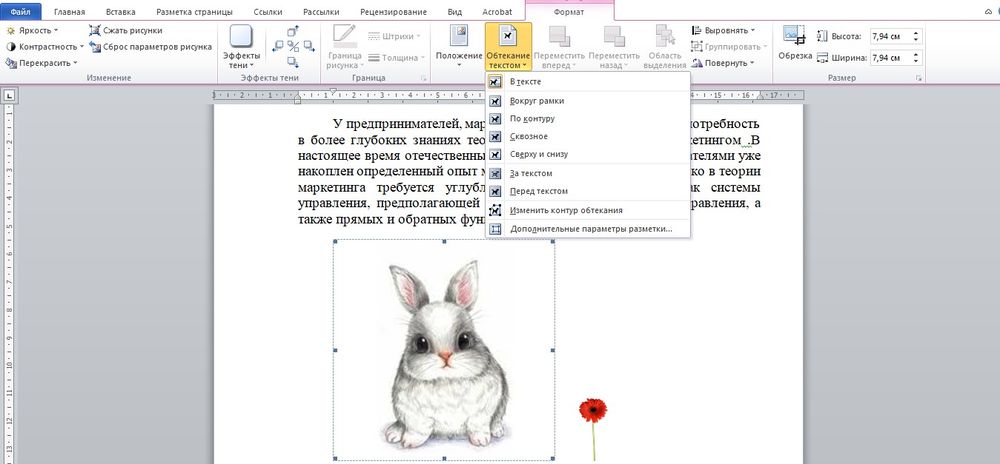
С помощью «Надписи»
- Во вкладке «Вставка» найти раздел «Текст».
- Выбрать инструмент «Надпись» — подойдет простая, или можно нарисовать ее.
- В месте, где установлен курсор, появится рамка с текстом, которая перемещается по странице левой кнопкой мышки.
- Выделить и удалить текст кнопкой «Del» или «Backspace».
- Вставить внутрь пустой рамки картинку, используя опцию «Вставка» — «Рисунок» или комбинацию клавиш Ctrl+C и Ctrl+V.
- Второе изображение можно наложить на фон.
- Для скрытия рамки и белых полей нужно выделить объект и перейти во вкладку «Формат». В контуре и заливке фигуры установить вариант «Нет».
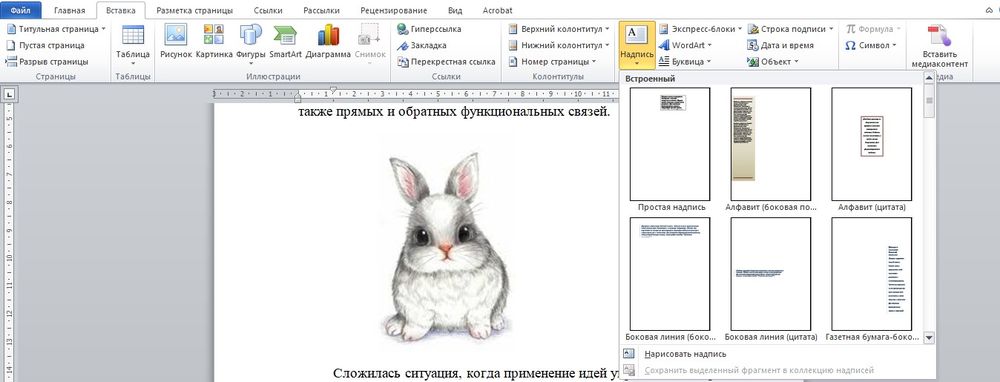
Как в Word вставить текст на картинку
Иногда требуется сделать так, чтобы текст располагался не под или над рисунком, а прямо на нем. Эта опция обычно актуальна для объяснения определенных фрагментов изображения или просто красивой надписи. Написание текста на графическом элементе осуществляется двумя способами.
С помощью «WordArt»
- После добавления рисунка в документ перейти во вкладку «Вставка», в разделе «Текст» выбрать инструмент «WordArt».
- В списке найти подходящий стиль и кликнуть по нему.
- На экране появится диалоговое окно. Нужно удалить пример, написать желаемую фразу, выбрать шрифт и размер, установить курсивное или жирное начертание.
- Нажать «Ок».
- Во вкладке «Формат» настраивается оформление надписи: заливка, контур, тени и т.д. Здесь также можно изменить текст.
- Задать для надписи формат обтекания – «Перед текстом».
- Передвинуть готовую надпись на рисунок.
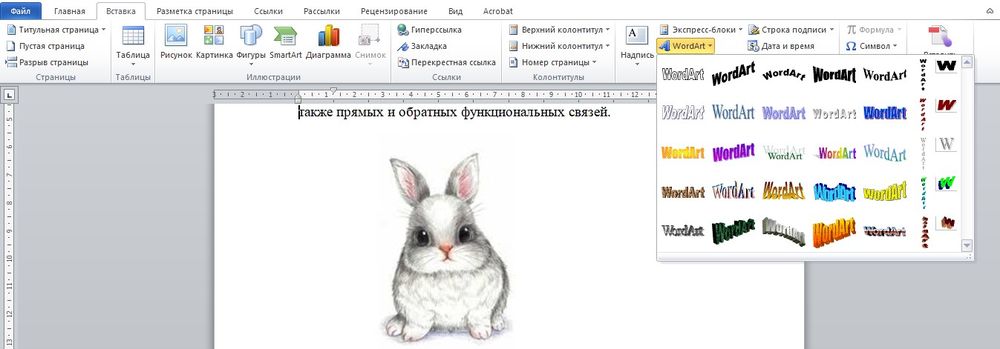


С помощью «Фигуры»
- Во вкладке «Вставка» раскрыть список с фигурами.
- Найти вариант «Надпись» и клацнуть по нему.
- На экране вместо курсора появится знак в виде «+».
- Левой кнопкой мышки кликнуть по любому месту на рисунке и протянуть прямоугольник до нужного размера.
- Вписать текст, выбрать шрифт, размер, цвет, заливку.
- При желании оформить надпись, используя инструменты во вкладке «Формат».
- Для изменения белого фона прямоугольника и удаления границ в «Заливке фигуры» и «Контуре фигуры» установить вариант «Нет».
- Щелкнуть в любом месте документа для применения изменений.
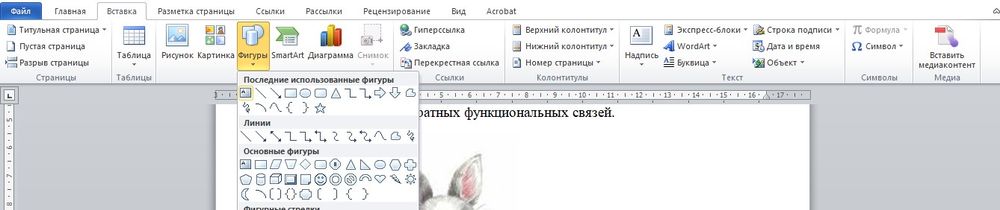
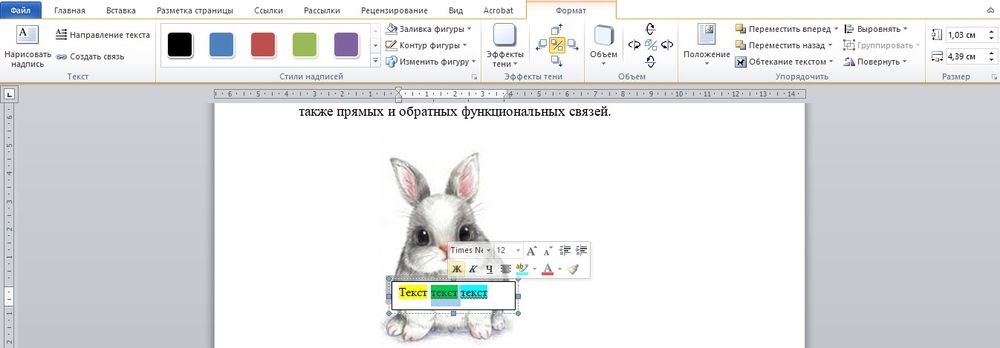

Ваш покорный слуга — компьютерщик широкого профиля: системный администратор, вебмастер, интернет-маркетолог и много чего кто. Вместе с Вами, если Вы конечно не против, разовьем из обычного блога крутой технический комплекс.
How to Edit, Reposition, and Compress Images in Microsoft Word
Ways to work with images in Word
Updated on October 17, 2021
When you insert an image in a Microsoft Word document, resize and position it to customize the document layout and choose how the text appears around the image, for example, have it seamlessly wrap around the photo. An image with a large file size can be compressed so that the document downloads quickly from a web page or is suitable for an email attachment. And, for images that need more explanation, add a caption.
Instructions in this article apply to Word for Microsoft 365, Word 2019, Word 2016, Word 2013, and Word 2010. For Microsoft Word Online, disable the Simplified Ribbon.
How to Insert a Picture in Word
The easiest way to insert a picture is to drag the photo from Windows File Explorer to the Word document. However, if you want more control over the image placement, use the Word Insert menu.
-
Place the cursor where you want the image to appear.
-
Go to the Insert tab, then select Pictures. In Word 2010, select Picture. In Word Online, select Picture or Online Pictures.
-
In the Insert Picture dialog box, choose an image to insert into the document, then select Insert or Open.
To insert several images simultaneously, hold Ctrl and select each image.
-
To move the image, drag the image to a different location in the document.
How to Edit the Picture Size in Word
Ideally, pictures should be enhanced in a photo editing program, but Microsoft Word contains a few simple editing tools. To quickly resize a photo in Word, select the image, then drag a sizing handle in or out to make the picture smaller or larger.
To set a specific size for the image:
-
Right-click the image, then select Size and Position.
-
In the Layout dialog box, go to the Size tab and select Lock aspect ratio to ensure that the height and width remain proportional.
-
Change the value in the Height or Width text box to adjust the size of the image in inches.
To change the height and width by percentage, go to the Scale section and change the Height or Width value. For example, make the image 75% or 120% of the size it was.
-
Select OK.
How to Compress an Image in Word
Compressing photos in Word reduces the file size of documents that contain images.
Images cannot be compressed in Word Online.
-
Select the picture you want to compress.
To compress all the images in a Word document, select any photo.
-
Go to the Picture Format tab and select Compress Pictures.
-
In the Compress Pictures dialog box, select Apply only to this picture to compress only the selected image. Clear the Apply only to this picture check box to compress all the photos in the Word document.
-
Select Delete cropped areas of pictures to remove the parts of the images that were cropped.
Cropped areas are hidden so that you can undo the crop. When cropped areas are deleted, file size is reduced because cropped pieces are permanently removed.
-
In the Resolution section, choose a resolution or target output option to compress the image and save it with a specific number of pixels per inch, which indicates the picture quality. If you’re not sure what to select, choose Use default resolution or Use document resolution.
-
Select OK.
How to Edit the Picture Layout in Word
Word provides a variety of options that change the layout of pictures. For example, have the text wrap around the photo or insert the picture inline with the document text.
To change how the image appears in the document, select the image, then go to the Layout tab. In Word 2013 and 2010, go to the Format tab. In the Arrange group, you’ll find options that allow for more precise placement of the image and the content that surrounds it.
- Select Position, then choose where the image should appear on the page.
- Select Wrap Text, then choose how the text should flow around the image.
Hover over an option to see a preview of how the layout or text wrapping will appear in the document.
In Word Online, you can only customize the wrap text options, not the image layout. To make this adjustment, select Format > Wrap Text.
How to Add a Caption to a Photo in Word
A caption clarifies your picture to readers. It can be used to attribute the photo to a specific source or to reference a picture in another part of the document.
Captions are not supported in Microsoft Word Online.
To add a caption, right-click the image and select Insert Caption. In the Caption dialog box, enter a caption, then choose the type of label and the position of the caption. Select Numbering to configure automatic captioning based on a specific number style or chapter number.
To edit the caption, highlight the text and type a new caption.
Thanks for letting us know!
Get the Latest Tech News Delivered Every Day
Subscribe
Изображение или объект не могут отображаться в документе Word 2010 или Word 2007
Office 365 ProPlus переименован в Майкрософт 365 корпоративные приложения. Для получения дополнительной информации об этом изменении прочитайте этот блог.
Симптомы
При открываемом Microsoft Office Word 2010 или Word 2007 с изображением или объектом изображение или объект могут не отображаться. Эта проблема может возникнуть в документе, который содержит изображение, графическое изображение, объект AutoShape или другой объект.
Эта проблема также может возникать в более поздних версиях Word.
Причина
Эта проблема возникает, если вы используете параметр Стиля упаковки, кроме параметра In с текстовым параметром с изображением или объектом. И одно из следующих условий верно:
- Вы просматриваете документ Word в представлении Draft или в представлении Outline.
- На экране отключены рисунки и текстовые поля show.
- Рисунки печати, созданные в варианте Word, отключены.
- Включена опция качества «Использование черновика».
Если вы используете параметр In с текстовым параметром с изображением или объектом, эта проблема может возникнуть при включении параметра Placeholders Picture.
Эта проблема также может возникнуть, если у вас возникли проблемы с драйвером видео.
Обходной путь
Вы используете параметр Типа упаковки, кроме параметра «В соответствии с текстом»
Если вы используете параметр Стиля упаковки, кроме параметра In с текстовым параметром, используйте один из следующих обходных способов.
Использование параметра «В соответствии с текстом» Параметр упаковки
Чтобы изменить параметр Wrapping style для изображения или объекта в соответствии с текстом, выполните следующие действия, соответствующие вашей версии Word.
Word 2007
- Щелкните изображение или объект.
- На вкладке Format щелкните Текстовую упаковку в группе Аранжировка.
- Нажмите кнопку В соответствии с текстом.
Word 2010
- Щелкните изображение или объект.
- На вкладке Format щелкните Текстовую упаковку в группе Аранжировка.
- Нажмите кнопку В соответствии с текстом.
При использовании параметра In с текстом изображение или объект будут отображаться в любом представлении.
Если вы хотите использовать параметр Типа упаковки, кроме параметра In с текстовым параметром, используйте один из следующих обходных способов.
Изменение представления
Эта проблема может возникнуть, если вы просматриваете документ в представлении Draft или в представлении Outline. Чтобы решить эту проблему, просмотреть документ в одном из следующих представлений:
- Разметка страницы
- Режим чтения
- Веб-документ
- Распечатать Предварительный просмотр для Word 2007. Для
Word 2010: Нажмите файл и нажмите кнопку Печать.
Документы Word 2010 и Word 2007 состоят из отдельных слоев текста и рисования. При использовании параметра Стиля упаковки, помимо параметра In с текстовым вариантом с изображением или объектом, изображение или объект вставляется в слой рисования. Word 2010 и Word 2007 не отображают слой рисования при просмотре документа в представлении Draft или в представлении Outline. Слой рисования отображается в Word 2010 и в документе Word 2007 при использовании любого из представлений, указанных в этом обходе.
Включаем параметр «Показать рисунки и текстовые поля на экране»
При включке рисунков и текстовых полей Show на экране можно просмотреть изображение или объект в представлении Макет печати или в представлении веб-макета. Чтобы включить рисунки шоу и текстовые поля на экране, выполните следующие действия, как это необходимо для версии Word.
Word 2007
- Нажмите кнопку Microsoft Office, затем выберите пункт Параметры Word.
- Нажмите кнопку Дополнительно.
- В статье Показать содержимое документа щелкните, чтобы выбрать рисунки шоу и текстовые поля на экране флажка.
- Нажмите кнопку ОК.
Word 2010
- Последовательно выберите пункты Файл и Параметры.
- Нажмите кнопку Дополнительно.
- В статье Показать содержимое документа щелкните, чтобы выбрать рисунки шоу и текстовые поля на экране флажка.
- Нажмите кнопку ОК.
Включив параметр «Печать рисунков, созданных в Word».
При включив рисунки печати, созданные в варианте Word, можно просмотреть изображение или объект в предварительной версии печати. И вы можете распечатать изображение или объект. Чтобы включить рисунки печати, созданные в варианте Word, выполните следующие действия, соответствующие вашей версии Word.
Word 2007
- Нажмите кнопку Microsoft Office, затем выберите пункт Параметры Word.
- Нажмите кнопку Отображение.
- В статье Параметры печати щелкните, чтобы выбрать рисунки печати, созданные в поле Word.
- Нажмите кнопку ОК.
Word 2010
- Последовательно выберите пункты Файл и Параметры.
- Нажмите кнопку Отображение.
- В статье Параметры печати щелкните, чтобы выбрать рисунки **Print, созданные в поле Word **
- Нажмите кнопку ОК.
Отключение параметра «Использование качества черновика»
При отключении параметра Качества «Использование черновика» можно просмотреть изображение или объект в предварительном просмотре печати. И вы можете распечатать изображение или объект. Чтобы отключить параметр Качество использования черновика, выполните следующие действия, соответствующие вашей версии Word.
Word 2007
- Нажмите кнопку Microsoft Office, затем выберите пункт Параметры Word.
- Нажмите кнопку Дополнительно.
- В статье Печать щелкните, чтобы очистить окно качества «Использование черновика».
- Нажмите кнопку ОК.
Word 2010
- Последовательно выберите пункты Файл и Параметры.
- Нажмите кнопку Дополнительно.
- В статье Печать щелкните, чтобы очистить окно качества «Использование черновика».
- Нажмите кнопку ОК.
Вы используете параметр «В соответствии с текстом» Вариант стиля упаковки
Отключение параметра «Местообладатели изображения»
При выключении параметра Placeholders picture можно просмотреть изображение или объект во всех представлениях. Чтобы отключить параметр Picture Placeholders, выполните следующие действия, как это необходимо для вашей версии Word.
Word 2007
- Нажмите кнопку Microsoft Office, затем выберите пункт Параметры Word.
- Нажмите кнопку Дополнительно.
- В статье Отображение контента документа щелкните, чтобы очистить поле «Местообладатели изображения».
- Нажмите кнопку ОК.
Word 2010
- Последовательно выберите пункты Файл и Параметры.
- Нажмите кнопку Дополнительно.
- В статье Показать содержимое документа щелкните, чтобы очистить поле «Показать местообладатели изображения».
- Нажмите кнопку ОК.
Параметр Placeholders picture не влияет на изображения или объекты при использовании параметра стиля упаковки, кроме параметра In с текстовым параметром. Параметр Placeholders picture влияет на изображения и объекты при использовании параметра In с текстом во всех представлениях, кроме представления чтения на полном экране.
У вас возникли проблемы с драйвером видео
Если вы часто испытываете эту проблему, у вас могут возникнуть проблемы с настройками драйвера видео или с Windows параметров Display Properties. Если предыдущие обходные пути не устраняют проблему, попробуйте следующие обходные пути.
Изменение параметра качества цвета или разрешения экрана текущего драйвера видео
Чтобы изменить параметр качества цвета, следуйте этим шагам, соответствующим вашей ситуации.
Windows XP
- Нажмите кнопку Начните, нажмите кнопку Выполнить, введите desk.cpl, а затем нажмите кнопку ОК.
- Щелкните вкладку Параметры.
- Если параметр качества цвета заданной до самого высокого (32 бита), измените этот параметр на Средний (16 бит) и нажмите кнопку ОК.
Если вы все еще испытываете проблему, измените разрешение экрана. Для этого выполните следующие действия:
- Нажмите кнопку Начните, нажмите кнопку Выполнить, введите desk.cpl, а затем нажмите кнопку ОК.
- Щелкните вкладку Параметры.
- В разрешении Экрана переместите ползунок влево, а затем нажмите кнопку ОК.
Windows Vista
- Нажмите кнопку Начните, нажмите кнопку Выполнить, введите desk.cpl, а затем нажмите кнопку ОК.
- Если параметр Colors заданной до самого высокого (32 бита), измените этот параметр на Средний (16 бит) и нажмите кнопку ОК.
Если вы все еще испытываете проблему, измените разрешение экрана. Для этого выполните следующие действия:
- Нажмите кнопку Начните, нажмите кнопку Выполнить, введите desk.cpl, а затем нажмите кнопку ОК.
- В соответствии с разрешением переместите ползунок влево, а затем нажмите кнопку ОК.
Windows 7
- Нажмите кнопку Начните, нажмите кнопку Выполнить, введите desk.cpl, а затем нажмите кнопку ОК.
- Щелкните вкладку Advanced Параметры.
- Нажмите кнопку Монитор.
- Если параметр Colors заданной для highest (32 бита), измените этот параметр на Средний (16 бит) и нажмите кнопку ОК.
Если вы все еще испытываете проблему, измените разрешение экрана. Для этого выполните следующие действия:
- Нажмите кнопку Начните, нажмите кнопку Выполнить, введите desk.cpl, а затем нажмите кнопку ОК.
- В соответствии со статьей Разрешение щелкните стрелку и попробуйте другое разрешение, а затем нажмите кнопку ОК.
Изменение параметра ускорения оборудования
Windows XP
- Нажмите кнопку Начните, нажмите кнопку Выполнить, введите desk.cpl, а затем нажмите кнопку ОК.
- На вкладке Параметры нажмите кнопку Advanced.
- Щелкните вкладку Устранение неполадок.
- Переместите ползунок влево, чтобы уменьшить ускорение оборудования, а затем нажмите кнопку ОК два раза.
- Если вас спрашивают, хотите ли вы перезапустить компьютер, нажмите кнопку Да.
Windows Vista и Windows 7
- Нажмите кнопку Начните, нажмите кнопку Выполнить, введите desk.cpl, а затем нажмите кнопку ОК.
- Выберите пункт Дополнительные параметры.
- Щелкните устранение неполадок.
- Если драйвер отображения допускает изменения, нажмите кнопку Изменить Параметры. Переместите ползунок влево, чтобы уменьшить ускорение оборудования, а затем нажмите кнопку ОК два раза.
- Если вас спрашивают, хотите ли вы перезапустить компьютер, нажмите кнопку Да.
Получение обновленной видеокарты
Если описанные в этом разделе обходные пути помогают устранить эту проблему, обратитесь к производителю компьютеров с обновленными драйверами видео. Если вы уже обновили свою видеокарту, обратитесь к производителю видеокарты.
Блог did5.ru
Про АйТи и около айтишные темы
Не отображаются формулы и картинки в MS Word
В документах MS Word (.doc, .docx) не отображаются формулы и картинки, вместо них пустая рамка.
Открыл файл на другом ПК, все формулы отображаются. Значит дело в настройках офиса на конкретном компьютере.
Решение
1. Запустить MS Office 2007/2010 и открыть «Параметры Word»
2. В параметрах переходим в пункт «Дополнительно»
3. Снять галку «Показывать пустые рамки рисунков»

Формулы и картинки должны сразу отобразиться в документе, если нет, то откройте его заново
Нашли опечатку в тексте? Пожалуйста, выделите ее и нажмите Ctrl+Enter! Спасибо!
Хотите поблагодарить автора за эту заметку? Вы можете это сделать!
Рисунки не отображаются в Word
В документе Word отображаются лишь некоторые рисунки. Вместо других рисунков отображаются квадраты, размер которых нельзя изменить. Я пробовал разделять документ, но рисунки все равно не отображаются.
Сообщение о нарушении
Попробуйте выполнить указанные ниже действия.
1. Если активен режим черновика, переключитесь в режим «Разметка страницы». Для этого перейдите на вкладку Вид и нажмите кнопку Разметка страницы. В режиме черновика не отображаются объекты с любыми параметрами обтекания текстом, кроме «В тексте».
2. Измените параметры отображения. Для этого выполните действия, описанные ниже.
a. Нажмите кнопку Office, затем Параметры Word и перейдите в меню Дополнительно.
b. Прокрутите окно вниз до раздела Показывать содержимое документа.
c. Установите флажок Показывать рисунки и надписи. Затем снимите флажок Показывать пустые рамки рисунков.
d. Нажмите кнопку ОК.
3. Попробуйте снизить уровень аппаратного ускорения. Для этого выполните действия, описанные ниже.
a. Нажмите кнопку Пуск, введите в поле Начать поиск строку Панель управления и нажмите клавишу ВВОД.
b. Выберите пункт Оформление и персонализация.
c. Выберите пункт Экран.
d. Выберите команду Параметры дисплея.
e. Нажмите кнопку Дополнительно.
f. Перейдите на вкладку Диагностика.
g. Нажмите кнопку Изменить параметры.
Примечание . Если кнопка Изменить параметры неактивна, имеющаяся видеокарта не позволяет изменять параметры аппаратного ускорения.
Возможно, потребуется обратиться на веб-сайт изготовителя видеокарты, чтобы узнать,
More than ever, pictures are critical to the effectiveness of your communication materials. With the image formatting and layout tools in Microsoft Word, it’s possible to add and manipulate pictures in your document—even if you’re a beginner.


Starting with a Microsoft Word template makes it even easier. With a well-designed Word template, the positioning and formatting of pictures have already been done for you. All you’ve got to do is to drag your pictures into the image placeholders.
Even if you’re using a template for Word, it’s good to know how to format pictures so you can make your document look exactly the way you want it to.
In this article, you’re going to see, step-by-step, how to work with pictures in Microsoft Word.
(Note: The screenshots below show Microsoft Word for Mac. The screens and steps may be slightly different if you’re using a different version of Word.)
How to Insert a Picture in Word
To add a picture to a Word document, click Insert > Pictures. From here, you’ve got three options:
1. Photo Browser
If you choose this option, you’ll be able to select an image from the existing photo sets on your computer. On a Mac, that includes photos in iPhoto and Photo Booth. When you find the picture you want to use, click on it, then drag it into the document.


2. Picture From File
This option lets you insert an image from another location on your computer. Find the image file, select it, then click Insert.


3. Online Pictures
Insert pictures in Word from the web by selecting Online Pictures…. This opens a Bing image search right inside your document. Type a keyword or phrase in the search bar.


By default, the Creative Commons only filter is checked. Keep this selected to make sure you don’t violate any copyright laws. Click on the filter icon to filter the image results by other parameters.


Select an image by clicking on it, then click Insert. You can select several images before clicking the Insert button.


Microsoft Word automatically includes the image attribution and license details as a caption.


Note: While you can import many image formats into Word, the ones that work best are JPG and PNG.
How to Format Pictures in Word
After importing pictures into Word, you can apply different formatting settings to each Microsoft Word picture and control its appearance. Below are some of the most basic image formatting you can apply in Word:
1. Resize an Image
Resize a picture in two ways:
Resizing Method 1
Click on the picture. Press and hold the Shift key, then click and drag one of the sizing handles either towards or away from the center.


Holding the Shift key ensures that the proportion of the picture is retained. Otherwise, it would become distorted and your entire document will look amateurish.
Resizing Method 2
This method allows you to resize the picture to a specific length or width. Click on the picture, then click on the Picture Format tab. Type the length or width you wish the image to have.


By default, the original proportion of the image is retained even when you change either the length or width of the image. Keep this checked to avoid distorting the image.
2. Rotate or Flip Images
To rotate an image, do so either manually or by a specific amount.
Manual Image Rotation
To rotate an image manually, click on the image to select it. Click on the rotation handle and drag it in the direction you want.


Flip or Rotate an Image By a Specific Amount
Rotate a picture by a specific amount. Click on the picture, then go to Picture Format > Rotate. From here, you’ve got the option to:
- Rotate Right 90°
- Rotate Left 90°
- Flip Vertical
- Flip Horizontal
- Select More Rotation Options
To rotate a picture to an exact angle, choose Select More Rotation Options.


Type in the amount you wish to rotate the object, then click OK.


How to Crop Photos in Word
If you’re wondering how to crop a picture in Microsoft Word, it’s not difficult. Follow the steps below to not only crop an image, but also to dress it up by cropping it to a shape or adding decorative borders:
1. Basic Image Cropping
To crop a picture, select the picture, then go to Picture Format > Crop > Crop.
Black cropping handles appear on the sides of the picture. From here:
- Crop one side. Drag one side handle inward.
- Crop two adjacent sides at the same time. Drag one corner inward.
Click outside the image to apply the crop.
2. Crop Image to a Shape
To crop the picture to a specific shape, select the picture. Go to Picture Format > Crop > Crop to Shape. Select a shape from the selection that appears.


Click away from the picture to apply the new shape.


3. Frames and Borders
Borders are an easy way to dress up a picture in Microsoft Word. To add a border, select the picture, go to Picture Format. Click on the Picture Border button on the ribbon to reveal the border options.


From here, choose the color, weight, and dash style you wish to use for the border.


To add a frame, click on the picture, then go to Picture Format. Click on the Picture Quick Styles button on the ribbon. Select the border you want to use.


How to Use Image Editing Tools
There are many Word image editing tools. Learn how to format pictures in Word by removing the background or adjusting the brightness. Here’s how:
1. Remove Background
Microsoft Word allows you to remove the background from your pictures. This feature works best if the color of the background is distinct from the colors on the main subject of the picture.
To remove the background, select the image. Go to Picture Format > Remove Background.


Use the tools provided to select which parts of the image you wish to keep and which parts you want to remove.


The parts that’ll be removed are colored pink.
When you’re happy with the selection, click Keep Changes.


2. Sharpness and Brightness Corrections
Improve the sharpness and brightness of your pictures in Microsoft Word. To adjust these, select the picture. Go to Picture Format > Corrections. Select the sharpness and brightness/contrast settings you wish to use.


To more finely control these settings, go to Picture Format > Corrections > Picture Corrections Options. The Format Picture sidebar appears. It allows you to provide specific settings for sharpness, brightness, and contrast.


3. Picture Color
Microsoft Word also allows you to control the color saturation and tone of your picture. And you can recolor the entire picture for special effects. Select the picture, go to Picture Format > Color. Select any of the options that appear.


From here choose:
- More Variations. Recolors the image with a different color from the options provided.
- Set Transparent Color. Makes certain colors transparent so that the color of the background shows through.
- Picture Color Options. Opens the Format Picture sidebar, where you can fine-tune the settings for color saturation, tone, and recolor.
How to Use Layout Options
Microsoft Word’s layout options for images lets you control how photos are displayed alongside text.
By default, a picture is set to be «In line with text.» This means the picture is treated as an object that moves with the text. This means whatever formatting is applied to the text applies to the picture as well, which may not be how you want it to appear. When a picture is in line with text, you won’t be able to drag and drop it to a different part of the document.
To set up a picture’s layout options, select the image, then go to Picture Format > Position. Select one of the pre-configured layout options to position your picture on the page.


Gain more control by going to Picture Format > Wrap Text.


Select one of the text wrapping options:
- Square — wraps text around the picture in a square shape


- Tight — wraps text following the shape of the picture


- Through — shows text through all the “open” parts of the picture (may only be visible with certain picture shapes)


- Top and Bottom — wraps text only above and below the picture


These text wrapping options allow you to overlay pictures in Word or merge them together into a collage-type layout.
You’ve got other options:
- Behind text. Overlays the text in front of the picture
- In Front of Text. Places text behind the picture, covering it
- Edit Wrap Boundary. Lets you fine-tune how text wraps around the picture, which is especially useful if it’s irregularly shaped
- Move with text. Keeps the picture anchored to the text
- Fix position on page. Keeps the picture on the same position relative to the page, even if the text moves
- More Layout Options …. Gives you precise control over the picture layout
How to Move Pictures in Word and Arrange them on the Page
You may be wondering how to move a picture in Microsoft Word. The easiest way to move a picture is by clicking and dragging it. If this doesn’t work, the picture is probably set to be inline with text. Follow the instructions above to select a different text wrapping option.
To move multiple images, hold the shift key down as you click on each picture. Then, drag and drop them into place.
You can also move images using precise measurements. Select the image, go to Picture Format > Position > More Layout Options …. Specify the horizontal and vertical position of the picture relative to an element of the page.


Get Creative With Pictures in Word
Use the skills you learned above to add pictures in your Word documents and display them exactly the way you envision. As you’ve seen, it’s easy to control the appearance and placement of images on the page. By following the steps above, you can produce professional-looking documents all by yourself. However, we’ve only scratched the surface of the many ways you can work with pictures in Word!
Of course, if you prefer to have these design choices made for you, you’ve got the option to start with a Microsoft Word template. If you make a lot of Word documents, then you’ll like the cost-effectiveness of Envato Elements. You get unlimited downloads of templates as well as fonts, stock photos, and more for one low subscription price. On the other hand, GraphicRiver may be a better option if you only need the one-off template.
This gives you the ultimate convenience because professionally-designed Word templates have image placeholders. All you’ve got to do is to drag and drop your own pictures into the placeholders. The picture formatting steps in this article will help you fine-tune the image settings as you wish.
Now you, too, can get more creative—and effective—with pictures in Microsoft Word. But first, get your head start by downloading your favorite MS Word Template from Envato Elements or GraphicRiver.