
| title | keywords | f1_keywords | ms.prod | api_name | ms.assetid | ms.date | ms.localizationpriority |
|---|---|---|---|---|---|---|---|
|
Find.Execute method (Word) |
vbawd10.chm162529724 |
vbawd10.chm162529724 |
word |
Word.Find.Execute |
3b607955-0e82-aa13-dad1-7a5069a57b9d |
06/08/2017 |
medium |
Find.Execute method (Word)
Runs the specified find operation. Returns True if the find operation is successful. Boolean.
Syntax
expression.Execute (FindText, MatchCase, MatchWholeWord, MatchWildcards, MatchSoundsLike, MatchAllWordForms, Forward, Wrap, Format, ReplaceWith, Replace, MatchKashida, MatchDiacritics, MatchAlefHamza, MatchControl)
expression Required. A variable that represents a Find object.
Parameters
| Name | Required/Optional | Data type | Description |
|---|---|---|---|
| FindText | Optional | Variant | The text to be searched for. Use an empty string («») to search for formatting only. You can search for special characters by specifying appropriate character codes. For example, «^p» corresponds to a paragraph mark and «^t» corresponds to a tab character. |
| MatchCase | Optional | Variant | True to specify that the find text be case-sensitive. Corresponds to the Match case check box in the Find and Replace dialog box (Edit menu). |
| MatchWholeWord | Optional | Variant | True to have the find operation locate only entire words, not text that is part of a larger word. Corresponds to the Find whole words only check box in the Find and Replace dialog box. |
| MatchWildcards | Optional | Variant | True to have the find text be a special search operator. Corresponds to the Use wildcards check box in the Find and Replace dialog box. |
| MatchSoundsLike | Optional | Variant | True to have the find operation locate words that sound similar to the find text. Corresponds to the Sounds like check box in the Find and Replace dialog box. |
| MatchAllWordForms | Optional | Variant | True to have the find operation locate all forms of the find text (for example, «sit» locates «sitting» and «sat»). Corresponds to the Find all word forms check box in the Find and Replace dialog box. |
| Forward | Optional | Variant | True to search forward (toward the end of the document). |
| Wrap | Optional | Variant | Controls what happens if the search begins at a point other than the beginning of the document and the end of the document is reached (or vice versa if Forward is set to False). This argument also controls what happens if there is a selection or range and the search text is not found in the selection or range. Can be one of the WdFindWrap constants. |
| Format | Optional | Variant | True to have the find operation locate formatting in addition to, or instead of, the find text. |
| ReplaceWith | Optional | Variant | The replacement text. To delete the text specified by the Find argument, use an empty string («»). You specify special characters and advanced search criteria just as you do for the Find argument. To specify a graphic object or other nontext item as the replacement, move the item to the Clipboard and specify «^c» for ReplaceWith. |
| Replace | Optional | Variant | Specifies how many replacements are to be made: one, all, or none. Can be any WdReplace constant. |
| MatchKashida | Optional | Variant | True if find operations match text with matching kashidas in an Arabic-language document. This argument may not be available to you, depending on the language support (U.S. English, for example) that you have selected or installed. |
| MatchDiacritics | Optional | Variant | True if find operations match text with matching diacritics in a right-to-left language document. This argument may not be available to you, depending on the language support (U.S. English, for example) that you have selected or installed. |
| MatchAlefHamza | Optional | Variant | True if find operations match text with matching alef hamzas in an Arabic-language document. This argument may not be available to you, depending on the language support (U.S. English, for example) that you have selected or installed. |
| MatchControl | Optional | Variant | True if find operations match text with matching bidirectional control characters in a right-to-left language document. This argument may not be available to you, depending on the language support (U.S. English, for example) that you have selected or installed. |
| MatchPrefix | Optional | Variant | True to match words beginning with the search string. Corresponds to the Match prefix check box in the Find and Replace dialog box. |
| MatchSuffix | Optional | Variant | True to match words ending with the search string. Corresponds to the Match suffix check box in the Find and Replace dialog box. |
| MatchPhrase | Optional | Variant | True ignores all white space and control characters between words. |
| IgnoreSpace | Optional | Variant | True ignores all white space between words. Corresponds to the Ignore white-space characters check box in the Find and Replace dialog box. |
| IgnorePunct | Optional | Variant | True ignores all punctuation characters between words. Corresponds to the Ignore punctuation check box in the Find and Replace dialog box. |
Return value
Boolean
Remarks
If MatchWildcards is True, you can specify wildcard characters and other advanced search criteria for the FindText argument. For example, «*(ing)» finds any word that ends in «ing».
To search for a symbol character, type a caret (^), a zero (0), and then the symbol’s character code. For example, «^0151» corresponds to an em dash (—).
Unless otherwise specified, replacement text inherits the formatting of the text it replaces in the document. For example, if you replace the string «abc» with «xyz», occurrences of «abc» with bold formatting are replaced with the string «xyz» with bold formatting.
Also, if MatchCase is False, occurrences of the search text that are uppercase will be replaced with an uppercase version of the replacement text, regardless of the case of the replacement text. Using the previous example, occurrences of «ABC» are replaced with «XYZ».
Example
This example finds and selects the next occurrence of the word «library».
With Selection.Find
    .ClearFormatting
    .MatchWholeWord = True
    .MatchCase = False
    .Execute FindText:="library"
End With
This example finds all occurrences of the word «hi» in the active document and replaces each occurrence with «hello».
Set myRange = ActiveDocument.Content
myRange.Find.Execute FindText:="hi", _
    ReplaceWith:="hello", Replace:=wdReplaceAll
[!includeSupport and feedback]
Multiple objects Find
Find Multiple objects
Represents the criteria for a find operation. The properties and methods of the Find object correspond to the options in the Find and Replace dialog box.
Using the Find Object
Use the Find property to return a Find object. The following example finds and selects the next occurrence of the word «hi.»
With Selection.Find
    .ClearFormatting
    .Text = "hi"
    .Execute Forward:=True
End With
The following example finds all occurrences of the word «hi» in the active document and replaces the word with «hello.»
Set myRange = ActiveDocument.Content
myRange.Find.Execute FindText:="hi", ReplaceWith:="hello", _
    Replace:=wdReplaceAll
Remarks
If you’ve gotten to the Find object from the Selection object, the selection is changed when text matching the find criteria is found. The following example selects the next occurrence of the word «blue.»
Selection.Find.Execute FindText:="blue", Forward:=True
If you’ve gotten to the Find object from the Range object, the selection isn’t changed when text matching the find criteria is found, but the Range object is redefined. The following example locates the first occurrence of the word «blue» in the active document. If «blue» is found in the document, myRange is redefined and bold formatting is applied to «blue.»
Set myRange = ActiveDocument.Content
myRange.Find.Execute FindText:="blue", Forward:=True
If myRange.Find.Found = True Then myRange.Bold = True
Word VBA Find
This example is a simple word macro find the text “a”:
Sub SimpleFind()

    Selection.Find.ClearFormatting
    With Selection.Find
        .Text = "a"
        .Replacement.Text = ""
        .Forward = True
        .Wrap = wdFindAsk
        .Format = False
        .MatchCase = False
        .MatchWholeWord = False
        .MatchWildcards = False
        .MatchSoundsLike = False
        .MatchAllWordForms = False
    End With
    Selection.Find.Execute
End Sub
Find and Replace
This simple macro will search for the word “their” and replace it with “there”:
Sub SimpleReplace()

    Selection.Find.ClearFormatting
    Selection.Find.Replacement.ClearFormatting
    With Selection.Find
        .Text = "their"
        .Replacement.Text = "there"
        .Forward = True
        .Wrap = wdFindContinue
        .Format = False
        .MatchCase = False
        .MatchWholeWord = False
        .MatchWildcards = False
        .MatchSoundsLike = False
        .MatchAllWordForms = False
    End With
    Selection.Find.Execute Replace:=wdReplaceAll
End Sub
Find and Replace Only in Selection
This VBA macro will find and replace text in a selection. It will also italicize the replaced text.
Sub ReplaceInSelection()
'replaces text JUST in selection . in adittion it makes replaced text italic
    Selection.Find.ClearFormatting
    Selection.Find.Replacement.ClearFormatting
    With Selection.Find
        .Text = "their"

        With .Replacement
            .Font.Italic = True
            .Text = "there"
        End With

        .Forward = True
        .Wrap = wdFindStop    'this prevents Word from continuing to the end of doc
        .Format = True 'we want to replace formatting of text as well
        .MatchCase = False
        .MatchWholeWord = True
        .MatchWildcards = False
        .MatchSoundsLike = False
        .MatchAllWordForms = False
    End With
    Selection.Find.Execute Replace:=wdReplaceAll
End Sub
This line of code prevents VBA from continuing to the end of the Word document:
.Wrap = wdFindStop 'this prevents Word from continuing to the end of docThis line of code indicates to replace the formatting of the text as well:
.Format = True 'we want to replace formatting of text as wellFind and Replace Only In Range
Instead of replacing text throughout the entire document, or in a selection, we can tell VBA to find and replace only in range. In this example we defined the range as the first paragraph:
Dim oRange As Range
Set oRange = ActiveDocument.Paragraphs(1).Range
Sub ReplaceInRange()
'replaces text JUST in range [in this example just in the first paragraph]
Dim oRange As Range
Set oRange = ActiveDocument.Paragraphs(1).Range
oRange.Find.ClearFormatting
oRange.Find.Replacement.ClearFormatting
With oRange.Find
.Text = "their"
.Replacement.Text = "there"
.Forward = True
.Wrap = wdFindStop 'this prevent Word to continue to the end of doc
.Format = False
.MatchCase = False
.MatchWholeWord = False
.MatchWildcards = False
.MatchSoundsLike = False
.MatchAllWordForms = False
End With
oRange.Find.Execute Replace:=wdReplaceAll
End Sub
This post is part of a series on VBA for Microsoft Word. If you haven’t read the earlier parts, you can find them here: Part 1, Part 2, and Part 3.
In the previous posts in this series, we looked at some simple auto-formatting examples. In this final post, we demonstrate how you can use Word’s macro recorder to discover what code is needed to perform a task and how that generated code can be integrated into your own macros.

Using Word’s Record Macro Feature to Discover What Code is Needed
Let’s switch from writing code, and look at Word’s macro recording feature. Suppose you want to find all occurrences of the text ‘OK button’ in your document and format ‘OK’ with the appropriate character style, for example, Strong. You know how to find things using the UI, but you have no idea what code is needed to perform the same function. So let’s investigate this a little more.
First, add a few ‘OK button’ references to your test document so that you have something to find.
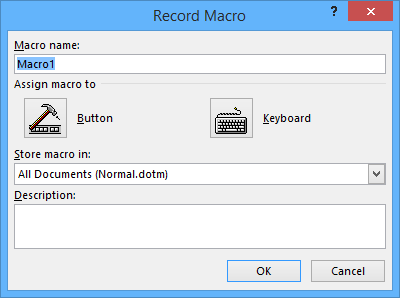
On the Developer tab, choose ![]() Record Macro. (Note: if the Developer tab is not visible, choose File > Options > Customize Ribbon, select the Developer check box, and click OK.) The Record Macro dialog is displayed with a default macro name, typically Macro1, and recorded macros are saved in the Normal template by default.
Record Macro. (Note: if the Developer tab is not visible, choose File > Options > Customize Ribbon, select the Developer check box, and click OK.) The Record Macro dialog is displayed with a default macro name, typically Macro1, and recorded macros are saved in the Normal template by default.
Click OK to accept the default settings.
Notice that the cursor changes to an arrow with a cassette tape icon ![]() to indicate that recording is now in progress.
to indicate that recording is now in progress.
Record the following steps:
- On the Home tab in the Editing panel, click Find > Advanced Find to open the Find and Replace dialog.
- Type ‘OK button’ into the Find what field and click Find Next. Word finds the next occurrence of the text in the document and highlights it. Click Cancel to close the Find and Replace dialog.
- Hold down Shift and press the Left arrow key seven times to deselect the last seven characters in the selection (that is, the word ‘button’ and the space before it). We deselect these characters because we don’t want to apply the Strong style to them; we want to apply the Strong style to the ‘OK’ part of the text only.
- Open the Styles gallery and select the Strong character style. The word ‘OK’ now appears in bold.
- Press the Right arrow key to deselect the word ‘OK’.
Switch to the Developer tab and choose ![]() Stop Recording.
Stop Recording.
Now, click the Macros button, select the name of the macro you just recorded (Macro1) and click Edit. You should see code like the following:
 Sub Macro1()
 '
 ' Macro1 Macro
 '
 '
     Selection.Find.ClearFormatting
     With Selection.Find
         .Text = "OK button"
         .Replacement.Text = ""
         .Forward = True
         .Wrap = wdFindContinue
         .Format = False
         .MatchCase = False
         .MatchWholeWord = False
         .MatchWildcards = False
         .MatchSoundsLike = False
         .MatchAllWordForms = False
     End With
     Selection.Find.Execute
     Selection.MoveLeft Unit:=wdCharacter, Count:=7, Extend:=wdExtend
     Selection.Style = ActiveDocument.Styles("Strong")
     Selection.MoveRight Unit:=wdCharacter, Count:=1
 End Sub
A few things to note:
- The first few lines beginning with ‘ (the apostrophe symbol in green) are comment lines. Any text that appears after an apostrophe is not treated as code, but as comment text. It is important to document your code so that others can understand it, so VBA adds these lines in anticipation that you will provide a good description. You can add more comment lines anywhere in the code.
- Selection.Find.ClearFormatting clears the settings for any previous find operation.
- With Selection.Find … End With is the VBA statement combination that sets up the parameters of the search. This is where you specify the text to search for. The full power of Word’s search capability is available here, so you could equally search for something specialized like a style or impose some specific matching criteria. Refer to the Find and replace text or other items article for more information on the available options.
- Selection.Find.Execute is the statement that actually performs the find operation.
- Selection.MoveLeft moves the cursor to the left. In this example, it is used to deselect seven characters of the found text, in this case ‘ button’, because it should not be formatted with the Strong style.
- Selection.Style applies the specified style, in this case Strong, to the selection.
- Selection.MoveRight moves the cursor to the right. In this example, it is used to deselect text by moving the cursor one space to the right.
So you can easily see the code that Word automatically generated in response to your UI actions. This is a really powerful feature because you can combine the code that Word generates with your own code.
Modifying Recorded Generated Code with Your Own Code
Let’s take this generated code and modify it to find all occurrences of ‘OK button’ in a document and change them to ‘OK button’, where the word ‘OK’ has the appropriate Strong style.
In Part 2 of this series, you created a loop. Let’s do something similar here. First, let’s copy the Word-generated code into a new macro called ApplyStrongStyle and add a few lines to it. The new macro should look like the following, where the added lines are shown as highlighted text.
 Sub ApplyButtonStyle()
 '
 ' Autoformats occurrences of "OK button" so that "OK" has the
 ' appropriate "Strong" style.
 '
     Selection.Find.ClearFormatting
     With Selection.Find
         .Text = "OK button"
         .Replacement.Text = ""
         .Forward = True
         .Wrap = wdFindContinue
         .Format = False
         .MatchCase = False
         .MatchWholeWord = False
         .MatchWildcards = False
         .MatchSoundsLike = False
         .MatchAllWordForms = False
     End With
     Selection.Find.Execute

     Do While Selection.Find.Found = True
         Selection.MoveLeft Unit:=wdCharacter, Count:=7, Extend:=wdExtend
         Selection.Style = ActiveDocument.Styles("Strong")
         Selection.MoveRight Unit:=wdCharacter, Count:=1
         Selection.Find.Execute
     Loop
 End Sub
Some things to note:
- Do While Selection.Find.Found = True … Loop is a do loop that continues while our find text (in this case, ‘OK button’) is searched for in the document. When there are no more occurrences to find, the value of Selection.Find.Found changes to False and the loop ends.
- Selection.Find.Execute performs the find operation as before, only in this case it runs within the loop.
With the cursor inside the subroutine, click![]() (Run Sub/UserForm) on the toolbar (or from the menu, choose Run > Run Sub/User Form).
(Run Sub/UserForm) on the toolbar (or from the menu, choose Run > Run Sub/User Form).
Result: Each occurrence of ‘OK button’ changes to ‘OK button’ where ‘OK’ is formatted with the Strong character style.
It doesn’t matter how big the document is, how many occurrences of ‘OK button’ there are, or where those occurrences are in the text, the macro formats them all correctly. You could extend this macro to find other UI components referenced in your text and format them in a similar way.
By using a combination of the code generated by Word and your own code, you have put together something quite useful in a short space of time. This is just a small example and with a little knowledge, the possibilities are endless.
One of the big advantages of working with VBA is the amount of information and support that is available on the web. Here are a couple of references to help you get started:
- Concepts (Word VBA reference)
- Object Model (Word VBA reference)
- Automating Common Word Tasks
In addition to documentation describing the concepts and objects, look for video tutorials on YouTube and other sources. For example, here is a Microsoft Webcast called Using Visual Basic for Applications (VBA) Every Day Is Easier Than You Think that you may find helpful.
To sum up, in the final blog post in this series, you’ve discovered how Word’s macro recording feature can show you what code to use. You can then use that code in your own macros to accomplish quite significant tasks.
The intention of this blog series was to show the very basics of Word VBA and encourage writers to explore further if this is something that would be useful for their work.
Do you think we have achieved that goal? Write in and let us know. We are always keen to hear from fellow writers and colleagues.

Возможно, у вас есть ощущение, что тема макросов в Ворде достаточно маргинальная. Кто ими может пользоваться-то вообще? Ну, малварь делают иногда… Да и пишутся они на давно забытом VBA (Visual Basic for Applications, он же несколько урезанный Visual Basic 6 в интерпретируемом виде), фу!
Но на самом деле у многих ведь возникает потребность то какой-нибудь отчётик в ворде написать, то курсовую оформить, то резюме перед отправкой в компанию вашей мечты подправить… А у некоторых работа напрямую связана с Word. Часто различные системы документации предлагают экспорт в форматы doc или docx, которые нужны вашим заказчикам. И бывает, что документы после экспорта выглядят фигово, приходится их исправлять.
Работа в ворде нередко подразумевает выполнение каких-то однообразных повторяющихся действий, которые иногда (но далеко не всегда!) решаются грамотной настройкой стилей и их применением, а также использованием шаблонов. Как же автоматизировать всё остальное? Тут-то нам на помощь приходят те самые макросы.
Что же в них такого хорошего? Ну, например, они автоматически и достаточно быстро выполняют за вас однообразные действия. Могут что-то подсчитать, переформатировать документ, пометить аннотациями подозрительные места, — словом, всё, что запрограммируете. Могут даже в режиме реального времени что-то исправлять и о чем-то предупреждать, пока вы пишете документ. VBA в Word позволяет автоматизировать практически все действия, которые вы можете выполнить с документом вручную.
Макросы можно прикрепить как к конкретному документу (в чём для нас мало пользы, а для писателей троянов это единственная опция), так и к самому ворду, что позволяет применять макросы к любому документу, с которым вы работаете.
Макросы работают в любой версии Word и требуют минимум правок при переносе с одной версии на другую (а чаще всего вообще не требуют). На макросах можно даже реализовать полноценный пользовательский интерфейс с формами!
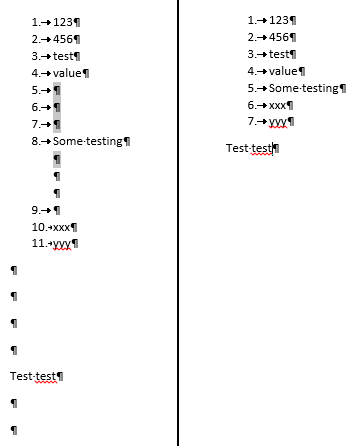
Давайте же занырнём в Visual Basic и напишем что-нибудь полезное! В качестве первого примера я покажу, как сделать макрос, который заменит два и более последовательных перевода строки на единственный. Это часто требуется при исправлении документов после экспорта из систем документации, или если вы хотите удалить случайно проставленные лишние переводы строк в собственноручно написанном документе. Макрос сделаем добротный, с пользовательским интерфейсом и прогрессом выполнения операции.
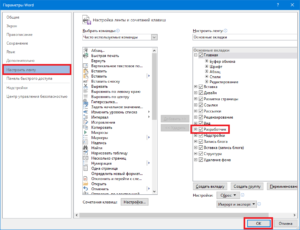
Чтобы начать писать или использовать макросы, сначала требуется убедиться, что в Word’е отображается панель «Разработчик» («Developer»). Если она у вас не отображается, следует зайти после создания нового документа в меню «Файл» («File») -> «Параметры» («Options») -> «Настроить ленту» («Customize Ribbon»), после чего найти там и установить флажок «Разработчик» («Developer»).
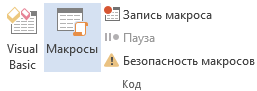
После этого нужно зайти на вкладку «Разработчик» и выбрать меню «Visual Basic».
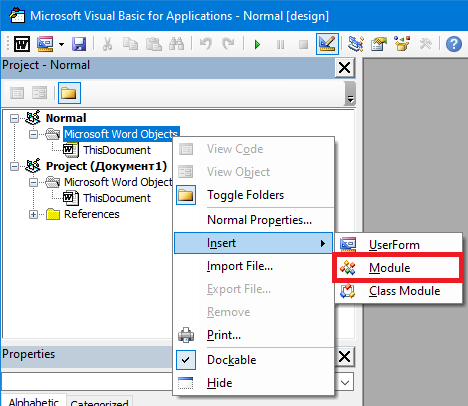
В открывшемся окне слева вы увидите два проекта: «Normal» и проект, относящийся к текущему открытому документу. Возможно, в проекте «Normal» у вас уже будет какой-то файл в каталоге «Modules». В любом случае, создайте новый модуль, кликнув правой кнопкой по проекту «Normal» и выбрав «Insert» -> «Module».
Созданный модуль представляет из себя файл, куда мы и будем писать код макросов. Можно переименовать модуль (по умолчанию его имя будет «Module1») в окне «Properties» -> «Name». Я назову свой модуль «AllMacros». Теперь откроем код модуля, дважды кликнув по его имени, и приступим к созданию макроса. Напомню, что наша цель — заменить два и более последовательных перевода строки на единственный, произведя замены по всему документу. Очевидно, нам потребуется функция, которая осуществляет поиск по тексту, ведь мы хотим найти несколько последовательных переводов строки. В Word это эквивалентно началу нового параграфа. Вы могли бы осуществить поиск начала нового параграфа через обычное окно поиска, введя в поле поиска ^p, ^13 или ^013 (что соответствует ASCII-коду перевода строки). Функция поиска будет выглядеть так:
|
1 2 3 4 5 6 7 8 9 10 11 12 13 14 15 16 17 18 19 20 21 |
Private Function FindNextText(text As String, useWildcards As Boolean) Selection.Find.ClearFormatting Selection.Find.Replacement.ClearFormatting With Selection.Find .Text = text .Forward = True .Format = False .MatchCase = False .MatchWholeWord = False .MatchKashida = False .MatchDiacritics = False .MatchAlefHamza = False .MatchControl = False .MatchWildcards = useWildcards .MatchSoundsLike = False .MatchAllWordForms = False .Wrap = wdFindStop End With Selection.Find.Execute FindNextText = Selection.Find.Found End Function |
Давайте разберём, что тут происходит. Мы объявляем функцию с двумя параметрами. Первый имеет тип String — это текст для поиска, а второй Boolean говорит о том, нужно ли использовать символы подстановки (wildcards). Про них я поговорю позже. В следующих двух строках 2 и 3 мы очищаем форматирование для строки поиска и строки замены, если оно было задано пользователем. Word позволяет задать форматирование строки поиска/замены, а для нашей задачи это не требуется. Далее мы задаём набор параметров для объекта Selection.Find: выставляем неинтересные нам параметры в False, параметр Text — это текст, который мы хотим найти, а параметр MatchWildcards указывает на использование символов подстановки. Параметр Wrap говорит о том, следует ли продолжать поиск, когда мы дошли до той точки, с которой поиск начали, и у нас его значение установлено в wdFindStop, так как мы хотим остановиться, когда дойдём до конца документа, и не зацикливать поиск.
Вообще, всё это обилие свойств и объектов из объектной модели Word, Excel и PowerPoint (да, там тоже есть макросы) хорошо описано в MSDN. Например, вот тут перечислены свойства и методы объекта Find. Есть русская документация (скажем, эта страница), но она выполнена совершенно кринжовым машинным переводом, невозможно читать:
![]()
Есть совершенно смехотворные страницы:

В общем, лучше читайте на английском. 
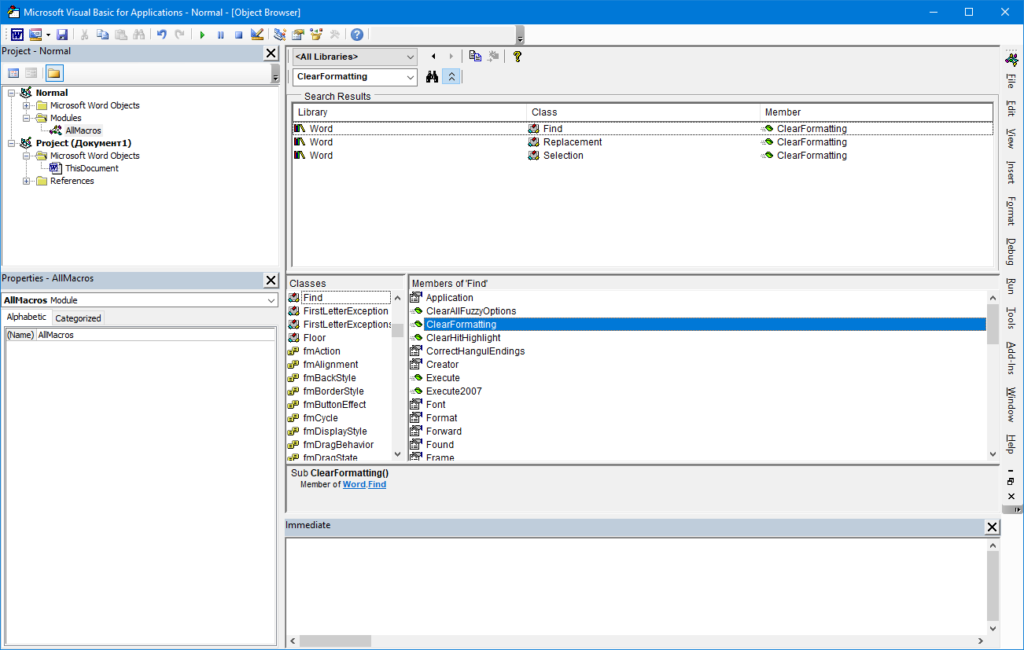
Кроме того, все доступные объекты, их свойства и методы можно посмотреть прямо в редакторе VBA в самом Word’е. Для этого нужно нажать F2 или выбрать меню «View» -> «Object browser», что приведет к открытию браузера объектов (Object browser), в котором можно пролистать или поискать то, что вам доступно.
Но вернёмся к нашей функции. На строке 19 мы непосредственно выполняем поиск заданного текста с указанными параметрами. Строка 20 — эта конструкция, аналогичная return в си-подобных языках, указывает возвращаемое значение функции. Мы возвращаем булевое значение Selection.Find.Found, которое говорит о том, было ли что-то найдено.
Хочу заметить, что использование объекта Selection.Find и изменение его свойств заменит их значения и для пользователя. Например, если вы в Word искали что-то хитроумное с конкретно заданными параметрами, то выполнение макроса заменит ваши параметры поиска на те, которые мы задали в макросе. В идеале, их можно запомнить, а потом вернуть, но мы не будем так сильно заморачиваться, а просто всё за собой подчистим. Сделаем функцию, которая сбрасывает параметры в значения по умолчанию:
|
Private Sub ClearFindAndReplaceParameters() With Selection.Find .ClearFormatting .Replacement.ClearFormatting .Text = «» .Replacement.Text = «» .Forward = True .Wrap = wdFindStop .Format = False .MatchCase = False .MatchWholeWord = False .MatchWildcards = False .MatchSoundsLike = False .MatchAllWordForms = False End With End Sub |
Обратите внимание, что это уже Sub, а не Function, потому что мы не хотим из этой процедуры возвращать никакое значение. Это аналог функции void в си-подобных языках.
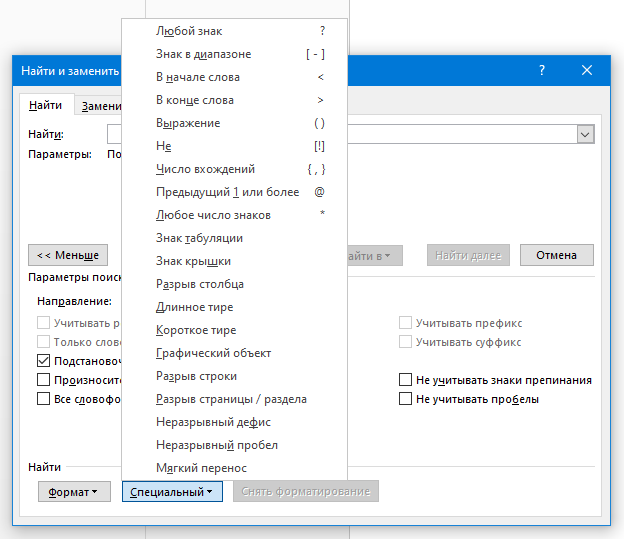
Теперь нужно определить, как нам найти два или более последовательных перевода строки. Для этого нам и потребуются упомянутые ранее wildcards. Word поддерживает символы подстановки при поиске, и по своей функциональности они напоминают регулярные выражения. Кстати, вы можете ими пользоваться и без макросов из окна расширенного поиска:
Хорошее описание символов подстановки я нашел здесь, правда, на английском языке. Составим регулярное выражение для поиска двух и более последовательных переводов строки: [^013]{2,}. Это очень похоже на классическое регулярное выражение Perl или PCRE, но в квадратных скобках в уникальном стиле Word мы задаем символ перевода строки. Фигурные скобки указывают, что символов перевода подряд должно быть два или более. Тут, кстати, есть нюанс: не во всех версиях/локализациях Word такая регулярка заработает. В некоторых случаях вместо запятой потребуется указать точку с запятой (да, в Microsoft иногда делают крайне странные вещи). Чтобы сделать наш макрос более универсальным, напишем функцию, которая вернёт регулярное выражение, пригодное для поиска в той версии Word, в которой эту функцию запустили:
|
Private Function GetLineBreakSearchRegExp() On Error GoTo Err FindNextText «[^013]{2,}», True GetLineBreakSearchRegExp = «[^013]{2,}» Exit Function Err: GetLineBreakSearchRegExp = «[^013]{2;}» End Function |
Здесь мы сначала пытаемся осуществить поиск с помощью wildcard’а [^013]{2,}. Если всё окей, то вернём из функции этот самый wildcard как рабочий (строка 4). В противном случае произойдёт ошибка, но мы готовы её обработать: мы установили обработчик всех ошибок в строке 2. Нас перекинет на метку Err, и тут мы вернём wildcard, который пригоден для других ревизий Word (в котором запятая внутри фигурных скобок заменена на точку с запятой).
Далее напишем функцию, которая будет заменять несколько последовательных переводов строки на единственный:
|
Private Sub RemoveNextEnters() Selection.MoveStart wdWord, 1 If Selection.Range.Start <> Selection.Range.End Then Selection.Delete End Sub |
Эта функция подразумевает, что вызывать её будут тогда, когда объект Selection указывает на найденные несколько переводов строки. В строке 2 перемещаем начало выделения (а в выделены у нас будут все найденные последовательные переводы строки) на один символ вперед, а затем в строке 3, если начало выделения не совпадает с его концом, удаляем его содержимое. Таким образом, если было выделено три перевода строки, мы отступаем вперед на 1 символ (оставляя один перевод строки нетронутым), а затем удаляем оставшиеся два.
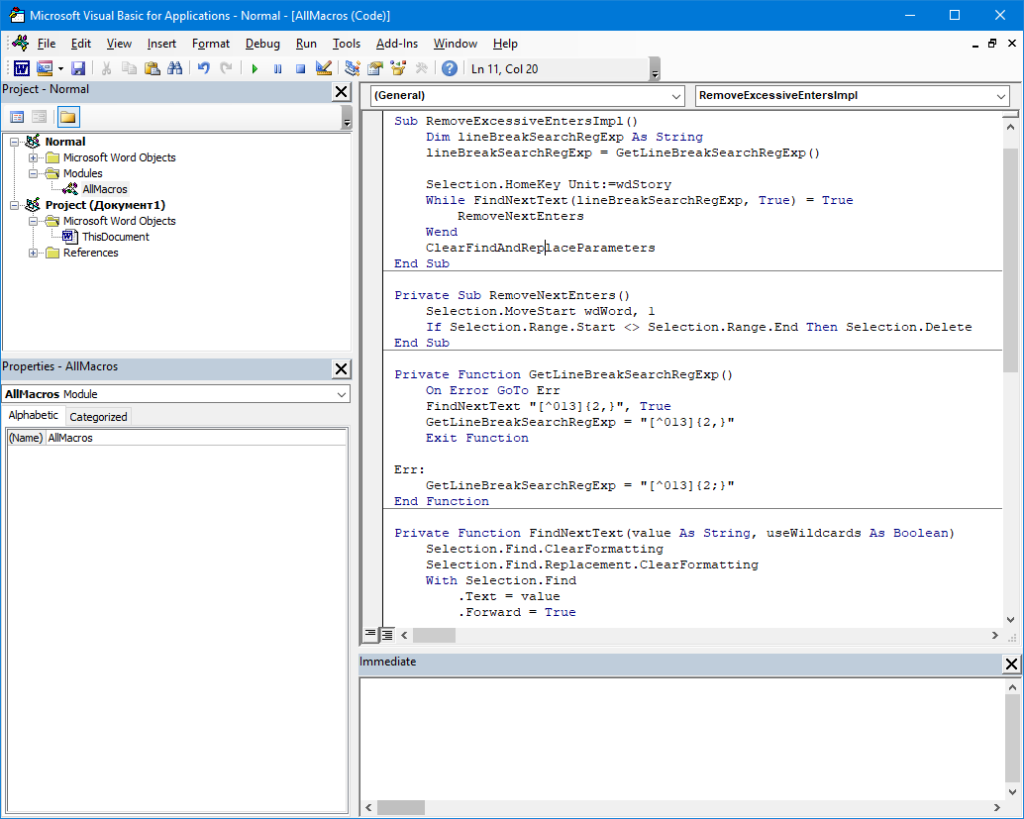
Осталось написать последнюю функцию, которая будет всем управлять.
|
Sub RemoveExcessiveEnters() Dim lineBreakSearchRegExp As String lineBreakSearchRegExp = GetLineBreakSearchRegExp() Selection.HomeKey Unit:=wdStory While FindNextText(lineBreakSearchRegExp, True) = True RemoveNextEnters Wend ClearFindAndReplaceParameters End Sub |
Здесь мы оперируем ранее написанными функциями. Сначала получаем текст регулярного выражения (wildcard’а) для поиска нескольких переводов строки подряд, затем вызовом HomeKey в строке 5 переходим в самое начало документа (перемещаем туда курсор), а затем в цикле ищем все интересующие нас места и удаляем излишние переводы строки. В конце сбрасываем параметры поиска на значения по умолчанию.
Вот и всё, макрос можно запускать! Обратите внимание, что все функции, кроме последней, мы пометили Private. Мы не хотим, чтобы их вызывали напрямую. Доступной для вызова снаружи будет только функция RemoveExcessiveEnters. Перед запуском макроса стоит убедиться, что макросы включены. Если вылазит такая панель, то нужно нажать «Включить содержимое» («Enable content»):
![]()
Если такой панели нет, то можно зайти в меню «Файл» («File») -> «Сведения» («Info») и включить макросы уже оттуда:
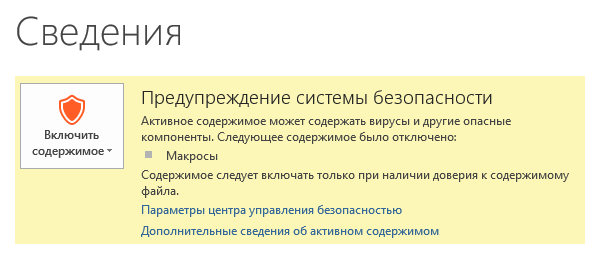
Вы можете включить макросы на время одного сеанса Word (это по умолчанию и происходит, если нажимаете «Включить содержимое»), так что после перезапуска Word макросы снова будут отключены. Для запуска макроса возвращаемся в Word на панель «Разработчик» и нажимаем кнопку «Макросы» («Macros»), выбираем наш макрос RemoveExcessiveEnters и нажимаем «Выполнить» («Run»). Разумеется, у вас должен быть открыт какой-нибудь подопытный документ, где имеются лишние переводы строк. В качестве бонуса наш макрос ещё и удалит пустые элементы списков, потому что они представляют из себя точно такие же несколько переводов строки подряд.
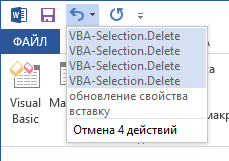
Макрос выполняется достаточно быстро. Его действие можно отменить (каждый шаг независимо), открыв меню выполненных действий:
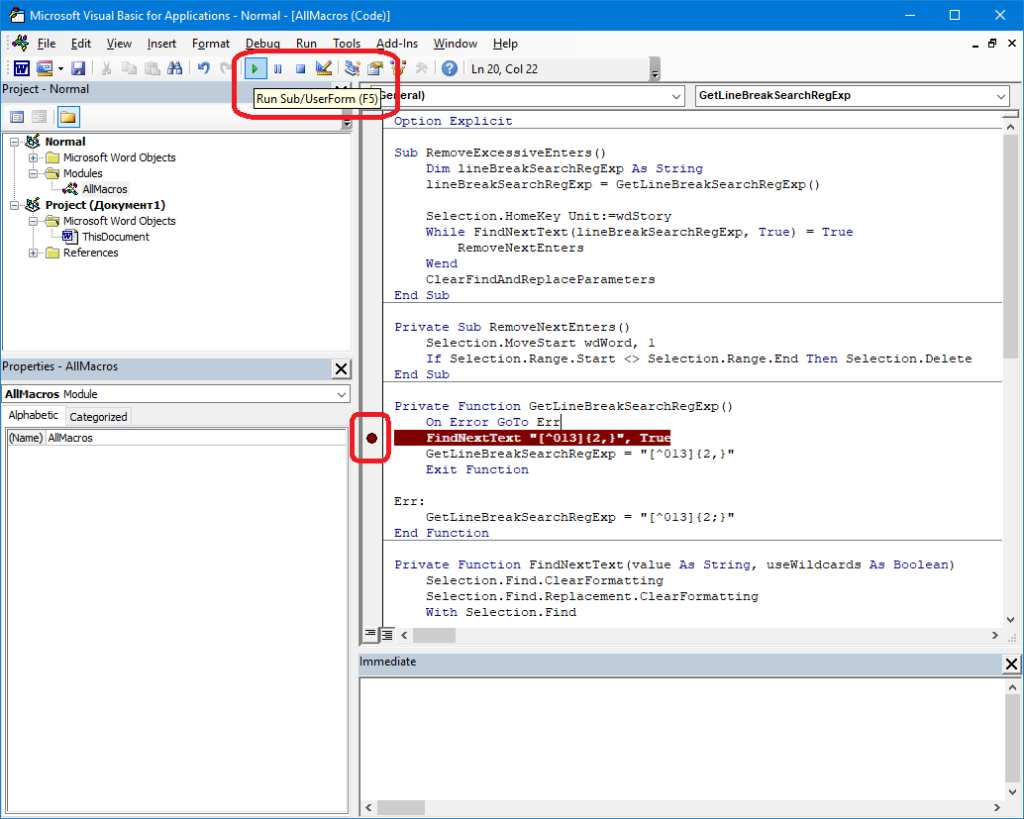
Макросы можно отлаживать через окно VBA, в котором мы писали макрос. Кликнув слева от строки кода, можно, как и в других средах разработки, поставить точку останова, а потом запустить макрос кнопкой «Run». Запустится та функция, на которой у вас находится курсор. Если вы поставите курсор на функцию с параметрами, то появится обычный запрос на выбор макроса для запуска, как при нажатии на кнопку «Макросы» в Word.
Думаю, что материала для одной статьи уже вполне достаточно. Я, конечно, пообещал горы функционала в виде интерфейса пользователя, отслеживания прогресса выполнения, и всё это обязательно будет, но в следующей публикации.
Код макроса можно скачать тут. Вы сможете его импортировать к себе в Word, кликнув правой кнопкой на «Normal» -> «Import file…» и выбрав загруженный файл.
P.S. Кстати, рекомендую создавать бэкапы своих макросов, экспортируя их куда-нибудь на диск. Даже лицензионный Word имеет свойство их иногда по какой-то причине удалять из шаблона Normal, в котором мы их создавали.