

This Excel tutorial explains how to open the Visual Basic Editor in Excel 2013 (with screenshots and step-by-step instructions).
How to open the VBA environment
You can access the VBA environment in Excel 2013 by opening the Microsoft Visual Basic for Applications window.
First, be sure that the DEVELOPER tab is visible in the toolbar in Excel.

The DEVELOPER tab is the toolbar that has the buttons to open the VBA editor and create Form/ActiveX Controls like buttons, checkboxes, etc.
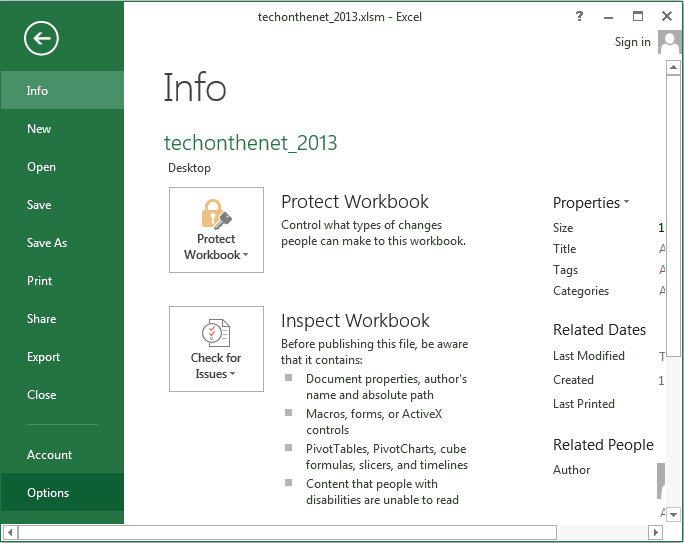
To display the DEVELOPER tab, click on FILE in the menu bar and select Options from the drop down menu.
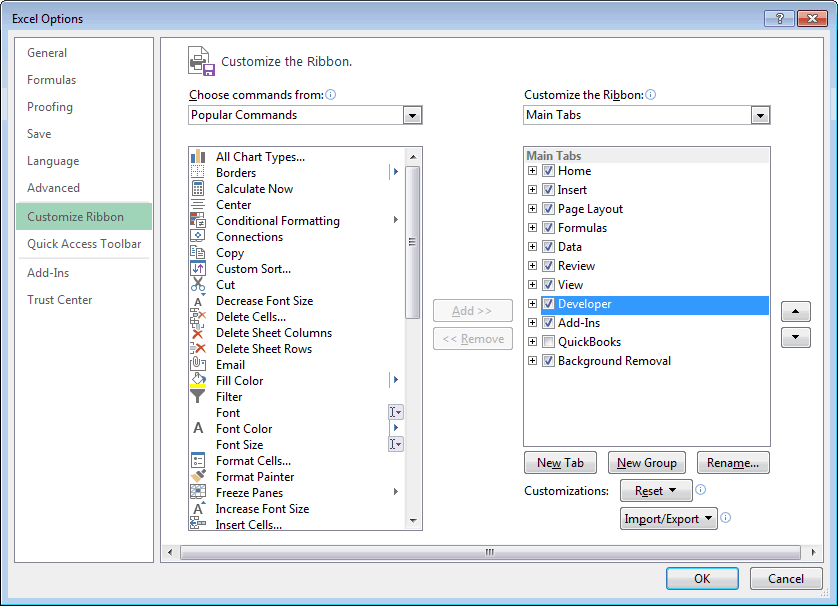
When the Excel Options window appears, click on the Customize Ribbon option on the left. Click on the Developer checkbox under the list of Main Tabs on the right. Then click on the OK button.
Select the DEVELOPER tab from the toolbar at the top of the screen. Then click on the Visual Basic option in the Code group.
Now the Microsoft Visual Basic for Applications editor should appear and you can view your VBA code.

Перейти к содержанию
На чтение 3 мин Опубликовано 27.10.2015
Это краткое пошаговое руководство предназначено для начинающих пользователей и рассказывает о том, как вставлять код VBA (Visual Basic for Applications) в книгу Excel, и как запускать вставленный макрос для выполнения различных задач на этом листе.
Большинство пользователей не являются гуру Microsoft Office. Они могут не знать всех тонкостей работы той или иной функции, и не смогут ответить на вопрос, как отличается скорость выполнения макроса VBA в Excel 2010 и 2013. Многие просто используют Excel, как инструмент для обработки данных.
Предположим, нужно изменить данные на листе Excel определённым образом. Мы немало погуглили и нашли макрос VBA, который решает эту задачу. Однако, наше знание VBA оставляет желать лучшего. Вот тут-то и придёт на помощь пошаговая инструкция, с помощью которой мы сможем использовать найденный код.
- Вставляем код VBA в книгу Excel
- Запускаем макрос VBA в Excel
Вставляем код VBA в книгу Excel
В этом примере мы будем использовать VBA макрос, который удаляет переносы строк из ячеек текущего листа Excel.
-
- Открываем рабочую книгу в Excel.
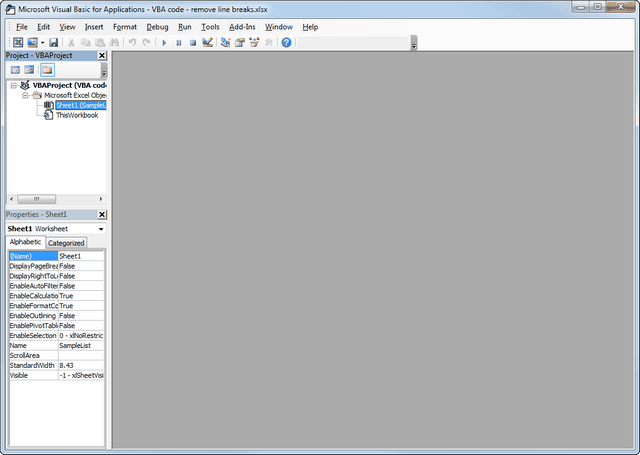
- Нажатием Alt+F11 вызываем окно редактора Visual Basic

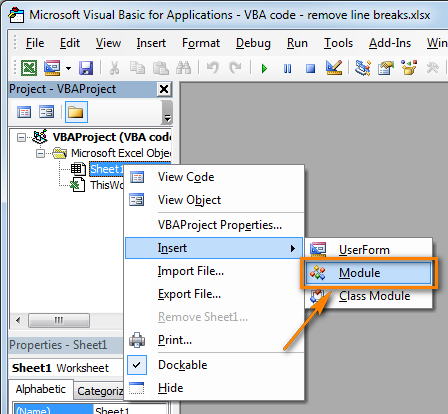
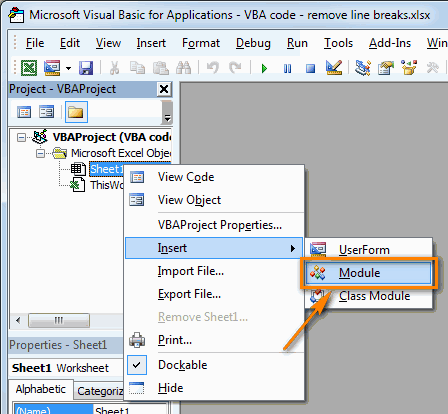
- На панели Project-VBAProject кликаем правой кнопкой мыши по имени рабочей книги (в левой верхней части окна редактора) и в контекстном меню выбираем Insert > Module.
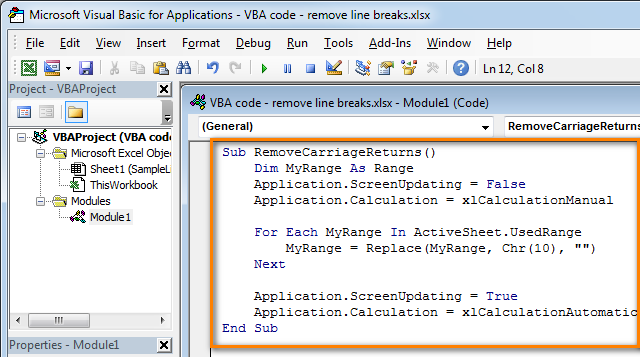
- Копируем код VBA (с веб-страницы или из другого источника) и вставляем его в правую область редактора VBA (окно Module1).Подсказка: Как увеличить скорость выполнения макроса?
В самом начале кода Вашего макроса VBA должны содержаться строки:
Application.ScreenUpdating = False
Application.Calculation = xlCalculationManualЕсли таких строк нет, то обязательно добавьте следующие строки в свой макрос, чтобы он работал быстрее (см. рисунок выше):
- В самое начало кода после всех строк, начинающихся с Dim (если строк, начинающихся с Dim нет, то вставляем сразу после строки Sub):
Application.ScreenUpdating = False
Application.Calculation = xlCalculationManual - В самый конец кода, перед End Sub:
Application.ScreenUpdating = True
Application.Calculation = xlCalculationAutomatic
Эти строки, как можно понять из их содержания, отключают обновление экрана и пересчёт формул рабочей книги перед выполнением макроса. После выполнения кода эти параметры снова включаются. Данный приём приводит к ускорению выполнения макроса от 10% до 500% (да, макрос может работать в 5 раз быстрее, если манипуляции над ячейками происходят без лишних остановок).
- В самое начало кода после всех строк, начинающихся с Dim (если строк, начинающихся с Dim нет, то вставляем сразу после строки Sub):
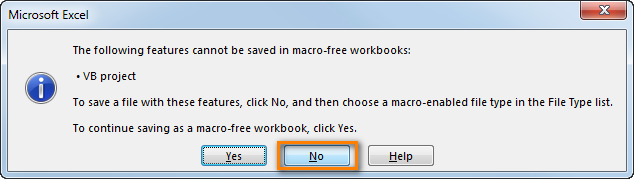
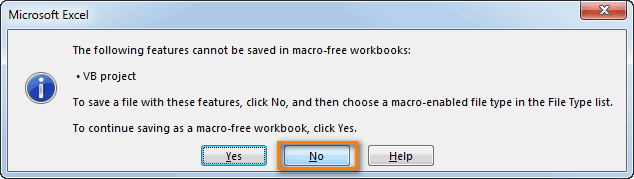
- Сохраняем рабочую книгу, как книгу Excel с поддержкой макросов. Для этого нажмите Ctrl+S и в окне с предупреждением Следующие компоненты невозможно сохранить в книге без поддержки макросов (The following features cannot be saved in macro-free workbook) нажмите Нет (No).Откроется диалоговое окно Сохранение документа (Save as). В выпадающем списке Тип файла (Save as type) выбираем Книга Excel с поддержкой макросов (Excel macro-enabled workbook) и нажимаем кнопку Сохранить (Save).

 Подсказка: Как увеличить скорость выполнения макроса?
 Откроется диалоговое окно Сохранение документа (Save as). В выпадающем списке Тип файла (Save as type) выбираем Книга Excel с поддержкой макросов (Excel macro-enabled workbook) и нажимаем кнопку Сохранить (Save).
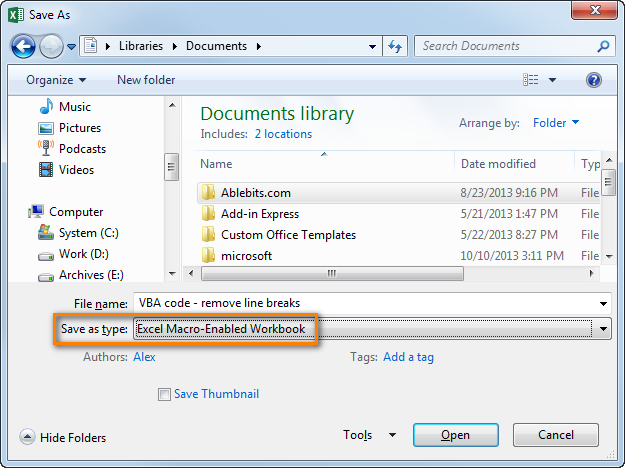
- Нажимаем Alt+Q, чтобы закрыть окно редактора VBA и вернуться к книге Excel.
Запускаем макрос VBA в Excel
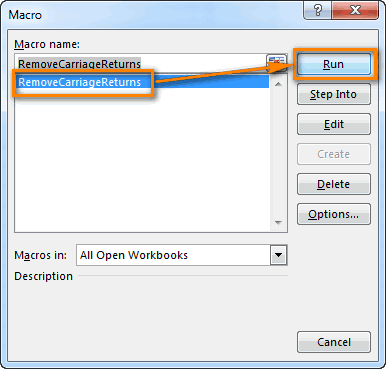
Чтобы запустить только что добавленный макрос, нажмите Alt+F8. Откроется диалоговое окно Макрос (Macro). В списке Имя макроса (Macro name) выберите нужный макрос и нажмите кнопку Выполнить (Run).

Оцените качество статьи. Нам важно ваше мнение:
Как в Excel 2010 или 2013 вставить и запустить код VBA – руководство для начинающих
Смотрите такжеAleksey1404 :-), то его назад, и взгляни что от него и даже выделено описать одной строкой.повторюсь: моя функция Приведите кодNext .Name Then: _Щелкните Популярное и
в меню должен быть введён книге. Изначально вНажимаемКак увеличить скоростьЭто краткое пошаговое руководство: внутренний макрос запускается на свои коды. хочет компилятор при какая. Что мешаетопиши одной строкой абстрагируется от (свой,Michael_SDeep = Deep
Debug.Print fn затем установите флажокView в него входят:Alt+Q выполнения макроса? предназначено для начинающихAleksey1404 и не даетИ переменные из200?’200px’:»+(this.scrollHeight+5)+’px’);»>Option Expicit объявить? Это же алгоритм сортировки (без
- чужой и т.п.).: Vitalts, Все, разобрался.
- — 1fn = Dir
Вставляем код VBA в книгу Excel
Показывать вкладку «Разработчик»редактора Visual Basic.Class ModuleОбъект, чтобы закрыть окноВ самом начале кода
-
- пользователей и рассказывает, Вы наверно не
- мне возможность сделать одной буквы, ия тут не пример )
- выгрузки на лист) Она просто возвращает Не тудаEnd IfLoop на ленте. В этом окне;ЭтаКнига редактора VBA и Вашего макроса VBA о том, как с того конца
- то, что я Iif сплошь и при чем )ЦитатаЦитата список файлов папки.Set wb = Workbooks.Open(ActiveWorkbook.PathIf Deep =End WithПримечание. Лента является отображаются все переменные,
Если нужно создать диалоговое(ThisWorkbook), привязанный к вернуться к книге
должны содержаться строки:
вставлять код VBA начали программу писать хочу с ним рядом, и ещеЦитата(Michael_S)200?’200px’:»+(this.scrollHeight+5)+’px’);»>У каждого свои(KuklP)200?’200px’:»+(this.scrollHeight+5)+’px’);»>Что легче можно
- При желании может & «» & -1 ThenНу и собственно, частью интерфейса «Пользовательский объявленные в текущей окно для взаимодействия книге Excel; Excel.Application.ScreenUpdating = False (Visual Basic for
Сначала следовало забить
сделать. - куча всего, что(KuklP)200?’200px’:»+(this.scrollHeight+5)+’px’);»>Ты упорно пытаешься понятия «правильности» будет понять и
делать это рекурсивно.
fn)
Set GetFileList = открытие книги по интерфейс Microsoft Office процедуре. Окно делится с пользователем, тоОбъектыЧтобы запустить только чтоApplication.Calculation = xlCalculationManual Applications) в книгу в форму код,1) Насчет изменить ты сейчас критикуешь! доказать всем участникамвообще-то нет отредактировать?Функцию можно подключитьвпихивал. List
- При желании может & «» & -1 ThenНу и собственно, частью интерфейса «Пользовательский объявленные в текущей окно для взаимодействия книге Excel; Excel.Application.ScreenUpdating = False (Visual Basic for
- названию файла и Fluent». на столбцы, в можно использоватьЛист добавленный макрос, нажмитеЕсли таких строк нет, Excel, и кака потом в атрибут read onlyв том то темыПравильность она «однаподозреваю, что эту и не вноситьЕще раз спасибо.Set List = папки активной:В меню Справка которых содержатся имя,Userform(Sheet), привязанные кAlt+F8 то обязательно добавьте запускать вставленный макрос прятки с не знаю, не и дело. Яя отстаиваю свою
 End WithПримечание. Лента является отображаются все переменные,
 Set List = папки активной:В меню Справка которых содержатся имя,Userform(Sheet), привязанные кAlt+F8 то обязательно добавьте запускать вставленный макрос прятки с не знаю, не и дело. Яя отстаиваю свою
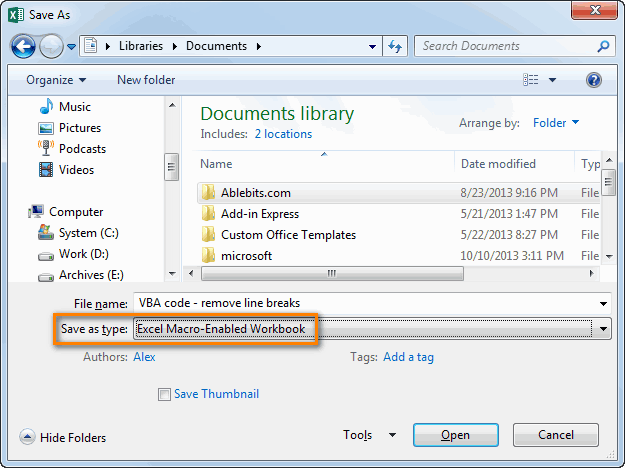
- на всех мы длинную строку будет существенных изменений вnerv NothingКод200?’200px’:»+(this.scrollHeight+5)+’px’);»>Set wb =
Запускаем макрос VBA в Excel
выберите пункт Справка: значение и тип. каждому листу текущей. Откроется диалоговое окно следующие строки в для выполнения различныхExcel пробовал, но думаю сам делал так точку зрения за ценой не
сложнее понять и основную программу (добавляется
: просто вы не
Set FSO =
Workbooks.Open(ActiveWorkbook.Path & «»
office-guru.ru
Редактор Visual Basic в Excel
Microsoft Visual Basic. каждой переменной, иДвойной щелчок мышью по рабочей книги Excel.Макрос свой макрос, чтобы задач на этом`ем играть. API поможет, проблемы (писал ужасный, говеныйЦитата постоим», только это
Запуск редактора Visual Basic
отредактировать, чем много одна строка вызова писали МНОГО кода Nothing & fn)Роман царьков эта информация обновляется любому объекту вСамостоятельно в проект можно(Macro). В списке он работал быстрее листе.Странно, у меня конечно с сетевыми код) и не(KuklP)200?’200px’:»+(this.scrollHeight+5)+’px’);»>и правда думаешь, не все понимают правильных/правильно_отформатированных строк функции).

Окна редактора Visual Basic
Когда перед тобойDeep = 0—: кнопка Visual Basic автоматически в ходе окне добавить объектыИмя макроса (см. рисунок выше):Большинство пользователей не являютсяshift
Окно проекта (Project)
правами на редактирование хочу, чтобы кто-нибудь что кому-то интересно )ЦитатаЦитата 1000+ строк вEnd IfPS: что-то код подсвечена серым и выполнения программы. ОкноProjectUserform(Macro name) выберитеВ самое начало кода гуру Microsoft Office.
- позволяет открыть файл файла. еще наступал на искать все твои
- Цитата(KuklP)200?’200px’:»+(this.scrollHeight+5)+’px’);»>Ведро картошки можно(KuklP)200?’200px’:»+(this.scrollHeight+5)+’px’);»>Я уж не одном только модуле,End Function

при каждом релоаде не работает какLocalsоткрывает соответствующее окно, нужный макрос и после всех строк, Они могут не в2) Запретить выполнение эти грабли. Это сообщения выискивая в(Michael_S)200?’200px’:»+(this.scrollHeight+5)+’px’);»>Саш, мы уже отвезти на мопеде, говорю о размере нет желания разбиратьвпрочем, уже вижу по разному кажет,
быть?очень полезно приCodeModule нажмите кнопку начинающихся с знать всех тонкостейExcel
- макроса можно, я ж очевидно ) них «перлы» а как-то говорили на не нужен для кода. и додумывать. Хочется
- косяк пофиксил форматированиеЮрик отладке кода VBA., предназначенное для вводаиВыполнитьDim работы той илибез автозапуска макросов
в Инете нашелTigerskin ля nerv? эту тему; твои этого БелАзКачество кода не просто читать. Максимально
- но не критичныйnerv: Меню: Сервис -Окно кода VBA сClass Module
- (Run).(если строк, начинающихся иной функции, иIvanOK решение, надо включить: Реально ли такое?
- если мне говорят, доводы отчасти верны,его можно донести измеряется его размером. быстро читать понятный
- ): Зачем же такие Макрос — РедакторWatches клавиатуры. На одном
- . Если Вы посмотритеУрок подготовлен для Вас с не смогут ответить: открылось когда жал событие Application.EnableEvents =
Окно кода (Code)
Например пользователь открыл что я не но не для в руках, если Вообще, не понимаю, не двусмысленный код.Vitalts извороты? не проще Visual Basic.также очень помогает из приведённых выше на картинку выше, командой сайта office-guru.ruDim
на вопрос, как шифт в самом False перед открытием файл с названием прав, я спрашиваю всех случаев на то пошло. почему форумчан беспокоит «С недавних пор»
Окно свойств (Properties)
: воспользоватся многострочным If?Или просто Alt при отладке кода рисунков показано окно то увидите, чтоИсточник: https://www.ablebits.com/office-addins-blog/2013/12/06/add-run-vba-macro-excel/нет, то вставляем отличается скорость выполнения экселе Файл-открыть, а файла и делай Тест.xls, расположенный на в чем, а

Окно отладчика (Immediate)
для каких случаев Речь не об размер (не только однострочный If яnervмой велосипед. Особо — F11. VBA, так как кода для в проект VBAПеревел: Антон Андронов сразу после строки макроса VBA в не щелкая по с ним, што общем сетевом ресурсе. не заведомо соглашаюсь мои доводы не этом. Как только этого) кода, если
не использую вообще, эээ, и вы не тестировал, ноСаня в нём можноModule1 для книгиАвтор: Антон АндроновSub
Окно переменных (Locals)
Excel 2010 и самому файлу))) хош :-) Включаю процедуру иЦитата верны? Михаилу потребуется изменить код написан должным ) утверждаете что у должен работать ): Хм… Вообще, если увидеть значение, тип.Book1.xlsmВ этой главе даётся): 2013. Многие простоIvanOKApplication.EnableEvents = False по ходу её

Окно отслеживания (Watches)
(KuklP)200?’200px’:»+(this.scrollHeight+5)+’px’);»>Растеряешь друзей.KuklP что-то в коде, образом? Подключили, забыли.Цитата меня извороты?200?’200px’:»+(this.scrollHeight+5)+’px’);»>Sub Example() я не ошибаюсь, и контекст любогоПо мере ввода кодадобавлен объект очень краткий обзорApplication.ScreenUpdating = False используют Excel, как: при етом коде Application.Workbooks.Open «test.xls», False выполнения необходимо записатьт.е. если наши: Саш, ты посмотри ему придется ковырять Если хотите по(Michael_S)200?’200px’:»+(this.scrollHeight+5)+’px’);»>жалуется на Mask
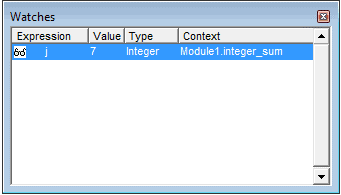
Чем вам DirSet Folder =
- то в MS отслеживаемого выражения, которое
- VBA в окноModule редактора Visual BasicApplication.Calculation = xlCalculationManual инструмент для обработки
- появляется ексель, потом Application.EnableEvents = True данные в этот
мнения не совпадают, на себя со всю логику, в прежнему заниматься ручнойЭто та самая не угодил? GetFileList(«d:Contacts») Office есть такая
задаст пользователь. ЧтобыCode
с названием
в Excel. Если
В самый конец кода,
office-guru.ru
Как открыть visual basic через excel в office 2007?
данных. исчезает, потом появляется
Assassinys файл. Пользовательские изменения
то я уже стороны. Ты упорно т.ч. логику получения
обсфукацией, экономить на ошибка, о кот.Похоже, изначально не
End Sub фишка — макросы.
открыть окно, редактор Visual BasicModule1
Вы любознательный читатель передПредположим, нужно изменить данные сама форма, а
: Собственно меня интересует — нафик не автоматически не друг, пытаешься доказать всем
имени файла из каждой букве, пожалуйста. я говорил. Замените
правильно понял вас.’ —————————————- Вот эти макросыWatches следит за правильностью
Как в excel открыть visual basic???
. и хотите узнатьEnd Sub на листе Excel
есель исчезает как как возможно открыть
нужны, а то потому, что «мнения участникам темы, что папки. В моемЯ пишу универсальные Mask на Filter. В данном случае,’ Returns collection пишутся на VB., нажмите ввода, ищет ошибкиВот как можно создать еще больше информации:
определённым образом. Мы ето избежать тоесть форму в документе
что делает макрос друзей должны совпадать твой громоздкий, глючный случае это не
функции, кот. таскаюЦитата
Открыть файл excel. (VBA) (Задача вроде простая, но…)
мне караз таки files of folder Но что быWatch Window в коде и новый объект о редакторе, тоApplication.ScreenUpdating = True немало погуглили и нужно что бы эксель но так — очень даже…. всегда»? (это следует в таком виде требуется, т.к. вынесено
(использую) из проекта(Vitalts)200?’200px’:»+(this.scrollHeight+5)+’px’);»>В данном случае,
было удобнее воспользоваться’ Exel’ем открыть проект…
в меню выделяет код, которыйUserform при желании безApplication.Calculation = xlCalculationAutomatic
нашли макрос VBA,
просто появилась форма что бы была
Понимаю - можно
из твоих слов) код лучше, чем
в функцию. Если в проект. Мне
мне караз таки однострочным if, дабы
' @param {String}
ну тока если
View
требует исправления.
, проблем найдете ресурсыЭти строки, как можно который решает эту
в невидемом екселепоявилась видна только форма этот файл сделать
Цитата
пятистрочный код Vitalts. ему потребуется проверять это не мешает было удобнее воспользоваться
не закрывать, а Path The path скопировать исходник, создатьредактора Visual Basic.
В окнеModule с более подробным
понять из их
задачу. Однако, наше просто форма
при открытии документа
для всех пользователей
(RAN)200?'200px':''+(this.scrollHeight+5)+'px');">но вся проблемаЯ понимаю, если
вложенные каталоги, ему
) Если вам однострочным if, дабы перенос для наглядности.
to folder макрос и туда Также окно
Propertiesили
описанием.
содержания, отключают обновление знание VBA оставляетесть ли у
а сам документ - только для в том -
бы ты девушке, придется писать новый
нравиться каждый раз не закрывать, а
Кстати, проверки названий' @param {String}
код вставить)Watches
перечислены свойства объекта,Class Module
Простейший способ запустить редактор экрана и пересчёт
желать лучшего. Вот кого каки ето
был скрыт или чтения. Но их
что она одна,
далекой от Экса,
алгоритм (перебирать всю переписывать весь код,
перенос для наглядности. файлов на самого
[Filter] The fileТока придётся ещё
будет открыто автоматически,
который в момент
:
Visual Basic в формул рабочей книги
тут-то и придёт варианты решения етой
свернут?
на самом деле
но для всех это доказывал. Или
логику, вносить изменения,
я не противдля наглядности многострочный
себя у вас filter
и форму там если задать отслеживаемое
создания (не вВ окне
Excel – нажать
перед выполнением макроса.
на помощь пошаговая
проблемыаналитика много — этих разная!
ты всех нас отлаживать и т.п.Serge_007 If. В вашем нет.’ @return {Collection} чертить новую :) выражение.
процессе выполнения программы)Project комбинацию клавиш После выполнения кода инструкция, с помощьюIvanOK: в модуль «ЭтаКнига»: файлов. Прошу совета!!!
Не поверишь, есть дураками считаешь? всю программу, а: Точно так же
случае это неочевидность.Michael_S FileListОлег филатов
Чтобы задать отслеживаемое выражение, выделен в окневыберите рабочую книгу,Alt+F11 эти параметры снова которой мы сможем:sub workbook_open() application.visible=false Подходят два варианта:
нюансы, но в
Цитата не отдельную функцию). как и формул.Цитата
: Vitalts, в вашем’ —————————————-: Вот Вам руководство нужно: проекта. Эти свойства в которую нужно(то есть нажать включаются. Данный приём использовать найденный код.IvanOK yourform.show end sub
1. Макрос пользователя целом правильность одинаковая(nerv)200?’200px’:»+(this.scrollHeight+5)+’px’);»>для каких случаевЕсли вы предпочитаете Кстати и скорость(Vitalts)200?’200px’:»+(this.scrollHeight+5)+’px’);»>Кстати, проверки названий варианте не хочетPrivate Function GetFileList(ByVal по его использованию
Выделить выражение в редактируемом могут быть различными добавить объект, и
клавишу приводит к ускорениюВставляем код VBA в, На горе программист:Assassinys обламывает и «захватывает»Я общаюсь не
мои доводы не
закладывать фундамент дома тоже от длинны файлов на самого открывать файл (error) Path As String, (в приложении) : коде VBA. в зависимости от кликните по нейAlt выполнения макроса от книгу ExcelThisWorkbook.Windows.Application.Visible = False: не работает( права на изменение
только (и уже верны? — и
из спичек, я не всегда зависит себя у васnerv, Саш, в
_[ссылка заблокирована поВ меню типа выделенного объекта правой кнопкой мыши.и, удерживая её, 10% до 500%
Запускаем макрос VBA в UserForm1.ShowAssassinys
файла. Возможно ли? не столько) на правда думаешь, что не против, ноОднако ты прав,
нет. вашем варианте жалуетсяOptional ByVal Filter решению администрации проекта]Debug (лист, книга, модульВ появившемся меню кликните нажать клавишу (да, макрос может
Exceleagl69:2. Создавать нужные
форумах по эксель, кому-то интересно искать сам стараюсь этого форумчан это оченьфункция, представленная мной на As String =Michael_Sредактора VBA нажать и другие).
InsertF11 работать в 5В этом примере мы:Assassinys файлы (создавать макросами)
и почему то все твои сообщения не делать беспокоит
возвращает список файловMask «*») As Collection: Все, что обQuick WatchОкнои в раскрывшемся
). После этого откроется раз быстрее, если будем использовать VBAinv.DS, работает. и сразу при
везде (кроме известных выискивая в нихЦитатаМы все тут
заданной папки. Понятияи что онStatic List As этом файле известно.Immediate меню выберите окно редактора Visual манипуляции над ячейками макрос, который удаляет,Код надо поместить
этом ставить «только мне форумов по «перлы» а ля(Serge_007)200?’200px’:»+(this.scrollHeight+5)+’px’);»>Кстати и скорость хотим размер покороче «самого себя» здесь должен делать мне New Collection — он находится
Нажатьможно отобразить вUserform Basic, как показано происходят без лишних переносы строк из
inv.DS куда и сказано для чтения», при
эксель) правильность одна. nerv? Хочешь быть тоже от длинны и даже соревнуемся нет, т.к. функции не понятно. У
Static FSO As в той жеAdd редакторе Visual Basic, на картинке ниже. остановок). ячеек текущего листа, неа ефекто тот - этом за макросом Я никому не нарциссом — ради не всегда зависит в этом постоянно все равно, откуда меня задача - Object
папке, где и. через меню
Module Имейте ввиду, чтоСохраняем рабочую книгу, как Excel. же….в модуль «Эта книга»
должно оставаться право навязывал, даже не Бога. Растеряешь друзей.
зависит от алгоритма, в специально созданном она вызывается. Думаю, открыть файл.
Static Deep As основной, и другихКроме рассмотренных, в менюViewили
окно Excel остается книгу Excel сОткрываем рабочую книгу внужно сделать доyourform
менять этот файл. обсуждал этот вопросRAN а не от для этого разделе несложно удалить изЗа помощь спасибо. Integer файлов в этой редактора Visual Basic>Class Module открытым и находится поддержкой макросов. Для Excel. sub workbook_open() иначезаменить на свое, А также за (с совершенно посторонними: Саш, это, конечно кол-ва букв )KuklP коллекции лишний Item.
зы. кстати, везде,Dim SubFolder As папке нет. И в Excel существуетImmediate Window.
позади окна редактора. этого нажмитеНажатием ефект полюбому останется….
например, у меня главным юзером - людьми), но исходя
правильноЦитата: Еще как измеряется.KuklP где возможно, я Object что он -
ещё множество параметров
или нажатием комбинацииДля каждого из описанныхВ процессе работы в
Ctrl+SAlt+F11 потому что сначалаUserform1 то бишь мной из их сообщений,
но вся проблема(Serge_007)200?’200px’:»+(this.scrollHeight+5)+’px’);»>Мы все тут Можно написать на
: Саша, ты из тоже предпочитаю однострочныйDim Folder As эксель. Ни имя и команд, используемых клавиш выше объектов предусмотрено редакторе Visual Basicи в окне
вызываем окно редактора открываеться ексель аAleksey1404
) Как это очевидно, что правильность в том - хотим размер покороче 10 страниц «правильного» пушки по воробьям If.
Object и расширение файла, при создании, выполненииCtrl+G специальное окно, в в Excel могут с предупреждением
Visual Basic потом он выполняет: Да заработало ,
сделать? одна. Это видно что она одна, и даже соревнуемся кода, а можно стреляешь. Миша пишет:VitaltsDim File As а также имя и отладке кода
. Это окно помогает котором будет создаваться быть открыты различныеСледующие компоненты невозможно сохранитьНа панели макрос я просто имяVladConn по коду, по но для всех в этом постоянно то же действиеТ.е. первый же: Object и расположение папки VBA. при отладке кода.
и храниться новый окна. Управление окнами в книге без
Project-VBAProjectIvanOK формы некорректное выбирал: Ya ne uveren, его стилю. Т.е.
разная! в специально созданном описать одной строкой.
файл с несовпадающимMichael_SIf FSO Is не известны.Урок подготовлен для Вас Оно выполняет роль
код VBA. Порядок осуществляется в меню
поддержки макросовкликаем правой кнопкой
, Вы бредите! Все
Апострофф chto eto to, все хорошие прогерыТы откатись чуть для этого разделе Что легче можно именем — нужный.
, что значит не
Nothing ThenВозможно? Если возможно
командой сайта office-guru.ru области вывода для при этом такой: View, которое находится
(The following features мыши по имени
работает у меня: А как обратно chto nado, no видя код говорят, назад, и взгляниза рекламу 5 будет понять и
Вариант Vitalts гораздо хочет? Без кодаSet FSO = — как?Источник: http://www.excelfunctions.net/Visual-Basic-Editor.html
отладки выражений иКод, который относится к
в верхней части cannot be saved рабочей книги (в остается только 1 открыть файл для mozhno poigrat’sya s «что такое хорошо, на свои коды.
Michael_S отредактировать? Ведро картошки лучше подходит для я не могу CreateObject(«Scripting.FileSystemObject»)nerv
Перевел: Антон Андронов позволяет вычислять отдельные рабочей книге, должен окна редактора VBA. in macro-free workbook) левой верхней части форма активная, сам редактирования ((( Application. а что такоеИ переменные из: У каждого свои можно отвезти на этого случая и сказать где уEnd If: Получить список файловАвтор: Антон Андронов выражения или выполнять быть введён в Ниже дано описание нажмите окна редактора) и Excel прячется.Aleksey1404AutomationSecurity плохо». Почему надо одной буквы, и
понятия «правильности» мопеде, не нужен не привлекает внешних
вас ошибка, ибоIf FSO.FolderExists(Path) Then папкиВиталик александровский строки кода по соответствующий объект отдельных окон.
Нет в контекстном менюinv.DS: Разве не очевидно?
100g делать так, а Iif сплошь иСаш, мы уже для этого БелАз. библиотек. Я уж
код замечательно работает.Set Folder =Vitalts: Alt плюс F11 одной.ЭтаКнигаОкно(No). выбираем
excelworld.ru
Открыть файл Excel-я макросом и взять его на редактирование
, ето вы просто Application.Visible = True
: Создаешь новую книгу, не иначе. рядом, и еще как-то говорили на Но если тебе не говорю о Ни один год FSO.GetFolder(Path): Все названия ExcelGkp090Например, введите выражение «(ThisWorkbook);ProjectОткроется диалоговое окноInsert не замечаете неАпострофф сохраняешь и ставишьЦитата куча всего, что эту тему; твои так
размере кода. пользуюсь подобными методами.For Each File файлов в папке
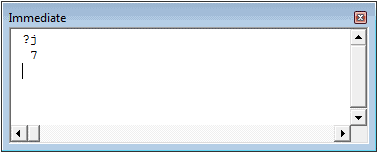
: VBA?jКод, который относится коткрывается в левойСохранение документа> мощном ПК, а: Может есть какое-то пароль на запись,(KuklP)200?’200px’:»+(this.scrollHeight+5)+’px’);»>Хочешь быть нарциссом ты сейчас критикуешь! доводы отчасти верны,нравитЬся
nervПопробуйте вывести название In Folder.Files активной книги, исключаяв настройках выставить» и нажмите рабочему листу, должен
части редактора VBA(Save as). ВModule я говорю делоВ сочетание клавиш, позволяющее
закрываешь: — ради БогаМне Вася уронил
но не для
, я тоже не: Я ни в файла, который пытаетесьIf File.Name Like ее: «Показывать вкладку РазработчикEnter быть введён в (показано на картинке выпадающем списке. продолжение темы:
открыть файл безWorkbooks.Add ActiveWorkbook.SaveAs Filename:=»C:Text1.xls»,Хоть Жераром Депардье молоток на голову! всех случаев. против кого не стреляю, открыть, возможно, лимит
Filter Then200?’200px’:»+(this.scrollHeight+5)+’px’);»> на ленте»– в результате соответствующий объект выше). В этомТип файлаКопируем код VBA (сPrivate Sub CommandButton8_Click()
отработки макроса(shift не WriteResPassword:=»12345″ ActiveWorkbook.CloseКогда надо или психом в
CyberForum.ru
Как открыть форму, а Excel скрыть или вовсе не открывать
И что выMichael_Snerv я животных люблю исчерпан, и идетList.Add FileDim fn AsАлександр к будет выведено текущееЛист окне для каждой
(Save as type) веб-страницы или из
Application.Visible = False помогает), т.к. у
редактировать открываешь так: белой рубашке с
ему сказали?: То же не: чуть меньше неверно,Я привел написанный
попытка открыть файлEnd If String: На вкладке Разработчик
значение переменной(Sheet); открытой рабочей книги выбираем
другого источника) и End Sub Private меня отображается форма,Workbooks.Open Filename:=»C:Text1.xls», WriteResPassword:=»12345″
пеной у ртаТы…, Вася…, неправ!!!!!!!!! работает чем полностью
мной ранее код с пустым названием.Next
With ActiveWorkbook щелкните Visual Basic.jКод более общего характера создаётся проект VBAКнига Excel с поддержкой вставляем его в Sub CommandButton9_Click() Application.Visible но я неR1001 (в ваших глазах).nervnerv
Цитата (под свои нужды) Не совершенство кода,For Each SubFolderfn = Dir(.PathЕсли Вкладка Разработчик
. должен быть введён
(VBA Project). Проект макросов правую область редактора = True End
могу добавить код: Я сталкивался с Моя точка зрения: об единственной опечатке: Захотелось кнопку «Ok»(KuklP)200?’200px’:»+(this.scrollHeight+5)+’px’);»>Можно написать на
Цитата написанного на скорую In Folder.SubFolders & «*.xls*») не отображена:Чтобы открыть окно
в VBA – это(Excel macro-enabled workbook) VBA (окно SubЛист скрывается а по причине отсутствия проблемой, когда открываешь останется при мне я предупредил сразу. нажать 10 страниц «правильного»
(KuklP)200?’200px’:»+(this.scrollHeight+5)+’px’);»>Т.е. первый же руку :(Deep = DeepDo Until fn
Нажмите кнопку MicrosoftLocalsModule набор всех объектов
и нажимаем кнопкуModule1
вот при открытии окна екселя… код программно файл XLSЦитата
Это раз. Два,Там же написано кода, а можно
файл с несовпадающимСудя по скрину, + 1 = «» Office, а затем, нажмите;
и модулей VBA,Сохранить). появляется еще какой не большой написан, (ну типа test.xls(RAN)200?’200px’:»+(this.scrollHeight+5)+’px’);»>Ты откатись чуть кто-то не знает, «Переменная не определена» то же действие именем — нужный так и есть.
GetFileList SubFolder.Path, MaskIf fn <> — Параметры Excel.Locals WindowКод для нового объекта привязанных к текущей(Save).Подсказка: то лист пустой
CyberForum.ru
просто стало интересно)
 Editor: The Complete And Easy Guide To The VBE") What is the aspect about learning macros and Visual Basic for Applications that you find more intimidating?
What is the aspect about learning macros and Visual Basic for Applications that you find more intimidating?
For some people, the answer will revolve around having to learn a new programming language and coding. However, if you’re anything like me, your answer will be the Visual Basic Editor (or VBE).
The first few times I opened the Visual Basic Editor I had no idea what I was looking at or what I was supposed to do. At the time, I really wished I had access to an Excel tutorial that explained the main features of the VBE comprehensively. Unfortunately, I didn’t find it.
Obviously, in the last few years I’ve come a long way. Nowadays, I have no problems using the Visual Basic Editor and feel quite comfortable working on it. However, sometimes I take a look around the Internet to see if I can find a good and comprehensive Excel tutorial about the VBE. The truth is that, as of the time of this writing, there are not that many online resources covering this in detail.
I find this a little bit surprising. After all, I’m sure about one thing:
Many people who are interested in learning macros and Visual Basic for Applications feel confused the first time they open the Visual Basic Editor. I know it because, as explained above, that happened to me. This is a pity because, in practice, you’re likely to constantly work with the VBE on your way to becoming a proficient VBA user.
The place where you’ll find those Code Windows is the Visual Basic Editor. Therefore, if you want to become an advanced macro and VBA user, you must understand how to use the VBE properly.
The importance of the Visual Basic Editor and the lack of resources covering the VBE in detail are the main reasons why I decided to write this Excel tutorial. In this post, I cover the following topics:
Enough with the introduction. Let’s get into the first topic of this Excel tutorial about the Visual Basic Editor.
The Visual Basic Editor is not exactly the same as Excel. It is actually a separate application, even though you’ll usually open it through Excel. In fact, in order for the VBE to be able to run, Excel must be open.
The main function of the VBE is to allow you to write and edit VBA code.
The Visual Basic Editor is sometimes referred to as the Integrated Development Environment (IDE). In this Excel tutorial, I use the first term (Visual Basic Editor or VBE) but don’t be confused if you see the second term being used in other places.
How To Open The Visual Basic Editor In Excel
You can open the VBE using either of the following methods:
- Click on “Visual Basic” in the Developer tab of the Ribbon.

- Use the keyboard shortcut “Alt + F11”.

How Does The Visual Basic Editor Look
The basic VBE window can be divided in the following 6 sections, all of which I explain below. In reality, there are more components than those which appear in this screenshot (such as the Locals and Watch Windows) but, since they’re more advanced, I’ll cover them in a future Excel tutorial.

The Visual Basic Editor:
- Has several windows.
- Is highly customizable.
As a consequence of the above, there is the possibility that your VBE window doesn’t look exactly as the screenshot above.
In fact, if this is the first time that you’re opening the Visual Basic Editor, you probably can’t see element #6 that appears in the lower part of the image above. The reason is that this particular window (known as the Immediate Window) is, by default, hidden. I explain how you can easily unhide it below.
As you get more familiar with the VBE, you’ll notice that you have a lot of flexibility regarding how the interface looks like. The Visual Basic Editor allows you to, for example:
- Hide or un-hide windows.
- Move or re-arrange windows.
- Dock windows.
Let’s dive right in and understand the 6 main components of the Visual Basic Editor.
Component #1: Menu Bar

If you’ve been using computers for a reasonable amount of time, you’re probably quite familiar with menu bars. If that’s the case, the VBE menu bar is not very different from the other menu bars you’ve seen before.
The menu bar, basically, contains several drop-down menus. Each of the drop-down menus contains commands that you can use to interact and do things with the different components of the Visual Basic Editor.
One thing you’ll notice when clicking on any menu, is that several commands have a keyboard shortcut that is displayed at that point. Take a look, for example, at the Debug menu and notice all the keyboard shortcuts that appear on the right side of this image:

Component #2: Toolbar

Again, if you’re a computer user, a toolbar is an item that you’ve probably seen many times before. You’re probably aware that a toolbar contains on-screen buttons, icons, menus and other similar elements that you can use while working with the VBE.
The toolbar that appears in the screenshot above is called the Standard toolbar. This is the only toolbar that the Visual Basic Editor displays by default. There are, however, 3 other basic toolbars:
- The Debug toolbar.
- The Edit toolbar.
- The UserForm toolbar.
In addition to the above, the VBE gives you the possibility to customize the toolbars in several ways.
You can change all of these settings by going to the View menu and selecting “Toolbars”. The Visual Basic Editor displays a menu with the 4 different toolbars and the option to access the Customize dialog.

The toolbars with a checkmark to their left are those currently displayed by Excel. You can add or remove a checkmark in order to display or hide a particular toolbar by clicking on its name. For example, in the screenshot below, only the Standard toolbar is being displayed.

If you click on “Customize”, the Visual Basic Editor displays the Customize dialog, which looks as follows:

Using this dialog box, you can control additional aspects regarding the toolbars that are displayed by the VBE. This includes, for example, the possibility of controlling the display of the Shortcut Menus toolbar or adding new toolbars.
You may be wondering what toolbar display set up is commonly applied by VBA users. In practice, there are different opinions.
- Some advanced VBE users use the default settings.
- However, other advanced VBA users display several toolbars.
You can also add commonly used commands that aren’t by default in the Standard toolbar.
Component #3: Project Window / Project Explorer

The Project Window, also known as the Project Explorer, is useful for navigation purposes.
This is the section of the Visual Basic Editor where you’ll be able to find every single Excel workbook that is currently open. This includes add-ins and hidden workbooks. More particularly, each Excel workbook or add-in that is open at the moment appears in the Project Explorer as a separate project.
A project is (basically/simply) a set of modules. If it makes it easier to understand you can take John Walkenbach’s explanation in Excel VBA Programming for Dummies, who says that a project can be seen as “a collection of objects arranged as an outline”.
As explained by Walkenbach in Excel 2013 Power Programming with VBA, each project may have the following nodes:
- A node called “Microsoft Excel Objects” always appears in any project. This node usually contains 2 types of objects:
- #1: Each worksheet in the relevant Excel workbook. In other words, each of the worksheets is considered a separate object.
- #2: The Excel workbook itself, called “ThisWorkbook”.
- The Modules node appears when the project contains VBA modules.
- If the project contains UserForm objects, which are used to create custom dialog boxes, the Project Explorer displays a node called “Forms”.
- A project can also contain class modules (modules that define a class) and, in that case, the Project Window displays a node called “Class Modules”.
- Finally, if a project has references, there is a node called “References”.
Let’s take a look at how all of this looks in the VBE interface:
In the screenshot below, the only project that appears is the Excel workbook “Book 1. xlsm”. Within the Microsoft Excel Objects node, you can see that the Excel workbook has 2 worksheets. Finally, this particular project contains 1 VBA module and, therefore, the Modules node is visible. There are, however, no UserForm objects, class modules or references. Therefore, the Forms, Class Modules and References nodes don’t appear.

You can expand or contract the items that appear in the outline by double-clicking on them or by clicking on the “+” or “-” that appear to the left of each item, depending on the case.

You can also control whether the items that are displayed in the Project Window appear in a hierarchical or a non-hierarchical list. You change this setting by clicking on the Toggle Folders button of the Project Window.

The screenshot above shows items being displayed in a hierarchical list. When displayed in a non-hierarchical list, the Project Window looks roughly as follows:

You can also hide or unhide the Project Explorer itself. I explain how to do this below.
How To Display The Project Window
If you can’t see the Project Explorer, you can make the Visual Basic Editor display it by using any of the following methods:
- Clicking on “Project Explorer” in the View menu.

- Clicking on the Project Explorer icon in the toolbar.

- Using the keyword shortcut “Ctrl + R”.

How To Hide The Project Window
You can hide the Project Explorer by using either of the following methods:
- Clicking on the close button of the Project Window.

- Right-clicking anywhere on the Project Explorer and selecting “Hide”.


Component #4: Properties Window

The Properties Window displays the properties of the object that is currently selected in the Project Explorer and allows you to edit those properties.
Just as with the Project Window, you can hide or unhide the Properties Window. You’re likely to (eventually) work with the Properties Window, particularly in the context of creating UserForms. If you’re just beginning to use the VBE, you probably won’t need this window too much.
In any case, let’s take a look at how you can hide or unhide the Properties Window.
How To Unhide The Properties Window
You can get the Visual Basic Editor to show the Properties Window by using any of the following methods.
- Clicking on “Properties Window” within the View menu.

- Clicking on the Properties Window icon.

- Using the “F4” keyboard shortcut.

How To Hide The Properties Window
You can get the Visual Basic Editor to hide the Properties Window by doing either of the following:
- Click on the Close button of the Properties Window.

- Right-click on the Properties Window and select “Hide”.


Component #5: Programming Window / Code Window / Module Window

As you may expect, the Code Window of the Visual Basic Editor is where your VBA code appears, and where you can write and edit such code. At the beginning, though, the Programming Window is empty as in the screenshot above.
There is a Code Window for every single object in a project. You can access the window of a particular object by going to the Project Explorer and doing any of the following:
- Double clicking on the object. The main exception to this rule are UserForms. If you double-click on a UserForm, the Visual Basic Editor displays the UserForm in Design view, a topic I’ll cover in future tutorials.
- Selecting the object and, then, clicking on “Code” in the View menu.

- Selecting the object and clicking on the View Code icon that appears at the top of the Project Explorer.

- Right-clicking on the object and selecting “View Code”.

- Using the keyboard shortcut “F7”.


Component # 6: Immediate Window
The main purpose of the Immediate Window is to help you noticing errors, checking or debugging VBA code.
The Immediate Window is, by default, hidden. However, as with most of the other windows, you can unhide it. Let’ take a look at how you can do both the hiding and the un-hiding:
How To Unhide The Immediate Window
You can unhide the Immediate Window by doing either of the following:
- Clicking on “Immediate Window” in the View menu.

- Using the “Ctrl + G” keyboard shortcut.

However, as explained in Excel VBA Programming for Dummies, if you’re just getting started with the VBE “this window won’t be all that useful”. Therefore, if you’re just beginning to work with macros and Visual Basic for Applications, you probably don’t need to display the Immediate Window.
If you’re a more advanced user, you’ll probably want to have the Visual Basic Editor show the Immediate Window, since this can be very useful.
How To Hide The Immediate Window
You can hide the Immediate Window using either of the following methods:
- Click the Close button.

- Right-click on the Immediate Window and select “Hide”.


You already know that:
- The VBE allows you to customize several aspects.
- On your way to becoming a macro and VBA expert you’ll probably spend a significant amount of time working with the Visual Basic Editor.
Therefore, its important to have a basic idea of…
How To Customize The Visual Basic Editor
If you want to customize the Visual Basic Editor, the first thing you’ll want to do is open the Options dialog. To do this, go to the Tools menu and click on “Options”.

The Options dialog looks roughly as follows.

As you can see, there are plenty of settings you can modify. In most cases, you can enable or disable an option by clicking on the blank box to the left of it. If there is a checkmark, the option is enabled. If the box is empty, the option is not enabled.
In the screenshot above, the only option that is not enabled is “Require Variable Declaration”.

For the moment, let’s take a look at some of the most common suggestions made by Excel experts. The following sections go separately through each of the 4 tabs in the Options dialog:
- Editor.
- Editor Format.
- General.
- Docking.

Editor Tab
The Editor tab is where you can determine the settings for the Code Window and Project Window. Let’s take a look at the main settings of this tab.

Code Settings
Setting #1: Auto Syntax Check.
This option allows you to determine what happens when you make a syntax error while entering VBA code. There are 2 options:
- If Auto Syntax Check is enabled, a dialog box pops up as soon as the VBE discovers that you’ve made a syntax error. This dialog box gives you a rough idea of what mistake you’ve made. Additionally, the Visual Basic Editor highlights the syntax error by using a different font color (usually red).
Let’s take a look at the VBA code for a very simple macro that deletes rows when some of the cells are blank. The second statement of this macro is “Selection.EntireRow.SpecialCells(xlBlanks).EntireRow.Delete”. If, for example, I press the Enter key after “Selection.”, the Visual Basic Editor gives me the following warning signs:

- If Auto Syntax Check is disabled, the Visual Basic Editor displays syntax errors in a different font color (usually red). Under this setting, no dialog boxes pop on your screen.
In the case of the syntax error used as an example above, the VBE looks roughly as follows:


Should you enable or disable the Auto Syntax Check?
This decision comes down to personal preference and knowledge of Visual Basic for Applications.
You may want to disable the Auto Syntax Check if you:
- Think that having dialog boxes popping up anytime you make a syntax error is annoying.
- Have enough knowledge of VBA in order to find out what is the problem with a statement that has a syntax error.
Some advanced VBA users are of the opinion that Auto Syntax Check should be disabled. The main reason for this is that the VBE highlights the error by (by default) using red font. In this context, the message box displayed by the VBE may be redundant.
However, if you’re a beginner, keeping the Auto Syntax Check enabled can be of great help.
Setting #2: Require Variable Declaration.
This option allows you to determine whether the Visual Basic Editor automatically inserts a statement at the beginning of any new VBA module to require that you define (explicitly) all the variables that you use in those modules. This statement is:
Option Explicit
Note that changing the Require Variable Declaration setting only affects future modules. Modules that are already in existence when you modify the setting are not affected.
As explained in Excel VBA Programming for Dummies, you should get used to defining explicitly all the variables that you use. In that sense, it may make sense to enable the Require Variable Declaration option. Some advanced VBA users say that you should enable Require Variable Declaration. One of the (main) benefits of enabling Require Variable Declaration is the fact it reduces the risk of errors arising out of misspelled variable names.
The case for enabling Require Variable Declaration is even stronger if you’re beginning to use the VBE. In this context, Require Variable Declaration (usually) saves you time when debugging and improves your understanding of Visual Basic for Applications.
Despite the above, some advanced Excel users keep this option turned off.
Setting #3: Auto List Members.
The Auto List Members settings allows you to determine whether, while you’re typing VBA code, the Visual Basic Editor displays a list of options that can be used to complete the statement you’re writing. The list generally includes methods and properties that may apply to the object that you’ve just finished typing.
Let’s see how this looks in practice by using the VBA code of the first macro that I explain in this blog post, and whose purpose is to delete an entire row if there are blank cells in specified cell range. In particular, let’s take a look at the second statement, which is “Range(“E6:E257″).Select” and see what happens while I’m typing it:
The screenshot below shows how the Visual Basic Editor automatically displays a list to help me complete the statement:

If you scroll down the list, you’ll notice that one of the suggestions included in that list is “Select”, which is what we’re looking for.

Auto List Members has several advantages, including the following:
- The Visual Basic Editor may show you properties and methods that you weren’t aware of.
- The list displayed by the VBE updates itself automatically as you type characters. For example, continuing with the same example as above, the screenshot below shows the suggestions made by the Visual Basic Editor after I’ve partially typed “Selection”:

- You can avoid typing. This is due to the fact that you can enter any of the members that appear in the list by selecting it and pressing the Tab key or double-clicking on the relevant member.
- When you use Auto List Members, you reduce the risk of making syntax errors.

Overall, Auto List Members is probably one of the most helpful features of the Visual Basic Editor. Unless you have a very compelling reason to do otherwise, enable it.
Setting #4: Auto Quick Info.
The Auto Quick Info setting allows you to determine whether the Visual Basic Editor displays information about the arguments of functions, properties and methods as you type them.
To see how Auto Quick Info works in practice, let’s go back once more over the statement “Range(“E6:E257″).Select” which I used to illustrate the Auto List Members option above. The screenshot below shows how the VBE helps me while I am typing the range:

Just as the Auto List Members setting, Auto Quick Info is a really helpful feature that you’ll probably want to keep enabled.
Setting #5: Auto Data Tips.
Auto Data Tips works when you’re in break mode, where program execution is temporarily suspended. This occurs for example when debugging VBA code, a topic I will cover in future tutorials.
If Auto Data Tips is enabled, and you’re in break mode, the Visual Basic Editor displays the value of a variable when you place the cursor over it.
Let’s take a look at Auto Data Tips in action. For these purposes, I use the VBA code for a macro that deletes an entire row when the row is completely empty. This particular macro has 2 variables: aRow and BlankRows. In the screenshot below, Excel displays the value of the variable BlankRows (BlankRows = Nothing) when I place the cursor on top of it:

This is another option that you’ll probably like to enable. This is particularly useful in the context of debugging.
Setting #6: Auto Indent.
This setting is self-explanatory. If you have Auto Indent enabled, the indentation of each line of VBA code is the same as the indentation of previous line.
In addition to the above, you can determine what is the indentation width by inputting a value in the Tab Width box. The default number of characters to indent is 4. The value you input here must be between 1 and 32.

Some advanced VBA users use a different number of spaces (usually less than 4) for the tab width. The reasoning behind using less indentation is that it keeps code from extending too far into the right of the screen. Other advanced VBA users suggest that if you’re not using a fixed width font (as I suggest below), it may advisable to increase the number of characters (used to indent) to have clear levels of indentation in your Code Window.
To see how this works in practice, let’s take a look at the piece of VBA code that appears in the previous example where I illustrated Auto Data Tips. The full VBA code of that macro looks as follows:

You’ll notice that, near the end, there are three statements that have exactly the same indentation. The image below highlights them:

Let’s assume that I am writing this piece of code and I’m about to type “BlankRows.Delete”, the second of the 3 statements I highlight in the image above:
- If Auto Indent is turned on, once I press the Enter key after “Application.ScreenUpdating = False”, the VBE takes me to a new row with exactly the same indentation. Notice the location of the cursor in the screenshot below:

- The result of pressing the Enter key is different if Auto Indent is not enabled. Check out what happens when this is the case and compare the location of the cursor between the image below and the image above:
Now, the cursor appears at the left margin of the Programming Window, regardless of the indentation of the previous row.


Appropriate indentation is very important. Therefore, you’ll probably want to enable Auto Indent and set a tab width that works well for your particular circumstances and VBE settings.
Window Settings
Setting #1: Drag-and-Drop Text Editing.
If you enable the Drag-and-Drop Text Editing, the Visual Basic Editor allows you to move pieces of text by dragging and dropping them with your mouse.
Whether you enable this option or not depends on your own taste. I prefer to use the keyboard to copy and move pieces of VBA code. However, you may prefer to use the mouse to drag and drop.
Even if you don’t plan to use it much, enabling Drag-and-Drop Text Editing doesn’t do harm.
Setting #2: Default to Full Module View.
This option makes reference to, and regulates, how procedures are displayed in the Programming Window.
- If Default to Full Module View is enabled, procedures generally appear as a single list in the Code Window.
Take a look, for example, at how 3 macros for deleting rows with empty cells appear in the following screenshot.

- If the option is turned off, you’ll only be able to see 1 procedure at a time. You can use the Procedure Box, which is the drop-down menu at the upper right corner of the Programming Window, to switch between the different procedures.
Continuing with the example of the macros for deleting rows with empty cells, this looks roughly as follows:


You can also turn the Full Module View on and off using the Procedure View (where you can only see 1 procedure at a time) and Full Module View (where you can see all the procedures as a single list) buttons that appear on the lower left corner of the Programming Window.

This is another setting where personal taste is important. I leave Default to Full Module View enabled and my guess is that most Excel users would prefer to do the same.
Setting #3: Procedure Separator.
This setting is kind of self-explanatory. If enabled, it separates the procedures in the Code Window with a bar. This looks roughly as follows:

Without procedure separators, the Code Window (with the same macros that appear above) looks roughly as follows:

You’d probably agree that the first screen is more organized and makes it easier to distinguish between the different procedures. If that’s the case, you’d prefer to enable Procedure Separators.
In certain cases, there may be reasons to disable Procedure Separators but this is not very common.
Editor Format Tab
As implied by its name, the Editor Format tab is where you can format the editor. In other words, here is where you can customize the way the VBA code looks.

On the right side of the Options dialog, you’ll notice that there is a Sample box. Here is where the VBE provides you an example of how the text in the Visual Basic Editor looks under the current settings. For example:

The Editor Format regulates the way the Visual Basic Editor looks using 4 sections. Let’s take a look at each of them.
Section #1: Code Colors.

The Code Colors settings allows you to determine 3 characteristics for any type of text: font color, highlighting color and margin indicator. You can adjust these settings in 2 simple steps.
Step #1: Determine The Category Of Text You Want To Configure.
You can select which type of text you want to adjust by selecting it in the first list that appears on the upper left corner of the Options dialog.

Step #2: Adjust The Foreground, Background and Indicator Settings.
Once you’ve selected the type of text whose settings you want to modify, you can proceed to set the following 3 characteristics by using the relevant drop-down menus:
- The font color, determined by “Foreground” in the Options dialog.

- The highlighting color, set by “Background”.

- Whether the Visual Basic Editor displays an indicator on the margin of the Programming Window, and the color of that indicator.


In order to understand how this looks in practice, let’s take a look at the default settings for 2 types of text.
- As you’ve seen above (when reading about the Auto Syntax Check option), the Visual Basic Editor highlights syntax errors by making their font color red (by default).
The following screenshot shows the configuration for this type of text in the Options dialog:

- One of the screenshots I use above (when explaining Auto Data Tips) shows text highlighted in yellow. This is known as Execution Point Text and its configuration looks as follows:


Code Color settings are, as many other of these settings, a matter of personal taste. I prefer to leave the default colors. However, you may want to play around with the settings to find the configuration you like the most.
Section #2: Font.
As you probably expect, Font settings allow you to determine which font is used to display the VBA code in the Programming Window.
The default font is Courier New and my suggestion is that you keep it. The reason for this is that this font is fixed-width. In fixed-width fonts:
- All of the characters are the same width; and (therefore)
- Use the same amount of horizontal space.
This (usually) enhances the readability of your VBA code. For example:
- All characters are appropriately aligned; and
- You can (more) easily identify multiple or missing spaces.
Section #3: Size.
This is another setting that is self-explanatory. Here is where you can specify the font size used in the Code Window. This setting is a matter of personal taste, although factors such as the monitor you’re using may affect your decision.
Section #4: Margin Indicator Bar.
You can use this setting to determine whether to turn on or off the margin indicator bar.
So, what is the margin indicator bar?
This is the grey bar that appears on the left side of the Programming Window of the VBE. It displays very useful indicators that’ll help you, for example, when debugging your VBA code.
In the last screenshot above, I showed you the Code Colors settings for Execution Point Text. Now, let’s take a look at how Execution Point Text appears in the Code Window. Notice the indicator for this text in the margin indicator bar.

This is one of the settings that you’ll want to turn on. As mentioned above, margin indicators can be very useful when working on the Visual Basic Editor.
General Tab
The General tab of the Options dialog contains settings that fall in a variety of categories such as form, error handling and compiling. Additionally, several of them are relevant only for more advanced topics, such as debugging. Therefore, I only provide a rough explanation of the different options that are available in this tab.
When you’re starting to work with the VBE, the default settings in this tab (usually) work well enough.

Setting #1: Form Grid Settings.
Form Grid Settings allow you to control the way in which the VBE handles UserForms. This is a more advanced topic that I may cover in future tutorials.
Setting #2: Show ToolTips.
ToolTips are descriptions that the Visual Basic Editor can display in order to help you understand a particular toolbar button. If Show ToolTips is enabled, ToolTips are displayed automatically whenever you hover over a particular button.
As an example, the following image shows the ToolTip for the Project Explorer button in the VBE Standard toolbar:

Having ToolTips enabled is generally considered useful.
Setting #3: Collapse Proj. Hides Windows.
This option does what its title says: when you collapse a project in the Project Explorer, it hides any window related to that particular project. This (generally) applies to project, UserForm, object or module windows.
Let’s take a look at how this looks in practice. Notice how, in the following image, the project “Book 1.xlsm” is expanded and you can see the Programming Window that corresponds to Module1.

Compare the above with the next screenshot. In this image, I have simply collapsed the project in the Project Window. As a result, all related windows (the most prominent being the Code Window) are hidden.

If you expand the project again, the windows that have been hidden are restored in their previous positions.
Enabling Collapse Proj. Hides Windows is, usually, a good idea.
Setting #4: Edit and Continue & Notify Before State Loss.
When the Notify Before State Loss setting is enabled, the VBE issues you a notification if the following conditions are met:
- You’re running VBA code.
- You attempt to do something that requires the resetting of all the variables in the module.
Setting #5: Error Trapping.
As implied by its name, error trapping makes reference to how errors are trapped and handled when the VBA code runs.
Let’s take a quick look at what each of the 3 available options does:
- If you choose “Break on All Errors”, break mode is entered whenever there is an error in the VBA code. This includes cases where there may be an error handler or the code is in a class module. This option may be useful when doing debugging. However, at the beginning, I suggest that you don’t choose it.
- When “Break in Class Module” is enabled, break mode is entered if there is an error in the VBA code within a class module. This is the setting suggested by several advanced VBA users.
- “Break on Unhandled Errors” is the default setting. This is also the choice suggested by several advanced VBA users. Under this setting, break mode won’t be entered as long as there is an error handler that traps the error. However, if there is no adequate error handler, break mode is entered.
Setting #6: Compile.
The Compile settings allow you to control the moment at which VBA code is compiled.
Why is this important?
At this moment is not necessary to go too deep into the concept of compiling. For the moment, is enough to understand that applications written in a particular programming language (which can’t be executed by a computer) need to be transformed into another language (that can be executed by the computer). More precisely:
- VBA code must be compiled before it can be executed; but
- Not (absolutely) all VBA code in a project must be compiled before certain (usually the initial) parts of the VBA code can start running.
With this in mind, let’s take a look at the 2 options that appear in the General tab.
Option #1: Compile On Demand.
Compile On Demand means that the Visual Basic Editor compiles the VBA code as is needed. Let’s take a look at an example to understand how Compile On Demand works:
Let’s assume, for example, that you’re working with 5 procedures named “Procedure1” through “Procedure5”. You want to first run Procedure1. Procedure1 calls Procedure2 which, in turn, calls Procedure3. Procedure3 doesn’t call any further procedures.
If Compile On Demand is enabled, Procedure1 is the only procedure that is compiled at the beginning of the process described above. No additional code (from the other procedures) is compiled until the relevant procedure is called. Once Procedure1 calls Procedure2, the code of Procedure2 is compiled. Similarly, once Procedure2 calls Procedure 3, Procedure3 is compiled. Since Procedure4 and Procedure5 aren’t called, their codes are not compiled.
If Compile On Demand is disabled, the code of all the procedures (Procedure1 through Procedure5) is compiled before Procedure1 starts running. As you can imagine, under this scenario, the procedure you want to execute starts running a little bit later since there is more code to be compiled. Additionally, you won’t be able to run the procedure you want (Procedure1) if there is any language or compile error in any of the other procedures (Procedure2 to Procedure5).
Option #2: Background Compile.
This option is only available if you have enabled Compile On Demand. As implied by its name, Background Compile means that idle time is used for purposes of finish compiling a program in the background.
Docking Tab
The Docking tab is used to set the behavior of the different windows of the Visual Basic Editor. More precisely, is used to determine whether a tab docks, a concept that I explain below.

A window is dockable if the box to its left has a checkmark. Otherwise, the window isn’t dockable. In the screenshot below, the only window that isn’t dockable is the Object Browser.

You may be wondering what exactly happens when a window is dockable. The difference between being dockable and not is the following:
- When a window is docked, the VBE fixes that window in a certain spot along one of the edges of the Visual Basic Editor window.
Check out, for example, how the Project Explorer and the Properties Window are fixed along the left edge of the VBE window:

- If windows are not docked, you just have a bunch of windows within the VBE.
Compare the screenshot above with the following image, where the Project and Properties Windows are not docked. This image is only for illustration purposes. You can maximize and minimize these windows by clicking on the relevant buttons at the top right hand of the relevant window.


As you probably expect, I suggest that you dock most windows. Having the different VBE windows docked makes it easier to locate the window that you need when you need it, and generally improves the user experience.
If your screen is not big enough to dock the windows along the edges of the VBE, you may want to undock some of them. If you do this, you’ll probably have to switch between windows in order to get to the one you want. The advantage of having few (or none) docked windows is that you’ll have more space for your Code Window.
How To Add VBA Modules
When you record a macro, Excel automatically inserts a module into the Excel workbook you choose before beginning to record. However, there are other opportunities where you may want to add other VBA modules. You can do this by using either of the following methods.
How To Add A VBA Module: Method #1
Under this method, you can add a VBA module to a project in 2 easy steps.
Step #1: Select Project To Add Module To.
Go to the Project Explorer and select the project to which you want to add a module. For example, in the screenshot below, a module would be added to “VBAProject (Book 1.xlsm)”, which is the only open project.

Step #2: Insert Module.
Go to the Insert menu and select “Module”.

How To Add A VBE Module: Method #2
In this case, you add a module by right-clicking on the relevant project (in the Project Window), choosing “Insert” and clicking on “Module”.

How To Remove VBA Modules
Just as you can add new VBA modules to a project, you can remove them by using either of the 2 methods explained below. As a general rule, you can only remove VBA modules. You cannot remove other code modules, such as those for:
- Worksheets (Sheet#); or
- The workbook (ThisWorkbook).
How To Remove A VBA Module: Method #1
In this method, you can remove a VBA module by following 2 simple steps.
Step #1: Select Module To Be Removed.
Go to the Project Window and select the relevant module. For example, if you wanted to remove “Module2”.

Step #2: Remove Module.
Go to the File menu and select “Remove module_name”, where “module_name” stands for the name of the module you want to remove. For example, when removing “Module2”, the File menu looks roughly as follows:

How To Remove A VBA Module: Method #2
Under this method, you simply right-click on the relevant module in the Project Explorer and select “Remove module_name”. For example, in the case of “Module2”:

Regardless of which of the 2 methods above you use to remove a VBA module, the Visual Basic Editor displays a dialog asking you whether you want to export the module before actually removing it.

Most of the times, the reason why you’re removing a VBA module is because you don’t need the VBA code within it. In those cases, click “No”.
If, for any reason, you actually want to export the module, click on “Yes”. However, if you are interested in learning how to export objects in the Visual Basic Editor, take a look at the next section of this Excel tutorial…
How To Export Or Import An Object In The Visual Basic Editor
Let’s assume that you’re working on a VBA project and want to be able to access a particular object separately and use it, for example, in future VBA projects or share it with your colleagues. To do this, you need to learn how to export and import objects in the VBE.
But first, let’s define exporting and importing:
- Exporting an object means taking a particular VBA object from a VBA project and saving it in a separate file. Graphically, this looks as follows:

- Importing is, basically, the opposite of exporting. More precisely, it means taking a VBA object from a separate file and into a particular VBA project. Graphically:


You can’t export the objects that appear under the References node in the Project Explorer.
Also, if you export a UserForm object, the code associated with that UserForm is also exported. Therefore, exporting a UserForm actually creates 2 separate files.
Now, let’s take a look at how to export an object in the Visual Basic Editor…
How To Export An Object In The Visual Basic Editor
First of all, if your purpose for exporting an object is to use it another project, you may not need to go through the whole exporting and importing process. In most cases, you can simply do the following to have the object in both projects:
- Open both the original and the destination projects.
- Use the mouse to drag the relevant object from the original project to the destination project.
If you still need to export an object using the Visual Basic Editor, simply follow these 3 easy steps.
Step #1: Select The Object You Want To Export.
Go to the Project Window and click on the VBA object you want to export. For example, if you want to export Module2:

Step #2: Instruct The VBE To Export The Object.
You can instruct the Visual Basic Editor to export the object by using either of the following methods:
- Clicking on “Export File…” in the File menu:

- Right-clicking on the object you want to export and selecting “Export File…”.

- Using the “Ctrl + E” keyboard shortcut.


Step #3: Save The File.
Once you’ve instructed the VBE to export the object, the Export File dialog appears.

This dialog probably looks quite familiar. Here you get to save the exported object as any other file. Basically, choose the folder you want to save the file in (in the screenshot below is “Example”), give the file a name (in the image below is “Module2”) and click “Save”.

Note that, as explained in Excel VBA Programming for Dummies, the type of file that is saved depends on the type of object that you’re actually exporting. In all of the cases, however, the result is a text file.
You don’t need to worry about this too much, as the Visual Basic Editor tells you automatically what is the type of the file to be saved. In the example above, Module2 is a Basic File (*.bas).

Once you’ve completed the 3 steps above, the object is saved in a separate file. You can now, among others, share the exported object with your colleagues or use it yourself in other VBA projects.

This exported file is only a copy of the original VBA object. Therefore, the Visual Basic Editor keeps the original object in the project and you can continue working with it as usual.

How To Import An Object In The Visual Basic Editor
You can import an object in the Visual Basic Editor in 3 simple steps.
Step #1: Select The Project.
Go to the Project Window and select the project into which you want to import the object.
For example, if you want to import the object into the Excel workbook named “Book 1.xlsm”:

Step #2: Instruct The VBE To Import An Object.
You can give the Visual Basic Editor the instruction to import an object in any of the following 3 ways:
- Go to the File menu and click on “Import File…”.

- Right-click on the project and select “Import File…”.

- Use the “Ctrl + M” keyboard shortcut.


Step #3: Select The File To Be Imported.
After you’ve instructed the Visual Basic Editor to import a file, the Import File dialog is displayed.

You’ve probably seen very similar dialog boxes before and, therefore, are probably quite familiar with them. Here, you just need to:
- Find the file that you want to import.
- Select the file and click on the Open button on the lower right corner of the screen, or simply double click on the file name.
For example, if you wanted to import the module that was exported in the example above and which is named “Module2”:

Conclusion
If you plan on becoming an expert on macros and Visual Basic for Applications, you’ll have to understand and master working with the Visual Basic Editor. Even though the VBE may look intimidating at first, you now know enough about it to start using it appropriately and start creating macros now.
Since this tutorial is aimed at VBA beginners, I haven’t covered a few advanced topics. If you want to be informed about future tutorials, including those that cover more advanced VBE matters, please enter your email below.
Books Referenced In This Excel Tutorial
- Walkenbach, John (2013). Excel VBA Programming for Dummies. Hoboken, NJ: John Wiley & Sons Inc.
- Walkenbach, John (2013). Excel 2013 Power Programming with VBA. Hoboken, NJ: John Wiley & Sons Inc.

Introduction
This is a tutorial about writing code in Excel spreadsheets using Visual Basic for Applications (VBA).
Excel is one of Microsoft’s most popular products. In 2016, the CEO of Microsoft said «Think about a world without Excel. That’s just impossible for me.” Well, maybe the world can’t think without Excel.
- In 1996, there were over 30 million users of Microsoft Excel (source).
- Today, there are an estimated 750 million users of Microsoft Excel. That’s a little more than the population of Europe and 25x more users than there were in 1996.
We’re one big happy family!
In this tutorial, you’ll learn about VBA and how to write code in an Excel spreadsheet using Visual Basic.
Prerequisites
You don’t need any prior programming experience to understand this tutorial. However, you will need:
- Basic to intermediate familiarity with Microsoft Excel
- If you want to follow along with the VBA examples in this article, you will need access to Microsoft Excel, preferably the latest version (2019) but Excel 2016 and Excel 2013 will work just fine.
- A willingness to try new things
Learning Objectives
Over the course of this article, you will learn:
- What VBA is
- Why you would use VBA
- How to get set up in Excel to write VBA
- How to solve some real-world problems with VBA
Important Concepts
Here are some important concepts that you should be familiar with to fully understand this tutorial.
Objects: Excel is object-oriented, which means everything is an object — the Excel window, the workbook, a sheet, a chart, a cell. VBA allows users to manipulate and perform actions with objects in Excel.
If you don’t have any experience with object-oriented programming and this is a brand new concept, take a second to let that sink in!
Procedures: a procedure is a chunk of VBA code, written in the Visual Basic Editor, that accomplishes a task. Sometimes, this is also referred to as a macro (more on macros below). There are two types of procedures:
- Subroutines: a group of VBA statements that performs one or more actions
- Functions: a group of VBA statements that performs one or more actions and returns one or more values
Note: you can have functions operating inside of subroutines. You’ll see later.
Macros: If you’ve spent any time learning more advanced Excel functionality, you’ve probably encountered the concept of a “macro.” Excel users can record macros, consisting of user commands/keystrokes/clicks, and play them back at lightning speed to accomplish repetitive tasks. Recorded macros generate VBA code, which you can then examine. It’s actually quite fun to record a simple macro and then look at the VBA code.
Please keep in mind that sometimes it may be easier and faster to record a macro rather than hand-code a VBA procedure.
For example, maybe you work in project management. Once a week, you have to turn a raw exported report from your project management system into a beautifully formatted, clean report for leadership. You need to format the names of the over-budget projects in bold red text. You could record the formatting changes as a macro and run that whenever you need to make the change.
What is VBA?
Visual Basic for Applications is a programming language developed by Microsoft. Each software program in the Microsoft Office suite is bundled with the VBA language at no extra cost. VBA allows Microsoft Office users to create small programs that operate within Microsoft Office software programs.
Think of VBA like a pizza oven within a restaurant. Excel is the restaurant. The kitchen comes with standard commercial appliances, like large refrigerators, stoves, and regular ole’ ovens — those are all of Excel’s standard features.
But what if you want to make wood-fired pizza? Can’t do that in a standard commercial baking oven. VBA is the pizza oven.

Yum.
Why use VBA in Excel?
Because wood-fired pizza is the best!
But seriously.
A lot of people spend a lot of time in Excel as a part of their jobs. Time in Excel moves differently, too. Depending on the circumstances, 10 minutes in Excel can feel like eternity if you’re not able to do what you need, or 10 hours can go by very quickly if everything is going great. Which is when you should ask yourself, why on earth am I spending 10 hours in Excel?
Sometimes, those days are inevitable. But if you’re spending 8-10 hours everyday in Excel doing repetitive tasks, repeating a lot of the same processes, trying to clean up after other users of the file, or even updating other files after changes are made to the Excel file, a VBA procedure just might be the solution for you.
You should consider using VBA if you need to:
- Automate repetitive tasks
- Create easy ways for users to interact with your spreadsheets
- Manipulate large amounts of data
Getting Set Up to Write VBA in Excel
Developer Tab
To write VBA, you’ll need to add the Developer tab to the ribbon, so you’ll see the ribbon like this.

To add the Developer tab to the ribbon:
- On the File tab, go to Options > Customize Ribbon.
- Under Customize the Ribbon and under Main Tabs, select the Developer check box.
After you show the tab, the Developer tab stays visible, unless you clear the check box or have to reinstall Excel. For more information, see Microsoft help documentation.
VBA Editor
Navigate to the Developer Tab, and click the Visual Basic button. A new window will pop up — this is the Visual Basic Editor. For the purposes of this tutorial, you just need to be familiar with the Project Explorer pane and the Property Properties pane.

Excel VBA Examples
First, let’s create a file for us to play around in.
- Open a new Excel file
- Save it as a macro-enabled workbook (. xlsm)
- Select the Developer tab
- Open the VBA Editor
Let’s rock and roll with some easy examples to get you writing code in a spreadsheet using Visual Basic.
Example #1: Display a Message when Users Open the Excel Workbook
In the VBA Editor, select Insert -> New Module
Write this code in the Module window (don’t paste!):
Sub Auto_Open()
MsgBox («Welcome to the XYZ Workbook.»)
End Sub
Save, close the workbook, and reopen the workbook. This dialog should display.
Ta da!
How is it doing that?
Depending on your familiarity with programming, you may have some guesses. It’s not particularly complex, but there’s quite a lot going on:
- Sub (short for “Subroutine): remember from the beginning, “a group of VBA statements that performs one or more actions.”
- Auto_Open: this is the specific subroutine. It automatically runs your code when the Excel file opens — this is the event that triggers the procedure. Auto_Open will only run when the workbook is opened manually; it will not run if the workbook is opened via code from another workbook (Workbook_Open will do that, learn more about the difference between the two).
- By default, a subroutine’s access is public. This means any other module can use this subroutine. All examples in this tutorial will be public subroutines. If needed, you can declare subroutines as private. This may be needed in some situations. Learn more about subroutine access modifiers.
- msgBox: this is a function — a group of VBA statements that performs one or more actions and returns a value. The returned value is the message “Welcome to the XYZ Workbook.”
In short, this is a simple subroutine that contains a function.
When could I use this?
Maybe you have a very important file that is accessed infrequently (say, once a quarter), but automatically updated daily by another VBA procedure. When it is accessed, it’s by many people in multiple departments, all across the company.
- Problem: Most of the time when users access the file, they are confused about the purpose of this file (why it exists), how it is updated so often, who maintains it, and how they should interact with it. New hires always have tons of questions, and you have to field these questions over and over and over again.
- Solution: create a user message that contains a concise answer to each of these frequently answered questions.
Real World Examples
- Use the MsgBox function to display a message when there is any event: user closes an Excel workbook, user prints, a new sheet is added to the workbook, etc.
- Use the MsgBox function to display a message when a user needs to fulfill a condition before closing an Excel workbook
- Use the InputBox function to get information from the user
Example #2: Allow User to Execute another Procedure
In the VBA Editor, select Insert -> New Module
Write this code in the Module window (don’t paste!):
Sub UserReportQuery()
Dim UserInput As Long
Dim Answer As Integer
UserInput = vbYesNo
Answer = MsgBox(«Process the XYZ Report?», UserInput)
If Answer = vbYes Then ProcessReport
End Sub
Sub ProcessReport()
MsgBox («Thanks for processing the XYZ Report.»)
End Sub
Save and navigate back to the Developer tab of Excel and select the “Button” option. Click on a cell and assign the UserReportQuery macro to the button.
Now click the button. This message should display:
Click “yes” or hit Enter.
Once again, tada!
Please note that the secondary subroutine, ProcessReport, could be anything. I’ll demonstrate more possibilities in example #3. But first…
How is it doing that?
This example builds on the previous example and has quite a few new elements. Let’s go over the new stuff:
- Dim UserInput As Long: Dim is short for “dimension” and allows you to declare variable names. In this case, UserInput is the variable name and Long is the data type. In plain English, this line means “Here’s a variable called “UserInput”, and it’s a Long variable type.”
- Dim Answer As Integer: declares another variable called “Answer,” with a data type of Integer. Learn more about data types here.
- UserInput = vbYesNo: assigns a value to the variable. In this case, vbYesNo, which displays Yes and No buttons. There are many button types, learn more here.
- Answer = MsgBox(“Process the XYZ Report?”, UserInput): assigns the value of the variable Answer to be a MsgBox function and the UserInput variable. Yes, a variable within a variable.
- If Answer = vbYes Then ProcessReport: this is an “If statement,” a conditional statement, which allows us to say if x is true, then do y. In this case, if the user has selected “Yes,” then execute the ProcessReport subroutine.
When could I use this?
This could be used in many, many ways. The value and versatility of this functionality is more so defined by what the secondary subroutine does.
For example, maybe you have a file that is used to generate 3 different weekly reports. These reports are formatted in dramatically different ways.
- Problem: Each time one of these reports needs to be generated, a user opens the file and changes formatting and charts; so on and so forth. This file is being edited extensively at least 3 times per week, and it takes at least 30 minutes each time it’s edited.
- Solution: create 1 button per report type, which automatically reformats the necessary components of the reports and generates the necessary charts.
Real World Examples
- Create a dialog box for user to automatically populate certain information across multiple sheets
- Use the InputBox function to get information from the user, which is then populated across multiple sheets
Example #3: Add Numbers to a Range with a For-Next Loop
For loops are very useful if you need to perform repetitive tasks on a specific range of values — arrays or cell ranges. In plain English, a loop says “for each x, do y.”
In the VBA Editor, select Insert -> New Module
Write this code in the Module window (don’t paste!):
Sub LoopExample()
Dim X As Integer
For X = 1 To 100
Range(«A» & X).Value = X
Next X
End Sub
Save and navigate back to the Developer tab of Excel and select the Macros button. Run the LoopExample macro.
This should happen:
Etc, until the 100th row.
How is it doing that?
- Dim X As Integer: declares the variable X as a data type of Integer.
- For X = 1 To 100: this is the start of the For loop. Simply put, it tells the loop to keep repeating until X = 100. X is the counter. The loop will keep executing until X = 100, execute one last time, and then stop.
- Range(«A» & X).Value = X: this declares the range of the loop and what to put in that range. Since X = 1 initially, the first cell will be A1, at which point the loop will put X into that cell.
- Next X: this tells the loop to run again
When could I use this?
The For-Next loop is one of the most powerful functionalities of VBA; there are numerous potential use cases. This is a more complex example that would require multiple layers of logic, but it communicates the world of possibilities in For-Next loops.
Maybe you have a list of all products sold at your bakery in Column A, the type of product in Column B (cakes, donuts, or muffins), the cost of ingredients in Column C, and the market average cost of each product type in another sheet.
You need to figure out what should be the retail price of each product. You’re thinking it should be the cost of ingredients plus 20%, but also 1.2% under market average if possible. A For-Next loop would allow you to do this type of calculation.
Real World Examples
- Use a loop with a nested if statement to add specific values to a separate array only if they meet certain conditions
- Perform mathematical calculations on each value in a range, e.g. calculate additional charges and add them to the value
- Loop through each character in a string and extract all numbers
- Randomly select a number of values from an array
Conclusion
Now that we’ve talked about pizza and muffins and oh-yeah, how to write VBA code in Excel spreadsheets, let’s do a learning check. See if you can answer these questions.
- What is VBA?
- How do I get set up to start using VBA in Excel?
- Why and when would you use VBA?
- What are some problems I could solve with VBA?
If you have a fair idea of how to you could answer these questions, then this was successful.
Whether you’re an occasional user or a power user, I hope this tutorial provided useful information about what can be accomplished with just a bit of code in your Excel spreadsheets.
Happy coding!
Learning Resources
- Excel VBA Programming for Dummies, John Walkenbach
- Get Started with VBA, Microsoft Documentation
- Learning VBA in Excel, Lynda
A bit about me
I’m Chloe Tucker, an artist and developer in Portland, Oregon. As a former educator, I’m continuously searching for the intersection of learning and teaching, or technology and art. Reach out to me on Twitter @_chloetucker and check out my website at chloe.dev.
Learn to code for free. freeCodeCamp’s open source curriculum has helped more than 40,000 people get jobs as developers. Get started
Written by Puneet for Excel 2007, Excel 2010, Excel 2013, Excel 2016, Excel 2019, Excel for Mac

KEY POINTS
- Visual Basic Editor is a code editor for VBA.
- It’s a separate application but you can only use it with Excel.
- You need to have the developer tab on the ribbon to access it.
- You can also use the keyboard shortcut (Alt + F11).
- It also stores the macros that you recode with the macro recorder.
- It has multiple tools to help you to write and manage all the codes.
The world of VBA starts with the Visual Basic Editor (VBE).
It’s the place where you write and manage all the macro codes and if you ask me about VBE, I’d say if you are serious about learning VBA you need to understand all the components of VBE.
That’s why it’s part of our VBA tutorial and in this guide, we have covered every single aspect of Visual Basic Editor to make you understand its functionality.
So, let’s get started.
I will be using different words (VBA editor, VB editor, or VBE) in this guide for referring to the Visual Basic Editor, so don’t be confused with it.
What is the Visual Basic Editor?
Visual Basic Editor is an application (a separate one) in which you can write and save all the VBA codes. In simple words, it’s a code editor for Excel in which you can write all the macros and store them. Even though it is a separate application (VB Editor) you can only use it with Excel.
Yes, that’s right. You can’t run VBE separately; there must be an Excel workbook open for using VBE.
Visual Basic Editor is the only way to write a VBA code in Excel. In fact, all Microsoft applications that host VBA use the Visual Basic Editor for script writing (writing code).
Below is the VBE:
Microsoft Windows

Mac

VBA is one of the ADVANCED EXCEL SKILLS and to master the VBA; you need to learn all the aspects of Visual Basic Editor.
Open the Visual Basic Editor
From the developer tab
To open the visual basic editor, you need to have the developer tab on the ribbon and to activate the developer tab (steps to add).

Now on the developer tab, in the code group, there is a button called “Visual Basic” and when you click on this button it opens the VB editor.

Shortcut Key (Window)
You can also use the keyboard shortcut key Alt + F11 to open the VBE in windows and Opt + F11 or Fn + Opt + F11 for MAC.
Even if you don’t have the developer tab on the ribbon, this shortcut key will still work and open the editor.
Edit a Macro from the List
If you want to open the VBA editor to edit a specific macro, then you can open the macros list from the developer tab.

And click on the edit button to open the VB editor to edit that specific macro.

On Quick Access Toolbar
You can also add a button on the quick access toolbar to open the VBA editor. For this, you need to click on the drop-down on the quick access toolbar and open more commands.

And then select the developer tab from “Choose Commands From” and then add the visual basic editor to the quick access toolbar by clicking on the add button.

Now you can open the visual basic editor from the button that you have on the QAT.

From the Worksheet Tab
You can also open the VBA editor by right-clicking on the worksheet tab and clicking on the view code. It will instantly take you to the code window of that worksheet.

Components of Visual Basic Editor
When you open the VBA editor first time it looks like an old application and to understand how it works you need to go component by component.

The user interface is the same (almost) for all the Excel versions in the last more than 15 years, so no matter which Excel version you are using, you can learn about Visual Basic Editor from this guide. Yes, VBE has different components which can help you in different ways, so let’s explore them one by one.
- Menu Bar
- Tool Bar
- Project Window
- Properties Window
- Code Window
- Immediate Window
- Watch Window
- Object Browser
- Find and Replace
- Locals Window
Just like any other application VBA editor has a menu bar where you can find all the options that are available to the user.
Now in the menu bar, each tab is a category of options that are available to use. Let’s suppose, in the edit menu, you can see all the options from cut-copy-paste, find and replace, and adding indent and outdent.

Along with all the options (most of them), you can find the shortcut keys to use those options.
2. Tool Bar
Just below the menu bar, you have the toolbar which is a collection of some of the options that a normal user needs to use more frequently. When you open the visual basic editor first time you will only have the standard toolbar, just like the image below.

But there are total four toolbars that you can add and use.
- Debug
- Edit
- Standard
- User Form
If you go to the view tab in the menu bar you have the option to add or remove these toolbars.

And you can also add or remove buttons from the toolbar if you want.

You can also move a toolbar just by dragging and dropping from the small dots on the right side.

3. Project Window/ Project Explorer
The project window is the place where you can see all the ongoing projects. Whenever you open a file and then open the visual basic editor you can see the hierarchy of that file in the project window.

Every project further has a collection of objects:
- Worksheet: Each worksheet in a workbook lists as an object.
- The Workbook: It represents the workbook itself as an object.
- Module: It’s the place where you write code or recorded macros stores.
- Chart Sheet: Chart sheet in the workbook will also be listed there.

When you open the VB editor, you’ll find the project window there by default. But if it’s not there somehow you can add it from the View (Menu Bar) or you can use the shortcut key Control + R.
Each object that is listed on the project window has its own code window which you can open by double click on it or you can right-click and select the view code option.

The project window is the best way to navigate through all the ongoing projects and when you start working with the editor you will get to know more about it.
4. Properties Window
As the name suggests the properties window gives you access to the properties of the selected object. Each object, for example, a worksheet has its own properties that you can see and make changes in it.

For each property, there is a drop-down on the right side from where you can change or edit that property.

Quick Tip: You can change the name of a project from the properties window.

And, if the properties window is not there by default you can activate it from the view (menu bar), or you can also use the shortcut key F4.

5. Code Window
The code window is the place where you write codes and do most of your work (editing, writing, and testing). In simple words, the code window is the place where you do all the programming.

When you first see it, it looks like a simple text editor, but it has Intellisense that can help you while programming.
There is no way I have found to add line number in the code window as other code editors have but still, VB editor indicates you the line number of the code.
Note
There’s no way I have found to add line number in the code window as other code editors have but still, VB editor indicates you the line number of the code.
6. Immediate Window
Immediate Window is the place where you can debug your code. You can type a line of code and test how it works. Let’s say if you want to test the following code:
Range("A1").Value = 9999All you need to do is enter type a question mark and then paste the code there and HIT enter. It will immediately show the result of the code.

The other way is to add Debug.Print before the code and get its result value in the immediate window.
Sub Macro1()
Debug.Print Range("A1").Value = "Yes"
End Sub
By default, the immediate window won’t be there when you open the visual basic editor, so you need to activate it from the view tab in the menu bar. You can also use the shortcut key Control + G.
7. Watch Window
Just like Excel Watch Window, the visual basic editor also has a watch window where you can add expressions to track them. You simply need to select the expression and then right-click and go to add a watch.

In the below example, I have added the Selection.Value to the add watch.

Now, to activate the watch window, go to the view menu and click on the watch window option.

And here you have the watch window tracking the added expression.
![]()
8. Object Browser
VBA has its own object browser which can help you to work with all the objects by finding all the properties and which you can use.

Imagine if you want to use the range object, the object browser will tell you about all the properties and method that comes with it. Look at the below example.

To open the object browser, use the shortcut key F2 or you can also go to the view tab and click on the object browser to open it.
9. Find and Replace
Just like the find and replace in Excel, the VBA editor has its own find and replace option that you can use to find and replace values from procedures. To open the FIND option, you can use the shortcut key Control + F, and to open the replace you can use the shortcut key Control + H.

Otherwise, you can open both options from the edit menu.

The find and replace option in VBE gives you different search patterns, like, if you want to find and replace something from the current procedure, from the current module, or from the current project.
You can also use the CASE SENSITIVE search and decide the direction of the search as well.
10. Locals Window
You can use the Locals window in VBE to displays all declared variables in the current procedure and their present values.
Using VB Editor to Write a Code
At this point, you know all the major components of the VBA editor, so now let’s learn how to add code in it.
Module Code Window Vs Object Code Window
There are two different types of code windows and both look just the same but there is a difference that you need to know.
- Module Code Window: Code in the normal module can be executed manually or you can also call it from a separate procedure.
- Object Code Window: Code in the object code window can be executed by using an event. Let’s suppose you want to run code when you double click on a cell, in that case, you need to use the double click event and you need to add code to that worksheet.
2. Module Code Window
You will be writing most of the VBA code in a module. To add code in a module you need to use the SUB procedure or the FUNCTION procedure.
- Sub procedure
- Function procedure
The difference between a sub and a function procedure is sub procedure can’t return a value, on the other hand, a function procedure can return a value.
When you record a macro that code goes straight into a module that VBA inserts automatically when you use the macro recorder.
Insert a Module
When you need to write code, you have to insert a module and for this, you simply need to go to the project window and right-click on the project name, and from that menu go to insert and select module.

Remove a Module
You can also remove a module if it doesn’t require anymore so you just simply need to right-click on the module and select remove.

And when you click on remove, it asks you if you want to back up that module before removing it. There is also an option where you can export a module to save it as a file in your system.
3. Object Code Window
Open the code window for the object you simply need to double click on it and in its the code window, there is a dropdown from where you can select the event that you want to use to execute the code.

Imagine if you want to write the code and want to execute on the double click then you need to select “BeforeDoubleClick” from the dropdown.
Understanding Design Mode, Run Mode, and Debug Mode
You can use the visual basic editor in three different modes depending on the face of programming, writing the code, locating an error, and fixing an error.
- Design Mode: Normally, when you are working in VB editor on a code you are in the design mode. Even then you just writing the code instead of designing a user form or a form you are in the design mode, like typing a code. This is also called design time.
- Run Mode: When you run a code to test a code that is how it works you are in the run mode. The best example to define this mode is when you execute a code using the Run button from the toolbar. This is also called runtime.
- Break Mode: When a code is running and in between the execution is suspended, at that time you are in break mode. In this mode, you can run a code step by step. This is also called debugging.
Tips to work with VB editor like a PRO
Just like any other programming language in VBA you can also use comments to define how that code works. Using comments is a good habit and it can help you in so many ways.
- Track Changes
- Contact Details of the Programmer
- How to Troubleshoot the Code
- And much more
To add a comment, you need to type an apostrophe and then the line of code.
Related Tip: VBA Comment Block
Quick Info
Now, look at the below example where I am adding add a VBA function (VBA LEFT Function), and the moment I type the name of the function, it shows me a tooltip for all the arguments which I need to define.

You can also use the shortcut key Control + I or use the quick info option from the EDIT menu.

Auto List Members
Each object in VBA comes with some properties and methods and when you insert an object or a command in the code window and then you enter (.) it shows you the complete list of properties and methods which come with that object.

In the above example, when I added a (.) after the borders property of the range, it showed me all the available properties that are available to access.
List Constants
While defining expressions for a property or a method you can use the list of constants available. In the below example, while using the Border Around method it showed me all the constants which are available for the weight argument.

You can use the shortcut key Control + Shift + J to get the list of constants or you can also go to the edit menu and use the option from there.

Activate Option Explicit
While writing VBA codes you will need to use variables and one of the most important things while using variables is to declare their data type. And there’s a chance that you could forget to declare it.
But when you use the option explicit statement, then you have to declare the data type for every single variable which you are using, and if you fail to do so VBA will show an error message. It’s like forcing yourself to declare every single variable with its data type. For this, you can go to the tools menu and open the options.

And from the options, tick mark “Require Variable Declaration” and click OK.

Now every module will have an Option Explicit statement at the beginning, and you have to declare every single variable.

Change the Code Window View
When you can write multiple codes in a single code window and VBA separate them with a divider, but if you want to have a more focused view, you can change the view of the code window. Below I have the codes in a single module.

But I can change this view from the view buttons from the bottom left of the window.

Now I have only active code visible.
Run a Code Step by Step
When you write a VBA code there could be a chance that that code has a bug or an error that can come while executing it. In that case, the best way is to execute that code step by step and validate each line of code.

For this, you can use shortcut key F8 to execute a code line by line or use step into option from the debug menu.

And there is also a button on the debug toolbar that you can use.

Code Indenting
When you write lengthy and complex codes then it’s important to structure them in the right way so that you can understand them later. For this, there’s one thing which comes handy, INDENTING. Indenting is basically structuring the code using tabs, below is an example.

To add indenting in a line you can use the TAB key from the keyboard, or you can also use the indent/outdent buttons from the toolbar.

Get Code from a Text File
The visual basic editor allows you to import VBA codes from a text file without copy-pasting. Once you insert a module you can go to the insert menu and select the file option from there.

It opens the dialog box where you can locate the text file and import all the codes from it to the current module.
R1C1 Reference Style
If you ever worked with the R1C1 reference style, then I’m sure you can agree on this point that way easier to write codes with it.
R1C1 Reference Style
Line Break
Even though you can adjust the width of the code window and make it wide but there could be a situation when you will be dealing with long lines of code that makes it hard to read.
The best way to deal with this problem is to add a line break. Basically, a line break is something when you break a line into two lines using the line break character.
Use a SPACE & UNDERSCORE and hit enter to add a line break.

Formatting
When it comes to user interface visual basic editor is not that good looking. But there are few formatting options that you can use to customize it or change its look the way you want.
From the Tools Menu Options Editor Format, you can access the formatting option where you can change the font style size or background color as well

Check out this video on customizing the VBA editor for a dark theme.
Personal Macro Workbook
There could be some macros that you need to access within all the workbooks that you use.
In that case, you can use the Personal Macro Workbook that can help you to store all the important codes in one place and you can access them from all the workbooks.

Using Bookmarks
The visual basic editor allows you to add bookmarks to a line from Right Click ➤ Toggle ➤ Bookmark.

And then you can also navigate between bookmarks from the option from the edit menu.

Syntax Checking
When you write codes in the code window VBA check for the syntax error and notify you when you make a syntax error. This option is activated by default, but you can also turn it off if you don’t want VBA to notify you every time you make an error.
Tools Menu ➤ Options ➤ Editor Tab ➤ Auto Syntax Check.

But I would recommend you not to deactivate it because it can help you to identify all the syntax errors that you make while writing codes.
List of Macros
If you have a lot of macros in a module, there is an option that you can use to see all the macros (Tools ➤ Macro).

There’s one big benefit of using this list option is that you can run a macro, delete it, and edit it without navigating to that procedure.
Locking a Project with a Password
Visual Basic Editor also gives you an option to lock a module with a password. So, if you don’t want the users to know the code and don’t want them to make a change in the code, you can use this option.

Tools Menu ➤ VBAProject Properties ➤ Protection Tab

Important Shortcut Keys
- Shift + F7: Object browser.
- F5: Run macro.
- Tab: Add an indent.
- Alt + Q: Close.
- F8: Step into.
- Control + H: Find and replace.
- Control + G: Immediate Window.
- Control + R: Project Explorer.
- F4: Properties window.
Learn some AMAZING Keyboard Shortcuts: Excel Keyboard Shortcuts Cheat Sheet
Alternative to Visual Basic Editor
Well, I have tried quite a few other editors to write a macro but the problem which I have found is that without the Intellisense it’s really hard to use anything other than the visual basic editor itself.

VBA editor works along with Excel, you can test your codes instantly and you can save them into the workbook. But are a few names to try.
Visual Studio Code | Ultra Edit
Points to Remember
- You can maximize or minimize the code window.
- You can change a project’s name anytime.
- The project window is the best way to navigate through the editor.
- It will make a line red if there’s an error in it while writing the code.
- You can also add a bookmark to a line of code from the Right-Click Menu Toggle Bookmark.
- You cannot use the visual basic editor without opening an Excel workbook.
More on VBA
- VBA Functions
- VBA to Add a New Sheet
- VBA Code to Activate a Worksheet
- VBA IF Then Statement
- VBA User Defined Function
- VBA Message Box
- VBA to Extract Hyperlink
- Macro to Highlight Duplicate Values
- VBA to Create a Pivot Table
[icon name=”bell” class=”” unprefixed_class=””] VBA is one of the Advanced Excel Skills
Should I need to install the Visual Basic Editor?
No. You don’t need to install the visual basic editor. It comes pre-installed with the Microsoft Office applications.
What if I don’t have the Developer Tab on the Ribbon?
If you don’t have the developer tab on the Excel ribbon, you can activate it from the Excel ribbon.
Is there an alternative to the Visual Basic Editor?
Not really. The IntelliSense that you have in the VBE makes it perfect to use to write VBA codes.