
Return to VBA Code Examples
This tutorial will show you how to use the Range.End property in VBA.
Most things that you do manually in an Excel workbook or worksheet can be automated in VBA code.
If you have a range of non-blank cells in Excel, and you press Ctrl+Down Arrow, your cursor will move to the last non-blank cell in the column you are in. Similarly, if you press Ctrl+Up Arrow, your cursor will move to the first non-blank cell. The same applies for a row using the Ctrl+Right Arrow or Ctrl+Left Arrow to go to the beginning or end of that row. All of these key combinations can be used within your VBA code using the End Function.
Range End Property Syntax
The Range.End Property allows you to move to a specific cell within the Current Region that you are working with.
expression.End (Direction)
the expression is the cell address (Range) of the cell where you wish to start from eg: Range(“A1”)
END is the property of the Range object being controlled.
Direction is the Excel constant that you are able to use. There are 4 choices available – xlDown, xlToLeft, xlToRight and xlUp.

Moving to the Last Cell
The procedure below will move you to the last cell in the Current Region of cells that you are in.
Sub GoToLast()
'move to the last cell occupied in the current region of cells
   Range("A1").End(xlDown).Select
End Sub
Counting Rows
The following procedure allows you to use the xlDown constant with the Range End property to count how many rows are in your current region.
Sub GoToLastRowofRange()
   Dim rw As Integer
   Range("A1").Select
'get the last row in the current region
   rw = Range("A1").End(xlDown).Row
'show how many rows are used
   MsgBox "The last row used in this range is " & rw
End Sub
While the one below will count the columns in the range using the xlToRight constant.
Sub GoToLastCellofRange()
   Dim col As Integer
   Range("A1").Select
'get the last column in the current region
   col = Range("A1").End(xlToRight).Column
'show how many columns are used
   MsgBox "The last column used in this range is " & col
 End Sub
Creating a Range Array
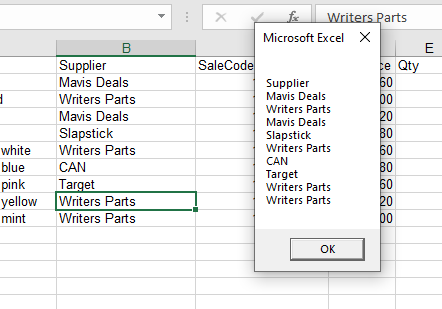
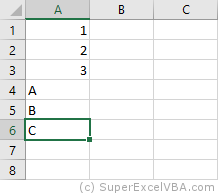
The procedure below allows us to start at the first cell in a range of cells, and then use the End(xlDown) property to find the last cell in the range of cells. We can then ReDim our array with the total rows in the Range, thereby allowing us to loop through the range of cells.
Sub PopulateArray()
'declare the array
   Dim strSuppliers() As String
'declare the integer to count the rows
   Dim n As Integer
'count the rows
   n = Range("B1", Range("B1").End(xlDown)).Rows.Count
'initialise and populate the array
   ReDim strCustomers(n)
'declare the integer for looping
   Dim i As Integer
'populate the array
   For i = 0 To n
     strCustomers(i) = Range("B1").Offset(i, 0).Value
   Next i
'show message box with values of array
   MsgBox Join(strCustomers, vbCrLf)
End Sub
When we run this procedure, it will return the following message box.
VBA Coding Made Easy
Stop searching for VBA code online. Learn more about AutoMacro — A VBA Code Builder that allows beginners to code procedures from scratch with minimal coding knowledge and with many time-saving features for all users!

Learn More!
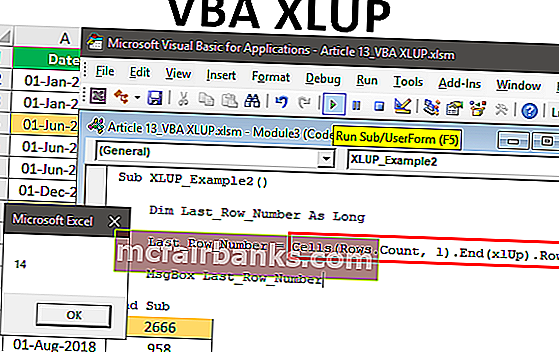
Excel VBA XLUP
VBA XlUP is a snippet that is used to find out the last row of the given data set in an excel table. So how this snippet or code or statement does works in VBA. It loops through each instance of the row and adding each instance to the outcome. The loop stops when it reaches the last used cell and then the number of instances the loop is executed is the last row of the data.
So this snippet works as similar to the keyboard shortcut we use in excel worksheet which is CTRL + Down Arrow. This is also known as the range end property method.
How to Use VBA XLUP in Excel?
The following examples will teach us how to use XLUP Property in Excel by using the VBA Code.
You can download this VBA XLUP Excel Template here – VBA XLUP Excel Template
Example #1
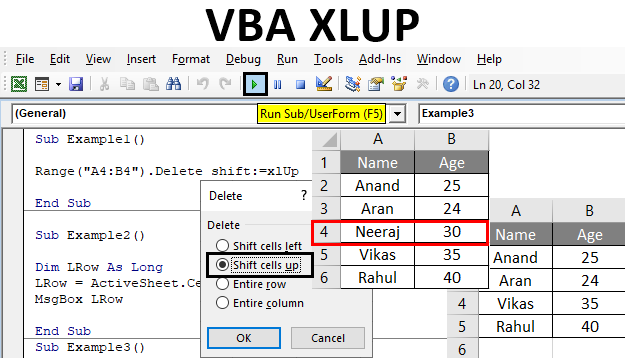
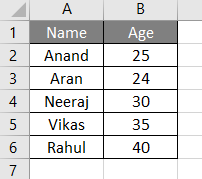
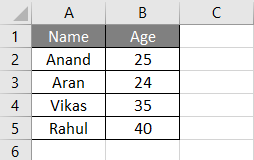
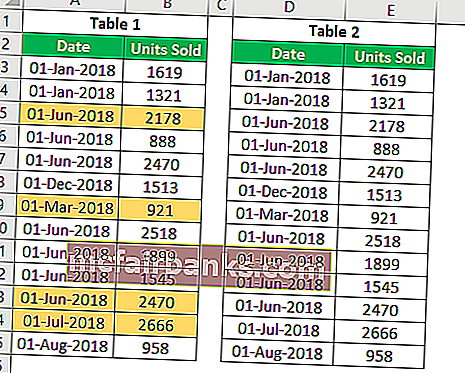
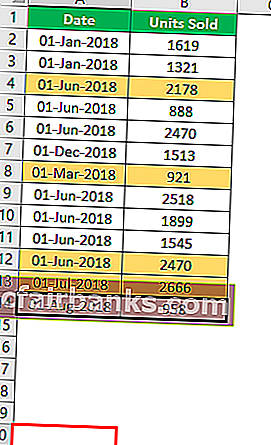
Let us begin with the first example where we will use the worksheet method of removing data from cells by using keyboard shortcut CTRL + -. When we do this operation on cells which has data then excel gives us certain options like what we want to shift cells or the rows up, left, right or below. For example, let us see the data we have below,
So let us delete the cell range A4:B4 using the XlUP method. For this, follow the below steps:
Step 1: Insert a new module inside Visual Basic Editor (VBE). Click on Insert tab > select Module.
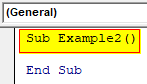
Step 2: Now write the subprocedure for VBA XLUP.
Code:
Sub Example1()

End Sub
Step 3: We will use the range property method to decide the range which we want to delete which in this case is A4:B4.
Code:
Sub Example1()

Range("A4:B4")

End Sub
Step 4: We can use the .Delete property method to delete the data from these two cells.
Code:
Sub Example1()

Range("A4:B4").Delete

End Sub
Step 5: Now when we do the same in excel to remove the cell data we get these options.
Code:
Sub Example1()

Range("A4:B4").Delete shift:=xlUp

End Sub
Step 6: Since we want to shift the cells up when the cell data is deleted we will use Shift Statement with the XlUP snippet.
Step 7: Run this code by hitting F5 or Run button. we can see the changes in our data.
Example #2
We can also use the XlUP End snippet to find out the last row in the data. In this example let us use the same data in sheet 1 and find out what the last row is. For this, follow the below steps:
Step 1: In the same module let us begin with our another subprocedure.
Code:
Sub Example2()

End Sub
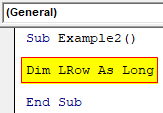
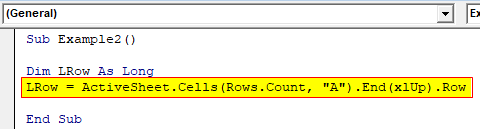
Step 2: Let us declare a variable that will hold the value for our last row. Since the number of rows in excel exceeds the integer value can hold we will use the long data type.
Code:
Sub Example2()

Dim LRow As Long

End Sub
Step 3: Now in the variable we will store the value of the last row. We can choose any column to find the last row which has data but it is preferred to use the column which has unique index number such as name is unique in this data so we will use column A.
Code:
Sub Example2()

Dim LRow As Long
LRow = ActiveSheet.Cells(Rows.Count, "A").End(xlUp).Row

End Sub
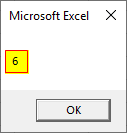
Step 4: Now we can use the Msgbox function to display the value of the last row stored in the variable.
Code:
Sub Example2()

Dim LRow As Long
LRow = ActiveSheet.Cells(Rows.Count, "A").End(xlUp).Row
MsgBox LRow

End Sub

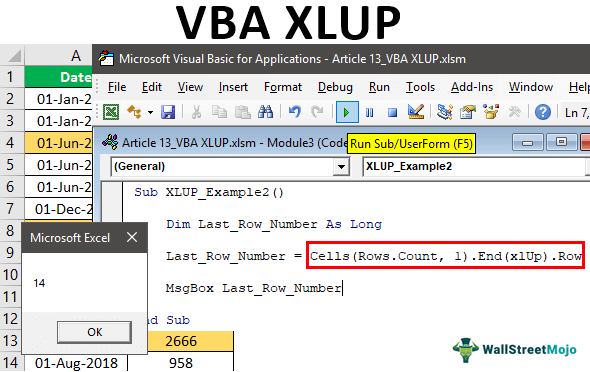
Step 5: Run this code by hitting F5 or Run button placed at the uppermost ribbon of Visual Basic Editor.
Example #3
In the above example, we have used the XlUP Snippet for the last row but we can also find out the last column using a type of this snippet too. In this example, we can use the same data from sheet 1. For this, follow the below steps:
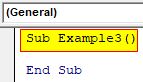
Step 1: So let us declare another procedure in the same module.
Code:
Sub Example3()

End Sub
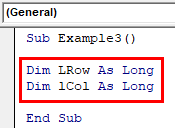
Step 2: We need to declare two variables one for the row and another for the column.
Code:
Sub Example3()

Dim LRow As Long
Dim lCol As Long

End Sub
Step 3: In the first variable, we will store the value of the last row which is by finding the last used cell in the column.
Code:
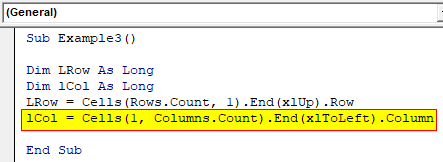
Sub Example3()

Dim LRow As Long
Dim lCol As Long
LRow = Cells(Rows.Count, 1).End(xlUp).Row

End Sub

Step 4: Similarly in the second variable we will store the value of the last column by finding the last blank cell in a row.
Code:
Sub Example3()

Dim LRow As Long
Dim lCol As Long
LRow = Cells(Rows.Count, 1).End(xlUp).Row
lCol = Cells(1, Columns.Count).End(xlToLeft).Column

End Sub
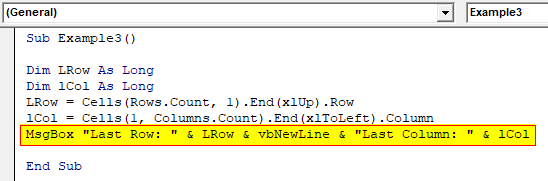
Step 5: Now we can display both last row and the last column using the Msgbox function.
Code:
Sub Example3()

Dim LRow As Long
Dim lCol As Long
LRow = Cells(Rows.Count, 1).End(xlUp).Row
lCol = Cells(1, Columns.Count).End(xlToLeft).Column
MsgBox "Last Row: " & LRow & vbNewLine & "Last Column: " & lCol

End Sub
Step 6: When we press F8 we can see how this procedure works.
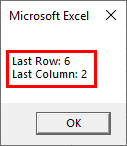
To explain we used column A to find out the last cell which was on the sixth position thus the last row being 6 and in a row where the last cell is the last column thus the column position.
Explanation of VBA XlUP:
As we have learned from the above examples there can be many uses of the XlUP snippet in our day to day life. We can use it to remove data or we can use it to find the last row. But apart from the usage, there are some demerits of using this such as we can find the last row or the last column at a time. But if we are to find the last used cell we have to use two different statements for row and column and by referring them we can find the last used cell.
There are two uses which are explained in the examples above:
- First is which is used with the shift statement to delete the data from a cell range using the Shift property.
- Second application is used to find the last row of the property using the End statement.
Things to Remember
There are few things which we need to remember about VBA XlUP and they are:
- VBA v is a snippet used to find out the last row of the property.
- This snippet can only be used in a single row.
- It is pretty much simple to the keyboard shortcuts which involve CTRL + Down Arrow.
Recommended Articles
This is a guide to the VBA XLUP. Here we discuss how to use the XLUP in Excel VBA for moving the cells toa deleted cell position and finding the last used row along with practical examples and downloadable excel template. You can also go through our other suggested articles –
- VBA XML
- VBA Filter
- VBA Login
- VBA Month
Excel VBA XLUP
One thing you need to remember while writing VBA codeVBA code refers to a set of instructions written by the user in the Visual Basic Applications programming language on a Visual Basic Editor (VBE) to perform a specific task.read more is what you do with the regular worksheet. You can replicate the same thing in VBA as well. One such keyword in VBA coding is “XLUP” in this article. First, we will show you what this keyword is in VBA coding and how to use it in coding.
Table of contents
- Excel VBA XLUP
- How to Use VBA XLUP in Coding?
- Example #1 – Move Cells to Deleted Position of Cells
- Example #2 – Find Last Used Row by using XLUP
- Things to Remember about VBA XLUP
- Recommended Articles
- How to Use VBA XLUP in Coding?
You are free to use this image on your website, templates, etc, Please provide us with an attribution linkArticle Link to be Hyperlinked
For eg:
Source: VBA XLUP (wallstreetmojo.com)
How to Use VBA XLUP in Coding?
The following are examples of Excel VBA XLUP.
You can download this VBA XLUP Excel Template here – VBA XLUP Excel Template
Example #1 – Move Cells to Deleted Position of Cells
Look at the scenario of the below data, where you need to delete those colored cells data and move up the below rows data to the above data.

One way of deleting this in the worksheet is to select those cells in which we can delete the entire row. But here, situations are a little tricky because we have colored cells in Table 1 when we delete the entire row. Even Table 2 rows get deleted, but we don’t want this to happen. So instead, we only need to delete colored rows, and the below cells should move up the position of the deleted cells.
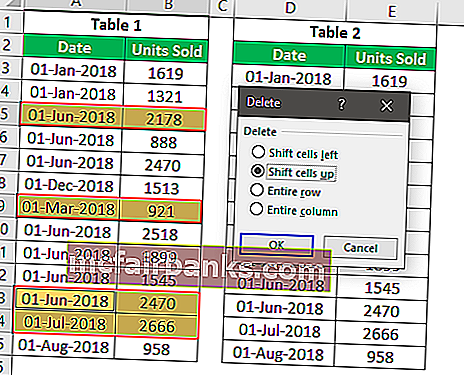
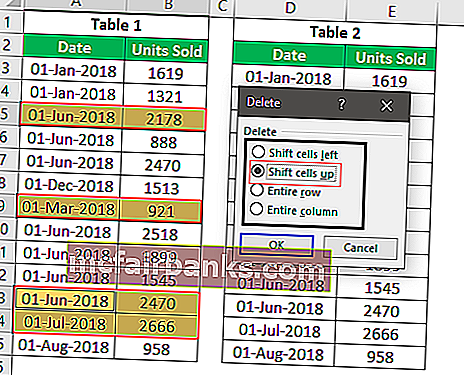
First, select the colored cells and press Ctrl + Minus Symbol (-) to open the “Delete” option.
Shortcut Key to Open “Delete” Option
![]()

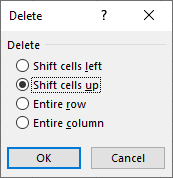
In the “Delete” options window, we have four options. We can choose the action as per our requirement. Since we need to move our cells up for those deleted cells’ position, choose “Shift cells up.”

We’ll have unchanged Table 2 rows.

This action in VBA requires using the XLUP property to perform similar actions in VBA. Now, come to the window of the VBA editorThe Visual Basic for Applications Editor is a scripting interface. These scripts are primarily responsible for the creation and execution of macros in Microsoft software.read more and start your macro name.
Code:
Sub XLUP_Example()
End Sub

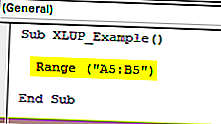
First, supply the cell RANGE to be included in this operation. In this action, the first cells to be deleted and moved up are “A5: B5” cells.
Code:
Sub XLUP_Example()

  Range ("A5:B5")

End Sub

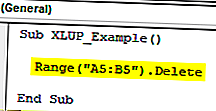
For this range of cells, select the “Delete” method.
Code:
Sub XLUP_Example()

  Range("A5:B5").Delete

End Sub

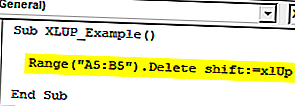
As you can see, we have one optional argument for the “Delete” method as [Shift]. For this argument, we need to enter the argument as “XLUP.”
Code:
Sub XLUP_Example()

  Range("A5:B5").Delete shift:=xlUp

End Sub

You can run this code manually or through the shortcut excel keyAn Excel shortcut is a technique of performing a manual task in a quicker way.read more F5 to see the result.

As you can see in Table 1, row number 6 moved up to the 5th row. On the other hand, Table 2 row (colored) is unaltered, so we can do this operation by using the “VBA XLUP” option.
Example #2 – Find Last Used Row by using XLUP
Imagine a situation where you are in the A20th cell (see below image), and your last-used cell is A14.

Now, what will you do by using a shortcut key if you want to choose the last used cell (A14)?
We would use Ctrl + Up Arrow key to move to the last used cell from the current position.
Shortcut Key to Move to Last used Cell
![]()

So, the Ctrl + Up arrow selected the last used cell from the current cell. Similarly, in VBA coding, we use END (XLUP) to perform the same.
Now, come back to the VBA coding window.
In this window, we will perform the task of finding the last used row in the worksheet. But, first, create a new subprocedure in the VBASUB in VBA is a procedure which contains all the code which automatically gives the statement of end sub and the middle portion is used for coding. Sub statement can be both public and private and the name of the subprocedure is mandatory in VBA.read more window.
Code:
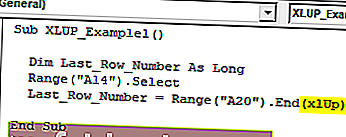
Sub XLUP_Example1()
End Sub

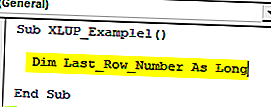
To store the last used row number. Define the variable as the VBA LONG data typeLong is a data type in VBA that is used to store numeric values. We know that integers also store numeric values, but Long differs from integers in that the range for data storage is much larger in the case of long data type.read more.
Code:
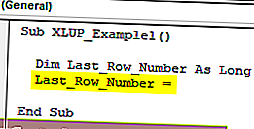
Sub XLUP_Example1()

  Dim Last_Row_Number As Long

End Sub

Now, we will assign the last used row number for this variable.
Code:
Sub XLUP_Example1()

  Dim Last_Row_Number As Long
  Last_Row_Number =

End Sub

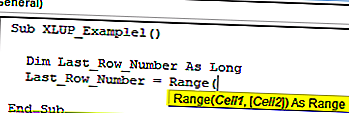
Now use the RANGE objectRange is a property in VBA that helps specify a particular cell, a range of cells, a row, a column, or a three-dimensional range. In the context of the Excel worksheet, the VBA range object includes a single cell or multiple cells spread across various rows and columns.read more and open this object.
Code:
Sub XLUP_Example1()
  Dim Last_Row_Number As Long
  Last_Row_Number = Range(
End Sub

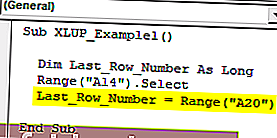
Now, mention the active cell (A20) for the RANGE object.
Code:
Sub XLUP_Example1()

  Dim Last_Row_Number As Long
  Range("A14").Select
  Last_Row_Number = Range("A20")

End Sub

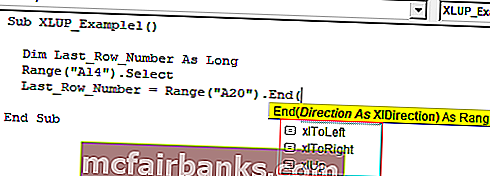
Now, open the END property for the supplied range cell.
Code:
Sub XLUP_Example1()
  Dim Last_Row_Number As Long
  Range("A14").Select
  Last_Row_Number = Range("A20").End(
End Sub

As you can see above, we have arrow key options like “xlDown,” “xlToLeft,” “xlToRight,” and “xlUp.” Since we are moving up from the A14 cell, choose the “VBA XLUP” option.
Code:
Sub XLUP_Example1()

  Dim Last_Row_Number As Long
  Range("A14").Select
  Last_Row_Number = Range("A20").End(xlUp)

End Sub

After moving up from the A14 cell, we need to mention what we need to do since we need the last used row number. We will use the ROW property.
Code:
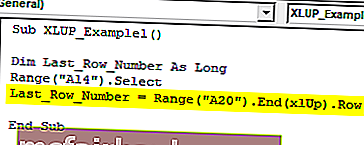
Sub XLUP_Example1()

  Dim Last_Row_Number As Long
  Range("A14").Select
  Last_Row_Number = Range("A20").End(xlUp).Row

End Sub

Now, for the message box, assign the value of the variable “Last_Row_Number.”
Code:
Sub XLUP_Example1()

   Dim Last_Row_Number As Long
   Range("A14").Select
   Last_Row_Number = Range("A20").End(xlUp).Row
   MsgBox Last_Row_Number

End Sub

You can run this code manually or through shortcut key F5 to see the result.

So, the message box shows the last used row number as 14, so our last data used row number is A14 cell.
In this case, since the data is very small, we started the room cell, but when the data is large, we cannot say which cell to consider first. In such cases, we need to employ a different technique.
We need to use the CELLS property. Below is an example of the same.
Code:
Sub XLUP_Example2()

  Dim Last_Row_Number As Long
  Last_Row_Number = Cells(Rows.Count, 1).End(xlUp).Row
  MsgBox Last_Row_Number

End Sub
You can run this code manually or through shortcut key F5 to see the result.

Instead of a RANGE object, we have used the CELLS property. Let me explain this in detail to you.
ROW.COUNT will count how many rows are there in column 1. What this will do is it will take into consideration the last cell in the worksheet instead of the random cell address. We have used A14 as the random cell address in the above case.
Things to Remember about VBA XLUP
- XLUP is the word used in VBA code to replicate the action of the “Up Arrow” key in Excel.
- VBA XLUP moves from active cells to the above or last-used cell.
- Generally, one may use XLUP along with the END property in VBA.
Recommended Articles
This article has been a guide to VBA XLUP. Here, we discuss how to use XLUP in VBA coding to move cells to a deleted position of cells and to find the last used row in Excel, along with practical examples and a downloadable Excel template. Below you can find some useful Excel VBA articles: –
- VBA LOOKUP
- VBA CDATE Function
- Message Box (Yes/No) in VBA
- With VBA
Excel VBA XLUP
При написании кода VBA вам нужно помнить о том, что вы делаете с обычным листом, и вы также можете реплицировать то же самое в VBA. Одним из таких ключевых слов в кодировании VBA является «XLUP», в этой статье мы покажем вам, что это за ключевое слово в кодировании VBA и как его использовать при кодировании.
Как использовать VBA XLUP в кодировании?
Ниже приведены примеры Excel VBA XLUP.
Вы можете скачать этот шаблон VBA XLUP Excel здесь — Шаблон VBA XLUP Excel
Пример # 1 — Перемещение ячеек в удаленное положение ячеек
Например, посмотрите на сценарий с данными ниже, где вам нужно удалить данные этих цветных ячеек и другие данные из строк ниже в данные выше.
Один из способов удалить это на листе — выбрать те ячейки, в которых мы можем просто удалить всю строку. Но здесь ситуации немного сложны, потому что у меня есть цветные ячейки в таблице 1, когда мы удаляем всю строку, даже строки таблицы 2 также удаляются, но мы не хотим, чтобы это происходило, вместо этого нам нужно только удалить цветные строки, а нижние ячейки должны переместиться. вверх положение удаленных ячеек.
Сначала выберите цветные ячейки и нажмите Ctrl + символ минуса (-), чтобы открыть опцию «Удалить».
Сочетание клавиш для открытия опции «Удалить»

В окне «Удалить» у нас есть четыре варианта, мы можем выбрать действие в соответствии с нашими требованиями. Поскольку нам нужно переместить наши ячейки вверх для позиции этих удаленных ячеек, выберите «Сдвинуть ячейку вверх».
У нас останутся неизменные строки таблицы 2.

Это действие в VBA требует использования свойства «XLUP» для выполнения аналогичного набора действий в VBA. Теперь подойдите к окну редактора VBA и начните свое имя макроса.
Код:
Sub XLUP_Example () End Sub
Сначала укажите ДИАПАЗОН ячейки, который будет включен в эту операцию. В этом действии первыми удаляются и перемещаются вверх ячейки «A5: B5».
Код:
Sub XLUP_Example () Диапазон ("A5: B5") End Sub
Для этого диапазона ячеек выберите метод «Удалить».
Код:
Sub XLUP_Example () Диапазон ("A5: B5"). Удалить End Sub
Как вы можете видеть для метода «Удалить», у нас есть один необязательный аргумент как [Shift], для этого аргумента нам нужно ввести аргумент как «XLUP».
Код:
Sub XLUP_Example () Диапазон ("A5: B5"). Удалить сдвиг: = xlUp End Sub
Теперь вы можете запустить этот код вручную или с помощью сочетания клавиш Excel F5, чтобы увидеть результат.
Как вы можете видеть в Таблице 1, у нас есть строка номер 6, перемещенная на 5-ю строку, а с другой стороны Таблица, 2 строка (цветная) не изменилась, поэтому, используя параметр «VBA XLUP», мы можем выполнить эту операцию.
Пример # 2 — Найти последнюю использованную строку с помощью XLUP
Представьте себе ситуацию, когда вы находитесь в ячейке A20 (см. Изображение ниже), а ваша последняя использованная ячейка — A14.
Теперь, если вы хотите выбрать последнюю использованную ячейку (A14). как вы будете делать с помощью сочетания клавиш ???
Мы бы использовали Ctrl + клавишу со стрелкой вверх для перехода к последней использованной ячейке из текущей позиции.
Сочетание клавиш для перехода к последней использованной ячейке


Итак, из текущей ячейки Ctrl + стрелка вверх выбрала последнюю использованную ячейку. Точно так же в кодировании VBA мы используем END (XLUP), чтобы выполнить то же самое.
Теперь вернемся к окну кодирования VBA.
In this window, we will perform the task of finding the last used row in the worksheet. Create a new subprocedure in the VBA window.
Code:
Sub XLUP_Example1() End Sub
To store the last used row number. define the variable as the VBA LONG data type.
Code:
Sub XLUP_Example1() Dim Last_Row_Number As Long End Sub
Now for this variable, we will assign the last used row number.
Code:
Sub XLUP_Example1() Dim Last_Row_Number As Long Last_Row_Number = End Sub
Now use RANGE object and open this object.
Code:
Sub XLUP_Example1() Dim Last_Row_Number As Long Last_Row_Number = Range( End Sub
Now mention the active cell (A20) for RANGE object.
Code:
Sub XLUP_Example1() Dim Last_Row_Number As Long Range("A14").Select Last_Row_Number = Range("A20") End Sub
Now open END property for supplied range cell.
Code:
Sub XLUP_Example1() Dim Last_Row_Number As Long Range("A14").Select Last_Row_Number = Range("A20").End( End Sub
As you can see above, we have to arrow key options like “xlDown”, “xlToLeft”, “xlToRight”, “xlUp”. Since we are moving up from the A14 cell choose the “VBA XLUP” option.
Code:
Sub XLUP_Example1() Dim Last_Row_Number As Long Range("A14").Select Last_Row_Number = Range("A20").End(xlUp) End Sub
After moving up from A14 cell we need to mention what we need to do since we need the last used row number I will use ROW property.
Code:
Sub XLUP_Example1() Dim Last_Row_Number As Long Range("A14").Select Last_Row_Number = Range("A20").End(xlUp).Row End Sub
Now for the message box assign the value of variable “Last_Row_Number”.
Code:
Sub XLUP_Example1() Dim Last_Row_Number As Long Range("A14").Select Last_Row_Number = Range("A20").End(xlUp).Row MsgBox Last_Row_Number End Sub

Now you can run this code manually or through shortcut key F5, to see the result.
So message box showing the last used row number as 14, so our last data used row number is A14 cell.
In this case, since data is very small we started from A20 cell but when the data is large we cannot say which cell to take into consideration first, in such cases we need to employ a different technique.
We need to use CELLS property, below is the example of the same.
Code:
Sub XLUP_Example2() Dim Last_Row_Number As Long Last_Row_Number = Cells(Rows.Count, 1).End(xlUp).Row MsgBox Last_Row_Number End Sub
Now you can run this code manually or through shortcut key F5, to see the result.
Instead of a RANGE object, I have used CELLS property. Let me explain this in detail to you.
ROW.COUNT this will count how many rows are there in column 1. What this will do is it will take into consideration of the last cell in the worksheet instead of random cell address, in the above case we have used A14 as the random cell address.
Things to Remember about VBA XLUP
- XLUP is the word used in VBA code to replicate the action of the “Up Arrow” key in excel.
- VBA XLUP is used to move from active cells to the above cell or last used cell.
- XLUP is generally used along with END property in VBA.
VBA Last Row or Column with Data
It is important to know how to generate a code that identifies the address of the last row or column with data from a spreadsheet. It is useful as a final counter in Loops and as a reference for intervals.
VBA Count
The .Count property, when used for a Range object, returns the number of cells in a given range. (whether they are filled or not).
MsgBox Range("A1:B7").Count 'Returns 14
If you want to know the number of columns or of rows of a given range, you can use the Columns or the Rows properties in conjunction with the Count property.
    MsgBox Range("A1:B7").Rows.Count    'Returns 7
    MsgBox Range("A1:B7").Columns.Count 'Returns 2
The .Count property returns the number of objects of a given collection.
If you want to know the number of rows or columns in the worksheet, you can use Rows or Columns without specifying the cells with the Range:
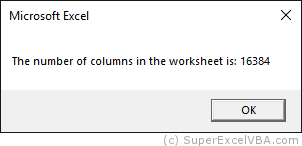
MsgBox "The number of rows in the worksheet is: " & Rows.Count
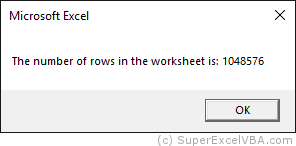
MsgBox "The number of columns in the worksheet is: " & Columns.Count
VBA End
Although the Count property is very useful, it returns only the available amount of elements, even if they are without values.
The End property, used in conjunction with the Range object, will return the last cell with content in a given direction. It is equivalent to pressing
 +
+
( or
or
 or
or
 or
or
 ).
).
    Range("A1").End(xlDown).Select
    'Range("A1").End([direction]).Select
When using End it is necessary to define its argument, the direction: xlUp, xlToRight, xlDown, xlToLeft.
You can also use the end of the worksheet as reference, making it easy to use the xlUp argument:
MsgBox "The last row with data is number: " & Cells(Rows.Count, 1).End(xlUp).Row
VBA Last Cell Filled
Note that there are some ways to determine the last row or column with data from a spreadsheet:
    Range("A1").End(xlDown).Row
    'Determines the last row with data from the first column

    Cells(Rows.Count, 1).End(xlUp).Row
    'Determines the last row with data from the first column

    Range("A1").End(xlToRight).Column
    'Determines the last column with data from the first row

    Cells(1,Columns.Count).End(xlToLeft).Column
    'Determines the last column with data from the first row
Show Advanced Topics
Consolidating Your Learning
Suggested Exercises
SuperExcelVBA.com is learning website. Examples might be simplified to improve reading and basic understanding. Tutorials, references, and examples are constantly reviewed to avoid errors, but we cannot warrant full correctness of all content. All Rights Reserved.
Excel ® is a registered trademark of the Microsoft Corporation.
© 2023 SuperExcelVBA | ABOUT
![]()
Свойство End объекта Range применяется для поиска первых и последних заполненных ячеек в VBA Excel — аналог сочетания клавиш Ctrl+стрелка.
Свойство End объекта Range возвращает объект Range, представляющий ячейку в конце или начале заполненной значениями области исходного диапазона по строке или столбцу в зависимости от указанного направления. Является в VBA Excel программным аналогом сочетания клавиш — Ctrl+стрелка (вверх, вниз, вправо, влево).
Возвращаемая свойством Range.End ячейка в зависимости от расположения и содержания исходной:
| Исходная ячейка | Возвращаемая ячейка |
|---|---|
| Исходная ячейка пустая | Первая заполненная ячейка или, если в указанном направлении заполненных ячеек нет, последняя ячейка строки или столбца в заданном направлении. |
| Исходная ячейка не пустая и не крайняя внутри исходного заполненного диапазона в указанном направлении | Последняя заполненная ячейка исходного заполненного диапазона в указанном направлении |
| Исходная ячейка не пустая, но в указанном направлении является крайней внутри исходного заполненного диапазона | Первая заполненная ячейка следующего заполненного диапазона или, если в указанном направлении заполненных ячеек нет, последняя ячейка строки или столбца в заданном направлении. |
Синтаксис
|
Expression.End (Direction) |
Expression — выражение (переменная), представляющее объект Range.
Параметры
| Параметр | Описание |
|---|---|
| Direction | Константа из коллекции XlDirection, задающая направление перемещения. Обязательный параметр. |
Константы XlDirection:
| Константа | Значение | Направление |
|---|---|---|
| xlDown | -4121 | Вниз |
| xlToLeft | -4159 | Влево |
| xlToRight | -4161 | Вправо |
| xlUp | -4162 | Вверх |
Примеры
Скриншот области рабочего листа для визуализации примеров применения свойства Range.End:

Примеры возвращаемых ячеек свойством End объекта Range("C10") с разными значениями параметра Direction:
| Выражение с Range.End | Возвращенная ячейка |
|---|---|
Set myRange = Range("C10").End(xlDown) |
Range("C16") |
Set myRange = Range("C10").End(xlToLeft) |
Range("A10") |
Set myRange = Range("C10").End(xlToRight) |
Range("E10") |
Set myRange = Range("C10").End(xlUp) |
Range("C4") |
Пример возвращения заполненной значениями части столбца:
|
Sub Primer() Dim myRange As Range Set myRange = Range(Range(«C10»), Range(«C10»).End(xlDown)) MsgBox myRange.Address ‘Результат: $C$10:$C$16 End Sub |
Программируя в VBA, часто можно столкнуться с ситуацией, когда приходится решать одни и те же задачи снова и снова из-за того, что в языке нет удобных встроенных средств для работы с объектами. В данной статье собраны аналоги функций Python для работы с объектами в VBA.
Содержание
Table of Contents:
- Функция для добавления элемента к массиву VBA
- Последняя строка/столбец VBA
- Метод 1 — UsedRange
- Метод 2 — End(xlUp).Row
- Метод 3 — пользовательская функция. Получить последнюю ячейку как объект Range
Функция для добавления элемента к массиву VBA
Аналог метода append из Python для массива MS Office VBA.
# Метод в Python
MyList.append(ItemToAppend)
Вариант аналога в VBA:
'Функция append:
Function append(InArray, Value)             'InArray - массив, Value - элемент, который необходимо добавить к нему
ReDim Preserve InArray(UBound(InArray) + 1) 'увеличиваем размер массива с сохранением имеющихся в нём значений
InArray(UBound(InArray)) = Value            'дописываем Value в массив
append = InArray                            'функция возвращает новый массив
End Function


'Пример использования функции:

Sub MySub ()

'Для работы необходимо вставить эту функцию в свой проект VBA
'и использовать в качестве первого аргумента динамический массив:

ReDim InArray(0) as Variant  'Наш динамический массив
ReDim Value as String        'Произвольная переменная, например, типа String

Value = "MyStringValue"      'записываем произвольный текст в переменную
InArray = append(InArray, Value)    'вызов функции append
Debug.Print (InArray(1))            'Убедиться в том, что первый элемент добавлен можно, например, так - в окне Immediate
MsgBox(InArray(1))                  'либо так – в сообщении

End Sub
UPD 2022. Вариант проще:
ReDim Preserve MyArray (UBound(MyArray) + 1)
MyArray (UBound(MyArray))= "VALUE"
Последняя строка/столбец VBA
Метод 1 — UsedRange
LastRow1 = ActiveSheet.UsedRange.Row + ActiveSheet.UsedRange.Rows.Count - 1
LastCol1 = ActiveSheet.UsedRange.Column + ActiveSheet.UsedRange.Columns.Count - 1
UsedRange — область на листе, в которой что-то есть. Использование отдельно UsedRange.Rows.Count для поиска последнего ряда/столбца ненадёжно, т.к. в случае, если на листе есть пустые столбцы/строки, будет получен неверный результат.
Метод 2 — End(xlUp).Row
Метод следует использовать, если нужно найти последний заполненный столбец/строку по конкретной строке/столбцу.
LastRow2 = Cells(Rows.Count, 7).End(xlUp).Row ' Найти последнюю строку в столбце 7
LastCol2 = Cells(13, Columns.Count).End(xlToLeft).Column 'Найти послдений столбец в строке 13
Метод 3 — пользовательская функция. Получить последнюю ячейку как объект Range
В данном случае используется поиск -1 значения относительно первой ячейки по столбцам и по строкам. По умолчанию работает на активном листе. Можно указать на вход лист (как объект Worksheet).
Function Last_Cell(Optional ws As Worksheet) As Range
   Dim LastCol As Long, LastRow As Long
   LastCol = 1
   LastRow = 1
   On Error Resume Next
   If ws Is Nothing Then Set ws = ActiveSheet

      LastCol = ws.UsedRange.Cells.Find(what:="*", after:=ws.UsedRange.Cells(1), _
              SearchOrder:=xlByColumns, _
              SearchDirection:=xlPrevious, searchformat:=False).Column
      LastRow = ws.UsedRange.Cells.Find(what:="*", after:=ws.UsedRange.Cells(1), _
              SearchOrder:=xlByRows, _
              SearchDirection:=xlPrevious, searchformat:=False).Row

   Set Last_Cell = ws.Cells(LastRow, LastCol)

End Function
Все функции:
Скачать пример xlsm
Sub findlastrow()

'1 - using UsedRange
LastRow1 = ActiveSheet.UsedRange.Row + ActiveSheet.UsedRange.Rows.Count - 1
LastCol1 = ActiveSheet.UsedRange.Column + ActiveSheet.UsedRange.Columns.Count - 1
'where UsedRange begins  + number of rows/columns in the usedrange - 1

Debug.Print ("Method 1")
Debug.Print ("Row" + Str(LastRow1) + " Column " + Str(LastCol1))
Debug.Print ("Value " + Str(ThisWorkbook.ActiveSheet.Cells(LastRow1, LastCol1).Value))

Debug.Print ("  Usedrange params")
Debug.Print ("  ActiveSheet.UsedRange.Rows.Count " + Str(ActiveSheet.UsedRange.Rows.Count))
Debug.Print ("  ActiveSheet.UsedRange.Row " + Str(ActiveSheet.UsedRange.Row))
Debug.Print ("LastCol " + Str(LastCol1))

Debug.Print (" ")

'2 if you know which column/row to choose to count as last:
LastRow2 = Cells(Rows.Count, 7).End(xlUp).Row '!!!! 7 - column to look for last row
LastCol2 = Cells(13, Columns.Count).End(xlToLeft).Column '!!! row to look for last column

Debug.Print ("Method 2")
Debug.Print ("LastRow " + Str(LastRow2) + " LastCol " + Str(LastCol2))
Debug.Print (" ")

'3 - ultimate solution - custom function -  using Search (previous from the first cell -> last cell
' output of the funciton Last_Cell - object (range) - lastcell


LastRow = Last_Cell.Row
LastCol = Last_Cell.Column
LastVal = Last_Cell.Value


Debug.Print ("Method 3")
Debug.Print ("Last_Cell.Row " + Str(Last_Cell.Row))
Debug.Print ("Last_Cell.Column " + Str(Last_Cell.Column))
Debug.Print ("Last_Cell.Value " + Str(Last_Cell.Value))


End Sub

Function Last_Cell(Optional ws As Worksheet) As Range
   Dim LastCol As Long, LastRow As Long
   LastCol = 1
   LastRow = 1
   On Error Resume Next
   If ws Is Nothing Then Set ws = ActiveSheet

      LastCol = ws.UsedRange.Cells.Find(what:="*", after:=ws.UsedRange.Cells(1), _
              SearchOrder:=xlByColumns, _
              SearchDirection:=xlPrevious, searchformat:=False).Column
      LastRow = ws.UsedRange.Cells.Find(what:="*", after:=ws.UsedRange.Cells(1), _
              SearchOrder:=xlByRows, _
              SearchDirection:=xlPrevious, searchformat:=False).Row

   Set Last_Cell = ws.Cells(LastRow, LastCol)

End Function

'OUTPUT:

'Method 1
'Row 13 Column  7
'Value  1234
'  Usedrange params
'  ActiveSheet.UsedRange.Rows.Count  1
'  ActiveSheet.UsedRange.Row  13
'LastCol  7

'Method 2
'LastRow  13 LastCol  7

'Method 3
'Last_Cell.Row  13
'Last_Cell.Column  7
'Last_Cell.Value  1234