Применение оператора With для упрощения кода VBA Excel и ускорения его работы. Синтаксис оператора With, параметры, поясняющие примеры.
Оператор With предназначен для выполнения последовательности операторов (строк кода) для отдельного объекта или пользовательского типа данных.
Применение оператора With упрощает написание и восприятие кода VBA Excel, а также ускоряет его работу.
Синтаксис
Синтаксис оператора With в VBA Excel:
|
With object [statements] End With |
Параметры
Параметры оператора With:
| Параметр | Описание |
|---|---|
| object | Имя объекта или пользовательского типа данных. |
| statements | Один или несколько операторов (строк кода), которые выполняются в отношении указанного объекта. |
Примеры
В следующей процедуре выполняется несколько идущих подряд операторов (строк кода) в отношении одного и того же объекта Range("A1:E5"):
|
Sub Primer1() Range(«A1:E5»).Value = «Тест» Range(«A1:E5»).Interior.Color = vbMagenta Range(«A1:E5»).Font.Size = 14 Range(«A1:E5»).Font.Color = vbYellow Range(«A1:E5»).Font.Italic = True Range(«A1:E5»).Borders.LineStyle = True End Sub |
Если в процедуре выполняется несколько идущих подряд операторов в отношении одного и того же объекта, то оператор With позволяет указать объект только один раз:
|
Sub Primer2() With Range(«A1:E5») .Value = «Тест» .Interior.Color = vbMagenta .Font.Size = 14 .Font.Color = vbYellow .Font.Italic = True .Borders.LineStyle = True End With End Sub |
Такое написание кода делает его более понятным, а выполнение – более быстрым.
Конструкции с оператором With можно вкладывать одну в другую:
|
Sub Primer3() With Range(«A1:E5») .Value = «Тест» .Interior.Color = vbMagenta With .Font .Size = 14 .Color = vbYellow .Italic = True End With .Borders.LineStyle = True End With End Sub |
Такой код удобен, когда необходимо выполнить ряд операторов по отношению к некоторому объекту [Range("A1:E5")], а также по отношению к одному из содержащихся в нем объектов [Range("A1:E5").Font].
Примечания
Примечания от разработчика:
- После входа в блок With параметр object изменить нельзя. Следовательно, один оператор With не может быть использован для изменения нескольких объектов.
- Во вложенном блоке With необходимо указывать полные ссылки на любые элементы объекта из внешнего блока With.
- Не рекомендуется использовать переходы в блоки With или из них.
With Statement in Excel VBA
In this article, we will see an outline on Excel VBA With. With is a statement in programming languages. It is one of the most commonly used statement which is used with an END statement. The object which is referred to is mentioned after the with keyword and the whole process is ended with End With statement. A VBA With Statement cannot be without an end with a statement so it is mandatory to close the series of statements. The key feature of the with the statement is that we can access the properties of the object without referring to the object multiple times. The method to access the properties of the object lies in the dot keyword. When we put a dot keyword we can see a multiple number of options to access the properties of the object. Let us learn how to use With statement in some of the examples below.
How to Use With Statement in Excel VBA?
We will learn how to use the With Statement in Excel by using the VBA Code.
You can download this VBA With Excel Template here – VBA With Excel Template
VBA With – Example #1
Let us first begin with a basic example in which we will use the With statement for accessing the range value of an object and then assign a custom value to it. For this, follow the steps below:
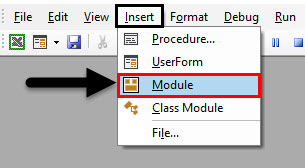
Step 1: Insert a new module inside Visual Basic Editor (VBE). Click on Insert tab > select Module.
Step 2: Define a new subprocedure within the inserted module that can hold your macro.
Code:
Sub Example1()

End Sub

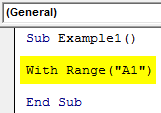
Step 3: Since we are beginning with the most basic with statement.
Code:
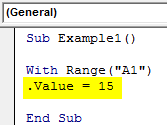
Sub Example1()

With Range("A1")

End Sub
Step 4: When we type a dot (.) we can see a range of different functions associated with the object.
Code:
Sub Example1()

With Range("A1")
.Value = 15

End Sub
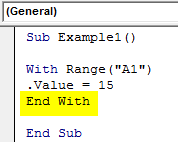
Step 5: Always remember to close the with statement with an End statement.
Code:
Sub Example1()

With Range("A1")
.Value = 15
End With

End Sub
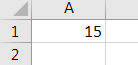
Step 6: Now, run this code by hitting the Run button or F5.
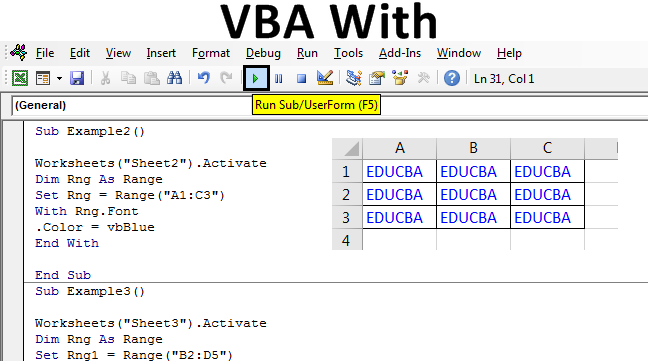
VBA With – Example #2
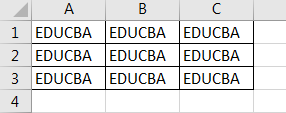
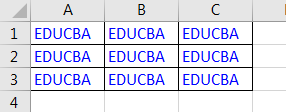
In this example, we will see how to change one of the fonts or the color of the property of the object. I have some data in Sheet 2 in the cells A1 to C3 in normal black color and I want to change the text font to blue using With Statement. First, let us see the current data in sheet 2 as follows. For this, follow the steps below:
Step 1: Now in the same module declare another subprocedure as follows.
Code:
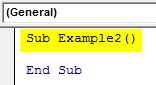
Sub Example2()

End Sub
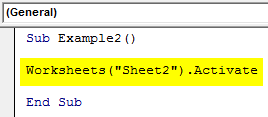
Step 2: Also we have now more than one sheet in this workbook so let us activate sheet 2 with the following code.
Code:
Sub Example2()

Worksheets("Sheet2").Activate

End Sub
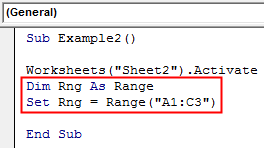
Step 3: Now declare a variable as Range data type which will store the range for our data as shown below and set the range to the range which has our data in sheet 2.
Code:
Sub Example2()

Worksheets("Sheet2").Activate
Dim Rng As Range
Set Rng = Range("A1:C3")

End Sub
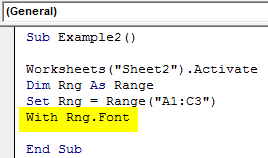
Step 4: Access the Font property of the Rng variable using the with statement with the following code shown below.
Code:
Sub Example2()

Worksheets("Sheet2").Activate
Dim Rng As Range
Set Rng = Range("A1:C3")
With Rng.Font

End Sub
Step 5: Now we can use the dot (.) operator to change the color of the range using the following code and change the color of the text in the cell range.
Code:
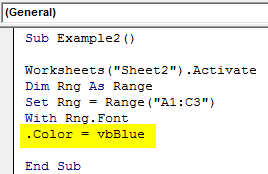
Sub Example2()

Worksheets("Sheet2").Activate
Dim Rng As Range
Set Rng = Range("A1:C3")
With Rng.Font
.Color = vbBlue

End Sub
Step 6: Now let us end the with statement with the END WITH statement as follows.
Code:
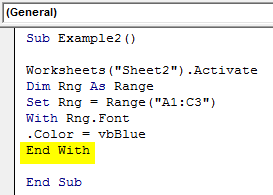
Sub Example2()

Worksheets("Sheet2").Activate
Dim Rng As Range
Set Rng = Range("A1:C3")
With Rng.Font
.Color = vbBlue
End With

End Sub
Step 7: When we execute the code we get the following result in sheet 2.
VBA With – Example #3
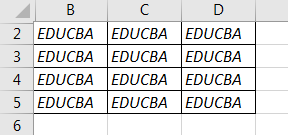
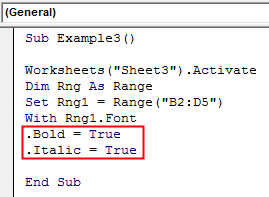
In this very basic example, we will see another font feature to manipulate using the With statement. For this example, we have similar text in cells B2 to D5 and they are in normal fonts. We want to change the font to Bold and Italic using the With statement. First, let us look at the data in sheet 3 as follows. For this, follow the steps below:
Step 1: Now in the same module declare another subprocedure as follows.
Code:
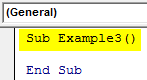
Sub Example3()

End Sub
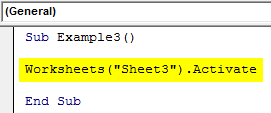
Step 2: Also we have now more than one sheet in this workbook so let us activate sheet 3 with the following code.
Code:
Sub Example3()

Worksheets("Sheet3").Activate

End Sub
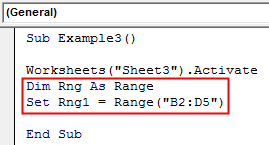
Step 3: Now declare a variable as Range data type which will store the range for our data as shown below and set the range to the range which has our data in sheet 3.
Code:
Sub Example3()

Worksheets("Sheet3").Activate
Dim Rng As Range
Set Rng1 = Range("B2:D5")

End Sub
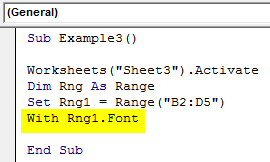
Step 4: Access the Font property of the Rng variable using the with statement.
Code:
Sub Example3()

Worksheets("Sheet3").Activate
Dim Rng As Range
Set Rng1 = Range("B2:D5")
With Rng1.Font

End Sub
Step 5: Now again we use the dot (.) operator in the code to change the font to Bold and Italic.
Code:
Sub Example3()

Worksheets("Sheet3").Activate
Dim Rng As Range
Set Rng1 = Range("B2:D5")
With Rng1.Font
.Bold = True
.Italic = True

End Sub
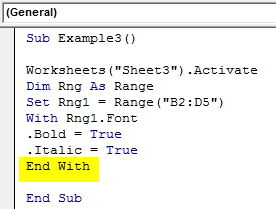
Step 6: Let us end the Statements using the End statement as shown below.
Code:
Sub Example3()

Worksheets("Sheet3").Activate
Dim Rng As Range
Set Rng1 = Range("B2:D5")
With Rng1.Font
.Bold = True
.Italic = True
End With

End Sub
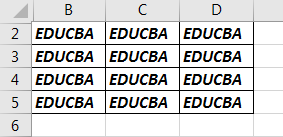
Step 7: When we execute the above code we can see the result in sheet 3 as follows.
As with the above examples, we can see how important with statement is in our day to day coding. Also, it removes the repetitive steps involved when we are trying to access the properties of an object. We can also use Loop statements in the With statements to define the criteria which we want to access for the object.
How to Use VBA With (Real Example)?
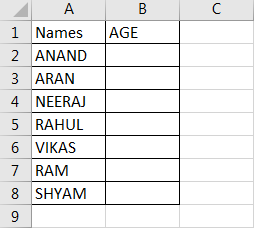
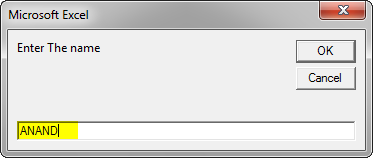
We have seen the basic uses of With statement in the above examples. Now let us use With statement for a real-life problem. We will make a code that will ask for a Name from user and Age, the code will then check the name in the list and paste the value of age beside the corresponding name. The data is in sheet 4 as follows.
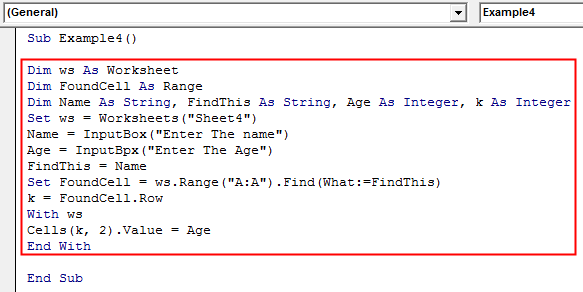
So the code we will be using for this as shown below and we will execute it and then understand it step by step.
Code:
Sub Example4()

Dim ws As Worksheet
Dim FoundCell As Range
Dim Name As String, FindThis As String, Age As Integer, k As Integer
Set ws = Worksheets("Sheet4")
Name = InputBox("Enter The name")
Age = InputBox("Enter The Age")
FindThis = Name
Set FoundCell = ws.Range("A:A").Find(What:=FindThis)
k = FoundCell.Row
With ws
Cells(k, 2).Value = Age
End With

End Sub
When we execute the code we get the following two pop-ups:
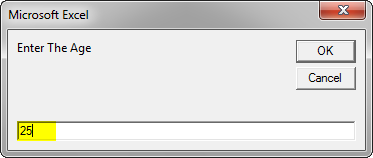
When we press OK for Age we can see the result displayed in Sheet 4 as follows.
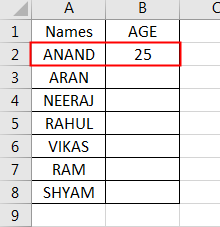
Now let us understand the code step by step:
- When we ask the user to input the name the code finds it in column A.
- When the value provided by the user is found the row for the value is stored in a variable.
- Now in the With statement, we use the Cells Properties to change the values adjacent to the cells found with the values with the age provided by the user.
Things to Remember
There are few things which we need to remember about With statement in VBA:
- With Statement starts with referencing the Object property.
- With Statements are always ended with End With Statement.
- The properties of the object are accessed by the dot (.) keyword.
With Statements can also be used with the Loop statements.
Recommended Articles
This is a guide to VBA With. Here we discuss How to Use the With Statement in Excel VBA along with practical examples and downloadable excel template. You can also go through our other suggested articles –
- VBA Collection
- VBA Square Root
- VBA SendKeys
- VBA Name Worksheet
With Statement in Excel VBA
A With statement is used in VBA to access all the properties and methods of a mentioned object. Therefore, we need to supply which VBA objectThe “Object Required” error, also known as Error 424, is a VBA run-time error that occurs when you provide an invalid object, i.e., one that is not available in VBA’s object hierarchy.read more we are referring to first, close the With statement with End With, then inside this statement. Then, we can perform all the property changes and methods of the mentioned object.
Table of contents
- With Statement in Excel VBA
- How to Use With Statement in Excel VBA?
- Example #1
- Example #2
- Example #3
- Things to Remember
- Recommended Articles
- How to Use With Statement in Excel VBA?
Below is the syntax of With Statement in VBA.
With [OBJECT]

     [Code… What needs to be done?]

End With
The object is nothing but a range of cells or cells we are referring to, and then we can change the properties and perform all the methods associated with that specific cell or cell.
How to Use With Statement in Excel VBA?
Below are some examples of using With statements in Excel VBA.
You can download this VBA With Excel Template here – VBA With Excel Template
Example #1
Assume you have a certain value in the A1 cell. We have entered the text as “Excel VBA” in cell A1.

Now, we need to do some tasks for this cell, i.e., formatting in excelFormatting is a useful feature in Excel that allows you to change the appearance of the data in a worksheet. Formatting can be done in a variety of ways. For example, we can use the styles and format tab on the home tab to change the font of a cell or a table.read more.
We want to change the font size, name, and interior color, insert a border, etc. Typically, we refer to the cell using VBA RANGE objectRange is a property in VBA that helps specify a particular cell, a range of cells, a row, a column, or a three-dimensional range. In the context of the Excel worksheet, the VBA range object includes a single cell or multiple cells spread across various rows and columns.read more.
Code:
Sub With_Example1()

    Range ("A1")

End Sub

Now, we access this cell’s “font” property to change the font size.
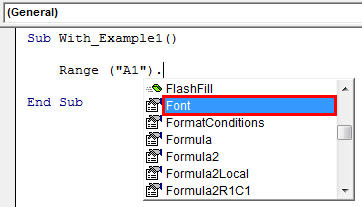
Under the FONT property, we access the Size property and enter size by putting an equal sign.
Code:
Sub With_Example1()

    Range("A1").Font.Size = 15

End Sub

Now similarly, we do other formatting tasks, as shown below.
Code:
Sub With_Example1()

    Range("A1").Font.Size = 15
    Range("A1").Font.Name = "Verdana"
    Range("A1").Interior.Color = vbYellow
    Range("A1").Borders.LineStyle = xlContinuous

End Sub

It will do all the mentioned tasks, but if you look at the code to perform every formatting activity. We have supplied the cell address every time. It makes the code look lengthy and time-consuming.
Now, we will use VBA With a statement to reduce the entry of cell addresses every time. Open WITH statement in Excel VBA and supply cell address.
Code:
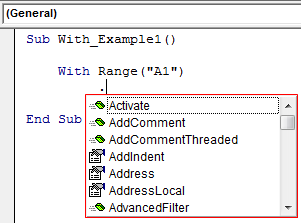
Sub With_Example1()

    With Range("A1")

End Sub

Inside the With statement, put a dot to see all the properties and methods of cell A1.
The first formatting activity is changing font size, so access FONT. Under this, access the SIZE property.
Code:
Sub With_Example1()

    With Range("A1")
         .Font.Size = 15

End Sub

Similarly, supply other formatting codes and close VBA With statement.
Code:
Sub With_Example1()

    With Range("A1")
         .Font.Size = 15
         .Font.Name = "Verdana"
         .Interior.Color = vbYellow
         .Borders.LineStyle = xlContinuous
    End With

End Sub
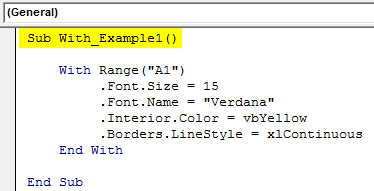
Run the code to see all the formatting in the mentioned object, i.e., cell A1.
So, all the formatting applies to the cell. Look how cool this technique is.
Example #2
If you want to change all the properties related to the font, you can mention the cell and FONT property.
Code:
Sub With_Example2()

    With Range("A1").Font

    End With

End Sub

Inside the VBA With Statement, we can see the IntelliSense list. It will show properties and methods related to FONT property only.

We can perform any set of activities with this now.
Code:
Sub With_Example2()

    With Range("A1").Font
         .Bold = True 'Font will be Bold
         .Color = vbAlias 'Font color will be Alias
         .Italic = True 'Font will be italic style
         .Size = 20 ' Font size will be 20
         .Underline = True 'Font will be underlined
    End With

End Sub
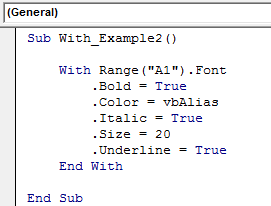
It will show the result of this below.
Example #3
The below code will access only cell border-related properties.
Code:
Sub With_Example3()

    With Range("B2").Borders
         .Color = vbRed 'Border color will be red
         .LineStyle = xlContinuous 'Full border
         .Weight = xlThick 'Thick border
    End With

End Sub

The result of this code is as follows.
Things to Remember
- A With statement is used to minimize the code.
- We need to supply the object first for the With statement.
- Once we supply the specific object, we can access only that object’s properties and methods.
Recommended Articles
This article has been a guide to VBA With. Here, we discuss how to use With…End With Statement in Excel VBA along with examples and downloadable Excel sheet. You can learn more about VBA from the following articles: –
- VBA Delete Sheet
- VBA If Else
- VBA Type Statement
- Named Range in VBA
Using Excel Macros can speed up work and save you a lot of time.
One way of getting the VBA code is to record the macro and take the code it generates. However, that code by macro recorder is often full of code that is not really needed. Also macro recorder has some limitations.
So it pays to have a collection of useful VBA macro codes that you can have in your back pocket and use it when needed.
While writing an Excel VBA macro code may take some time initially, once it’s done, you can keep it available as a reference and use it whenever you need it next.
In this massive article, I am going to list some useful Excel macro examples that I need often and keep stashed away in my private vault.
I will keep updating this tutorial with more macro examples. If you think something should be on the list, just leave a comment.
You can bookmark this page for future reference.
Now before I get into the Macro Example and give you the VBA code, let me first show you how to use these example codes.
Using the Code from Excel Macro Examples
Here are the steps you need to follow to use the code from any of the examples:
- Open the Workbook in which you want to use the macro.
- Hold the ALT key and press F11. This opens the VB Editor.
- Right-click on any of the objects in the project explorer.
- Go to Insert –> Module.
- Copy and Paste the code in the Module Code Window.
In case the example says that you need to paste the code in the worksheet code window, double click on the worksheet object and copy paste the code in the code window.
Once you have inserted the code in a workbook, you need to save it with a .XLSM or .XLS extension.
How to Run the Macro
Once you have copied the code in the VB Editor, here are the steps to run the macro:
- Go to the Developer tab.
- Click on Macros.

- In the Macro dialog box, select the macro you want to run.
- Click on Run button.

In case you can’t find the developer tab in the ribbon, read this tutorial to learn how to get it.
Related Tutorial: Different ways to run a macro in Excel.
In case the code is pasted in the worksheet code window, you don’t need to worry about running the code. It will automatically run when the specified action occurs.
Now, let’s get into the useful macro examples that can help you automate work and save time.
Note: You will find many instances of an apostrophe (‘) followed by a line or two. These are comments that are ignored while running the code and are placed as notes for self/reader.
In case you find any error in the article or the code, please be awesome and let me know.

Excel Macro Examples
Below macro examples are covered in this article:
Unhide All Worksheets at One Go
If you are working in a workbook that has multiple hidden sheets, you need to unhide these sheets one by one. This could take some time in case there are many hidden sheets.
Here is the code that will unhide all the worksheets in the workbook.
'This code will unhide all sheets in the workbook
Sub UnhideAllWoksheets()
Dim ws As Worksheet
For Each ws In ActiveWorkbook.Worksheets
ws.Visible = xlSheetVisible
Next ws
End Sub
The above code uses a VBA loop (For Each) to go through each worksheets in the workbook. It then changes the visible property of the worksheet to visible.
Here is a detailed tutorial on how to use various methods to unhide sheets in Excel.
Hide All Worksheets Except the Active Sheet
If you’re working on a report or dashboard and you want to hide all the worksheet except the one that has the report/dashboard, you can use this macro code.
'This macro will hide all the worksheet except the active sheet
Sub HideAllExceptActiveSheet()
Dim ws As Worksheet
For Each ws In ThisWorkbook.Worksheets
If ws.Name <> ActiveSheet.Name Then ws.Visible = xlSheetHidden
Next ws
End Sub
Sort Worksheets Alphabetically Using VBA
If you have a workbook with many worksheets and you want to sort these alphabetically, this macro code can come in really handy. This could be the case if you have sheet names as years or employee names or product names.
'This code will sort the worksheets alphabetically
Sub SortSheetsTabName()
Application.ScreenUpdating = False
Dim ShCount As Integer, i As Integer, j As Integer
ShCount = Sheets.Count
For i = 1 To ShCount - 1
For j = i + 1 To ShCount
If Sheets(j).Name < Sheets(i).Name Then
Sheets(j).Move before:=Sheets(i)
End If
Next j
Next i
Application.ScreenUpdating = True
End Sub
Protect All Worksheets At One Go
If you have a lot of worksheets in a workbook and you want to protect all the sheets, you can use this macro code.
It allows you to specify the password within the code. You will need this password to unprotect the worksheet.
'This code will protect all the sheets at one go
Sub ProtectAllSheets()
Dim ws As Worksheet
Dim password As String
password = "Test123" 'replace Test123 with the password you want
For Each ws In Worksheets
   ws.Protect password:=password
Next ws
End Sub
Unprotect All Worksheets At One Go
If you have some or all of the worksheets protected, you can just use a slight modification of the code used to protect sheets to unprotect it.
'This code will protect all the sheets at one go
Sub ProtectAllSheets()
Dim ws As Worksheet
Dim password As String
password = "Test123" 'replace Test123 with the password you want
For Each ws In Worksheets
ws.Unprotect password:=password
Next ws
End Sub
Note that the password needs to the same that has been used to lock the worksheets. If it’s not, you will see an error.
Unhide All Rows and Columns
This macro code will unhide all the hidden rows and columns.
This could be really helpful if you get a file from someone else and want to be sure there are no hidden rows/columns.
'This code will unhide all the rows and columns in the Worksheet
Sub UnhideRowsColumns()
Columns.EntireColumn.Hidden = False
Rows.EntireRow.Hidden = False
End Sub
Unmerge All Merged Cells
It’s a common practice to merge cells to make it one. While it does the work, when cells are merged you will not be able to sort the data.
In case you are working with a worksheet with merged cells, use the code below to unmerge all the merged cells at one go.
'This code will unmerge all the merged cells
Sub UnmergeAllCells()
ActiveSheet.Cells.UnMerge
End Sub
Note that instead of Merge and Center, I recommend using the Centre Across Selection option.
Save Workbook With TimeStamp in Its Name
A lot of time, you may need to create versions of your work. These are quite helpful in long projects where you work with a file over time.
A good practice is to save the file with timestamps.
Using timestamps will allow you to go back to a certain file to see what changes were made or what data was used.
Here is the code that will automatically save the workbook in the specified folder and add a timestamp whenever it’s saved.
'This code will Save the File With a Timestamp in its name
Sub SaveWorkbookWithTimeStamp()
Dim timestamp As String
timestamp = Format(Date, "dd-mm-yyyy") & "_" & Format(Time, "hh-ss")
ThisWorkbook.SaveAs "C:UsersUsernameDesktopWorkbookName" & timestamp
End Sub
You need to specify the folder location and the file name.
In the above code, “C:UsersUsernameDesktop is the folder location I have used. You need to specify the folder location where you want to save the file. Also, I have used a generic name “WorkbookName” as the filename prefix. You can specify something related to your project or company.
Save Each Worksheet as a Separate PDF
If you work with data for different years or divisions or products, you may have the need to save different worksheets as PDF files.
While it could be a time-consuming process if done manually, VBA can really speed it up.
Here is a VBA code that will save each worksheet as a separate PDF.
'This code will save each worsheet as a separate PDF
Sub SaveWorkshetAsPDF()
Dim ws As Worksheet
For Each ws In Worksheets
ws.ExportAsFixedFormat xlTypePDF, "C:UsersSumitDesktopTest" & ws.Name & ".pdf"
Next ws
End Sub
In the above code, I have specified the address of the folder location in which I want to save the PDFs. Also, each PDF will get the same name as that of the worksheet. You will have to modify this folder location (unless your name is also Sumit and you’re saving it in a test folder on the desktop).
Note that this code works for worksheets only (and not chart sheets).
Save Each Worksheet as a Separate PDF
Here is the code that will save your entire workbook as a PDF in the specified folder.
'This code will save the entire workbook as PDF
Sub SaveWorkshetAsPDF()
ThisWorkbook.ExportAsFixedFormat xlTypePDF, "C:UsersSumitDesktopTest" & ThisWorkbook.Name & ".pdf"
End Sub
You will have to change the folder location to use this code.
Convert All Formulas into Values
Use this code when you have a worksheet that contains a lot of formulas and you want to convert these formulas to values.
'This code will convert all formulas into values
Sub ConvertToValues()
With ActiveSheet.UsedRange
.Value = .Value
End With
End Sub
This code automatically identifies cells are used and convert it into values.
Protect/Lock Cells with Formulas
You may want to lock cells with formulas when you have a lot of calculations and you don’t want to accidentally delete it or change it.
Here is the code that will lock all the cells that have formulas, while all the other cells are not locked.
'This macro code will lock all the cells with formulas
Sub LockCellsWithFormulas()
With ActiveSheet
   .Unprotect
   .Cells.Locked = False
   .Cells.SpecialCells(xlCellTypeFormulas).Locked = True
   .Protect AllowDeletingRows:=True
End With
End Sub
Related Tutorial: How to Lock Cells in Excel.
Protect All Worksheets in the Workbook
Use the below code to protect all the worksheets in a workbook at one go.
'This code will protect all sheets in the workbook
Sub ProtectAllSheets()
Dim ws As Worksheet
For Each ws In Worksheets
ws.Protect
Next ws
End Sub
This code will go through all the worksheets one by one and protect it.
In case you want to unprotect all the worksheets, use ws.Unprotect instead of ws.Protect in the code.
Insert A Row After Every Other Row in the Selection
Use this code when you want to insert a blank row after every row in the selected range.
'This code will insert a row after every row in the selection
Sub InsertAlternateRows()
Dim rng As Range
Dim CountRow As Integer
Dim i As Integer
Set rng = Selection
CountRow = rng.EntireRow.Count
For i = 1 To CountRow
ActiveCell.EntireRow.Insert
ActiveCell.Offset(2, 0).Select
Next i
End Sub
Similarly, you can modify this code to insert a blank column after every column in the selected range.
Automatically Insert Date & Timestamp in the Adjacent Cell
A timestamp is something you use when you want to track activities.
For example, you may want to track activities such as when was a particular expense incurred, what time did the sale invoice was created, when was the data entry done in a cell, when was the report last updated, etc.
Use this code to insert a date and time stamp in the adjacent cell when an entry is made or the existing contents are edited.
'This code will insert a timestamp in the adjacent cell
Private Sub Worksheet_Change(ByVal Target As Range)
On Error GoTo Handler
If Target.Column = 1 And Target.Value <> "" Then
Application.EnableEvents = False
Target.Offset(0, 1) = Format(Now(), "dd-mm-yyyy hh:mm:ss")
Application.EnableEvents = True
End If
Handler:
End Sub
Note that you need to insert this code in the worksheet code window (and not the in module code window as we have done in other Excel macro examples so far). To do this, in the VB Editor, double click on the sheet name on which you want this functionality. Then copy and paste this code in that sheet’s code window.
Also, this code is made to work when the data entry is done in Column A (note that the code has the line Target.Column = 1). You can change this accordingly.
Highlight Alternate Rows in the Selection
Highlighting alternate rows can increase the readability of your data tremendously. This can be useful when you need to take a print out and go through the data.
Here is a code that will instantly highlight alternate rows in the selection.
'This code would highlight alternate rows in the selection
Sub HighlightAlternateRows()
Dim Myrange As Range
Dim Myrow As Range
Set Myrange = Selection
For Each Myrow In Myrange.Rows
   If Myrow.Row Mod 2 = 1 Then
      Myrow.Interior.Color = vbCyan
   End If
Next Myrow
End Sub
Note that I have specified the color as vbCyan in the code. You can specify other colors as well (such as vbRed, vbGreen, vbBlue).
Highlight Cells with Misspelled Words
Excel doesn’t have a spell check as it has in Word or PowerPoint. While you can run the spell check by hitting the F7 key, there is no visual cue when there is a spelling mistake.
Use this code to instantly highlight all the cells that have a spelling mistake in it.
'This code will highlight the cells that have misspelled words
Sub HighlightMisspelledCells()
Dim cl As Range
For Each cl In ActiveSheet.UsedRange
If Not Application.CheckSpelling(word:=cl.Text) Then
cl.Interior.Color = vbRed
End If
Next cl
End Sub
Note that the cells that are highlighted are those that have text that Excel considers as a spelling error. In many cases, it would also highlight names or brand terms that it doesn’t understand.
Refresh All Pivot Tables in the Workbook
If you have more than one Pivot Table in the workbook, you can use this code to refresh all these Pivot tables at once.
'This code will refresh all the Pivot Table in the Workbook
Sub RefreshAllPivotTables()
Dim PT As PivotTable
For Each PT In ActiveSheet.PivotTables
PT.RefreshTable
Next PT
End Sub
You can read more about refreshing Pivot Tables here.
Change the Letter Case of Selected Cells to Upper Case
While Excel has the formulas to change the letter case of the text, it makes you do that in another set of cells.
Use this code to instantly change the letter case of the text in the selected text.
'This code will change the Selection to Upper Case
Sub ChangeCase()
Dim Rng As Range
For Each Rng In Selection.Cells
If Rng.HasFormula = False Then
Rng.Value = UCase(Rng.Value)
End If
Next Rng
End Sub
Note that in this case, I have used UCase to make the text case Upper. You can use LCase for lower case.
Highlight All Cells With Comments
Use the below code to highlight all the cells that have comments in it.
'This code will highlight cells that have comments`
Sub HighlightCellsWithComments()
ActiveSheet.Cells.SpecialCells(xlCellTypeComments).Interior.Color = vbBlue
End Sub
In this case, I have used vbBlue to give a blue color to the cells. You can change this to other colors if you want.
Highlight Blank Cells With VBA
While you can highlight blank cell with conditional formatting or using the Go to Special dialog box, if you have to do it quite often, it’s better to use a macro.
Once created, you can have this macro in the Quick Access Toolbar or save it in your personal macro workbook.
Here is the VBA macro code:
'This code will highlight all the blank cells in the dataset
Sub HighlightBlankCells()
Dim Dataset as Range
Set Dataset = Selection
Dataset.SpecialCells(xlCellTypeBlanks).Interior.Color = vbRed
End Sub
In this code, I have specified the blank cells to be highlighted in the red color. You can choose other colors such as blue, yellow, cyan, etc.
How to Sort Data by Single Column
You can use the below code to sort data by the specified column.
Sub SortDataHeader()
Range("DataRange").Sort Key1:=Range("A1"), Order1:=xlAscending, Header:=xlYes
End Sub
Note that the I have created a named range with the name ‘DataRange’ and have used it instead of the cell references.
Also there are three key parameters that are used here:
- Key1 – This is the on which you want to sort the data set. In the above example code, the data will be sorted based on the values in column A.
- Order- Here you need to specify whether you want to sort the data in ascending or descending order.
- Header – Here you need to specify whether your data has headers or not.
Read more on how to sort data in Excel using VBA.
How to Sort Data by Multiple Columns
Suppose you have a dataset as shown below:

Below is the code that will sort the data based on multiple columns:
Sub SortMultipleColumns()
With ActiveSheet.Sort
 .SortFields.Add Key:=Range("A1"), Order:=xlAscending
 .SortFields.Add Key:=Range("B1"), Order:=xlAscending
 .SetRange Range("A1:C13")
 .Header = xlYes
 .Apply
End With
End Sub
Note that here I have specified to first sort based on column A and then based on column B.
The output would be something as shown below:


How to Get Only the Numeric Part from a String in Excel
If you want to extract only the numeric part or only the text part from a string, you can create a custom function in VBA.
You can then use this VBA function in the worksheet (just like regular Excel functions) and it will extract only the numeric or text part from the string.
Something as shown below:

Below is the VBA code that will create a function to extract numeric part from a string:
'This VBA code will create a function to get the numeric part from a string
Function GetNumeric(CellRef As String)
Dim StringLength As Integer
StringLength = Len(CellRef)
For i = 1 To StringLength
If IsNumeric(Mid(CellRef, i, 1)) Then Result = Result & Mid(CellRef, i, 1)
Next i
GetNumeric = Result
End Function
You need place in code in a module, and then you can use the function =GetNumeric in the worksheet.
This function will take only one argument, which is the cell reference of the cell from which you want to get the numeric part.
Similarly, below is the function that will get you only the text part from a string in Excel:
'This VBA code will create a function to get the text part from a string
Function GetText(CellRef As String)
Dim StringLength As Integer
StringLength = Len(CellRef)
For i = 1 To StringLength
If Not (IsNumeric(Mid(CellRef, i, 1))) Then Result = Result & Mid(CellRef, i, 1)
Next i
GetText = Result
End Function
So these are some of the useful Excel macro codes that you can use in your day-to-day work to automate tasks and be a lot more productive.
Other Excel tutorials you may like:
- How to Delete Macros in Excel
- How to Enable Macros in Excel?
VBA Code Examples

AutoMacro: VBA Add-in with Hundreds of Ready-To-Use VBA Code Examples & much more!
Search the list below for free Excel VBA code examples complete with explanations.
Some include downloadable files as well. These Excel VBA Macros & Scripts are professionally developed and ready-to-use.
We hope you find this list useful!
Excel Macro Examples
Below you will find a list of basic macro examples for common Excel automation tasks.
Copy and Paste a Row from One Sheet to Another
This super simple macro will copy a row from one sheet to another.
Sub Paste_OneRow()
'Copy and Paste Row
Sheets("sheet1").Range("1:1").Copy Sheets("sheet2").Range("1:1")

Application.CutCopyMode = False

End Sub
Send Email
This useful macro will launch Outlook, draft an email, and attach the ActiveWorkbook.
Sub Send_Mail()
    Dim OutApp As Object
    Dim OutMail As Object
    Set OutApp = CreateObject("Outlook.Application")
    Set OutMail = OutApp.CreateItem(0)
    With OutMail
        .to = "test@test.com"
        .Subject = "Test Email"
        .Body = "Message Body"
        .Attachments.Add ActiveWorkbook.FullName
        .Display
    End With
    Set OutMail = Nothing
    Set OutApp = Nothing
End Sub
List All Sheets in Workbook
This macro will list all sheets in a workbook.
Sub ListSheets()

    Dim ws As Worksheet
    Dim x As Integer

    x = 1

    ActiveSheet.Range("A:A").Clear

    For Each ws In Worksheets
        ActiveSheet.Cells(x, 1) = ws.Name
        x = x + 1
    Next ws

End Sub
Unhide All Worksheets
This macro will unhide all worksheets.
' Unhide All Worksheets
Sub UnhideAllWoksheets()
    Dim ws As Worksheet

    For Each ws In ActiveWorkbook.Worksheets
        ws.Visible = xlSheetVisible
    Next ws

End Sub
Hide All Worksheets Except Active
This macro will hide all worksheets except the active worksheet.
' Hide All Sheets Except Active Sheet
Sub HideAllExceptActiveSheet()
    Dim ws As Worksheet

    For Each ws In ThisWorkbook.Worksheets
        If ws.Name <> ActiveSheet.Name Then ws.Visible = xlSheetHidden
    Next ws

End Sub
Unprotect All Worksheets
This macro example will unprotect all worksheets in a workbook.
' UnProtect All Worksheets
Sub UnProtectAllSheets()
    Dim ws As Worksheet

    For Each ws In Worksheets
        ws.Unprotect "password"
    Next ws

End Sub
Protect All Worksheets
This macro will protect all worksheets in a workbook.
' Protect All Worksheets
Sub ProtectAllSheets()
    Dim ws As Worksheet

    For Each ws In Worksheets
        ws.protect "password"
    Next ws

End Sub
Delete All Shapes
This macro will delete all shapes in a worksheet.
Sub DeleteAllShapes()

Dim GetShape As Shape

For Each GetShape In ActiveSheet.Shapes
  GetShape.Delete
Next

End Sub
Delete All Blank Rows in Worksheet
This example macro will delete all blank rows in a worksheet.
Sub DeleteBlankRows()
Dim x As Long

With ActiveSheet
    For x = .Cells.SpecialCells(xlCellTypeLastCell).Row To 1 Step -1
        If WorksheetFunction.CountA(.Rows(x)) = 0 Then
            ActiveSheet.Rows(x).Delete
        End If
    Next
End With

End Sub
Highlight Duplicate Values in Selection
Use this simple macro to highlight all duplicate values in a selection.
' Highlight Duplicate Values in Selection
Sub HighlightDuplicateValues()
    Dim myRange As Range
    Dim cell As Range

    Set myRange = Selection

    For Each cell In myRange
        If WorksheetFunction.CountIf(myRange, cell.Value) > 1 Then
            cell.Interior.ColorIndex = 36
        End If
    Next cell
End Sub
Highlight Negative Numbers
This macro automates the task of highlighting negative numbers.
' Highlight Negative Numbers
Sub HighlightNegativeNumbers()
    Dim myRange As Range
    Dim cell As Range

    Set myRange = Selection

    For Each cell In myRange
        If cell.Value < 0 Then
            cell.Interior.ColorIndex = 36
        End If
    Next cell
End Sub
Highlight Alternate Rows
This macro is useful to highlight alternate rows.
' Highlight Alternate Rows
Sub highlightAlternateRows()
    Dim cell As Range
    Dim myRange As Range

    myRange = Selection

    For Each cell In myRange.Rows
        If cell.Row Mod 2 = 1 Then
            cell.Interior.ColorIndex = 36
        End If
    Next cell
End Sub
Highlight Blank Cells in Selection
This basic macro highlights blank cells in a selection.
' Highlight all Blank Cells in Selection
Sub HighlightBlankCells()
    Dim rng As Range

    Set rng = Selection
    rng.SpecialCells(xlCellTypeBlanks).Interior.Color = vbCyan

End Sub
Excel VBA Macros Examples – Free Download
We’ve created a free VBA (Macros) Code Examples add-in. The add-in contains over 100 ready-to-use macro examples, including the macro examples above!
Download Page
Excel Macro / VBA FAQs
How to write VBA code (Macros) in Excel?
To write VBA code in Excel open up the VBA Editor (ALT + F11). Type “Sub HelloWorld”, Press Enter, and you’ve created a Macro! OR Copy and paste one of the procedures listed on this page into the code window.
What is Excel VBA?
VBA is the programming language used to automate Excel.
How to use VBA to automate Excel?
You use VBA to automate Excel by creating Macros. Macros are blocks of code that complete certain tasks.
Practice VBA
You can practice VBA with our interactive VBA tutorial.