
Содержание
- Input function
- Syntax
- Return value
- Remarks
- Example
- See also
- Support and feedback
- Application.InputBox method (Excel)
- Syntax
- Parameters
- Return value
- Remarks
- Example
- Support and feedback
- Функция InputBox
- Синтаксис
- Примечания
- Пример
- См. также
- Поддержка и обратная связь
- Функция Input
- Синтаксис
- Возвращаемое значение
- Замечания
- Пример
- См. также
- Поддержка и обратная связь
Input function
Returns String containing characters from a file opened in Input or Binary mode.
Syntax
Input(number, [ # ]filenumber)
The Input function syntax has these parts:
| Part | Description |
|---|---|
| number | Required. Any valid numeric expression specifying the number of characters to return. |
| filenumber | Required. Any valid file number. |
Return value
Data read with the Input function is usually written to a file with Print # or Put. Use this function only with files opened in Input or Binary mode.
Unlike the Input # statement, the Input function returns all the characters it reads, including commas, carriage returns, linefeeds, quotation marks, and leading spaces.
With files opened for Binary access, an attempt to read through the file by using the Input function until EOF returns True generates an error. Use the LOF and Loc functions instead of EOF when reading binary files with Input, or use Get when using the EOF function.
Use the InputB function for byte data contained within text files. With InputB, number specifies the number of bytes to return rather than the number of characters to return.
Example
This example uses the Input function to read one character at a time from a file and print it to the Immediate window. This example assumes that TESTFILE is a text file with a few lines of sample data.
See also
Support and feedback
Have questions or feedback about Office VBA or this documentation? Please see Office VBA support and feedback for guidance about the ways you can receive support and provide feedback.
Источник
Application.InputBox method (Excel)
Displays a dialog box for user input. Returns the information entered in the dialog box.
Syntax
expression.InputBox (Prompt, Title, Default, Left, Top, HelpFile, HelpContextID, Type)
expression A variable that represents an Application object.
Parameters
| Name | Required/Optional | Data type | Description |
|---|---|---|---|
| Prompt | Required | String | The message to be displayed in the dialog box. This can be a string, a number, a date, or a Boolean value (Microsoft Excel automatically coerces the value to a String before it is displayed). Maximum length is 255 characters, otherwise there is no prompt, and Application’s method immediately returns Error 2015. |
| Title | Optional | Variant | The title for the input box. If this argument is omitted, the default title is Input. |
| Default | Optional | Variant | Specifies a value that will appear in the text box when the dialog box is initially displayed. If this argument is omitted, the text box is left empty. This value can be a Range object. |
| Left | Optional | Variant | Specifies an x position for the dialog box in relation to the upper-left corner of the screen, in points. |
| Top | Optional | Variant | Specifies a y position for the dialog box in relation to the upper-left corner of the screen, in points. |
| HelpFile | Optional | Variant | The name of the Help file for this input box. If the HelpFile and HelpContextID arguments are present, a Help button will appear in the dialog box. |
| HelpContextID | Optional | Variant | The context ID number of the Help topic in HelpFile. |
| Type | Optional | Variant | Specifies the return data type. If this argument is omitted, the dialog box returns text. |
Return value
The following table lists the values that can be passed in the Type argument. Can be one or a sum of the values. For example, for an input box that can accept both text and numbers, set Type to 1 + 2.
| Value | Description |
|---|---|
| 0 | A formula |
| 1 | A number |
| 2 | Text (a string) |
| 4 | A logical value (True or False) |
| 8 | A cell reference, as a Range object |
| 16 | An error value, such as #N/A |
| 64 | An array of values |
Use InputBox to display a simple dialog box so that you can enter information to be used in a macro. The dialog box has an OK button and a Cancel button. If you select the OK button, InputBox returns the value entered in the dialog box. If you select the Cancel button, InputBox returns False.
If Type is 0, InputBox returns the formula in the form of text; for example, =2*PI()/360 . If there are any references in the formula, they are returned as A1-style references. (Use ConvertFormula to convert between reference styles.)
If Type is 8, InputBox returns a Range object. You must use the Set statement to assign the result to a Range object, as shown in the following example.
If you don’t use the Set statement, the variable is set to the value in the range, rather than the Range object itself.
If you use the InputBox method to ask the user for a formula, you must use the FormulaLocal property to assign the formula to a Range object. The input formula will be in the user’s language.
The InputBox method differs from the InputBox function in that it allows selective validation of the user’s input, and it can be used with Excel objects, error values, and formulas. Notice that Application.InputBox calls the InputBox method; InputBox with no object qualifier calls the InputBox function.
Example
This example prompts the user for a number.
This example prompts the user to select a cell on Sheet1. The example uses the Type argument to ensure that the return value is a valid cell reference (a Range object).
This example uses an InputBox for the user to select a range to pass to the user-defined function MyFunction, which multiplies three values in a range together and returns the result.
Support and feedback
Have questions or feedback about Office VBA or this documentation? Please see Office VBA support and feedback for guidance about the ways you can receive support and provide feedback.
Источник
Функция InputBox
Отображает приглашение в диалоговом окне, ждет, пока пользователь введет текст или нажмет кнопку, и возвращает строку с содержимым текстового поля.
Синтаксис
InputBox(prompt, [ title ], [ default ], [ xpos ], [ ypos ], [ helpfile, context ])
В синтаксисе функции InputBox представлены следующие именованные аргументы:
| Part | Описание |
|---|---|
| сообщение | Обязательный аргумент. Строковое выражение, отображающееся в диалоговом окне. Максимальная длина строки аргумента сообщение составляет приблизительно 1024 знака и зависит от их ширины. Если запрос состоит из нескольких строк, можно разделить строки с помощью символа возврата каретки (Chr(13)), символа канала строк (Chr(10)) или сочетания символов возврата и строки каретки ((Chr(13) & (Chr(10)) между каждой строкой. |
| заголовок | Необязательный аргумент. Строковое выражение, отображаемое в заголовке диалогового окна. Если аргумент заголовок пропущен, в заголовке выводится имя приложения. |
| default | Необязательный параметр. Строковое выражение, отображаемое в текстовом поле в качестве ответа по умолчанию, если ввод вообще не будет выполнен. Если пропустить аргумент default, соответствующее текстовое поле отображается пустым. |
| xpos | Необязательный параметр. Числовое выражение, задающее в твипах расстояние по горизонтали от левого края диалогового окна до левого края экрана. Если аргумент xpos пропускается, диалоговое окно выравнивается по горизонтальной оси. |
| ypos | Необязательный параметр. Числовое выражение, задающее в твипах расстояние по вертикали от верхнего края диалогового окна до верхнего края экрана. Если аргумент ypos пропускается, диалоговое окно позиционируется по вертикальной оси и отстоит от верхнего края окна примерно на треть от высоты экрана. |
| файл_справки | Необязательный аргумент. Строковое выражение, определяющее файл, в котором содержится контекстная справка для данного диалогового окна. Если задан аргумент файл_справки, необходимо также указать аргумент контекст. |
| контекст | Необязательный аргумент. Числовое выражение, представляющее собой номер контекста, присвоенный автором справки соответствующему разделу. Если задан аргумент контекст, необходимо также указать аргумент файл_справки. |
Примечания
Если одновременно указаны аргументы файл_справки и контекст, пользователь может нажать клавишу F1 (Windows) или HELP (Macintosh) для просмотра раздела справки, соответствующего аргументу контекст. Некоторые ведущие приложения, например Microsoft Excel, автоматически добавляют кнопку Справка в диалоговое окно. Если пользователь нажимает кнопку ОК или нажимает клавишу ВВОД, функция InputBox возвращает все, что находится в текстовом поле. Если пользователь выбирает Отмена, функция возвращает строку нулевой длины («»).
Текстовое поле принимает только 255 символов. Возвращаемая строка усекается до 254 символов.
Текстовое поле не принимает разрывы строк, например SHIFT+ВВОД. Если пользователь вставляет текст с разрывом строки в текстовое поле, текст усекается при разрыве строки.
Чтобы задать больше чем один первый именованный аргумент, необходимо использовать функцию InputBox в выражении. Чтобы пропустить некоторые из позиционных аргументов, нужно вставить соответствующие запятые.
Пример
В этом примере показывается различные способы использования функции InputBox, чтобы пригласить пользователя ввести значение. Если позиции x и y пропустить, диалоговое окно будет автоматически центрироваться относительно соответствующих осей. Переменная MyValue содержит значение, введенное пользователем, если пользователь нажимает кнопку ОК или нажимает клавишу ВВОД. Если пользователь выбирает Отмена, возвращается строка нулевой длины.
См. также
Поддержка и обратная связь
Есть вопросы или отзывы, касающиеся Office VBA или этой статьи? Руководство по другим способам получения поддержки и отправки отзывов см. в статье Поддержка Office VBA и обратная связь.
Источник
Функция Input
Возвращает значение типа String (строка), содержащее знаки из файла, открытого в режиме Ввод или Двоичный.
Синтаксис
Input(number, [ # ]filenumber)
Синтаксис функции Input включает следующие элементы:
| Part | Описание |
|---|---|
| число | Обязательный аргумент. Все допустимые числовые выражения, задающие количество возвращаемых символов. |
| filenumber | Обязательно указывать. Любой допустимый номер файла. |
Возвращаемое значение
Замечания
Данные, считанные с помощью функции Input , обычно записываются в файл с помощью Print # или Put. Эта функция используется только для файлов, открытых в режиме Ввод или Двоичный.
В отличие от инструкции Input # , функция Input возвращает все считываемые символы, включая запятые, возврат каретки, каналы строк, кавычки и пробелы в начале.
Если файлы открыты для двоичного доступа, попытка прочитать файл с помощью функции Input до тех пор, пока EOF не вернет значение True , создает ошибку. Используйте функции LOF и Loc вместо EOF при чтении двоичных файлов с помощью входных данных или get при использовании функции EOF .
Функция InputB используется для битовых данных, которые содержатся в текстовых файлах. С помощью функции InputB, элемент number задает число возвращаемый битов вместо количества возвращаемых символов.
Пример
В этом примере функция Input используется для чтения из файла отдельных символов и их печати в окно Интерпретация. В этом примере предполагается, что TESTFILE это текстовый файл с несколькими строками примеров данных.
См. также
Поддержка и обратная связь
Есть вопросы или отзывы, касающиеся Office VBA или этой статьи? Руководство по другим способам получения поддержки и отправки отзывов см. в статье Поддержка Office VBA и обратная связь.
Источник
Элемент управления пользовательской формы TextBox в VBA Excel. Использование текстового поля для ввода и вывода информации, основные свойства, примеры. Привязка текстового поля к ячейке.
UserForm.TextBox – это элемент управления пользовательской формы, предназначенный для ввода, редактирования и вывода информации в текстовом формате.

Текстовое поле незаменимо, когда необходимо заполнить пользовательскую форму новой информацией. Например, это может быть ФИО нового сотрудника и его паспортные данные, сумма выручки за день, новый электронный адрес и многое-многое другое.
Если с помощью текстового поля требуется вводить заранее известную информацию, элементы которой можно сгруппировать в список, то в этом случае удобнее вместо элемента управления TextBox использовать ListBox или ComboBox.
Вводить информацию в TextBox на открытой форме можно не только с помощью клавиатуры, но и вставкой текста из буфера обмена. Когда текстовое поле применяется для ввода пароля, есть возможность отобразить все его знаки замещающим символом, например, звездочкой.
Иногда, если на пользовательской форме используется только одно текстовое поле и кнопка «OK» (или кнопки «OK» и «Отмена»), для ввода информации такую форму можно заменить функцией InputBox, а для вывода информации, когда не требуется редактирование отображаемого текста, – функцией MsgBox.
Свойства текстового поля
| Свойство | Описание |
|---|---|
| AutoSize* | Автоподбор размера текстового поля. True – размер автоматически подстраивается под длину размещаемой строки. False – размер элемента управления определяется свойствами Width и Height. |
| AutoTab | Включение автоматической табуляции – передачи фокуса следующему элементу управления при достижении максимального числа символов при значениях свойства MaxLenght > 0. True – автоматическая табуляция включена, False – выключена. |
| ControlSource | Ссылка на источник данных для поля TextBox. |
| ControlTipText | Текст всплывающей подсказки при наведении курсора на TextBox. |
| Enabled | Возможность ввода, редактирования, копирования, вставки, удаления текста. True – все перечисленные опции включены, False – выключены (цвет текста в поле становится серым). |
| Font | Шрифт, начертание и размер текста в поле. |
| Height | Высота текстового поля. |
| Left | Расстояние от левого края внутренней границы пользовательской формы до левого края текстового поля. |
| Locked | Запрет ввода, редактирования, удаления текста. True – перечисленные опции запрещены (разрешено выделение и копирование текста), False – перечисленные опции разрешены. |
| MaxLenght | Максимальная длина строки. По умолчанию – 0, что означает – ограничений нет. |
| Multiline | Устанавливает многострочный (True) или однострочный (False) режим ввода-вывода текста. |
| PasswordChar | Задает символ, который будет отображаться при вводе знаков пароля. |
| TabIndex | Определяет позицию элемента управления в очереди на получение фокуса при табуляции, вызываемой свойством AutoTab или нажатием клавиш «Tab», «Enter». Отсчет начинается с 0. |
| Text** | Текстовое содержимое (значение) поля (=Value). |
| TextAlign | Выравнивание текста: 1 (fmTextAlignLeft) – по левому краю, 2 (fmTextAlignCenter) – по центру, 3 (fmTextAlignRight) – по правому краю. |
| Top | Расстояние от верхнего края внутренней границы пользовательской формы до верхнего края текстового поля. |
| Value** | Текстовое содержимое (значение) поля (=Text). |
| Visible | Видимость текстового поля. True – TextBox отображается на пользовательской форме, False – TextBox скрыт. |
| Width | Ширина текстового поля. |
| WordWrap | Актуально при Multiline = True. Переход на новую строку при достижении границы текстового поля. True – переход включен, False – переход выключен. |
* При использовании свойства AutoSize в значении True следует учитывать, что автоматическое изменение размеров поля при вводе текста может нарушить дизайн пользовательской формы.
** Text и Value — это два обозначения одного и того же свойства. Если в окне Properties элемента управления TextBox в поле свойства Text начать ввод строки, в поле Value ввод будет дублироваться. И наоборот, при вводе текста в поле свойства Value, дублирование произойдет в поле Text.
В таблице перечислены только основные, часто используемые свойства текстового поля. Все доступные свойства отображены в окне Properties элемента управления TextBox.
Свойства BackColor, BackStyle, BorderColor, BorderStyle отвечают за внешнее оформление текстового поля и его границ. Попробуйте выбирать доступные значения этих свойств в окне Properties, наблюдая за изменениями внешнего вида элемента управления TextBox на проекте пользовательской формы.
Привязка текстового поля к ячейке
Привязать элемент управления TextBox к ячейке на рабочем листе можно двумя способами.
1. В окне Properties элемента управления TextBox в поле свойства ControlSource необходимо указать адрес ячейки:

2. Присвоить свойству ControlSource адрес ячейки в коде VBA Excel:
|
UserForm1.TextBox1.ControlSource = «C5» |
Теперь ячейка C5 активного листа будет привязана к элементу управления TextBox1. При открытии формы текстовое поле будет заполнено значением ячейки C5.
Чтобы наглядно ознакомиться с взаимозависимостью значения ячейки C5 и содержимого текстового поля, разместите на пользовательской форме еще какой-нибудь элемент управления и откройте ее в немодальном* окне:
|
Sub Test() UserForm1.TextBox1.ControlSource = «C5» UserForm1.Show 0 End Sub |
Измените значение ячейки C5 и нажмите клавишу «Tab» или «Enter» – изменения будут продублированы в текстовом поле на форме. Измените содержимое поля TextBox1, нажмите клавишу «Tab» или «Enter», передав фокус другому элементу управления, – изменения продублируются в ячейке C5.
Чтобы привязать текстовое поле к ячейке неактивного листа, необходимо в адресе указать имя листа по ярлыку с разделителем «!»:
|
UserForm1.TextBox1.ControlSource = «Лист2!A3» |
Если имя листа содержит пробел, заключите его в одинарные кавычки:
|
UserForm1.TextBox1.ControlSource = «‘Мой лист’!B6» |
Точно также адрес ячейки конкретного листа можно указать непосредственно в окне Properties элемента управления TextBox в поле свойства ControlSource (без парных кавычек).
* Отображение пользовательской формы в немодальном окне позволяет редактировать ячейки на рабочем листе Excel, не закрывая форму.
Примеры использования TextBox
Пример 1
Обмен содержимым между текстовым полем, переменной и ячейкой на рабочем листе:
|
‘Присвоение текстовому полю значения ‘ячейки A2 и переменной a1 UserForm1.TextBox1.Text = Range(«A2») UserForm1.TextBox1.Text = a1 ‘Присвоение ячейке B3 и переменной a2 ‘значения текстового поля Cells(3, 2) = UserForm1.TextBox1.Text a2 = UserForm1.TextBox1.Value ‘Свойства Text и Value элемента ‘управления TextBox равнозначны |
Пример 2
Программное создание элемента управления TextBox, размещение его по центру пользовательской формы, добавление всплывающей подсказки и текста по умолчанию.
Предположим, что текстовое поле предназначено для ввода даты, поэтому добавляем соответствующую подсказку, а в качестве текста по умолчанию – текущую дату.
Создаем новую пользовательскую форму с именем UserForm2. Если у вас другое имя формы, это не имеет значения, так как обращаться к ней будем с помощью ключевого слова «Me». Открываем модуль созданной формы и вставляем в него следующий код VBA Excel:
|
1 2 3 4 5 6 7 8 9 10 11 12 13 14 15 16 17 18 19 20 21 22 23 24 25 |
Private Sub UserForm_Initialize() Dim myTextBox As Control ‘Создаем новый TextBox и присваиваем его переменной Set myTextBox = Me.Controls.Add(«Forms.TextBox.1») ‘Задаем размеры и заголовок пользовательской формы With Me .Height = 100 .Width = 220 .Caption = «Форма №2» End With ‘Присваиваем значения свойствам текстового поля With myTextBox .Width = 100 .Height = 20 ‘Left и Top рассчитаны для Excel 2016* .Left = 60 — 5 .Top = 40 — 15 ‘Добавляем всплывающую подсказку .ControlTipText = «Введите дату подписания договора» ‘Вставляем в поле текущую дату .Text = Format(Now, «DD.MM.YYYY») ‘Выравниваем текст по центру .TextAlign = 2 End With End Sub |
В результате выполнения кода откроется следующая форма с всплывающей подсказкой при наведении на TextBox курсора:

* Значения свойств Left и Top рассчитаны для Excel 2016. Вычитаемые числа зависят от толщины границ пользовательской формы, которые в других версиях Excel могут отличаться.
|
Leanna  Пользователь Сообщений: 816 |
Добрый день! В книге-примере в ячейке А1 и А2 в ячейках вставлены символы — замок закрытый и замок открытый. Каким кодом VBA я могу вставить эти символы Работать надо не 12 часов, а головой. |
|
БМВ  Модератор Сообщений: 21378 Excel 2013, 2016 |
chrw(57846) По вопросам из тем форума, личку не читаю. |
|
у Вас отличная подпись к сообщениям, осталось начать ее использовать в быту… Программисты — это люди, решающие проблемы, о существовании которых Вы не подозревали, методами, которых Вы не понимаете! |
|
|
Leanna Пользователь Сообщений: 816 |
Добрый день! У меня не получается( В ячейку вставляется знак вопроса, вместо замка. [A7] = ChrW(57846) Возможно, вы скажете, что нужен шрифт правильный, но e1f6, e1f7 — в связке с ключевым словом VBA нагуглить ничего не удалось. [A9] = ChrW(«e1f6») — выдает ошибку.
Изменено: Leanna — 06.05.2018 10:44:28 Работать надо не 12 часов, а головой. |

|
Leanna Пользователь Сообщений: 816 |
Как все-таки вставить такой замок в ячейку? Работать надо не 12 часов, а головой. |
|
БМВ Модератор Сообщений: 21378 Excel 2013, 2016 |
#6 06.05.2018 11:15:11 Leanna
По вопросам из тем форума, личку не читаю. |
||
|
Leanna Пользователь Сообщений: 816 |
Откуда я должна была это знать, если с этим шрифтом не сталкивалась? Научите? Ваш вариант с изменением шрифта работает, спасибо. Что такое e1f6 и e1f7? Из вашего первого сообщения? Но все-таки — что это за значки в [A2] и [A3]? Это не то же самое, что и ChrW(57846). В них, что удобно, не требуется устанавливать специальный шрифт. Работать надо не 12 часов, а головой. |
|
RAN  Пользователь Сообщений: 7091 |
#8 06.05.2018 11:46:41 БМВ, в 2010/32 код не работает. Leanna, замки другие, но работает
Изменено: RAN — 06.05.2018 11:49:09 |
||
|
БМВ Модератор Сообщений: 21378 Excel 2013, 2016 |
#9 06.05.2018 15:03:02
Достаточно было посмотреть формат ячейки исходного файла.
Это шестнадцатеричное 57846 и 57847
может и не требуется но в исходном файле именно этот шрифт.
см. #8 Там более распространенный шрифт, но еще раз , у вас именно был Segoe UI Symbol По вопросам из тем форума, личку не читаю. |
||||||||
|
Hugo Пользователь Сообщений: 23251 |
#10 06.05.2018 16:15:52 У меня там два символа показывает, так работает на открытый и закрытый (ниже) замок:
И шрифт не особо важен, на исходном Calibri тоже есть корректный результат. P.S. Искал так:
Изменено: Hugo — 06.05.2018 16:21:25 |
||||
|
RAN Пользователь Сообщений: 7091 |
ГОЛОВА! PS и =ДЛСТР(A2) = 2 PPS Мне вообще удалось найти замок только с кодом 1F512 Изменено: RAN — 06.05.2018 17:36:21 |
|
Hugo Пользователь Сообщений: 23251 |
Там в примере в какой-то ячейке ещё и пробел после замка кажется был, качать/проверять уже не буду… |
|
БМВ Модератор Сообщений: 21378 Excel 2013, 2016 |
По вопросам из тем форума, личку не читаю. |
|
RAN Пользователь Сообщений: 7091 |
Дасс! Пулемета я вам не дам. |
|
sokol92  Пользователь Сообщений: 4445 |
Здравствуйте, коллеги! суррогатными парами «, как в нашем случае) в Excel 2013+ есть функции рабочего листа UNICODE и UNICHAR. |
|
БМВ Модератор Сообщений: 21378 Excel 2013, 2016 |
sokol92, ДА, Владимир, я немного поспешил, даже тут https://unicode-table.com/en/search/?q=Lock это 128274 и 128275. По вопросам из тем форума, личку не читаю. |
|
Leanna Пользователь Сообщений: 816 |
Вау! Hugo, спасибо! Это именно оно!))) Работать надо не 12 часов, а головой. |
|
Hugo Пользователь Сообщений: 23251 |
#18 06.05.2018 23:08:38 В свою переменную не заглянули? А там два «??» |
The VBA Application.InputBox provides a dialog for you to get a response from the user.
You can specify the response type from the user. These include numbers, string, date and a range.
If you want to get a single piece of text or value from the user you can use the InputBox. The following code asks the user for a name and writes the user’s response to the Immediate Window(Ctrl + G to view)
' https://excelmacromastery.com/
Sub GetValue()

    Dim name As String
    name = Application.InputBox("Please enter your name")

    Debug.Print name

End Sub

Important
Confusingly there are two InputBoxes in Excel VBA.
- Application.InputBox
- InputBox(also calledVBA.InputBox)
They are almost the same except that:
- Application.InputBox allows you to specify the variable type of result e.g. String, integer, date, range.
- The Application.InputBox parameters Left and Top are not used by VBA.
In, the example below, the Application.InputBox allows you to specify the type but the VBA.InputBox doesn’t:
number = VBA.InputBox("Enter Number")

number = Application.InputBox("Enter number", Type:=1) ' The type is number
In this article, we will be dealing primarily with the Application.InputBox.
InputBox Syntax
InputBox Prompt, Title, default , Left, Top, Helpfile, Helpfilecontextid, Type
Note that Prompt is the only parameter that is required. The others are optional. See the next section for more info.
InputBox Parameters
Prompt – this is the text displayed by the InputBox e.g. “Please enter a number between one and ten”, “Please select a range”.
Title[optional] – this is the text that is displayed in the title bar of the InputBox.
Default[optional]– this will be the response if no response is entered by the user.
Left[optional] – not used. If you need to position the InputBox you need to use the VBA.InputBox.
Top[optional] – not used. If you need to position the InputBox you need to use the VBA.InputBox.
Helpfile[optional] – specifies a related help file if your application has one(hint: it probably doesn’t unless it is a legacy application.)
Helpfilecontextidl[optional] – specifies a position in the help file.
Type[optional] – specifies the type of value that will be returned. If this parameter is not used then the return type is text. See below for a list of options for this parameter.
What makes using the InputBox simple is that you really only need to use 4 of these parameters, namely prompt, title, default and type.
VBA Optional Parameters
As, we saw in the above section, VBA has a lot of optional parameters. Sometimes we want to use an optional parameter but don’t need the optional parameters before it. We can deal with this in two ways:
- Leave the other optional parameters blank.
- Use the name of the parameter.
Here are examples of each method:
' Method 1: Using blank parameters
Number = Application.InputBox("Enter number", , 99)
Number = Application.InputBox("Enter number", , 99, , , , , 1)

' Method 2: Naming the parameters
Number = Application.InputBox("Enter number", Default:=99)
Number = Application.InputBox("Enter number", Default:=99, Type:=Number)
You can see that naming the parameters is a better idea as it makes the code much more readable and understandable.
InputBox Title Parameter
The Title parameter simply allows you to see the Title of the InputBox dialog. The following examples shows this:
Dim year As Long
year = Application.InputBox("Enter the Year", Title:="Customer Report")

InputBox Default Parameter
The default value is simply the value that will be returned if the user does not enter a value. This value is displayed in the InputBox when it appears.
When the following code runs, the value Apple is displayed in the InputBox when it appears:
Dim fruit As Long
fruit = Application.InputBox("Please enter fruit", Default:="Apple")

InputBox Type Parameter Options
| Value | Type |
|---|---|
| 0 | Formula |
| 1 | Number |
| 2 | String |
| 4 | Boolean — True or False |
| 8 | Range |
| 16 | An error value like #N/A |
| 64 | Array of values |
You can create your own constants for the Type parameter if you want your code to be more readable:
Public Enum appInputBox
    IBFormula = 0
    IBNumber = 1
    IBString = 2
    IBBoolean = 4
    IBRange = 8
    IBError = 16
    IBArray = 64
End Enum
You can then use them like this:
year = Application.InputBox("Enter the Year", Type:=IBNumber)
year = Application.InputBox("Enter your name", Type:=IBString)
Getting the Range
To get a range from the user we set Type to 8.
If we set the return variable to be a range we must use the Set keyword like in this example:
Dim rg As Range
Set rg = Application.InputBox("Enter the Year", Type:=8)
If you leave out the Set keyword you will get the runtime error 91: “object variable or with block not set”.
In VBA we can declare the variable as a variant in VBA. This means that VBA will set the type at runtime:
' In both cases the variable will be a variant
Dim rg1 As Variant
Dim rg2
If we replace the Set keyword with a variant then the InputBox will return an array of values instead of the range object:
Dim rg As Variant

' Returns an array of values
rg = Application.InputBox("Enter the Year", Type:=8)

' Returns the range object
Set rg = Application.InputBox("Enter the Year", Type:=8)
Cancelling the Range
One problem with selecting the range is that if the user clicks cancel then VBA gives an error.
There is no nice way around this. We have to turn off errors and then check the return value. We can do it like this:
' https://excelmacromastery.com/
Sub UseInputBox()

    Dim rg As Range

    ' Turn off errors
    On Error Resume Next

    Set rg = Application.InputBox("Please enter Range", Type:=8)

    ' Turn on errors
    On Error Goto 0

    ' Display the result
    If rg Is Nothing Then
        MsgBox "The range was cancelled"
    Else
        MsgBox "The selected range is " & rg.Address
    End If

End Sub
Related Reading
VBA Message Box
VBA UserForm – A Guide for Everyone
VBA UserForm Controls – A Guide for Everyone
What’s Next?
Free VBA Tutorial If you are new to VBA or you want to sharpen your existing VBA skills then why not try out The Ultimate VBA Tutorial.
Related Training: Get full access to the Excel VBA training webinars.
(NOTE: Planning to build or manage a VBA Application? Learn how to build 10 Excel VBA applications from scratch.)
Excel VBA Input Function
In this article, we will see an outline on Excel VBA Input. Input is a function in VBA that is used to read the files whether it is opened in binary or input mode. The result of this function is a string that returns the contents of the file.
Syntax of the Input Function:
Input ( number, [#]filenumber )
These are the required parameters for this function. When we use this function to read a file we also use another function which is known as EOF or End of File function which reads the contents of the file until the end is reached. Also in this input function, the contents of the files are read as rows.
How to Use the Input Function in Excel VBA?
Input function in VBA is a statement whose one mandatory argument is to provide it with the file number. There can be many files opened at once in VBA but they are required to be in sequence or given a file number. Even if there is a single file we need to number it as #1. The input statement is used on the file and also on the contents of the file, let’s see this through a few examples.
You can download this VBA Input Excel Template here – VBA Input Excel Template
VBA Input – Example #1
For this example, I have a text file on my desktop with some data in it. In this example, we will use the input function to read the data in the text file in the notepad document. For this, follow the below steps:
Step 1: Insert a new module inside Visual Basic Editor (VBE). Click on Insert tab > select Module.

Step 2: Once the new module is inserted we can start with our subprocedure for this example.
Code:
Sub Example()

End Sub
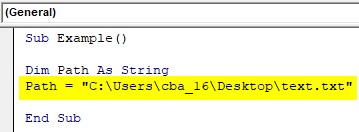
Step 3: In order to read the path of the file we need to declare a variable for it, as the path does contain characters let us declare the path as a string.
Code:
Sub Example()

Dim Path As String

End Sub
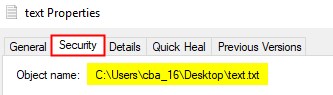
Step 4: The next step is to give the variable the path of a text file, in order to get that right-click on the file on the desktop and click on properties and then on security we can see the file path as the object.
Step 5: Assign the path to the variable for the path in the code.
Code:
Sub Example()

Dim Path As String
Path = "C:Userscba_16Desktoptext.txt"

End Sub
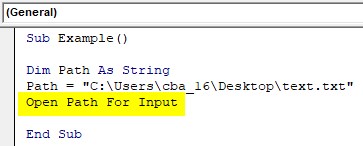
Step 6: Let us open our file path with the Open statement and we need to specify how we want to open the file, we want to open the file with input because we want to read from the file.
Code:
Sub Example()

Dim Path As String
Path = "C:Userscba_16Desktoptext.txt"
Open Path For Input

End Sub
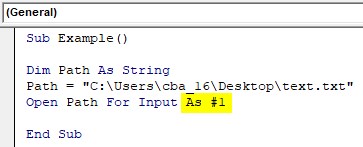
Step 7: So we have to open a single file or multiple files we need to provide it a number. since this is the first file we want to open for Input we will give it a number 1 with the character hashtag or #.
Code:
Sub Example()

Dim Path As String
Path = "C:Userscba_16Desktoptext.txt"
Open Path For Input As #1

End Sub
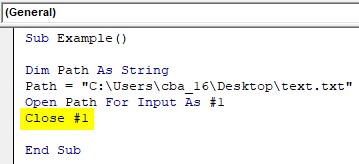
Step 8: Like every statement in this open statement when we have opened up our file we want to close the file too, so before we begin to read from the file let us close the file first with the close statement.
Code:
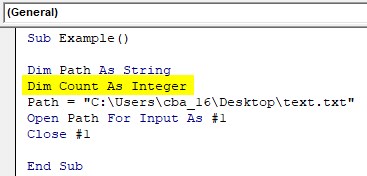
Sub Example()

Dim Path As String
Dim Count As Integer
Dim CLine As String
Path = "C:Userscba_16Desktoptext.txt"
Open Path For Input As #1
Do Until EOF(1)
Count = Count + 1
Line Input #1, CLine
Loop
Close #1

End Sub
Step 9: Since we want to read the file contents and before we begin our loop we need to get a counter to loop throughout the file so first declare a variable as Integer which will help for our loop.
Code:
Sub Example()

Dim Path As String
Dim Count As Integer
Path = "C:Userscba_16Desktoptext.txt"
Open Path For Input As #1
Close #1

End Sub
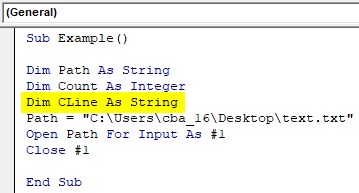
Step 10: We want to also read the lines in our text file so we need to declare another variable that will help us to read the contents of the file.
Code:
Sub Example()

Dim Path As String
Dim Count As Integer
Dim CLine As String
Path = "C:Userscba_16Desktoptext.txt"
Open Path For Input As #1
Close #1

End Sub
Step 11: Now we can start with our loop to read the contents of the file.
Code:
Sub Example()

Dim Path As String
Dim Count As Integer
Dim CLine As String
Path = "C:Userscba_16Desktoptext.txt"
Open Path For Input As #1
Do Until EOF(1)
Loop
Close #1

End Sub
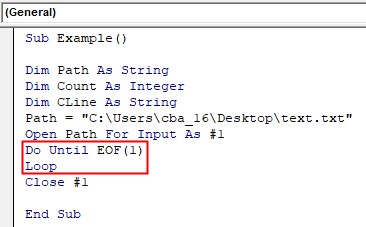
Here EOF stands for End of File and 1 is the number of the file which we want to read, as for this example we want the first file to be in the loop.
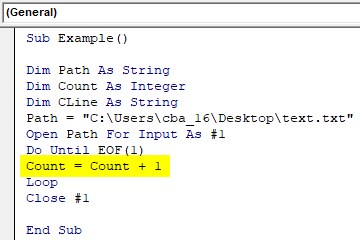
Step 12: Now let us loop with the end of the file.
Code:
Sub Example()

Dim Path As String
Dim Count As Integer
Dim CLine As String
Path = "C:Userscba_16Desktoptext.txt"
Open Path For Input As #1
Do Until EOF(1)
Count = Count + 1
Loop
Close #1

End Sub
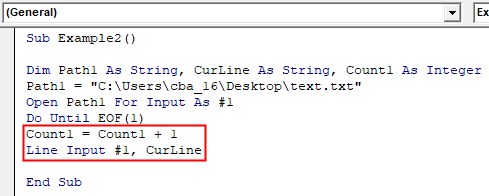
Step 13: So now to read the lines in the file we will use the following input code.
Code:
Sub Example()

Dim Path As String
Dim Count As Integer
Dim CLine As String
Path = "C:Userscba_16Desktoptext.txt"
Open Path For Input As #1
Do Until EOF(1)
Count = Count + 1
Line Input #1, CLine
Loop
Close #1

End Sub
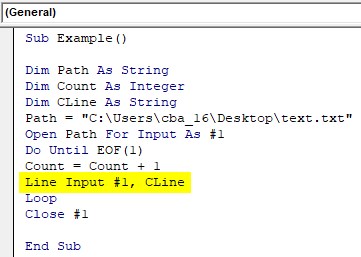
This will take the input from line 1 and put it in our current line.
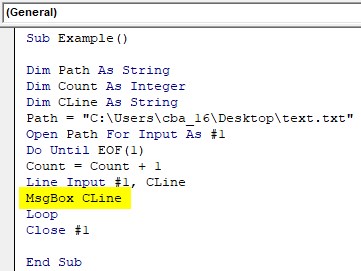
Step 14: Let us just simply display the contents of the file through a message box function.
Code:
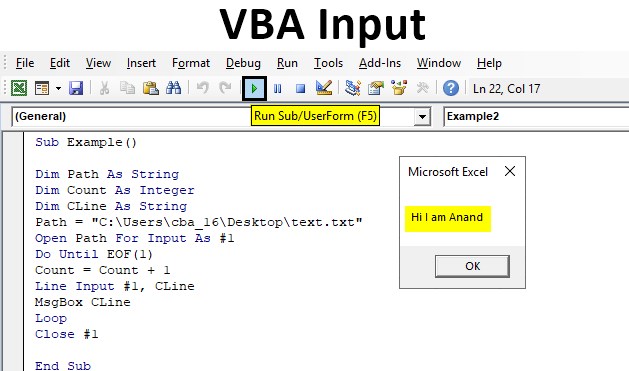
Sub Example()

Dim Path As String
Dim Count As Integer
Dim CLine As String
Path = "C:Userscba_16Desktoptext.txt"
Open Path For Input As #1
Do Until EOF(1)
Count = Count + 1
Line Input #1, CLine
MsgBox CLine
Loop
Close #1

End Sub
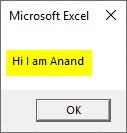
Step 15: Run the code by pressing the F5 key or by clicking on the Play Button.
VBA Input – Example #2
In the above example, we simply read the contents of the line from an Input function, but for this example, we will also read the contents of the text file and copy the input to our excel sheet. For this, follow the below steps:
Step 1: We will work in the same module in which we had worked before and declare another sub-function.
Code:
Sub Example2()

End Sub
Step 2: Now we know how many variables we need to declare for an input to read from the file.
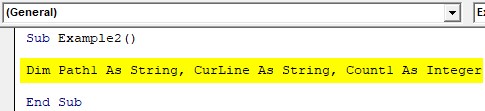
Code:
Sub Example2()

Dim Path1 As String, CurLine As String, Count1 As Integer

End Sub
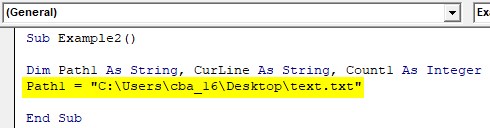
Step 3: Let us assign the path of our second text file to the variable.
Code:
Sub Example2()

Dim Path1 As String, CurLine As String, Count1 As Integer
Path1 = "C:Userscba_16Desktoptext.txt"

End Sub
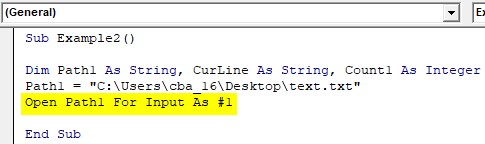
Step 4: We will use the Open statement to open the file and read for the input since for example, this is the only file we are opening so the number of the file still remains 1.
Code:
Sub Example2()

Dim Path1 As String, CurLine As String, Count1 As Integer
Path1 = "C:Userscba_16Desktoptext.txt"
Open Path1 For Input As #1

End Sub
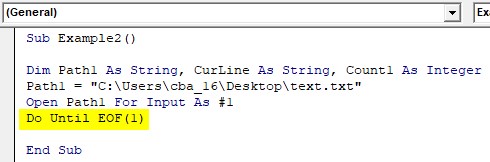
Step 5: Now we will start with our loop to read the contents of the file.
Code:
Sub Example2()

Dim Path1 As String, CurLine As String, Count1 As Integer
Path1 = "C:Userscba_16Desktoptext.txt"
Open Path1 For Input As #1
Do Until EOF(1)

End Sub
Step 6: Let us loop through the lines and read the file contents with the input statements.
Code:
Sub Example2()

Dim Path1 As String, CurLine As String, Count1 As Integer
Path1 = "C:Userscba_16Desktoptext.txt"
Open Path1 For Input As #1
Do Until EOF(1)
Count1 = Count1 + 1
Line Input #1, CurLine

End Sub
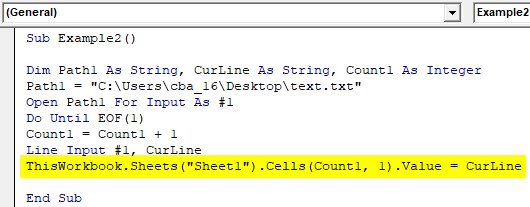
Step 7: Now since we want the contents to be written in our excel file.
Code:
Sub Example2()

Dim Path1 As String, CurLine As String, Count1 As Integer
Path1 = "C:Userscba_16Desktoptext.txt"
Open Path1 For Input As #1
Do Until EOF(1)
Count1 = Count1 + 1
Line Input #1, CurLine
ThisWorkbook.Sheets("Sheet1").Cells(Count1, 1).Value = CurLine

End Sub
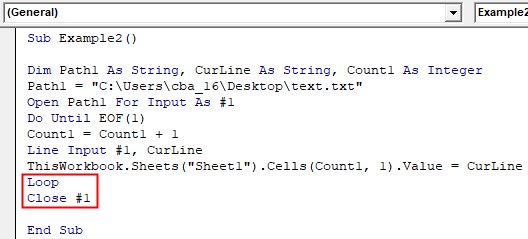
Step 8: Now we will end the loop and the open statement.
Code:
Sub Example2()

Dim Path1 As String, CurLine As String, Count1 As Integer
Path1 = "C:Userscba_16Desktoptext.txt"
Open Path1 For Input As #1
Do Until EOF(1)
Count1 = Count1 + 1
Line Input #1, CurLine
ThisWorkbook.Sheets("Sheet1").Cells(Count1, 1).Value = CurLine
Loop
Close #1

End Sub
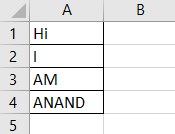
Step 9: When we execute the following code by pressing the F5 key. we can see the results in sheet1.
Conclusion
Input is one of the functions in VBA, these functions are used to read the contents of the file and sometimes they are used with output functions so that we can write something on the file. In developers Input functions, output functions and append functions are used to read the contents and the update is as per the data.
Things to Remember
- Input Statement has to be followed up by the file number.
- When we open a file with the Open statement it is mandatory to close the file to avoid the endless loop.
- Input can be used both for the file as well as the contents of the file.
Recommended Articles
This is a guide to the VBA Input. Here we discuss how to use the Input function in Excel VBA along with practical examples and downloadable excel template. You can also go through our other suggested articles –
- VBA SendKeys
- VBA Name Worksheet
- VBA On Error Goto
- VBA Msgbox Yes/No
 In this VBA Tutorial, you learn how to create input boxes with both the InputBox function and the Application.InputBox method. This includes:
- How to create an InputBox.
- How to create an InputBox with multiple lines.
- How to create an InputBox that works with a specific type of data.
- How to handle the cases where the user clicks the Cancel button of the InputBox.
This VBA InputBox Tutorial is accompanied by an Excel workbook containing the macros I use in the examples below. You can get immediate access to this example workbook by clicking the button below.

Related VBA and Macro Tutorials
The following VBA and Macro Tutorials may help you better understand and implement the contents below:
- General VBA constructs and structures:
- Read a Macro Tutorial for beginners here.
- Learn the definitions of several basic and important VBA terms here.
- Learn how to specify macro security settings here.
- Learn how to work with the Visual Basic Editor here.
- Learn about the Excel VBA Object Model here.
- Learn how to refer to cell ranges here.
- Learn how to create Sub procedures here.
- Learn how to work with object properties here.
- Learn how to work with object methods here.
- Learn how to declare and work with variables here.
- Learn how to work with data types here.
- Learn how to work with functions here.
- Learn how to work with loops here.
- Learn how to work with arrays here.
- Practical VBA applications and macro examples:
- Learn how to work with worksheets here.
- Learn how to convert strings to numbers here.
- Learn how to create message boxes here.
- Learn how to create UserForms here.
You can find additional VBA and Macro Tutorials in the Archives.
#1: Create InputBox with InputBox function
VBA code to create InputBox with InputBox function
To create a basic InputBox with the VBA InputBox function, use a statement with the following structure:
InputBoxVariable = InputBox(Prompt:=PromptString, Title:=TitleString, Default:=DefaultInputString)
Process to create InputBox with InputBox function
To create a basic InputBox with the VBA InputBox function, follow these steps:
- Create an input box with the InputBox function (InputBox(…)).
- Assign the value returned by the InputBox function to a variable (InputBoxVariable = InputBox(…)).
VBA statement explanation
Item: InputBoxVariable
InputBoxVariable is the variable you want to hold the value returned by the InputBox function.
The InputBox function returns a String.
Item: =
The = operator assigns a value to a variable or property.
Use the = operator to assign the value returned by the InputBox function (InputBox(…)) to InputBoxVariable.
Item: InputBox(…)
The InputBox function:
- Displays an input box;
- Waits for the user to either (i) input text and click the OK button (or press the Enter key), or (ii) click the Cancel button (or press the Esc key); and
- Returns a string with the contents of the text box in the input box (when the user clicks OK or presses Enter).
If you want to handle the cases where the user clicks on the Cancel button or presses Esc, please refer to the appropriate section of this Tutorial.
Item: Prompt:=PromptString
The Prompt argument of the InputBox function is a string displayed as the message in the input box. Prompt is a required argument.
You generally specify PromptString as a string expression.
The maximum length of PromptString is roughly 1024 characters. However, this maximum length may vary slightly depending on the width of the characters within PromptString.
PromptString can be composed of multiple lines. To create an input box with multiple lines, please refer to the appropriate section of this Tutorial.
Item: Title:=TitleString
The Title argument of the InputBox function is a string expression displayed as the title in the title bar of the input box.
Title is an optional argument. If you omit the Title argument, the title of the input box is “Microsoft Excel”.
You generally specify TitleString as a string expression.
Item: Default:=DefaultInputString
The Default argument of the InputBox function is a string expression displayed inside the text box of the input box. DefaultInputString is, therefore, the default response.
Default is an optional argument. If you omit the Default argument, the text box is empty.
Macro example to create InputBox with InputBox function
The following macro example:
- Creates a basic input box with the InputBox function.
- Assigns the value returned by the InputBox function to a variable (myInputBoxVariable = inputBox(…)).
- Displays a message box with the value held by the variable.
Sub CreateInputBoxFunction()
    'source: https://powerspreadsheets.com/
    'creates an input box with the InputBox function
    'for further information: https://powerspreadsheets.com/excel-vba-inputbox/

    'declare variable to hold value returned by InputBox
    Dim myInputBoxVariable As String

    '(1) create InputBox, and (2) assign value returned by InputBox function to variable
    myInputBoxVariable = inputBox(Prompt:="Create Excel VBA InputBox", Title:="This is an Excel VBA InputBox", Default:="Enter VBA InputBox value here")

    'display message box with value held by variable
    MsgBox "Your input was: " & myInputBoxVariable

End Sub
Effects of executing macro example to create InputBox with InputBox function
The following GIF illustrates the results of executing the macro example. As expected, Excel displays a basic input box using the InputBox function.

#2: Create InputBox with Application.InputBox method
VBA code to create InputBox with Application.InputBox method
To create a basic InputBox with the VBA Application.InputBox method, use a statement with the following structure:
InputBoxVariable = Application.InputBox(Prompt:=PromptString, Title:=TitleString, Default:=DefaultInput)
Process to create InputBox with Application.InputBox method
To create a basic InputBox with the VBA Application.InputBox method, follow these steps:
- Create an input box with the Application.InputBox method (Application.InputBox(…)).
- Assign the value returned by the Application.InputBox method to a variable (InputBoxVariable = Application.InputBox(…)).
VBA statement explanation
Item: InputBoxVariable
InputBoxVariable is the variable you want to hold the value returned by the Application.InputBox method.
The Application.InputBox method returns a Variant.
Item: =
The = operator assigns a value to a variable or property.
Use the = operator to assign the value returned by the InputBox function (InputBox(…)) to InputBoxVariable.
Item: Application.InputBox(…)
The Application.InputBox method:
- Displays an input box’
- Waits for the user to either (i) input information and click the OK button (or press the Enter key), or (ii) click the Cancel button (or press the Esc key); and
- Returns the information entered in the dialog box (if the user clicks OK or presses Enter) or the False Boolean value (if the user clicks Cancel).
Item: Prompt:=PromptString
The Prompt parameter of the Application.InputBox method is a string displayed as the message in the input box. Prompt is a required parameter.
You generally specify PromptString as a string expression.
You can also specify PromptString as a number, a date or a Boolean. In such cases, Excel coerces the number, date or Boolean to a string.
PromptString can be composed of multiple lines. To create an input box with multiple lines, please refer to the appropriate section of this Tutorial.
Item: Title:=TitleString
The Title parameter of the Application.InputBox method is the title displayed in the title bar of the input box.
Title is an optional parameter. If you omit the Title parameter, the title of the input box is “Input”.
The Title parameter is of the Variant data type.
Item: Default:=DefaultInput
The Default parameter of the Application.InputBox method is the value displayed inside the text box of the input box. DefaultInput is, therefore, the default response.
Default is an optional parameter. If you omit the Default parameter, the text box is empty.
The Default parameter is of the Variant data type.
Macro example to create InputBox with Application.InputBox method
The following macro example:
- Creates a basic input box with the Application.InputBox method.
- Assigns the value returned by the Application.InputBox method to a variable (myInputBoxVariable = Application.inputBox(…)).
- Displays a message box with the value held by the variable.
Sub CreateInputBoxMethod()
    'source: https://powerspreadsheets.com/
    'creates an input box with the Application.InputBox method
    'for further information: https://powerspreadsheets.com/excel-vba-inputbox/

    'declare variable to hold value returned by InputBox
    Dim myInputBoxVariable As Variant

    '(1) create InputBox, and (2) assign value returned by Application.InputBox method to variable
    myInputBoxVariable = Application.inputBox(Prompt:="Create Excel VBA InputBox", Title:="This is an Excel VBA InputBox", Default:="Enter VBA InputBox value here")

    'display message box with value held by variable
    MsgBox "Your input was: " & myInputBoxVariable

End Sub
Effects of executing macro example to create InputBox with Application.InputBox method
The following GIF illustrates the results of executing the macro example. As expected, Excel displays a basic input box using the Application.InputBox method.

#3: Create InputBox with multiple lines using InputBox function
VBA code to create InputBox with multiple lines using InputBox function
To create an InputBox containing multiple lines with the VBA InputBox function, use a statement with the following structure:
InputBoxMultipleLinesVariable = inputBox(Prompt:=PromptString1 & NewLineCharacter & PromptString2 & ... & NewLineCharacter & PromptString#)
Process to create InputBox with multiple lines using InputBox function
To create an InputBox containing multiple lines with the VBA InputBox function, follow these steps:
- Create an input box with the InputBox function (InputBox(…)).
- Specify the message displayed in the message box (Prompt:=PromptString1 & NewLineCharacter & PromptString2 & … & NewLineCharacter & PromptString#) as an appropriately concatenated (with the & character) combination of:
- Strings (PromptString1, PromptString2, …, PromptString#); and
- Characters that create a new line or line break (NewLineCharacter).
- Assign the value returned by the InputBox function to a variable (InputBoxMultipleLinesVariable = InputBox(…)).
VBA statement explanation
Item: InputBoxMultipleLinesVariable
InputBoxMultipleLinesVariable is the variable you want to hold the value returned by the InputBox function.
The InputBox function returns a String.
Item: =
The = operator assigns a value to a variable or property.
Use the = operator to assign the value returned by the InputBox function (InputBox(…)) to InputBoxVariable.
Item: inputBox(…)
The InputBox function:
- Displays an input box;
- Waits for the user to either (i) input text and click the OK button (or press the Enter key), or (ii) click the Cancel button (or press the Esc key); and
- Returns a string with the contents of the text box in the input box (when the user clicks OK or presses Enter).
If you want to handle the cases where the user clicks on the Cancel button or presses Esc, please refer to the appropriate section of this Tutorial.
Item: Prompt:=PromptString1 & NewLineCharacter & PromptString2 & … & NewLineCharacter & PromptString#
The Prompt argument of the InputBox function is a string displayed as the message in the input box. Prompt is a required argument.
You generally specify Prompt as a string expression.
The maximum length of Prompt is roughly 1024 characters. However, this maximum length may vary slightly depending on the width of the characters you work with.
To create an input box with multiple lines, you build the string expression assigned to Prompt by concatenating as many strings (PromptString1, PromptString2, …, PromptString#) and new line characters (NewLineCharacter) as required. For these purposes:
- PromptString1, PromptString2, …, PromptString# are the strings (excluding the new line characters) that determine the message in the input box.
- The & operator carries out string concatenation. Therefore, & concatenates the different strings and new line characters.
- NewLineCharacter is a character or character combination returning 1 of the following:
- Carriage return.
- Linefeed.
- Carriage return linefeed combination.
- New line (which is platform specific).
Specify NewLineCharacter using any of the constants or character codes (with the Chr function) listed below:
| Constant | Equivalent Chr function | General description |
| vbLf | Chr(10) | Linefeed |
| vbCr | Chr(13) | Carriage return |
| vbCrLf | Chr(13) & Chr(10) | Carriage return linefeed combination |
| vbNewLine | Chr(13) & Chr(10) in Excel for Windows or Chr(13) in Excel for Mac | New line character, which is platform specific |
Macro example to create InputBox with multiple lines using InputBox function
The following macro example:
- Creates an input box containing multiple lines (Create Excel VBA InputBox” & vbNewLine & “with multiple lines) with the InputBox function.
- Assigns the value returned by the InputBox function to a variable (myInputBoxMultipleLinesVariable = inputBox(…)).
- Displays a message box with the value held by the variable.
Sub CreateInputBoxFunctionMultipleLines()
    'source: https://powerspreadsheets.com/
    'creates an input box with multiple lines using the InputBox function
    'for further information: https://powerspreadsheets.com/excel-vba-inputbox/

    'declare variable to hold value returned by InputBox
    Dim myInputBoxMultipleLinesVariable As String

    '(1) create InputBox with multiple lines, and (2) assign value returned by InputBox function to variable
    myInputBoxMultipleLinesVariable = inputBox(Prompt:="Create Excel VBA InputBox" & vbNewLine & "with multiple lines")

    'display message box with value held by variable
    MsgBox "Your input was: " & myInputBoxMultipleLinesVariable

End Sub
Effects of executing macro example to create InputBox with multiple lines using InputBox function
The following GIF illustrates the results of executing the macro example. As expected, Excel displays an input box containing multiple lines using the InputBox function.

#4: Create InputBox with multiple lines using Application.InputBox method
VBA code to create InputBox with multiple lines using Application.InputBox method
To create an InputBox containing multiple lines with the VBA Application.InputBox method, use a statement with the following structure:
InputBoxMultipleLinesVariable = Application.InputBox(Prompt:=PromptString1 & NewLineCharacter & PromptString2 & ... & NewLineCharacter & PromptString#)
Process to create InputBox with multiple lines using Application.InputBox method
To create an InputBox containing multiple lines with the VBA Application.InputBox method, follow these steps:
- Create an input box with the Application.InputBox method (Application.InputBox(…)).
- Specify the message displayed in the message box (Prompt:=PromptString1 & NewLineCharacter & PromptString2 & … & NewLineCharacter & PromptString#) as an appropriately concatenated (with the & character) combination of:
- Strings (PromptString1, PromptString2, …, PromptString#); and
- Characters that create a new line or line break (NewLineCharacter).
- Assign the value returned by the Application.InputBox method to a variable (InputBoxMultipleLinesVariable = Application.InputBox(…)).
VBA statement explanation
Item: InputBoxMultipleLinesVariable
InputBoxMultipleLinesVariable is the variable you want to hold the value returned by the Application.InputBox method.
The Application.InputBox method returns a Variant.
Item: =
The = operator assigns a value to a variable or property.
Use the = operator to assign the value returned by the InputBox function (InputBox(…)) to InputBoxVariable.
Item: Application.InputBox(…)
The Application.InputBox method:
- Displays an input box’
- Waits for the user to either (i) input information and click the OK button (or press the Enter key), or (ii) click the Cancel button (or press the Esc key); and
- Returns the information entered in the dialog box (if the user clicks OK or presses Enter) or the False Boolean value (if the user clicks Cancel).
Item: Prompt:=PromptString1 & NewLineCharacter & PromptString2 & … & NewLineCharacter & PromptString#
The Prompt parameter of the Application.InputBox method is a string displayed as the message in the input box. Prompt is a required parameter.
You generally specify Prompt as a string expression. You can also specify Prompt as a number, a date or a Boolean. In such cases, Excel coerces the number, date or Boolean to a string.
To create an input box with multiple lines, you build the expression assigned to Prompt by concatenating as many strings (PromptString1, PromptString2, …, PromptString#) and new line characters (NewLineCharacter) as required. For these purposes:
- PromptString1, PromptString2, …, PromptString# are the strings (excluding the new line characters) that determine the message in the input box.
- The & operator carries out string concatenation. Therefore, & concatenates the different strings and new line characters.
- NewLineCharacter is a character or character combination returning 1 of the following:
- Carriage return.
- Linefeed.
- Carriage return linefeed combination.
- New line (which is platform specific).
Specify NewLineCharacter using any of the constants or character codes (with the Chr function) listed below:
| Constant | Equivalent Chr function | General description |
| vbLf | Chr(10) | Linefeed |
| vbCr | Chr(13) | Carriage return |
| vbCrLf | Chr(13) & Chr(10) | Carriage return linefeed combination |
| vbNewLine | Chr(13) & Chr(10) in Excel for Windows or Chr(13) in Excel for Mac | New line character, which is platform specific |
Macro example to create InputBox with multiple lines using Application.InputBox method
The following macro example:
- Creates an input box containing multiple lines (Create Excel VBA InputBox” & vbNewLine & “with multiple lines) with the Application.InputBox method.
- Assigns the value returned by the Application.InputBox method to a variable (myInputBoxMultipleLinesVariable = Application.inputBox(…)).
- Displays a message box with the value held by the variable.
Sub CreateInputBoxMethodMultipleLines()
    'source: https://powerspreadsheets.com/
    'creates an input box with multiple lines using the Application.InputBox method
    'for further information: https://powerspreadsheets.com/excel-vba-inputbox/

    'declare variable to hold value returned by InputBox
    Dim myInputBoxMultipleLinesVariable As Variant

    '(1) create InputBox with multiple lines, and (2) assign value returned by Application.InputBox method to variable
    myInputBoxMultipleLinesVariable = Application.inputBox(Prompt:="Create Excel VBA InputBox" & vbNewLine & "with multiple lines")

    'display message box with value held by variable
    MsgBox "Your input was: " & myInputBoxMultipleLinesVariable

End Sub
Effects of executing macro example to create InputBox with multiple lines using Application.InputBox method
The following GIF illustrates the results of executing the macro example. As expected, Excel displays an input box containing multiple lines using the Application.InputBox method.

#5: Create InputBox that works with a specific data type using InputBox function
VBA code to create InputBox that works with a specific data type using InputBox function
To create an InputBox that works with a specific data type with the VBA InputBox function, use a macro with the following statement structure:
InputBoxTypeVariable = InputBox(Prompt:=PromptString)
If IsFunction(InputBoxTypeVariable) Then
    StatementsIfInputIsType
Else
    StatementsIfInputIsNotType
End If
Process to create InputBox that works with a specific data type using InputBox function
To create an InputBox that works with a specific data type with the VBA InputBox function, follow these steps:
- Create an input box with the InputBox function (InputBox(…)).
- Assign the value returned by the InputBox function to a variable (InputBoxTypeVariable = InputBox(…)).
- Use an If… Then… Else statement for the following:
- Testing whether the type of data held by the variable is the one you want to work with (IsFunction(InputBoxTypeVariable)).
- Executing the appropriate group of statements depending on whether the type of data held by the variable is the one you want to work with (StatementsIfInputIsType) or not (StatementsIfInputIsNotType).
VBA statement explanation
Line #1: InputBoxTypeVariable = InputBox(Prompt:=PromptString)
Item: InputBoxTypeVariable
InputBoxTypeVariable is the variable you want to hold the value returned by the InputBox function.
The InputBox function returns a String.
Item: =
The = operator assigns a value to a variable or property.
Use the = operator to assign the value returned by the InputBox function (InputBox(…)) to InputBoxVariable.
Item: InputBox(…)
The InputBox function:
- Displays an input box;
- Waits for the user to either (i) input text and click the OK button (or press the Enter key), or (ii) click the Cancel button (or press the Esc key); and
- Returns a string with the contents of the text box in the input box (when the user clicks OK or presses Enter).
If you want to handle the cases where the user clicks on the Cancel button or presses Esc, please refer to the appropriate section of this Tutorial.
Item: Prompt:=PromptString
The Prompt argument of the InputBox function is a string displayed as the message in the input box. Prompt is a required argument.
You generally specify PromptString as a string expression.
The maximum length of PromptString is roughly 1024 characters. However, this maximum length may vary slightly depending on the width of the characters within PromptString.
PromptString can be composed of multiple lines. To create an input box with multiple lines, please refer to the appropriate section of this Tutorial.
Lines #2, #4 and #6: If IsFunction(InputBoxTypeVariable) Then | Else | End If
Item: If… Then… Else… End If
The If… Then… Else statement conditionally executes a group of statements (StatementsIfInputIsType or StatementsIfInputIsNotType) depending on the value of an expression (Isfunction(InputBoxTypeVariable)).
Item: IsFunction(InputBoxTypeVariable)
The condition of the If… Then… Else statement is an expression returning True or False.
When you work with an input box and a specific data type using this macro structure, you can check the type of data held by InputBoxTypeVariable by working with certain VBA built-in functions (an IsFunction), as appropriate. These include the following functions:
| Function | Returns True if InputBoxTypeVariable… | Returns False if InputBoxTypeVariable… |
| IsDate | Is a date or recognizable as a valid date | Isn’t date or isn’t recognizable as a valid date |
| IsError | Is an error value | Isn’t an error value |
| IsNumeric | Can be evaluated/recognized as a number | Can’t be evaluated/recognized as a number |
Line #3: StatementsIfInputIsType
Statements executed if the tested condition (IsFunction(InputBoxTypeVariable)) returns True. In other words, these statements are executed if the input entered by the user in the input box is of the appropriate type.
Line #5: StatementsIfInputIsNotType
Statements executed if the tested condition (IsFunction(InputBoxTypeVariable)) returns False. In other words, these statements are executed if the input entered by the user in the input box isn’t of the appropriate type.
Macro example to create InputBox that works with a specific data type using InputBox function
The following macro example:
- Creates an input box with the InputBox function.
- Assigns the value returned by the InputBox function to a variable (myInputBoxTypeVariable = inputBox(…)).
- Checks whether the value held by the variable is numeric (IsNumeric(myInputBoxTypeVariable)).
- If the value is numeric, displays a message box with the value held by the variable.
- If the value isn’t numeric, displays a message box asking the user to try again and enter a number.
Sub CreateInputBoxFunctionDataType()
    'source: https://powerspreadsheets.com/
    'creates an input box that works with a number using the InputBox function
    'for further information: https://powerspreadsheets.com/excel-vba-inputbox/

    'declare variable to hold value returned by InputBox
    Dim myInputBoxTypeVariable As String

    '(1) create InputBox that works with a number, and (2) assign value returned by InputBox function to variable
    myInputBoxTypeVariable = inputBox(Prompt:="Create Excel VBA InputBox that works with a number")

    'check if user entered a number and, if appropriate, execute statements
    If IsNumeric(myInputBoxTypeVariable) Then

        'display message box with value held by variable
        MsgBox "Your input was: " & myInputBoxTypeVariable

    'if user didn't enter a number, execute statements
    Else

        'display message box confirming that user didn't enter a number
        MsgBox "Please try again and enter a number"

    End If

End Sub
Effects of executing macro example to create InputBox that works with a specific data type using InputBox function
The following GIF illustrates the results of executing the macro example. As expected:
- Excel identifies whether the input box created with the InputBox function contains a number; and
- Displays the appropriate message box.

#6: Create InputBox that works with a specific data type using Application.InputBox method
VBA code to create InputBox that works with a specific data type using Application.InputBox method
To create an InputBox that works with a specific data type with the VBA Application.InputBox method, use a statement with the following structure:
InputBoxTypeVariable = Application.InputBox(Prompt:=PromptString, Type:=TypeValue)
Process to create InputBox that works with a specific data type using Application.InputBox method
To create an InputBox that works with a specific data type with the VBA Application.InputBox method, follow these steps:
- Create an input box with the Application.InputBox method (Application.InputBox(…)).
- Specify the data type you want to work with by working with the Type parameter of the Application.InputBox method (Type:=TypeValue).
- Assign the value returned by the Application.InputBox method to a variable (InputBoxTypeVariable = Application.InputBox(…)).
VBA statement explanation
Item: InputBoxTypeVariable
InputBoxTypeVariable is the variable you want to hold the value returned by the Application.InputBox method.
The Application.InputBox method returns a Variant.
Item: =
The = operator assigns a value to a variable or property.
Use the = operator to assign the value returned by the InputBox function (InputBox(…)) to InputBoxVariable.
Item: Application.InputBox(…)
The Application.InputBox method:
- Displays an input box’
- Waits for the user to either (i) input information and click the OK button (or press the Enter key), or (ii) click the Cancel button (or press the Esc key); and
- Returns the information entered in the dialog box (if the user clicks OK or presses Enter) or the False Boolean value (if the user clicks Cancel).
Item: Prompt:=PromptString
The Prompt parameter of the Application.InputBox method is a string displayed as the message in the input box. Prompt is a required parameter.
You generally specify PromptString as a string expression.
You can also specify PromptString as a number, a date or a Boolean. In such cases, Excel coerces the number, date or Boolean to a string.
PromptString can be composed of multiple lines. To create an input box with multiple lines, please refer to the appropriate section of this Tutorial.
Item: Type:=TypeValue
The Type parameter of the Application.InputBox method specifies the data type returned.
Set the Type parameter using the values listed below. If required, you can set the Type parameter to be a sum of several of these values.
| Value | Basic description | Additional comments |
| 0 | Formula | Application.InputBox returns the formula in the form of text. Cell references inside the formula are returned as A1-style references. |
| 1 | Number | |
| 2 | Text | |
| 4 | Boolean | |
| 8 | Range object | Use the Set statement to assign the Range object returned by Application.InputBox to an object variable. |
| 16 | Error | |
| 64 | Array of values |
Type is an optional parameter. If you omit the Type parameter, the Application.InputBox method returns text.
Macro example to create InputBox that works with a specific data type using Application.InputBox method
The following macro example:
- Creates an input box that returns a number (Type:=1) with the Application.InputBox method.
- Assigns the value returned by the Application.InputBox method to a variable (myInputBoxTypeVariable = Application.inputBox(…)).
- Displays a message box with the value held by the variable.
Sub CreateInputBoxMethodDataType()
    'source: https://powerspreadsheets.com/
    'creates an input box that works with a number using the Application.InputBox method
    'for further information: https://powerspreadsheets.com/excel-vba-inputbox/

    'declare variable to hold value returned by InputBox
    Dim myInputBoxTypeVariable As Variant

    '(1) create InputBox that works with a number, and (2) assign value returned by Application.InputBox method to variable
    myInputBoxTypeVariable = Application.inputBox(Prompt:="Create Excel VBA InputBox that works with a number", Type:=1)

    'display message box with value held by variable
    MsgBox "Your input was: " & myInputBoxTypeVariable

End Sub
Effects of executing macro example to create InputBox that works with a specific data type using Application.InputBox method
The following GIF illustrates the results of executing the macro example. As expected:
- Excel identifies whether the input box created with the Application.InputBox method contains a number; and
- If the entered input isn’t a number, displays a warning.

#7: Create InputBox and check if user clicks Cancel button with InputBox function
VBA code to create InputBox and check if user clicks Cancel button with InputBox function
To create an InputBox with the VBA InputBox function and check if the user clicks Cancel, use a macro with the following statement structure:
InputBoxCancelVariable = InputBox(Prompt:=PromptString)
If StrPtr(InputBoxCancelVariable) = 0 Then
    StatementsIfCancel
ElseIf InputBoxCancelVariable = "" Then
    StatementsIfNoInput
Else
    StatementsIfInputAndOK
End If
Process to create InputBox and check if user clicks Cancel button with InputBox function
To create an InputBox that works with a specific data type with the VBA InputBox function, follow these steps:
- Create an input box with the InputBox function (InputBox(…)).
- Assign the value returned by the InputBox function to a variable (InputBoxCancelVariable = InputBox(…)).
- Use an If… Then… Else statement for the following:
- Testing whether the user clicked Cancel (StrPtr(InputBoxCancelVariable) = 0) or entered no input prior to clicking OK (InputBoxCancelVariable = “”).
- Executing the appropriate group of statements depending on whether the user clicked Cancel (StatementsIfCancel), entered no input prior to clicking OK (StatementsIfNoInput) or entered input and clicked OK (StatementsIfInputAndOK).
VBA statement explanation
Line #1: InputBoxCancelVariable = InputBox(Prompt:=PromptString)
Item: InputBoxCancelVariable
InputBoxCancelVariable is the variable you want to hold the value returned by the InputBox function.
The InputBox function returns a String.
Item: =
The = operator assigns a value to a variable or property.
Use the = operator to assign the value returned by the InputBox function (InputBox(…)) to InputBoxVariable.
Item: InputBox(…)
The InputBox function:
- Displays an input box;
- Waits for the user to either (i) input text and click the OK button (or press the Enter key), or (ii) click the Cancel button (or press the Esc key); and
- Returns a string with the contents of the text box in the input box (when the user clicks OK or presses Enter).
According to the Microsoft Developer Network, the InputBox function returns a zero-length string (“”) when the user clicks Cancel (or presses Esc). When checking if the user clicks Cancel using this macro structure, you rely on a quirk of the InputBox function which allows you to work with StrPtr.
Item: Prompt:=PromptString
The Prompt argument of the InputBox function is a string displayed as the message in the input box. Prompt is a required argument.
You generally specify PromptString as a string expression.
The maximum length of PromptString is roughly 1024 characters. However, this maximum length may vary slightly depending on the width of the characters within PromptString.
PromptString can be composed of multiple lines. To create an input box with multiple lines, please refer to the appropriate section of this Tutorial.
Lines #2, #6 and #8: If StrPtr(InputBoxCancelVariable) = 0 Then | Else | End If
Item: If… Then… Else… End If
The If… Then… Else statement conditionally executes a group of statements (StatementsIfCancel, StatementsIfNoInput or StatementsIfInputAndOK) depending on the value of an expression (StrPtr(InputBoxCancelVariable) = 0 or InputBoxCancelVariable = “”).
Item: StrPtr(InputBoxCancelVariable) = 0
The condition of the If… Then… Else statement is an expression returning True or False.
When you check if the user clicks the Cancel button using this macro structure, you can work with the StrPtr function. StrPtr is an undocumented function. You can usually work with the StrPtr function to obtain the address of a variable.
When the user clicks Cancel, no string is assigned to InputBoxCancelVariable. Therefore, if the user clicks Cancel, StrPtr(InputBoxCancelVariable) = 0 returns True.
Line #3: StatementsIfCancel
Statements executed if the tested condition (StrPtr(InputBoxCancelVariable) = 0) returns True. In other words, these statements are executed if the user clicks Cancel.
Line #4: ElseIf InputBoxCancelVariable = “” Then
Item: ElseIf… Then
The If… Then… Else statement conditionally executes a group of statements (StatementsIfCancel, StatementsIfNoInput or StatementsIfInputAndOK) depending on the value of an expression (StrPtr(InputBoxCancelVariable) = 0 or InputBoxCancelVariable = “”).
Item: InputBoxCancelVariable = “”
The condition-n of the If… Then… Else statement is an expression returning True or False.
You can check if the user didn’t enter any input prior to clicking OK by testing whether InputBoxCancelVariable holds a zero-length string (“”). In other words, if the user doesn’t enter any input and clicks the OK button, InputBoxCancelVariable = 0 returns True.
Line #5: StatementsIfNoInput
Statements executed if the tested condition (InputBoxCancelVariable = “”) returns True. In other words, these statements are executed if the user doesn’t enter any input and clicks the OK button.
Line #7: StatementsIfInputAndOK
Statements executed if none of the tested conditions (StrPtr(InputBoxCancelVariable) = 0 or InputBoxCancelVariable = “”) return True. In other words, these statements are executed if the user enters an input and clicks the OK button.
Macro example to create InputBox and check if user clicks Cancel button with InputBox function
The following macro example:
- Creates an input box with the InputBox function.
- Assigns the value returned by the InputBox function to a variable (myInputBoxCancelVariable = inputBox(…)).
- Checks whether user clicked Cancel (StrPtr(myInputBoxCancelVariable) = 0). If the user clicked Cancel, displays a message box confirming this.
- If the user didn’t click Cancel, checks whether the user entered no input prior to clicking OK (myInputBoxCancelVariable = “”). If the user entered no input prior to clicking OK, displays a message box confirming this.
- If the user entered input and clicked OK, displays a message box with the value held by the variable.
Sub CreateInputBoxFunctionCancel()
    'source: https://powerspreadsheets.com/
    '(1) creates an input box with the InputBox function, and (2) handles case where user clicks Cancel button
    'for further information: https://powerspreadsheets.com/excel-vba-inputbox/

    'declare variable to hold value returned by InputBox
    Dim myInputBoxCancelVariable As String

    '(1) create InputBox, and (2) assign value returned by InputBox function to variable
    myInputBoxCancelVariable = inputBox(Prompt:="Create Excel VBA InputBox and work with Cancel button")

    'check if user clicked Cancel button and, if appropriate, execute statements
    If StrPtr(myInputBoxCancelVariable) = 0 Then

        'display message box confirming that user clicked Cancel button
        MsgBox "You clicked the Cancel button"

    'check if user entered no input and, if appropriate, execute statements
    ElseIf myInputBoxCancelVariable = "" Then

        'display message box confirming that user entered no input
        MsgBox "You didn't enter an input"

    'if user didn't click Cancel button and entered input, execute statements
    Else

        'display message box with value held by variable
    MsgBox "Your input was: " & myInputBoxCancelVariable

    End If

End Sub
Effects of executing macro example to create InputBox and check if user clicks Cancel button with InputBox function
The following GIF illustrates the results of executing the macro example. As expected:
- Excel displays an input box created with the InputBox function.
- The macro identifies whether the user:
- Clicks the Cancel button;
- Enters no input prior to clicking OK; or
- Enters input and clicks OK.
- Excel displays the appropriate message box depending on the actions taken by the user.

#8: Create InputBox and check if user clicks Cancel button with Application.InputBox method
VBA code to create InputBox and check if user clicks Cancel button with Application.InputBox method
To create an InputBox with the VBA Application.InputBox method and check if the user clicks Cancel, use a macro with the following statement structure:
InputBoxCancelVariable = Application.InputBox(Prompt:=PromptString)
If (TypeName(InputBoxCancelVariable) = "Boolean") And (InputBoxCancelVariable = "False") Then
    StatementsIfCancel
ElseIf InputBoxCancelVariable = "" Then
    StatementsIfNoInput
Else
    StatementsIfInputAndOK
End If
Process to create InputBox and check if user clicks Cancel button with Application.InputBox method
To create an InputBox with the VBA Application.InputBox method and check if the user clicks Cancel, follow these steps:
- Create an input box with the Application.InputBox method (Application.InputBox(…)).
- Assign the value returned by the Application.InputBox method to a variable (InputBoxCancelVariable = Application.InputBox(…)).
- Use an If… Then… Else statement for the following:
- Testing whether the user clicked Cancel ((TypeName(InputBoxCancelVariable) = “Boolean”) And (InputBoxCancelVariable = “False”)) or entered no input prior to clicking OK (InputBoxCancelVariable = “”).
- Executing the appropriate group of statements depending on whether the user clicked Cancel (StatementsIfCancel), entered no input prior to clicking OK (StatementsIfNoInput) or entered input and clicked OK (StatementsIfInputAndOK).
VBA statement explanation
Line #1: InputBoxCancelVariable = Application.InputBox(Prompt:=PromptString)
Item: InputBoxCancelVariable
InputBoxCancelVariable is the variable you want to hold the value returned by the Application.InputBox method.
The Application.InputBox method returns a Variant.
Item: =
The = operator assigns a value to a variable or property.
Use the = operator to assign the value returned by the InputBox function (InputBox(…)) to InputBoxVariable.
Item: Application.InputBox(…)
The Application.InputBox method:
- Displays an input box’
- Waits for the user to either (i) input information and click the OK button (or press the Enter key), or (ii) click the Cancel button (or press the Esc key); and
- Returns the information entered in the dialog box (if the user clicks OK or presses Enter) or the False Boolean value (if the user clicks Cancel).
Item: Prompt:=PromptString
The Prompt parameter of the Application.InputBox method is a string displayed as the message in the input box. Prompt is a required parameter.
You generally specify PromptString as a string expression.
You can also specify PromptString as a number, a date or a Boolean. In such cases, Excel coerces the number, date or Boolean to a string.
PromptString can be composed of multiple lines. To create an input box with multiple lines, please refer to the appropriate section of this Tutorial.
Lines #2, #6 and #8: If (TypeName(InputBoxCancelVariable) = “Boolean”) And (InputBoxCancelVariable = “False”) Then | Else | End If
Item: If… Then… Else… End If
The If… Then… Else statement conditionally executes a group of statements (StatementsIfCancel, StatementsIfNoInput or StatementsIfInputAndOK) depending on the value of an expression (((TypeName(InputBoxCancelVariable) = “Boolean”) And (InputBoxCancelVariable = “False”)) or InputBoxCancelVariable = “”).
Item: TypeName(InputBoxCancelVariable) = “Boolean” And InputBoxCancelVariable = “False”
The condition of the If… Then… Else statement is an expression returning True or False.
The Application.InputBox method returns the False Boolean value when the user clicks Cancel. Therefore, when you check if the user clicks the Cancel button using this macro structure, you test whether 2 conditions are met.
Condition #1: TypeName(InputBoxCancelVariable) = “Boolean”
TypeName(InputBoxCancelVariable) = “Boolean” checks whether InputBoxCancelVariable is a Boolean value.
For these purposes, work with the TypeName function, which returns a string with information about the variable passed as argument (InputBoxCancelVariable). Therefore, TypeName(InputBoxCancelVariable) = “Boolean”:
- Returns True if InputBoxCancelVariable is a Boolean. This occurs, among others, when the user clicks Cancel.
- Returns False if InputBoxCancelVariable isn’t a Boolean.
Condition #2: InputBoxCancelVariable = “False”
InputBoxCancelVariable = “False” checks whether InputBoxCancelVariable holds the string “False”. Therefore, InputBoxCancelVariable = “False”:
- Returns True if InputBoxCancelVariable holds “False”. This occurs, among others, when the user clicks Cancel.
- Returns False if InputBoxCancelVariable doesn’t hold “False”.
Condition #1 And Condition #2
When you check if the user clicks the Cancel button using this macro structure, both conditions #1 (TypeName(InputBoxCancelVariable) = “Boolean”) and #2 (InputBoxCancelVariable = “False”) must be met.
The And operator performs a logical conjunction. Therefore, the condition of the If… Then… else statement returns True if the user clicks Cancel.
Line #3: StatementsIfCancel
Statements executed if the tested condition ((TypeName(InputBoxCancelVariable) = “Boolean”) And (InputBoxCancelVariable = “False”)) returns True. In other words, these statements are executed if the user clicks Cancel.
Line #4: ElseIf InputBoxCancelVariable = “” Then
Item: ElseIf… Then
The If… Then… Else statement conditionally executes a group of statements (StatementsIfCancel, StatementsIfNoInput or StatementsIfInputAndOK) depending on the value of an expression (((TypeName(InputBoxCancelVariable) = “Boolean”) And (InputBoxCancelVariable = “False”)) or InputBoxCancelVariable = “”).
Item: InputBoxCancelVariable = “”
The condition-n of the If… Then… Else statement is an expression returning True or False.
You can check if the user didn’t enter any input prior to clicking OK by testing whether InputBoxCancelVariable holds a zero-length string (“”). In other words, if the user doesn’t enter any input and clicks the OK button, InputBoxCancelVariable = 0 returns True.
Line #5: StatementsIfNoInput
Statements executed if the tested condition (InputBoxCancelVariable = “”) returns True. In other words, these statements are executed if the user doesn’t enter any input and clicks the OK button.
Line #7: StatementsIfInputAndOK
Statements executed if none of the tested conditions (((TypeName(InputBoxCancelVariable) = “Boolean”) And (InputBoxCancelVariable = “False”)) or InputBoxCancelVariable = “”) return True. In other words, these statements are executed if the user enters an input and clicks the OK button.
Macro example to create InputBox and check if user clicks Cancel button with Application.InputBox method
The following macro example:
- Creates an input box with the Application.InputBox method.
- Assigns the value returned by the Application.InputBox method to a variable (myInputBoxCancelVariable = Application.inputBox(…)).
- Checks whether user clicked Cancel ((TypeName(myInputBoxCancelVariable) = “Boolean”) And (myInputBoxCancelVariable = “False”)). If the user clicked Cancel, displays a message box confirming this.
- If the user didn’t click Cancel, checks whether the user entered no input prior to clicking OK (myInputBoxCancelVariable = “”). If the user entered no input prior to clicking OK, displays a message box confirming this.
- If the user entered input and clicked OK, displays a message box with the value held by the variable.
Sub CreateInputBoxMethodCancel()
    'source: https://powerspreadsheets.com/
    '(1) creates an input box with the Application.InputBox method, and (2) handles case where user clicks Cancel button
    'for further information: https://powerspreadsheets.com/excel-vba-inputbox/

    'declare variable to hold value returned by InputBox
    Dim myInputBoxCancelVariable As Variant

    '(1) create InputBox, and (2) assign value returned by Application.InputBox method to variable
    myInputBoxCancelVariable = Application.inputBox(Prompt:="Create Excel VBA InputBox and work with Cancel button")

    'check if user clicked Cancel button and, if appropriate, execute statements
    If (TypeName(myInputBoxCancelVariable) = "Boolean") And (myInputBoxCancelVariable = "False") Then

        'display message box confirming that user clicked Cancel button
        MsgBox "You clicked the Cancel button"

    'check if user entered no input and, if appropriate, execute statements
    ElseIf myInputBoxCancelVariable = "" Then

        'display message box confirming that user entered no input
        MsgBox "You didn't enter an input"

    'if user didn't click Cancel button and entered input, execute statements
    Else

        'display message box with value held by variable
        MsgBox "Your input was: " & myInputBoxCancelVariable

    End If

End Sub
Effects of executing macro example to create InputBox and check if user clicks Cancel button with Application.InputBox method
The following GIF illustrates the results of executing the macro example. As expected:
- Excel displays an input box created with the Application.InputBox function.
- The macro identifies whether the user:
- Clicks the Cancel button;
- Enters no input prior to clicking OK; or
- Enters input and clicks OK.
- Excel displays the appropriate message box depending on the actions taken by the user.

#9: Create InputBox and check if user clicks Cancel button when working with cell range and Application.InputBox method
VBA code to create InputBox and check if user clicks Cancel button when working with cell range and Application.InputBox method
To create an InputBox that works with a cell range using the VBA Application.InputBox method and check if the user clicks Cancel, use a macro with the following statement structure:
Dim InputBoxRangeCancelVariable As Range
On Error Resume Next
Set InputBoxRangeCancelVariable = Application.InputBox(Prompt:=PromptString, Type:=8)
On Error GoTo 0
If InputBoxRangeCancelVariable Is Nothing Then
    StatementsIfCancel
Else
    StatementsIfRangeInput
End If
Process to create InputBox and check if user clicks Cancel button when working with cell range and Application.InputBox method
To create an InputBox that works with a cell range using the VBA Application.InputBox method and check if the user clicks Cancel, follow these steps:
- Explicitly declare an object variable to hold a reference to the Range object representing the cell range (Dim InputBoxRangeCancelVariable As Range).
- Enable error-handling with the On Error Resume Next statement.
- Create an input box with the Application.InputBox method (Application.InputBox(…)).
- Set the Type parameter of the Application.InputBox method to 8 (Type:=8), which results in Application.InputBox returning a Range object.
- Assign the value returned by the Application.InputBox method to the object variable (InputBoxRangeCancelVariable = Application.InputBox(…)).
- Disable error-handling withe the On Error GoTo 0 statement.
- Use an If… Then… Else statement for the following:
- Testing whether the user clicked Cancel (InputBoxRangeCancelVariable Is Nothing).
- Executing the appropriate group of statements depending on whether the user clicked Cancel (StatementsIfCancel) or not (StatementsIfRangeInput).
VBA statement explanation
Line #1: Dim InputBoxRangeCancelVariable As Range
The Dim statement declares the InputBoxRangeCancelVariable object variable as of the Range object data type and allocates storage space.
When you check if the user clicks the Cancel button while working with a cell range using this macro structure, you explicitly declare the object variable that holds the reference to the cell range returned by the Application.InputBox method.
Line #2: On Error Resume Next
The On Error Resume Next statement enables an error-handling routine and specifies that, when a run-time error occurs, control goes to the statement following that where the error occurred.
When you check if the user clicks the Cancel button while working with a cell range using this macro structure, On Error Resume Next handles the error caused by line #3 (Set InputBoxRangeCancelVariable = Application.InputBox(Prompt:=PromptString, Type:=8)) if the user clicks Cancel. This error is usually run-time error 424 (object required).
If you don’t declare the InputBoxRangeCancelVariable object variable explicitly, the behavior of the macro and the error caused when the user clicks Cancel usually differs from what I describe in this VBA Tutorial.
Line #3: Set InputBoxRangeCancelVariable = Application.InputBox(Prompt:=PromptString, Type:=8)
Item: Set… =…
The Set statement assigns the object reference returned by the Application.InputBox method (Application.InputBox(…)) to InputBoxRangeCancelVariable.
Item: InputBoxRangeCancelVariable
InputBoxRangeCancelVariable is the object variable you want to hold the Range object returned by the Application.InputBox method.
When working with a cell range and the Application.InputBox method, Application.InputBox usually returns a Range object, unless the user clicks on the Cancel button. The cases where the user clicks on the Cancel button are handled by the On Error Resume Next statement.
Therefore, if you explicitly declare InputBoxRangeCancelVariable when working with this macro structure, you can usually declare it as of the Range object data type.
Item: Application.InputBox(…)
The Application.InputBox method:
- Displays an input box;
- Waits for the user to either (i) input information and click the OK button (or press the Enter key), or (ii) click the Cancel button (or press the Esc key); and
- Returns the information entered in the dialog box (if the user clicks OK or presses Enter).
Item: Prompt:=PromptString
The Prompt parameter of the Application.InputBox method is a string displayed as the message in the input box. Prompt is a required parameter.
You generally specify PromptString as a string expression.
You can also specify PromptString as a number, a date or a Boolean. In such cases, Excel coerces the number, date or Boolean to a string.
PromptString can be composed of multiple lines. To create an input box with multiple lines, please refer to the appropriate section of this Tutorial.
Item: Type:=8
The Type parameter of the Application.InputBox method specifies the data type returned.
When working with a cell range, set Type to 8. In such case, Application.InputBox returns a Range object.
Line #4: On Error GoTo 0
The On Error GoTo 0 statement disables the error-handler enabled in line #2.
Lines #5, #7 and #9: If InputBoxRangeCancelVariable Is Nothing Then | Else | End If
Item: If… Then… Else… End If
The If… Then… Else statement conditionally executes a group of statements (StatementsIfCancel or StatementsIfRangeInput) depending on the value of an expression (InputBoxRangeCancelVariable Is Nothing).
Item: InputBoxRangeCancelVariable Is Nothing
The condition of the If… Then… Else statement is an expression returning True or False.
The Is operator compares InputBoxRangeCancelVariable and Nothing. This expression returns True if both refer to the same.
Nothing is the default value for an object variable. Therefore, if the user clicks Cancel, InputBoxRangeCancelVariable Is Nothing returns True.
Line #6: StatementsIfCancel
Statements executed if the tested condition (InputBoxRangeCancelVariable Is Nothing) returns True. In other words, these statements are executed if the user clicks Cancel.
Line #8: StatementsIfRangeInput
Statements executed if the tested condition (InputBoxRangeCancelVariable Is Nothing) returns False. In other words, these statements are executed if the user enters/selects a cell range as input.
Macro example to create InputBox and check if user clicks Cancel button when working with cell range and Application.InputBox method
The following macro example:
- Enables error-handling (On Error Resume Next).
- Creates an input box that returns a Range object (Type:=8) with the Application.InputBox method.
- Assigns the object reference returned by the Application.InputBox method to an object variable (Set myInputBoxRangeCancelVariable = Application.inputBox(…)).
- Disables error-handling (On Error GoTo 0).
- Checks whether user clicked Cancel (myInputBoxRangeCancelVariable Is Nothing).
- If the user clicked Cancel, displays a message box confirming this.
- If the user didn’t click Cancel, displays a message box with the range reference of the cell range represented by the variable (myInputBoxRangeCancelVariable.Address).
Sub CreateInputBoxMethodCellRangeCancel()
    'source: https://powerspreadsheets.com/
    '(1) creates an input box that works with cell ranges using the Application.InputBox method, and (2) handles case where user clicks Cancel button
    'for further information: https://powerspreadsheets.com/excel-vba-inputbox/

    'declare object variable to hold reference to Range object (cell range) returned by InputBox
    Dim myInputBoxRangeCancelVariable As Range

    'enable error-handling
    On Error Resume Next

    '(1) create InputBox that works with cell range, and (2) assign value returned by Application.InputBox method to variable
    Set myInputBoxRangeCancelVariable = Application.inputBox(Prompt:="Create Excel VBA InputBox that works with cell range and handles Cancel button", Type:=8)

    'disable error-handling
    On Error GoTo 0

    'check if user clicked Cancel button and, if appropriate, execute statements
    If myInputBoxRangeCancelVariable Is Nothing Then

        'display message box confirming that user clicked Cancel button
        MsgBox "You clicked the Cancel button"

    'if user didn't click Cancel button, execute statements
    Else

        'display message box with address of cell range represented by object variable
        MsgBox "Your input was: " & myInputBoxRangeCancelVariable.Address

    End If

End Sub
Effects of executing macro example to create InputBox and check if user clicks Cancel button when working with cell range and Application.InputBox method
The following GIF illustrates the results of executing the macro example. As expected:
- Excel displays an input box created with the Application.InputBox function. The InputBox allows the user to select a cell range.
- The macro identifies whether the user:
- Clicks the Cancel button; or
- Selects or otherwise enters an appropriate cell range.
- Excel displays the appropriate message box depending on the actions taken by the user.

| title | keywords | f1_keywords | ms.prod | api_name | ms.assetid | ms.date | ms.localizationpriority |
|---|---|---|---|---|---|---|---|
|
Application.InputBox method (Excel) |
vbaxl10.chm133149 |
vbaxl10.chm133149 |
excel |
Excel.Application.InputBox |
d3bd2f3a-7fed-20fa-918d-a71e2a2a1d49 |
04/05/2019 |
high |
Application.InputBox method (Excel)
Displays a dialog box for user input. Returns the information entered in the dialog box.
Syntax
expression.InputBox (Prompt, Title, Default, Left, Top, HelpFile, HelpContextID, Type)
expression A variable that represents an Application object.
Parameters
| Name | Required/Optional | Data type | Description |
|---|---|---|---|
| Prompt | Required | String | The message to be displayed in the dialog box. This can be a string, a number, a date, or a Boolean value (Microsoft Excel automatically coerces the value to a String before it is displayed). Maximum length is 255 characters, otherwise there is no prompt, and Application’s method immediately returns Error 2015. |
| Title | Optional | Variant | The title for the input box. If this argument is omitted, the default title is Input. |
| Default | Optional | Variant | Specifies a value that will appear in the text box when the dialog box is initially displayed. If this argument is omitted, the text box is left empty. This value can be a Range object. |
| Left | Optional | Variant | Specifies an x position for the dialog box in relation to the upper-left corner of the screen, in points. |
| Top | Optional | Variant | Specifies a y position for the dialog box in relation to the upper-left corner of the screen, in points. |
| HelpFile | Optional | Variant | The name of the Help file for this input box. If the HelpFile and HelpContextID arguments are present, a Help button will appear in the dialog box. |
| HelpContextID | Optional | Variant | The context ID number of the Help topic in HelpFile. |
| Type | Optional | Variant | Specifies the return data type. If this argument is omitted, the dialog box returns text. |
Return value
Variant
Remarks
The following table lists the values that can be passed in the Type argument. Can be one or a sum of the values. For example, for an input box that can accept both text and numbers, set Type to 1 + 2.
| Value | Description |
|---|---|
| 0 | A formula |
| 1 | A number |
| 2 | Text (a string) |
| 4 | A logical value (True or False) |
| 8 | A cell reference, as a Range object |
| 16 | An error value, such as #N/A |
| 64 | An array of values |
Use InputBox to display a simple dialog box so that you can enter information to be used in a macro. The dialog box has an OK button and a Cancel button. If you select the OK button, InputBox returns the value entered in the dialog box. If you select the Cancel button, InputBox returns False.
If Type is 0, InputBox returns the formula in the form of text; for example, =2*PI()/360. If there are any references in the formula, they are returned as A1-style references. (Use ConvertFormula to convert between reference styles.)
If Type is 8, InputBox returns a Range object. You must use the Set statement to assign the result to a Range object, as shown in the following example.
Set myRange = Application.InputBox(prompt := "Sample", type := 8)
If you don’t use the Set statement, the variable is set to the value in the range, rather than the Range object itself.
If you use the InputBox method to ask the user for a formula, you must use the FormulaLocal property to assign the formula to a Range object. The input formula will be in the user’s language.
The InputBox method differs from the InputBox function in that it allows selective validation of the user’s input, and it can be used with Excel objects, error values, and formulas. Notice that Application.InputBox calls the InputBox method; InputBox with no object qualifier calls the InputBox function.
Example
This example prompts the user for a number.
myNum = Application.InputBox("Enter a number")
This example prompts the user to select a cell on Sheet1. The example uses the Type argument to ensure that the return value is a valid cell reference (a Range object).
Worksheets("Sheet1").Activate
Set myCell = Application.InputBox( _
    prompt:="Select a cell", Type:=8)
This example uses an InputBox for the user to select a range to pass to the user-defined function MyFunction, which multiplies three values in a range together and returns the result.
Sub Cbm_Value_Select()
   'Set up the variables.
   Dim rng As Range

   'Use the InputBox dialog to set the range for MyFunction, with some simple error handling.
   Set rng = Application.InputBox("Range:", Type:=8)
   If rng.Cells.Count <> 3 Then
     MsgBox "Length, width and height are needed -" & _
         vbLf & "please select three cells!"
      Exit Sub
   End If

   'Call MyFunction by value using the active cell.
   ActiveCell.Value = MyFunction(rng)
End Sub

Function MyFunction(rng As Range) As Double
   MyFunction = rng(1) * rng(2) * rng(3)
End Function
[!includeSupport and feedback]