
Добавление изображений на элементы управления пользовательской формы. Свойство Picture. Привязка картинки в редакторе и из кода VBA Excel. Удаление изображения.
Свойство Picture есть у пользовательской формы и некоторых элементов управления: CheckBox, CommandButton, Frame, Image, Label, OptionButton, ToggleButton. Оно позволяет отобразить на этих объектах изображение с расширением jpg, bmp, gif.
Синтаксис
object.Picture = LoadPicture(«pathname»)
- object – пользовательская форма или подходящий элемент управления;
- pathname – полный путь к изображению.
Добавление изображений в редакторе VBA
Чтобы добавить картинку на форму или элемент управления в редакторе VBA Excel, необходимо в окне Properties выбранного объекта нажать кнопку с тремя точками в поле значений свойства Picture:

Откроется окно проводника, с помощью которого следует выбрать нужное изображение.
Картинка на элементе управления может использоваться вместо надписи или вместе с ней. За выравнивание изображения и положение надписи на объекте отвечает свойство PicturePosition. Подходящее значение свойства PicturePosition проще подобрать в окне Properties выбранного элемента управления.
Добавление изображений из кода VBA Excel
Пример кода VBA Excel, добавляющего надпись и изображение на элемент управления ToggleButton:
|
Private Sub UserForm_Initialize() With ToggleButton1 .Caption = «Кекс домашний» .Picture = LoadPicture(«C:PHOTOkeks.jpg») .PicturePosition = 4 End With End Sub |

Программное удаление изображения
Удаляется изображение из элемента управления в коде VBA Excel путем присвоения свойству Picture значения Nothing с помощью ключевого слова Set:
|
Set CommandButton1.Picture = Nothing |
Excel VBA UserForm Image
Image is one of the UserForm control. You can select and drag Image on the UserForm. You can select and drag Image on the UserForm. Image control embeds a picture such as a jpg, jpeg, gif, png, bitmap, etc. It can be used on the UserForm. You can see how it works and more details about Image Control.
- Load VBA Image_Control on the UserForm
- Add Dynamic Image_Control on the UserForm Using VBA
- Delete Image_Control on the UserForm using VBA
VBA Image_Control on the UserForm
Please find more details about VBA ActiveX Image_Control on the UserForm.
-
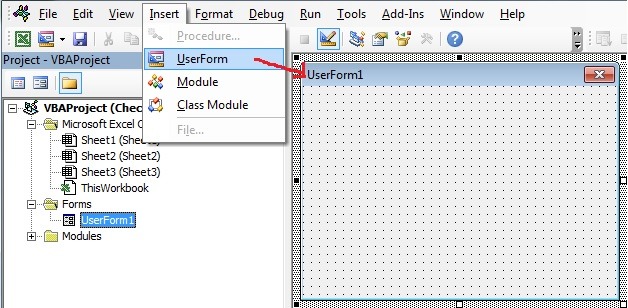
- Go To Developer Tab and then click Visual Basic from the Code or Press Alt+F11.
- Go To Insert Menu, Click UserForm. Please find the screenshot for the same.
-
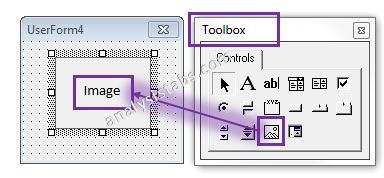
- Drag the Image_control on the Userform from the Toolbox. Please find the screenshot for the same.
-
- Click on the image_control properties.
- On the left side find ‘Picture’ from the available properties of the control.
- On the right side click on that, and select image from the source.
- On the left side find ‘PictureSizeMode’ from the available properties of the control.
- On the right side, select ‘1 – frmPictureSiseModeStretch’ from the available list.
- Now, Click ‘F5’ to see the output.
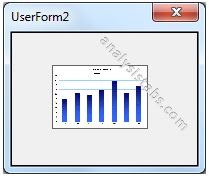
- Now, you can see the following output as shown below in the screen shot.
Add dynamic Image_Control on the UserForm using VBA
Please find the following steps and example code, it will show you how to add dynamic Image_control on the userform.
-
- Add Image and CommandButton on the userform from the toolbox.
- Right click on the CommandButton, click properties
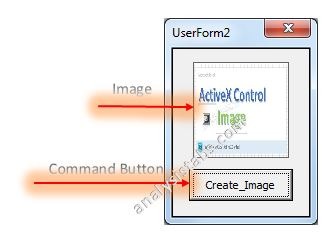
- Change the CommandButton caption to ‘Create_Image ’
- Double click on the CommandButton
- Now, it shows the following code.
Private Sub CommandButton1_Click()

End Sub
-
- Call the below procedure named ‘Add_Dynamic_Image ’ and find the below procedure to run.
Private Sub CommandButton1_Click()
    Call Add_Dynamic_Image
End Sub
Procedure to call in the CommandButton:
Sub Add_Dynamic_Image()
    'Add Dynamic Image and assign it to object 'Img'
    Set Img = UserForm2.Controls.Add("Forms.Image.1")

    With Img
        'Load Picture to Image Control
        .Picture = LoadPicture("C:Image  Excel ActiveX Control Object.jpg")  ‘Change Image Path here

        'Align the Picture Size
        .PictureSizeMode = fmPictureSizeModeStretch

        'Image Position
        .Left = 50
        .Top = 10
    End With
End Sub
-
- Now, click F5 to run the macro, click ‘Create_Image ’ button to see the result.
- You can see the created dynamic Image_control which is shown in the following screen shot.
output:
Delete Image_Control on the UserForm using VBA
Please find the below code, it will show you how to delete or remove the control on the UserForm. In the below example, its deleting the Image named ‘New Image’ which is on the UserForm named ‘UserForm4’. We can use Remove method to delete the controls which are created during run time. Controls which are created during design time cannot be deleted using this method. Please find the below example and screen shots for better understand.
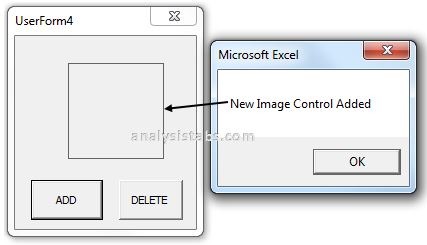
Code 1: Adding control During Run Time
Private Sub CommandButton1_Click()
    'We can use Add method to add the new controls on run time
    Set lblBtn = Me.Controls.Add("Forms.Image.1")
    With lblBtn
        .Top = 20
        .Left = 40
        .Name = "lblNew1"
    End With
    MsgBox "New Image Control Added"
End Sub
Please find the below screen shot for your reference for the above macro and its output.
When we click on Add Command Button:
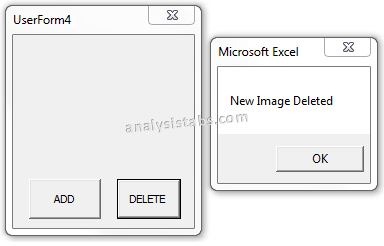
Code 1: Deleting or Removing Image_control which is created during run time.
Private Sub CommandButton2_Click()
    'We can use Remove method to delete the controls which are created during run time
    'Note: Controls which are created on design time cannot be deleted using this method
    Me.Controls.Remove ("lblNew1")
    MsgBox "Image Control Deleted"
End Sub
Please find the below screen shot for your reference for the above macro and its output.
When we click on Delete Command Button:
A Powerful & Multi-purpose Templates for project management. Now seamlessly manage your projects, tasks, meetings, presentations, teams, customers, stakeholders and time. This page describes all the amazing new features and options that come with our premium templates.
Save Up to 85% LIMITED TIME OFFER

All-in-One Pack
120+ Project Management Templates
Essential Pack
50+ Project Management Templates
Excel Pack
50+ Excel PM Templates
PowerPoint Pack
50+ Excel PM Templates
MS Word Pack
25+ Word PM Templates
Ultimate Project Management Template
Ultimate Resource Management Template
Project Portfolio Management Templates
-
-
- In this topic:
-
- VBA Image_Control on the UserForm
- Add dynamic Image_Control on the UserForm using VBA
-
- Procedure to call in the CommandButton:
-
- Delete Image_Control on the UserForm using VBA
VBA Reference
Effortlessly
Manage Your Projects
120+ Project Management Templates
Seamlessly manage your projects with our powerful & multi-purpose templates for project management.
120+ PM Templates Includes:
Effectively Manage Your
Projects and Resources
ANALYSISTABS.COM provides free and premium project management tools, templates and dashboards for effectively managing the projects and analyzing the data.
We’re a crew of professionals expertise in Excel VBA, Business Analysis, Project Management. We’re Sharing our map to Project success with innovative tools, templates, tutorials and tips.
Project Management
Excel VBA
Download Free Excel 2007, 2010, 2013 Add-in for Creating Innovative Dashboards, Tools for Data Mining, Analysis, Visualization. Learn VBA for MS Excel, Word, PowerPoint, Access, Outlook to develop applications for retail, insurance, banking, finance, telecom, healthcare domains.
Page load link

3 Realtime VBA Projects
with Source Code!
Go to Top
Здравствуйте. Суть в следующем, на Userform создается бокс Image где в процессе использования картинка должна будет меняться в зависимости от вводных данных.
Первый способ который я нашёл это загрузка картинки из указанной папки каждый раз когда используется форма
[vba]
Код
Me.Image1.Picture = LoadPicture(«Адрес к файлу»)
[/vba]
Минус такого способа в том, что папка с файлами должны оставаться в одном месте, а при переносе на другой ПК её вовсе можно забыть скопировать.
Второй вариант, вставить все картинки в Image через окно Properties, команду Picture, и спрятать за границей формы.
Картинки тогда сохраняются в форме и надобность во внешних файлах отпадает, можно просто прописать макросом копировать картинки из спрятанных Image в рабочие.
Но когда картинок много, то выходит нужно с начала каждую отдельно загрузить в Image, затем переименовать его чтоб упрастить поиск нужной картинки, что вылевается в очень долгий процесс.
И вот тут возникает вопрос: есть ли способ загружать в форму картинки, сохранённые на листах?
Well, after searching with google, I found this solution:
For the example you will need:
+----------------+----------------+
| Control        | Name           |
+----------------+----------------+
| User Form      | UserForm1      |
| Image          | Image1         |
| Command Button | CommandButton1 |
+----------------+----------------+
And 2 normal modules, and I use this Names:
+---------------+
| Module Names  |
+---------------+
| Functions_VBA |
| Image_Job     |
+---------------+
Inside the UserForm1 use this code:
Option Explicit

Private Sub CommandButton1_Click()
    Paste_ThePicture 'I will explain later...
     Me.Image1.Picture = LoadPicture(thePath) 'Just this... load the picture
     'If you want to delete the picture from directory
     'Uncomment this:
     'Kill thePath
End Sub
Inside the Image_Job Module put this:
Option Explicit
Public thePath As String

Sub Paste_ThePicture() 'The procedure inside UserForm1
Dim fname As String
Dim objPicture As Variant

    With ActiveSheet.Shapes("Picture 1") 'The name of the picture inside the excel sheet
                                         'you can loop over the pictures or do somenthing
                                         'to take the picture you want
        .CopyPicture xlScreen, xlBitmap
        Set objPicture = PastePicture(xlBitmap) 'Store the picture inside the var
        fname = ThisWorkbook.Path & "" & .Name & ".bmp" 'Create the path for the picture full path
    End With
    thePath = fname 'Store the full path to use it later
SavePicture objPicture, fname 'save the picture in the directory
                              'you can delete it later
                              'Look inside the userForm code
End Sub
And the magic come heres! Inside the Functions_VBA put this:
Option Explicit
Option Compare Text

''' User-Defined Types for API Calls
'Declare a UDT to store a GUID for the IPicture OLE Interface
Private Type GUID
    Data1 As Long
    Data2 As Integer
    Data3 As Integer
    Data4(0 To 7) As Byte
End Type
'Declare a UDT to store the bitmap information
Private Type uPicDesc
    Size As Long
    Type As Long
    hPic As Long
    hPal As Long
End Type

'''Windows API Function Declarations
'Does the clipboard contain a bitmap/metafile?

Private Declare Function IsClipboardFormatAvailable Lib "user32" (ByVal wFormat As Integer) As Long
'Open the clipboard to read
Private Declare Function OpenClipboard Lib "user32" (ByVal hwnd As Long) As Long
'Get a pointer to the bitmap/metafile
Private Declare Function GetClipboardData Lib "user32" (ByVal wFormat As Integer) As Long
'Close the clipboard
Private Declare Function CloseClipboard Lib "user32" () As Long
'Convert the handle into an OLE IPicture interface.
Private Declare Function OleCreatePictureIndirect Lib "olepro32.dll" (PicDesc As uPicDesc, RefIID As GUID, ByVal fPictureOwnsHandle As Long, IPic As IPicture) As Long
'Create our own copy of the metafile, so it doesn't get wiped out by subsequent clipboard updates.
Declare Function CopyEnhMetaFile Lib "gdi32" Alias "CopyEnhMetaFileA" (ByVal hemfSrc As Long, ByVal lpszFile As String) As Long
'Create our own copy of the bitmap, so it doesn't get wiped out by subsequent clipboard updates.
Declare Function CopyImage Lib "user32" (ByVal handle As Long, ByVal un1 As Long, ByVal n1 As Long, ByVal n2 As Long, ByVal un2 As Long) As Long
'The API format types we're interested in
Const CF_BITMAP = 2
Const CF_PALETTE = 9
Const CF_ENHMETAFILE = 14
Const IMAGE_BITMAP = 0
Const LR_COPYRETURNORG = &H4
''''''''''''''''''''''''''''''''''''''''''''''''''''''''''''''''''''''''''''''''''''''''''''''''''
''' Subroutine: PastePicture
'''
''' Purpose:    Get a Picture object showing whatever's on the clipboard.
'''
''' Arguments:  lXlPicType - The type of picture to create.  Can be one of:
'''                          xlPicture to create a metafile (default)
'''                          xlBitmap to create a bitmap
'''
''' Date        Developer           Action
''' --------------------------------------------------------------------------
''' 30 Oct 98   Stephen Bullen      Created
''' 15 Nov 98   Stephen Bullen      Updated to create our own copies of the clipboard images
'''

Function PastePicture(Optional lXlPicType As Long = xlPicture) As IPicture
'Some pointers
Dim h As Long, hPicAvail As Long, hPtr As Long, hPal As Long, lPicType As Long, hCopy As Long
'Convert the type of picture requested from the xl constant to the API constant
lPicType = IIf(lXlPicType = xlBitmap, CF_BITMAP, CF_ENHMETAFILE)
'Check if the clipboard contains the required format
hPicAvail = IsClipboardFormatAvailable(lPicType)
If hPicAvail <> 0 Then
    'Get access to the clipboard
    h = OpenClipboard(0&)
    If h > 0 Then
        'Get a handle to the image data
        hPtr = GetClipboardData(lPicType)
        'Create our own copy of the image on the clipboard, in the appropriate format.
        If lPicType = CF_BITMAP Then
            hCopy = CopyImage(hPtr, IMAGE_BITMAP, 0, 0, LR_COPYRETURNORG)
        Else
            hCopy = CopyEnhMetaFile(hPtr, vbNullString)
        End If
        'Release the clipboard to other programs
        h = CloseClipboard
        'If we got a handle to the image, convert it into a Picture object and return it
        If hPtr <> 0 Then Set PastePicture = CreatePicture(hCopy, 0, lPicType)
    End If
End If
End Function

''''''''''''''''''''''''''''''''''''''''''''''''''''''''''''''''''''''''''''''''''''''''''''''''''
''' Subroutine: CreatePicture
'''
''' Purpose:    Converts a image (and palette) handle into a Picture object.
'''
'''             Requires a reference to the "OLE Automation" type library
'''
''' Arguments:  None
'''
''' Date        Developer           Action
''' --------------------------------------------------------------------------
''' 30 Oct 98  Stephen Bullen      Created
'''

Private Function CreatePicture(ByVal hPic As Long, ByVal hPal As Long, ByVal lPicType) As IPicture

' IPicture requires a reference to "OLE Automation"
Dim r As Long, uPicInfo As uPicDesc, IID_IDispatch As GUID, IPic As IPicture

'OLE Picture types
Const PICTYPE_BITMAP = 1
Const PICTYPE_ENHMETAFILE = 4
' Create the Interface GUID (for the IPicture interface)
With IID_IDispatch
    .Data1 = &H7BF80980
    .Data2 = &HBF32
    .Data3 = &H101A
    .Data4(0) = &H8B
    .Data4(1) = &HBB
    .Data4(2) = &H0
    .Data4(3) = &HAA
    .Data4(4) = &H0
    .Data4(5) = &H30
    .Data4(6) = &HC
    .Data4(7) = &HAB
End With
' Fill uPicInfo with necessary parts.
With uPicInfo
    .Size = Len(uPicInfo)                                                   ' Length of structure.
    .Type = IIf(lPicType = CF_BITMAP, PICTYPE_BITMAP, PICTYPE_ENHMETAFILE)  ' Type of Picture
    .hPic = hPic                                                            ' Handle to image.
    .hPal = IIf(lPicType = CF_BITMAP, hPal, 0)                              ' Handle to palette (if bitmap).
End With
' Create the Picture object.
r = OleCreatePictureIndirect(uPicInfo, IID_IDispatch, True, IPic)
' If an error occured, show the description
If r <> 0 Then Debug.Print "Create Picture: " & fnOLEError(r)
' Return the new Picture object.
Set CreatePicture = IPic
End Function
''''''''''''''''''''''''''''''''''''''''''''''''''''''''''''''''''''''''''''''''''''''''''''''''''
''' Subroutine: fnOLEError
'''
''' Purpose:    Gets the message text for standard OLE errors
'''
''' Arguments:  None
'''
''' Date        Developer           Action
''' --------------------------------------------------------------------------
''' 30 Oct 98   Stephen Bullen      Created
'''

Private Function fnOLEError(lErrNum As Long) As String
'OLECreatePictureIndirect return values
Const E_ABORT = &H80004004
Const E_ACCESSDENIED = &H80070005
Const E_FAIL = &H80004005
Const E_HANDLE = &H80070006
Const E_INVALIDARG = &H80070057
Const E_NOINTERFACE = &H80004002
Const E_NOTIMPL = &H80004001
Const E_OUTOFMEMORY = &H8007000E
Const E_POINTER = &H80004003
Const E_UNEXPECTED = &H8000FFFF
Const S_OK = &H0
Select Case lErrNum
Case E_ABORT
    fnOLEError = " Aborted"
Case E_ACCESSDENIED
    fnOLEError = " Access Denied"
Case E_FAIL
    fnOLEError = " General Failure"
Case E_HANDLE
    fnOLEError = " Bad/Missing Handle"
Case E_INVALIDARG
    fnOLEError = " Invalid Argument"
Case E_NOINTERFACE
    fnOLEError = " No Interface"
Case E_NOTIMPL
    fnOLEError = " Not Implemented"
Case E_OUTOFMEMORY
    fnOLEError = " Out of Memory"
Case E_POINTER
    fnOLEError = " Invalid Pointer"
Case E_UNEXPECTED
    fnOLEError = " Unknown Error"
Case S_OK
    fnOLEError = " Success!"
End Select
End Function
With all that, you will:
Open the UserForm1 and click the CommandButton1 this will take from the ActiveSheet the shape name «Picture 1» (it is your picture) and Save it in the same path of the Workbook, after that, take that path (the stored picture) and insert it into Image1.
If you want you can delete the picture from the path.
I try to take the picture directly from the clipboard, but I don not know if that is possible, if you can do it, please let me know how you did it, by now this is my help in your question.
Note: I take the magic code from here: Stephen Bullen
Добавить растровое
изображение можно непосредственно в
форму или в элементы управления Image.
Для добавления изображения в форму
нужно выполнить следующие действия:
1) создать новый
проект и присвоить ему имя. Для заголовка
формы задать название, например «Растровая
графика» (свойство Caption);
2) добавить в форму
элемент управления Image;
3) установить
размеры и положение элементов управления
Image,
как показано на рисунке 55;


Рисунок 55 – Проект
формы «Растровая графика»
4) выделить форму.
Обратиться к свойству Picture
в окне “Properties”
(Свойства). Открыть диалоговое окно
“LoadPicture”
(Загрузка рисунка), показанное на рисунке
56

Рисунок 56 –
Диалоговое окно «Загрузка рисунка»
5) в диалоговом
окне “LoadPicture”
перейти в каталог Windows
(или в другой каталог) и отыскать файл
с расширением *.bmp,
а затем щелкнуть мышью по кнопке
<Открыть>. На месте вставки рисунка
в форме появится изображение;
6) для свойства
AutoSize
объекта Image1
установить значение True.
Размеры окна Image1
будут приведены к размерам рисунка;
7) сохранить проект
и запустить программу. Внешний вид формы
после запуска программы будет выглядеть
подобно изображению на рисунке 57.

Рисунок 57 – Внешний
вид формы
3.6.2 Вставка изображений в форму
Ранее рассматривался
пример добавления растровых графических
изображений в форму во время проектирования.
Функция LoadPicture
позволяет делать добавление изображений
в форму во время выполнения программы.
Синтаксис:
NamePicture
= LoadPicture
(FilePath)
где
NamePicture
– имя элемента управления типа Image;
LoadPicture
– имя функции;
FilePath
– строковая переменная или константа,
которая
содержит
путь к файлу с графическим изображением.
Пример 1.
Постановка
задачи.
Создать приложение, в котором, щелкая
кнопкой мыши на элементах управления
OptionButton
(Переключатели), можно менять графические
изображения в окне Image
(рисунок 58).
Технология
выполнения задания:
1 Конструирование
проекта.
Процесс
программирования приложения Рисунок
предусмотрен тремя этапами, как показано
в таблице 46.
Таблица 46 — Этапы
программирования
|
Этапы |
Число |
|
1 |
5 |
|
2 |
5 |
|
3 |
4 |
При помощи окна
Properties
установить значения свойств Name
и Caption
полей элементов управления следующим
образом, как показано в таблице 47.
Таблица 47 – Свойства
элементов управления
|
Элемент управления |
Свойство |
Значение |
Примечание |
|
Переключатель |
Name Caption |
OptionButton1 |
Рисунок 1 |
|
Переключатель |
Name Caption |
OptionButton2 |
Рисунок 2 |
|
Переключатель |
Name Caption |
OptionButton3 |
Рисунок 3 |
|
Командная кнопка |
Name Caption |
CommandButton1 |
End |
|
Рисунок |
Name |
Image1 |
Рисунок |
2 В модуле формы
набрать следующий код, изображенный на
рисунке 59.
Лабораторная
работа № 13
Разработка
пользовательского приложения с помощью
объекта: Рисунок
Цель: приобретение
навыков разработки пользовательского
приложение с помощью объекта формы VBA
– рисунок. Лабораторная работа № 13
выполняется согласно вышеописанной
технологии. Рисунок выбирается студентом
самостоятельно (2 часа).

Рисунок 58 – Окно
приложения Рисунок

Рисунок 59 –
Программный код
Соседние файлы в предмете [НЕСОРТИРОВАННОЕ]
- #
- #
- #
- #
- #
- #
- #
- #
- #
- #
- #