
Элемент управления пользовательской формы ListBox для выбора и ввода информации в VBA Excel. Свойства списка, его заполнение, извлечение данных, примеры кода.

UserForm.ListBox – это элемент управления пользовательской формы, предназначенный для передачи в код VBA информации, выбранной пользователем из одностолбцового или многостолбцового списка.
Список используется в тех случаях, когда необходимо добавить в форму информацию, которая заранее известна, а ее отдельные позиции можно сгруппировать в список. Элемент управления ListBox оправдывает себя при небольших списках, так как большой список будет занимать много места на форме.
Использование полос прокрутки уменьшает преимущество ListBox перед элементом управления ComboBox, которое заключается в том, что при открытии формы все позиции для выбора на виду без дополнительных действий со стороны пользователя. При выборе информации из большого списка удобнее использовать ComboBox.
Элемент управления ListBox позволяет выбрать несколько позиций из списка, но эта возможность не имеет практического смысла. Ввести информацию в ListBox с помощью клавиатуры или вставить из буфера обмена невозможно.
Свойства списка
| Свойство | Описание |
|---|---|
| ColumnCount | Указывает количество столбцов в списке. Значение по умолчанию = 1. |
| ColumnHeads | Добавляет строку заголовков в ListBox. True – заголовки столбцов включены, False – заголовки столбцов выключены. Значение по умолчанию = False. |
| ColumnWidths | Ширина столбцов. Значения для нескольких столбцов указываются в одну строку через точку с запятой (;). |
| ControlSource | Ссылка на ячейку для ее привязки к элементу управления ListBox. |
| ControlTipText | Текст всплывающей подсказки при наведении курсора на ListBox. |
| Enabled | Возможность выбора элементов списка. True – выбор включен, False – выключен*. Значение по умолчанию = True. |
| Font | Шрифт, начертание и размер текста в списке. |
| Height | Высота элемента управления ListBox. |
| Left | Расстояние от левого края внутренней границы пользовательской формы до левого края элемента управления ListBox. |
| List | Позволяет заполнить список данными из одномерного или двухмерного массива, а также обращаться к отдельным элементам списка по индексам для записи и чтения. |
| ListIndex | Номер выбранной пользователем строки. Нумерация начинается с нуля. Если ничего не выбрано, ListIndex = -1. |
| Locked | Запрет возможности выбора элементов списка. True – выбор запрещен**, False – выбор разрешен. Значение по умолчанию = False. |
| MultiSelect*** | Определяет возможность однострочного или многострочного выбора. 0 (fmMultiSelectSingle) – однострочный выбор, 1 (fmMultiSelectMulti) и 2 (fmMultiSelectExtended) – многострочный выбор. |
| RowSource | Источник строк для элемента управления ListBox (адрес диапазона на рабочем листе Excel). |
| TabIndex | Целое число, определяющее позицию элемента управления в очереди на получение фокуса при табуляции. Отсчет начинается с 0. |
| Text | Текстовое содержимое выбранной строки списка (из первого столбца при ColumnCount > 1). Тип данных String, значение по умолчанию = пустая строка. |
| TextAlign | Выравнивание текста: 1 (fmTextAlignLeft) – по левому краю, 2 (fmTextAlignCenter) – по центру, 3 (fmTextAlignRight) – по правому краю. |
| Top | Расстояние от верхнего края внутренней границы пользовательской формы до верхнего края элемента управления ListBox. |
| Value | Значение выбранной строки списка (из первого столбца при ColumnCount > 1). Value – свойство списка по умолчанию. Тип данных Variant, значение по умолчанию = Null. |
| Visible | Видимость списка. True – ListBox отображается на пользовательской форме, False – ListBox скрыт. |
| Width | Ширина элемента управления. |
* При Enabled в значении False возможен только вывод информации в список для просмотра.
** Для элемента управления ListBox действие свойства Locked в значении True аналогично действию свойства Enabled в значении False.
*** Если включен многострочный выбор, свойства Text и Value всегда возвращают значения по умолчанию (пустая строка и Null).
В таблице перечислены только основные, часто используемые свойства списка. Еще больше доступных свойств отображено в окне Properties элемента управления ListBox, а все методы, события и свойства – в окне Object Browser.
Вызывается Object Browser нажатием клавиши «F2». Слева выберите объект ListBox, а справа смотрите его методы, события и свойства.
Свойства BackColor, BorderColor, BorderStyle отвечают за внешнее оформление списка и его границ. Попробуйте выбирать доступные значения этих свойств в окне Properties, наблюдая за изменениями внешнего вида элемента управления ListBox на проекте пользовательской формы.
Способы заполнения ListBox
Используйте метод AddItem для загрузки элементов в список по одному:
|
With UserForm1.ListBox1 .AddItem «Значение 1» .AddItem «Значение 2» .AddItem «Значение 3» End With |
Используйте свойство List, чтобы скопировать одномерный массив значений в элемент управления ListBox.
|
UserForm1.ListBox1.List = Array(«Текст 1», _ «Текст 2», «Текст 3», «Текст 4», «Текст 5») |
Вместо функции Array можно использовать переменные одномерных и двухмерных массивов. При загрузке значений из двухмерного массива, требуется предварительно указать количество столбцов в списке.
Используйте свойство RowSource, чтобы загрузить в список значения из диапазона ячеек рабочего листа:
|
UserForm1.ListBox1.RowSource = «Лист1!A1:A6» |
При загрузке данных из диапазона, содержащего более одного столбца, требуется предварительно указать количество столбцов в списке:
|
With UserForm1.ListBox1 ‘Указываем количество столбцов .ColumnCount = 5 .RowSource = «‘Лист со списком’!A1:E10» End With |
В качестве имени листа используется имя ярлыка. Если имя листа содержит пробелы, оно заключается в одинарные кавычки.
Подробнее о заполнении элемента управления ListBox вы можете ознакомиться в отдельной статье с наглядными примерами.
Привязка списка к ячейке
Для привязки списка к ячейке на рабочем листе используется свойство ControlSource. Суть привязки заключается в том, что при выборе строки в элементе управления, значение свойства Value копируется в привязанную ячейку.
Если привязанная к списку ячейка содержит значение одной из строк элемента управления ListBox, то при запуске пользовательской формы список откроется с выделенной строкой, содержащей это значение. Если привязанная ячейка при загрузке формы пустая, то список откроется без выделения какой-либо строки.
В случае, когда при открытии формы в привязанной к списку ячейке содержится значение, которого нет ни в одной из строк элемента управления ListBox, будет сгенерирована ошибка.
Привязать ячейку к списку можно, указав адрес ячейки в поле свойства ControlSource в окне Properties элемента управления ListBox. Или присвоить адрес ячейки свойству ControlSource в коде VBA Excel:
|
UserForm1.ListBox1.ControlSource = «Лист1!A2» |
Теперь значение выбранной строки в списке автоматически копируется в ячейку «A2» на листе «Лист1»:

В окне Properties адрес указывается без двойных кавычек. Если имя листа содержит пробелы, оно заключается в одинарные кавычки.
Извлечение информации из списка
Первоначально элемент управления ListBox открывается со строками, ни одна из которых не выбрана. При выборе (выделении) строки, ее значение записывается в свойства Value и Text.
Из этих свойств мы с помощью кода VBA Excel извлекаем информацию, выбранную в списке пользователем:
|
Dim myVar as Variant, myTxt As String myVar = UserForm1.ListBox1.Value ‘или myTxt = UserForm1.ListBox1.Text |
Вторую строку кода можно записать myVar = UserForm1.ListBox1, так как Value является свойством списка по умолчанию.
Если ни одна позиция в списке не выбрана, свойство Value возвращает значение Null, а свойство Text – пустую строку. Если выбрана строка в многостолбцовом списке, в свойства Value и Text будет записана информация из первого столбца.
Что делать, если понадобятся данные из других столбцов многостолбцового списка, кроме первого?
Для получения данных из любого столбца элемента управления ListBox используется свойство List, а для определения выбранной пользователем строки – ListIndex.
Для тестирования приведенного ниже кода скопируйте таблицу и вставьте ее в диапазон «A1:D4» на листе с ярлыком «Лист1»:
| Звери | Лев | Тапир | Вивера |
| Птицы | Грач | Сорока | Филин |
| Рыбы | Карась | Налим | Парусник |
| Насекомые | Оса | Жук | Муравей |
Создайте в редакторе VBA Excel пользовательскую форму и добавьте на нее список с именем ListBox1. Откройте модуль формы и вставьте в него следующие процедуры:
|
Private Sub UserForm_Initialize() With Me.ListBox1 ‘Указываем, что у нас 4 столбца .ColumnCount = 4 ‘Задаем размеры столбцов .ColumnWidths = «50;50;50;50» ‘Импортируем данные .RowSource = «Лист1!A1:D4» ‘Привязываем список к ячейке «F1» .ControlSource = «F1» End With End Sub Private Sub UserForm_Click() MsgBox Me.ListBox1.List(Me.ListBox1.ListIndex, 2) End Sub |
В процедуре UserForm_Initialize() присваиваем значения некоторым свойствам элемента управления ListBox1 перед открытием пользовательской формы. Процедура UserForm_Click() при однократном клике по форме выводит в MsgBox значение из третьего столбца выделенной пользователем строки.

Теперь при выборе строки в списке, значение свойства Value будет записываться в ячейку «F1», а при клике по форме функция MsgBox выведет значение третьего столбца выделенной строки.
Обратите внимание, что при первом запуске формы, когда ячейка «F1» пуста и ни одна строка в ListBox не выбрана, клик по форме приведет к ошибке. Это произойдет из-за того, что свойство ListIndex возвратит значение -1, а это недопустимый номер строки для свойства List.
Если для списка разрешен многострочный выбор (MultiSelect = fmMultiSelectMulti или MultiSelect = fmMultiSelectExtended), тогда, независимо от количества выбранных строк, свойство Value будет возвращать значение Null, а свойство Text – пустую строку. Свойство ListIndex будет возвращать номер строки, которую кликнули последней, независимо от того, что это было – выбор или отмена выбора.
Иногда перед загрузкой в ListBox требуется отобрать уникальные элементы из имеющегося списка. Смотрите, как это сделать с помощью объектов Collection и Dictionary.
Элемент управления ListBox vba позволяет добавлять список с данными на форму. В отличии от комбинированного списка ComboBox, ListBox имеет следующие отличия:
- Тут нельзя вводить собственные значения, а лишь любоваться теми, что были добавлены изначально
- Есть возможность выбирать сразу несколько значений.
Хорошо, прежде чем продолжить, вспоминаем – для запуска редактора VBA служит комбинация клавиш Alt + F11, все элементы управления находятся в окне ToolBox (меню Insert, пункт ToolBox). Вот некоторые свойства для объекта ListBox:
ColumnCount – позволяет задать количество столбиков в списке
ColumnHeads – позволяет задать режим отображения заголовков для колонок: true – заголовки отображаются, false – заголовки не отображаются. Данное свойство актуально при использовании компонента vba ListBox в Exel.
ColumnWidths – свойство определяет ширину колонок, например, “20;30;15”. Как видим, значение строковое, тут мы задали ширину для трех столбиков, если мы зададим ноль, то столбик не будет отображаться.
TextColumn – содержит целое значение, определяющее, содержимое которого столбца должно возвращать свойство Text.
BoundColumn — содержит целое значение, определяющее, содержимое которого столбца должно возвращать свойство Value.
Если для TextColumn и BoundColumn прописать 0, то будет возвращаться номер выбранного значения в списке объекта ListBox VBA языка.
Если вам надо вывести значение для заданного столбика, то надо просто прописать свойство Column задав после него в круглых скобках числовой индекс. Как все это работает, я покажу на примере дальше.
MultiSelect – позволяет определить, как происходит выбор элементов: 0 – fmMultuSelectSingle (только одиночный выбор), 1 — fmMultuSelectMulti (возможность выбирать несколько элементов щелчком мыши или посредством нажатия клавиши “Пробел”), 2 — fmMultuSelectExtended (возможность выбирать несколько элементов посредством нажатия клавиши “Shift”).
VBA Excel ListBox

Теперь надо попрактиковаться, напишем пример использования компонента VBA ListBox в Excel. Но прежде всего, надо заполнить четыре столбика различными данными. Я создал книгу в Excel и заполнил первые четыре столбика такими данными:
- A – первое поле Автомобиль (оно будет служить заголовком), далее следуют марки автомобилей.
- B – первое поле Телефон (оно будет служить заголовком), далее следуют модели телефона Samsung.
- C – первое поле Компьютер (оно будет служить заголовком), далее следуют марки производителей PC.
- D – первое поле Напиток (оно будет служить заголовком), далее следуют марки напитков.
Хорошо, таблицу в Excel мы сделали, теперь можно приступить к работе с проектом. И так, добавьте в проект новый модуль и форму.
Внешний вид формы вы можете увидеть на рисунке. На форме должны быть расположены два элемента управления vba excel ListBox, три элемента TextBox и одна кнопка (CommandButton). Первый список будет содержать четыре столбца, в которых будет отображаться содержимое первых пятидесяти ячеек для A, B, C и D. Второй список будет содержать также все 4 столбика, но отображаться будет только первый. При нажатии на кнопку, произойдет считывание выбранного элемента во втором списке, и в текстовых полях отобразится содержимое для второй, третьей и четвертой колонки.

Чтобы не путать все еще больше, приступим к практике:
Private Sub UserForm_Initialize()
    With ListBox1
        .ColumnHeads = True
        .ColumnCount = 4
        .ColumnWidths = "60;80;60;30"
        .RowSource = "=A2:D50"
        .MultiSelect = fmMultiSelectSingle
        .TextColumn = 1
        .BoundColumn = 0
    End With

    With ListBox2
        .ColumnHeads = False
        .ColumnCount = 4
        .ColumnWidths = "60;0;0;0"
        .RowSource = "=A2:D50"
        .MultiSelect = fmMultiSelectSingle
        .TextColumn = 0
        .BoundColumn = 0
    End With
End Sub

Private Sub CommandButton1_Click()
    If ListBox2.Value <> "" Then
        TextBox1.Value = ListBox2.Column(1)
        TextBox2.Value = ListBox2.Column(2)
        TextBox3.Value = ListBox2.Column(3)
    End If
End Sub

UserForm_Initialize – настройка данных при инициализации формы (UserForm). Тут происходит настройка свойств для первого и второго объекта ListBox vba языка:
ListBox1 – будет отображаться заголовок, компонент содержит четыре колонки, их ширина: 60;80;60;30. Данные в список будут добавляться из диапазона A2:D50, присутствует возможность выделять только один элемент в списке.
ListBox2 – тут практически все тоже самое, что и для первого списка, только ширина колонок: 60;0;0;0 – то есть, будет отображаться содержимое только первой колонки.
CommandButton1_Click – тут происходит обработка щелчка по кнопке, а именно: происходит проверка, выбрано ли что-то во втором списке (vba excel ListBox), если да, то в первое текстовое поле запишется содержимое из второй колонки, во второе – из третей и в третье – из четвертой.
The VBA ListBox is a very useful control. If you are creating any kind of UserForm application you will most likely use it.
In this post, I’m going to show you everything you need to know about the VBA ListBox so you can avoid the common pitfalls and get up and running quickly and easily.

What is the VBA ListBox used for?
The ListBox is used to display a list of items to the user so that the user can then select one or more. The ListBox can have multiple columns and so it is useful for tasks like displaying records.
VBA ListBox versus the VBA ComboBox
The ListBox is very similar to the ComboBox which also allows the user to select an item from a list of items. The main differences are:
- The Listbox allows multiple selections. The Combobox only allows one selection.
- Items in the ListBox are always visible. The Combobox items are only visible when you click on the “down” icon.
- The ComboBox has the ability to filter the contents when you type.
The VBA ListBox Properties Quick Guide
| Function | Operation | Example |
|---|---|---|
| AddItem | Add an item | listbox.AddItem «Spain» |
| Clear | Remove all Items | listbox.Clear |
| ColumnCount | Set the number of visible columns | ComboBox1.ColumnCount = 2 |
| ColumnHeads | Make the column row visible | ComboBox1.ColumnHeads = True |
| List | Range to Listbox ListBox to Range |
Listbox.List = Range(«A1:A4»).Value Range(«A1:A4»).Value = Listbox.List |
| List | Update a column value | Listbox.List(1,2) = «New value» |
| ListCount | Get the number of items | cnt = listbox.ListCount |
| ListIndex | Get/set selected item | Idx = listbox.ListIndex combo.ListIndex = 0 |
| RemoveItem | Remove an item | listbox.Remove 1 |
| RowSource | Add a range of values from a worksheet | ComboBox1.RowSource = Sheet1.Range(«A2:B3»).Address |
| Value | Get the value of selected Item | Dim sCountry As String sCountry = listbox.Value |
How to Add Items to the ListBox
There are 3 ways to add items to the VBA Listbox:
- One at a time using the AddItem property.
- Adding an array/range using the List property.
- Adding a Range using the RowSource property.
The List and RowSource properties are the most commonly used. The table below provides a quick comparison of these properties:
| Task | RowSource | List |
|---|---|---|
| Column Headers | Yes | No |
| Update values in ListBox | No | Yes |
| Add new items | No | Yes |
| Data type | Range | Array(including Range.Value) |
| If source data changes | Listbox is automatically updated. | ListBox is not updated. |
VBA ListBox List Property
The List property allows you to add to contents of an array to a ListBox. As Range.Value is an array you can copy the contents of any range to the Listbox.
Here are some examples of using the List property:
' Add the contents of an array
ListBox1.List = Array("Apple", "Orange", "Banana")

' Add the contents of a Range
ListBox1.List = Range("A1:E5").Value
You can also use the List property to write from the ListBox to an array or range:
Range("A1:B3").Value = ListBox1.List
Important Note: If there is only one item in a range then VBA doesn’t covert it to an array. Instead, it converts the range to a string/double/date etc.
Sheet1.Range("A1:A2").Value ' Array
Sheet1.Range("A1").Value ' Single value variable
In this case, you need to use AddItem to add the value to the ListBox:
 If myRange.Count = 1 Then
    ListBox1.AddItem myRange
 Else
    ListBox1.List = myRange.Value
 End If
The List Property and Column Headers
The ListBox only displays column headers if you use RowSource. Otherwise, they are not available. The best way to add column headers(and it’s not a great way) is to add Labels above the ListBox columns. One advantage is that you can use the click event of the Label if you want to implement something like sorting.
Updating Items using the List Property
You can update individual items in the ListBox using the List Property.
Imagine we have a ListBox with data like this:

If we want to change Nelson in row 3, column 2 we do it like this:
ListBox1.List(2, 1) = "SMITH"
The result we get is:

The List property rows and columns are zero-based so this means row 1 is 0, row 2 is 1, row 3 is 2 and so on:

VBA ListBox RowSource
The RowSource property allows us to add a range to the ListBox. This is different from the List Property in that the Range is linked to the ListBox. If data in the Range changes then the data in the ListBox will update automatically.
When we use RowSource the data in the ListBox is read-only. We can change the RowSource range but we cannot change the values in the ListBox.
How to use RowSource
We add the RowSource range as a string like this:
ListBox1.RowSource = "Sheet1!A1:A5"
If you don’t specify the sheet the VBA will use the active sheet
ListBox1.RowSource = "A1:A5"
If you are using the Address of a range object with RowSource then it is important to use the External parameter. This will ensure that RowSource will read from the sheet of the range rather than the active sheet:
 ' Get the range
 Dim rg As Range
 Set rg = Sheet1.Range("A1:A5")

 ' Address will be $A$1:$A$5 which will use the active sheet
 ListBox1.RowSource = rg.Address
 Debug.Print ListBox1.RowSource

 ' Address will be [Book2]Sheet1!$A$1:$A$5 which will use Sheet1
 ListBox1.RowSource = rg.Address(External:=True)
 Debug.Print ListBox1.RowSource
RowSource Column Headers
Column headers are automatically added to the ListBox when you use the RowSource property. The ColumnHeads property must be set to True or the headers will not appear. You can set this property in the code or in the properties window of the ListBox.
ListBox1.ColumnHeads = True
The column headers are taken from the row above the range used for the RowSource. For example, if your range is A2 to C5 then the column header will use the range A1 to C1:
Here is an example: We want to add the data below to our ListBox and we want A1 to C1 to be the header.

We set the RowSource property to A2:C5 and set the ColumnHeads property to true:
With ListBox1
    .RowSource = "sheet1!A2:C5"
    .ColumnHeads = True
    .ColumnWidths = "80;80;80"
End With
The result will look like this:

VBA ListBox AddItem
It is very rare that you would use the AddItem property to fill the ListBox. List and RowSource are much more efficient. AddItem is normally used when the Listbox already has items and you want to add a new item.
The AddItem property is simple to use. You provide the item you want to add as a parameter. The ListBox will automatically add it as the last item:
With ListBox
    .AddItem "Apple"
    .AddItem "Orange"
End With
If you want to Insert the item at a certain position you can use the second parameter. Keep in mind that this is a zero-based position, so if you want the item in position one then the value is 0, position 2 the value is 1, and so on.
With ListBox1
    .AddItem "Apple"
    .AddItem "Orange"

    ' Add "Banana" to position 1(Index 0)
    .AddItem "Banana", 0
End With
The order will be:
Banana
Apple
Orange
If you want to add multiple columns with AddItem then you need to use the List property after you use AddItem:
 With listboxFruit
    .List = myRange.Value
    .AddItem "Banana"

    ' Add to the second column of 'Banana' row
    .List(2, 1) = "$2.99"
 End With
One reason for using AddItem is if you are adding from data that isn’t sequential so you cannot use the List or RowSource properties:
 Dim cell As Range
 ' Fill items with first letter is A
 For Each cell In Sheet1.Range("A1:A50")
    If Left(cell.Value, 1) = "A" Then
        comboBoxFruit.AddItem cell.Value
    End If
 Next
Important Note: If you fill a ListBox with RowSource then you cannot use AddItem to add a new item. If you try you will get a “Runtime Error 70 – Permission Denied”.
VBA ListBox Selected Items
If only one item is selected then you can use ListIndex to get the selected row. Remember that it is zero-based so row 1 in the ListBox is at ListIndex 0, row 2 at ListIndex 1 and so on.
MsgBox "The selected item is " & ListBox1.ListIndex
If the ListBox has multiple columns then you can use the ListIndex and List properties together to return a value in the selected row:
  ' Display the value from the second column of the selected row
  MsgBox ListBox1.List(ListBox1.ListIndex, 2)
If multiple items are selected then you can use the GetSelectedRows function which returns a collection of selected rows:
 Sub Example()

    ' Store the row numbers of selected items to a collection
    Dim selectedRows As Collection
    Set selectedRows = GetSelectedRows()

    ' Print the selected rows numbers to the Immediate Window
    Dim row As Long
    For Each row In selectedRows
        ' Print to the Immediate Window Ctrl + G
        Debug.Print row
    Next row

 End Sub

 ' Returns a collection of all the selected items
 Function GetSelectedRows() As Collection

    ' Create the collection
    Dim coll As New Collection

    ' Read through each item in the listbox
    Dim i As Long
    For i = 0 To listboxFruit.ListCount - 1

        ' Check if item at position i is selected
        If listboxFruit.Selected(i) Then
            coll.Add i
        End If
    Next i

    Set GetSelectedRows = coll

End Function
Reading Data from the VBA Listbox
To read data from the ListBox we can use the ListBox.Value property. This only works when the ListBox is set to only select one item i.e. MultiSelect is set to frmMultiSelectSingle(see the section VBA ListBox MultiSelect below for more about this).
Single selection only with one column
When only one item is selected we can use the Value property to get the currently selected item:
 Dim fruit As String
 fruit = ListBox1.Value
Keep in mind that if there are multiple columns, Value will only return the value in the first column.
Single selection only with multiple columns
If the ListBox has Multiple columns you can use the Value property to get the value in the first column. You need to read through the List property to get the values in the other column(s). The List property is essentially an array so you can treat it like one.
In the example below we read through the columns of row 1(the index of row 1 is 0):
 With ListBox1

     For j = LBound(.List, 2) To UBound(.List, 2)
         ' Print the columns of the first row to the Immediate Window
         Debug.Print .List(0, j)
     Next j

 End With
Normally you want to print the values in the selected row. You can use the ListIndex property to get the selected item(Note that ListIndex returns the last selected items so it won’t work where there are multiple items selected):
 ' ExcelMacroMastery.com
 Sub ReadValuesFromSelectedRow()

    ' Write contents of the row to the Immediate Window(Ctrl G)
    With ListBox1
        For j = LBound(.List, 2) To UBound(.List, 2)
            ' Print the columns of the selected row to the Immediate Window
            Debug.Print .List(.ListIndex, j) Next j
    End With
 End Sub
Multiple selections
If the ListBox has multiple selections and you want to get all the data from each then you can use the GetSelectedRows() sub from the section VBA ListBox Selected Items. This will get a collection of all selected rows. You can use this to print the data from the selected rows:
Sub PrintMultiSelectedRows()

    ' Get all the selected rows
    Dim selectedRows As Collection
    Set selectedRows = GetSelectedRows(Me.ListBox1)

    Dim i As Long, j As Long, currentRow As Long
    ' Read through the selected rows
    For i = 1 To selectedRows.Count
        With ListBox1

            ' Get the current row
            currentRow = selectedRows(i)

            ' Print row header
            Debug.Print vbNewLine & "Row : " & currentRow

            ' Read items in the current row
            For j = LBound(.List, 2) To UBound(ListBox1.List, 2)
                ' Print the columns of the first row to the Immediate Window
                Debug.Print .List(currentRow, j)
            Next j

        End With
    Next i

End Sub

Function GetSelectedRows(currentListbox As MSForms.ListBox) As Collection

    ' Create the collection
    Dim coll As New Collection

    ' Read through each item in the listbox
    Dim i As Long
    For i = 0 To currentListbox.ListCount - 1

        ' Check if item at position i is selected
        If currentListbox.Selected(i) Then
            coll.Add i
        End If
    Next i

    Set GetSelectedRows = coll

End Function
VBA ListBox MultiSelect
We can use the MultiSelect property of the ListBox to allow the user to select either a single item or multiple items:

There are 3 selections:
- 0 = frmMultiSelectSingle – [Default]Multiple selection isn’t allowed.
- 1 = frmMultiSelectMulti – Multiple items are selected or deselected by choosing them with the mouse or by pressing the Spacebar.
- 2 = frmMultiSelectExtended – Multiple items are selected by holding down Shift and choosing them with the mouse, or by holding down Shift and pressing an arrow key to extend the selection from the previously selected item to the current item. You can also select items by dragging with the mouse. Holding down Ctrl and choosing an item selects or deselects that item.
VBA ListBox Columns
You can have multiple columns in a ListBox. For example, you can load a Range or two-dimensional array to a ListBox using List or RowSource.
Often when you load data with multiple columns only one column appears. This can be very confusing when you are using the Listbox. To get the columns to appear you have to set the ColumnCount property to the number of Columns.
You should also make sure that the ColumnWidths property is correct or one of the columns may not appear.
You can do it like this:
With listboxFruit
    .RowSource = "Sheet1!A2:B4"
    .ColumnCount = 2
    .ColumnWidths = "100,100"
End With
In a real-world application, you could set the RowSource and ColumnCount properties like this:
With listboxFruit
    .RowSource = myRange.Address(External:=True)
    .ColumnCount = myRange.Columns.Count
End With
See the AddItem section for how to add data to the other columns when you are using the AddItem property.
VBA ListBox Column Headers
Column Headers are another confusing element of the ListBox. If you use the RowSource property to add data to the ListBox then the line above the Range will be automatically used as the header.
For the Column headers to appear the ColumnHeads property must be set to true. You can do this in the properties window of the ListBox or in the code list this:
ListBox1.ColumnHeads = True
If you use the List or AddItem property to fill the ListBox then the column headers are not available. The best solution, albeit a frustrating one, is to use labels above the ListBox. I know it sounds crazy but that unfortunately is the reality. The one advantage is that you can use the Label click event which is useful if you plan to sort the data by a column.
Creating a ListBox Dynamically
Controls are normally created at design time but you can also create them dynamically at run time:
    Dim myListbox As MSForms.ListBox
    Set myListbox = Controls.Add("Forms.ListBox.1")
If you want to add an event to a dynamic control you can do it like this:
- First of all create a Class like this:
Public WithEvents myListBox As MSForms.ListBox

Private Sub myListBox_Change()
  MsgBox "Selection changed"
End Sub
- Name the class clsListBoxEvents. Create a variable of this class object in the UserForm like this:
Private listBoxEvents As New clsListBoxEvents
- Attach the events to the ListBox:
Sub CreateDynamicListBox()

    ' Create the ListBox
    Dim newListBox As MSForms.ListBox
    Set newListBox = Controls.Add("Forms.ListBox.1")

    ' Add some items
    newListBox.List = Array("Apple", "Orange", "Pear")

    ' Connect the ListBox to the ListBox events class
    Set listBoxEvents.myListBox = newListBox

End Sub
Note that you can attach events to any ListBox. It doesn’t have to be created dynamically to do this.
Loop through ListBoxes
If you want to loop through all the ListBoxes on a UserForm you can do it like this:
 Dim ctrl As Variant
 For Each ctrl In Me.Controls
    If TypeName(ctrl) = "ListBox" Then
        Debug.Print ctrl.Name
    End If
 Next ctrl
YouTube Video
Check out this video where I use the ListBox. The source code for the video is available from here
What’s Next?
Free VBA Tutorial If you are new to VBA or you want to sharpen your existing VBA skills then why not try out this Free VBA Tutorial.
Related Training: Get full access to the Excel VBA training webinars and all the tutorials.
(NOTE: Planning to build or manage a VBA Application? Learn how to build 10 Excel VBA applications from scratch.)
Что такое список в Excel VBA?
Поле списка в Excel VBA представляет собой список, назначенный переменной. Этот список имеет различные входы для выбора и позволяет выбрать несколько вариантов одновременно. Список можно вставить в пользовательскую форму, выбрав параметр списка.
Списки используют именованные диапазоны, имеющие определенные значения. Целью использования списка является отображение списка значений, из которых пользователи могут выбирать.
Оглавление
- Что такое список в Excel VBA?
- Как создать список в Excel?
- Как создать список в VBA?
- Как создать список в пользовательской форме?
- Как добавить динамический элемент управления в список?
- Как добавить элементы в список элементов управления в VBA?
- Как удалить элементы из списка элементов управления с помощью VBA?
- Пример
- Константы списка в VBA
- Часто задаваемые вопросы
- Рекомендуемые статьи
Как создать список в Excel?
Шаги для создания списка в Excel перечислены ниже:
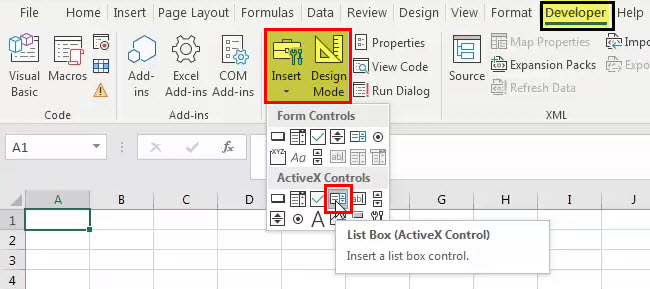
- Шаг 1. Включите вкладку «Разработчик» на ленте Excel, чтобы получить доступ к элементам управления ActiveX. В диалоговом окне «Параметры Excel» нажмите «Настроить ленту в Excel» и установите флажок «Разработчик».
Шаг 2: На вкладке «Разработчик» нажмите «Вставить», а затем элемент управления «список». Это вставит новый список на лист Excel.
- Шаг 3: Нарисуйте прямоугольник на листе Excel, чтобы создать список, как показано на следующем рисунке.

- Шаг 4: Выберите список, перейдите на вкладку «Разработчик» и выберите «Свойства». Откроется окно «Свойства».

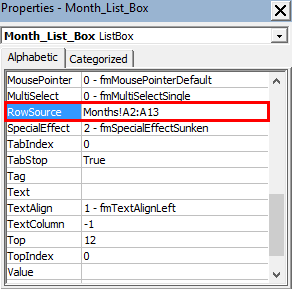
- Шаг 5: В окне «Свойства» введите «дни» в «ListFillRange». «Дни» — это именованный диапазон дней недели.

- Шаг 6: Щелкните свойство «MultiSelect». В раскрывающемся списке выберите «1-fmMultiSelectMulti», как показано на следующем изображении.

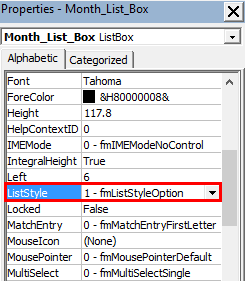
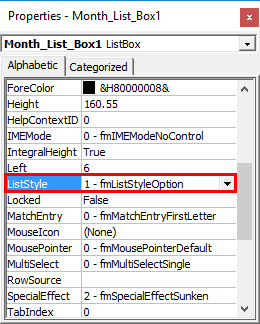
- Шаг 7: Щелкните свойство «ListStyle». В раскрывающемся списке выберите «1-fmListStyleOption». Это добавит флажки слева от перечисленных элементов, как показано на следующем рисунке.
- Шаг 8: Закройте окно «Свойства». Окно со списком выглядит так, как показано на следующем рисунке.

Примечание: Вы можете выбрать «режим дизайна выключен», нажав «Режим дизайна». Это закрывает «режим проектирования».


Как создать список в VBA?
Шаги для создания списка в VBA перечислены ниже:
.free_excel_div{фон:#d9d9d9;размер шрифта:16px;радиус границы:7px;позиция:относительная;margin:30px;padding:25px 25px 25px 45px}.free_excel_div:before{content:»»;фон:url(центр центр без повтора #207245;ширина:70px;высота:70px;позиция:абсолютная;верх:50%;margin-top:-35px;слева:-35px;граница:5px сплошная #fff;граница-радиус:50%} Вы можете скачать этот шаблон Excel для списков здесь — Шаблон Excel для списков
- Шаг 1: Щелкните правой кнопкой мыши список и убедитесь, что выбран режим разработки. Это связывает поле со списком с ячейкой.
- Шаг 2: В «свойствах» перейдите к свойству «LinkedCell» и заполните «B17», как показано на следующем рисунке.

- Шаг 3: В «ListFillRange» введите «Месяц».

- Шаг 4: Окно со списком выглядит так, как показано на следующем изображении.

Данные в ячейке B17 изменяются, когда вы меняете свой выбор в списке. Это показано на следующем изображении.

Как создать список в пользовательской форме?
Шаги для создания списка в пользовательской форме перечислены ниже:
- Шаг 1: На вкладке «Разработчик» нажмите «Visual Basic» в разделе «Код» или нажмите клавиши ALT+F11.

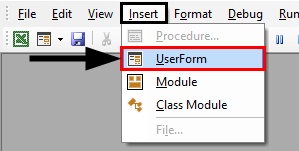
- Шаг 2: В меню «Вставка» нажмите «Пользовательская форма».

- Шаг 3: Из панели инструментов перетащите элемент управления списком на «Пользовательскую форму».

- Шаг 4: Дважды щелкните «UserForm» и выберите «Событие UserForm», как показано на следующем снимке экрана.

- Шаг 5: Добавьте следующий код в промежуточную процедуру.
Частная подпрограмма UserForm_Initialize()
ListBox1.AddItem «MBA»
ListBox1.AddItem «MCA»
ListBox1.AddItem «MSC»
ListBox1.AddItem «MECS»
ListBox1.AddItem «CA»
Конец сабвуфера

- Шаг 6: Нажмите F5, чтобы запустить код.
Как добавить динамический элемент управления в список?
Действия по добавлению динамического элемента управления в поле со списком в форме UserForm с помощью VBAUserForm Использование VBA В VBA пользовательские формы представляют собой настраиваемые определяемые пользователем формы, предназначенные для приема пользовательского ввода в виде формы. Он имеет различные наборы элементов управления для добавления, такие как текстовые поля, флажки и метки. Подробнее перечислены ниже:
- Шаг 1: На панели инструментов добавьте «CommandButton» в «UserForm».

- Шаг 2: Щелкните правой кнопкой мыши «Командную кнопку» и выберите «Свойства».

- Шаг 3: Измените заголовок «CommandButton» на «Create_Listbox».

- Шаг 4: Дважды щелкните кнопку команды, и появится следующий код.
Частная подпрограмма CommandButton1_Click()
Конец сабвуфера

- Шаг 5: Назовите следующую процедуру «Add_Dynamic_Listbox».
Подпрограмма Add_Dynamic_Listbox()
‘Добавить окно динамического списка и назначить его объекту ‘LstBx’
Установите LstBx = UserForm3.Controls.Add(«Forms.ListBox.1»)
‘Позиция списка
LstBx.Left = 20
LstBx.Top = 10
Конец сабвуфера
- Шаг 6: Нажмите F5, чтобы запустить макрос.
Как добавить элементы в список элементов управления в VBA?
Код для добавления элементов в элемент управления списком в VBA упоминается следующим образом:
Частная подпрограмма Insert _Items _To_LstBox ()
ListBox1.AddItem «Элемент 1»
ListBox1.AddItem «Элемент 2»
ListBox1.AddItem «Элемент 3»
ListBox1.AddItem «Элемент 4»
ListBox1.AddItem «Элемент 5»
Конец сабвуфера
Как удалить элементы из списка элементов управления с помощью VBA?
Код для удаления элементов из элемента управления списком в VBA упоминается следующим образом:
Sub Clr_LstBx()
UserForm3.ListBox1.Clear
Конец сабвуфера
Пример
Допустим, у нас есть ежедневные данные о продажах. Мы хотим подготовить графический пользовательский интерфейс этих данных о продажах, который позволит нам выбирать элементы из списка. Чтобы получить данные о продажах, мы должны изменить ячейку индекса на «ссылку на ячейку» и применить формулу ВПРФормула ВПРФункция Excel выполняет поиск определенного значения и возвращает соответствующее совпадение на основе уникального идентификатора. Уникальный идентификатор однозначно связан со всеми записями базы данных. Например, идентификатор сотрудника, номер списка учащихся, контактный номер клиента, адрес электронной почты продавца и т. д. являются уникальными идентификаторами. читайте больше, как показано на следующих изображениях.


Константы списка в VBA
Константы, их значения и описание приведены в следующей таблице:

Часто задаваемые вопросы
#1 – Как использовать список в Excel?
Списки используются для управления таблицами в пользовательской форме. Строки информации аккуратно управляются без ненужного отображения информации в пользовательской форме.
Пользователь может прокручивать элементы списка. Настройка «типа выбора» позволяет пользователям выбирать несколько вариантов из списка. Когда пользователь выбирает элемент из списка, с таким выбором предпринимается действие.
По умолчанию поле со списком выдает результат, соответствующий порядковому номеру выбранного элемента. Таким образом, если выбран четвертый элемент, на выходе будет число 4.
# 2 — Как заполнить список в Excel VBA?
Обычно список необходимо заполнять значениями каждый раз при открытии рабочей книги. Процедура «Открыть» выполняется каждый раз при открытии Рабочей книги.
Для заполнения списка необходимо использовать следующий код:
С Sheet1.lstListBox
.AddItem «Джеймс»
.AddItem «Келли»
.AddItem «Элизабет»
.AddItem «Джордж»
.AddItem «Уильям»
Конец с
С этим кодом список заполняется 5 именами — Джеймс, Келли, Элизабет, Джордж и Уильям.
#3 – Как получить данные из списка в Excel?
Данные могут быть эффективно использованы только при правильном их извлечении. Шаги для извлечения данных из списка перечислены ниже:
1. Выберите «Управление форматом» в меню после щелчка правой кнопкой мыши по списку.
2. В поле «Ссылка на ячейку» введите координаты пустой ячейки.
3. Выберите ячейку, в которой будут отображаться данные из списка. Необходимо использовать следующую формулу:
«=ИНДЕКС([begin cell]:[end cell],[cell link],0)”
Примечание: «Начальная ячейка» означает первую ячейку списка. «Конечная ячейка» означает последнюю ячейку списка. «Ссылка на ячейку» означает ячейку, координаты которой были введены на втором шаге.
№ 4. В чем разница между списком и полем со списком?
Различия между полем со списком и полем со списком перечислены ниже.
– Окно списка состоит из списка элементов и позволяет пользователям выбирать один или несколько параметров. Напротив, поле со списком состоит из комбинации текстового поля и раскрывающегося списка. Текстовое поле позволяет пользователям вводить элемент. Выпадающий список позволяет пользователям выбирать элемент.
– В поле со списком отображаются все элементы в заданной области сразу, а в поле со списком — по одному элементу за раз. Элементы раскрывающегося списка поля со списком видны, когда пользователь щелкает
это.
– В поле со списком пользователь должен выбирать из доступных элементов, тогда как в поле со списком пользователь может ввести элемент, которого нет в списке.
– Окно списка используется, когда ввод ограничен элементами списка. Однако поле со списком используется там, где упоминается список предлагаемых вариантов.
– Окно со списком занимает больше места, поскольку сразу отображается полный список. С другой стороны, поле со списком помещается на маленьком пространстве, потому что список отображается только при нажатии кнопки
Кнопка «Стрелка вниз.
- Поле со списком в Excel — это список, назначенный переменной, который можно использовать для выбора нескольких элементов.
- В пользовательской форме список можно вставить, выбрав параметр списка.
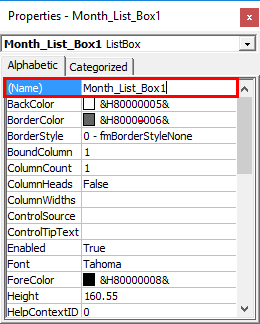
- При создании списка в Excel необходимо ввести данные в свойствах «ListFillRange», «MultiSelect» и «ListStyle».
- «Режим дизайна» можно отключить, нажав «Режим дизайна».
- При создании списка в пользовательской форме щелкните «Visual Basic» или нажмите клавиши ALT+F11.
Рекомендуемые статьи
Это было руководство по списку в Excel VBA. Здесь мы обсуждаем, как создать поле списка на листе Excel и в пользовательских формах, а также приводим практические примеры и загружаемые шаблоны. Вы также можете посмотреть на эти полезные функции в Excel –
- Редактировать раскрывающийся список в ExcelРедактировать раскрывающийся список в ExcelРаскрывающиеся списки в Excel помогают пользователю вручную вводить данные в ячейку с определенными значениями на выбор.Подробнее
- Флажок в ExcelФлажок в ExcelФлажок в Excel представляет собой квадратное поле, используемое для представления вариантов (или выбора) пользователю для выбора.Подробнее
- Функция VBA MsgBoxVBA MsgBoxVBA MsgBox — это функция вывода, которая отображает обобщенное сообщение, предоставленное разработчиком. Этот оператор не имеет аргументов, и персонализированные сообщения в этой функции записываются в двойных кавычках, а для значений предоставляется ссылка на переменную.Подробнее
What is List Box in Excel VBA?
List Box is one of the tools under user form in VBA. As the name itself suggests list box will hold all the list of values given by the user. In VBA List box comes with a user form. In this article, we will see how to create a list box and how to hold values in the list box in Excel VBA.
List Box is a box which can hold values in it. From this list of items, the user can select the item shown in the list box.
We can also draw a list box in a regular excel sheet as well.
How to Create List Box in Excel?
Assume you have a list of the month in one of the excel sheet.
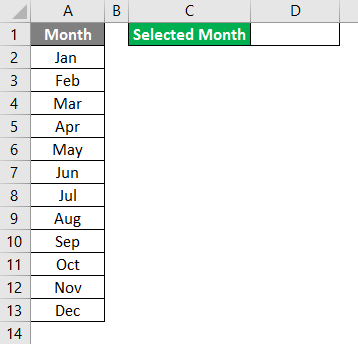
For this list of months, we will create a list box. Follow the below steps to create the List Box in excel worksheet:
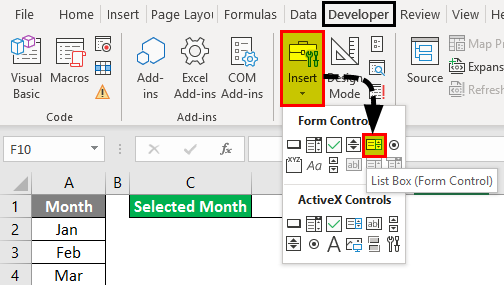
Step 1: Go to Developer Tab. Under developer, tab Go to Insert option, and under insert, option Go to Form Control, under form control select List Box.
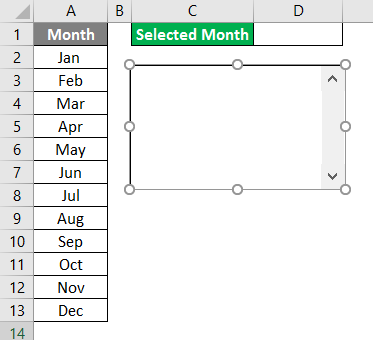
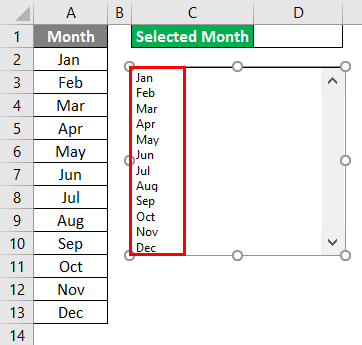
Step 2: After selecting the list box, draw the list box in the excel sheet.
Step 3: Right-click on the inserted list box and select Format Control.

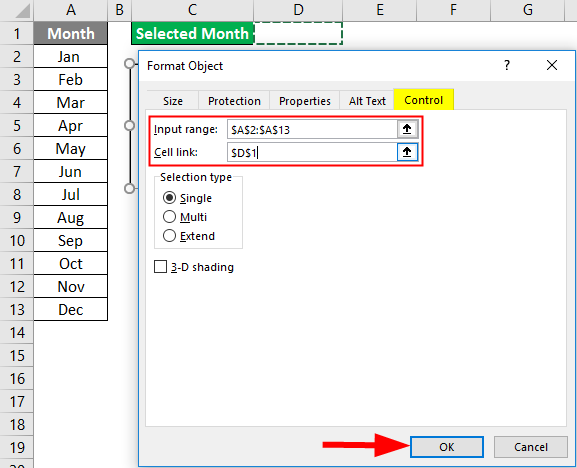
Step 4: Under Format Control, go to Control. Select the input range as month name range and give the cell reference to cell D1 and then click on Ok.
Step 5: We will have a list of the month in the list box.
Step 6: Select any of the items in the list box and see the change in cell D1 .
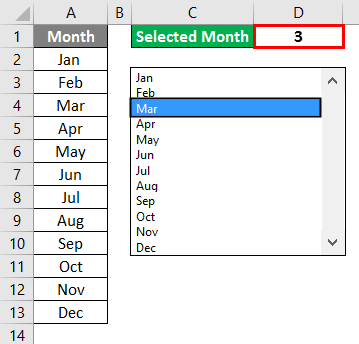
So, we got 3 as a result in cell D1 because Mar is the third item in the list.
How to Create List Box in VBA?
Create a list box is not that easy; as we have seen in the above example, you need to have a considerable amount of knowledge of Excel VBA Macros.
You can download this VBA List Box Excel Template here – VBA List Box Excel Template
VBA List Box – Example #1
Understanding of VBA List Box.
You can consider the following example for a better understanding of the VBA List Box.
Follow the below steps to create a list box in VBA.
Step 1: In the Visual Basic window, Insert the User form.
Step 2: As soon as you insert the user form, you can see the toolbox along with the user form.
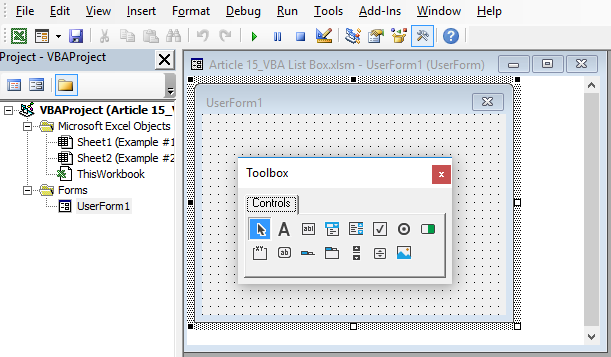
Step 3: In this toolbox, select List Box.
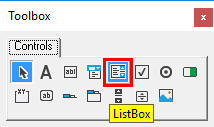
Step 4: Draw this list box on the user form.
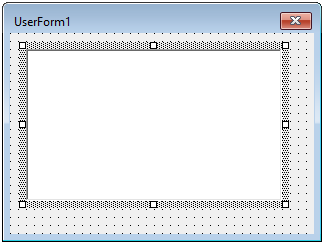
Step 5: After inserting the list box, give a proper name to this list box under the Properties window.
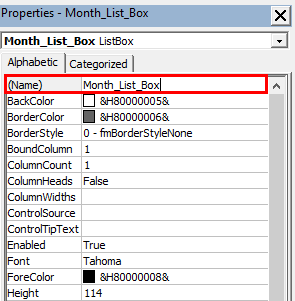
Note: If you don’t see this list box, press the F4 key, you will see a properties window like the above one.
Step 6: Scroll down and find “Row Source”. In this, type the range of values of your month name along with the sheet name.
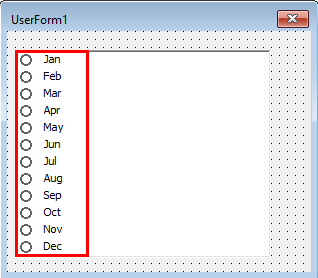
Step 7: As soon as you give the reference, you can see the month names in the list box.

Step 8: Now, in the list box properties window, select line style as “1 – fmListStyleOption”.
Step 9: As soon as you select the line style, you can see the impact immediately.
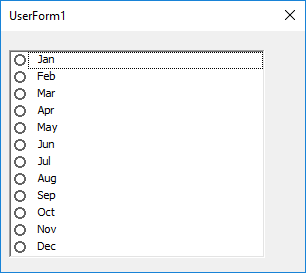
Step 10: Run this code; you will see a list box in separately.
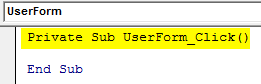
Step 11: Now, we will add macro code to store the data selected by the user. Double click on the list box. You will see a separate macro name like the one below.
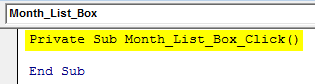
Private Sub Month_List_Box_Click()

End Sub
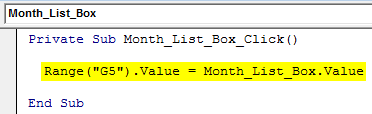
Step 11: When the user selects the month, we will store the data in cell G5. In order to store the input given by the user, add the below code.
Private Sub Month_List_Box_Click()

  Range("G5").Value = Month_List_Box.Value

End Sub
Step 12: Now, if you run the code and select any of the months, we can see the value selected by the user in the G5 cell.
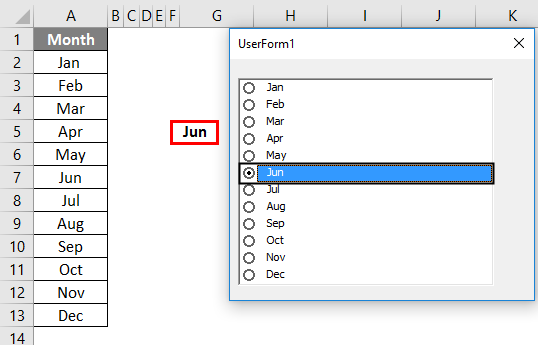
I have selected Jun, so I can see Jun in the G5 cell. Like this, we can use a list box in your VBA projects to take input from the users.
VBA List Box – Example #2
Add.Items Method to Add Values to List Box
Follow the below steps to create a list box in VBA.
Step 1: Create a New UserForm. Here it is UserForm2.
Step 2: Add List box in the Userform 2.
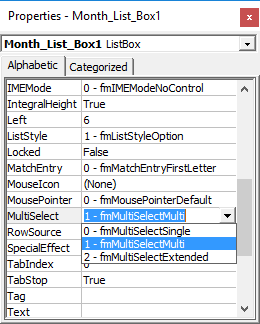
Step 3: After inserting the list box, give a proper name to this list box under the Properties window, i.e. Month_list_Box1.
Step 4: Now, in the list box properties window, select line style as “1 – fmListStyleOption”.
Step 5: Double click on the user form. You will see an auto inserted macro like the below one.
Private Sub UserForm_Click()

End Sub
Step 6: By placing a cursor inside the macro, select “Initialize”.
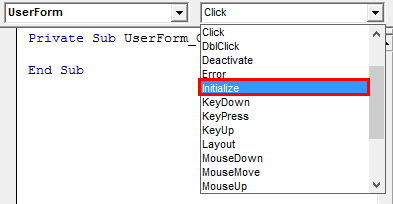
Step 7: As soon as you selected “Initialize”, we can see a new macro to be created just below the current one.
Private Sub UserForm_Initialize()

End Sub
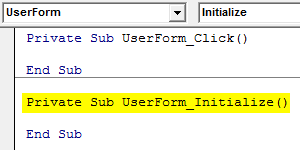
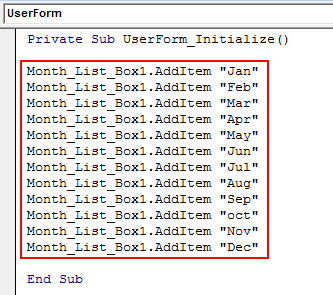
Step 8: Delete the old macro. Under UserForm, initialize write the below code to add items to the list box.
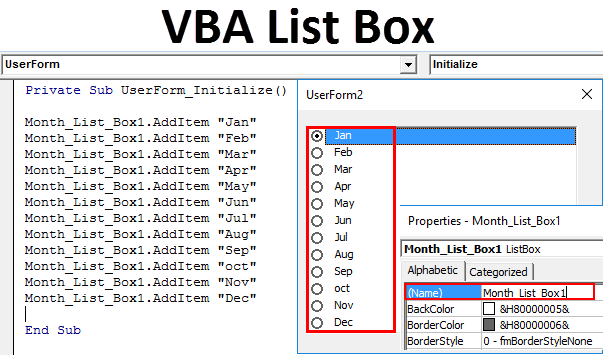
Private Sub UserForm_Initialize()

Month_List_Box1.AddItem "Jan"
Month_List_Box1.AddItem "Feb"
Month_List_Box1.AddItem "Mar"
Month_List_Box1.AddItem "Apr"
Month_List_Box1.AddItem "May"
Month_List_Box1.AddItem "Jun"
Month_List_Box1.AddItem "Jul"
Month_List_Box1.AddItem "Aug"
Month_List_Box1.AddItem "Sep"
Month_List_Box1.AddItem "oct"
Month_List_Box1.AddItem "Nov"
Month_List_Box1.AddItem "Dec"

End Sub
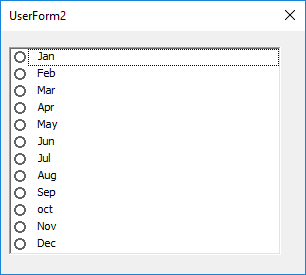
Step 10: Now press the F5 button to run the code, and you will get the following output.
Things to Remember
- If you are directly giving cell reference, then you need to specify the sheet name and cell reference. (You need to add exclamation (!) symbol in front of sheet name).
- You can also add items to the list box by using Add.Item method.
- If you want to allow the user to select more than one item, then you need to select the “fmMultiSelectMult” option under Multi-Select in the Properties window.
Recommended Articles
This is a guide to VBA List Box. Here we discuss how to Create a List Box in Excel and in VBA along with practical examples and a downloadable excel template. You can also go through our other suggested articles –
- VBA Replace
- VBA ByVal
- VBA Arrays
- VBA XML
What is List Box in Excel VBA?
The list box in Excel VBA is a list assigned to a variable. This list has various inputs to select from and allows selecting multiple options at once. A list box can be inserted on a UserForm by choosing the list box option.
List boxes use named ranges having certain values. The purpose of using a list box is to display a list of values that users can choose from.
Table of contents
- What is List Box in Excel VBA?
- How to Create List Box in Excel?
- How to Create a List Box in VBA?
- How to Create a List Box on a UserForm?
- How to Add a Dynamic Control to List Box?
- How to add items to list box control in VBA?
- How to clear items from list box control using VBA?
- Example
- The Constants of List Box in VBA
- Frequently Asked Questions
- Recommended Articles
How to Create List Box in Excel?
The steps to create a list box in Excel are listed as follows:
- Step 1: Enable the Developer tab on Excel ribbon to access ActiveX controls. In the Excel Options dialog box, click “customize ribbon in Excel” and select the Developer checkbox.
Step 2: In the Developer tab, click on Insert, followed by the “list box” control. This inserts a new list box in the Excel worksheet. - Step 3: Draw a rectangle in the Excel worksheet to create a list box, as shown in the following image.
- Step 4: Select the list box, go to the Developer tab, and select “properties”. The “properties” window opens.
- Step 5: In the “properties” window, enter “days” in “ListFillRange”. “Days” is the named range for weekdays.
- Step 6: Click the “MultiSelect” property. From the drop-down list, select “1- fmMultiSelectMulti” as shown in the succeeding image.
- Step 7: Click the “ListStyle” property. From the drop-down list, select “1- fmListStyleOption”. This adds checkboxes to the left of the listed items, as shown in the following image.
- Step 8: Close the “properties” window. The list box appears as shown in the following image.
Note: You can select “design mode off” by clicking Design Mode. This closes the “design mode”.


How to Create a List Box in VBA?
The steps to create a list box in VBA are listed as follows:
You can download this List Boxes Excel Template here – List Boxes Excel Template
- Step 1: Right-click on the list box and make sure the Design Mode is selected. This links the list box to a cell.
- Step 2: In “properties,” go to the “LinkedCell” property and fill in “B17” as shown in the following image.

- Step 3: In “ListFillRange,” enter “Month.”

- Step 4: The list box appears as shown in the succeeding image.

The data in cell B17 changes when you change your choice in the list box. This is shown in the following image.

How to Create a List Box on a UserForm?
The steps to create a list box on a UserForm are listed as follows:
- Step 1: In the Developer tab, click “Visual Basic” from the Code or Press Alt+F11.

- Step 2: In the Insert menu, click “UserForm.”

- Step 3: From the toolbox, drag the list box control on the “UserForm.”

- Step 4: Double-click on “UserForm” and select “UserForm event,” as shown in the following screenshot.

- Step 5: Add the following code to the in-between procedure.
Private Sub UserForm_Initialize()
ListBox1.AddItem “MBA”
ListBox1.AddItem “MCA”
ListBox1.AddItem “MSC”
ListBox1.AddItem “MECS”
ListBox1.AddItem “CA”
End Sub

- Step 6: Press F5 to run the code.
How to Add a Dynamic Control to List Box?
The steps to add a dynamic control to the list box on the UserForm using VBAIn VBA, userforms are customized user-defined forms that are designed to accept user input in the form of a form. It has various sets of controls to add such as text boxes, checkboxes, and labels.read more are listed as follows:
- Step 1: From the toolbox, add a “CommandButton” on the “UserForm.”

- Step 2: Right-click on the “Commandbutton” and click “properties.”

- Step 3: Change the caption of the “CommandButton” to “Create_Listbox.”

- Step 4: Double-click on the command button and the following code appears.
Private Sub CommandButton1_Click()
End Sub

- Step 5: Name the following procedure as “Add_Dynamic_Listbox.”
Sub Add_Dynamic_Listbox()
‘Add Dynamic List Box and assign it to object ‘LstBx’
Set LstBx = UserForm3.Controls.Add(“Forms.ListBox.1”)
‘List Box Position
LstBx.Left = 20
LstBx.Top = 10
End Sub
- Step 6: Click F5 to run the macro.
How to add items to list box control in VBA?
The code to add items to list box control in VBA is mentioned as follows:
Private Sub Insert _Items _To_LstBox ()
ListBox1.AddItem “Item 1”
ListBox1.AddItem “Item 2”
ListBox1.AddItem “Item 3”
ListBox1.AddItem “Item 4”
ListBox1.AddItem “Item 5”
End Sub
How to clear items from list box control using VBA?
The code to clear items from the list box control in VBA is mentioned as follows:
Sub Clr_LstBx()
UserForm3.ListBox1.Clear
End Sub
Example
Let us say we have daily sales data. We want to prepare a graphical user interface of this sales data that allows us to select items from a list box. To fetch the sales details, we have to change the Index cell to “cell link” and apply the VLOOKUP formulaThe VLOOKUP excel function searches for a particular value and returns a corresponding match based on a unique identifier. A unique identifier is uniquely associated with all the records of the database. For instance, employee ID, student roll number, customer contact number, seller email address, etc., are unique identifiers.
read more as shown in the following images.


The Constants of List Box in VBA
The constants, their values, and description are given in the following table:

Frequently Asked Questions
#1 – How to use a list box in Excel?
The list boxes are used to manage tables within a UserForm. The rows of information are managed neatly without an unnecessary display of information within the UserForm.
A user can scroll through the items of the list box. The setting of the “selection type” allows users to select multiple options from a list box. As the user selects an item from the list box, an action is undertaken with such selection.
By default, the list box gives an output that matches the index number of the selected item. Thus, if the fourth item is selected, the output will be number 4.
#2 – How to populate a list box in Excel VBA?
Usually, the list box needs to be populated with values every time the Workbook is opened. The procedure “Open” is executed every time the Workbook opens.
The following code must be used to populate a list box:
With Sheet1.lstListBox
.AddItem “James”
.AddItem “Kelly”
.AddItem “Elizabeth”
.AddItem “George”
.AddItem “William”
End With
With this code, the list box is populated with 5 names–James, Kelly, Elizabeth, George, and William.
#3 – How to retrieve data from a list box in Excel?
The data can be used effectively only if it is retrieved properly. The steps to retrieve data from a list box are mentioned as follows:
1. Select “Format Control” from the menu after right-clicking the list box.
2. In the box titled “Cell Link”, type the coordinates of an empty cell.
3. Select the cell in which data from the list box will be displayed. The following formula must be used:
“=INDEX([begin cell]:[end cell],[cell link],0)”
Note: The “begin cell” stands for the first cell of the list. The “end cell” stands for the last cell of the list. The “cell link” stands for the cell whose coordinates were typed in the second step.
#4 – What is the difference between a list box and a combo box?
The differences between a list box and a combo box are listed as follows:
– A list box consists of a list of items and allows users to select one or more options. In contrast, a combo box consists of a combination of a text box and a drop-down list. The text box enables users to type an item. The drop-down list allows users to select an item.
– A list box displays all items in a given area at once, while a combo box displays one item at a time. The items of the drop-down list of a combo box are visible when the user clicks
it.
– In a list box, the user has to choose from the available items, whereas in a combo box, a user can type an item that is not there in the list.
– A list box is used where the input is restricted to the items on the list. However, a combo box is used where a list of suggested choices is mentioned.
– A list box uses more space because the full list is displayed at once. On the other hand, a combo box fits in a small space because the list is displayed only on the clicking of the
down arrow.
- A list box in Excel is a list assigned to a variable that can be used to select multiple items.
- On a UserForm, a list box can be inserted by selecting the list box option.
- While creating a list box in Excel, the details in “ListFillRange,” “MultiSelect,” and “ListStyle” properties have to be entered.
- The “design mode” can be switched off by clicking the “Design Mode.”
- While creating a list box on a UserForm, either click “Visual Basic” or press Alt+F11
Recommended Articles
This has been a guide to List Box in Excel VBA. Here we discuss how to create List Box in Excel Worksheet and on UserForms, along with practical examples and downloadable templates. You may also look at these useful functions in Excel –
- Edit Drop-Down List in ExcelDropdowns in Excel assist a user in manually entering data in a cell with some specific values to choose from.read more
- Checkbox in ExcelA checkbox in excel is a square box used for presenting options (or choices) to the user to choose from.read more
- VBA MsgBoxVBA MsgBox function is an output function which displays the generalized message provided by the developer. This statement has no arguments and the personalized messages in this function are written under the double quotes while for the values the variable reference is provided.read more
In this Article
- Create a Listbox
- Populate a Listbox in VBA code
- Populate a Listbox From a Cells Range
- Get a Selected Item of a Listbox in VBA
- Clear a Listbox
- Use a Listbox in a UserForm
This tutorial will demonstrate how to work with Listboxes using VBA.
In VBA, you can create a Listbox where a user can choose one of the listed options. Listboxes are often used in UserForms, but can also be used in a Worksheet. In this tutorial, you will learn how to create, populate and delete a Listbox. You will also see how to get a user choice in VBA and use it in code.
If you want to learn how to create a ComboBox, click here: VBA ComboBox
If you want to learn how to create a Checkbox, click here: VBA Checkbox
Create a Listbox
In order to insert a Listbox in the Worksheet, you need to go to the Developer tab, click Insert and under ActiveX Controls choose List Box:
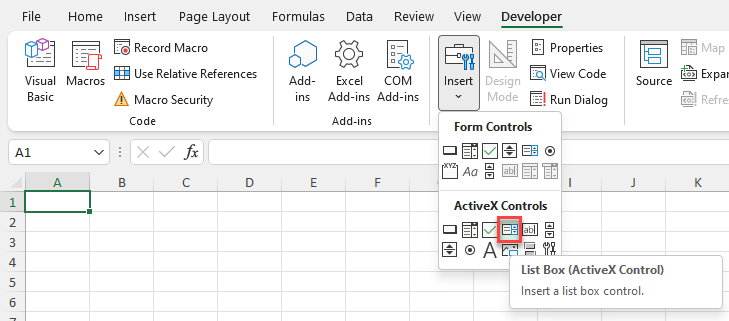
Image 1. Insert a Listbox in the Worksheet
When you select the Listbox which you inserted, you can click on Properties under the Developer tab:
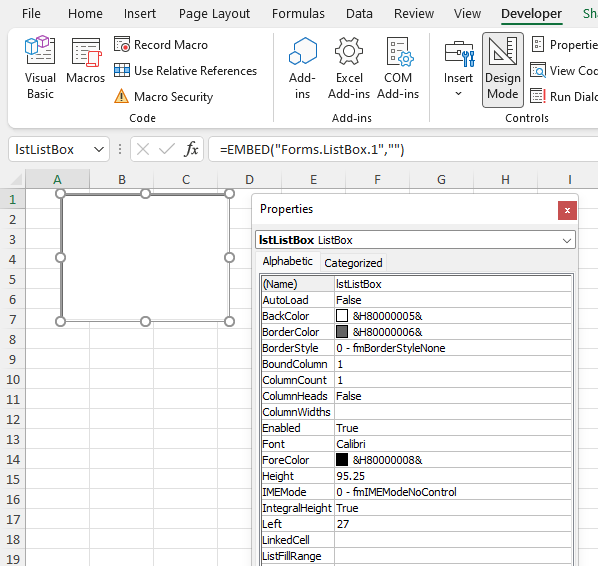
Image 2. Change Listbox Properties
Here you can set different properties of the Listbox. For the beginning, we changed the attribute Name to lstListBox. Now, we can use the Listbox with this name in VBA code.
Populate a Listbox in VBA code
First, we need to populate the Listbox with values. In most cases, a Listbox needs to be populated when the Workbook is opened. Because of this, we need to put a code for populating the Listbox in object Workbook, procedure Open. This procedure is executed every time a user opens the Workbook. Here is the code:
With Sheet1.lstListBox
    .AddItem "John"
    .AddItem "Michael"
    .AddItem "Jennifer"
    .AddItem "Lilly"
    .AddItem "Robert"
End With
As you can see in Image 3, we populated our Listbox with 5 names (John, Michael, Jennifer, Lilly and Robert):
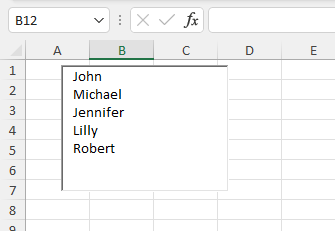
Image 3. Populate the Listbox in VBA
Populate a Listbox From a Cells Range
Another possible way to populate a Listbox is to let a user do it. A Listbox can be linked to a range of cells. Therefore, every time a user enters a new value in the cells range, the Listbox will update with that value.
If you want to enable this, you have to go to the Properties of the ListBox and set the attribute ListFillRange:
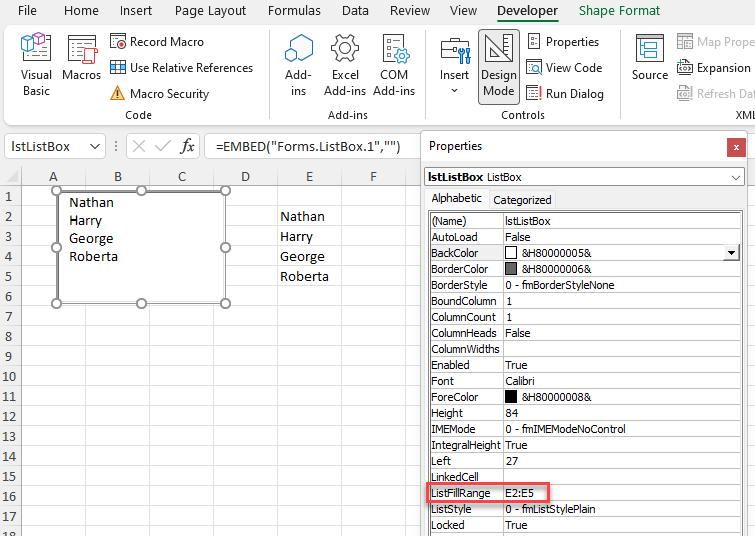
Image 4. Populate the Listbox from the cells range
We linked our Listbox with the range E2:E5, where we put names we want (Nathan, Harry, George, Roberta). As a result, the Listbox is now populated with these names.
Get a Selected Item of a Listbox in VBA
The purpose of a Listbox is to get a users choice. In order to retrieve a value that is selected by a user, you need to use this code:
Dim strSelectedItem As Variant

strSelectedItem = Sheet1.lstListBox.Value
The users selection is in the attribute Value of Sheet1.lstListbox object. This value is assigned to the variable strSelectedItem:
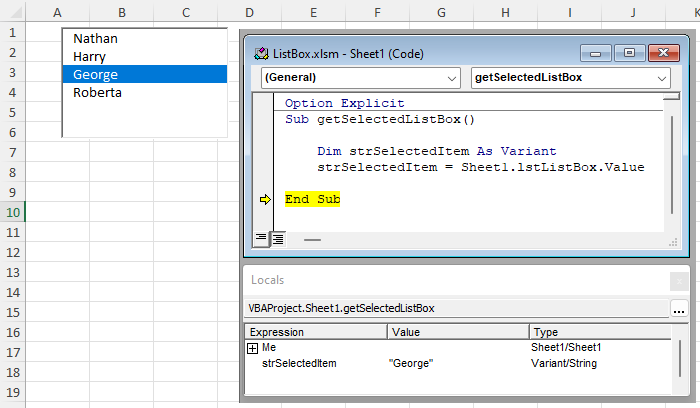
Image 5. Get a selected value from the Listbox in VBA
We selected George in the Listbox and executed the procedure. As you can see in Image 5, the value of the strSelectedItem is George, which is the value we selected. Furthermore, you can process this variable in the code.
Clear a Listbox
In order to clear a Listbox in VBA, you need to use Clear method of Sheet1.lstListBox object. It will delete all the items from the Listbox. Here is the code:
Sheet1.lstListBox.Clear(Note: If the attribute ListFillRange is set, the above code will produce an error.
You have to clear the attribute ListFillRange first.)
When we execute the code, we get the empty Listbox:
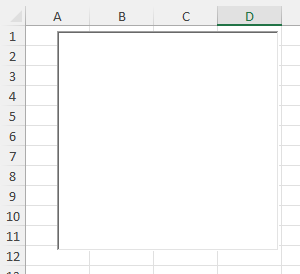
Image 6. Clear the Listbox
Use a Listbox in a UserForm
As we mentioned, Listbox is most often used in UserForms. To explain how you can do it, we will first insert an Userform. In VBA Editor, right-click on Module name, click on Insert and choose UserForm:
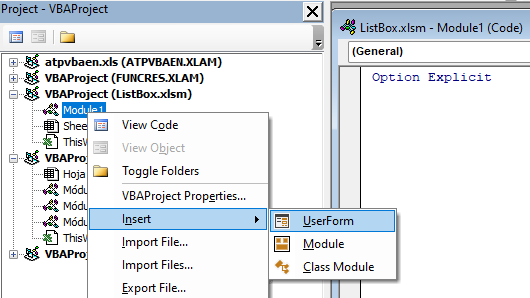
Image 7. Insert a Userform
To display controls for inserting, you need to enable the Toolbox. To do this, click on the Toolbox icon in the toolbar. After that, you will get the windows with all the controls available. You can click on ListBox to create it in the Userform.
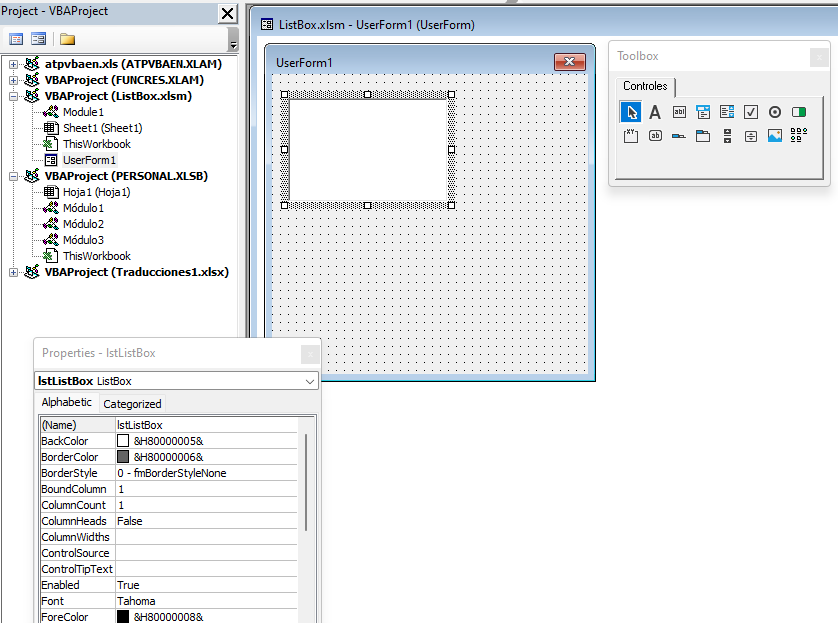
Image 8. Insert a Listbox in the Userform
We will name the ListBox lstListBox. In order to populate it with values, we need to put the following code into the method Initialize of the object UserForm:
Private Sub UserForm_Initialize()

    With UserForm1.lstListBox

        .AddItem "John"
        .AddItem "Michael"
        .AddItem "Jennifer"
        .AddItem "Lilly"
        .AddItem "Robert"

    End With

End Sub
This code triggers every time a user runs the Userform and populates the Listbox with these 5 names:
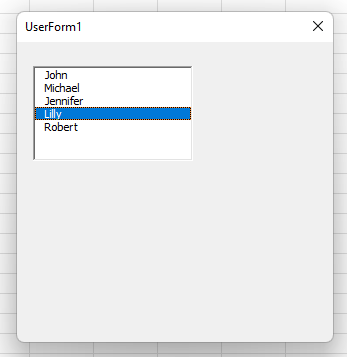
Image 9. The Listbox with values in the Userform
If you want to get selected value from the ListBox, you need to use the same logic for the Listbox in a Worksheet, which is explained earlier in the article.