
Сортировка данных в таблице на рабочем листе Excel средствами VBA. Sort и SortField, объекты и методы. Примеры сортировки данных в диапазоне.
Синтаксис сортировки
Синтаксис полного кода VBA Excel, применяемого для сортировки данных в таблицах и диапазонах:
|
With Expression.Sort .SortFields.Clear .SortFields.Add Key, SortOn, Order, DataOption .SetRange [Range] .Header = [xlGuess, xlYes, xlNo] .MatchCase = [True, False] .Orientation = [xlTopToBottom, xlLeftToRight] .Apply End With |
Синтаксис сокращенного кода VBA Excel, применяемого для сортировки данных с параметрами по умолчанию:
|
With Expression.Sort .SortFields.Clear .SortFields.Add Key .SetRange [Range] .Apply End With |
Expression – выражение, возвращающее объект Worksheet, например:
|
ActiveSheet Worksheets («Лист1») ActiveWorkbook.Worksheets («Лист1») Workbooks(«Книга1.xlsm»).Worksheets («Лист1») |
Расшифровка кода
1. Expression.Sort – метод Sort объекта Worksheet возвращает объект Sort.
Объект Sort – это объект, представляющий сортировку диапазона данных.
2. .SortFields.Clear – метод SortFields объекта Sort возвращает коллекцию объектов SortFields. Метод Clear объекта SortFields удаляет все существующие объекты SortField.
Объект SortField содержит все сведения о параметрах сортировки для заданного рабочего листа.
3. .SortFields.Add Key, SortOn, Order, DataOption – метод Add объекта SortFields создает и возвращает новый экземпляр объекта SortField с заданными параметрами.
Параметры метода Add объекта SortFields:
Key – обязательный параметр, который задает значение ключа для сортировки. Тип данных – Range. Обычно указывается первая ячейка столбца при сортировке по строкам или первая ячейка строки при сортировке по столбцам. Сортировка диапазона будет осуществлена по данным столбца (строки), первая ячейка которого указана в качестве ключа.
SortOn – необязательный параметр, который задает критерий сортировки (по какому свойству ячеек производится сортировка).
Значения, которые может принимать SortOn:
| Константа | Значение | Описание |
|---|---|---|
| SortOnValues | 0 | сортировка по значению (значение по умолчанию) |
| SortOnCellColor | 1 | сортировка по цвету ячейки |
| SortOnFontColor | 2 | сортировка по цвету шрифта |
| SortOnIcon | 3 | сортировка по иконке* |
* Иконки (значки) могут быть заданы ячейкам при условном форматировании диапазона.
Order – необязательный параметр, задающий порядок сортировки (по возрастанию или по убыванию).
Значения, которые может принимать Order:
| Константа | Значение | Описание |
|---|---|---|
| xlAscending | 1 | сортировка по возрастанию (значение по умолчанию) |
| xlDescending | 2 | сортировка по убыванию |
DataOption – необязательный параметр, который задает способ сортировки текста.
Значения, которые может принимать DataOption:
| Константа | Значение | Описание |
|---|---|---|
| xlSortNormal | 0 | числовые и текстовые данные сортируются отдельно (значение по умолчанию) |
| xlSortTextAsNumbers | 1 | текстовые данные рассматриваются для сортировки как числовые |
4. .SetRange [Range] – метод SetRange объекта Sort задает диапазон (таблицу), в котором выполняется сортировка.
5. .Header = [xlGuess, xlYes, xlNo] – свойство Header объекта Sort указывает, является ли первая строка таблицы строкой заголовков (шапкой).
Значения, которые может принимать свойство Header:
| Константа | Значение | Описание |
|---|---|---|
| xlGuess | 0 | Excel сам определяет, есть ли строка заголовков |
| xlYes | 1 | строка заголовков есть, сортировка ее не затрагивает |
| xlNo | 2 | строки заголовков нет (значение по умолчанию) |
6. .MatchCase = [True, False] – свойство MatchCase объекта Sort указывает, как учитывать регистр при сортировке.
Значения, которые может принимать свойство MatchCase:
| Константа | Значение | Описание |
|---|---|---|
| False | 0 | регистр не учитывается (значение по умолчанию) |
| True | 1 | сортировка с учетом регистра |
7. .Orientation = [xlTopToBottom, xlLeftToRight] – свойство Orientation объекта Sort задает ориентацию для сортировки.
Значения, которые может принимать свойство Orientation:
| Константа | Значение | Описание |
|---|---|---|
| xlTopToBottom | 1 | сортировка по стокам (значение по умолчанию) |
| xlLeftToRight | 2 | сортировка по столбцам |
8. .Apply – метод Apply объекта Sort выполняет сортировку диапазона в соответствии с примененными параметрами.
Примеры сортировки
Таблица для примеров

Сортировка по одному столбцу
Краткая запись кода VBA Excel для сортировки диапазона по первому столбцу с параметрами по умолчанию:
|
Sub Primer1() With ActiveSheet.Sort .SortFields.Clear .SortFields.Add Key:=Range(«A2») .SetRange Range(«A2:C7») .Apply End With End Sub |
Полная запись, но тоже с параметрами по умолчанию:
|
Sub Primer2() With ActiveSheet.Sort .SortFields.Clear .SortFields.Add Key:=Range(«A2»), SortOn:=xlSortOnValues, Order:=xlAscending, DataOption:=xlSortNormal .SetRange Range(«A2:C7») .Header = xlNo .MatchCase = False .Orientation = xlTopToBottom .Apply End With End Sub |
Результат сортировки:

Сортировка по двум столбцам
Код VBA Excel для сортировки исходной таблицы по первому и второму столбцам с параметрами по умолчанию:
|
Sub Primer3() With ActiveSheet.Sort .SortFields.Clear .SortFields.Add Key:=Range(«A2») .SortFields.Add Key:=Range(«B2») .SetRange Range(«A2:C7») .Apply End With End Sub |
Результат сортировки:

Применение сортировки ко второму столбцу (добавление еще одного объекта SortField) не нарушает сортировку первого – в первом столбце меняются местами только ячейки с одинаковыми значениями.
Excel already has a couple of ways to sort data quickly.
You can easily sort a data set by using the sort icons in the ribbon or the sort dialog box.
Then why do you need to know how to do this using VBA?
Knowing how to sort data using VBA can be helpful when included as a part of your code. For example, suppose you get a data set daily/weekly that you need to format and sort in a specific order.
You can create a macro to do all this for you with a single click. That will save you a lot of time and effort every time you do it.
Also, if you create Excel dashboards, you can take Excel sorting capability to a new level by allowing the user to sort the data just by double-clicking on the header (as shown below).
I will cover how to create this later in this tutorial. Let’s first quickly get the basics straight.
Understanding the Range.Sort Method in Excel VBA
When sorting using VBA, you need to use the Range.Sort method in your code.
The ‘Range’ would be the data that you’re trying to sort. For example, if you’re sorting the data in A1:A10, then ‘Range’ would be Range(“A1:A10”).
You can also create a named range and use it instead of the cell references. For example, if I create a named range ‘DataRange’ for the cells A1:A10, then I can also use Range(“DataRange”)
With the sort method, you need to provide some additional information through parameters. Below are the key parameters you need to know:
- Key – here you need to specify the column that you want to sort. For example, if you want to sort column A, you need to use key:=Range(“A1”)
- Order – here you specify whether you want the sorting in an ascending order or the descending order. For example, if you want the sorting in ascending order, you will use Order:=xlAscending
- Header – here you specify whether your data set has headers or not. If it has headers, the sorting starts from the second row of the data set, else it starts from the first row. To specify that your data has headers, you will use Header:=xlYes
While these three suffices in most of the cases, you can read more about the parameters in this article.
Now let’s see how to use the Range.Sort method in VBA to sort data in Excel.
Sorting a Single Column Without Header
Suppose you have a single column without header (as shown below).
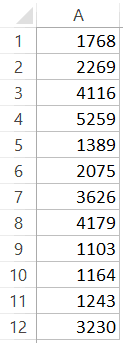
You can use the below code to sort it in ascending order.
Sub SortDataWithoutHeader()
Range("A1:A12").Sort Key1:=Range("A1"), Order1:=xlAscending, Header:=xlNo
End Sub
Note that I have specified the data range manually as Range(“A1:A12”).
In case there might be changes in the data and values might be added/deleted, you can use the below code that automatically adjusts based on the filled cells in the dataset.
Sub SortDataWithoutHeader()
Range("A1", Range("A1").End(xlDown)).Sort Key1:=Range("A1"), Order1:=xlAscending, Header:=xlNo
End Sub
Note that instead of Range(“A1:A12”), I have used, Range(“A1”, Range(“A1”).End(xlDown)).
This will check the last consecutively filled cell in the column and include it in sorting. In case there are blanks, it will only consider data till the first blank cell.
You can also create a named range and use that named range instead of the cell references. For example, if the named range is DataSet, your code would now be as shown below.
Sub SortDataWithoutHeader()
Range("DataRange").Sort Key1:=Range("A1"), Order1:=xlAscending, Header:=xlNo
End Sub
Now let me quickly explain the parameters used in the above examples:
- Key1:=Range(“A1”) – Specified A1 so that the code would know which column to sort.
- Order1:=xlAscending – Specified the order as xlAscending. If you want it to be in the descending order, use xlDescending.
- Header:= xlNo – Specified that there are no headers. This is also the default value. So even if you omit this, your data will be sorted considering it has no headers.
Wondering where to put this VBA code and how to run the macro? Read this tutorial!
Sorting a Single Column With Header
In the previous example, the data set did not have a header.
When your data has headers, you need to specify that in the code so that the sorting can start from the second row of the dataset.
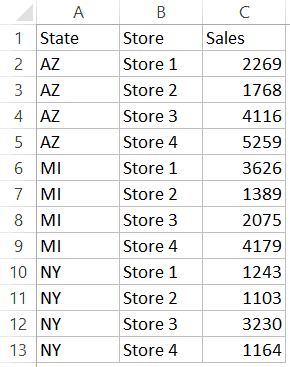
Suppose you have a dataset as shown below:

Below is the code that will sort the data in descending order based on the sales of the stores.
Sub SortDataWithHeader()
Range("DataRange").Sort Key1:=Range("C1"), Order1:=xlDescending
End Sub
Note that I have created a named range – ‘DataRange’, and used this named range in the code.
Sorting Multiple Columns With Headers
So far in this tutorial, we have seen how to sort a single column (with and without headers).
Now, what if you want to sort based on multiple columns.
For example, in the below data set, what if I want to first sort by the state code, and then by the store.
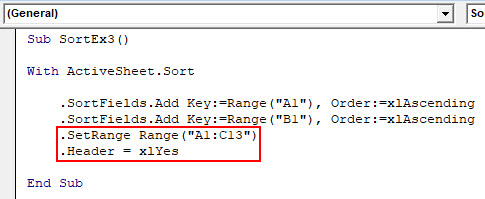
Here is the code that will sort multiple columns at one go.
Sub SortMultipleColumns()
With ActiveSheet.Sort
     .SortFields.Add Key:=Range("A1"), Order:=xlAscending
     .SortFields.Add Key:=Range("B1"), Order:=xlAscending
     .SetRange Range("A1:C13")
     .Header = xlYes
     .Apply
End With
End Sub
Below is the result that you will get.
In the above example, the data is first sorted by the state code (column A). Then within the state code data, it is again sorted by the Store (Column B). This order is determined by the code in which you mention it.
Sorting Data Using Double Click on Header
If you’re creating a dashboard or want more ease of use in your reports, you can write a VBA code that will sort the data when you double click on the headers.
Something as shown below:
Below is the code that will allow you to do this:
Private Sub Worksheet_BeforeDoubleClick(ByVal Target As Range, Cancel As Boolean)
Dim KeyRange As Range
Dim ColumnCount As Integer
ColumnCount = Range("DataRange").Columns.Count
Cancel = False
If Target.Row = 1 And Target.Column <= ColumnCount Then
Cancel = True
Set KeyRange = Range(Target.Address)
Range("DataRange").Sort Key1:=KeyRange, Header:=xlYes
End If
End Sub
Note that I have created a named range (“DataRange”) and have used it in the code instead of using the cell references.
As soon as you double-click on any of the headers, the code disables the usual double-click functionality (which is to get into the edit mode) and uses that cell as the key while sorting the data.
Also note that as of now, this code will sort all the columns in ascending order only.
Note that double-click is a trigger allows Excel to run the specified code. These triggers such as double-click, opening a workbook, adding a new worksheet, changing a cell, etc. are called events and can be used to run macros in Excel. You can read more about Excel VBA events here.
Where to put this code?
You need to paste this code into the code window of the sheet in which you want this double click sort functionality.
To do this:
- Right-click on the sheet tab.
- Click on View Code.
- Paste the code in the code window of the sheet in which your data resides.
Now what if you want to sort the first two columns (‘State’ and ‘Store’) in ascending order, but ‘Sales’ column in descending order.
Here is the code that will do it:
Private Sub Worksheet_BeforeDoubleClick(ByVal Target As Range, Cancel As Boolean)
Dim KeyRange As Range
Dim ColumnCount As Integer
ColumnCount = Range("DataRange").Columns.Count
Cancel = False
If Target.Row = 1 And Target.Column <= ColumnCount Then
Cancel = True
Set KeyRange = Range(Target.Address)
If Target.Value = "Sales" Then
SortOrder = xlDescending
Else
SortOrder = xlAscending
End If
Range("DataRange").Sort Key1:=KeyRange, Header:=xlYes, Order1:=SortOrder
End If
End Sub
In the above code, it checks if the cell that is double-clicked is the Sales header or not. If yes, then it assigns the xlDescending value to the variable SortOrder, else it makes it xlAscending.
Now let’s take this a notch further and show a visual Marker (arrow and colored cell) in the header when it is sorted.
Something as shown below:
To get this, I have added a new worksheet and made the following changes in it (you can download the example file and follow along):
- Changed the name of the new sheet to ‘BackEnd’.
- In cell B2, entered an arrow symbol (to do this, go to Insert and click on ‘Symbol’ option).
- Copy and paste the headers from the data set to cell A3:C3 in the ‘Backend’ sheet.
- Use the following function in cell A4:AC4:
=IF(A3=$C$1,A3&" "&$B$1,A3)
- Rest of the cells will automatically get filled by the VBA code when you double click on the headers to sort the column.
Your backend sheet would look something as shown below:
![]()
Now you can use the below code to sort the data by double-clicking on the headers. When you double-click on a header, it will automatically get the arrow in the header text. Note that I have also used conditional formatting to highlight the cell as well.
Private Sub Worksheet_BeforeDoubleClick(ByVal Target As Range, Cancel As Boolean)
Dim KeyRange As Range
Dim ColumnCount As Integer
ColumnCount = Range("DataRange").Columns.Count
Cancel = False
If Target.Row = 1 And Target.Column <= ColumnCount Then
Cancel = True
Worksheets("Backend").Range("C1") = Target.Value
Set KeyRange = Range(Target.Address)
Range("DataRange").Sort Key1:=KeyRange, Header:=xlYes
Worksheets("BackEnd").Range("A1") = Target.Column
For i = 1 To ColumnCount
Range("DataRange").Cells(1, i).Value = Worksheets("Backend").Range("A4").Offset(0, i - 1).Value
Next i
End If
End Sub
Note that this code works well for the way my data and workbook is constructed. If you change the structure of the data, you will have to modify the code accordingly.
Download the Example File
You May Also Like the Following Excel Tutorials:
- Sort Worksheets in Excel (Alphabetically)
- How to Filter Data in a Pivot Table in Excel.
- Dynamic Excel Filter Search Box – Extract Data as you Type.
- How to do a Multi-level Data Sorting in Excel.
- Excel Advanced Filter – A Complete Guide with Examples.
- 24 Useful Excel Macro Examples for VBA Beginners.
- How to Use Excel VBA InStr Function (with practical EXAMPLES).
- Excel VBA Autofilter.
To sort a range of cells using VBA, you need to use the “SORT” method that allows you to set a single key (column) or multiple keys (for multiple columns) to sort. You can also define the order (ascending or descending) in which you want to sort, and you can specify if you have a header or not.
Sort a Range with VBA
- Use the range object to specify the range that you wish to sort.
- Type a dot and enter the sort method.
- Specify the key that you want to use to sort.
- Define the sorting order.
- Mention if you have a header or not.

Range("A1:A11").Sort Key1:=Range("A1"), _
                     Order1:=xlAscending, _
                     Header:=xlYes
In the above code, you have used the range A1:A11, and in the sort method, you have used the ascending order, mentioned that you have a header in the range.
Understanding the VBA’s Sort Method
Before you write a macro to sort a range it’s better to make deep dive into the sort method and understand its arguments.
Sort (Key1, Order1, Key2, Type, Order2, Key3, Order3, _
Header, OrderCustom, MatchCase, Orientation, SortMethod, _
DataOption1, DataOption2, DataOption3)
The following are the most important arguments that you will be using in the real life.
- Key: Here you need to define a cell whose column you want to use as a base to sort.
- Order: Order in which you want to sort the column (ascending/descending).
- Header: A constant to specify if you have a header or not or you want VBA to guess.
In the following code, I have used the “xlDescending” to sort amount column using descending order.

Range("A1:A13").Sort Key1:=Range("A1"), _
                     Order1:=xlDescending, _
                     Orientation:=xlSortColumns
Using Multiple Columns (Keys) to Sort
You can also use more than one column to sort a range. Let’s take an example of the below table where you have multiple entries with employee names and cities, and you need to sort using the name and city.

Here’s the code that you need to use:

Range("A1:C13").Sort Key1:=Range("A1"), _
                     Order1:=xlAscending, _
                     Key2:=Range("B1"), _
                     Order1:=xlAscending, _
                     Header:=xlYes
As you can see in the code, you have key1 and key2. In the key1, you have the column with the employee name, and in the key2, you have the city column. For both columns, the sorting order is ascending, and headers are there.
Note: You can use it as any column you want to use to take as a sort base using the keys and order.
Changing Sort Orientation
When you normally sort data in Excel, by default, you can sort using columns. But from the sort options, you can change the sort orientation to the left to right instead of top to bottom.

In the same way, you have an argument in the sort method to change the orientation (link).

Range("A1:C13").Sort Key1:=Range("A1"), _
                     Order1:=xlAscending, _
                     Orientation:=xlSortRows
More Tutorials
- Count Rows using VBA in Excel
- Excel VBA Font (Color, Size, Type, and Bold)
- Excel VBA Hide and Unhide a Column or a Row
- Excel VBA Range – Working with Range and Cells in VBA
- Apply Borders on a Cell using VBA in Excel
- Find Last Row, Column, and Cell using VBA in Excel
- Insert a Row using VBA in Excel
- Merge Cells in Excel using a VBA Code
- Select a Range/Cell using VBA in Excel
- SELECT ALL the Cells in a Worksheet using a VBA Code
- ActiveCell in VBA in Excel
- Special Cells Method in VBA in Excel
- UsedRange Property in VBA in Excel
- VBA AutoFit (Rows, Column, or the Entire Worksheet)
- VBA ClearContents (from a Cell, Range, or Entire Worksheet)
- VBA Copy Range to Another Sheet + Workbook
- VBA Enter Value in a Cell (Set, Get and Change)
- VBA Insert Column (Single and Multiple)
- VBA Named Range | (Static + from Selection + Dynamic)
- VBA Range Offset
- VBA Wrap Text (Cell, Range, and Entire Worksheet)
- VBA Check IF a Cell is Empty + Multiple Cells
⇠ Back to What is VBA in Excel
Helpful Links – Developer Tab – Visual Basic Editor – Run a Macro – Personal Macro Workbook – Excel Macro Recorder – VBA Interview Questions – VBA Codes
Excel VBA Sort Range
Sorting a range in VBA is done by the range.sort method. It is a property of the range method with which a user can sort a range in order. The arguments for this function are: Key1, Order1, Key2, Type, Order2, Key3, Order3, Header, OrderCustom, MatchCase, Orientation, SortMethod, DataOption1, DataOption2, DataOption3. All the arguments for this function are optional.
As part of data organizing or data structuring, it is important to sort the data and make it organized. A similar thing is also available with VBA. A common question about new learners of VBA is how we can use this sort of option as part of VBA automation. This article guides you through the VBA Sort range in detail.
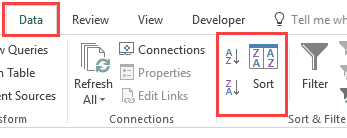
With Excel, we are all familiar with the sort option available under the DATA tab.
Table of contents
- Excel VBA Sort Range
- Sort Option in VBA
- Example of Sort Range in VBA
- Things to Remember about Excel VBA Sort Range
- Recommended Articles
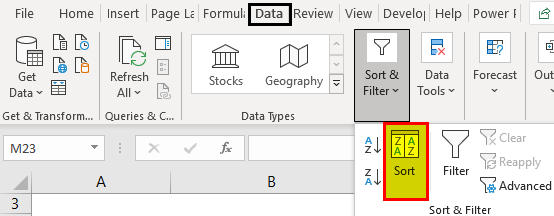
Sort Option in VBA
To use the sort option, first, we need to decide what our data range is and mention the same data range by using the RANGE object in VBARange is a property in VBA that helps specify a particular cell, a range of cells, a row, a column, or a three-dimensional range. In the context of the Excel worksheet, the VBA range object includes a single cell or multiple cells spread across various rows and columns.read more. Then, only we can access the “Sort” option in VBA. For example, assuming my data range is from A1 to D10, we can provide the data range as follows.
Code:
Sub Sort_Range_Example()

  Range ("A1:D10")

End Sub

Now, put a dot and select the “SORT” method.
Code:
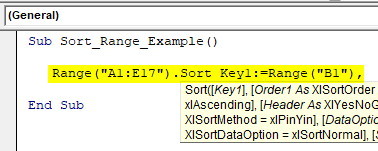
Sub Sort_Range_Example()

  Range("A1:D10").Sort

End Sub

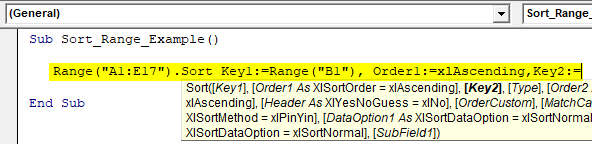
Below is the syntax of the SORT method of range. Though syntax has different arguments, we do not need all of them for our VBA codingVBA code refers to a set of instructions written by the user in the Visual Basic Applications programming language on a Visual Basic Editor (VBE) to perform a specific task.read more. So, we need only a few elements.
![]()
[Key1]: In the data range we are sorting, we need to specify which column we need to sort. For example, in the data range of A1: D10, if we want to sort the data based on column B, then [Key1] will be Range(“B1”).
[Order1]: The mentioned column in the [Key1] argument should sort in what order? We can choose two options here: “xlAscending” or “xlDescending.”
Header: The mentioned data range has headers or not? If yes, we can supply “xlYes,” or else we can supply “xlNo.”
Example of Sort Range in VBA
Let us take the example of the Excel VBA sort range to understand this better.
You can download this VBA Sort Range Excel Template here – VBA Sort Range Excel Template
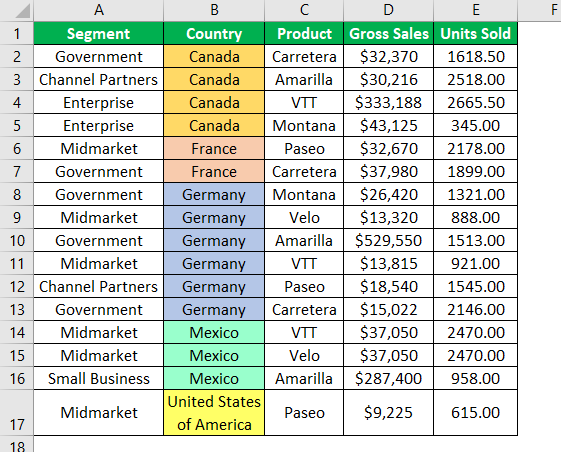
Look at the below data structure.
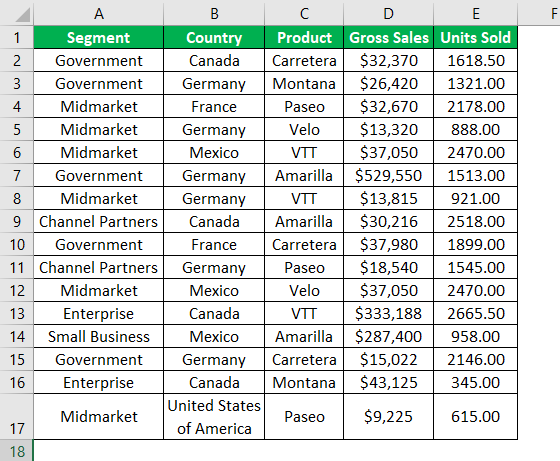
We have data from A1 to E17. First, we will sort the data based on “Country-wise.” Then, follow the below steps to write the code to sort the data.
Step 1: Start the excel macroA macro in excel is a series of instructions in the form of code that helps automate manual tasks, thereby saving time. Excel executes those instructions in a step-by-step manner on the given data. For example, it can be used to automate repetitive tasks such as summation, cell formatting, information copying, etc. thereby rapidly replacing repetitious operations with a few clicks.
read more procedure.
Code:
Sub Sort_Range_Example()

End Sub

Step 2: First, mention the data range using the RANGE object.
Code:
Sub Sort_Range_Example()

  Range ("A1:E17")

End Sub

Step 3: Now, choose the “Sort” method of the Range object.
Code:
Sub Sort_Range_Example()

  Range("A1:E17").Sort

End Sub

Step 4: Since we are sorting the data based on “Country-wise,” our Key 1 argument column will be Range (“B1”).
Code:
Sub Sort_Range_Example()

  Range("A1:E17").Sort Key1:=Range("B1"),

End Sub
Step 5: Once we mention the required column, we need to mention in what order we need to sort the data, and “Order1” will be the “xlAscending” order.
Code:
Sub Sort_Range_Example()

   Range("A1:E17").Sort Key1:=Range("B1"), Order1:=xlAscending,

End Sub

Step 6: Our data has headers so that that header will be “xlYes.”
Code:
Sub Sort_Range_Example()

  Range("A1:E17").Sort Key1:=Range("B1"), Order1:=xlAscending, Header:=xlYes

End Sub

We have mentioned all the elements which are required to sort the data. Then, execute the code by pressing the F5 function and key and see the result.
Output:
The data has been sorted based on country names from A to Z.
Now, assume we need to sort the data based on country-wise. Also, we need to sort the “Gross Sales” from highest to lowest. In such cases, we also need to use Key2 and Order2 arguments.
After mentioning Key1 and Order1, let us choose Key2.
Code:
Sub Sort_Range_Example()

  Range("A1:E17").Sort Key1:=Range("B1"), Order1:=xlAscending,Key2:=

End Sub
Since we are sorting the data based on the “Gross Sales” column, our Key2 column name will be Range(“D1”).
Code:
Sub Sort_Range_Example()

  Range("A1:E17").Sort Key1:=Range("B1"), Order1:=xlAscending,Key2:=Range("D1"),

End Sub
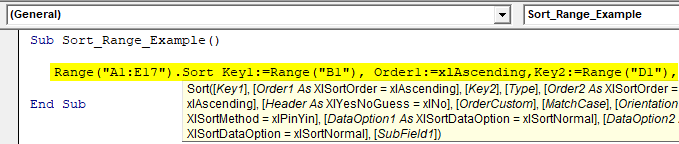
Once the Key2 is specified, we need to decide on the sorting pattern of whether it is ascending order or descending order in the Order2 argument. Since we are sorting the sales value from largest to smallest, we can choose the “xlDescending” order.
Code:
Sub Sort_Range_Example()

  Range("A1:E17").Sort Key1:=Range("B1"), Order1:=xlAscending, Key2:=Range("D1"),
  Order2:=xlDescending, Header:=xlYes

End Sub
After that, mention the header argument as “xlYes.” Now, run the code and see what happens.
Output:
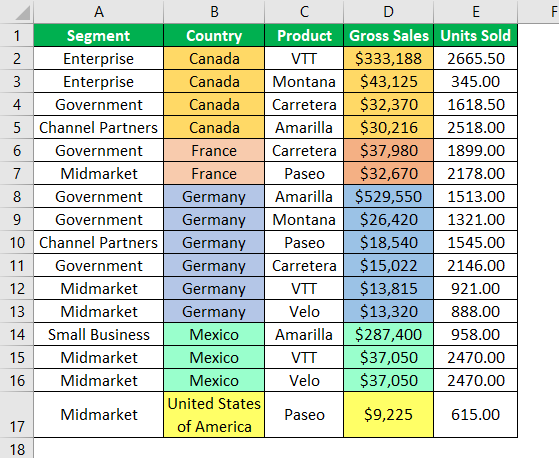
Previously, it was sort based only on “Country-wise.” But this time, it sorted based on “Country-wise” first and then on “Gross Sales” from highest to lowest.
Like this, we can use the “Sort” method in VBA to organize the data.
Things to Remember about Excel VBA Sort Range
- The sort is a method available in VBA. To access this method, we need to specify the range of cells we will sort.
- If the data range includes headers, we need to choose the header option as “xlYes.” If not, we can choose “xlNo.”
Recommended Articles
This article is a guide to VBA Sort Range. Here, we discuss how to sort range using the specific column in VBA, Excel example, and downloadable Excel templates. You may also look at these useful functions in Excel: –
- Pivot Table Sort
- VBA Variable Range
- Named Range in VBA
- UsedRange in VBA

Excel VBA Sort
There are different ways to sort the data in Microsoft Excel. There is a sort icon under Excel Data tab ribbon from where you can sort your data in a jiffy and get the results. Why there is a need to write the complex VBA code then?
You need to keep it in your mind every time, VBA codes are there to automate the things. Suppose you have a data which gets updated every now and then. Maybe every Day, Weekly, Monthly, etc. and you need your data in a specific sorted manner. In such cases, VBA SORT function can be used and will come out as a handy tool for your reference.
VBA has a Range.Sort method to sort the data for you. Where Range specifies the range of cells which we want to sort out in ascending or descending order.
The syntax for Range.Sort is as given below:

Where,
- Key – Column/Range you need to sort. Ex. If you want to sort cells A1:A10, you should mention Range(A1:A10)
- Order – This is the parameter which allows you to sort the data in ascending or descending order.
- Header – This is the parameter which specifies whether your column/range has headers or not.
These three parameters are enough for our proceedings. However, there are some other parameters like MatchCase, SortMethod, etc. which you can always explore and see how they work.
How to Use Excel VBA Sort Function?
We will learn how VBA Sort can be used to sort the column without headers, a column with headers and Multiple columns with examples in excel.
You can download this VBA Sort Excel Template here – VBA Sort Excel Template
VBA Sort Function – Example #1
Sorting single column without a header
Suppose you have a column with names as shown below and all you need is to sort this data alphabetically in ascending or descending order.
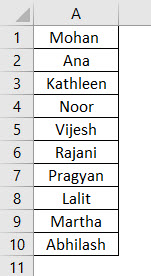
Follow the below steps to use Sort function in VBA.
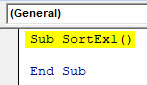
Step 1: Define a new sup-procedure under a module and create a macro.
Code:
Sub SortEx1()

End Sub
Step 2: Use Range.Sort function to be able to sort this column in ascending order.
Code:
Sub SortEx1()

Range("A1", Range("A1").End(xlDown)).Sort

End Sub
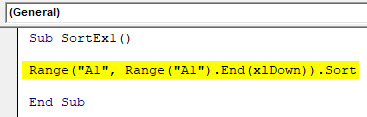
Here you are giving range starting from cell A1 to the last used/non-empty cell (see the function .End(xlDown)) to Range.Sort function.
Step 3: Now, input the argument values.
Code:
Sub SortEx1()

Range("A1", Range("A1").End(xlDown)).Sort Key1:=Range("A1"), Order1:=xlAscending, Header:=xlNo

End Sub

As we have discussed earlier, Key, Order, and Header are the important and necessary arguments to be provided. We have given Range(“A1”) as the column starting range which we need to sort. Order is provided as Ascending and Header as No (Which means column doesn’t have header).
This code will check for all non-empty cells starting from A1 and then sort them in ascending order starting from cell A1.
Step 4: Run this code by hitting F5 or Run button manually and see the output.
If you can compare this with the image at the start of this example, you can see that names are sorted in ascending order.
VBA Sort Function – Example #2
Sorting a Single Column with Header
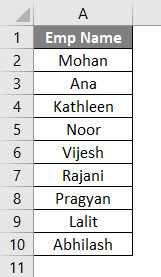
Suppose you have a column with the header as shown below. And you wanted to sort this column in ascending or descending order.
Follow the below steps to use Sort function in VBA.
Step 1: Define a new sub-procedure under a new model to store the macro.
Code:
Sub SortEx2()

End Sub
Step 2: Use Sheets(“Example #2”) to specify which sheet your data is.
Code:
Sub SortEx2()

Sheets ("Example #2")

End Sub
Step 3: Use Range(“A1”).Sort in front of the above code line to make it a sort function.
Code:
Sub SortEx2()

Sheets("Example #2").Range("A1").Sort

End Sub
Step 4: Provide Key1 as Range(“A1”) to sort the data from cell A1, Order1 in order to sort the data in ascending or descending order and Header as Yes in order to let the system know that first row is header in your data.
Code:
Sub SortEx2()

Sheets("Example #2").Range("A1").Sort Key1:=Range("A1"), Order1:=xlAscending, Header:=xlYes

End Sub

Step 5: Run this code by hitting F5 or Run button manually and See the output.
Here, the data from Example #2 of given excel workbook is sorted in ascending order given that it has a header. Which means that, while sorting this data, first row (which contains Emp Name) is neglected because it is considered as a header for this data in column A.
You can also sort the same data in descending order of alphabets. All you need to do is change the order from ascending to descending.
Step 6: Change order1 to descending in order to sort the data in descending order.
Code:
Sub SortEx2()

Sheets("Example #2").Range("A1").Sort Key1:=Range("A1"), Order1:=xlDescending, Header:=xlYes

End Sub

Step 7: Run the code and see an output as given below.
You can see that the data is sorted in Descending order.
VBA Sort Function – Example #3
Sorting Multiple Columns with Headers
Till now, we have covered how to sort a single column data in ascending or descending order (without header and with header). What if you have data which you need to sort based on multiple columns? Is it possible to write a code for the same?
The answer is, “Yes, surely it can be done!”
Suppose you have data as given below:
You wanted to sort this data first by Emp Name and then by Location. Follow the below steps to see how we can code it in VBA.
Step 1: Define a new sub-procedure to add a macro under a new module.
Code:
Sub SortEx3()

End Sub

Step 2: Use a With… End With statement to add multiple sort conditions in a single loop.
Code:
Sub SortEx3()

With ActiveSheet.Sort

End Sub

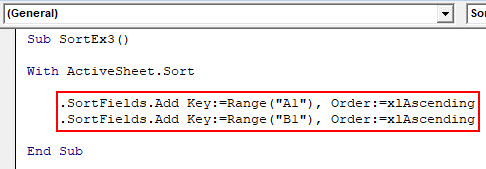
Step 3: Now, use SortFields.Add to add the multiple sort conditions in the same worksheet.
Code:
Sub SortEx3()

With ActiveSheet.Sort

   .SortFields.Add Key:=Range("A1"), Order:=xlAscending
   .SortFields.Add Key:=Range("B1"), Order:=xlAscending

End Sub
Step 4: Decide sheet range to be sorted and header In next step.
Code:
Sub SortEx3()

With ActiveSheet.Sort

    .SortFields.Add Key:=Range("A1"), Order:=xlAscending
    .SortFields.Add Key:=Range("B1"), Order:=xlAscending
    .SetRange Range("A1:C13")
    .Header = xlYes

End Sub
Step 5: Use .Apply to apply all these things under with statement and close the loop writing End With.
Code:
Sub SortEx3()

With ActiveSheet.Sort

    .SortFields.Add Key:=Range("A1"), Order:=xlAscending
    .SortFields.Add Key:=Range("B1"), Order:=xlAscending
    .SetRange Range("A1:C13")
    .Header = xlYes
    .Apply
End With

End Sub
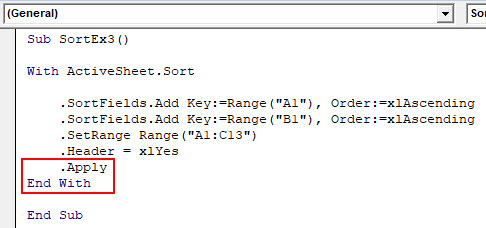
Step 6: Run this code by hitting F5 or Run button manually and see the Output.

In this code, ActiveSheets.Sort helps the system identify the sheet under which data is to be sorted. SortFields.Add allows adding two sorting conditions with their order (Ascending in both cases). SetRange allows the system to set the range from A1 to C13. You can move this range up as well. Apply statements allows the system to apply all the changes made in With loop.
Finally, you’ll get the data which is sorted based on Emp Name First and then by Location.
Things to Remember
- Under VBA Sort, you can create named ranges instead of cell references and use the same. Ex. If you have created the named range for cell A1:A10 as “EmpRange”, you can use it under Range.Sort like Range(“EmpRange”).
- You can sort the data in ascending as well as in descending order same as that of in excel.
- If you are not sure whether your data has a header or not, you can use xlGuess under Header section to let system guess whether the first line of data is a header or not.
Recommended Articles
This has been a guide to Excel VBA Sort. Here we discussed VBA Sort and how to use Excel VBA Sort Function along with practical examples and downloadable excel template. You can also go through our other suggested articles –
- VBA Match
- VBA Month
- VBA While Loop
- VBA XML