
Элемент управления пользовательской формы CheckBox для выбора или невыбора его пользователем и передачи результата в VBA Excel. Свойства «Флажка», примеры кода.
UserForm.CheckBox – это элемент управления пользовательской формы, предназначенный для передачи в код VBA информации о выборе или невыборе его пользователем и возвращающий одно из двух значений: False (галочки нет) или True (галочка установлена).

Элемент управления CheckBox состоит из флажка и надписи. В VBA Excel флажок имеет квадратную форму, надпись расположена справа от него. Надпись реагирует на нажатие мышью так же, как и флажок.
По тексту статьи значение слова «Флажок» в кавычках равно значению слова CheckBox, флажок без кавычек обозначает квадрат с галочкой или без нее.
Кроме состояний «выбран» или «не выбран», существует и третье состояние флажка: серая галочка на сером фоне. Получить такое состояние на пользовательской форме можно путем присвоения свойству CheckBox.Value значения Null.

Надписи флажков выведены с помощью следующего кода VBA Excel:
|
Private Sub UserForm_Initialize() CheckBox1.Value = False CheckBox1.Caption = «CheckBox1.Value = « _ & CheckBox1.Value CheckBox2.Value = Null CheckBox2.Caption = «CheckBox2.Value = « _ & CheckBox2.Value CheckBox3.Value = True CheckBox3.Caption = «CheckBox3.Value = « _ & CheckBox3.Value End Sub |
Интересно было посмотреть, какое значение отобразится в надписи элемента управления CheckBox2. Обратите внимание на то, что если строку CheckBox2.Caption = "CheckBox2.Value = " & CheckBox2.Value заменить на CheckBox2.Caption = CheckBox2.Value, будет сгенерирована ошибка, так как в VBA не существует текстового отображения значения Null.
Эксперименты показали, что отобразить «Флажок» в третьем состоянии можно также с помощью присвоения свойству CheckBox.Value значения «пустая строка».
Элемент управления CheckBox может использоваться на пользовательской форме для
- выбора или отмены каких-либо параметров и условий,
- отображения или скрытия других элементов управления,
- изменение доступности других элементов управления для взаимодействия с пользователем.
Если требуется выбор только одной опции из группы предложенных, для этой цели в VBA Excel используется набор элементов управления OptionButton.
Свойства элемента «Флажок»
| Свойство | Описание |
|---|---|
| AutoSize | Автоподбор размера «Флажка». True – размер автоматически подстраивается под длину набираемой строки. False – размер элемента управления определяется свойствами Width и Height. |
| ControlSource | Ссылка на источник данных для свойства Value. |
| ControlTipText | Текст всплывающей подсказки при наведении курсора на CheckBox. |
| Enabled | Возможность взаимодействия пользователя с элементом управления. True – взаимодействие включено, False – отключено (цвет флажка и надписи становится серым). |
| Font | Шрифт, начертание и размер текста надписи. |
| Height | Высота элемента управления. |
| Left | Расстояние от левого края внутренней границы пользовательской формы до левого края элемента управления. |
| Picture | Добавление изображения вместо текста надписи или дополнительно к нему. |
| PicturePosition | Выравнивание изображения и текста в поле надписи. |
| TabIndex | Определяет позицию элемента управления в очереди на получение фокуса при табуляции, вызываемой нажатием клавиш «Tab», «Enter». Отсчет начинается с 0. |
| TextAlign* | Выравнивание текста надписи: 1 (fmTextAlignLeft) – по левому краю, 2 (fmTextAlignCenter) – по центру, 3 (fmTextAlignRight) – по правому краю. |
| Top | Расстояние от верхнего края внутренней границы пользовательской формы до верхнего края элемента управления. |
| TripleState | Определяет, может ли пользователь делать выбор между двумя состояниями «Флажка» или между тремя, включая серую галочку на сером квадрате. True – доступны три состояния, False – доступны два состояния. |
| Value | Значение «Флажка»: True – галочка установлена, False – галочка не установлена, Null – серая галочка на сером квадрате. |
| Visible | Видимость элемента CheckBox. True – элемент отображается на пользовательской форме, False – скрыт. |
| Width | Ширина элемента управления. |
| WordWrap | Перенос текста надписи на новую строку при достижении границы ее поля. True – перенос включен, False – перенос выключен. |
* При загруженной в поле надписи картинке свойство TextAlign не работает, следует использовать свойство PicturePosition.
Свойство по умолчанию для элемента CheckBox – Value, основное событие – Click.
В таблице перечислены только основные, часто используемые свойства «Флажка». Все доступные свойства отображены в окне Properties элемента управления CheckBox.
Примеры использования CheckBox
Пример 1
Отображение элемента управления CheckBox на пользовательской форме с параметрами, заданными в коде VBA Excel:
|
Private Sub UserForm_Initialize() With CheckBox1 .Caption = «Нажмите на меня» .ControlSource = «A1» .Value = False .Left = 12 .Top = 12 End With End Sub |

Размещается данная процедура в модуле пользовательской формы.
Если несколько элементов управления CheckBox привязать к одной ячейке, то при клике на одном из них, менять свое состояние будут и все остальные.
Пример 2
Смена надписи «Флажка» в зависимости от его состояния:
|
1 2 3 4 5 6 7 8 9 10 11 12 13 14 15 16 17 18 |
‘Устанавливаем первоначальные ‘значения свойств «Флажка» Private Sub UserForm_Initialize() With CheckBox1 .Caption = «Поставьте галочку» .Value = False .TripleState = False End With End Sub ‘Меняем надпись «Флажка» при ‘смене параметра CheckBox1.Value Private Sub CheckBox1_Change() If CheckBox1.Value Then CheckBox1.Caption = «Снимите галочку» Else CheckBox1.Caption = «Поставьте галочку» End If End Sub |

Пример 3
Скрытие и отображение, изменение доступности других элементов управления с помощью «Флажка».
Для реализации этого примера необходимо создать пользовательскую форму с четырьмя элементами управления: CheckBox1, TextBox1, TextBox2 и CommandButton1. А в модуле формы разместить следующий код:
|
1 2 3 4 5 6 7 8 9 10 11 12 13 14 15 16 17 18 19 20 21 22 23 24 25 26 27 28 29 30 31 32 33 34 35 36 37 38 39 40 41 |
‘Устанавливаем первоначальные ‘значения свойств элементов управления Private Sub UserForm_Initialize() With CheckBox1 .Caption = «Хочу сложить два числа» .Value = False .TripleState = False End With With TextBox1 .Enabled = False .Text = «Слагаемое 1» End With With TextBox2 .Enabled = False .Text = «Слагаемое 2» End With With CommandButton1 .Caption = «Сложить» .Visible = False End With End Sub ‘Меняем свойства других элементов ‘управления при смене состояния «Флажка» Private Sub CheckBox1_Change() If CheckBox1.Value Then TextBox1.Enabled = True TextBox2.Enabled = True CommandButton1.Visible = True Else TextBox1.Enabled = False TextBox2.Enabled = False CommandButton1.Visible = False End If End Sub ‘Складываем два числа Private Sub CommandButton1_Click() If IsNumeric(TextBox1) And IsNumeric(TextBox2) Then MsgBox TextBox1 & » + « & TextBox2 & » = « _ & CDbl(TextBox1) + CDbl(TextBox2) End If End Sub |
Форма открывается с недоступными для пользователя текстовыми полями и скрытой кнопкой «Сложить»:

После установки галочки на флажке текстовые поля становятся доступными для редактирования, и отображается кнопка «Сложить»:

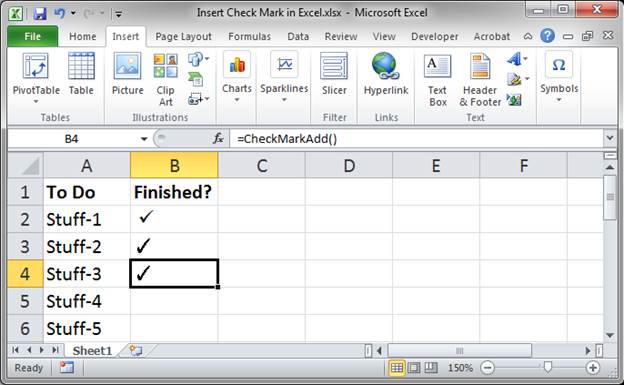
This tutorial goes beyond other simple check-mark tutorials. Here, I’ll show you 3 methods to insert a check-mark into Excel, including using Macros/VBA and a UDF, or User Defined Function.
Sections:
Basic Method to Insert a Check Mark into Excel
VBA Method to Insert a Check Mark into Excel
UDF that Inserts a Check Mark into Excel
Notes
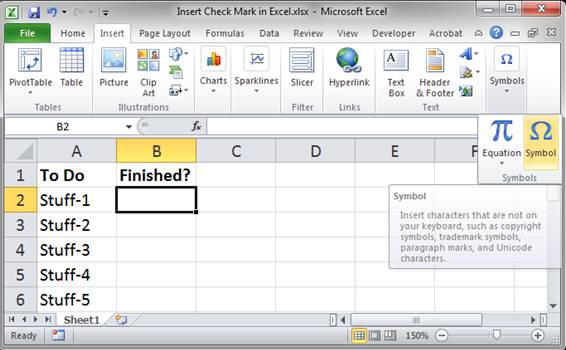
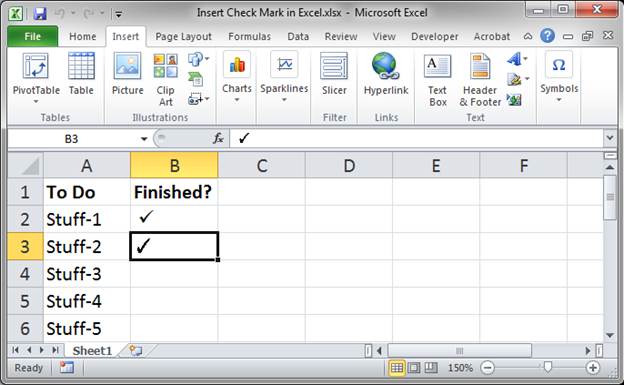
Basic Method to Insert a Check Mark into Excel
This is the most basic way you can enter a check-mark, but it’s kind of time consuming.
- Select the cell where you want the check-mark to go.
- Go to the Insert tab and click the Symbols button and then Symbol

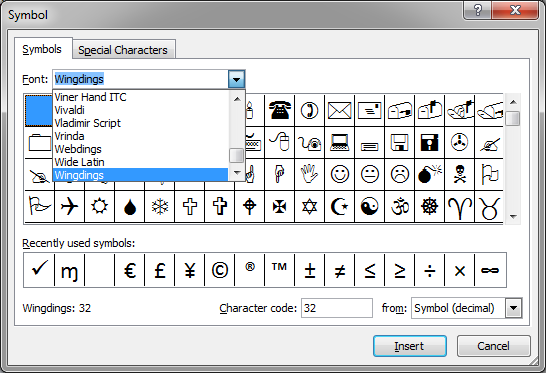
- In the window that opens, go to the Symbols tab and select the Wingdings font from the Font: drop down at the top.
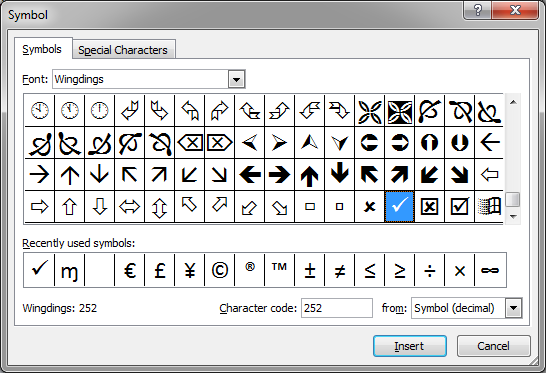
- Scroll down to the bottom and choose the check-mark symbol:
- Hit the Insert button once and then hit the Cancel button and you will now see the check-mark in Excel.
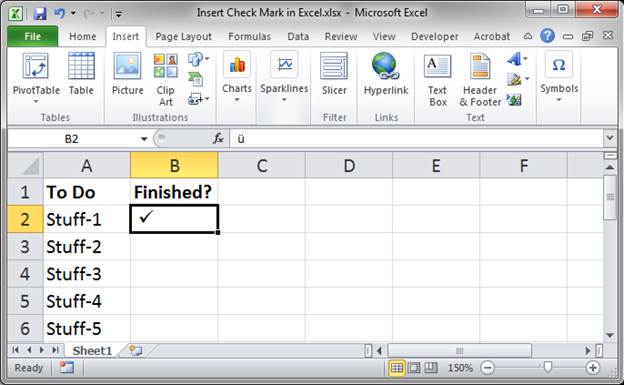
Repeatedly Enter the Check Mark with Ease
Now that you have a check-mark, you may want to enter it again and again. To do that, select the cell with the mark and hit Ctrl + C and then go to where you want it, select that cell, and hit Ctrl + V. Simple copy/paste.
VBA Method to Insert a Check Mark into Excel
To enter a check-mark using VBA, it’s actually very simple.
- Go to the VBA Editor window, Alt + F11, then to Insert > Module.
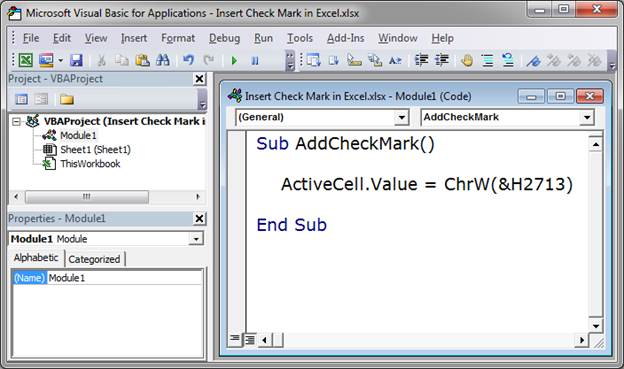
- Paste this code into your macro:
ActiveCell.Value = ChrW(&H2713) - The final macro, in its simplest form can look like this:
- Go back to Excel (Alt + F11) and select a cell, hit Alt + F8, select the macro, hit Run and you have another check-mark in Excel.
UDF that Inserts a Check Mark into Excel
This allows you to use a simple function that you create to add a check mark to Excel.
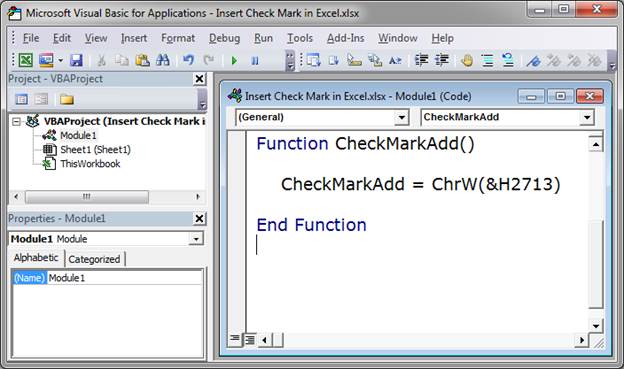
- Go to the VBA Editor window (Alt + F11) and add a module (Insert >Module) and then add this code:
Function CheckMarkAdd()CheckMarkAdd = ChrW(&H2713)
End Function
- Go back to Excel, Alt + F11, and go to the desired cell and type your new function =CheckMarkAdd()
- Hit Enter and that’s it!
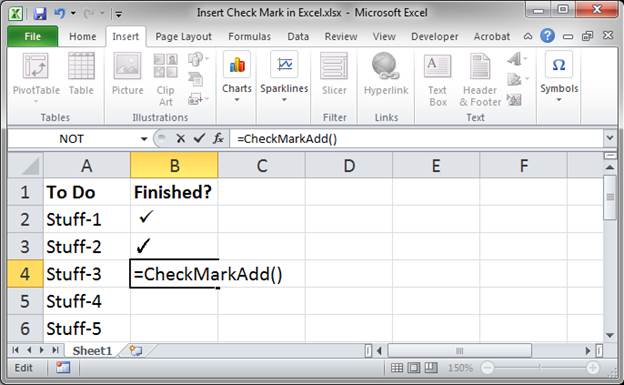
Using this method, you only ever have to remember the UDF that you created and, in less than a second, you can type it in, hit Enter, and you have your check-mark.
This is my favorite method to use!
Notes
All of the above methods come in handy depending on the situation. My person favorite is the UDF method because I love UDFs and it’s just so simple to use.
Download the sample workbook attached to this tutorial to get all of the code used here and try it yourself.
Subscribe for Weekly Tutorials
BONUS: subscribe now to download our Top Tutorials Ebook!
Return to VBA Code Examples
In VBA, you can create a CheckBox where a user can check or uncheck the option. Checkboxes are often used in UserForms, but can also be used in a Worksheet. In this tutorial, you will learn how to create a Checkbox (in both VBA and in Excel Worksheets), get a user choice in VBA and use it in code.
If you want to learn how to create a Listbox, click here: VBA Listbox
If you want to learn how to create a Combobox, click here: VBA Combobox
Create a Checkbox
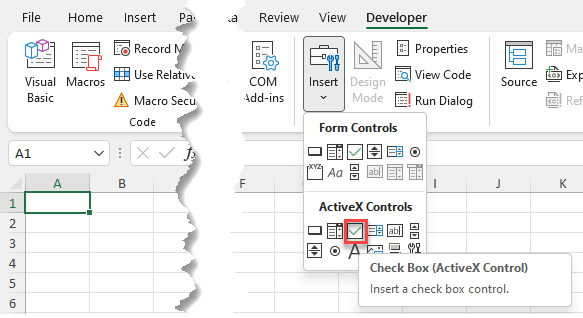
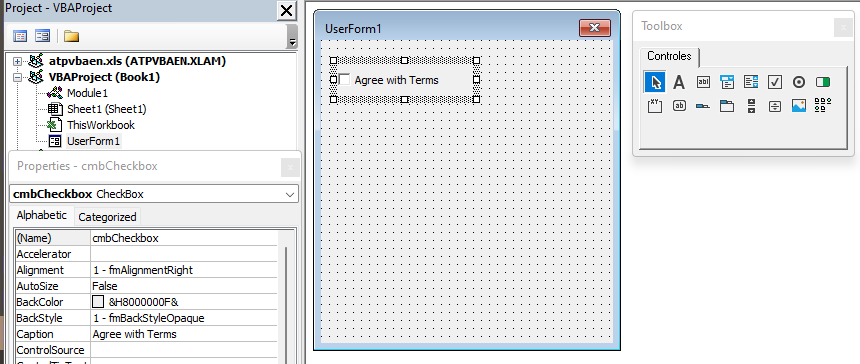
In order to insert a Checkbox in the Worksheet, you need to go to the Developer tab, click Insert and under ActiveX Controls choose Check Box:
When you select the Checkbox which you inserted, you can click on Properties under the Developer tab:
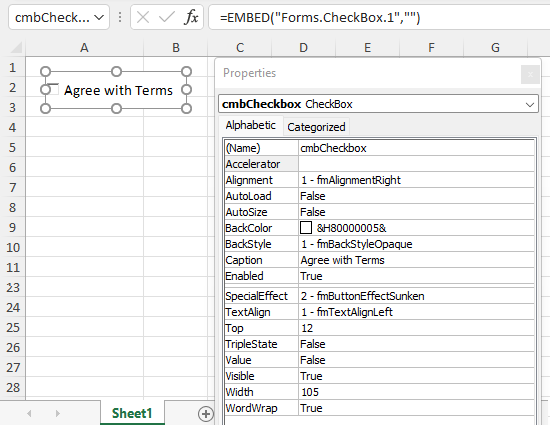
Here you can set different properties of the Checkbox. First, we changed the attribute Name to cmbCheckbox. Next, we can use the Checkbox with this name in VBA code.
Also, we changed the text which appears next to the checkbox to Agree with Terms. To do this, you need to set the attribute Caption.
Get a Selected Item of a Checkbox in VBA
The purpose of a Checkbox is to get a user’s choice (checkbox checked or not). In order to retrieve a value that is selected by user, you need to use this code:
If Sheet1.cmbCheckBox.Value = True Then
    Sheet1.Range("C3") = "Agree"
Else
    Sheet1.Range("C3") = "Don't agree"
End If
We want to populate the cell C3 with Agree if the checkbox is checked and Don’t agree otherwise. The value of the checkbox is in the Value attribute of the object Sheet1.cmbCheckbox. The value of the checkbox can be true or false.

As we checked the checkbox, the value of Sheet1.cmbCheckbox.Value is true, so the result in C3 is Agree.
Use a Checkbox in a UserForm
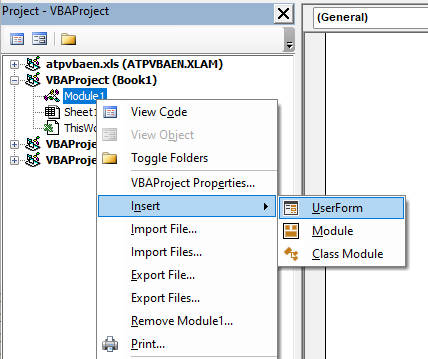
As we mentioned, Checkboxes are most often used in UserForms. To explain how you can do it, we will first insert an Userform. In the VBA Editor, right-click on Module name, click on Insert and choose UserForm:
To display controls for inserting, you need to enable the Toolbox. To do this, click on the Toolbox icon in the toolbar. After that, you will get the windows with all the controls available. You can click on Checkbox to create it in the Userform:
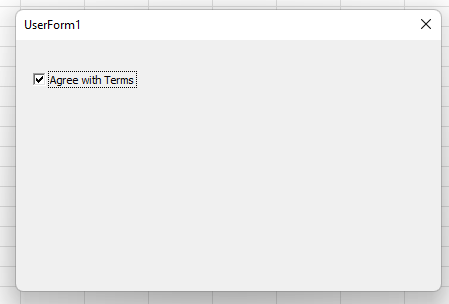
In the properties window, we will change the name of the Checkbox to chbCheckBox and caption to Agree with Terms. When we run the Userform, we get the Checkbox in it.
If you want to get selected value from the Checkbox, you need to use the same logic for the Checkbox in a Worksheet, which is explained earlier in the article.
VBA Coding Made Easy
Stop searching for VBA code online. Learn more about AutoMacro — A VBA Code Builder that allows beginners to code procedures from scratch with minimal coding knowledge and with many time-saving features for all users!

Learn More!
Содержание
- Элемент управления CheckBox
- Замечания
- См. также
- Поддержка и обратная связь
- VBA Excel. Элемент управления CheckBox (флажок)
- Элемент управления CheckBox
- Свойства элемента «Флажок»
- Примеры использования CheckBox
- The Complete Guide to Excel VBA ActiveX Checkboxes
- The VBA Tutorials Blog
- Table of Contents
- Introduction
- Available Properties
- Renaming a Checkbox
- Method 1
- Method 2
- Return the Value of your Checkbox
- Method 1
- Method 2
- Checking/Unchecking your Checkbox
- Method 1
- Method 2
- Enabling/Disabling your Checkbox
- Method 1
- Method 2
- Method 3
- Hiding/Unhiding your Checkbox
- Method 1
- Method 2
- Editing the Label (Caption) of your Checkbox
- Method 1
- Method 2
- Adding/Deleting a Checkbox
- Add a Checkbox
- Delete a Checkbox
- Selecting a Checkbox
- Method 1
- Method 2
- Linking Checkbox to a Cell
- Method 1
- Method 2
- Changing the Checkbox Font
- Method 1
- Method 2
- Changing the Color of the Checkbox
- Method 1
- Method 2
- Changing Other Checkbox Properties
- Run Macro when Checkbox is Clicked
- Run Macro when Mouse Hovers over Checkbox
- Other Checkbox Events
- Looping Through All Checkboxes
Элемент управления CheckBox
Отображает состояние выбора элемента.
Замечания
Используйте CheckBox , чтобы предоставить пользователю выбор между двумя значениями, такими как Да/Нет, True/False или On/Off.
Когда пользователь выбирает элемент CheckBox, отображается специальная метка (например, X) и его текущее значение — Да, True или Включено; Если пользователь не выбирает флажок, он пуст, а для него задано значение Нет, Ложь или Выкл. В зависимости от значения свойства TripleState, CheckBox также может иметь значение NULL.
Если элемент CheckBoxпривязан к источнику данных, то при изменении настройки изменяется значение этого источника. Выключенный элемент CheckBox показывает текущее значение, но недоступен и не позволяет изменять значение из пользовательского интерфейса.
Можно также использовать флажки внутри группы, чтобы выбрать один или несколько связанных элементов группы. Например, можно создать форму заказа, содержащую список доступных товаров с элементом CheckBox, расположенным перед каждым товаром. Пользователь может выбрать конкретный товар или товары, устанавливая соответствующие флажки CheckBox.
Свойством по умолчанию для элемента CheckBox является свойство Value. Событием по умолчанию для элемента CheckBox является событие Click.
ListBox также позволяет поставить флажок по выбранным параметрам. В зависимости от приложения можно использовать элемент ListBox вместо группы элементов управления CheckBox.
См. также
Поддержка и обратная связь
Есть вопросы или отзывы, касающиеся Office VBA или этой статьи? Руководство по другим способам получения поддержки и отправки отзывов см. в статье Поддержка Office VBA и обратная связь.
Источник
VBA Excel. Элемент управления CheckBox (флажок)
Элемент управления пользовательской формы CheckBox для выбора или невыбора его пользователем и передачи результата в VBA Excel. Свойства «Флажка», примеры кода.
Элемент управления CheckBox
Элемент управления CheckBox состоит из флажка и надписи. В VBA Excel флажок имеет квадратную форму, надпись расположена справа от него. Надпись реагирует на нажатие мышью так же, как и флажок.
Кроме состояний «выбран» или «не выбран», существует и третье состояние флажка: серая галочка на сером фоне. Получить такое состояние на пользовательской форме можно путем присвоения свойству CheckBox.Value значения Null.
Надписи флажков выведены с помощью следующего кода VBA Excel:
Интересно было посмотреть, какое значение отобразится в надписи элемента управления CheckBox2. Обратите внимание на то, что если строку CheckBox2.Caption = «CheckBox2.Value = » & CheckBox2.Value заменить на CheckBox2.Caption = CheckBox2.Value , будет сгенерирована ошибка, так как в VBA не существует текстового отображения значения Null.
Эксперименты показали, что отобразить «Флажок» в третьем состоянии можно также с помощью присвоения свойству CheckBox.Value значения «пустая строка».
Элемент управления CheckBox может использоваться на пользовательской форме для
- выбора или отмены каких-либо параметров и условий,
- отображения или скрытия других элементов управления,
- изменение доступности других элементов управления для взаимодействия с пользователем.
Если требуется выбор только одной опции из группы предложенных, для этой цели в VBA Excel используется набор элементов управления OptionButton.
Свойства элемента «Флажок»
| Свойство | Описание |
|---|---|
| AutoSize | Автоподбор размера «Флажка». True – размер автоматически подстраивается под длину набираемой строки. False – размер элемента управления определяется свойствами Width и Height. |
| ControlSource | Ссылка на источник данных для свойства Value. |
| ControlTipText | Текст всплывающей подсказки при наведении курсора на CheckBox. |
| Enabled | Возможность взаимодействия пользователя с элементом управления. True – взаимодействие включено, False – отключено (цвет флажка и надписи становится серым). |
| Font | Шрифт, начертание и размер текста надписи. |
| Height | Высота элемента управления. |
| Left | Расстояние от левого края внутренней границы пользовательской формы до левого края элемента управления. |
| Picture | Добавление изображения вместо текста надписи или дополнительно к нему. |
| PicturePosition | Выравнивание изображения и текста в поле надписи. |
| TabIndex | Определяет позицию элемента управления в очереди на получение фокуса при табуляции, вызываемой нажатием клавиш «Tab», «Enter». Отсчет начинается с 0. |
| TextAlign* | Выравнивание текста надписи: 1 (fmTextAlignLeft) – по левому краю, 2 (fmTextAlignCenter) – по центру, 3 (fmTextAlignRight) – по правому краю. |
| Top | Расстояние от верхнего края внутренней границы пользовательской формы до верхнего края элемента управления. |
| TripleState | Определяет, может ли пользователь делать выбор между двумя состояниями «Флажка» или между тремя, включая серую галочку на сером квадрате. True – доступны три состояния, False – доступны два состояния. |
| Value | Значение «Флажка»: True – галочка установлена, False – галочка не установлена, Null – серая галочка на сером квадрате. |
| Visible | Видимость элемента CheckBox. True – элемент отображается на пользовательской форме, False – скрыт. |
| Width | Ширина элемента управления. |
| WordWrap | Перенос текста надписи на новую строку при достижении границы ее поля. True – перенос включен, False – перенос выключен. |
* При загруженной в поле надписи картинке свойство TextAlign не работает, следует использовать свойство PicturePosition.
Свойство по умолчанию для элемента CheckBox – Value, основное событие – Click.
В таблице перечислены только основные, часто используемые свойства «Флажка». Все доступные свойства отображены в окне Properties элемента управления CheckBox.
Примеры использования CheckBox
Пример 1
Отображение элемента управления CheckBox на пользовательской форме с параметрами, заданными в коде VBA Excel:
Источник
The Complete Guide to Excel VBA ActiveX Checkboxes
The VBA Tutorials Blog
Table of Contents
Introduction
This complete guide shows you how to control Excel ActiveX Checkboxes using VBA. If you want to learn how to control Form Control Checkboxes, instead, head over to my Excel VBA Form Control Checkboxes Guide.
ActiveX checkboxes are one of the two types of checkboxes you can add directly to your worksheet. The ActiveX checkboxes are located under ActiveX Controls on the Developer Tab > Insert menu:

ActiveX Checkboxes
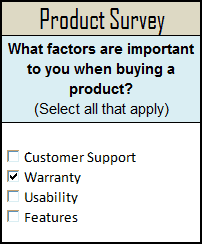
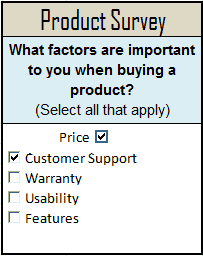
I made a sample product survey form using Excel ActiveX Checkboxes. I’ll point to this survey form throughout this guide as I use VBA macros to show you how to control ActiveX checkboxes.
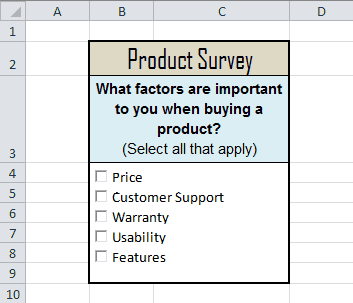
Excel Survey Form
Keep reading to learn how to grab the value, check, uncheck, change properties and loop through all ActiveX checkboxes!
Available Properties
Unlike Form Control Checkboxes, you can right-click ActiveX Checkboxes and pull up a list of properties:

ActiveX Checkbox Properties
All these properties can be changed in Excel using VBA — I’ll show you how.
Renaming a Checkbox
The checkbox name can be found beside the row labeled (Name) in the Properties Window. A version of the name is found in the upper left of Excel when you have your checkbox selected, but here are two cautions about relying on this version of the name:
- ActiveX controls cannot have spaces in their names. That’s why Method 1, below, works. Even if you put a space in the name in the upper left, the (Name) attribute in the Properties Window will still not have the space.
- You must click Design Mode on the Developer Tab to select your checkbox

CheckBox1
Method 1
Method 2
Return the Value of your Checkbox
Just like with Form Control Checkboxes, there is more than one way to check the value of an ActiveX checkbox using VBA. I’ll show you two ways. The following macros return the value of a checkbox named “ CheckBox1 ” and store the value in the variable cbValue :
Method 1
Method 2
Make powerful macros with our free VBA Developer Kit
This is actually pretty neat. If you have trouble understanding or remembering it, our free VBA Developer Kit can help. It’s loaded with VBA shortcuts to help you make your own macros like this one — we’ll send a copy, along with our Big Book of Excel VBA Macros, to your email address below.
Notice, the syntax of these macros is slightly different than the macros for Form Control Checkboxes. ActiveX Controls fall into the OLEObjects category, which are a subset of the Shapes collection we used when calling Form Control Checkboxes.
Each method produces the same result, so you can use whichever one you feel the most comfortable with. There are three possible values of a checkbox.
| Value | Example | Description |
|---|---|---|
| True |  |
Checked |
| False |  |
Unchecked |
| Null |  |
Grayed Out |
If you’re trying to read the value of a checkbox using a data type Boolean, you will receive an error if the value is Null. That’s why I chose a Variant data type in the macro examples above.
Checking/Unchecking your Checkbox
Checking and unchecking your checkbox is almost identical to returning the value of your checkbox. Again, at least two methods can be used. The following macros first check the box, then uncheck the box and, finally, nullify the checkbox:
Method 1
Method 2
One thing worth noting is that when you programatically change the state of the checkbox to True or False, it calls the Click event for that checkbox. In other words, if you have a macro that runs when you click your checkbox on your spreadsheet, it may run when you change its value using VBA.
Enabling/Disabling your Checkbox
ActiveX checkboxes gray out when you disable them, which is excellent. They can either gray out in the Checked or Unchecked state. Disabling a checkbox prevents the user from changing the value of the checkbox by clicking (checking and unchecking). You would still be able to change the value by using VBA. Here are some examples for disabling ActiveX checkboxes:
Method 1
Method 2
Method 3
I know, I know. It makes no sense that you get the same outcome whether or not you use the .Object keyword. This works for some properties, like .Enabled , but not for other properties, like .Value .
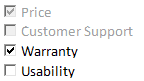
Top 2 Checkboxes are Disabled
Remember when we did this with the Form Control Checkboxes? Recall that disabling the checkboxes did not disable the macro associated with it. ActiveX checkboxes are different. Disabling the checkbox does disable the Click event macro associated with it.
To enable your checkbox again, just set the .Enabled property back to True using whichever method you prefer. Here’s an example:
Hiding/Unhiding your Checkbox
You can completely hide your ActiveX Checkboxes by changing the .Visible property. Setting it to True shows the checkbox and setting it to False hides the checkbox.
Method 1
Method 2
Again, I know it makes no sense, but you cannot use the .Object notation to change the visibility, like you could to enable/disable the checkbox. Silly fact.
Price checkbox no longer visible
To make your checkbox visible again, change the .Enabled property back to True using whichever method you prefer. Here’s an example:
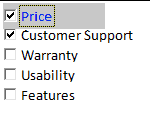
Editing the Label (Caption) of your Checkbox
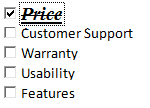
You can change the caption of your Checkbox using the .Caption property. The following examples change the label beside CheckBox1 from “Price” to “Reliability.”
Method 1
Method 2
Here’s the end product:
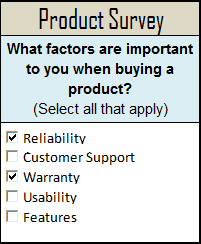
Reliability
If using the OLEObjects method, the .Object method must be used to change the caption. Otherwise, you’ll get a runtime error.
Adding/Deleting a Checkbox
To add an ActiveX Checkbox, you need to know where you want to place the checkbox and what size you want it to be.
Add a Checkbox
Notice how this macro combines the .Name and .Caption properties we discussed earlier to make a new checkbox with a custom label and custom name.
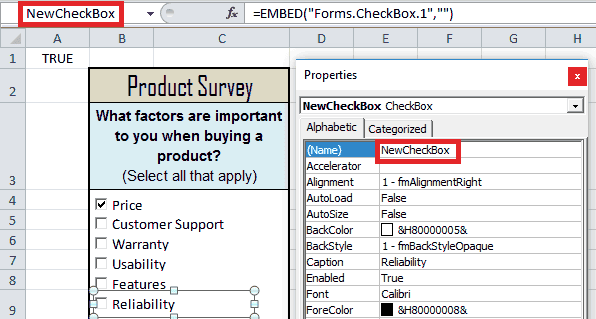
Creating a New Checkbox
To delete the checkbox titled NewCheckBox , run this VBA macro:
Delete a Checkbox
Selecting a Checkbox
To select a checkbox titled CheckBox5 on your spreadsheet, try the following macro:
Method 1
Method 2
You won’t actually see that the checkbox is selected until you enter Design Mode on your Developer Tab.
Linking Checkbox to a Cell
To link a checkbox to the value of a cell using VBA, you would try one of the following methods:
Method 1
Method 2
Now, cell “A1” in “Sheet1” changes to “TRUE” when CheckBox5 is checked, “FALSE” when unchecked and “#N/A” when Null.
Changing the Checkbox Font
The ability to change the font style of an ActiveX checkbox is what sets it apart from Form Control checkboxes. These next macros change the font, font size and other font properties of an ActiveX Checkbox named CheckBox1 :
Method 1
Method 2
ActiveX Checkbox Font
Play around with the properties in the examples above until you get the look you desire. Using the .Font object, you can change the actual font of the checkbox caption, the size of the font and whether or not the font is italicized, bolded, underlined or struck through. Notice how this only changes the label beside the checkbox — not the actual checkbox.
Although most of the macros in this guide show you how to change properties of your ActiveX Checkboxes using VBA, this is a good time to remind you the macros work both ways. For example, if you’re interested in seeing what value a property is set to, just change the order of the equality:
ActiveX Checkbox Font
Changing the Color of the Checkbox
In addition to changing the font style, changing the color of an ActiveX checkbox also makes it stand out from Form Control checkboxes. The following macro examples change the font color and background color of the ActiveX Checkbox named CheckBox1 :
Method 1
Method 2
ActiveX Checkbox Colors
The .ForeColor property changes the font color, while the .BackColor property changes the background color of your checkbox. If you find that your checkbox does not appear centered in your background color, adjust the .Height property of your checkbox.
Changing Other Checkbox Properties
By now, I’m sure you’re starting to notice a bunch of commonalities between each of these macro examples.
If you want to change other properties listed in the Properties Window, you can follow one of the above examples, but change the property portion of the code to the property you want to change as it appears in the Properties Window. Here is an example to get you started:
Wacky Checkbox
You can change the size and position of the checkbox in much the same way.
Run Macro when Checkbox is Clicked
To run a Macro when your checkbox is clicked, you’ll use the Click event. This template runs when CheckBox1 on Sheet1 is clicked:
It’s important that you paste this template in the Microsoft Excel Object associated with where your checkbox is located! My checkbox is located on Sheet1, so I double-clicked Sheet1 and pasted the macro in there.
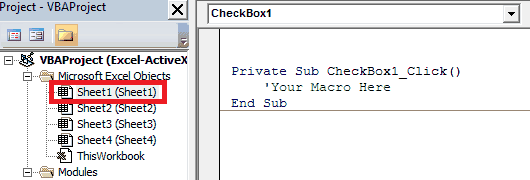
In Sheet1 because my checkbox was on Sheet1
Here’s an example. If your checkbox is named cbSelect , your macro would look like:
Notice the name if the Private Sub now says cbSelect _Click
Run Macro when Mouse Hovers over Checkbox
To run a Macro when your mouse hovers over your checkbox, you’ll use the MouseMove event. This template runs when the mouse moves over the CheckBox1 checkbox.
Remember, this template must be pasted in the Microsoft Excel Object that matches the worksheet where your checkbox is located! My checkbox is located on Sheet1, so I double-clicked Sheet1 and pasted the macro in there.
Other Checkbox Events
For a complete list of ActiveX Checkbox Events,
- Open your VBA Editor,
- Click your worksheet under Microsoft Excel Objects in the Project Explorer Pane (left)
- Select your Checkbox from the left dropdown box
- Click the down arrow in the Declarations dropdown box on the right.
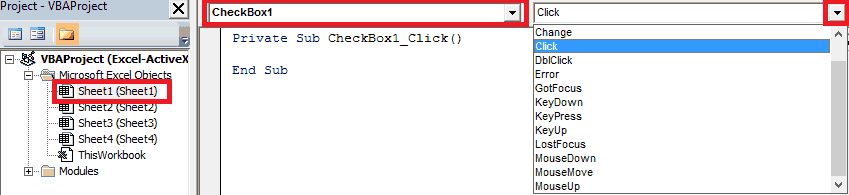
View All ActiveX Checkbox Events
Play around with these events to create some powerful spreadsheet interfaces.
Looping Through All Checkboxes
Use this template to loop through all ActiveX Checkboxes in your active sheet. This macro lets you take different actions depending on whether your checkboxes are checked, unchecked or null. Be sure to read the macro comments to understand how you can modify the VBA macro.
I put a lot of effort into this tutorial and I hope you found it helpful. If you did, please subscribe using the form below and I’ll send you more comprehensive VBA tutorials like this one.
Ready to do more with VBA?
We put together a giant PDF with over 300 pre-built macros and we want you to have it for free. Enter your email address below and we’ll send you a copy along with our VBA Developer Kit, loaded with VBA tips, tricks and shortcuts.
Before we go, I want to let you know we designed a suite of VBA Cheat Sheets to make it easier for you to write better macros. We included over 200 tips and 140 macro examples so they have everything you need to know to become a better VBA programmer.
Источник
Обычно для того, чтобы поставить галочку в ячейке, вам нужно попасть в диалоговое окно «Символ», найти символ галочки и вставить его вручную. Но найти символ галочки в диалоговом окне «Символ» не так-то просто, так как внутри перечислено множество символов. Как быстро поставить галочку в ячейке в Excel? В этой статье будет показан метод VBA, с помощью которого можно легко добавить галочку в ячейку только двойным щелчком.
Дважды щелкните, чтобы добавить галочку в ячейку с кодом VBA
Дважды щелкните, чтобы добавить галочку в ячейку с кодом VBA
Следующий код VBA поможет вам добавить галочку в ячейку двойным щелчком. Пожалуйста, сделайте следующее.
1. Откройте рабочий лист, на котором нужно поставить галочку в ячейке, затем щелкните правой кнопкой мыши и выберите Просмотреть код из контекстного меню.
2. в Microsoft Visual Basic для приложений окно, скопируйте и вставьте приведенный ниже код VBA в Code окно.
Код VBA: дважды щелкните, чтобы добавить галочку в ячейку
Private Sub Worksheet_BeforeDoubleClick(ByVal Target As Range, Cancel As Boolean)
    If Not Intersect(Target, Range("B1:B10")) Is Nothing Then
        Application.EnableEvents = False
        If ActiveCell.Value = ChrW(&H2713) Then
            ActiveCell.ClearContents
        Else
            ActiveCell.Value = ChrW(&H2713)
        End If
        Cancel = True
    End If
    Application.EnableEvents = True
End SubВнимание: В коде B1: B10 — это диапазон, в который вы добавляете галочку двойным щелчком. Пожалуйста, измените его в зависимости от ваших потребностей.

3. нажмите другой + Q ключи, чтобы закрыть Microsoft Visual Basic для приложений окно и вернитесь к рабочему листу.
Теперь дважды щелкните любую ячейку в диапазоне B1: B10, флажок будет установлен автоматически. И еще раз дважды щелкнув ячейку, установленная галочка будет удалена.

Статьи по теме:
- Как дважды щелкнуть ячейку и добавить 1 к значению этой ячейки в Excel?
- Как автоматически добавить / ввести текущую дату / время в ячейку двойным щелчком в Excel?
Лучшие инструменты для работы в офисе
Kutools for Excel Решит большинство ваших проблем и повысит вашу производительность на 80%
- Снова использовать: Быстро вставить сложные формулы, диаграммы и все, что вы использовали раньше; Зашифровать ячейки с паролем; Создать список рассылки и отправлять электронные письма …
- Бар Супер Формулы (легко редактировать несколько строк текста и формул); Макет для чтения (легко читать и редактировать большое количество ячеек); Вставить в отфильтрованный диапазон…
- Объединить ячейки / строки / столбцы без потери данных; Разделить содержимое ячеек; Объединить повторяющиеся строки / столбцы… Предотвращение дублирования ячеек; Сравнить диапазоны…
- Выберите Дубликат или Уникальный Ряды; Выбрать пустые строки (все ячейки пустые); Супер находка и нечеткая находка во многих рабочих тетрадях; Случайный выбор …
- Точная копия Несколько ячеек без изменения ссылки на формулу; Автоматическое создание ссылок на несколько листов; Вставить пули, Флажки и многое другое …
- Извлечь текст, Добавить текст, Удалить по позиции, Удалить пробел; Создание и печать промежуточных итогов по страницам; Преобразование содержимого ячеек в комментарии…
- Суперфильтр (сохранять и применять схемы фильтров к другим листам); Расширенная сортировка по месяцам / неделям / дням, периодичности и др .; Специальный фильтр жирным, курсивом …
- Комбинируйте книги и рабочие листы; Объединить таблицы на основе ключевых столбцов; Разделить данные на несколько листов; Пакетное преобразование xls, xlsx и PDF…
- Более 300 мощных функций. Поддерживает Office/Excel 2007-2021 и 365. Поддерживает все языки. Простое развертывание на вашем предприятии или в организации. Полнофункциональная 30-дневная бесплатная пробная версия. 60-дневная гарантия возврата денег.
")
Вкладка Office: интерфейс с вкладками в Office и упрощение работы
- Включение редактирования и чтения с вкладками в Word, Excel, PowerPoint, Издатель, доступ, Visio и проект.
- Открывайте и создавайте несколько документов на новых вкладках одного окна, а не в новых окнах.
- Повышает вашу продуктивность на 50% и сокращает количество щелчков мышью на сотни каждый день!
")
Комментарии (12)
Оценок пока нет. Оцените первым!