Свойство Offset объекта Range, возвращающее смещенный диапазон, в том числе отдельную ячейку, в коде VBA Excel. Синтаксис, параметры, примеры.
Offset – это свойство объекта Range, возвращающее диапазон той же размерности, но смещенный относительно указанного диапазона на заданное количество строк и столбцов.
Синтаксис
Синтаксис свойства Range.Offset:
|
Expression.Offset (RowOffset, ColumnOffset) |
Expression – это выражение (переменная), возвращающее исходный объект Range, относительно которого производится смещение.
Параметры
RowOffset – это параметр, задающий смещение диапазона по вертикали относительно исходного на указанное количество строк.
| Значение RowOffset | Направление смещения |
|---|---|
| Отрицательное | вверх |
| Положительное | вниз |
| 0 (по умолчанию) | нет смещения |
ColumnOffset – это параметр, задающий смещение диапазона по горизонтали относительно исходного на указанное число столбцов.
| Значение ColumnOffset | Направление смещения |
|---|---|
| Отрицательное | влево |
| Положительное | вправо |
| 0 (по умолчанию) | нет смещения |
Необходимо следить за тем, чтобы возвращаемый диапазон не вышел за пределы рабочего листа Excel. В противном случае VBA сгенерирует ошибку (Пример 3).
Примеры
Пример 1
Обращение к ячейкам, смещенным относительно ячейки A1:
|
Sub Primer1() Cells(1, 1).Offset(5).Select MsgBox ActiveCell.Address Cells(1, 1).Offset(, 2).Select MsgBox ActiveCell.Address Cells(1, 1).Offset(5, 2).Select MsgBox ActiveCell.Address End Sub |
Пример 2
Обращение к диапазону, смещенному относительно исходного:
|
Sub Primer2() Range(«C8:F12»).Offset(—3, 5).Select MsgBox Selection.Address End Sub |
Пример 3
Пример ошибки при выходе за границы диапазона рабочего листа:
|
Sub Primer3() On Error GoTo ErrorText Cells(1, 1).Offset(—3).Select Exit Sub ErrorText: MsgBox «Ошибка: « & Err.Description End Sub |
In this Article
- ActiveCell.Offset Properties and Methods
- ActiveCell.Offset Syntax
- ActiveCell.Offset..Select
- Using Range Object with Activecell.Offset Select
- Alternatives to ActiveCell
This tutorial will demonstrate how to use Activecell Offset in VBA.
The ActiveCell is a property of VBA that represents the cell address of the active cell in your worksheet. If the cursor is positioned in cell A1 then the ActiveCell property in VBA will return the cell address of “A1”. The are a number of properties and methods that are connected to the ActiveCell. In this article we are concentrating on the ActiveCell.Offset method.
ActiveCell.Offset Properties and Methods
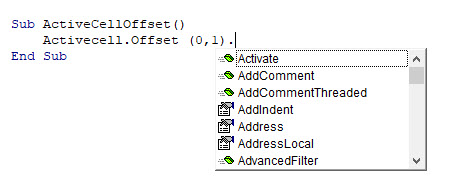
Activecell.Offset has a number of properties and methods available to be programmed with VBA. To view the properties and methods available, type the following statement in a procedure as shown below, and press the period key on the keyboard to see a drop down list.
Methods are depicted by the green method icon, and properties by the small hand icon. The properties and methods for the ActiveCell.Offset method are the same as for the ActiveCell method.
ActiveCell.Offset Syntax
The syntax of ActiveCell.Offset is as follows
where the RowOffset and ColumnOffset is the number of rows to offset (positive numbers for down, negative number for up) or the number of columns you wish offset (positive numbers offsets to the right, negative number to the left).
ActiveCell.Offset..Select
The Activecell.Offset..Select method is the most commonly used method for with Activecell.Offset method. It allows you to move to another cell in your worksheet. You can use this method to move across columns, or up or down rows in your worksheet.
To move down a row, but stay in the same column:
Activecell.Offset(1,0).SelectTo move across a column, but stay in the same row:
Activecell.Offset (0,1).SelectTo move down a row, and across a column:
Activecell.Offset (1,1).SelectTo move up a row:
Activecell.Offset(-1,0).SelectTo move left a column:
Activecell.Offset(0,-1).SelectIn the procedure below, we are looping through a range of cells and moving down one row, and across one column as we do the loop:
Sub ActiveCellTest()
  Dim x As Integer
  Range("A1").Select
  For x = 1 To 10
   ActiveCell = x
   ActiveCell.Offset(1, 1).Select
  Next x
End Sub
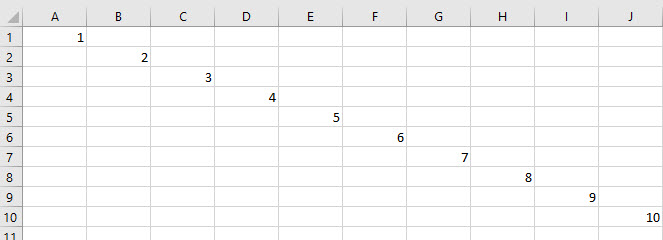
The result of which is shown in the graphic below:
The Loop puts the value of i (1-10) into the Activecell, and then it uses the Activecell.Offset property to move down one row, and across one column to the right – repeating this loop 10 times.
Using Range Object with Activecell.Offset Select
Using the Range Object with the active cell can sometimes confuse some people.
Consider the following procedure:
Sub ActiveCellOffsetRange()
  Range("B1: B10").Select
  ActiveCell.Offset(1, 1).Range("A1").Select
End Sub
With the ActiveCell.Offset(1,1.Range(“A1”), the Range(“A1”) has been specified. However, this does not mean that cell A1 in the sheet will be selected. As we have specified the Range(“B1:B10”), cell A1 in that range is actually cell B1 in the workbook. Therefore the cell will be offset by 1 row and 1 column from cell B1 NOT from cell A1.
Therefore, the Range(“A1′) in this instance is not required as the macro will work the same way with it or without it.
Alternatives to ActiveCell
Instead of using Activecell with the Offset method, we can also use the Range object with the Offset method.
Sub RangeOffset()
 Range("B1").Offset(0, 1).Select
End Sub
The procedure above would select cell C1 in the worksheet.
VBA Coding Made Easy
Stop searching for VBA code online. Learn more about AutoMacro — A VBA Code Builder that allows beginners to code procedures from scratch with minimal coding knowledge and with many time-saving features for all users!
Learn More!
Excel VBA OFFSET Function
VBA Offset function one may use to move or refer to a reference skipping a particular number of rows and columns. The arguments for this function in VBA are the same as those in the worksheet.
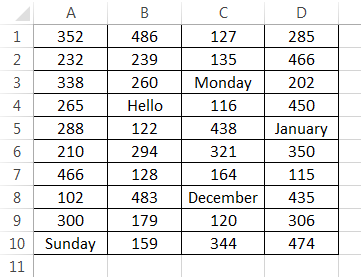
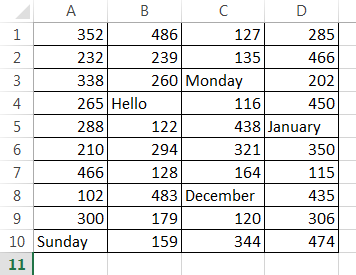
For example, assume you have a data set like the one below.
Now from cell A1, you want to move down four cells and select that 5th cell, the A5 cell.
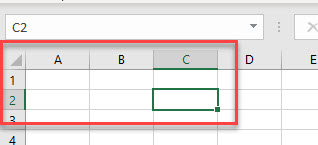
Similarly, if you want to move two rows down from the A1 cell and two columns to the right, select that cell, i.e., the C2 cell.
In these cases, the OFFSET function is very helpful. Especially in VBA OFFSET, the function is just phenomenal.
Table of contents
- Excel VBA OFFSET Function
- OFFSET is Used with Range Object in Excel VBA
- Syntax of OFFSET in VBA Excel
- Examples
- Example #1
- Example #2
- Example #3
- Example #4
- Things to Remember
- Recommended Articles
OFFSET is Used with Range Object in Excel VBA
In VBA, we cannot directly enter the word OFFSET. Instead, we need to use the VBA RANGE objectRange is a property in VBA that helps specify a particular cell, a range of cells, a row, a column, or a three-dimensional range. In the context of the Excel worksheet, the VBA range object includes a single cell or multiple cells spread across various rows and columns.read more first. Then, from that range object, we can use the OFFSET property.
In Excel, the range is nothing but a cell or range of the cell. Since OFFSET refers to cells, we need to use the object RANGE first, and then we can use the OFFSET method.
Syntax of OFFSET in VBA Excel
- Row Offset: How many rows do you want to offset from the selected cell? Here the selected cell is A1, i.e., Range (“A1”).
- Column Offset: How many columns do you want to offset from the selected cell? Here, the selected cell is A,1, i.e., Range (“A1”).
Examples
You can download this VBA OFFSET Template here – VBA OFFSET Template
Example #1
Consider the below data for demonstration.
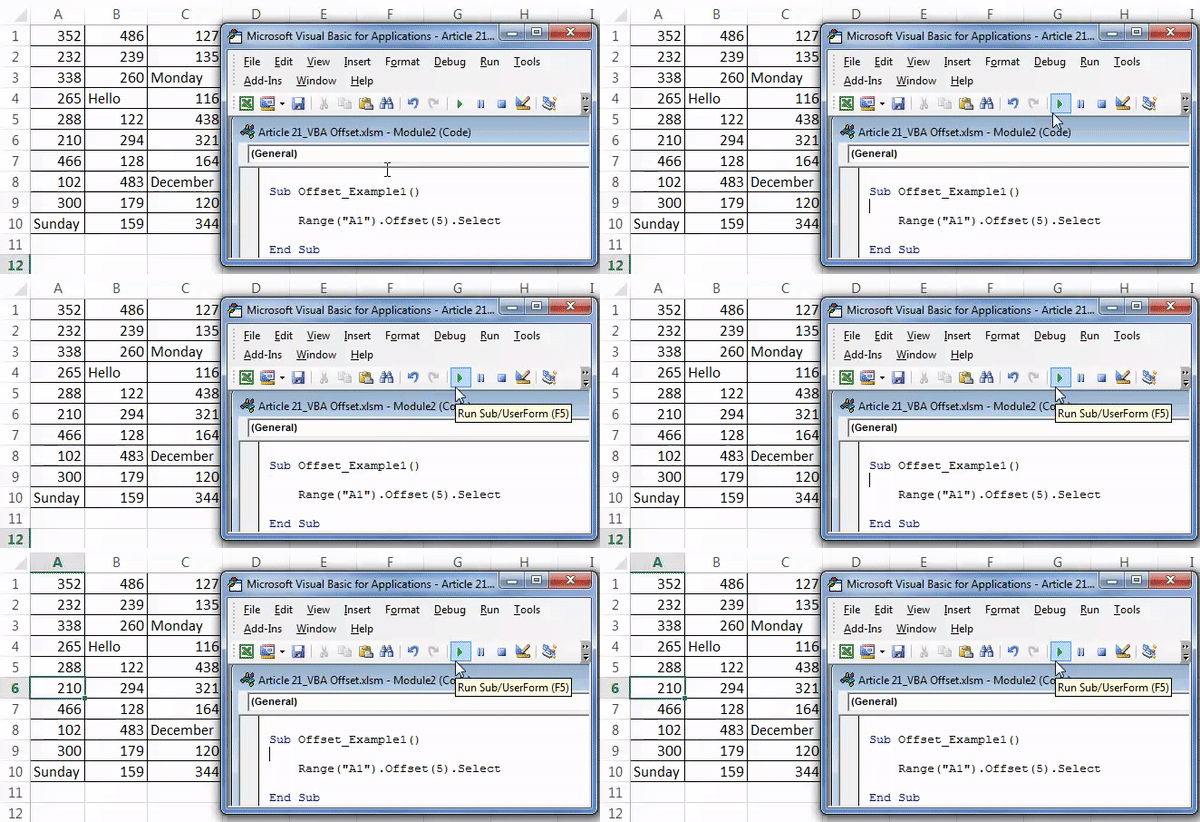
Now, we want to select cell A6 from cell A1. But, first, start the macro and reference cell using the Range object.
Code:
Sub Offset_Example1()

    Range("A1").offset(

End Sub
Now, we want to select cell A6. Then, we want to go down 5 cells. So, enter 5 as the parameter for Row Offset.
Code:
Sub Offset_Example1()

    Range("A1").offset(5

End Sub
Since we are selecting the same column, we leave out the column part. Close the bracket, put a dot (.), and type the method “Select.”
Code:
Sub Offset_Example1()

    Range("A1").Offset(5).Select

End Sub
Now, run this code using the F5 key, or you can run it manually to select cell A6, as shown below.
Output:
Example #2
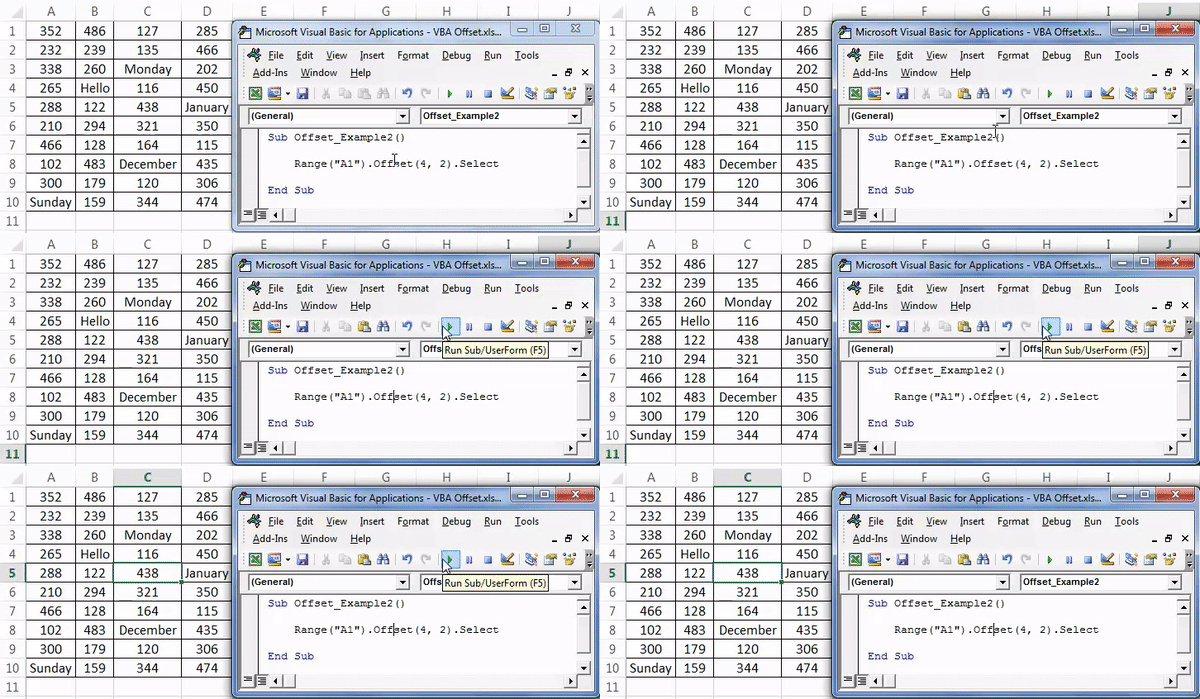
Now, take the same data, but here will also see how to use the column offset argument. Now, we want to select cell C5.
Since we want to select cell C5 firstly, we want to move down four cells and take the right two columns to reach cell C5. The below code would do the job for us.
Code:
Sub Offset_Example2()

    Range("A1").Offset(4, 2).Select

End Sub
We run this code manually or using the F5 key. Then, it will select cell C5, as shown in the below screenshot.
Output:
Example #3
We have seen how to offset rows and columns. We can also select the above cells from the specified cells. For example, if you are in cell A10 and want to select the A1 cell, how do you select it?
In the case of moving down the cell, we can enter a positive number, so here in the case of moving up, we need to enter negative numbers.
From the A9 cell, we need to move up by 8 rows, i.e., -8.
Code:
Sub Offset_Example1()

    Range("A9").Offset(-8).Select

End Sub
If you run this code using the F5 key or manually run it, it will select cell A1 from the A9 cell.
Output:
Example #4
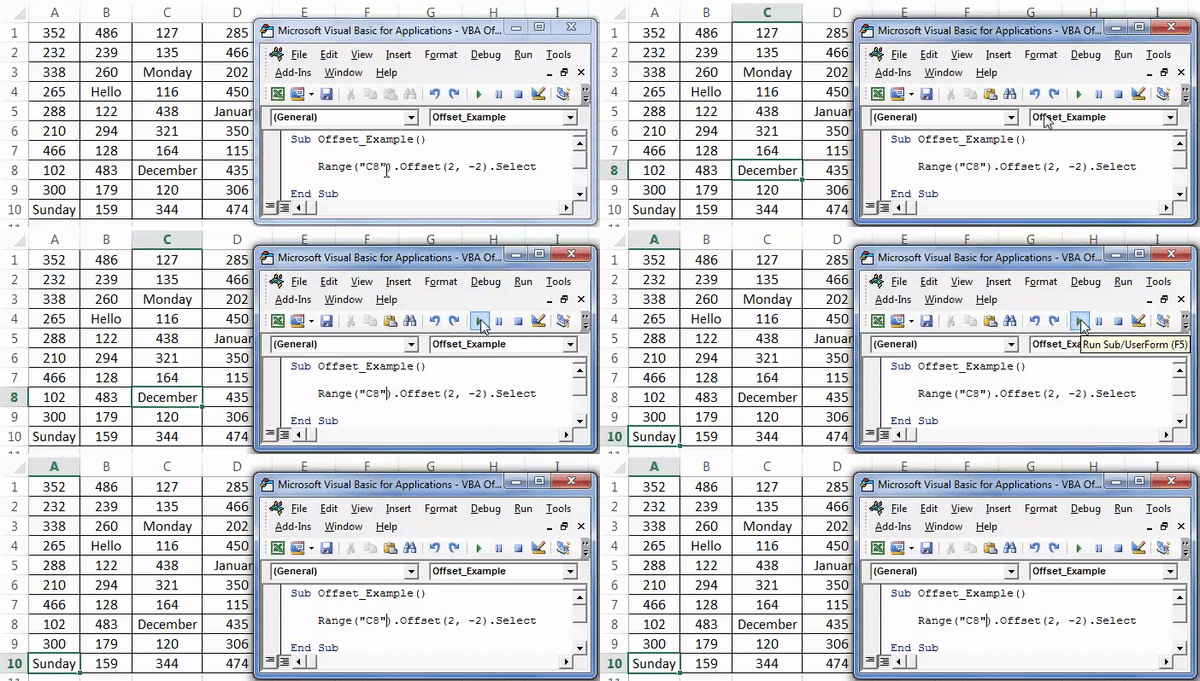
Assume you are in cell C8. From this cell, you want to select cell A10.
From the active cell, i.e., the C8 cell, we need to first move down 2 rows and move to the left by 2 columns to select cell A10.
In case of moving left to select the column, we need to specify the number is negative. So, here we need to come back by -2 columns.
Code:
Sub Offset_Example2()

    Range("C8").Offset(2, -2).Select

End Sub
Now, run this code using the F5 key or run it manually. It will select the A10 cell as shown below:
Output:
Things to Remember
- In moving up rows, we need to specify the number in negatives.
- In case of moving left to select the column, the number should be negative.
- A1 cell is the first row and first column.
- The “Active Cell” means presently selected cells.
- To select the cell using OFFSET, you need to mention “.Select.”
- To copy the cell using OFFSET, you need to mention “.Copy.”
Recommended Articles
This article has been a guide to VBA OFFSET. Here, we learn how to use VBA OFFSET Property to navigate in Excel, practical examples, and a downloadable template. Below are some useful Excel articles related to VBA:-
- Active Cell in VBA
- VBA Set
- What is OFFSET Formula in Excel?
- VBA Cells References
- VBA Format Date
Excel VBA OFFSET Function
As there are two things in this word, one is VBA and other is OFFSET. In this, I’ll be explaining how to use OFFSET function using VBA (Visual Basic for Applications).
VBA – It is a programming language for those who work in Excel and other Office programs, so one can automate tasks in Excel by writing Macros.
OFFSET – It is a reference function in Excel. The OFFSET function returns a reference to a range that is a specific number of rows and columns from another range or cell. It is one of the most important notions in Excel.
Let’s consider we have a dataset which consists of columns Customer Name, Product, sales, Quantity, Discount.
Suppose on the chance that we need to move down from a particular cell to the particular number of rows and to choose that cell at that point of time OFFSET function is very useful. For example, from cell B1 we want to move down 5 cells and want to select 5th cell i.e. B6. Suppose, if you want to move down from B1 cell 2 rows and goes 2 columns to the right and select that cell i.e. cell D3.
To use OFFSET function in VBA, we have to use VBA RANGE object because OFFSET refers cells and from that RANGE object we can use OFFSET function. In Excel, RANGE refers to the range of cells.
Let’s take a look at how OFFSET is used with RANGE.
Range(“A1”).offset(5).select
How to Use the OFFSET Function in Excel VBA?
Below are the different examples to use OFFSET Function in Excel using VBA Code.
You can download this VBA OFFSET Excel Template here – VBA OFFSET Excel Template
VBA OFFSET – Example #1
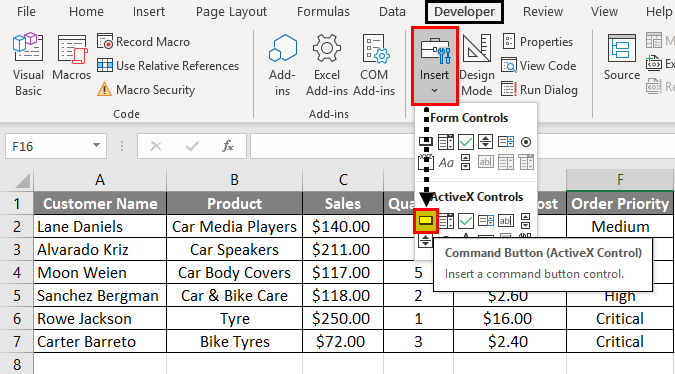
Step 1: Select the Developer Tab. Click on Insert and select the first option from ActiveX Controls. As you can see that Command Button.
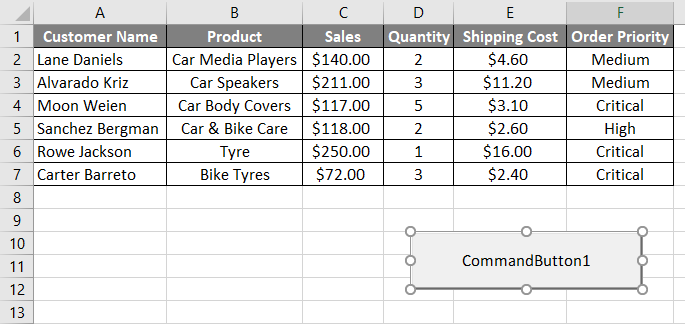
Step 2: Drag the arrow at any cell to create a Command Button.
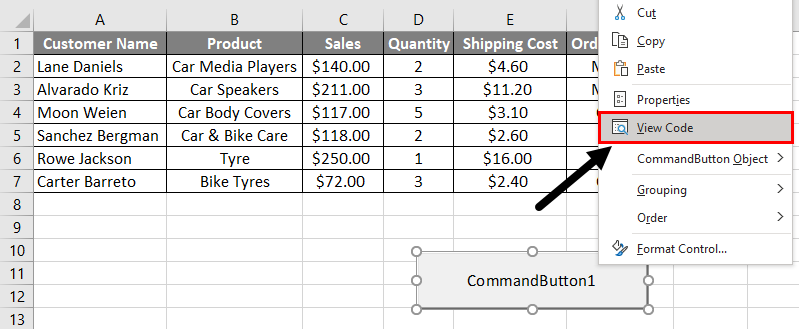
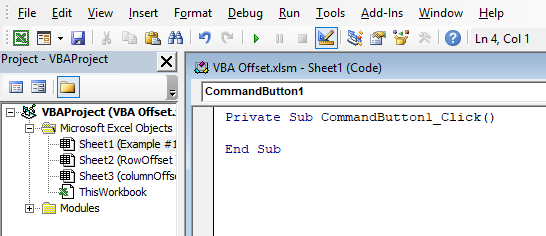
Step 3: To enter the OFFSET function, right-click on the Command Button and click on View Code.
When you click on the View code, Microsoft VBA (Visual Basic for Applications) windows appears. In that window, we can see that some function is written.
Code:
Private Sub CommandButton1_Click()

End Sub
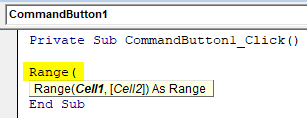
Step 4: Inside this function, we have to write our code of OFFSET for selecting cells. As mentioned in the previously we have to use OFFSET function with RANGE in VBA.
Code:
Private Sub CommandButton1_Click()

Range(

End Sub
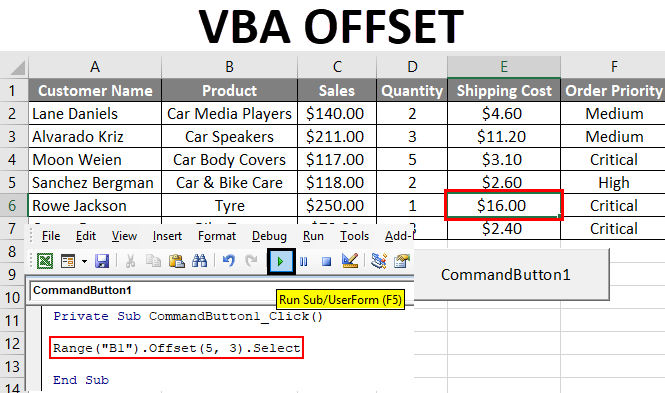
Step 5: In this code, we have to select the 5th cell of column Product i.e. B6. Cell1 in Range is B1 because we have to move down 5 cells from cell B1 to B6 i.e 5 cells down.
Code:
Private Sub CommandButton1_Click()

Range("B1").Offset(

End Sub
OFFSET function has two arguments:
- RowOffset: How many rows we want to move from the selected row. We have to pass the number as an argument.
- ColumnOffset: How many columns we want to move from the selected row.
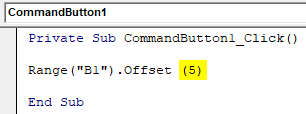
Step 6: Now I want to select cell B6 i.e I have to move down 5 cells. So, we have to enter 5 as the parameter for Row Offset.
Code:
Private Sub CommandButton1_Click()

Range("B1").Offset(5)

End Sub
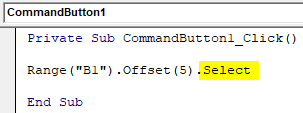
Step 7: After closing the bracket we have to put a (.) dot and write the Select method.
Code:
Private Sub CommandButton1_Click()

Range("B1").Offset(5).Select

End Sub
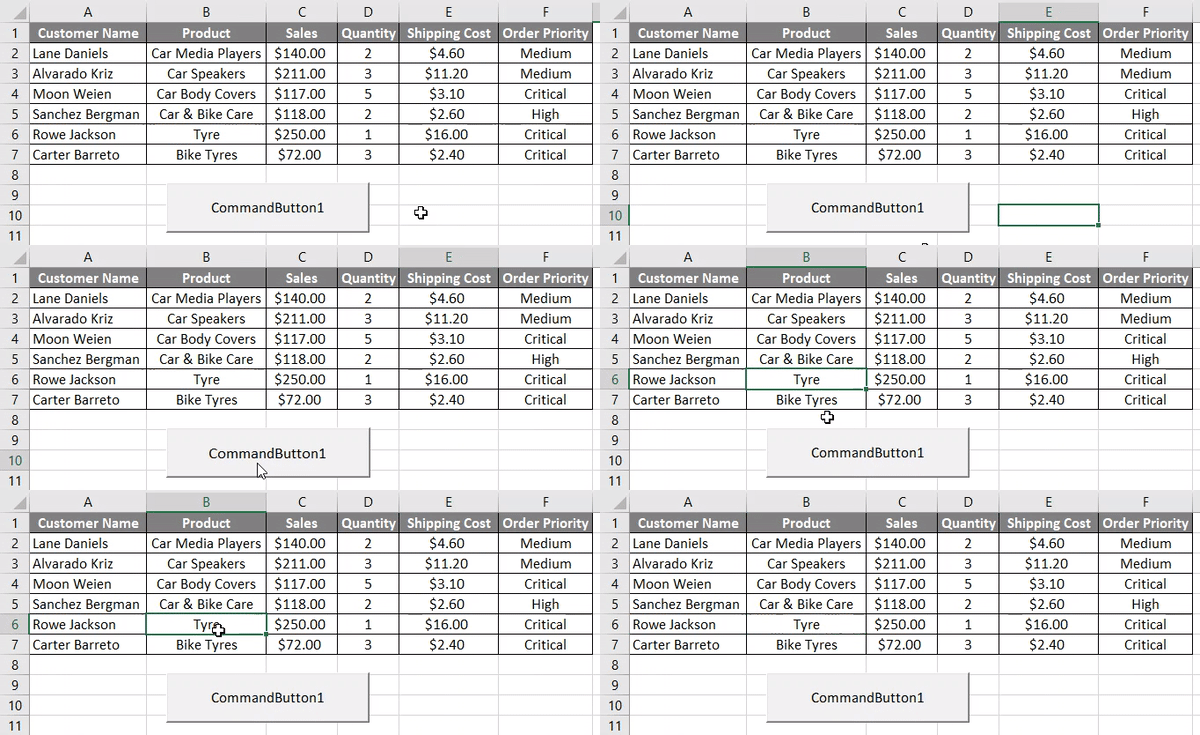
Step 8: To select the cell B6 click on the Command Button.
As we can see that cell B6 gets selected after clicking on the button.
VBA OFFSET – Example #2
In this example, we will see how to use Column OFFSET argument. We will be working on the same data. All the above steps will be the same but we need to make a change in code.
Since I want to move down 5 cells and take the right 3 columns to reach the cell E6.
Code:
Private Sub CommandButton1_Click()

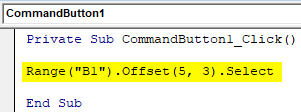
Range("B1").Offset(5, 3).Select

End Sub
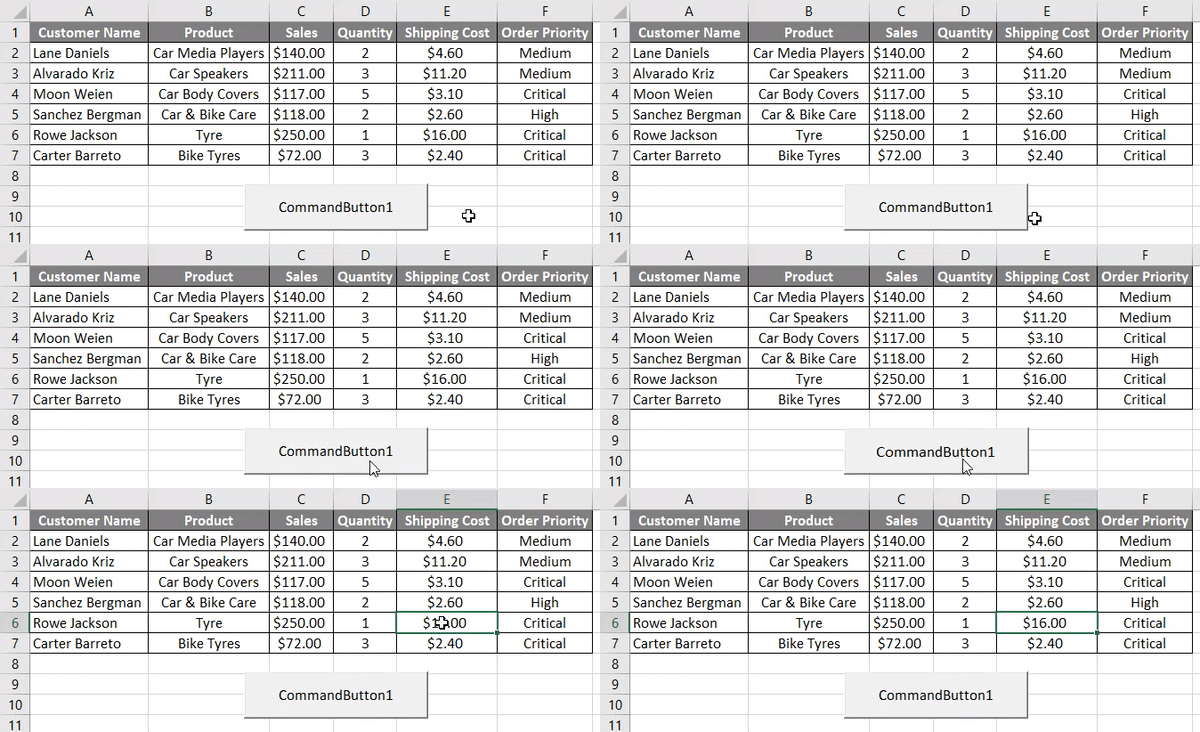
To select cell E6 click on the Command Button.
As we can see that cell E6 is selected after clicking on the button.
Things to Remember
- It is a reference function in Excel. The OFFSET function returns a reference to a range that is a specific number of rows and columns from another range or cell.
- VBA OFFSET is used with RANGE object in VBA.
Recommended Articles
This is a guide to VBA OFFSET. Here we discuss how to use OFFSET function in Excel using VBA code along with practical examples and downloadable excel template. You may also look at the following articles to learn more –
- VBA UBound
- OFFSET in Excel
- VBA Hyperlink
- VBA RGB
Using OFFSET with the range object, you can navigate from one cell to another in the worksheet and you can also select a cell or a range. It also gives you access to the properties and methods that you have with the range object to use, but you need to specify the arguments in the OFFSET to use it.
Use OFFSET with the Range Object
- Specify the range from where you want to start.
- Enter a dot (.) to get a list of properties and methods.
- Select the offset property and specify the arguments (row and column).
- In the end, select property to use with the offset.

Select a Range using OFFSET
You can also select a range which is the number of rows and columns aways from a range. Take the below line of code, that selects a range of two cells which is five rows down and 3 columns right.
Range("A1:A2").Offset(3, 2).Select
Apart from that, you can also write code to select the range using a custom size. Take an example of the following code.
Range(Range("A1").Offset(1, 1), Range("A1").Offset(5, 2)).Select
To understand this code, you need to split it into three parts.

First thing first, in that range object, you have the option to specify the first cell and the last of the range.

Now let’s come back to the example:
- In the FIRST part, you have used the range object to refer to the cell that is one row down and one column right from the cell A1.
- In the SECOND part, you have used the range object to refer to the cell that us five rows down and two columns right from the cell A1.
- In the THRID part, you have used the cells from the part first and second to refer to a range and select it.
Using OFFSET with ActiveCell
You can also use the active cell instead of using a pre-defined range. That means you’ll get a dynamic offset to select a cell navigating from the active cell.
ActiveCell.Offset(5, 2).SelectThe above line of code will select the cell which is five rows down and two columns right from the active cell.
Using OFFSET with ActiveCell to Select a Range
Use the following code to select a range from the active cell.
Range(ActiveCell.Offset(1, 1), ActiveCell.Offset(5, 2)).SelectTo understand how this code works, make sure to see this explanation.
Copy a Range using OFFSET
Range(Range("A1").Offset(1, 1), Range("A1").Offset(5, 2)).Copy
Range(ActiveCell.Offset(1, 1), ActiveCell.Offset(5, 2)).Copy
Using Cells Property with OFFSET
You can also use the OFFSET property with the CELLS property. Consider the following code.
Cells(1, 3).Offset(2, 3).Select
The above code first refers to the cell A1 (as you have specified) with row one and column one using the cells property, and then uses the offset property to selects the cell which is two rows down and three columns.
More Tutorials
- Count Rows using VBA in Excel
- Excel VBA Font (Color, Size, Type, and Bold)
- Excel VBA Hide and Unhide a Column or a Row
- Excel VBA Range – Working with Range and Cells in VBA
- Apply Borders on a Cell using VBA in Excel
- Find Last Row, Column, and Cell using VBA in Excel
- Insert a Row using VBA in Excel
- Merge Cells in Excel using a VBA Code
- Select a Range/Cell using VBA in Excel
- SELECT ALL the Cells in a Worksheet using a VBA Code
- ActiveCell in VBA in Excel
- Special Cells Method in VBA in Excel
- UsedRange Property in VBA in Excel
- VBA AutoFit (Rows, Column, or the Entire Worksheet)
- VBA ClearContents (from a Cell, Range, or Entire Worksheet)
- VBA Copy Range to Another Sheet + Workbook
- VBA Enter Value in a Cell (Set, Get and Change)
- VBA Insert Column (Single and Multiple)
- VBA Named Range | (Static + from Selection + Dynamic)
- VBA Sort Range | (Descending, Multiple Columns, Sort Orientation
- VBA Wrap Text (Cell, Range, and Entire Worksheet)
- VBA Check IF a Cell is Empty + Multiple Cells
⇠ Back to What is VBA in Excel
Helpful Links – Developer Tab – Visual Basic Editor – Run a Macro – Personal Macro Workbook – Excel Macro Recorder – VBA Interview Questions – VBA Codes

