
|
prostor  Пользователь Сообщений: 69 |
Здравствуйте, Может ли кто помочь с такой не хитрой задачей: из модуля хочу добавить на лист (с привязкой к ячейке) чек-бокс и далее читать его состояние (true/false) и сохранять в массив. Демо-файлик прикрепил. |
|
tolstak  Пользователь Сообщений: 471 |
#2 11.08.2017 17:58:09 prostor,
In GoTo we trust |
||
|
prostor Пользователь Сообщений: 69 |
#3 11.08.2017 19:14:21 tolstak, спасибо, все сработало. Маленький нюансик остался — как снимать показания именно с чек-бокса, без участия колонки D ? Ну и добавлять в нее тоже ничего не надо, соответственно
А вот как теперь снять показание с самого чек-бокса — разобраться не могу…. Изменено: prostor — 11.08.2017 19:34:35 |
||
|
tolstak Пользователь Сообщений: 471 |
#4 11.08.2017 20:16:40 prostor, тогда чуть усложняем словарем и такой-то матерью)
Я не понимаю почему, но значение при отмеченной галке — 1, а при не выбранной — -4146 , но преобразование типа
работает. Тут вот тот же вопрос проскакивал. In GoTo we trust |
||||
|
prostor Пользователь Сообщений: 69 |
tolstak, огромное спасибо! все работает. По поводу -4146, думаю не проблема. это значение вроде как постоянное, значит с ним можно работать. верно понимаю? |
|
tolstak Пользователь Сообщений: 471 |
prostor, да, так и есть. Просто непонятная какая-то константа… |
|
prostor Пользователь Сообщений: 69 |
#7 16.08.2017 19:09:35 tolstak, Приветствую:) Допиливаю ваш пример под себя и столкнулся с такой сложностью: хочу использовать ActiveAdd как процедуру с параметрами, вызывать из другого модуля, но не могу сообразить как правильно организовать вызов, с использованием цикла
Прошу вашей помощи по этому поводу:) Файл приложил… Заранее, благодарю. Прикрепленные файлы
|
||
|
tolstak Пользователь Сообщений: 471 |
prostor, посмотрите в файле. Вероятно, что i и j — строка и столбец, изменил процедуру соответствующим образом. Работает,но сложилось ощущение, что вставляется не совсем так как Вами задумывалось Изменено: tolstak — 16.08.2017 20:19:47 |
|
prostor Пользователь Сообщений: 69 |
tolstak, спасибо, все как надо, чуток подправил под себя По ходу дела, возникла такая ситуация, что после закрытия файла и повторного открытия — считать показания чек-боксов нельзя. При этом сам excel сохраняет галочки на чек-боксах, а значит оно в прицепи где-то есть в самом файле excel, на диске… Я понимаю, что идет чтение из словаря, пока он живой. Но интересно, как то ведь можно снимать показания с чек-боксов после «закрыл-открыл файл»? Прикладываю файлик.. |
|
tolstak Пользователь Сообщений: 471 |
#10 16.08.2017 23:23:58 prostor, у Вас красивая логика присвоения имен чек-боксам.
Прикрепленные файлы
In GoTo we trust |
||
|
prostor Пользователь Сообщений: 69 |
#11 17.08.2017 15:14:50 tolstak, спасибо:) стараюсь, учусь… В этом варианте все срабатывает в идеале. Только не могу понять что происходит в этой строке
|
||
|
tolstak Пользователь Сообщений: 471 |
prostor, в словарь chkBoxDic добавить элемент с ключом dicItem (Ваше название а-ля (Михаил.Нет.0)) и содержанием — элементом чек-бокс активного листа с именем dicItem (Ваше название а-ля (Михаил.Нет.0)) |
|
prostor Пользователь Сообщений: 69 |
tolstak, верно понимаю, что IF срабатывает когда в памяти нет словаря (после закрыл-открыл файл) — далее создается нужный словарь и в него снимается текущее состояние чек-боксов? Сорри за дотошность, не очень хорошо еще разбираюсь в коде, хочу все-все понять… |
|
Nordheim Пользователь Сообщений: 3154 |
#14 17.08.2017 15:45:47 Вот тут
я обычно использую такой код
вроде как быстрей считается «Все гениальное просто, а все простое гениально!!!» |
||||
|
tolstak Пользователь Сообщений: 471 |
Nordheim, хм, действительно, выглядит изящней |
|
prostor Пользователь Сообщений: 69 |
tolstak, Nordheim, спасибо за вашу помощь! Начинаю чуток лучше разбираться в коде, мне это нравится.. |
|
prostor Пользователь Сообщений: 69 |
Уже было подумал, что все интересное позади, но не тут то было:) Веселье продолжается… Такая вот ситуация: 3 колонки * 1000 строк = 3000 чекбоксов… Все, на что хватило моих знаний, — отключить всякую активность excel при старте модуля и включить на финише… |
|
tolstak Пользователь Сообщений: 471 |
#18 19.08.2017 13:04:34 prostor, ну, на мой взгляд, нужно понимать ограничения программы
In GoTo we trust |
||
|
Nordheim Пользователь Сообщений: 3154 |
#19 19.08.2017 13:20:04 prostor, CheckBox нужно все удалить одновременно? Если все то можно так.
Изменено: Nordheim — 19.08.2017 13:21:47 «Все гениальное просто, а все простое гениально!!!» |
||
|
prostor Пользователь Сообщений: 69 |
tolstak, Nordheim, а можно как-то сделать, что бы сама ячейка реагировала на клик (событие) и красилась в цвет, без чекбоксов… ну и дальше снимать с ячейки цвет…? как вариант… Или как вариант 2: поместить на лист три кнопки (Да, Нет, Неизвестно) и нажатие на кнопку добавляло значение в ячейку ряда, а выделение ряда менялось бы динамически вниз, после нажатия одной из кнопки… Только кнопки должны быть плавающие — менять положение следом за скролом:) Изменено: prostor — 19.08.2017 15:14:31 |
|
tolstak Пользователь Сообщений: 471 |
#21 19.08.2017 15:33:47 prostor, можно, но к
отношения это уже явно не имеет, должна быть отдельная тема In GoTo we trust |
||

|
Nordheim Пользователь Сообщений: 3154 |
#22 19.08.2017 20:01:08 Попробуйте, может так скорость возрастет и тормоза пропадут, но не факт.
«Все гениальное просто, а все простое гениально!!!» |
||||
|
prostor Пользователь Сообщений: 69 |
Nordheim, что то вообще не заводится… выдает ошибку на строке dic1.Add CheckBoxes, 0. Что то про ассоциации…(( |
|
Юрий М  Модератор Сообщений: 60575 Контакты см. в профиле |
А может вместо настоящих ЧекБоксов использовать псевдо-чекбоксы? Не упростится задача? ) |
|
prostor Пользователь Сообщений: 69 |
Думал об этом тоже… Но тогда возникает еще такой вопрос: |
|
Nordheim Пользователь Сообщений: 3154 |
#26 21.08.2017 08:24:20
Изменено: Nordheim — 21.08.2017 08:26:18 «Все гениальное просто, а все простое гениально!!!» |
||||
|
Юрий М Модератор Сообщений: 60575 Контакты см. в профиле |
#27 21.08.2017 13:23:54
Ввод указанного символа — уже событие. |
||
|
prostor Пользователь Сообщений: 69 |
#28 21.08.2017 18:12:16
Вввод символа это понятно. но всетаки хочется полный аналог чек-бокса, но без «этих тяжелых элементов». Типа, левыый клик по ячейке — отрисовалась галочка… В случае, если вариант только ввода символа с клавиатуры, — принципиальной разницы нет, что вводить, на мой взгляд, хоть букву Ё |
||
|
Юрий М Модератор Сообщений: 60575 Контакты см. в профиле |
#29 21.08.2017 18:58:07 Вы же сами говорили, что не хотите пользоваться мышкой ))
Можно: событие Worksheet_SelectionChange, но тогда возможны непреднамеренные срабатывания (при ошибочном выделении ячейки мышкой или клавишами управления курсором). |
||
|
RAN  Пользователь Сообщений: 7091 |
#30 21.08.2017 19:18:28
Изменено: RAN — 21.08.2017 19:45:25 |
||
Элемент управления пользовательской формы CheckBox для выбора или невыбора его пользователем и передачи результата в VBA Excel. Свойства «Флажка», примеры кода.
UserForm.CheckBox – это элемент управления пользовательской формы, предназначенный для передачи в код VBA информации о выборе или невыборе его пользователем и возвращающий одно из двух значений: False (галочки нет) или True (галочка установлена).

Элемент управления CheckBox состоит из флажка и надписи. В VBA Excel флажок имеет квадратную форму, надпись расположена справа от него. Надпись реагирует на нажатие мышью так же, как и флажок.
По тексту статьи значение слова «Флажок» в кавычках равно значению слова CheckBox, флажок без кавычек обозначает квадрат с галочкой или без нее.
Кроме состояний «выбран» или «не выбран», существует и третье состояние флажка: серая галочка на сером фоне. Получить такое состояние на пользовательской форме можно путем присвоения свойству CheckBox.Value значения Null.

Надписи флажков выведены с помощью следующего кода VBA Excel:
|
Private Sub UserForm_Initialize() CheckBox1.Value = False CheckBox1.Caption = «CheckBox1.Value = « _ & CheckBox1.Value CheckBox2.Value = Null CheckBox2.Caption = «CheckBox2.Value = « _ & CheckBox2.Value CheckBox3.Value = True CheckBox3.Caption = «CheckBox3.Value = « _ & CheckBox3.Value End Sub |
Интересно было посмотреть, какое значение отобразится в надписи элемента управления CheckBox2. Обратите внимание на то, что если строку CheckBox2.Caption = "CheckBox2.Value = " & CheckBox2.Value заменить на CheckBox2.Caption = CheckBox2.Value, будет сгенерирована ошибка, так как в VBA не существует текстового отображения значения Null.
Эксперименты показали, что отобразить «Флажок» в третьем состоянии можно также с помощью присвоения свойству CheckBox.Value значения «пустая строка».
Элемент управления CheckBox может использоваться на пользовательской форме для
- выбора или отмены каких-либо параметров и условий,
- отображения или скрытия других элементов управления,
- изменение доступности других элементов управления для взаимодействия с пользователем.
Если требуется выбор только одной опции из группы предложенных, для этой цели в VBA Excel используется набор элементов управления OptionButton.
Свойства элемента «Флажок»
| Свойство | Описание |
|---|---|
| AutoSize | Автоподбор размера «Флажка». True – размер автоматически подстраивается под длину набираемой строки. False – размер элемента управления определяется свойствами Width и Height. |
| ControlSource | Ссылка на источник данных для свойства Value. |
| ControlTipText | Текст всплывающей подсказки при наведении курсора на CheckBox. |
| Enabled | Возможность взаимодействия пользователя с элементом управления. True – взаимодействие включено, False – отключено (цвет флажка и надписи становится серым). |
| Font | Шрифт, начертание и размер текста надписи. |
| Height | Высота элемента управления. |
| Left | Расстояние от левого края внутренней границы пользовательской формы до левого края элемента управления. |
| Picture | Добавление изображения вместо текста надписи или дополнительно к нему. |
| PicturePosition | Выравнивание изображения и текста в поле надписи. |
| TabIndex | Определяет позицию элемента управления в очереди на получение фокуса при табуляции, вызываемой нажатием клавиш «Tab», «Enter». Отсчет начинается с 0. |
| TextAlign* | Выравнивание текста надписи: 1 (fmTextAlignLeft) – по левому краю, 2 (fmTextAlignCenter) – по центру, 3 (fmTextAlignRight) – по правому краю. |
| Top | Расстояние от верхнего края внутренней границы пользовательской формы до верхнего края элемента управления. |
| TripleState | Определяет, может ли пользователь делать выбор между двумя состояниями «Флажка» или между тремя, включая серую галочку на сером квадрате. True – доступны три состояния, False – доступны два состояния. |
| Value | Значение «Флажка»: True – галочка установлена, False – галочка не установлена, Null – серая галочка на сером квадрате. |
| Visible | Видимость элемента CheckBox. True – элемент отображается на пользовательской форме, False – скрыт. |
| Width | Ширина элемента управления. |
| WordWrap | Перенос текста надписи на новую строку при достижении границы ее поля. True – перенос включен, False – перенос выключен. |
* При загруженной в поле надписи картинке свойство TextAlign не работает, следует использовать свойство PicturePosition.
Свойство по умолчанию для элемента CheckBox – Value, основное событие – Click.
В таблице перечислены только основные, часто используемые свойства «Флажка». Все доступные свойства отображены в окне Properties элемента управления CheckBox.
Примеры использования CheckBox
Пример 1
Отображение элемента управления CheckBox на пользовательской форме с параметрами, заданными в коде VBA Excel:
|
Private Sub UserForm_Initialize() With CheckBox1 .Caption = «Нажмите на меня» .ControlSource = «A1» .Value = False .Left = 12 .Top = 12 End With End Sub |

Размещается данная процедура в модуле пользовательской формы.
Если несколько элементов управления CheckBox привязать к одной ячейке, то при клике на одном из них, менять свое состояние будут и все остальные.
Пример 2
Смена надписи «Флажка» в зависимости от его состояния:
|
1 2 3 4 5 6 7 8 9 10 11 12 13 14 15 16 17 18 |
‘Устанавливаем первоначальные ‘значения свойств «Флажка» Private Sub UserForm_Initialize() With CheckBox1 .Caption = «Поставьте галочку» .Value = False .TripleState = False End With End Sub ‘Меняем надпись «Флажка» при ‘смене параметра CheckBox1.Value Private Sub CheckBox1_Change() If CheckBox1.Value Then CheckBox1.Caption = «Снимите галочку» Else CheckBox1.Caption = «Поставьте галочку» End If End Sub |

Пример 3
Скрытие и отображение, изменение доступности других элементов управления с помощью «Флажка».
Для реализации этого примера необходимо создать пользовательскую форму с четырьмя элементами управления: CheckBox1, TextBox1, TextBox2 и CommandButton1. А в модуле формы разместить следующий код:
|
1 2 3 4 5 6 7 8 9 10 11 12 13 14 15 16 17 18 19 20 21 22 23 24 25 26 27 28 29 30 31 32 33 34 35 36 37 38 39 40 41 |
‘Устанавливаем первоначальные ‘значения свойств элементов управления Private Sub UserForm_Initialize() With CheckBox1 .Caption = «Хочу сложить два числа» .Value = False .TripleState = False End With With TextBox1 .Enabled = False .Text = «Слагаемое 1» End With With TextBox2 .Enabled = False .Text = «Слагаемое 2» End With With CommandButton1 .Caption = «Сложить» .Visible = False End With End Sub ‘Меняем свойства других элементов ‘управления при смене состояния «Флажка» Private Sub CheckBox1_Change() If CheckBox1.Value Then TextBox1.Enabled = True TextBox2.Enabled = True CommandButton1.Visible = True Else TextBox1.Enabled = False TextBox2.Enabled = False CommandButton1.Visible = False End If End Sub ‘Складываем два числа Private Sub CommandButton1_Click() If IsNumeric(TextBox1) And IsNumeric(TextBox2) Then MsgBox TextBox1 & » + « & TextBox2 & » = « _ & CDbl(TextBox1) + CDbl(TextBox2) End If End Sub |
Форма открывается с недоступными для пользователя текстовыми полями и скрытой кнопкой «Сложить»:

После установки галочки на флажке текстовые поля становятся доступными для редактирования, и отображается кнопка «Сложить»:

Add CheckBox on Worksheet or UserForm using VBA
We can add CheckBox on Worksheet or UserForm is using VBA with checkbox control and is used to specify or indicate boolean choice. In this section we will see how to add single checkbox or multiple checkboxes on the worksheet or userform using VBA. Please find the more details about add checkbox control using VBA in the following chapter.
In this Topic:
- How to add a CheckBox on the Worksheet Using VBA Code
- Example 1: Add Form Check Box Control
- Example 2: Add ActiveX Check Box Control
- How to add multiple CheckBoxs on the Worksheet using VBA code
- Example 1: Add Form Check Box Control
- Example 2: Add ActiveX Check Box Control
Add a CheckBox on the Worksheet Using VBA Code
Please find the below two example macros, it will show you how to add checkbox on the Worksheet using VBA code.
- Click Developer Tab in the Excel menu bar.
- On the Code group, Click Visual Basic. Now, VBA Editor window will be displayed.
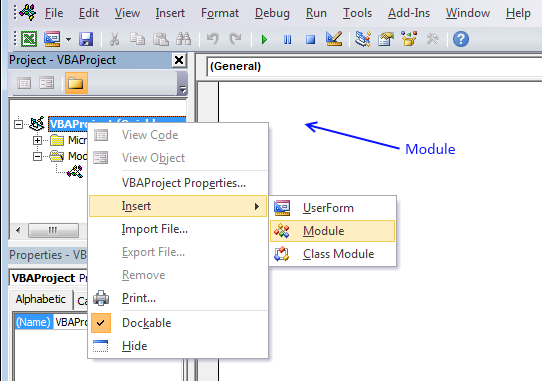
- Click Insert from the menu, Click Module and then add the below example macros into the module.
- Click run button or ‘F5’ to execute the above macro code.
- Go to Sheet3 to see the output for the above mentioned examples.
Example 1: Add Form Check Box Control
The below example show you how to add form checkbox control on the worksheet.
Private Sub ActX_Add_CheckBox_Ex1()
    Sheets("Sheet3").CheckBoxes.Add(Left:=Range("E1").Left, Top:=Range("E1").Top, Width:=Range("G1").Width, Height:=Range("E1").Height).Select
    With Selection
        .Caption = "Adding Checkbox"
    End With
End Sub
Example 2: Add ActiveX Check Box Control
The below example show you how to add ActiveX checkbox control on the worksheet.
Private Sub ActX_Add_CheckBox_Ex2()
    Sheets("Sheet3").OLEObjects.Add "Forms.CheckBox.1", Left:=Range("A1").Left, Top:=Range("A1").Top, Width:=Range("A1").Width, Height:=Range("A1").Height
End Sub
Add multiple CheckBoxs on the Worksheet using VBA code
Please find the below two example macros, it will show you how to add multiple checkboxs on the Worksheet using VBA code.
- Click Developer Tab in the Excel menu bar.
- On the Code group, Click Visual Basic. Now, It will display VBA Editor window.
- Click Insert from the menu, Click Module and then add the below example codes into the module.
- Click run button or ‘F5’ to execute the above macro code.
- Go to active sheet to see the output for the above mentioned examples.
Example 1: Add Form Check Box Control
The below example show you how to add multiple form checkbox control on the worksheet.
Sub ActX_Add_Multiple_CheckBox_Ex1()

'Disable Screen Update
Application.ScreenUpdating = False

'Variable Declaration
Dim Rng As Range
Dim ShtRng As Range
Dim WrkSht As Worksheet
Dim i As Integer

'Variable Initialization
i = 1

Set ShtRng = Application.Selection
Set ShtRng = Application.InputBox("Range", "Analysistabs", ShtRng.Address, Type:=8)
Set WrkSht = Sheets(“Sheet3”)


For Each Rng In ShtRng
    With WrkSht.CheckBoxes.Add(Left:=Rng.Left, Top:=Rng.Top, Width:=Rng.Width, Height:=Rng.Height).Select
        With Selection
            .Characters.Text = Rng.Value
            .Caption = ""
            .Caption = "Check Box " & i
            i = i + 1
        End With
    End With
Next

ShtRng.ClearContents
ShtRng.Select

'Enable Screen Update
Application.ScreenUpdating = True

End Sub
Example 2: Add ActiveX Check Box Control
The below example show you how to add multiple ActiveX checkbox control on the worksheet.
Sub ActX_Add_Multiple_CheckBox_Ex2()

'Disable Screen Update
Application.ScreenUpdating = False

'Variable Declaration
Dim Rng As Range
Dim ShtRng As Range
Dim WrkSht As Worksheet


Set ShtRng = Application.Selection
Set ShtRng = Application.InputBox("Range", "Analysistabs", ShtRng.Address, Type:=8)
Set WrkSht = Application.ActiveSheet

For Each Rng In ShtRng
    WrkSht.OLEObjects.Add "Forms.CheckBox.1", Left:=Rng.Left, Top:=Rng.Top, Width:=Rng.Width, Height:=Rng.Height
Next

ShtRng.ClearContents
ShtRng.Select

'Enable Screen Update
Application.ScreenUpdating = True

End Sub
A Powerful & Multi-purpose Templates for project management. Now seamlessly manage your projects, tasks, meetings, presentations, teams, customers, stakeholders and time. This page describes all the amazing new features and options that come with our premium templates.
Save Up to 85% LIMITED TIME OFFER

All-in-One Pack
120+ Project Management Templates
Essential Pack
50+ Project Management Templates
Excel Pack
50+ Excel PM Templates
PowerPoint Pack
50+ Excel PM Templates
MS Word Pack
25+ Word PM Templates
Ultimate Project Management Template
Ultimate Resource Management Template
Project Portfolio Management Templates
Related Posts
- In this Topic:
- Add a CheckBox on the Worksheet Using VBA Code
- Example 1: Add Form Check Box Control
- Example 2: Add ActiveX Check Box Control
- Add multiple CheckBoxs on the Worksheet using VBA code
- Example 1: Add Form Check Box Control
- Example 2: Add ActiveX Check Box Control
VBA Reference
Effortlessly
Manage Your Projects
120+ Project Management Templates
Seamlessly manage your projects with our powerful & multi-purpose templates for project management.
120+ PM Templates Includes:
2 Comments
-
Bhupender
May 22, 2016 at 2:01 AM — ReplyHi
I am a new VBA learner and I need your support to get E-mail when checkbox in tick.
We have E-mail subject line Example- 012 EBN4615 CA, so I need vba help to get this mailo according to last two corrector (CA)
and if in checkbox CA is unchecked then user will not get this mail. please help me I am in big need of your help?
. -
Eric
March 1, 2017 at 3:03 AM — ReplyHello, Thank you for the tutorial. I am new to VBA and have a question on how to code the checkboxes I’m working on. I have sheet 1 with checkboxes on it and on sheet 2 I have a list of sentences in different cells. what I want to happen is when a checkbox is checked on sheet 1 I want it to take a specific sentence from sheet 2 and put it in a “Notes” box on sheet 1. That way I can compile notes with a couple checks of some checkboxes. Any help would be greatly appreciated. Thanks
Effectively Manage Your
Projects and Resources
ANALYSISTABS.COM provides free and premium project management tools, templates and dashboards for effectively managing the projects and analyzing the data.
We’re a crew of professionals expertise in Excel VBA, Business Analysis, Project Management. We’re Sharing our map to Project success with innovative tools, templates, tutorials and tips.
Project Management
Excel VBA
Download Free Excel 2007, 2010, 2013 Add-in for Creating Innovative Dashboards, Tools for Data Mining, Analysis, Visualization. Learn VBA for MS Excel, Word, PowerPoint, Access, Outlook to develop applications for retail, insurance, banking, finance, telecom, healthcare domains.
Page load link

3 Realtime VBA Projects
with Source Code!
Go to Top
One of the most demanding and fascinating things for an Excel user is to create interactive things in Excel. And a checkbox is a small but powerful tool that you can use to control a lot of things by unchecking/checking it.
In short: It gives you the power to make your stuff interactive. And, I’m sure you use it in your work, frequently. But, the thing is: Do you know how to use a checkbox up to its best? Yes, that’s the question.
In today’s post, I’m going to show you exactly how you can insert a checkbox in Excel and all the other things which will help you to know about its properties and options. So without any further ado, let’s explore this thing.
Here you have two different methods to insert a checkbox. You can use any of these methods which you think are convenient for you.
Manual Method
- First of all, go to the developer tab and if you are unable to see the developer tab in your ribbon, you can use these simple steps to enable it.

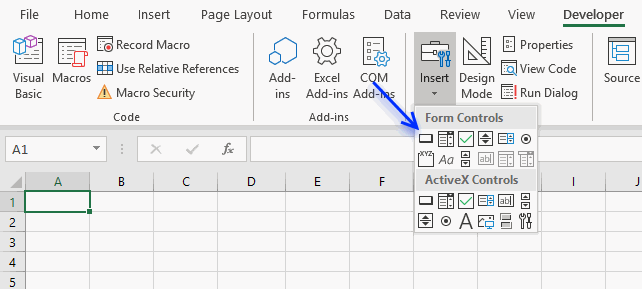
- In the Developer Tab, go to Controls → Form Controls → Select Checkbox.
- After selecting the check box click on the place on your worksheet where you want to insert it.
VBA Code
This is another method to insert a checkbox, you can use the following VBA code.
ActiveSheet.CheckBoxes.Add(left, Right, Height, Width).Select
ActiveSheet.CheckBoxes.Add(80, 40, 72, 72).Select
Using the above method is only helpful when you exactly know the place to insert and the size of the checkbox. Learn more about this method here.
Link a Checkbox with a Cell
Once you insert a checkbox in your worksheet the next thing you need to do is to link it with a cell. Follow these simple steps.
- Right-click on the check box and select format control.

- Now, you’ll get a format control dialog box.
- Go to the control tab and in the cell link input bar enter the cell address of the cell which you want to link with the checkbox.
- Click OK.
- In the cell which you have linked with your checkbox, you’ll get TRUE when you tick the checkbox and FALSE when you un-tick.

Deleting a Checkbox
You can delete a checkbox using two ways. The first way is to select a checkbox and press delete. This is a simple and fast method to do that.
And if you have more than one checkbox in your worksheet. Select all the checkboxes by holding the control key and pressing delete to delete them all. The second way is to use the selection pane to delete them
- Go to Home Tab → Editing → Find & Select → Selection Pane.
- In the selection pane, you will get the list of all the checkboxes you have used in your worksheet.
- You can select each of them one by one or you can select more than one by using the control key.
- Once you select them, press delete.
Printing a Checkbox
Most of the time users avoid printing a checkbox. But if you want to do that you can enable this option by using the following way.
- Right-click on the checkbox, and select Format Control.
- Go to Properties Tab.
- Tick mark “Print Object”.

This will allow you to print check boxes, and if you don’t want to print them make sure to untick this option.
Resizing a Checkbox
If you want to resize the checkbox you can simply expand its size by using dots from its border. And, if you want to resize it using a particular height and& width, you can do it by using the following steps.
- Right-click on the checkbox and select the format control option.
- Go to Size -> Tab Size and Rotate.
- Enter the height and width that you want to fix for the checkbox.
- Click OK.

Quick Tip: To lock the aspect ratio for the size of the checkbox tick mark “Lock aspect ratio”.
Copy a Checkbox in Multiple Cells
You can use three different ways to copy a checkbox from one place to another.
Copy Paste
- Select a checkbox.
- Right-click on it and copy it.
- Go to the cell where you want to paste that checkbox.
- Right-click and paste.
Use Control Key
- Select a checkbox.
- Press the control key.
- Now with your mouse, drag that checkbox to another place where you want to paste it.
Using Fill Handle
- Select the cell on which you have your checkbox.
- Use the fill handle and drag it up to the cell on which you want to copy the checkbox.
Renaming a Checkbox
While renaming a checkbox, there is one thing you have to keep in mind you have two different names associated with a checkbox. Caption name and an actual name of a checkbox.
- Question: How to change the caption name of a checkbox?
- Answer: Right-click and select edit text and then delete the default text and enter new text.
- Question: How to rename a checkbox?
- Answer: Right-click on the check box. Go to the address bar and edit the name. Change to the name you want and press enter.
Fixing the Position of a Checkbox
By default when you insert a checkbox in excel it will change its position & shape when you expand the cell on which it is placed.
But you can easily fix its position using these steps.
- Right, click on the checkbox, and go to Format Control → Properties Tab.
- In object positioning, select “don’t move or size with cell”.
- Once you select this option, the checkbox will not move from its position by expanding the column or row.
Hide or Un-hide a Checkbox
You can also hide or un-hide a check box from your worksheet using these steps.
- Open the selection pane by using the shortcut key Alt + F10.
- On the right side of the name of every checkbox, there is a small icon of an eye.
- Click on that icon to hide a checkbox and the same icon again to unhide it.
- If you want to hide/unhide all the checks boxes you can use the hide all button and show all buttons to show all the checkboxes.
How to use Checkbox in Excel
Here I have a list of useful ideas to use as a checkbox in your spreadsheet.
Creating a Checklist
In the below example, I have used a checkbox to create a checklist. And, I have used formulas in conditional formatting to create this checklist.
- Insert a check box and link it to a cell.
- Now, select the cell in which you have the task name and go to Home Tab -> Styles -> Conditional Formatting -> New Rule.
- Click on “Use a formula to determine which cell to format” and enter the below formula into it.
- =IF(B1=TRUE,TRUE,FALSE)
- Apply formatting for strikethrough.
- Click OK.
Now, whenever you tick the checkbox it will change the value in the linked cell to TRUE, and the cell in which you have applied conditional formatting will get a line through a value.
Create a Dynamic Chart with a Checkbox
In the below example, I have created a dynamic chart using a line chart and a column chart.
- Create a table with profit values and link it to another table using the below formula.
- =IF($I$17=TRUE,VLOOKUP($I4,$M$3:$N$15,2,0),NA())
- Then linked $I$17 with the checkbox.
- Whenever I tick that checkbox, the above formula will use VLOOKUP Function to get profit percentages. And, if a checkbox is unticked I’ll get a #N/A.
Use Checkbox to Run a Macro
While working on an invoice template I got this idea. The idea is if you want to insert the shipping address the same as the billing address you just have to tick the checkbox and the address will be copied to it.
And, on the other side when you untick that checkbox content will be cleared.
- Go to the Developer Tab → Code → Visual Basic or you can also use the shortcut key to open the visual basic editor.
- Add below VBA code to the sheet in which you have inserted your checkbox.
Sub Ship_To_XL()

If Range(“D15”) = True Then
Range("D17:D21") = Range("C17:C21")

Else
If Range(“D15”) = False Then
Range("D17:D21").ClearContents

Else: MsgBox (“Error!”)

End If

End Sub
Please note you have to insert this code into the code window of the same worksheet in which you want to use it. In the above code, D17:D21 is the range for the shipping address and C17:C21 is the range for the billing address. In cell D15, I have linked the checkbox.
sample-file
Return to VBA Code Examples
In VBA, you can create a CheckBox where a user can check or uncheck the option. Checkboxes are often used in UserForms, but can also be used in a Worksheet. In this tutorial, you will learn how to create a Checkbox (in both VBA and in Excel Worksheets), get a user choice in VBA and use it in code.
If you want to learn how to create a Listbox, click here: VBA Listbox
If you want to learn how to create a Combobox, click here: VBA Combobox
Create a Checkbox
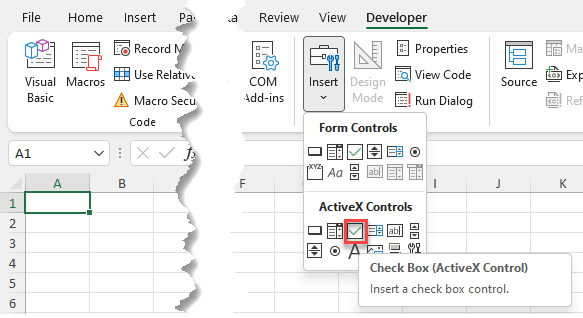
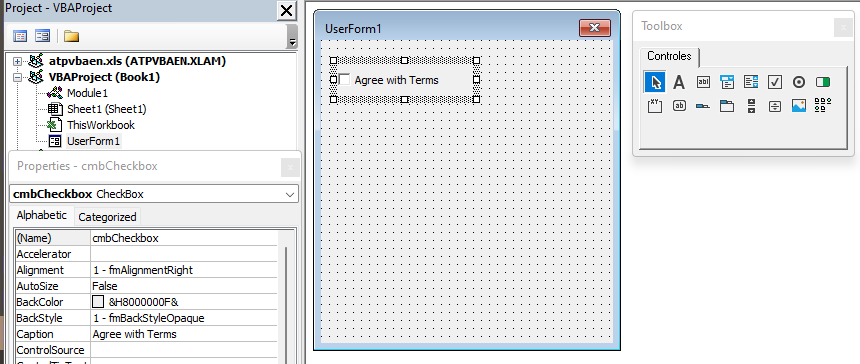
In order to insert a Checkbox in the Worksheet, you need to go to the Developer tab, click Insert and under ActiveX Controls choose Check Box:
When you select the Checkbox which you inserted, you can click on Properties under the Developer tab:
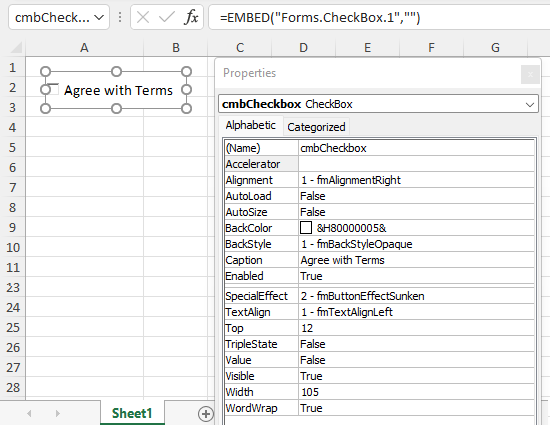
Here you can set different properties of the Checkbox. First, we changed the attribute Name to cmbCheckbox. Next, we can use the Checkbox with this name in VBA code.
Also, we changed the text which appears next to the checkbox to Agree with Terms. To do this, you need to set the attribute Caption.
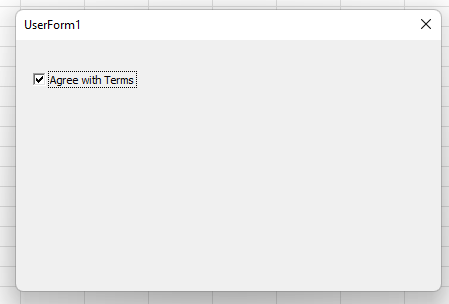
Get a Selected Item of a Checkbox in VBA
The purpose of a Checkbox is to get a user’s choice (checkbox checked or not). In order to retrieve a value that is selected by user, you need to use this code:
If Sheet1.cmbCheckBox.Value = True Then
    Sheet1.Range("C3") = "Agree"
Else
    Sheet1.Range("C3") = "Don't agree"
End If
We want to populate the cell C3 with Agree if the checkbox is checked and Don’t agree otherwise. The value of the checkbox is in the Value attribute of the object Sheet1.cmbCheckbox. The value of the checkbox can be true or false.

As we checked the checkbox, the value of Sheet1.cmbCheckbox.Value is true, so the result in C3 is Agree.
Use a Checkbox in a UserForm
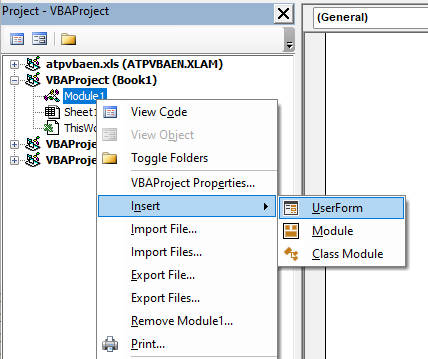
As we mentioned, Checkboxes are most often used in UserForms. To explain how you can do it, we will first insert an Userform. In the VBA Editor, right-click on Module name, click on Insert and choose UserForm:
To display controls for inserting, you need to enable the Toolbox. To do this, click on the Toolbox icon in the toolbar. After that, you will get the windows with all the controls available. You can click on Checkbox to create it in the Userform:
In the properties window, we will change the name of the Checkbox to chbCheckBox and caption to Agree with Terms. When we run the Userform, we get the Checkbox in it.
If you want to get selected value from the Checkbox, you need to use the same logic for the Checkbox in a Worksheet, which is explained earlier in the article.
VBA Coding Made Easy
Stop searching for VBA code online. Learn more about AutoMacro — A VBA Code Builder that allows beginners to code procedures from scratch with minimal coding knowledge and with many time-saving features for all users!

Learn More!
Содержание
- CheckBox control
- Remarks
- See also
- Support and feedback
- VBA Checkbox
- Create a Checkbox
- Get a Selected Item of a Checkbox in VBA
- Use a Checkbox in a UserForm
- VBA Coding Made Easy
- VBA Code Examples Add-in
- The Complete Guide to Excel VBA ActiveX Checkboxes
- The VBA Tutorials Blog
- Table of Contents
- Introduction
- Available Properties
- Renaming a Checkbox
- Method 1
- Method 2
- Return the Value of your Checkbox
- Method 1
- Method 2
- Checking/Unchecking your Checkbox
- Method 1
- Method 2
- Enabling/Disabling your Checkbox
- Method 1
- Method 2
- Method 3
- Hiding/Unhiding your Checkbox
- Method 1
- Method 2
- Editing the Label (Caption) of your Checkbox
- Method 1
- Method 2
- Adding/Deleting a Checkbox
- Add a Checkbox
- Delete a Checkbox
- Selecting a Checkbox
- Method 1
- Method 2
- Linking Checkbox to a Cell
- Method 1
- Method 2
- Changing the Checkbox Font
- Method 1
- Method 2
- Changing the Color of the Checkbox
- Method 1
- Method 2
- Changing Other Checkbox Properties
- Run Macro when Checkbox is Clicked
- Run Macro when Mouse Hovers over Checkbox
- Other Checkbox Events
- Looping Through All Checkboxes
CheckBox control
Displays the selection state of an item.
Use a CheckBox to give the user a choice between two values such as Yes/No, True/False, or On/Off.
When the user selects a CheckBox, it displays a special mark (such as an X) and its current setting is Yes, True, or On; if the user does not select the CheckBox, it is empty and its setting is No, False, or Off. Depending on the value of the TripleState property, a CheckBox can also have a null value.
If a CheckBox is bound to a data source, changing the setting changes the value of that source. A disabled CheckBox shows the current value, but is dimmed and does not allow changes to the value from the user interface.
You can also use check boxes inside a group box to select one or more of a group of related items. For example, you can create an order form that contains a list of available items, with a CheckBox preceding each item. The user can select a particular item or items by checking the corresponding CheckBox.
The default property of a CheckBox is the Value property. The default event of a CheckBox is the Click event.
The ListBox also lets you put a check mark by selected options. Depending on your application, you can use the ListBox instead of using a group of CheckBox controls.
See also
Support and feedback
Have questions or feedback about Office VBA or this documentation? Please see Office VBA support and feedback for guidance about the ways you can receive support and provide feedback.
Источник
VBA Checkbox
In this Article
In VBA, you can create a CheckBox where a user can check or uncheck the option. Checkboxes are often used in UserForms, but can also be used in a Worksheet. In this tutorial, you will learn how to create a Checkbox (in both VBA and in Excel Worksheets), get a user choice in VBA and use it in code.
If you want to learn how to create a Listbox, click here: VBA Listbox
If you want to learn how to create a Combobox, click here: VBA Combobox
Create a Checkbox
In order to insert a Checkbox in the Worksheet, you need to go to the Developer tab, click Insert and under ActiveX Controls choose Check Box:
When you select the Checkbox which you inserted, you can click on Properties under the Developer tab:
Here you can set different properties of the Checkbox. First, we changed the attribute Name to cmbCheckbox. Next, we can use the Checkbox with this name in VBA code.
Also, we changed the text which appears next to the checkbox to Agree with Terms. To do this, you need to set the attribute Caption.
Get a Selected Item of a Checkbox in VBA
The purpose of a Checkbox is to get a user’s choice (checkbox checked or not). In order to retrieve a value that is selected by user, you need to use this code:
We want to populate the cell C3 with Agree if the checkbox is checked and Don’t agree otherwise. The value of the checkbox is in the Value attribute of the object Sheet1.cmbCheckbox. The value of the checkbox can be true or false.
As we checked the checkbox, the value of Sheet1.cmbCheckbox.Value is true, so the result in C3 is Agree.
Use a Checkbox in a UserForm
As we mentioned, Checkboxes are most often used in UserForms. To explain how you can do it, we will first insert an Userform. In the VBA Editor, right-click on Module name, click on Insert and choose UserForm:
To display controls for inserting, you need to enable the Toolbox. To do this, click on the Toolbox icon in the toolbar. After that, you will get the windows with all the controls available. You can click on Checkbox to create it in the Userform:
In the properties window, we will change the name of the Checkbox to chbCheckBox and caption to Agree with Terms. When we run the Userform, we get the Checkbox in it.
If you want to get selected value from the Checkbox, you need to use the same logic for the Checkbox in a Worksheet, which is explained earlier in the article.
VBA Coding Made Easy
Stop searching for VBA code online. Learn more about AutoMacro — A VBA Code Builder that allows beginners to code procedures from scratch with minimal coding knowledge and with many time-saving features for all users!

VBA Code Examples Add-in
Easily access all of the code examples found on our site.
Simply navigate to the menu, click, and the code will be inserted directly into your module. .xlam add-in.
Источник
The Complete Guide to Excel VBA ActiveX Checkboxes
The VBA Tutorials Blog
Table of Contents
Introduction
This complete guide shows you how to control Excel ActiveX Checkboxes using VBA. If you want to learn how to control Form Control Checkboxes, instead, head over to my Excel VBA Form Control Checkboxes Guide.
ActiveX checkboxes are one of the two types of checkboxes you can add directly to your worksheet. The ActiveX checkboxes are located under ActiveX Controls on the Developer Tab > Insert menu:

ActiveX Checkboxes
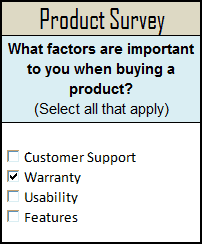
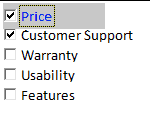
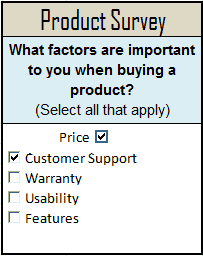
I made a sample product survey form using Excel ActiveX Checkboxes. I’ll point to this survey form throughout this guide as I use VBA macros to show you how to control ActiveX checkboxes.
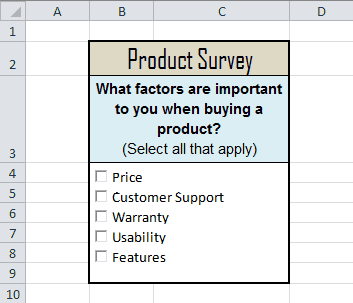
Excel Survey Form
Keep reading to learn how to grab the value, check, uncheck, change properties and loop through all ActiveX checkboxes!
Available Properties
Unlike Form Control Checkboxes, you can right-click ActiveX Checkboxes and pull up a list of properties:

ActiveX Checkbox Properties
All these properties can be changed in Excel using VBA — I’ll show you how.
Renaming a Checkbox
The checkbox name can be found beside the row labeled (Name) in the Properties Window. A version of the name is found in the upper left of Excel when you have your checkbox selected, but here are two cautions about relying on this version of the name:
- ActiveX controls cannot have spaces in their names. That’s why Method 1, below, works. Even if you put a space in the name in the upper left, the (Name) attribute in the Properties Window will still not have the space.
- You must click Design Mode on the Developer Tab to select your checkbox

CheckBox1
Method 1
Method 2
Return the Value of your Checkbox
Just like with Form Control Checkboxes, there is more than one way to check the value of an ActiveX checkbox using VBA. I’ll show you two ways. The following macros return the value of a checkbox named “ CheckBox1 ” and store the value in the variable cbValue :
Method 1
Method 2
Make powerful macros with our free VBA Developer Kit
This is actually pretty neat. If you have trouble understanding or remembering it, our free VBA Developer Kit can help. It’s loaded with VBA shortcuts to help you make your own macros like this one — we’ll send a copy, along with our Big Book of Excel VBA Macros, to your email address below.
Notice, the syntax of these macros is slightly different than the macros for Form Control Checkboxes. ActiveX Controls fall into the OLEObjects category, which are a subset of the Shapes collection we used when calling Form Control Checkboxes.
Each method produces the same result, so you can use whichever one you feel the most comfortable with. There are three possible values of a checkbox.
| Value | Example | Description |
|---|---|---|
| True |  |
Checked |
| False |  |
Unchecked |
| Null |  |
Grayed Out |
If you’re trying to read the value of a checkbox using a data type Boolean, you will receive an error if the value is Null. That’s why I chose a Variant data type in the macro examples above.
Checking/Unchecking your Checkbox
Checking and unchecking your checkbox is almost identical to returning the value of your checkbox. Again, at least two methods can be used. The following macros first check the box, then uncheck the box and, finally, nullify the checkbox:
Method 1
Method 2
One thing worth noting is that when you programatically change the state of the checkbox to True or False, it calls the Click event for that checkbox. In other words, if you have a macro that runs when you click your checkbox on your spreadsheet, it may run when you change its value using VBA.
Enabling/Disabling your Checkbox
ActiveX checkboxes gray out when you disable them, which is excellent. They can either gray out in the Checked or Unchecked state. Disabling a checkbox prevents the user from changing the value of the checkbox by clicking (checking and unchecking). You would still be able to change the value by using VBA. Here are some examples for disabling ActiveX checkboxes:
Method 1
Method 2
Method 3
I know, I know. It makes no sense that you get the same outcome whether or not you use the .Object keyword. This works for some properties, like .Enabled , but not for other properties, like .Value .
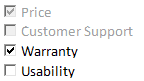
Top 2 Checkboxes are Disabled
Remember when we did this with the Form Control Checkboxes? Recall that disabling the checkboxes did not disable the macro associated with it. ActiveX checkboxes are different. Disabling the checkbox does disable the Click event macro associated with it.
To enable your checkbox again, just set the .Enabled property back to True using whichever method you prefer. Here’s an example:
Hiding/Unhiding your Checkbox
You can completely hide your ActiveX Checkboxes by changing the .Visible property. Setting it to True shows the checkbox and setting it to False hides the checkbox.
Method 1
Method 2
Again, I know it makes no sense, but you cannot use the .Object notation to change the visibility, like you could to enable/disable the checkbox. Silly fact.
Price checkbox no longer visible
To make your checkbox visible again, change the .Enabled property back to True using whichever method you prefer. Here’s an example:
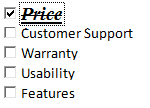
Editing the Label (Caption) of your Checkbox
You can change the caption of your Checkbox using the .Caption property. The following examples change the label beside CheckBox1 from “Price” to “Reliability.”
Method 1
Method 2
Here’s the end product:
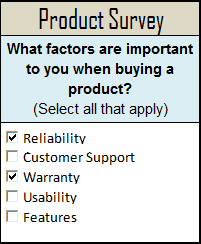
Reliability
If using the OLEObjects method, the .Object method must be used to change the caption. Otherwise, you’ll get a runtime error.
Adding/Deleting a Checkbox
To add an ActiveX Checkbox, you need to know where you want to place the checkbox and what size you want it to be.
Add a Checkbox
Notice how this macro combines the .Name and .Caption properties we discussed earlier to make a new checkbox with a custom label and custom name.
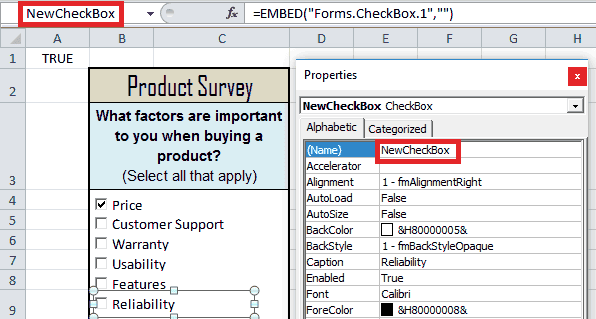
Creating a New Checkbox
To delete the checkbox titled NewCheckBox , run this VBA macro:
Delete a Checkbox
Selecting a Checkbox
To select a checkbox titled CheckBox5 on your spreadsheet, try the following macro:
Method 1
Method 2
You won’t actually see that the checkbox is selected until you enter Design Mode on your Developer Tab.
Linking Checkbox to a Cell
To link a checkbox to the value of a cell using VBA, you would try one of the following methods:
Method 1
Method 2
Now, cell “A1” in “Sheet1” changes to “TRUE” when CheckBox5 is checked, “FALSE” when unchecked and “#N/A” when Null.
Changing the Checkbox Font
The ability to change the font style of an ActiveX checkbox is what sets it apart from Form Control checkboxes. These next macros change the font, font size and other font properties of an ActiveX Checkbox named CheckBox1 :
Method 1
Method 2
ActiveX Checkbox Font
Play around with the properties in the examples above until you get the look you desire. Using the .Font object, you can change the actual font of the checkbox caption, the size of the font and whether or not the font is italicized, bolded, underlined or struck through. Notice how this only changes the label beside the checkbox — not the actual checkbox.
Although most of the macros in this guide show you how to change properties of your ActiveX Checkboxes using VBA, this is a good time to remind you the macros work both ways. For example, if you’re interested in seeing what value a property is set to, just change the order of the equality:
ActiveX Checkbox Font
Changing the Color of the Checkbox
In addition to changing the font style, changing the color of an ActiveX checkbox also makes it stand out from Form Control checkboxes. The following macro examples change the font color and background color of the ActiveX Checkbox named CheckBox1 :
Method 1
Method 2
ActiveX Checkbox Colors
The .ForeColor property changes the font color, while the .BackColor property changes the background color of your checkbox. If you find that your checkbox does not appear centered in your background color, adjust the .Height property of your checkbox.
Changing Other Checkbox Properties
By now, I’m sure you’re starting to notice a bunch of commonalities between each of these macro examples.
If you want to change other properties listed in the Properties Window, you can follow one of the above examples, but change the property portion of the code to the property you want to change as it appears in the Properties Window. Here is an example to get you started:
Wacky Checkbox
You can change the size and position of the checkbox in much the same way.
Run Macro when Checkbox is Clicked
To run a Macro when your checkbox is clicked, you’ll use the Click event. This template runs when CheckBox1 on Sheet1 is clicked:
It’s important that you paste this template in the Microsoft Excel Object associated with where your checkbox is located! My checkbox is located on Sheet1, so I double-clicked Sheet1 and pasted the macro in there.
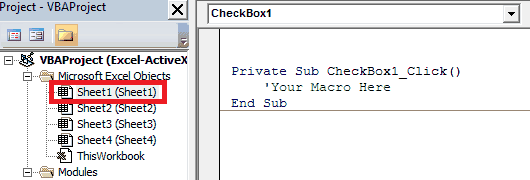
In Sheet1 because my checkbox was on Sheet1
Here’s an example. If your checkbox is named cbSelect , your macro would look like:
Notice the name if the Private Sub now says cbSelect _Click
Run Macro when Mouse Hovers over Checkbox
To run a Macro when your mouse hovers over your checkbox, you’ll use the MouseMove event. This template runs when the mouse moves over the CheckBox1 checkbox.
Remember, this template must be pasted in the Microsoft Excel Object that matches the worksheet where your checkbox is located! My checkbox is located on Sheet1, so I double-clicked Sheet1 and pasted the macro in there.
Other Checkbox Events
For a complete list of ActiveX Checkbox Events,
- Open your VBA Editor,
- Click your worksheet under Microsoft Excel Objects in the Project Explorer Pane (left)
- Select your Checkbox from the left dropdown box
- Click the down arrow in the Declarations dropdown box on the right.
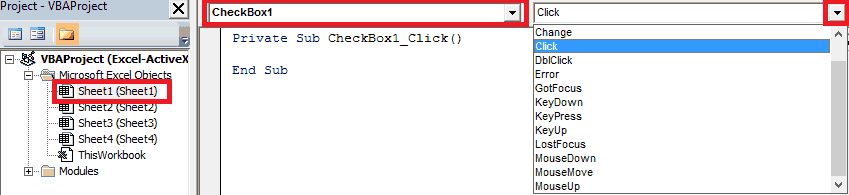
View All ActiveX Checkbox Events
Play around with these events to create some powerful spreadsheet interfaces.
Looping Through All Checkboxes
Use this template to loop through all ActiveX Checkboxes in your active sheet. This macro lets you take different actions depending on whether your checkboxes are checked, unchecked or null. Be sure to read the macro comments to understand how you can modify the VBA macro.
I put a lot of effort into this tutorial and I hope you found it helpful. If you did, please subscribe using the form below and I’ll send you more comprehensive VBA tutorials like this one.
Ready to do more with VBA?
We put together a giant PDF with over 300 pre-built macros and we want you to have it for free. Enter your email address below and we’ll send you a copy along with our VBA Developer Kit, loaded with VBA tips, tricks and shortcuts.
Before we go, I want to let you know we designed a suite of VBA Cheat Sheets to make it easier for you to write better macros. We included over 200 tips and 140 macro examples so they have everything you need to know to become a better VBA programmer.
Источник
Author: Oscar Cronquist Article last updated on February 17, 2019

In this post, I will demonstrate a macro that creates checkboxes in nonempty rows, see checkboxes in column E in image above.
The button «Add Checkboxes» next to column E is assigned to macro Addcheckboxes(), press with left mouse button on the button and the macro will be rund.
The same thing goes with the button «Remove Checkboxes» next to column E is assigned to macro RemoveCheckboxes(), press with left mouse button on the button and that macro will be rund.
VBA code — Add checkboxes
'Name macro
Sub Addcheckboxes()

'Declare variables and data types
Dim cell, LRow As Single
Dim chkbx As CheckBox
Dim CLeft, CTop, CHeight, CWidth As Double

'Don't refresh or update screen while processing macro, this will make the macro quicker.
Application.ScreenUpdating = False

'Find last non empty cell in column A
LRow = ActiveSheet.Range("A" & Rows.Count).End(xlUp).Row

'Iterate through 2 to last non empty cell
For cell = 2 To LRow

    'Check if cell in column A is not equal to nothing
    If Cells(cell, "A").Value <> "" Then

        'Save cell dimensions and coordinates of corresponding cell in column E to variables
        CLeft = Cells(cell, "E").Left
        CTop = Cells(cell, "E").Top
        CHeight = Cells(cell, "E").Height
        CWidth = Cells(cell, "E").Width

        'Create checkbox based on dimension and coordinates data from variables
        ActiveSheet.CheckBoxes.Add(CLeft, CTop, CWidth, CHeight).Select
        With Selection
            .Caption = ""
            .Value = xlOff
            .Display3DShading = False
        End With
    End If
Next cell

'Turn on screen refresh
Application.ScreenUpdating = True

End Sub
VBA code — Remove checkboxes
'Name macro
Sub RemoveCheckboxes()

'Declare variables and data types
Dim chkbx As CheckBox

'Iterate through all check boxes on active sheet
For Each chkbx In ActiveSheet.CheckBoxes

    'Remove checkbox
    chkbx.Delete

'Continue with next checkbox
Next

End Sub
Where to copy VBA code?
- Copy above code.
- Press Alt+F11 to open the Visual Basic Editor.
- Press with right mouse button on on your workbook in the Project Explorer, see image above.
- Press with left mouse button on «Insert».
- Press with left mouse button on «Module».
- Paste VBA code to the module.
- Exit VBE and return to Excel.
I have assigned the macros to two buttons: «Add Checkboxes» and «Remove Checkboxes», the top image shows these buttons.
- Go to Developer tab.
- Press with left mouse button on «Insert» button.
- Press with left mouse button on «Button» button

- Press with left mouse button on and drag on the worksheet and then release mouse button to create the button.
- Select a macro.
- Press with left mouse button on OK!
In the next post I will describe how to copy selected rows to another sheet.
Next: Copy selected rows (checkboxes) (2/2)
Latest updated articles.
More than 300 Excel functions with detailed information including syntax, arguments, return values, and examples for most of the functions used in Excel formulas.
More than 1300 formulas organized in subcategories.
Excel Tables simplifies your work with data, adding or removing data, filtering, totals, sorting, enhance readability using cell formatting, cell references, formulas, and more.
Allows you to filter data based on selected value , a given text, or other criteria. It also lets you filter existing data or move filtered values to a new location.
Lets you control what a user can type into a cell. It allows you to specifiy conditions and show a custom message if entered data is not valid.
Lets the user work more efficiently by showing a list that the user can select a value from. This lets you control what is shown in the list and is faster than typing into a cell.
Lets you name one or more cells, this makes it easier to find cells using the Name box, read and understand formulas containing names instead of cell references.
The Excel Solver is a free add-in that uses objective cells, constraints based on formulas on a worksheet to perform what-if analysis and other decision problems like permutations and combinations.
An Excel feature that lets you visualize data in a graph.
Format cells or cell values based a condition or criteria, there a multiple built-in Conditional Formatting tools you can use or use a custom-made conditional formatting formula.
Lets you quickly summarize vast amounts of data in a very user-friendly way. This powerful Excel feature lets you then analyze, organize and categorize important data efficiently.
VBA stands for Visual Basic for Applications and is a computer programming language developed by Microsoft, it allows you to automate time-consuming tasks and create custom functions.
A program or subroutine built in VBA that anyone can create. Use the macro-recorder to quickly create your own VBA macros.
UDF stands for User Defined Functions and is custom built functions anyone can create.
A list of all published articles.