
Автозаполнение ячеек в заданном диапазоне с помощью метода Range.AutoFill. Синтаксис, параметры, примеры автозаполнения из кода VBA Excel.
Определение
Определение метода Range.AutoFill:
AutoFill — это метод объекта Range, который выполняет автозаполнение ячеек в указанном диапазоне.
Синтаксис
Синтаксис метода Range.AutoFill:
|
Expression.AutoFill (Destination, Type) |
Expression — выражение (переменная), возвращающее объект Range.
Параметры
Параметры метода Range.AutoFill:
| Параметр | Описание |
|---|---|
| Destination | Диапазон ячеек, который необходимо заполнить. В него должен быть включен исходный диапазон (Expression). Обязательный параметр. |
| Type | Константа из коллекции XlAutoFillType, задающая тип автозаполнения. Необязательный параметр. |
Константа из коллекции XlAutoFillType указывает, как должен быть заполнен целевой диапазон (Destination) в зависимости от содержимого диапазона исходных данных (Expression). По умолчанию используется константа xlFillDefault (0), когда приложение Excel само определяет значения и форматы, используемые для заполнения целевого диапазона.
Примеры с Range.AutoFill
Примеры автозаполнения целевых диапазонов из кода VBA Excel с помощью метода AutoFill объекта Range.
Пример 1
Автозаполнение указанного диапазона (Destination), состоящего из нескольких строк и столбцов, данными одной ячейки (Expression) в зависимости от ее расположения в целевом диапазоне:
|
1 2 3 4 5 6 7 8 9 10 11 12 13 14 15 16 17 18 19 20 21 22 23 |
Sub Primer1() ‘Удаляем границы ячеек, если уже были запуски кода Range(«A1:E20»).Borders.LineStyle = xlNone ‘Ячейка Expression в верхнем левом углу Destination Range(«A1») = 111 Range(«A1»).AutoFill Range(«A1:E5») Range(«A1:E5»).Borders(xlEdgeBottom).LineStyle = True ‘Ячейка Expression в нижнем левом углу Destination Range(«A10») = 222 Range(«A10»).AutoFill Range(«A6:E10») Range(«A6:E10»).Borders(xlEdgeBottom).LineStyle = True ‘Ячейка Expression в верхнем правом углу Destination Range(«E11») = 333 Range(«E11»).AutoFill Range(«A11:E15») Range(«A11:E15»).Borders(xlEdgeBottom).LineStyle = True ‘Ячейка Expression в нижнем правом углу Destination Range(«E20») = «444» Range(«E20»).AutoFill Range(«A16:E20») End Sub |
Целевые диапазоны для наглядности разделены горизонтальными линиями. Ячейка (Expression) может находиться только по углам целевого диапазона (Destination), иначе будет сгенерирована ошибка.
Пример 2
Горизонтальное автозаполнение указанного диапазона (Destination) последовательностью чисел, месяцев и дней недели:
|
1 2 3 4 5 6 7 8 9 10 11 12 13 14 15 16 17 18 19 20 21 |
Sub Primer2() ‘Удаляем границы ячеек, если уже были запуски кода Range(«A1:L4»).Borders.LineStyle = xlNone ‘Автозаполнение строки единицами Range(«A1») = 1 Range(«A1»).AutoFill Range(«A1:L1») Range(«A1:L1»).Borders(xlEdgeBottom).LineStyle = True ‘Автозаполнение строки последовательностью натуральных чисел Range(«A2») = 1 Range(«B2») = 2 Range(«A2:B2»).AutoFill Range(«A2:L2») Range(«A2:L2»).Borders(xlEdgeBottom).LineStyle = True ‘Одновременное заполнение одной строки последовательностью ‘месяцев и второй строки — днями недели Range(«A3») = «Январь» Range(«A4») = «Понедельник» Range(«A3:A4»).AutoFill Range(«A3:L4») End Sub |
Пример 3
Вертикальное автозаполнение указанного диапазона (Destination) последовательностью дат:
|
Sub Primer3() ‘Автозаполнение столбца датами, начиная с текущей Range(«A1») = Date Range(«A1»).NumberFormat = «DD.MM.YYYY» Range(«A1»).AutoFill Range(«A1:A20») ‘Автозаполнение столбца датами в обратном порядке Range(«B20») = Date Range(«B20»).NumberFormat = «DD.MM.YYYY» Range(«B20»).AutoFill Range(«B1:B20») End Sub |
| title | keywords | f1_keywords | ms.prod | api_name | ms.assetid | ms.date | ms.localizationpriority |
|---|---|---|---|---|---|---|---|
|
Range.AutoFill method (Excel) |
vbaxl10.chm144083 |
vbaxl10.chm144083 |
excel |
Excel.Range.AutoFill |
257f6608-9211-86f9-79de-e3c44df8f3fd |
05/10/2019 |
medium |
Range.AutoFill method (Excel)
Performs an autofill on the cells in the specified range.
Syntax
expression.AutoFill (Destination, Type)
expression A variable that represents a Range object.
Parameters
| Name | Required/Optional | Data type | Description |
|---|---|---|---|
| Destination | Required | Range | The cells to be filled. The destination must include the source range. |
| Type | Optional | XlAutoFillType | Specifies the fill type. |
Return value
Variant
Example
This example performs an autofill on cells A1:A20 on Sheet1, based on the source range A1:A2 on Sheet1. Before running this example, type 1 in cell A1 and type 2 in cell A2.
Set sourceRange = Worksheets("Sheet1").Range("A1:A2")
Set fillRange = Worksheets("Sheet1").Range("A1:A20")
sourceRange.AutoFill Destination:=fillRange
[!includeSupport and feedback]
What Does AutoFill Do in Excel VBA?
We have seen AutoFill in the worksheet, where the cells are automatically filled based on the values in the previous cells above it. We can use VBA so that Excel does the task for us. To do this, we use the Selection.AutoFill method, and we must provide the destination, i.e., up to which cells it must fill the values.
The best use of VBA AutoFill comes when we need to fill the formula of the first cell to the cell of the column. We usually apply the formula in the first cell. Then, we copy and paste to the last cell or just auto-fill by double-clicking on the little arrow key. Another best example of using autofill in excelAutoFill in excel can fill a range in a specific direction by using the fill handle.read more is when we need to insert serial numbers. We usually type the first three numbers; then, we drag them down to the required last cell.
In VBA, we can perform the task of the AutoFill method. This article will show you how to use the autofill method and write the code. Now, we will see how we can use this tool in VBA codingVBA code refers to a set of instructions written by the user in the Visual Basic Applications programming language on a Visual Basic Editor (VBE) to perform a specific task.read more.
Table of contents
- What Does AutoFill Do in Excel VBA?
- How to Use AutoFill in VBA?
- Examples of AutoFill in Excel VBA
- Example #1 – xlFillDefault
- Example #2 – xlFillCopy
- Example #3 – xlFillMonths
- Example #4 – xlFillFormats
- Example #5 – xlFlashFill
- Recommended Articles

You are free to use this image on your website, templates, etc, Please provide us with an attribution linkArticle Link to be Hyperlinked
For eg:
Source: VBA AutoFill (wallstreetmojo.com)
How to Use AutoFill in VBA?
To use the AutoFill in VBA, we need to understand the syntax of the AutoFill method. Below is the syntax of the AutoFill.
![]()
- Range (“A1”): What are the cells to identify the pattern of the fill series.
- Destination: Till what cell do you want to continue the fill series pattern. Here, we need to mention the full range of cells.
- Type as xlAutoFillType: Here, we can select the series fill type. Below are the list of items in this parameter – xlFillCopy, xlFillDays, xlFillDefault, xlFillFormats, xlFillMonths, xlFillSeries, xlFillValues, xlFillWeekdays, xlFillYears, xlFlashFill, xlGrowthTrend, xlLinearTrend.
Examples of AutoFill in Excel VBA
Let us see some simple to advanced examples of VBAHere’s a list of the top examples of VBA Macro code in Excel: Print All Sheet Names, Insert Different Color Index in VBA, Insert Worksheets as Much as You want, Insert Blank Row After Every Other Row
Highlight Spelling Mistakes.read more AutoFill in excel.
Example #1 – xlFillDefault
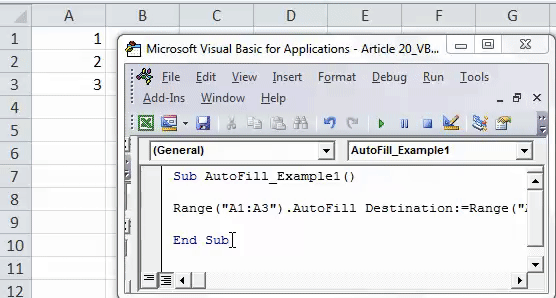
First, enter 3 serial numbers in the first three cells.
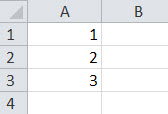
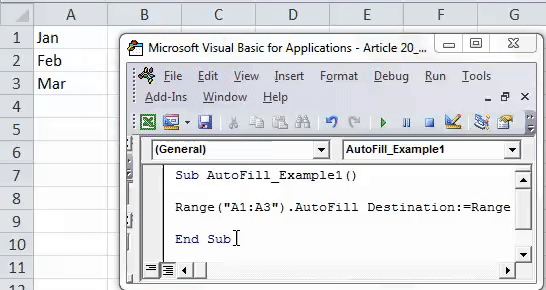
In the VBA subprocedure, mention the VBA rangeRange is a property in VBA that helps specify a particular cell, a range of cells, a row, a column, or a three-dimensional range. In the context of the Excel worksheet, the VBA range object includes a single cell or multiple cells spread across various rows and columns.read more as Range (“A1: A3”)
Code:
Sub AutoFill_Example1()

Range("A1:A3").

End Sub
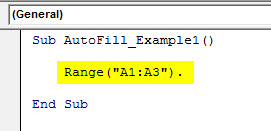
Now, access the AutoFill method.
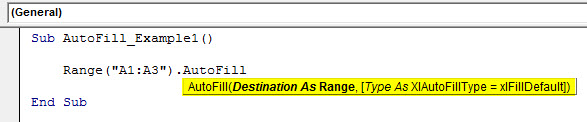
Enter the destination as Range (A1: A10)
Code:
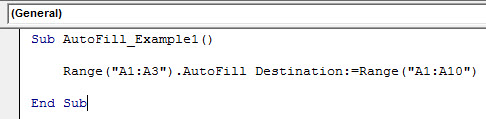
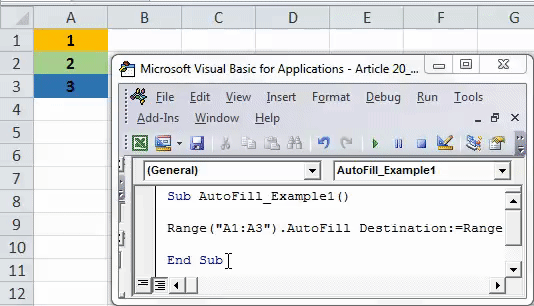
Range("A1:A3").AutoFill Destination:=Range("A1:A10")

Select the “Type” as xlFillDefault.
Code:
Range("A1:A3").AutoFill Destination:=Range("A1:A10"), Type:=xlFillDefault


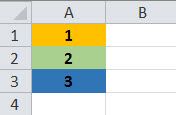
Now, run the code. We will get the serial numbers from 1 to 10.
Since we mentioned the end destination cell as A10, it has stopped there. Therefore, we can enter the destination cell as the last cell of the Excel.
Example #2 – xlFillCopy
We will use the “Type” for the same numbers as xlFillCopy.
Code:
Sub AutoFill_Example1()

Range("A1:A3").AutoFill Destination:=Range("A1:A10"), Type:=xlFillCopy

End Sub
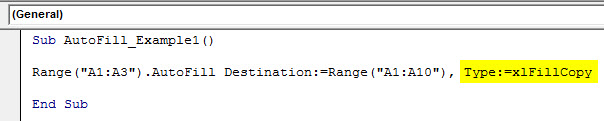
We have a copy of the first three cells for the remaining cells.
Example #3 – xlFillMonths
We have entered the first three months in the first three cells.
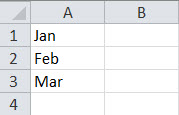
Change the AutoFill “Type” to xlFillMonths.
Code:
Sub AutoFill_Example1()

Range("A1:A3").AutoFill Destination:=Range("A1:A10"), Type:=xlFillMonths

End Sub

It will fill the month series.
Example #4 – xlFillFormats
For this example, we have entered numbers and applied formatting to those cells.
Now, we will change the “Type” to xlFillFormats.
Code:
Sub AutoFill_Example1()

Range("A1:A3").AutoFill Destination:=Range("A1:A10"), Type:=xlFillFormats

End Sub

Run this code and see what happens.
It has filled formats from the first three cells to the next three cells and, again, the next three cells.
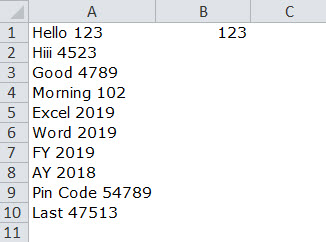
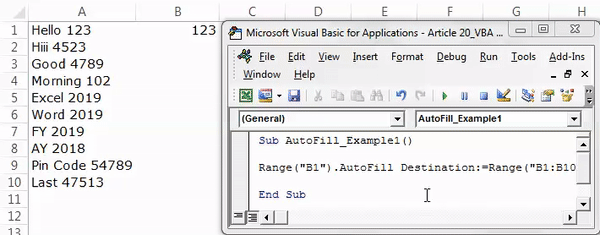
Example #5 – xlFlashFill
For this example, we have entered a few values from cell A1 to A10, as shown in the below image.

From this list, we want to extract the numerical part. To tell Excel about the pattern, in the first cell, we will manually enter the numerical part of the first cell.
We will write the code as usual and change the “Type” to xlFlashFill. This time we will use the B column range.
Code:
Sub AutoFill_Example1()

Range("B1").AutoFill Destination:=Range("B1:B10"), Type:=xlFlashFill

End Sub

If we run this code, we will get the result like the below.
It is an overview of the VBA AutoFill method. We hope you have enjoyed it.
You can download this VBA AutoFill Excel Template from here – VBA AutoFill Excel Template
Recommended Articles
This article has been a guide to VBA AutoFill in Excel. Here, we discuss How to Use Autofill in Excel VBA with various parameters like xlFillDefault, xlFillFormats, xlFlashFill, etc. You can learn more about VBA from the following articles: –
- Switch Case Statement in VBA
- VBA AND Function
- Count in VBA
- Copy Paste in VBA
I have some data in the first columns, some calculated fields right afterwards and I want to autofill the rest of the rows with the same rules that are in the first row.
The total number of rows, number of columns for input/calculated data are known and I would appreciate a working example for this data:
  |  A  |  B  |    C   |    D   |      E     |
----------------------------------------------
1 |  3  |  1  | =A1+B1 | =A1*B1 | =sum(C1:D1)|
2 |  4  |  4  |        |        |            |
3 |  5  | 23  |        |        |            |
4 | 42  |  4  |        |        |            |
5 |  7  |  4  |        |        |            |
The real data usually has 10K+ rows and 30+ columns. When I’m trying to do it manually sometimes getting the error Selection is too large. I’m telling this because the general solution might not work using VBA either, but if I know how to autofill this example, I’ll do it per column if necessary. Version of Excel is 2000 and it’s not my fault 
![]()
asked Feb 18, 2010 at 14:20
![]()
sub copydown()
    Range("c1:e" & Range("a" & activesheet.rows.count).End(xlUp).Row).FillDown
end sub
answered Feb 18, 2010 at 16:22
![]()
iDevlopiDevlop
24.6k11 gold badges89 silver badges147 bronze badges
3
Rudimentary, but it should give you something to build upon and it works in Excel 2003 (the oldest I have).
Option Explicit

Public Sub CopyFormulaeExample()

    On Error GoTo Handle_Exception

    Dim lastRow As Long
    Dim wrkSheet As Excel.Worksheet

    'Book and sheet names hard-coded for this example
    Set wrkSheet = Application.Workbooks("Book1").Worksheets("Sheet1")

    'Get the index of the last row used
    lastRow = wrkSheet.UsedRange.End(xlDown).Row

    'Copy the cells containing the formulae; also hard-coded for this example
    Range("C1:E1").Select
    Selection.Copy
    'Paste the selection to the range of interest
    Range("C2:E" + CStr(lastRow)).PasteSpecial xlPasteAll

    'Alternative approach
    Range("C1:E1").Copy Range("C2:E" + CStr(lastRow))

    'Release memory and exit method
    Set wrkSheet = Nothing
    Exit Sub

Handle_Exception:

    Set wrkSheet = Nothing
    MsgBox "An error has been found: " + Err.Description

End Sub
answered Feb 18, 2010 at 15:13
![]()
d..d..
1,0631 gold badge10 silver badges18 bronze badges
3
Using the copy down (ctrl-D) function.
Select Cells c1-e1 and then all the way down (if you have 10,000 rows of data, your selected cell range is c1-e10000).
Press Ctrl-D.
This copies the cell contents (your formulas) to all of the cells below it.
http://www.google.com/search?q=using+excel+ctrl-d
answered Feb 18, 2010 at 15:23
![]()
1
Following is how I did it, when I did it
Ctrl+C
<--
Ctrl+Shift+Down
-->
Ctrl+Shift+Up
Ctrl+V
This seems to me to be the most efficient way. Nothing prevents you from wrapping this into a macro and assign a convenient key-binding.
answered Feb 18, 2010 at 14:46
![]()
lprsdlprsd
83.6k47 gold badges135 silver badges168 bronze badges
1
VBA AutoFill in Excel
Sometimes in excel when we work on similar kind of data set which keeps on repeating, excel itself suggests sequential values as AutoFill. This is quite easy to implement and use. As mostly we get a sequence of autofill in the form of Numbers, Weekdays, Months or any number series. If we create autofill or not but excel sometimes create the Autofill to accompany in completing the task quickly.
How to Use VBA AutoFill Function in Excel?
We will learn how to use a VBA Autofill function with few examples in excel.
You can download this VBA AutoFill Excel Template here – VBA AutoFill Excel Template
Example #1 – VBA AutoFill
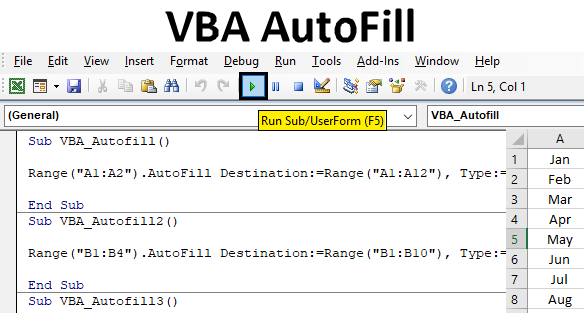
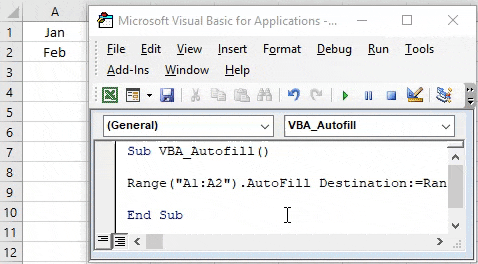
Let’s see an example where we will autofill months names in a proper sequence. In column A we have name of 2 months Jan and Fed in short. And we will write a code which will fill rest of the months automatically till Dec.

Follow the below steps to use VBA AutoFill function in Excel:
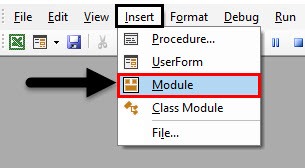
Step 1: For this, we need a module. Go to Insert menu and select the module as shown below.
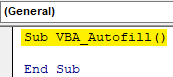
Step 2: After we get a module, in that write subcategory of VBA Autofill or in any other name of your choice as shown below.
Code:
Sub VBA_Autofill()

End Sub
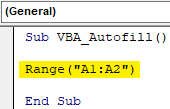
Step 3: Select the range of the cells which we need to drag or extent for autofill. We have cell A1 and A2.
Code:
Sub VBA_Autofill()

Range ("A1:A2")

End Sub
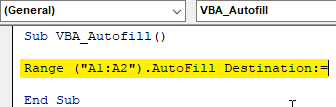
Step 4: Now select the function we need to perform which is “Autofill”, allowing the Destination to get selected as shown below.
Code:
Sub VBA_Autofill()

Range("A1:A2").AutoFill Destination:=

End Sub
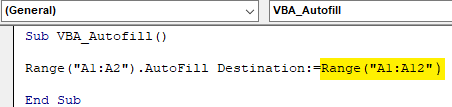
Step 5: Now select the range where we will need to autofill the names of months till Dec. We can select any range but selecting the same range makes it easy to implement.
Code:
Sub VBA_Autofill()

Range("A1:A2").AutoFill Destination:=Range("A1:A12")

End Sub
Step 6: Now here comes the moment, when we will select the time of autofill we need. Select the Type as xlFillMonths as shown below.
Code:
Sub VBA_Autofill()

Range("A1:A2").AutoFill Destination:=Range("A1:A12"), Type:=xlFillMonths

End Sub

Step 7: Once done, compile the code and run it by clicking on the Play button which is located below the menu bar in VBA or Press F5. And we will see, in a moment list of months from Jan to Dec will get automatically filled from cell A3 to A12.
Example #2 – VBA AutoFill
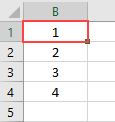
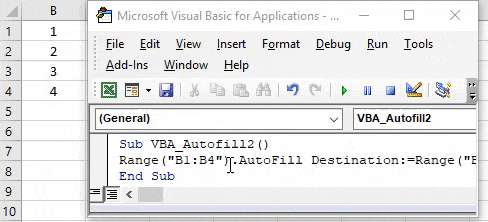
In this example we will see, how to Autofill numbers. We have column B with some numbers from 1 to 4 as shown below. Now we will Autofill the numbers till 10 automatically.
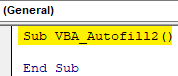
Step 1: For this we need a module where will implement the code for AutoFill the numbers. Open a module and create a sub category in the name of VBA AutoFill as shown below.
Code:
Sub VBA_Autofill2()

End Sub
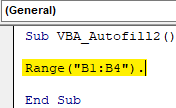
Step 2: Now select the range of the cells which are currently available which is from B1 to B4.
Code:
Sub VBA_Autofill2()

Range("B1:B4").

End Sub
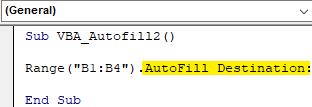
Step 3: Select the AutoFill function followed by the Destination command as shown below.
Code:
Sub VBA_Autofill2()

Range("B1:B4").AutoFill Destination:

End Sub
Step 4: Now select the range of the cells till we want to autofill the numbers. Here we are making it till number 10. So, select the range from cell B1 to B10.
Code:
Sub VBA_Autofill2()

Range("B1:B4").AutoFill Destination:=Range("B1:B10"),

End Sub

Step 5: Now for Auto filling numbers, we will select Type as xlFillDefault is meant only for number kind of things.
Code:
Sub VBA_Autofill2()

Range("B1:B4").AutoFill Destination:=Range("B1:B10"), Type:=xlFillDefault

End Sub

Step 6: Now compile the code and run to get the output. We will see numbers are auto filled from 1 to 10 as shown below.
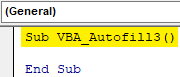
Example #3 – VBA AutoFill
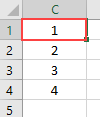
There is another way to autofill the content of any columns. This can be done for anything. Numbers, Text or any combination. We have considered the numbers here in Column C from 1 to 4 as shown below.
Step 1: Open a module, in that create the subcategory of VBA Autofill shown below.
Code:
Sub VBA_Autofill3()

End Sub
Step 2: As the same above examples, we will select the range of the cells which has the data and need to get Autofill.
Code:
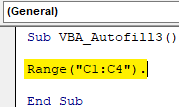
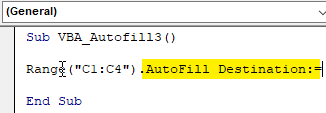
Sub VBA_Autofill3()

Range("C1:C4").

End Sub
Step 3: In the same manner as shown in the above examples, select the Autofill function followed by Destination command.
Code:
Sub VBA_Autofill3()

Range("C1:C4").AutoFill Destination:=

End Sub
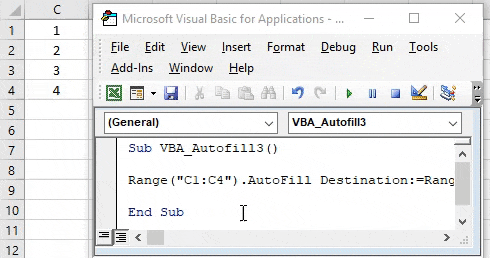
Step 4: Select the range of cells till where we need to autofill the cell contents. Here we are selecting the range of cell C1 to C12.
Code:
Sub VBA_Autofill3()

Range("C1:C4").AutoFill Destination:=Range("C1:C12"),

End Sub

Step 5: Now select the Type of autofill we want. Here we are selecting xlFillCopy which will Copy and Paste the data available in selected range cells to destination cells.
Code:
Sub VBA_Autofill3()

Range("C1:C4").AutoFill Destination:=Range("C1:C12"), Type:=xlFillCopy

End Sub
Step 6: At last, compile the code in one go, as it is a single line code and run. We will numbers from 1 to 4 are now copied to the cell till cell C12. And we can see all 4 numbers are copied twice.
Example #4 – VBA AutoFill
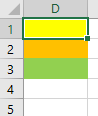
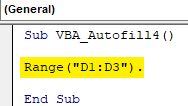
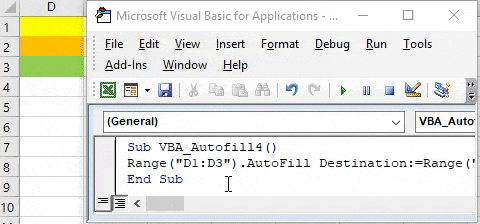
In this example we will see how to AutoFill format of cells to below destination cells. Format can be Bold, Italic or colored cells. Here we have columns D with some colored cells D1 to D3 as shown below.
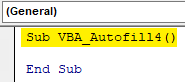
Step 1: Open a new module and create a sub category of VBA AutoFill or in any other name. As we can see, here we have kept all the sub categories in numerical sequence.
Code:
Sub VBA_Autofill4()

End Sub
Step 2: Select a range of those cells which has a colored background. Here those cells range is D1 to D3.
Code:
Sub VBA_Autofill4()

Range("D1:D3").

End Sub
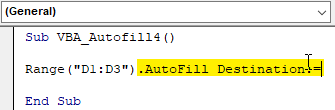
Step 3: Now select AutoFill function with command Destination as shown below.
Code:
Sub VBA_Autofill4()

Range("D1:D3").AutoFill Destination:=

End Sub
Step 4: Now select the Destination range of cells where we need to autofill the format cells. Here we are selecting D1 to D10.
Code:
Sub VBA_Autofill4()

Range("D1:D3").AutoFill Destination:=Range("D1:D10"),

End Sub
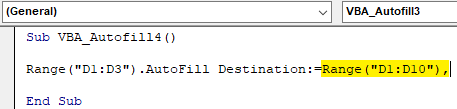
Step 5: At last select the Type which we need to autofill in destination cells as xlFillFormat.
Code:
Sub VBA_Autofill4()

Range("D1:D3").AutoFill Destination:=Range("D1:D10"), Type:=xlFillFormat

End Sub

Step 6: Finally we can compile the code and run it. We will the color which are in cells D1 to D3 are auto filled to the cell till D10.
Pros of VBA AutoFill
- It saves the time by automatically filling the content of the cells which need to be filled repeatedly.
- Sequential data can be automatically filled to save file.
Things to Remember
- Autofill can be used for formatting, copying, dragging for numbers and text.
- If possible then keep the proper sequence of code while writing multiple codes.
- It is always better to automate the data which we need to fill in same manner.
- New version of MS Excel has function where if we enter one data set one time then next time we just need to fill 2-3 cells and it will automatically suggest to fill the entire range.
Recommended Articles
This is a guide to VBA Autofill. Here we discuss how to use Excel VBA Autofill Function along with practical examples and downloadable excel template. You can also go through our other suggested articles –
- Copy Paste Function in VBA
- Substring Excel Function
- VBA Subscript out of Range
- Excel ISNUMBER Formula