
In this Article
- VBA PDF (Free Downloads)
- Word VBA Examples “CheatSheet”
- Select / Go To
- Bookmarks
- Document
- Columns
- Font
- Insert
- Loops
- Paragraph
- Word VBA Macro Tutorial
- Simple Word Macro Example
- Word Macro Basics
- Word Document Object
- Application
- Documents
- Document Methods
- Range, Selection, Paragraphs
- Range
- Selection
- Paragraphs
- Word VBA Tutorial Conclusion
- Word Macro Examples
- Word VBA FAQs
Welcome to our Word VBA / Macros Mega-Guide!
This page contains:
-
- Word VBA Tutorial PDF (Free Download)
- Word VBA “Cheat Sheet” containing a list of the most commonly used Word VBA code snippets
- Full Word VBA / Macro tutorial.
- Searchable list of all of our Word VBA Macro Tutorials
You might also be interested in our Interactive VBA Tutorial for Excel. While some of the examples / exercises are specific to Excel VBA, much of the content is generic to all VBA and you may find it useful to learn concepts like If Statements, Loops, MessageBoxes, and more.
VBA PDF (Free Downloads)
Download our free Microsoft Word VBA Tutorial! Or VBA Tutorials for other Office Programs!

Download
Word VBA Examples “CheatSheet”
Below you will find simple VBA code examples for working with Microsoft Word.
Select / Go To
Backspace
Selection.TypeBackspace
Select Entire Document
Selection.HomeKey Unit:=wdStory
Selection.Extend
Delete
Selection.Delete Unit:=wdCharacter, Count:=1
Insert After
Selection.InsertAfter “text”
Beginning of Line
Selection.HomeKey Unit:=wdLine
End of Line
Selection.EndKey Unit:=wdLine
Select All
Selection.WholeStory
Select Entire Line
Selection.EndKey Unit:=wdLine, Extend:=wdExtend
Move Up Paragraph
Selection.MoveUp Unit:=wdParagraph, Count:=1
Move Right One Character
Selection.MoveRight Unit:=wdCharacter, Count:=1
Move Right One Cell in Table
Selection.MoveRight Unit:=wdCell
Go To Start of Doc
Selection.HomeKey Unit:=wdStory
Go To End of Doc
Selection.EndKey Unit:=wdStory
Go To Page 1
Selection.GoTo What:=wdGoToPage, Which:=wdGoToNext, Name:=”1″
Go To Top of Page
Selection.GoTo What:=wdGoToBookmark, Name:=”Page”
Selection.MoveLeft Unit:=wdCharacter, Count:=1
Return to Top
Bookmarks
Add
With ActiveDocument.Bookmarks
.Add Range:=Selection.Range, Name:=”Name”
.DefaultSorting = wdSortByName
.ShowHidden = False
End With
Count
Dim n as Integer
n = ActiveDocument.Bookmarks.Count
Delete
ActiveDocument.Bookmarks(“BookmarkName”).Delete
Exists?
If ActiveDocument.Bookmarks.Exists(“BookmarkName”) = True then
‘Do something
End If
Go To
Selection.GoTo What:=wdGoToBookmark, Name:=”BookmarkName”
Select
ActiveDocument.Bookmarks(“BookmarkName”).Select
Replace Text
Selection.GoTo What:=wdGoToBookmark, Name:=”BookmarkName”
Selection.Delete Unit:=wdCharacter, Count:=1
Selection.InsertAfter “New Text”
ActiveDocument.Bookmarks.Add Range:=Selection.Range, _
Name:=”BookmarkName”
Return to Top
Document
Activate
Documents(“Example.doc”).Activate
Add to Variable
Dim doc As Document
Set doc = Documents.Add
Add (From Another Doc)
Documents.Add Template:=”C:FormsFormDoc.doc”, _
NewTemplate:=False
Close
Documents(“Example.doc”).Close
Close – Save Changes
Documents(“Example.doc”).Close SaveChanges:=wdSaveChanges
Close – Do Not Save
Documents(“Example.doc”).Close SaveChanges:=wdDoNotSaveChanges
Close – Prompt to Save
Documents(“Example.doc”).Close SaveChanges:=wdPromptToSaveChanges
Return to Top
Columns
Save As
Documents(“Example.doc”).SaveAs (“C:ExampleExample.doc”)
Save
Documents(“Example.doc”).Save
Protect
Documents(“Example.doc”).Protect Password:=”password”
Unprotect
Documents(“Example.doc”).UnProtect Password:=”password”
Number of Pages
Dim varNumberPages as Variant
varNumberPages = _
ActiveDocument.Content.Information(wdActiveEndAdjustedPageNumber)
Documents(“Example.doc”).Print
Return to Top
VBA Coding Made Easy
Stop searching for VBA code online. Learn more about AutoMacro — A VBA Code Builder that allows beginners to code procedures from scratch with minimal coding knowledge and with many time-saving features for all users!

Learn More
Font
Size
Selection.Font.Size = 12
Bold
Selection.Font.Bold = True
Italics
Selection.Font.Italic = True
Underline
Selection.Font.Underline = wdUnderlineSingle
All Caps
Selection.Font.AllCaps = True
Color
Selection.Font.TextColor = vbRed
Name
Selection.Font.Name = “Abadi”
Subscript
Selection.Font.Subscript = True
SuperScript
Selection.Font.Superscript = True
Highlight Color
Selection.Range.HighlightColorIndex = wdYellow
Style
Selection.Style = ActiveDocument.Styles(“Normal”)
Return to Top
Insert
Insert AutoText
Selection.TypeText Text:=”a3″
Selection.Range.InsertAutoText
Insert File
Selection.InsertFile (“C:DocsSomething.doc”)
Insert Page Break
Selection.InsertBreak Type:=wdPageBreak
Insert Paragraph Symbol
Selection.TypeText Text:=Chr$(182)
Insert Tab
Selection.TypeText Text:=vbTab
Insert Text
Selection.TypeText Text:=”Any Text”
Insert Type Paragraph
Selection.TypeParagraph
Insert Paragraph
Selection.InsertParagraph
Return to Top
Loops
Do Until End of Doc
Do Until ActiveDocument.Bookmarks(“Sel”) = ActiveDocument.Bookmarks(“EndOfDoc”)
‘Do Something
Sub
For Each Doc in Docs
Dim doc As Document
ForEach doc In Documents
‘Do Something
Next doc
Loop Through Paragraphs
Sub through Paragraphs
Dim i As Long, iParCount As Long
iParCount = ActiveDocument.Paragraphs.CountFori = 1 To iParCount
ActiveDocument.Paragraphs(i).Alignment = wdAlignParagraphLeft
Next i
Return to Top
VBA Programming | Code Generator does work for you!
Paragraph
KeepLinesTogether
Selection.ParagraphFormat.KeepTogether = True
KeepWithNext
Selection.ParagraphFormat.KeepWithNext = True
Space After
Selection.ParagraphFormat.SpaceAfter = 12
Space Before
Selection.ParagraphFormat.SpaceBefore = 0
Align Center
Selection.ParagraphFormat.Alignment = wdAlignParagraphCenter
Align Right
Selection.ParagraphFormat.Alignment = wdAlignParagraphRight
Align Left
Selection.ParagraphFormat.Alignment = wdAlignParagraphLeft
Left Indent
Selection.ParagraphFormat.LeftIndent = InchesToPoints(3.75)
Right Indent
Selection.ParagraphFormat.RightIndent = InchesToPoints(1)
Line Spacing
With Selection.ParagraphFormat
.LineSpacingRule = wdLineSpaceExactly
.LineSpacing = 12
End With
Loop Through All Paragraphs
Sub through Paragraphs
Dim i As Long, iParCount As Long
iParCount = ActiveDocument.Paragraphs.CountFori = 1 To iParCount
ActiveDocument.Paragraphs(i).Alignment = wdAlignParagraphLeft
Next i
Return to Top
Word VBA Macro Tutorial
This is a tutorial for using VBA with Microsoft Word. This tutorial will teach you how to write a simple Macro and interact with Documents, Ranges, Selections, and Paragraphs.
Note: If you’re brand new to Macros / VBA you might also find this article useful: How to write VBA Macros from Scratch.
VBA is the programming language used to automate Microsoft Office programs including Word, Excel, Outlook, PowerPoint, and Access.
Macros are blocks of VBA code that perform specific tasks.
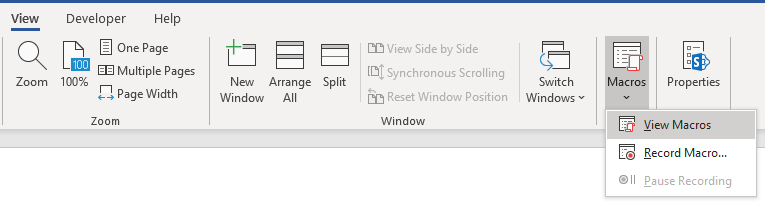
When you Record a Macro, Word will write VBA code into a Macro, allowing you to repeat your actions. You can see a list of all available Macros from View > Macros.
After recording a Macro, you will be able to edit the Macro from the Macro List:
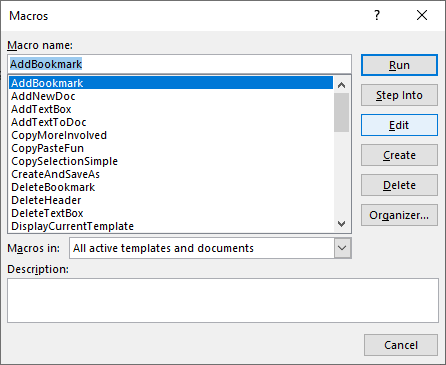
When you click Edit, you open the VBA Editor. Using the VBA Editor you can edit recorded Macros or write a Word Macro from scratch. To access the VBA Editor use the shortcut ALT + F11 or click Visual Basic from the Developer Ribbon.

Simple Word Macro Example
This is a simple example of a Word VBA Macro. It performs the following tasks:
- Opens a Word Document
- Writes to Document
- Closes and Saves the Word Document.
Sub WordMacroExample()

    'Open Doc & Assign to Variable
    Dim oDoc As Document
    Set oDoc = Documents.Open("c:UserssomeoneNewDocument.docx")

    'Write To Doc
    Selection.TypeText "www.automateexcel.com"
    Selection.TypeParagraph

    'Save and Close Doc
    oDoc.Save
    oDoc.Close

End Sub
Word Macro Basics
All VBA code must be stored within procedures like this. To create a procedure in VBA type “Sub WordMacroExample” (Where “WordMacroExample” is your desired Macro name) and press ENTER. VBA will automatically add the parenthesis and End Sub.
Word Document Object
When interacting with Microsoft Word in VBA, you will frequently reference Word “Objects”. The most common objects are:
Application Object – Microsoft Word itself
Document Object – A Word document
Range Object – A part of a Word document
Selection Object – A selected range or cursor location.
AutoMacro | Ultimate VBA Add-in | Click for Free Trial!
Application
Application is the “top-level” object. All other objects in Word can be reached through it.
In addition to accessing other Word objects, there are “application-level” settings that can be applied:
Application.Options.AllowDragAndDrop = TrueThis is an example of accessing the “Selection” of “Windows(1)” with in the Application:
Application.Windows(1).Selection.Characters.CountHowever, the most common Word objects can be accessed directly, without typing the full hierarchy. So instead, you can (and should) just type:
Selection.Characters.CountDocuments
ActiveDocument
Often, you will have two or more documents opened in Word and you will need specify which specific Word Document to interact with. One way to specify which document is to use ActiveDocument. For example:
ActiveDocument.PrintOut…would print the ActiveDocument. The ActiveDocument is the document in Word which “has focus”
To switch the ActiveDocument, use the Activate command:
Documents("Example.docx").ActivateThisDocument
Instead of using ActiveDocument to reference the active document, you can use ThisDocument to reference the document where the macro is stored. ThisDocument will never change.
ThisDocument.PrintOutDocument Variables
However, for more complicated macros, it can be hard to keep track of the Active Document. It can also be frustrating to switch back and forth between documents.
Instead, you can use Document variables.
This macro will assign the ActiveDocument to a variable and then print the document using the variable:
Sub VarExample()
    Dim oDoc As Document
    Set oDoc = ActiveDocument
    oDoc.PrintOut
End Sub
Document Methods
Open Document
To Open a Word Document:
Documents.Open "c:UsersSomeOneDesktopTest PM.docx"We recommend always assigning a Document to a variable upon opening it:
Dim oDoc as Document
Set oDoc = Documents.Open("c:UsersSomeOneDesktopTest PM.docx")
Create New Document
To create a new Word Document:
Documents.AddWe can instruct Word to create a new doc based on some template:
Documents.Add Template:="C:Program FilesMicrosoft OfficeTemplatesMyTemplate.dotx"As always, it is useful and huge problem saver to assign document to variable upon creating or opening:
Dim oDoc as Document
Set oDoc = Documents.Add (Template:="C:Program FilesMicrosoft OfficeTemplatesMyTemplate.dotx")
Save Document
To save a document:
ActiveDocument.Saveor SaveAs:
ActiveDocument.SaveAs FileName:= c:UsersSomeOneDesktoptest2.docx", FileFormat:=wdFormatDocumentClose Document
To close a Document and save changes:
ActiveDocument.Close wdSaveChangesor without saving changes:
ActiveDocument.Close wdDoNotSaveChangesPrint Document
This will print the active Document:
ActiveDocument.PrintOutRange, Selection, Paragraphs
Range and Selection are probably the most important objects in Word VBA, certainly the most used.
Range refers to some portion of document, usually, but not necessarily, text.
Selection refers to selected text (or other object like pictures) or, if nothing is selected, an insertion point.
Paragraphs represent paragraphs in document. Its less important than it sounds, because you can’t directly access paragraph text (you need to access particular paragraph range to make modifications).
AutoMacro | Ultimate VBA Add-in | Click for Free Trial!
Range
Range can be any part of document, including entire document:
Dim oRange As Range
Set oRange = ActiveDocument.Content
or it can be small as one character.
Another example, this range would refer to first word in document:
Dim oRange As Range
Set oRange = ActiveDocument.Range.Words(1)
Usually, you would want to get range which refers to specific part of document and then modify it.
In the following example we will make the first word of second paragraph bold:
Dim oRange As Range
Set oRange = ActiveDocument.Paragraphs(2).Range.Words(1)
oRange.Bold = True
Set Range Text
To set the text value of a Range:
Dim oRange As Range
Set oRange = ActiveDocument.Paragraphs(2).Range.Words(1)
oRange.Text = “Hello ”
(Tip: Note the space after “Hello”. Because word object includes space after word, with just “hello” we would get “Hellonext word”)
There are hundreds of things which you can do with ranges. Just a few examples (these assume you are already made object variable oRange referring to range of interest):
Change font
oRange.Font.Name = "Arial"Display in message box number of characters in particular range
MsgBox oRange.Characters.CountInsert some text before it
oRange.InsertBefore "this is inserted text "Add a footnote to range
ActiveDocument.Footnotes.Add Range:=oRange, _
Text:="Read more at automateexcel.com."
Copy it to clipboard
oRange.Copy
Often you need to change to what is particular range referring. So you can start it’s start and end
oRange.Start = 5
oRange.End = 50
After above code, oRange would refer to text starting with fifth and ending with 50th character in document.
Selection
Selection is even more widely used than Range, because it is easier to work with Selections than Ranges, IF your macro ONLY interacts with the ActiveDocument.
First select the desired part of your document. For example select the second paragraph in active document:
ActiveDocument.Paragraphs(2).Range.SelectThen you can use the Selection Object to type some text:
Selection.TypeText "Some text"We can type some paragraphs bellow “Some text”:
Selection.TypeText "Some text"
Selection.TypeParagraph
Often, it’s necessary to know if some text is selected or we have just a insertion point:
If Selection.Type <> wdSelectionIP Then
    Selection.Font.Bold = True
Else
    MsgBox "You need to select some text."
End If
When working with Selection object we want to place insertion point to particular place, and issue commands starting from this point.
Beginning of document:
Selection.HomeKey Unit:=wdStory, Extend:=wdMoveBeginning of current line:
Selection.HomeKey Unit:=wdLine, Extend:=wdMoveThe Extend parameter wdMove moves the insertion point. Instead, you could use wdExtend which will select all text between the current insertion point.
Selection.HomeKey Unit:=wdLine, Extend:=wdExtendMove Selection
The most useful method for changing position of insertion point is Move. To move Selection two characters forward:
Selection.Move Unit:=wdCharacter, Count:=2to move it backwards, use negative number for Count parameter:
Selection.Move Unit:=wdCharacter, Count:=-2Unit parameter can be wdCharacter, wdWord, wdLine, or more (use Word VBA help to see others).
To move words instead:
Selection.Move unit:=wdWord, Count:=2Selection is easier to work with (compared to ranges) because it is like a robot using Word, mimicking human user. Where Insertion point is – some action would take place. But, this means that you must take care where insertion point is! This is not easy after many steps in code. Otherwise, Word would change text in not desired place.
In the case you need some property or method not available in Selection object you can always easily obtain range associated with selection:
Set oRange = Selection.RangeTIP: Using Selection is often easier than using ranges, but also it’s way slower (important when you deal with big documents)
Paragraphs
You can’t directly use Paragraphs object to change text:
ActiveDocument.Paragraphs(1).Text = "No, it wouldn't work"Above wouldn’t work (actually it will throw an error). You need to first obtain range associated with particular paragraph:
ActiveDocument.Paragraphs(1).Range.Text = "It works now :)"But you can directly change its style:
ActiveDocument.Paragraphs(1).Style = "Normal"or change its paragraph level formatting:
ActiveDocument.Paragraphs(1).LeftIndent = 10or maybe you want to keep this paragraph on the same line with next paragraph:
ActiveDocument.Paragraphs(1).KeepWithNext = TrueMake paragraph centered:
ActiveDocument.Paragraphs(1).Alignment = wdAlignParagraphCenterIt is VERY useful to assign a particular paragraph to object variable. If we assign particular paragraph to variable we don’t have to worry if the first paragraph becomes the second because we inserted one paragraph before it:
dim oPara as Paragraph
Set oPara = Selection.Paragraphs(1) ‘here we assign first paragraph of current selection to variable
Here is an example where we insert a paragraph above the first paragraph, but we can still reference the old first paragraph because it was assigned to a variable:
Sub ParagraphExample()
    Dim oPara As Paragraph
    Set oPara = ActiveDocument.Paragraphs(1)
    MsgBox oPara.Range.Text
    oPara.Range.InsertParagraphBefore 'Insert Paragraph
    MsgBox oPara.Range.Text
End Sub
Paragraph object is very frequently used in loops:
Sub LoopThroughParagraphs()

    Dim oPara As Paragraph
    For Each oPara In ActiveDocument.Paragraphs
        'do something with it. We will just display
        'paragraph text if its style is "Heading 4"
        If oPara.Style = "Heading 4" Then
            MsgBox oPara.Range.Text
        End If
    Next oPara

End Sub
Word VBA Tutorial Conclusion
This tutorial covered the basics of Word VBA. If you’re new to VBA, you should also review our general VBA Tutorial to learn more about Variables, Loops, MessageBoxes, Settings, Conditional Logic and much more.
AutoMacro | Ultimate VBA Add-in | Click for Free Trial!
Word Macro Examples
Word VBA FAQs
What is a Word Macro?
A Macro is a general term that refers to a set of programming instructions that automates tasks. Word Macros automate tasks in Word using the VBA programming language.
Does word have VBA?
Yes, Microsoft Word has the VBA Editor. It can be accessed with by pressing ALT + F11 or by navigating to Developer > Visual Basic.
How do I use VBA in Word?
1. Open the VBA Editor (ALT + F11 or Developer > Visual Basic)
2. Go to Insert > Module to create a Code Module
3. Type ‘Sub HelloWorld’ and press Enter
4. In between the lines ‘Sub HelloWorld’ and ‘End Sub’, type ‘MsgBox “Hello World!’
5. You’ve created a Macro!
6. Now press ‘F5’ to run the Macro
This post is the second in a series about controlling other applications from Excel using VBA. In the first part we looked at the basics of how to reference other applications using Early Binding or Late Binding. In this post, we will look at how we can automate Word from Excel even though we don’t know any VBA code for Word… yet. The process we will use for this is as follows:
- Enable the Word Developer menu
- Record a Word macro
- Add the code to Excel VBA and amend
- Record macros in Excel if necessary
- Repeat the previous steps until macro complete
I am not an Excel VBA expert (I’m more of an Excel VBA tinkerer), and I am certainly not a Word VBA expert. The process I am about to show you may not create the most efficient code, but I know this process works, because I have used it myself to automate lots tasks using Microsoft Word.
Enable the Word Developer menu
If you have enabled the Excel Developer menu it is the same process in Word.
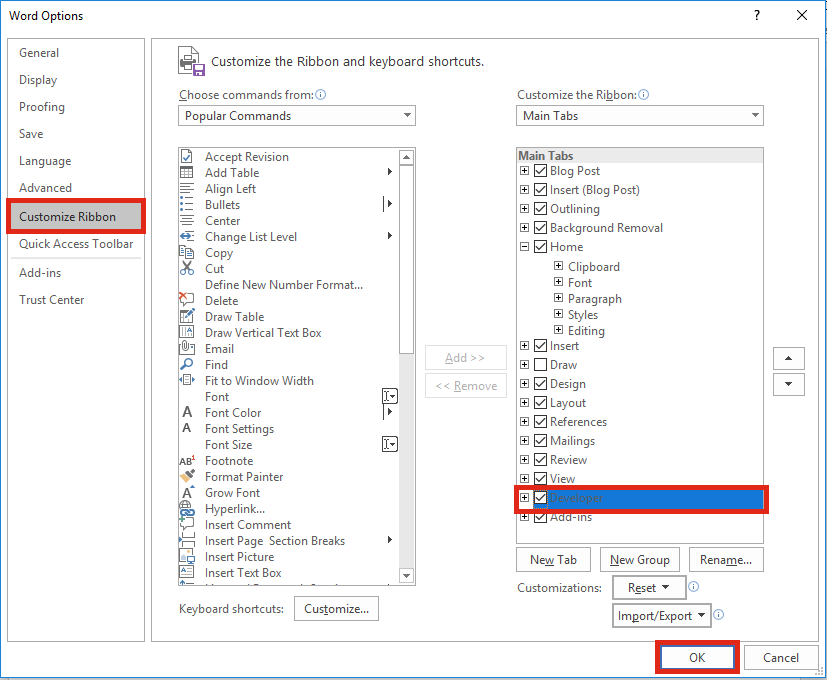
In Word: File -> Options -> Customize Ribbon
Then tick the Developer Ribbon option, OK.
Record a Word Macro
The key to the success of this method is taking small sections of code and building up a complex macro bit by bit. Using the Word Macro Recorder is again, similar to the Excel Macro recorder.
Click on: Developer -> Record Macro

For the example in this post, we will create a macro which will open a new Word document, then copy a chart from Excel and paste it into that Word document. We will tackle this one stage at a time. Firstly, lets create the macro to open a new word document.
Click – Developer -> Record Macro. The Record Macro window will open.
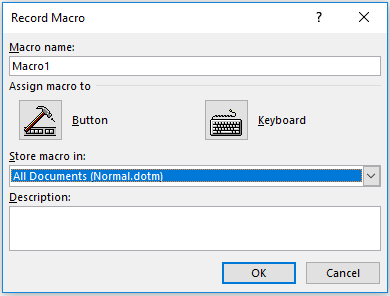
Make a note of the “Store macro in” option, as we will need to know where to find the recorded code later. Normal.dotm is fine for now. Click OK – the Macro Recorder is now running.
Open a new Word Document – File -> New -> Blank Document
Stop the Macro from recording – Developer -> Stop Recording

We can now view the code for opening a new Word Document in the Visual Basic Editor. Click: Developer -> Visual Basic.

Find the location of your recorded code in the Visual Basic Editor. In this example: Normal -> Modules -> NewMacros.
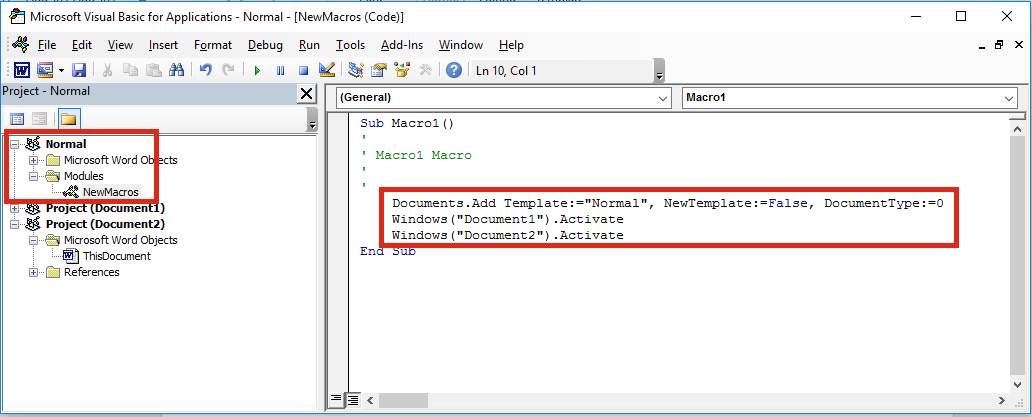
Your code should look like the following. It may be slightly different, but not significantly.
Sub Macro1()
'
' Macro1 Macro
'
'
    Documents.Add Template:="Normal", NewTemplate:=False, DocumentType:=0
    Windows("Document1").Activate
    Windows("Document2").Activate
End Sub
Add the code to Excel VBA and amend
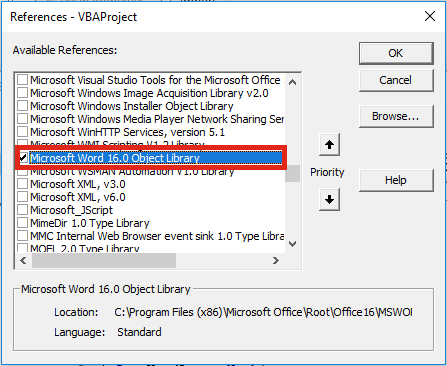
Let’s head back to the Excel VBA Editor and use the Early Binding method to control to Microsoft Word. In the Visual Basic Editor click Tools -> References select Microsoft Word x.xx Object Library. Then click OK.
As we are using Early Binding we need to declare the Application as a variable as follows:
Dim WordApp As Word.Application
Set WordApp = New Word.Application
Now copy and paste the code from the Word VBA Editor into the Excel VBA Editor.
The Word VBA code started with Documents.Add, all we have to do is add our application variable to the front of that line of code. Now becomes WordApp.Documents.Add . . .
Often, Selecting and Activating Objects is not required in VBA code, so I have not copied those statements into the code below.
Sub CreateWordDocument()

'Connect using Early Binding.
'Remember to set the reference to the Word Object Library
'In VBE Editor Tools -> References -> Microsoft Word x.xx Object Library
Dim WordApp As Word.Application
Set WordApp = New Word.Application

WordApp.Documents.Add Template:="Normal", NewTemplate:=False, DocumentType:=0
WordApp.Visible = True 'New Apps will be hidden by default, so make visible

Set WordApp = Nothing 'release the memory

End Sub
A point to note, when an application is opened with VBA, it is normally opened in the background. To make the Word document visible I have added the following code:
WordApp.Visible = True
Record macros in Excel (if necessary)
If we want to copy Excel content into a Word document, we will need to copy that content using Excel VBA. We can use the Macro Recorder in Excel to obtain the VBA code for copying, then we can use the Word Macro Recorder to obtain the VBA code for pasting.
Macro Recording from Excel – selecting a worksheet and copying chart
Sheets("Sheet1").Select
ActiveSheet.ChartObjects("Chart 1").Activate
ActiveChart.ChartArea.Copy
Macro Recording from Word – pasting a chart into a document
Selection.PasteSpecial Link:=False, DataType:=wdPasteEnhancedMetafile, _
        Placement:=wdInLine, DisplayAsIcon:=False
We can add both Macro recordings into our Excel macro. Remember to add WordApp. at the start of each statement of Word VBA code.
Sub CreateWordDocument()

'Connect using Early Binding.
'Remember to set the reference to the Word Object Library
'In VBE Editor Tools -> References -> Microsoft Word x.xx Object Library
Dim WordApp As Word.Application
Set WordApp = New Word.Application

WordApp.Documents.Add Template:="Normal", NewTemplate:=False, DocumentType:=0
WordApp.Visible = True 'New Apps will be hidden by default, so make visible

'code copied from Excel Macro recorder
Sheets("Sheet1").Select
Selection.ChartObjects("Chart 1").ChartArea.Copy

'code copied from Word Macro recorder with WordApp. added to the front.
WordApp.Selection.PasteSpecial Link:=False, DataType:=wdPasteEnhancedMetafile, _
        Placement:=wdInLine, DisplayAsIcon:=False

Set WordApp = Nothing 'release the memory

End Sub
This code is not particularly efficient; it contains a few unnecessary sections code. However… it works!
Repeat the previous steps until macro complete
By repeating the same steps above; recording short actions, then transferring the code into Excel, we can slowly build up much more complex Macros. The key is to keep the actions short, if you do too many actions with the Macro Recorder, code starts to look long and scary.
If you’ve you tried to use the Macro Recorder before you will know that this is not as easy as it seems. And this simple tutorial may make you think it is easy, when it’s not. Sometimes, it can be quite frustrating trying to find out where the issues and errors are. The key to success is recording very short actions, such as those below and copying them into the Visual Basic Editor.
'Pressing the Enter Key to move to a new line in Word
WordApp.Selection.TypeParagraph

'Turn on/off Bold Text
WordApp.Selection.Font.Bold = wdToggle

'Change Font Size
WordApp.Selection.Font.Size = 16

'Type some text
WordApp.Selection.TypeText Text:="Here is some text"
You will soon build up a standard library of code that you can use to control Word for most basic tasks.
In recorded VBA code from Word, the word “Selection” in the code often refers to the document itself. It is possible to make the code a little bit more efficient by declaring the document as a variable. If we were opening a specific document, we could include this at the start, just below the declaration of the application.
'Declare a specific document as a variable
Dim WordDocument As Object
Set WordDocument = WordApp.Documents.Open(sourceFileName)
Or, if we created a new document we could include the following below the declaration of the application variable.
'Delcare a new document as a variable
Dim WordDocument As Object
Set WordDocument = WordApp.Documents.Add Template:="Normal", _
NewTemplate:=False, DocumentType:=0
If we have created the document as a variable we can then reference the specific document. This code:
WordApp.Selection.TypeParagraph
Would become this code:
WordDocument.TypeParagraph
Or this code:
WordApp.Selection.TypeText Text:="Here is some text"
Would become this code:
WordDocument.TypeText Text:="Here is some text"
This method is much better, as it doesn’t rely on the Selection of the user being in the right place.
Conclusion
We have seen in this post that it is possible to create complex Macros to automate Word from Excel using VBA. By understanding how to declare variables for the application and documents we can create much more robust macros, even without knowing a lot of VBA code.
Related Posts:
- 5 quick ways to embed a Word document in Excel
- Controlling Powerpoint from Excel using VBA
- Edit links in Word using VBA
- How to link Excel to Word

About the author
Hey, I’m Mark, and I run Excel Off The Grid.
My parents tell me that at the age of 7 I declared I was going to become a qualified accountant. I was either psychic or had no imagination, as that is exactly what happened. However, it wasn’t until I was 35 that my journey really began.
In 2015, I started a new job, for which I was regularly working after 10pm. As a result, I rarely saw my children during the week. So, I started searching for the secrets to automating Excel. I discovered that by building a small number of simple tools, I could combine them together in different ways to automate nearly all my regular tasks. This meant I could work less hours (and I got pay raises!). Today, I teach these techniques to other professionals in our training program so they too can spend less time at work (and more time with their children and doing the things they love).
Do you need help adapting this post to your needs?
I’m guessing the examples in this post don’t exactly match your situation. We all use Excel differently, so it’s impossible to write a post that will meet everybody’s needs. By taking the time to understand the techniques and principles in this post (and elsewhere on this site), you should be able to adapt it to your needs.
But, if you’re still struggling you should:
- Read other blogs, or watch YouTube videos on the same topic. You will benefit much more by discovering your own solutions.
- Ask the ‘Excel Ninja’ in your office. It’s amazing what things other people know.
- Ask a question in a forum like Mr Excel, or the Microsoft Answers Community. Remember, the people on these forums are generally giving their time for free. So take care to craft your question, make sure it’s clear and concise. List all the things you’ve tried, and provide screenshots, code segments and example workbooks.
- Use Excel Rescue, who are my consultancy partner. They help by providing solutions to smaller Excel problems.
What next?
Don’t go yet, there is plenty more to learn on Excel Off The Grid. Check out the latest posts:
Содержание
- VBA PDF (бесплатные загрузки)
- Примеры Word VBA «Шпаргалка»
- Учебное пособие по макросам Word VBA
- Пример простого макроса Word
- Объект документа Word
- Документы
- Диапазон, выделение, абзацы
- Примеры макросов Word
Добро пожаловать в наше мега-руководство по Word VBA / макросам!
Эта страница содержит:
-
- Учебное пособие по Word VBA в формате PDF (бесплатная загрузка)
- Word VBA «Шпаргалка», содержащая список наиболее часто используемых фрагментов кода Word VBA.
- Полное руководство по Word VBA / Macro.
- Список всех наших руководств по макросам Word VBA с возможностью поиска
Возможно, вас заинтересует наше интерактивное руководство по VBA для Excel. Хотя некоторые из примеров / упражнений относятся к Excel VBA, большая часть содержимого является общим для всех VBA, и вам может быть полезно изучить такие концепции, как If, Loops, MessageBoxes и т. Д.
VBA PDF (бесплатные загрузки)
Загрузите наше бесплатное руководство по Microsoft Word VBA! Или учебники VBA для других программ Office!

Скачать
Ниже вы найдете простые примеры кода VBA для работы с Microsoft Word.
Выбрать / перейти к
ОписаниеКод VBABackspaceSelection.TypeBackspaceВыбрать весь документSelection.HomeKey Unit: = wdStory
Selection.ExtendКопироватьSelection.CopyУдалитьSelection.Delete Unit: = wdCharacter, Count: = 1Вставить послеSelection.InsertAfter «текст»Начало строкиSelection.HomeKey Unit: = wdLineКонец линииSelection.EndKey Unit: = wdLineВставитьSelection.PasteВыбрать всеSelection.WholeStoryВыбрать всю строкуSelection.EndKey Unit: = wdLine, Extend: = wdExtendВверх по абзацуSelection.MoveUp Unit: = wdParagraph, Count: = 1Переместить вправо на один символSelection.MoveRight Unit: = wdCharacter, Count: = 1Переместить вправо на одну ячейку в таблицеSelection.MoveRight Unit: = wdCellПерейти к началу документаSelection.HomeKey Unit: = wdStoryПерейти в конец документаSelection.EndKey Unit: = wdStoryПерейти на страницу 1Selection.GoTo What: = wdGoToPage, Which: = wdGoToNext, Name: = ”1 ″Перейти к началу страницыSelection.GoTo What: = wdGoToBookmark, Name: = ” Page”
Selection.MoveLeft Unit: = wdCharacter, Count: = 1
Return to Top
Закладки
ОписаниеКод VBAДобавлятьС ActiveDocument.Bookmarks
.Add Range: = Selection.Range, Name: = «Name».
.DefaultSorting = wdSortByName
.ShowHidden = Ложь
Конец сСчитатьDim n as Integer
n = ActiveDocument.Bookmarks.CountУдалитьActiveDocument.Bookmarks («Имя закладки»). УдалитьСуществуют?Если ActiveDocument.Bookmarks.Exists («BookmarkName») = True, то
‘Сделай что-нибудь
Конец, еслиПерейти кSelection.GoTo What: = wdGoToBookmark, Name: = ”BookmarkName”ВыбиратьActiveDocument.Bookmarks («Имя закладки»). ВыберитеЗаменить текстSelection.GoTo What: = wdGoToBookmark, Name: = ”BookmarkName”
Selection.Delete Unit: = wdCharacter, Count: = 1
Selection.InsertAfter «Новый текст»
ActiveDocument.Bookmarks.Add Range: = Selection.Range, _
Name: = ”BookmarkName”
Return to Top
Документ
ОписаниеКод VBAАктивироватьДокументы («Example.doc»). АктивироватьДобавить в переменнуюDim doc As Document
Установить doc = Documents.AddДобавлятьDocuments.AddДобавить (из другого документа)Documents.Add Template: = ”C: Forms FormDoc.doc”, _
NewTemplate: = FalseЗакрыватьДокументы («Example.doc»). ЗакрытьЗакрыть — сохранить измененияДокументы («Example.doc»). Закройте SaveChanges: = wdSaveChangesЗакрыть — не сохранятьДокументы («Example.doc»). Закройте SaveChanges: = wdDoNotSaveChanges.Закрыть — запрос на сохранениеДокументы («Example.doc»). Закройте SaveChanges: = wdPromptToSaveChanges.
Return to Top
Столбцы
ОписаниеКод VBAСохранить какДокументы («Example.doc»). SaveAs («C: Example Example.doc»)СохранитьДокументы («Example.doc»). СохранитьЗащищатьДокументы («Example.doc»). Защитить пароль: = «пароль»Снять защитуДокументы («Example.doc»). Снять пароль: = «пароль»Число страницDim varNumberPages как вариант
varNumberPages = _
ActiveDocument.Content.Information (wdActiveEndAdjustedPageNumber)РаспечататьДокументы («Example.doc»). Распечатать
Return to Top
Устали искать примеры кода VBA? Попробуйте AutoMacro!
Шрифт
ОписаниеКод VBAРазмерSelection.Font.Size = 12ЖирныйSelection.Font.Bold = TrueКурсивSelection.Font.Italic = TrueПодчеркиваниеSelection.Font.Underline = wdUnderlineSingleВсе заглавные буквыSelection.Font.AllCaps = TrueЦветSelection.Font.TextColor = vbRedИмяSelection.Font.Name = «Абади»Нижний индексSelection.Font.Subscript = TrueSuperScriptSelection.Font.Superscript = TrueЦвет выделенияSelection.Range.HighlightColorIndex = wdYellowСтильSelection.Style = ActiveDocument.Styles («Нормальный»)
Return to Top
Вставлять
ОписаниеКод VBAВставить автотекстSelection.TypeText Текст: = ”a3 ″
Selection.Range.InsertAutoTextВставить код датыВставить файлSelection.InsertFile («C: Docs Something.doc»)Вставить разрыв страницыSelection.InsertBreak Тип: = wdPageBreakВставить символ абзацаSelection.TypeText Text: = Chr $ (182)Вставить вкладкуSelection.TypeText Текст: = vbTabВставить текстSelection.TypeText Text: = «Любой текст»Вставить абзац типаSelection.TypeParagraphВставить абзацSelection.InsertParagraph
Return to Top
Петли
ОписаниеКод VBAСделать до конца документаСделать до ActiveDocument.Bookmarks (« Sel») = ActiveDocument.Bookmarks (« EndOfDoc»)
‘Сделай что-нибудь
SubДля каждого документа в ДокументахDim doc As Document
Для каждого документа в документах
‘Сделай что-нибудь
Следующий документЦикл по абзацамПодпункты через абзацы
Dim i As Long, iParCount As Long
iParCount = ActiveDocument.Paragraphs.CountFori = 1 На iParCount
ActiveDocument.Paragraphs (i) .Alignment = wdAlignParagraphLeft
Далее я
Return to Top
Пункт
ОписаниеКод VBAKeepLinesTogetherSelection.ParagraphFormat.KeepTogether = TrueKeepWithNextSelection.ParagraphFormat.KeepWithNext = ИстинаПробел послеSelection.ParagraphFormat.SpaceAfter = 12Пространство доSelection.ParagraphFormat.SpaceBefore = 0Выровнять по центруSelection.ParagraphFormat.Alignment = wdAlignParagraphCenterВыровнять по правому краюSelection.ParagraphFormat.Alignment = wdAlignParagraphRightВыровнять по левому краюSelection.ParagraphFormat.Alignment = wdAlignParagraphLeftЛевый отступSelection.ParagraphFormat.LeftIndent = InchesToPoints (3,75)Правый отступSelection.ParagraphFormat.RightIndent = InchesToPoints (1)Межстрочный интервалС Selection.ParagraphFormat
.LineSpacingRule = wdLineSpaceExactly
.LineSpacing = 12
Конец сПеребрать все абзацыПодпункты через абзацы
Dim i As Long, iParCount As Long
iParCount = ActiveDocument.Paragraphs.CountFori = 1 На iParCount
ActiveDocument.Paragraphs (i) .Alignment = wdAlignParagraphLeft
Далее я
Return to Top
Учебное пособие по макросам Word VBA
Это руководство по использованию VBA с Microsoft Word. Это руководство научит вас писать простой макрос и взаимодействовать с документами, диапазонами, выделениями и абзацами.
Примечание. Если вы новичок в Macros / VBA, вам также может быть полезна эта статья: Как писать макросы VBA с нуля.
VBA — это язык программирования, используемый для автоматизации программ Microsoft Office, включая Word, Excel, Outlook, PowerPoint и Access.
Макросы представляют собой блоки кода VBA, которые выполняют определенные задачи.
Когда ты Записать макрос, Word запишет код VBA в макрос, что позволит вам повторять ваши действия. Вы можете увидеть список всех доступных макросов из Просмотр> Макросы.

После записи макроса вы сможете редактировать макрос из списка макросов:

Когда вы нажимаете Редактировать, вы открываете Редактор VBA. Используя редактор VBA, вы можете редактировать записанные макросы или писать макрос Word с нуля. Для доступа к редактору VBA используйте ярлык ALT + F11 или щелкните Visual Basic от Лента разработчика.

Пример простого макроса Word
Это простой пример макроса Word VBA. Он выполняет следующие задачи:
- Открывает документ Word
- Записывает в документ
- Закрывает и сохраняет документ Word.
| 123456789101112131415 | Sub WordMacroExample ()’Открыть документ и назначить переменнойDim oDoc как документУстановите oDoc = Documents.Open («c: Users something NewDocument.docx»).’Написать в документSelection.TypeText «www.automateexcel.com»Selection.TypeParagraph’Сохранить и закрыть документoDoc.SaveoDoc.CloseКонец подписки |
Основы работы с макросами Word
Весь код VBA должен храниться в подобных процедурах. Чтобы создать процедуру в VBA, введите «Sub WordMacroExample» (где «WordMacroExample» — желаемое имя макроса) и нажмите ВХОДИТЬ. VBA автоматически добавит круглые скобки и End Sub.

Объект документа Word
При взаимодействии с Microsoft Word в VBA вы часто будете ссылаться на Word «Объекты». Наиболее распространенные объекты:
Объект приложения — сам Microsoft Word
Объект документа — документ Word
Объект диапазона — Часть документа Word
Объект выделения — Выбранный диапазон или положение курсора.
заявка
Приложение — это объект «верхнего уровня». Через него можно получить доступ ко всем остальным объектам Word.
Помимо доступа к другим объектам Word, можно применить настройки «уровня приложения»:
| 1 | Application.Options.AllowDragAndDrop = True |
Это пример доступа к «Выборке» в «Windows (1)» в Приложении:
| 1 | Application.Windows (1) .Selection.Characters.Count |
Однако к наиболее распространенным объектам Word можно получить доступ напрямую, без ввода полной иерархии. Поэтому вместо этого вы можете (и должны) просто ввести:
| 1 | Selection.Characters.Count |
Документы
ActiveDocument
Часто у вас есть два или более документов, открытых в Word, и вам нужно указать, с каким конкретным документом Word следует взаимодействовать. Один из способов указать, какой документ использовать ActiveDocument. Например:
| 1 | ActiveDocument.PrintOut |
… Напечатал бы ActiveDocument. ActiveDocument — это документ в Word, который «имеет фокус»
Чтобы переключить ActiveDocument, используйте команду Activate:
| 1 | Документы («Example.docx»). Активировать |
Этот документ
Вместо использования ActiveDocument для ссылки на активный документ вы можете использовать ThisDocument для ссылки на документ, в котором хранится макрос. Этот документ никогда не изменится.
Переменные документа
Однако для более сложных макросов может быть сложно отслеживать активный документ. Также может быть неприятно переключаться между документами.
Вместо этого вы можете использовать переменные документа.
Этот макрос назначит ActiveDocument переменной, а затем распечатает документ, используя переменную:
| 12345 | Sub VarExample ()Dim oDoc как документУстановите oDoc = ActiveDocumentoDoc.PrintOutКонец подписки |
Документ Методы
Открыть документ
Чтобы открыть документ Word:
| 1 | Documents.Open «c: Users SomeOne Desktop Test PM.docx» |
Мы рекомендуем всегда назначать документ переменной при его открытии:
| 12 | Dim oDoc как документУстановите oDoc = Documents.Open («c: Users SomeOne Desktop Test PM.docx»). |
Создать новый документ
Чтобы создать новый документ Word:
Мы можем указать Word создать новый документ на основе некоторого шаблона:
| 1 | Documents.Add Template: = «C: Program Files Microsoft Office Templates MyTemplate.dotx» |
Как всегда, присвоение документа переменной при создании или открытии помогает избавить от серьезных проблем:
| 12 | Dim oDoc как документУстановите oDoc = Documents.Add (Template: = «C: Program Files Microsoft Office Templates MyTemplate.dotx») |
Сохранить документ
Чтобы сохранить документ:
или Сохранить как:
| 1 | ActiveDocument.SaveAs FileName: = c: Users SomeOne Desktop test2.docx «, FileFormat: = wdFormatDocument |
Закрыть документ
Чтобы закрыть документ и сохранить изменения:
| 1 | ActiveDocument.Close wdSaveChanges |
или без сохранения изменений:
| 1 | ActiveDocument.Close wdDoNotSaveChanges |
Распечатать документ
Это напечатает активный документ:
| 1 | ActiveDocument.PrintOut |
Диапазон, выделение, абзацы
Диапазон а также Выбор являются, вероятно, наиболее важными объектами в Word VBA и, безусловно, наиболее часто используемыми.
Диапазон относится к некоторой части документа, обычно, но не обязательно, к тексту.
Выбор относится к выделенному тексту (или другому объекту, например изображениям) или, если ничего не выделено, к точке вставки.
Абзацы представляют абзацы в документе. Это менее важно, чем кажется, потому что у вас нет прямого доступа к тексту абзаца (вам нужно получить доступ к определенному диапазону абзацев, чтобы внести изменения).
Диапазон
Диапазон может быть любой частью документа, включая весь документ:
| 12 | Dim oRange As RangeУстановите oRange = ActiveDocument.Content |
или он может быть маленьким, как один символ.
Другой пример, этот диапазон будет относиться к первому слову в документе:
| 12 | Dim oRange As RangeУстановите oRange = ActiveDocument.Range.Words (1) |
Обычно вам нужно получить диапазон, который относится к определенной части документа, а затем изменить его.
В следующем примере мы выделим первое слово второго абзаца жирным шрифтом:
| 123 | Dim oRange As RangeУстановите oRange = ActiveDocument.Paragraphs (2) .Range.Words (1)oRange.Bold = True |
Установить текст диапазона
Чтобы установить текстовое значение диапазона:
| 123 | Dim oRange As RangeУстановите oRange = ActiveDocument.Paragraphs (2) .Range.Words (1)oRange.Text = «Привет» |
(Совет: обратите внимание на пробел после «Hello». Поскольку слово «объект» включает пробел после слова, просто «hello» мы получим «Hellonext word»)
С диапазонами можно делать сотни вещей. Всего несколько примеров (предполагается, что вы уже сделали объектную переменную апельсин относится к интересующему диапазону):
Изменить шрифт
| 1 | oRange.Font.Name = «Arial» |
Отображение в окне сообщения количества символов в определенном диапазоне
| 1 | MsgBox oRange.Characters.Count |
Вставьте текст перед ним
| 1 | oRange.InsertBefore «это вставленный текст» |
Добавить сноску к диапазону
| 12 | ActiveDocument.Footnotes.Add Диапазон: = oRange, _Text: = «Подробнее читайте на easyexcel.net.» |
Скопируйте в буфер обмена
| 1234 | oRange.CopyЧасто вам нужно перейти к конкретному диапазону. Итак, вы можете начать, начать и закончитьoRange.Start = 5oRange.End = 50 |
После приведенного выше кода oRange будет относиться к тексту, начинающемуся с пятого и заканчивающемуся 50-м символом в документе.
Выбор
Выбор используется даже шире, чем Диапазон, потому что с ним легче работать Выборы чем Диапазоны, ЕСЛИ ваш макрос взаимодействует ТОЛЬКО с ActiveDocument.
Сначала выберите желаемую часть вашего документа. Например, выберите второй абзац в активном документе:
| 1 | ActiveDocument.Paragraphs (2) .Range.Select |
Затем вы можете использовать объект выбора для ввода текста:
| 1 | Selection.TypeText «Какой-то текст» |
Мы можем ввести несколько абзацев ниже «Некоторый текст»:
| 12 | Selection.TypeText «Какой-то текст»Selection.TypeParagraph |
Часто необходимо знать, выделен ли какой-то текст или у нас есть только точка вставки:
| 12345 | Если Selection.Type wdSelectionIP ТогдаSelection.Font.Bold = TrueЕщеMsgBox «Вам нужно выделить текст».Конец, если |
При работе с объектом Selection мы хотим поместить точку вставки в определенное место и запускать команды, начиная с этой точки.
Начало документа:
| 1 | Selection.HomeKey Unit: = wdStory, Extend: = wdMove |
Начало текущей строки:
| 1 | Selection.HomeKey Unit: = wdLine, Extend: = wdMove |
Параметр Extend wdMove перемещает точку вставки. Вместо этого вы можете использовать wdExtend, который выделит весь текст между текущей точкой вставки.
| 1 | Selection.HomeKey Unit: = wdLine, Extend: = wdExtend |
Переместить выделение
Самый полезный метод изменения положения точки вставки — «Перемещение». Чтобы переместить выделение на два символа вперед:
| 1 | Selection.Move Unit: = wdCharacter, Count: = 2 |
чтобы переместить его назад, используйте отрицательное число для параметра Count:
| 1 | Selection.Move Unit: = wdCharacter, Count: = — 2 |
Параметр единицы измерения может быть wdCharacter, wdWord, wdLine или другим (используйте справку Word VBA, чтобы увидеть другие).
Чтобы вместо этого переместить слова:
| 1 | Selection.Move unit: = wdWord, Count: = 2 |
С выделением легче работать (по сравнению с диапазонами), потому что он похож на робота, использующего Word, имитирующего человека. Где находится точка вставки — какое-то действие произойдет. Но это означает, что вы должны позаботиться о том, где находится точка вставки! Это непросто после многих шагов в коде. В противном случае Word изменит текст в нежелательном месте.
Если вам нужно какое-то свойство или метод, недоступный в объекте Selection, вы всегда можете легко получить диапазон, связанный с выбором:
| 1 | Установите oRange = Selection.Range. |
СОВЕТ: Использование Выбор часто проще, чем использование диапазонов, но также и медленнее (важно, когда вы имеете дело с большими документами)
Абзацы
Вы не можете напрямую использовать объект Paragraphs для изменения текста:
| 1 | ActiveDocument.Paragraphs (1) .Text = «Нет, это не сработает» |
Выше не сработает (на самом деле выдаст ошибку). Вам нужно сначала получить диапазон, связанный с конкретным абзацем:
| 1 | ActiveDocument.Paragraphs (1) .Range.Text = «Теперь работает :)» |
Но вы можете напрямую изменить его стиль:
| 1 | ActiveDocument.Paragraphs (1) .Style = «Нормальный» |
или измените форматирование на уровне абзаца:
| 1 | ActiveDocument.Paragraphs (1) .LeftIndent = 10 |
или, может быть, вы хотите сохранить этот абзац на одной строке со следующим абзацем:
| 1 | ActiveDocument.Paragraphs (1) .KeepWithNext = True |
Сделайте абзац по центру:
| 1 | ActiveDocument.Paragraphs (1) .Alignment = wdAlignParagraphCenter |
ОЧЕНЬ полезно назначить конкретный абзац объектной переменной. Если мы присвоим переменной конкретный абзац, нам не нужно беспокоиться, станет ли первый абзац вторым, потому что мы вставили перед ним один абзац:
| 12 | dim oPara как абзацУстановите oPara = Selection.Paragraphs (1) ‘здесь мы присваиваем первый абзац текущего выделения переменной |
Вот пример, в котором мы вставляем абзац над первым абзацем, но мы все еще можем ссылаться на старый первый абзац, потому что он был назначен переменной:
| 1234567 | Sub ParagraphExample ()Dim oPara как абзацУстановить oPara = ActiveDocument.Paragraphs (1)MsgBox oPara.Range.TextoPara.Range.InsertParagraphBefore ‘Вставить абзацMsgBox oPara.Range.TextКонец подписки |
Объект абзаца очень часто используется в циклах:
| 123456789101112 | Sub LoopThroughParagraphs ()Dim oPara как абзацДля каждого параметра в ActiveDocument.Paragraphs«Сделай что-нибудь с этим. Мы просто покажем’текст абзаца, если его стиль — «Заголовок 4″Если oPara.Style = «Заголовок 4», тоMsgBox oPara.Range.TextКонец, еслиДалее oParaКонец подписки |
Word VBA Tutorial Заключение
В этом руководстве были рассмотрены основы Word VBA. Если вы новичок в VBA, вам также следует ознакомиться с нашим общим руководством по VBA, чтобы узнать больше о переменных, циклах, окнах сообщений, настройках, условной логике и многом другом.
Примеры макросов Word
| Примеры макросов Word |
|---|
| Шаблоны |
| Добавить новые документы |
| Подсчет слов в выделенном фрагменте |
| Текстовые поля |
| Сохранить как PDF |
| Закладки |
| Таблицы |
| Найти, найти и заменить |
| Открытые документы |
Word VBA: часто задаваемые вопросы
Что такое макрос Word?
Макрос — это общий термин, обозначающий набор инструкций по программированию, которые автоматизируют задачи. Макросы Word автоматизируют задачи в Word с помощью языка программирования VBA.
Есть ли в слове VBA?
Да, в Microsoft Word есть редактор VBA. Доступ к нему можно получить, нажав клавиши ALT + F11 или перейдя в раздел «Разработчик»> «Visual Basic».
Как использовать VBA в Word?
1. Откройте редактор VBA (ALT + F11 или Разработчик> Visual Basic).
2. Выберите «Вставить»> «Модуль», чтобы создать модуль кода.
3. Введите «Sub HelloWorld» и нажмите Enter.
4. Между строками «Sub HelloWorld» и «End Sub» введите «MsgBox« Hello World! »
5. Вы создали макрос!
6. Теперь нажмите «F5», чтобы запустить макрос.
Using Excel VBA to create Microsoft Word documents
In these examples, we generate Microsoft Word Documents with various formatting features using
the Microsoft Excel VBA scripting language. These techniques can have many useful applications.
For instance if you have a list of data like a price or product list in Excel that you want to present
in a formatted Word Document, these techniques can prove useful.
In these examples, we assume the reader has at least basic knowledge of VBA, so we will not
go over basics of creating and running scripts. This code has been tested on Microsoft Word and Excel
2007. Some changes may be required for other versions of Word and Excel.
Writing to Word
Inserting a Table of Contents
Inserting Tabs
Inserting Tables
Inserting Bullet List
more on Inserting Tables
Multiple Features
Function that demonstrates VBA writing to a Microsoft Word document
The following code illustrates the use of VBA Word.Application object and related properties.
In this example, we create a new Word Document add some text.
'In Tools > References, add reference to "Microsoft Word XX.X Object Library" before running.
'Early Binding
Dim wdApp As Word.Application
Set wdApp = New Word.Application
'Alternatively, we can use Late Binding
'Dim wdApp As Object
'Set wdApp = CreateObject("word.Application")
With wdApp
.Visible = True
.Activate
.Documents.Add
With .Selection
.ParagraphFormat.Alignment = wdAlignParagraphCenter
.Font.Bold = True
.Font.Name = "arial"
.Font.Size = 14
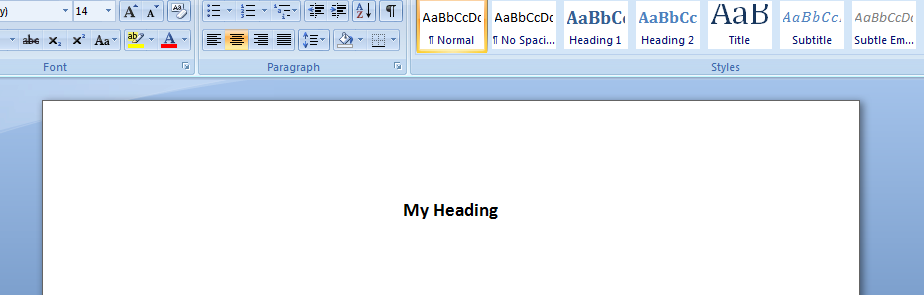
.TypeText ("My Heading")
.TypeParagraph
End With
End With
Some VBA Vocabulary
ParagraphFormat
Represents all the formatting for a paragraph.
output in MS Word:
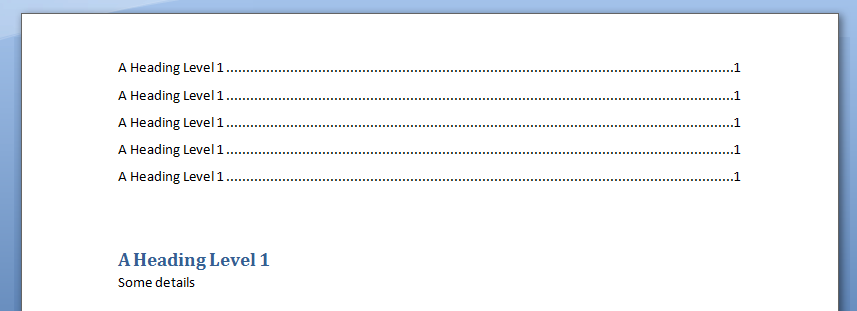
Inserting a Table of Contents into Word Document using Excel VBA
In this example, we generate a Table of Contents into a Word Document using Excel VBA
Sub sAddTableOfContents()

    Dim wdApp As Word.Application
    Set wdApp = New Word.Application

    'Alternatively, we can use Late Binding
    'Dim wdApp As Object
    'Set wdApp = CreateObject("word.Application")

    Dim wdDoc As Word.Document
    Set wdDoc = wdApp.Documents.Add

    ' Note we define a Word.range, as the default range wouled be an Excel range!
    Dim myWordRange As Word.range
    Dim Counter As Integer

    wdApp.Visible = True
    wdApp.Activate

    'Insert Some Headers
    With wdApp
        For Counter = 1 To 5
            .Selection.TypeParagraph
            .Selection.Style = "Heading 1"
            .Selection.TypeText "A Heading Level 1"
            .Selection.TypeParagraph
            .Selection.TypeText "Some details"
        Next
    End With

    ' We want to put table of contents at the top of the page
	Set myWordRange = wdApp.ActiveDocument.range(0, 0)

    wdApp.ActiveDocument.TablesOfContents.Add _
     range:=myWordRange, _
     UseFields:=False, _
     UseHeadingStyles:=True, _
     LowerHeadingLevel:=3, _
     UpperHeadingLevel:=1

End Sub
Some VBA Vocabulary
ActiveDocument.TablesOfContents.Add
The TablesOfContents property to return the TablesOfContents collection.
Use the Add method to add a table of contents to a document.
Some TablesOfContents Parameters
Range The range where you want the table of contents to appear. The table of contents replaces the range, if the range isn’t collapsed.
UseHeadingStyles True to use built-in heading styles to create the table of contents. The default value is True.
UpperHeadingLevel The starting heading level for the table of contents. Corresponds to the starting value used with the o switch for a Table of Contents (TOC) field. The default value is 1.
LowerHeadingLevel The ending heading level for the table of contents. Corresponds to the ending value used with the o switch for a Table of Contents (TOC) field. The default value is 9.
output Word Table in MS Word:
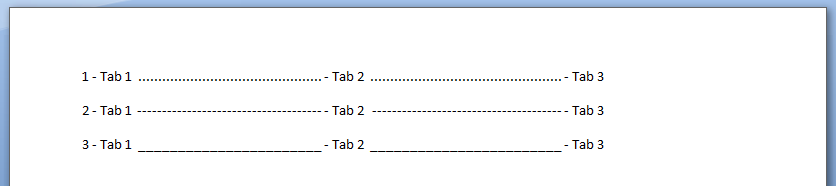
Write Microsoft Word Tabs
A function that writes tabbed content to a Microsoft Word Document. Note in each iteration, we change the
value of the leader character (characters that are inserted in the otherwise blank area created by the tab).
Public Sub sWriteMicrosoftTabs()

    'In Tools > References, add reference to "Microsoft Word XX.X Object Library" before running.

    'Early Binding
    Dim wdApp As Word.Application
    Set wdApp = New Word.Application

    'Alternatively, we can use Late Binding
    'Dim wdApp As Object
    'Set wdApp = CreateObject("word.Application")

    With wdApp
        .Visible = True
        .Activate
        .Documents.Add

        For Counter = 1 To 3
            .Selection.TypeText Text:=Counter & " - Tab 1 "

            ' position to 2.5 inches
            .Selection.Paragraphs.TabStops.Add Position:=Application.InchesToPoints(2.5), _
                Leader:=Counter, Alignment:=wdAlignTabLeft

            .Selection.TypeText Text:=vbTab & " - Tab 2 "

            ' position to 5 inches
            .Selection.Paragraphs.TabStops.Add Position:=Application.InchesToPoints(5), _
                Leader:=Counter, Alignment:=wdAlignTabLeft

            .Selection.TypeText Text:=vbTab & " - Tab 3 "

            .Selection.TypeParagraph
        Next Counter

    End With
End Sub
Some VBA Vocabulary
.TabStops.Add Use the TabStops property to return the TabStops collection. In the example above,
nprogram adds a tab stop positioned at 0, 2.5 and 5 inches.
output in MS Word:
Write Microsoft Word Tables
In this example, we generate a Microsoft Table using Excel VBA
Sub sWriteMSWordTable ()

    'In Tools > References, add reference to "Microsoft Word XX.X Object Library" before running.

    'Early Binding
    Dim wdApp As Word.Application
    Set wdApp = New Word.Application

    'Alternatively, we can use Late Binding
    'Dim wdApp As Object
    'Set wdApp = CreateObject("word.Application")

    With wdApp
        .Visible = True
        .Activate
        .Documents.Add

        With .Selection

            .Tables.Add _
                    Range:=wdApp.Selection.Range, _
                    NumRows:=1, NumColumns:=3, _
                    DefaultTableBehavior:=wdWord9TableBehavior, _
                    AutoFitBehavior:=wdAutoFitContent

            For counter = 1 To 12
                .TypeText Text:="Cell " & counter
                If counter <> 12 Then
                    .MoveRight Unit:=wdCell
                End If
            Next

        End With

    End With

End Sub
Some VBA vocabulary
Table.AddTable object that represents a new, blank table added to a document.
Table.Add properties
Range The range where you want the table to appear. The table replaces the range, if the range isn’t collapsed.
NumRows The number of rows you want to include in the table.
NumColumns The number of columns you want to include in the table.
DefaultTableBehavior Sets a value that specifies whether Microsoft Word automatically resizes cells in tables to fit the cells� contents (AutoFit). Can be either of the following constants: wdWord8TableBehavior (AutoFit disabled) or wdWord9TableBehavior (AutoFit enabled). The default constant is wdWord8TableBehavior.
AutoFitBehavior Sets the AutoFit rules for how Word sizes tables. Can be one of the WdAutoFitBehavior constants.
output in MS Word:

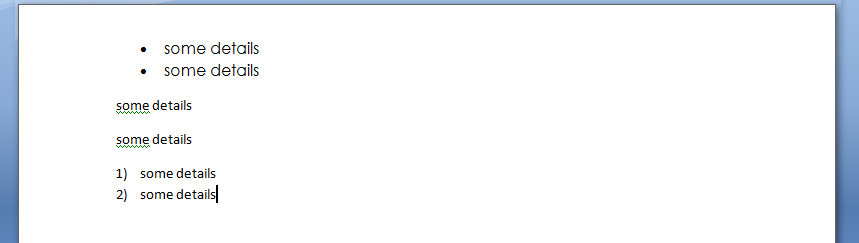
Write Microsoft Word bullet list
In this example, we write with bullet list and outline numbers with Excel VBA
    'In Tools > References, add reference to "Microsoft Word XX.X Object Library" before running.

    'Early Binding
    Dim wdApp As Word.Application
    Set wdApp = New Word.Application

    'Alternatively, we can use Late Binding
    'Dim wdApp As Object
    'Set wdApp = CreateObject("word.Application")

    With wdApp
        .Visible = True
        .Activate
        .Documents.Add
        ' turn on bullets
        .ListGalleries(wdBulletGallery).ListTemplates(1).Name = ""
        .Selection.Range.ListFormat.ApplyListTemplate ListTemplate:=.ListGalleries(wdBulletGallery).ListTemplates(1), _
            continuepreviouslist:=False, applyto:=wdListApplyToWholeList, defaultlistbehavior:=wdWord9ListBehavior

        With .Selection
            .ParagraphFormat.Alignment = wdAlignParagraphLeft
            .Font.Bold = False
            .Font.Name = "Century Gothic"
            .Font.Size = 12
            .TypeText ("some details")
            .TypeParagraph
            .TypeText ("some details")
            .TypeParagraph
        End With

        ' turn off bullets
        .Selection.Range.ListFormat.RemoveNumbers wdBulletGallery

        With .Selection
            .ParagraphFormat.Alignment = wdAlignParagraphLeft
            .TypeText ("some details")
            .TypeParagraph
            .TypeText ("some details")
            .TypeParagraph

        End With

        ' turn on outline numbers
        .ListGalleries(wdOutlineNumberGallery).ListTemplates(1).Name = ""
        .Selection.Range.ListFormat.ApplyListTemplate ListTemplate:=.ListGalleries(wdOutlineNumberGallery).ListTemplates(1), _
            continuepreviouslist:=False, applyto:=wdListApplyToWholeList, defaultlistbehavior:=wdWord9ListBehavior

        With .Selection
            .ParagraphFormat.Alignment = wdAlignParagraphLeft
            .TypeText ("some details")
            .TypeParagraph
            .TypeText ("some details")

        End With

    End With
output in MS Word:
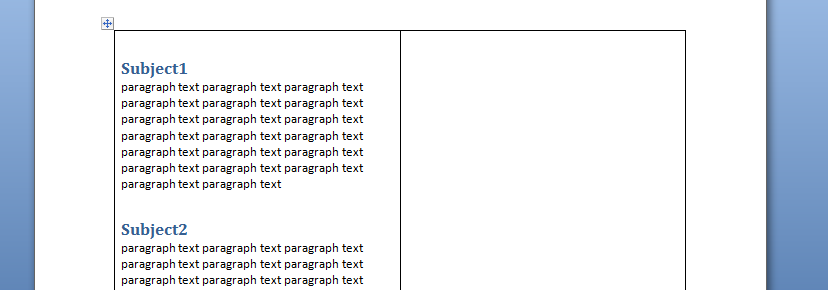
Another example of Writing Tables to Microsoft Word
In this example we will create a word document with 20 paragraphs. Each paragraph will have a header with a header style element
   'In Tools > References, add reference to "Microsoft Word XX.X Object Library" before running.
    Dim wdApp As Word.Application
    Dim wdDoc As Word.Document

    Set wdApp = New Word.Application
    wdApp.Visible = True


    Dim x As Integer
    Dim y As Integer

    wdApp.Visible = True
    wdApp.Activate
    wdApp.Documents.Add

    wdApp.ActiveDocument.Tables.Add Range:=wdApp.Selection.Range, NumRows:=2, NumColumns:= _
        2, DefaultTableBehavior:=wdWord9TableBehavior, AutoFitBehavior:= _
        wdAutoFitFixed

    With wdApp.Selection.Tables(1)
        If .Style <> "Table Grid" Then
            .Style = "Table Grid"
        End If
        .ApplyStyleHeadingRows = True
        .ApplyStyleLastRow = False
        .ApplyStyleFirstColumn = True
        .ApplyStyleLastColumn = False
        .ApplyStyleRowBands = True
        .ApplyStyleColumnBands = False
    End With

    With wdApp.Selection

        For x = 1 To 2
            ' set style name
            .Style = "Heading 1"
            .TypeText "Subject" & x
            .TypeParagraph
            .Style = "No Spacing"
            For y = 1 To 20
                .TypeText "paragraph text "
            Next y
            .TypeParagraph
        Next x

        ' new paragraph
        .TypeParagraph

        ' toggle bold on
        .Font.Bold = wdToggle
        .TypeText Text:="show some text in bold"
        .TypeParagraph

        'toggle bold off
        .Font.Bold = wdToggle
        .TypeText "show some text in regular front weight"
        .TypeParagraph


    End With
Some VBA vocabulary
TypeText
Inserts specified text at the beginning of the current selection. The selection is turned into an insertion point at the end of the inserted text.
If Options.ReplaceSelection = True then the original selection will be replaced. This behaves exactly the same as typing some text at the keyboard.
TypeParagraph
Insert a new blank paragraph. The selection is turned into an insertion point after the inserted paragraph mark. If Options.ReplaceSelection = True then the original selection will be replaced. This behaves exactly the same as pressing the Enter key.
output in MS Word:
Generating a Word table with VBA
	'In Tools > References, add reference to "Microsoft Word XX.X Object Library" before running.

	Dim wdApp As Word.Application
	Dim wdDoc As Word.Document
	Dim r As Integer

	Set wdApp = CreateObject("Word.Application")
	wdApp.Visible = True

	Set wdDoc = wdApp.Documents.Add
	wdApp.Activate

	Dim wdTbl As Word.Table
	Set wdTbl = wdDoc.Tables.Add(Range:=wdDoc.Range, NumRows:=5, NumColumns:=1)

	With wdTbl

		.Borders(wdBorderTop).LineStyle = wdLineStyleSingle
		.Borders(wdBorderLeft).LineStyle = wdLineStyleSingle
		.Borders(wdBorderBottom).LineStyle = wdLineStyleSingle
		.Borders(wdBorderRight).LineStyle = wdLineStyleSingle
		.Borders(wdBorderHorizontal).LineStyle = wdLineStyleSingle
		.Borders(wdBorderVertical).LineStyle = wdLineStyleSingle

		For r = 1 To 5
			.Cell(r, 1).Range.Text = ActiveSheet.Cells(r, 1).Value
		Next r
	End With
output in MS Word:
Option Explicit
Dim wdApp As Word.Application
Sub extractToWord()
'In Tools > References, add reference to "Microsoft Word 12 Object Library" before running.
Dim lastCell
Dim rng As Range
Dim row As Range
Dim cell As Range
Dim arrayOfColumns
arrayOfColumns = Array("", "", "", "", "", "", "", "", "", "", "", "", "", "", "")
Dim thisRow As Range
Dim thisCell As Range
Dim myStyle As String
' get last cell in column B
lastCell = getLastCell()
Set rng = Range("B2:H" & lastCell)
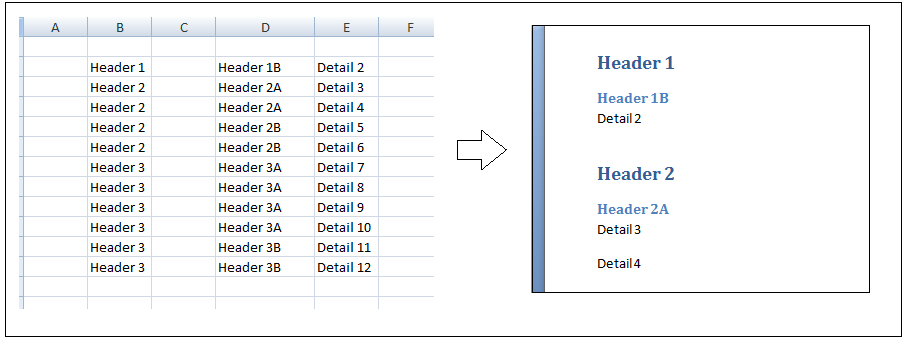
'iterate through rows
For Each thisRow In rng.Rows
'iterate through cells in row row
For Each thisCell In thisRow.Cells
If thisCell.Value = arrayOfColumns(thisCell.Column) Or thisCell.Value = "" Then
' do nothing
''frWriteLine thisCell.Value, "Normal"
''frWriteLine arrayOfColumns(thisCell.Column), "Normal"
If thisCell.Value = arrayOfColumns(thisCell.Column) Or thisCell.Value = "" Then
End If
Else
myStyle = "Normal"
Select Case thisCell.Column
Case 2
myStyle = "Heading 1"
Case 3
myStyle = "Heading 2"
Case 4
myStyle = "Heading 3"
Case Is > 5
myStyle = "Normal"
End Select
frWriteLine thisCell.Value, myStyle
End If
arrayOfColumns(thisCell.Column) = thisCell.Value
Next thisCell
Next thisRow
End Sub
Public Function getLastCell() As Integer
Dim lastRowNumber As Long
Dim lastRowString As String
Dim lastRowAddress As String
With ActiveSheet
getLastCell = .Cells(.Rows.Count, 2).End(xlUp).row
End With
End Function
Public Function frWriteLine(someData As Variant, myStyle As String)
If wdApp Is Nothing Then
Set wdApp = New Word.Application
With wdApp
.Visible = True
.Activate
.Documents.Add
End With
End If
With wdApp
With .Selection
.ParagraphFormat.Alignment = wdAlignParagraphCenter
.Style = myStyle
.TypeText (someData)
.TypeParagraph
End With
End With
End Function
output in MS Word:

Welcome to the Word VBA Tutorial. VBA is a great tool not only to be leveraged in MS Excel. Often it is worth to save some time doing repeatable tasks by adopting some VBA macros in Word or PowerPoint too. Today I wanted to focus a little bit on starting you off in Word VBA macro programming.
 When moving to macro programming in Word VBA you will stumble upon issues you would normally not expect in Excel. Lets take the example of moving around the Word file – in Excel you have spreadsheets which are easy to navigate around. In Word, however, you have a lot of different content e.g. text, objects like images and charts, tables etc. Navigating around Word file in VBA is the greatest challenge you will face. Today I would like to focus on that and other frequently used features in Word VBA. So let’s kick off this Word VBA Tutorial.
Starting your journey with programming in Visual Basic for Applications (VBA)? Start with my VBA Tutorial.
Word VBA is identical to Excel VBA – be sure to leverage the VBA Cheat Sheet
VBA Word Navigating
Let’s start with adding content to the most common places the start and end of a Word document in VBA. Know if you Google for this you will get tons of non-sense methods of navigating around Word files. I was truly amazed at how poorly it is documented.
Beginning and End of the Word Document
Go to the Beginning of a Word Document:
'Start - add text to the beginning of the Word Document
Dim startMark As Range
Set startMark = ActiveDocument.Range(0, 0)
startMark.Text = "This is the start of the document"
Go to the End of a Word Document:
'End - add text to the end of the Word Document
Dim endMark As Range
Set endMark = ActiveDocument.Range(Len(ActiveDocument.Range))
endMark.Text = "This is the end of the document"
Finding and replacing text in a Word Document with VBA
Finding and replacing text are basic functions that you will probably need to leverage every now and then.
'Find and print text in MsgBox
Dim selectText As Range
Set selectText = ActiveDocument.Content
selectText.Find.Execute "Hello"
If selectText.Find.Found Then
  MsgBox selectText.Text
End If
'Find and replace all instances of a specific text
Dim replaceText As Range
Set replaceText = ActiveDocument.Content
replaceText.Find.Execute FindText:="Hello", ReplaceWith:="Goodbye", Replace:=wdReplaceAll
VBA Word Text formatting
One of the first things you would want to do is probably text formatting in Word VBA.
Let’s start by adding some text to our document:
'Select the beginning of the document
ActiveDocument.Range(0).Select
'Type "Hello World!"
Selection.TypeText Text:="Hello World!"
Bold & Italic
To change the font weight to bold see below:
'Select the word "Hello"
ActiveDocument.Range(0, 5).Select

'Toggle the bold property
Selection.Font.Bold = wdToggle
To change the text decoration to italic see below:
'Select the word "World"
ActiveDocument.Range(0, 5).Select
'Toggle the bold property
Selection.Font.Bold = wdToggle
Below the final result of the code above:

Font size and name
Using the “Hello World!” example above we can similarly change the text font name and font size as shown below:
'Change font size
Selection.Font.Size = 20 'Size: 20
Selection.Font.Grow 'Size: 22
Selection.Font.Shrink 'Size: 20
'Change font name to "Aharoni"
Selection.Font.Name = "Aharoni"
VBA Word Tables
When editing Word files you might want to leverage tables as it is much easier to navigate around them in an automated way. My approach is to insert/modify tables in Word without and borders (invisible). This way you can guarantee a consistent and easy to navigate structure in Word. Let’s go through some of the basic functions around tables.
Add a table
Let’s add a table to the beginning of the Word document:
 Dim begin As Range
 Set startMark = ActiveDocument.Range(0, 0)
 'range as Range, NumRows as Long, NumColumns as Long
 Call ActiveDocument.Tables.Add(startMark, 3, 6) 'add to beginning of doc, 3 rows, 6 cols
Edit cell text
'Modify cell (1,3) to "Hello World!"
With ActiveDocument.Tables(1)
        .Cell(1, 3).Range.Text = "Hello World!"
End With
Working on rows and columns
With ActiveDocument.Tables(1)
        ' Modify height of row 1
        .Rows(1).Height = CentimetersToPoints(0.65)
        ' Modify width of column 1
        .Columns(1).Width = CentimetersToPoints(2.54)
        'Merge cell (1,3) with cell (1,4) - cells must be next to each other
        .Cell(1, 3).Merge .Cell(1, 4)
End With
Formatting borders
'Modify row 1 border, single, black and 100pt
 With ActiveDocument.Tables(1).Rows(3).Borders(wdBorderBottom)
        .LineStyle = wdLineStyleSingle
        .LineWidth = wdLineWidth100pt
        .Color = wdColorBlack
End With
In progress…
Время на прочтение
7 мин
Количество просмотров 8.1K

Картинка pch.vector, freepik
Практически каждый из читателей, наверняка не раз (а кто-то и на постоянной основе), имеет потребность в написании и редактировании документов в среде Word.
Однако если подобная деятельность производится с некоторой периодичностью, пытливый ум сразу начинает думать о способах оптимизации своего труда. Одним из таких способов является программирование в среде Visual Basic for Applications,- среде разработки, которая встроена в известные офисные продукты: Word, Excel, PowerPoint и т.д. Статья больше вводная, для тех, «кто совсем не в теме» :-).
Следует сразу оговориться, что любое программирование требует для изучения достаточных временных ресурсов и, в ряде случаев, подобные трудозатраты могут быть неоправданными.
Поэтому, в этих случаях имеет смысл просто — напросто записать макрос. Которой представляет собой записанную последовательность ваших действий, которая должна быть повторена многократно для некой, часто повторяющейся обработки.
Макрос
Тут следует сказать, что по умолчанию, меню для записи макроса скрыто и его необходимо явным образом включить. Для этого нужно пройти по пути: Файл-Параметры

В открывшемся окне перейти в настройку ленты:

Далее, в правом окне, под названием «Основные вкладки», поставить галочку рядом с опцией «разработчик»:

В результате этих действий на ленте сверху у вас появится вкладка «разработчик»:

Войдя в которую, в левой части, вы как раз и сможете найти две интересующие нас опции: «Visual Basic» и «Макросы»:

Соответственно, далее если мы нажимаем на кнопку «Запись макроса», то мы сможем записать нашу последовательность действий:

Созданный макрос можно сохранить либо в конкретном документе, либо сделать его доступным для всех документов (если сохраним его в шаблоне normal.dotm):

После чего, записанный макрос может быть воспроизведён, если мы перейдём, нажав на кнопку «Макросы»:

Для многих достаточно тривиальных задач, этого бывает достаточно. Однако бывают ситуации, когда нам необходимо применить программирование.
Здесь существуют 2 опции:
- правка кода уже имеющегося макроса
- написание кода с нуля.
Для первого случая, нам нужно перейти нажав на «макросы», для того чтобы открылась окно выбора макроса и нажать на кнопку «отладка»:

Это приведёт к запуску среды разработки, где вы сможете увидеть свой записанный макрос в виде кода. Кстати говоря, это является одним из интересных лайфхаков, когда недостаточное знание программирования на VBA вы подменяете сгенерированным кодом макроса и реверс-инжинирингом, с попыткой вникнуть, «а как оно там внутри устроено?»:

Чуть выше, мы произвели ряд манипуляций, для того чтобы вынести вкладку «разработчик» на ленту. Однако если вы хотите не писать макросы, а писать код сразу, совершенно необязательно добавлять эту вкладку на ленту.
Среду разработки можно вызвать нажатием сочетания клавиш Alt+F11, после чего, написав нужный код, запустить его прямо из среды разработки.
Список готовых макросов можно вызвать нажатием сочетания клавиш ALT+F8.
Visual Basic for Applications(VBA)
Как мы уже говорили, разработка кода для приложений Office ведётся с использованием специального кода, который является версией интерпретируемого языка Visual Basic (несколько упрощённой его версией).
Благодаря использованию объектной модели компонентов (COM), могут применяться компоненты, используемые в ряде программ одновременно, для этого используется технология OLE (Object Linking and Embedding), суть которой заключается передаче части работы от одной программы к другой (в рамках среды Windows), и получение обратно результата.
Это означает, что теоретически, вы можете на VBA написать программу, которая будет использовать, например, средства Photoshop или Corel Draw, если конечно они установлены у вас на компьютере (однако, есть подозрение, что для этого потребуется более расширенная версия языка, чем тот, который идёт в комплекте с пакетом Office).
В рамках VBA объекты представлены в виде иерархии: Application/Document/Paragraph и т.д., то есть, как можно видеть в этой строке, каждый предыдущий — содержит последующий.
Получается своего рода «матрёшка», где одно вложено в другое и, если задуматься, это достаточно логично.
Например, главным объектом является Application. Создание этого объекта, другими словами, означает просто запуск Word. Но программа сама по себе никому не интересна, необходимо, чтобы внутри этой программы был создан или открыт некий документ (объект Document). В свою очередь, этот объект содержит целый ряд других элементов иерархии, которые служат для задания его параметров и оформления.
Согласно этому источнику, несмотря на то, что Word содержит множество объектов, по большому счёту, для успешной работы достаточно понимания всего лишь 5 объектов:
- Application
- Document
- Selection
- Range
- Bookmark
Логика здесь следующая:
- мы запустили Word (Application),
- создали или открыли в нём документ(Document),
- дальнейшие манипуляции в этом документе происходят либо с постановкой курсора в определенное место, либо с выделением определённого места в документе(Range).
Последний же объект (Bookmark) имеет смысл изучить для создания удобной навигации по документам, так как он просто управляет созданием удобных закладок.
Каждый из перечисленных выше объектов, имеет свой набор свойств и методов.
Более подробно о их сути вы можете почитать вот здесь.
В свою очередь, наиболее полный список всех объектов, с их описанием вы можете найти вот здесь.
Вкратце, любая программа на Visual Basic представляет собой сочетание приложения (в нашем случае Word), среды разработки и модулей.
Под модулями понимаются процедуры, которые содержат в себе программный код.
Для создания модуля, всего лишь нужно перейти в соответствующий шаблон (например, если мы создаём модуль, который должен быть доступен для всех документов, мы создаём его в шаблоне Normal). Для этого нажимаем на папке Microsoft Word Objects — правой кнопкой мыши и проходим по пути:

Модули могут быть представлены двумя видами:
- подпрограммы
- функции (предназначены для вычисления конкретного значения).
Структура типичной подпрограммы выглядит следующим образом:
Sub имя_подпрограммы ([Параметры])

Тело подпрограммы

End Sub
Структура функции выглядит следующим образом:
Sub имя ([Параметры])

Тело функции

имя=выражение

End Sub
Например, если у нас существует некая функция которая должна возвращать определённое значение, она может выглядеть следующим образом:
Sub TextFinder ([Параметры])

Тело функции

TextFinder=Selection.Find.found

End Sub
На примере тех же самых макросов, если у нас их более 1, они открываются в среде разработки, разделённые на отдельные подпрограммы, располагаясь друг за другом:

Для более полного ознакомления с языком Visual Basic для приложений, следует обратиться к официальному справочнику по языку.
Visual Basic for Applications является объектно-ориентированном языком программирования и полностью поддерживает постулаты этой концепции.
Типичная команда выглядит как разделённая точками в стиле ООП, где мы спускаемся по иерархии в самый низ, — до конкретного действия:
Application.ActiveDocument.PageSetup.Orientation = wdOrientLandscape
Например, приведённая выше команда, служит для того, чтобы установить альбомную ориентацию листа.
В редакторе кода присутствует система автодополнения кода: после того как вы ввели первый уровень объектной модели и поставили после него точку, система сама предлагает вам доступные варианты следующего уровня:

Весьма полезной является и справочная система, встроенная в редактор:
для получения справки необходимо всего лишь поставить курсор на нужную команду или место кода и нажать F1. Такая оперативность получения справки существенно облегчает самостоятельное изучение программирования в этой среде:

Достаточно интересным является режим отладки программы. Для этого, вам необходимо
записать какой-либо макрос, далее, войти в режим его отладки:

В этом режиме вы увидите, что та команда, которая будет выполнена следующей, — окрашена жёлтым цветом. В этом режиме исполнение команд производится построчно, что позволяет отловить ошибку, закравшуюся на каком-либо из этапов.
Для того чтобы исполнить следующую команду, следует каждый раз нажимать на клавишу F8:


Если параллельно с редактором кода вы откроете документ Word, на примере которого вы отрабатываете этот макрос, то вы будете сразу визуально видеть, что делает каждая построчно выполняемая команда (например, если это переход в некую ячейку таблицы и её выделение, — вы будете видеть этот процесс пошагово).
Но тут есть один нюанс: как вы могли видеть выше, программа начинает исполняться с самого начала. Но программа может быть достаточно длинной! Как сделать так, чтобы можно было провести, условно говоря, «юнит-тест» участка программы, который находится не в самом начале?
Для этого нужно всего лишь кликнуть в серую зону слева от программы — и там появится красная метка. Она означает то место, с которого стартует выполнение кода. Теперь, если мы нажмём на F8, — начало исполнения перескочит на эту метку:


Вообще говоря, программирование на VBA может быть достаточно мощной штукой, так как позволяет не только писать некие простые макросы, но даже и создать свой программный продукт, для генерации каких-либо отчётов или форм (и не только). Да, конечно, я сам имею такую слабость, — не желая изучать имеющиеся у продукта инструменты, пытаюсь решить проблему собственными знакомыми костылями (ну, знаю я, например, Java, — значит, буду решать проблему в рамках этого языка, игнорируя встроенные возможности Word). Однако, это не совсем правильный подход, так как «ученье — свет» :-).
Кто к этому так подходит, имеет и неплохие плюшки: совсем недавно на хабре вышла статья «как я с помощью VBA оплатил себе университет», которая наглядно показывает, что программирование на этом языке, в среде Office ещё рано списывать и может быть к этому стоит присмотреться повнимательней.
P.S. Вот мы тут гоняемся за интеллектуальными IDE, модными актуальными языками… А может вот оно, а? 
Будет очень интересно почитать в комментах, если кто то из читателей использовал неким интересным образом программирование под word в VBA и какие результаты это дало!
В двух словах изложу свой опыт: приходилось использовать достаточно продвинутые макросы для написания документации по компьютерному железу. Макросы позволяли «одним кликом» форматировать гигантскую таблицу с параметрами (регистры, поля регистров и их описание и т.д.). Форматировать хитро: первую строку выделить, первый столбец — искать в каждой строке диапазон битов регистра, вида [12:0], если найдено — применить стиль; такая же сложная логика форматирования по всей таблице (поиск определённых участков и их оформление. Скажем, таблица на 50 строк форматировалась… Секунд 15-20. Вручную — до бесконечности (в зависимости от лени и загруженности работой). Так что, макросы имеют право на жизнь!