
Project Online Desktop Client Publisher for Microsoft 365 Excel 2021 Word 2021 PowerPoint 2021 Project Professional 2021 Project Standard 2021 Publisher 2021 Excel 2019 Word 2019 PowerPoint 2019 Project Professional 2019 Project Standard 2019 Publisher 2019 Excel 2016 Word 2016 PowerPoint 2016 Project Professional 2016 Project Standard 2016 Publisher 2016 Excel 2013 Word 2013 PowerPoint 2013 Project Professional 2013 Project Standard 2013 Publisher 2013 Excel 2010 Word 2010 Project 2010 Project Standard 2010 Publisher 2010 More…Less
If you have Outlook installed as part of Microsoft Office, and set as your default email app, you can send your document as an email attachment. If you are using Excel, Publisher, or Word, you can also send your file as the body of an email message.
If Outlook is not your default email application you’ll need to configure it as the default in order to use this feature. For more information see: Make Outlook the default program for email, contacts, and calendar.
Send as an attachment
Excel, PowerPoint, and Word
-
Click File > Share, and then choose one of the following options:
Note: The options you see will vary depending on the Office program you’re using.
-
Upload to OneDrive Uploads your file to your OneDrive account where you can then share through a direct link or an email message.
-
Attach a copy instead Choose to attach a the file to an email, or attach a PDF of the file.
-
-
Enter the recipients’ aliases, edit the subject line and message body as necessary, and then click Send.
OneNote, Visio, Publisher, and Project
-
Click File > Share, and then choose one of the following options:
Note: The options you see will vary depending on the Office program you’re using.
-
Share with People (OneNote and Visio) Lets you enter name or email address for who you want to send to, set whether you want them to edit, require the user signs in before editing, and an optional message.
This option requires that your file is uploaded to OneDrive.
-
Send a Link (Visio) Allows everyone to work on the same copy of the file, see the latest changes, and keeps your email size small.
To send a link, the file must be saved to a Web server or shared folder.
-
Send as Attachment Opens an email message with a copy of the file in its original file format attached.
-
Send as PDF Opens an email message with a copy of the file in .pdf format attached.
-
Send as XPS Opens an email message with a copy of the file in .xps format attached.
-
-
Enter the recipients’ aliases, edit the subject line and message body as necessary, and then click Send.
Send as the body of an email message
If you are using Excel, Publisher, or Word, you can send your file as the actual email message content — not as an attachment. To do this, first you need to add the Send to Mail Recipient command to the Quick Access Toolbar. See Customize the Quick Access Toolbar to learn how to add commands.
-
Open the file you want to send.
-
In the Quick Access Toolbar, click Send to Mail Recipient to open an email message. Your file will appear in the body of the message.
-
Enter the recipients’ aliases, edit the subject line and message body as necessary, and then click Send.
Send as an attachment
Excel, PowerPoint, Project, Publisher, Visio, and Word
-
Click File > Share > Email, and then choose one of the following options:
-
Send as Attachment Opens an email message with a copy of the file in its original file format attached.
-
Send as PDF Opens an email message with a copy of the file in .pdf format attached.
-
Send as XPS Opens an email message with a copy of the file in .xps format attached.
-
Send as Internet Fax Opens a web page where you can choose from a list of providers that let you send a fax over the Internet.
Note: The options you see will vary depending on the Office program you’re using.
-
-
Enter the recipients’ aliases, edit the subject line and message body as necessary, and then click Send.
OneNote
-
Click File > Send, and then choose one of the following options:
-
Send as Attachment Opens an email message with both a copy of the file in its original file format and a copy of the file as a web page attached.
-
Send as PDF Opens an email message with a copy of the file in .pdf format attached.
-
-
Enter the recipients’ aliases, edit the subject line and message body as necessary, and then click Send.
Send as the body of an email message
If you are using Excel, Publisher, or Word, you can send your file as the actual email message content — not as an attachment. To do this, first you need to add the Send to Mail Recipient command to the Quick Access Toolbar. See Customize the Quick Access Toolbar to learn how to add commands.
-
Open the file you want to send.
-
In the Quick Access Toolbar, click Send to Mail Recipient to open an email message. Your file will appear in the body of the message.
-
Enter the recipients’ aliases, edit the subject line and message body as necessary, and then click Send.
Send as an attachment
The following instructions apply to Excel, PowerPoint, Project, Publisher, Visio, and Word.
-
Click File.
-
Click Save & Send.
-
Select Send Using E-mail, and then choose one of the following options:
-
Send as Attachment Opens an email message with a copy of the file in its original file format attached.
-
Send as PDF Opens an email message with a copy of the file in .pdf format attached.
-
Send as XPS Opens an email message with a copy of the file in .xps format attached.
Note: The PDF and XPS options are not available in Project 2010.
-
-
Enter the recipients’ aliases, edit the subject line and message body as necessary, and then click Send.
The following instructions apply to OneNote 2010:
-
Click File.
-
Click Send, and then choose one of the following options:
-
E-mail Page as Attachment Opens an email message with both a copy of the file in its original file format and a copy of the file as a web page attached.
-
E-mail Page as PDF
Opens an e-mail message with a copy of the file in .
pdf
format attached.
-
-
Enter the recipients’ aliases, edit the subject line and message body as necessary, and then click Send.
Send as the body of an email message
If you are using Excel, Publisher, or Word, you can send your file as the actual email message content — not as an attachment. To do this, first you need to add the Send to Mail Recipient command to the Quick Access Toolbar. See Customize the Quick Access Toolbar to learn how to add commands.
To send your file as the body of an email message, follow these steps:
-
Open the file you want to send.
-
In the Quick Access Toolbar, click Send to Mail Recipient
 to open an email message. Your file will appear in the body of the message.
 -
Enter the recipients’ aliases, edit the subject line and message body as necessary, and then click Send.
 to open an email message. Your file will appear in the body of the message.
See also
Attach files or insert pictures in Outlook email messages
Reduce the size of pictures and attachments
View, open, or save attachments
Need more help?
Want more options?
Explore subscription benefits, browse training courses, learn how to secure your device, and more.
Communities help you ask and answer questions, give feedback, and hear from experts with rich knowledge.
Find solutions to common problems or get help from a support agent.
In this chapter, we will discuss how to email documents using Word 2010. Microsoft Word can be used to send a Word document in an email as an attachment directly at the given email address without opening your email program. This chapter will teach you simple ways of sending email in a variety of formats, including a Word document file (DOC) attachment or a PDF, among others.
Mailing Documents
Following are the simple steps to send a word document as an attachment at the given email address.
Step 1 − Open the document you want to send using e-mail as an attachment.
Step 2 − Click the File tab and then click the Save & Send option from the left most column; this will display a number of options to Save & Send, you will have to select the Send using Email option available in the middle column.
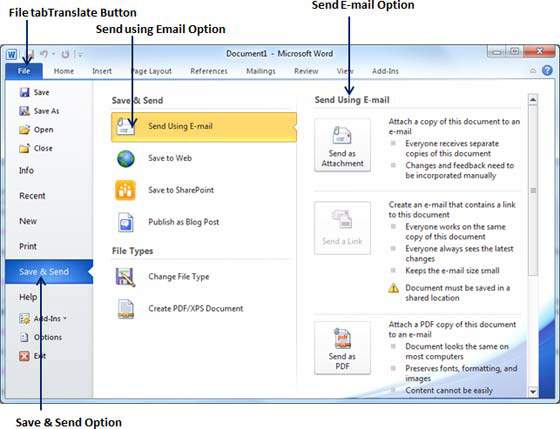
Step 3 − The third column will have various options to send email which allows you to send your document as an attachment in DOC format or you can send your Word document in a PDF format. Click a method to send the document. I’m going to send my document in PDF format.
When you click the Send as PDF option, it displays the following screen where you can type the email address to which you want to send your document, email subject and other additional messages as well. To send email to multiple recipients, separate each e-mail address with a semicolon (;) and a space.
I would like to show you some basics you can do with
Mailings in MS Word. It´s quite handy feature you can use for creating envelopes, labels, personalized letters etc.
First question could be
what is this feature good for?
Mailing can really help you and save a lot of time when you are working with some database and data from this database has to be placed in some document. In this way you can create, let say, rule how and which data will be used.
Because I really like to explain on examples from real word, not a theory, I do it also now. There is a database of customers I want to wish Merry Christmas and Happy New Year, because they are top customers. I will send them a letter, but I do not like to write
Dear Sir/Madame, I want to be more personal so I will write their names. This I can do manually – copy/paste – what could be good way, but not in case I have 100 customers like that, or 1000 (if I am a big company), so there is a place for Mailing.
So
what I need to do, basically 2 things:
• Write a letter
• Database (e.g. in excel)
Word text
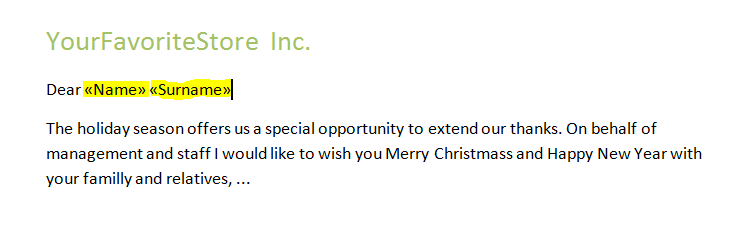
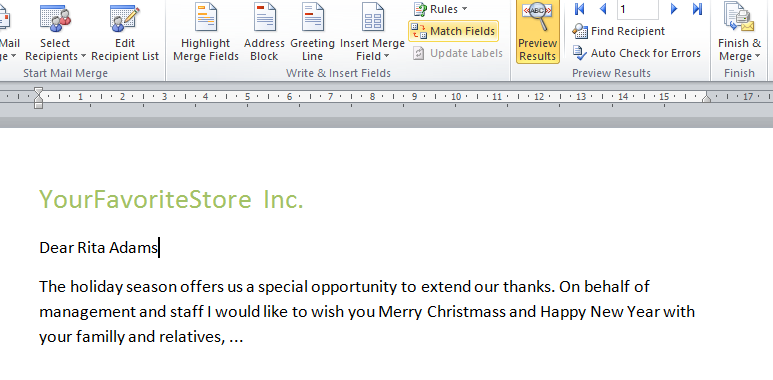
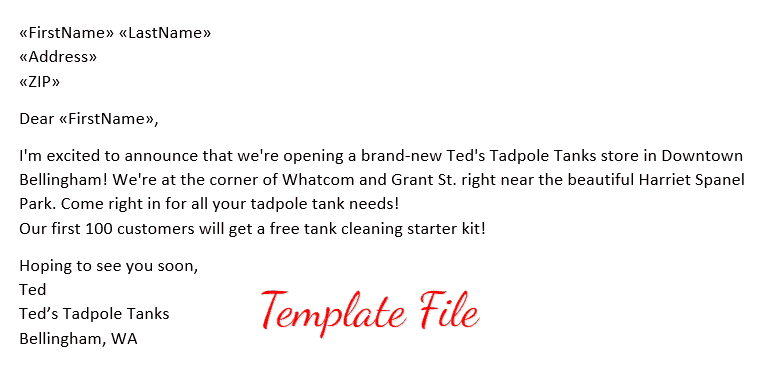
I will write the letter as normally I do, except words which won’t be «static», in this case name and surname will be such a dynamic words. See sample:
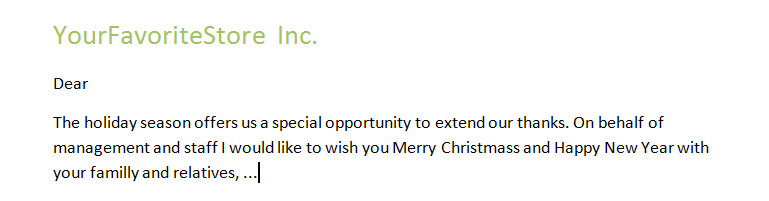
As you can see there is a part of letter where company is sending to customer, but there is missing name and surname next to «Dear». These 2 words will be added from database and will be changed dynamically.
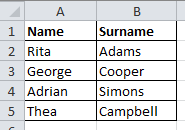
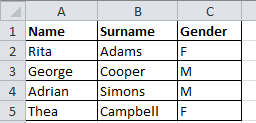
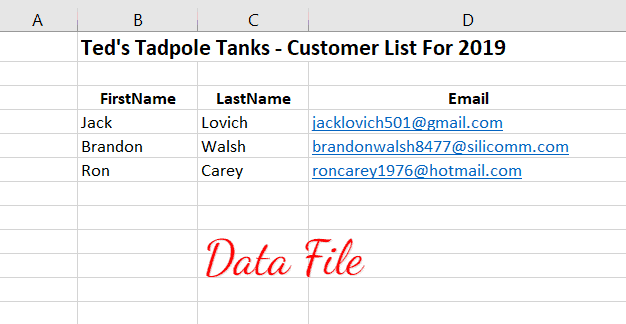
Database
In this example it will be Excel table (which is very common type of DB, I guess) where are just 2 columns – Name and surname, see on the picture
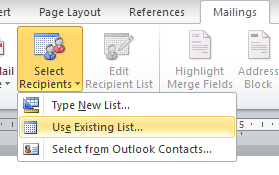
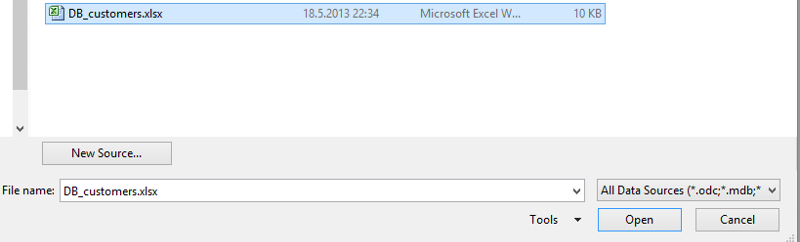
Now we can start to merge these two documents. In Word go to Mailings tab and click Select Recipients>Use Existing List … (because we have our own DB)
Then just browse your DB and click Open
Another window appears, which asks you in which sheet in this excel is your table (in my case it is in Sheet1)
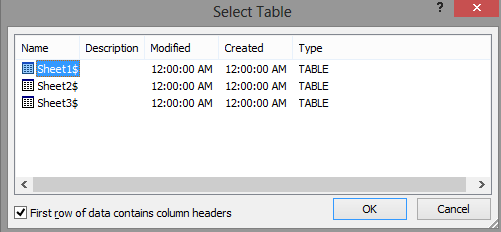
When you confirm sheet by OK it seems nothing happens, because there is no change in the document – visually. By these steps you connected Word with the database and you can work with it in next steps. This also enables more options in Mailing tab which were greyed out before

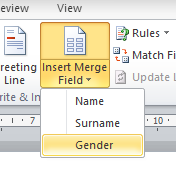
Now, finally, we can define Name and Surname fields to the letter. It’s a simple process, place the cursor where this Name and Surname should come and insert the fields – easy to say, but I will show you. After «Dear» word I do space and insert field for name by clicking Insert Merge field > Name
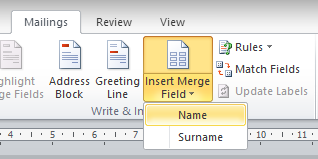
As you can see there are two options – Name and Surname – so this is a list of words from excel table headers. Click Name, put space and with the same procedure add also Surname. Result looks like this
And basically that’s it. You can switch between «code» and real words with Preview Results button
So with pressed Preview Results it will show you first record from the excel database
If you want to see next records just click Next/Previous records represented with blue arrows, or type number you want to jump on

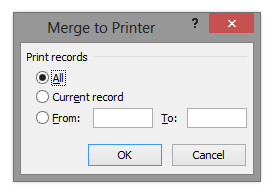
At the end you will probably want to print these letters. For this action press Finish & Merge button and choose Print documents …
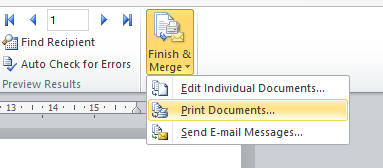
You can choose if you want to print letter for each record in database (All), only the one you see (Current record) or range (From-To)
Then just choose printer and that´s it.
This is how mailing works in MS Word. But I would like to show some also something advanced. I will stay with this example, just expand database with gender. This would be useful if you want to write Mr. or Mrs, based on gender. Database is like
Again I will broswe for excel database and you can see Gender appears in the list
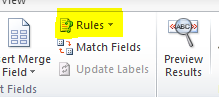
So Word has now connection with updated database and can read also Gender data. But how to tell Word to use «Dear Mr.» if man, and «Dear Mrs.» If woman? For this we have Rules field in Mailing tab
And suitable option under Rules in this case is «If … Then … Else …»
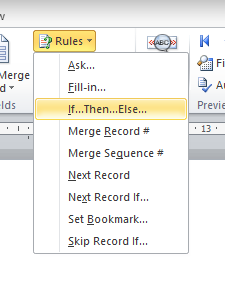
Place your cursor next to «Dear» and choose «If … Then … Else …» Rule. Table with contitions appears. Choose propriate Field name (in our example Gender), Comparison (in our example Equal to) and Compare to (in our example M). Then fulfill text which will be added if the conditions are correct (in our example Mr.) and another text if they are not (in our example Mrs.). See also on the picture
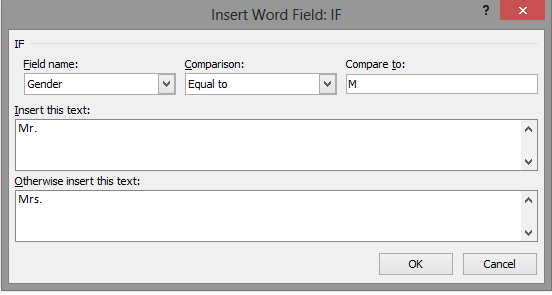
Then you click OK, and when you will switch record by record not only name and surname will change, but also Mr./Mrs.
Of course you can format also these «dynamic» fields in the same way as normal text in Word, so you can set color, font, font size, bold etc
.
This is not everything Mailings in Word can do, at least you see how many rules are available and each can do something. This tutorial wants to be a start point, to show you how to use this feature in MS Word.
— helpfinder —
A mail merge is a handy way to send personalized mass letters and bulk emails quickly.
It works by automatically adding personalization data from a data file (for example, a spreadsheet) to a template file (like a letter or an email).
In this article, I’ll first cover what a mail merge is and explain how it works. Then, I’ll go over how to mail merge using an Excel spreadsheet and a Word document.
Later, I’ll mention two issues of using the traditional method for mail merges and suggest a better and more powerful alternative to help you send mass emails.
Additionally, I’ll also answer seven FAQs associated with mail merges.
This Article Contains:
(Click on links to jump to specific sections)
- What Are Mail Merges?
- How Does Mail Merge Work?
- How to Use Mail Merge to Send Bulk Letters
- Two Problems of Using Microsoft Word to Send Mass Emails
- How to Use Mail Merge to Send Mass Emails
- 7 Mail Merge FAQs
Let’s jump right in.
What Are Mail Merges?
A mail merge lets you create personalized documents that are automatically customized on a recipient-by-recipient basis. This spares you the trouble of manually personalizing each document yourself!
You can use mail merges to create personalized messages automatically for:
- Marketing emails.
- Newsletters.
- Custom catalogs.
- Form letters, and more.
Note: A form letter is a template file used to create mass letters. Instead of typing a letter for each recipient, you can use a form letter to make quick, unique, personalized letters for each person.
Essentially, if there’s a document you need to personalize at scale, mail merges can take care of it for you!
Go back to Contents
Let’s now explore how a mail merge works.
How Does Mail Merge Work?
First, you need to understand the two essential components of every mail merge.
They are:
- Template File: the document that holds the message you’ll be sending out (like a letter or an email). It specifies the places where the personalization data will go. And that data (names, addresses, etc.) is fetched from a data file.
- Data File: a data source like a Microsoft Excel spreadsheet or a Google Sheets file. Each cell in the data file contains different information (first name, last name, email address, etc.) that will be placed in your template file in the corresponding space.
Essentially, a mail merge automatically adds the personalization data from your data file to your template file.
For example, let’s say you want to perform a mail merge to create mass letters.
Here, your letter is the template file — it has placeholders for your contacts’ names and addresses.
Notice the «FirstName», «Address» and other tags in the letter?
These are placeholders for your recipient’s details, also known as mail merge fields.
A mail merge field draws the personalization information from your data file (spreadsheet) to help you create your personalized letter.
But to make this work, the name of the mail merge field in your personalized letter template must match the name of the column header in your spreadsheet.
If the name of the merge fields and column headers match, the mail merge function would then merge your data file and your letter template to generate a personalized letter for each person.
Go back to Contents
Next, I’ll go over the steps involved in using mail merge to automatically personalize individual letters.
How to Use Mail Merge to Send Bulk Letters
You can use the mail merge feature in Word and Excel to create auto-personalized individual letters quickly.
Here:
- The mail merge template is a form letter in Microsoft Word.
- The data file is an Excel spreadsheet containing your recipients’ details.
Let’s now explore the steps involved in using mail merge for bulk letters:
Step 1: Create and format your address list in Microsoft Excel
Here’s a step-by-step guide on how to set up an Excel data file:
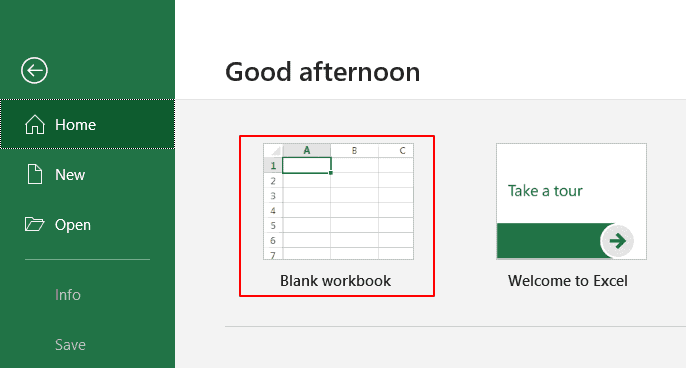
Step A
Open MS Excel and click on Blank workbook to open a blank Excel workbook (or document).
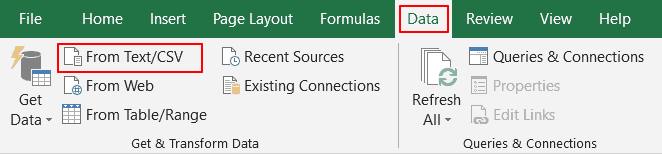
Note: If your contact data is readily available as an Excel spreadsheet, open the file and format it. If the data is present in a TXT or CSV file, go to Data → From Text/CSV to open the file in Excel.
Step B
Now you can start entering the details of your address list into the Excel workbook.
Only enter your column headers in the first row, starting in cell A1.
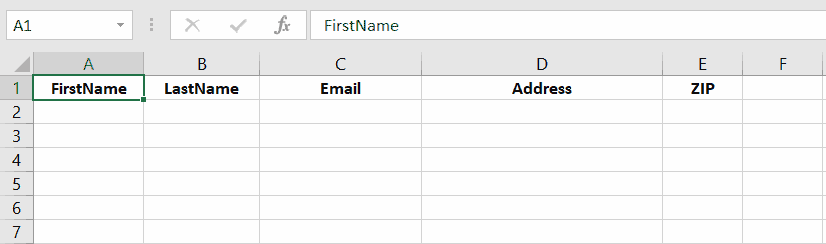
Check your header row to make sure the column headers in your Excel spreadsheet are exactly the same as the field names (or placeholder names) you want to use in your Word template document.
For example, if the column names in your Excel sheet are “FirstName”, “LastName”, and “Email”, the field names in your Microsoft Word document should also be “FirstName”, “LastName”, and “Email”.
Step C
Enter your contact information in your Excel database as one record per row, starting from cell A2.

Quick Tip
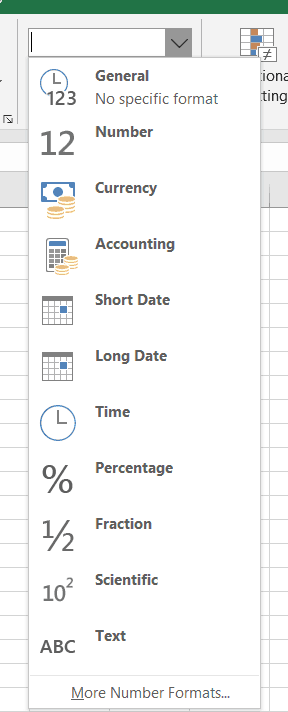
Data entries such as ZIP codes, percentages, currencies, etc., must be in the correct numeric format. To ensure this, you need to:
1. Select a column that has numeric data entries.
2. Go to the Home → Number section.

3. Click on the Number Format box and choose the correct format from the drop-down list that appears.
4. Repeat steps 1–3 for all columns containing numeric values.
Step D
Once you’ve created the contact sheet, you can save your Excel document by pressing Ctrl+S or going to File → Save or File → Save As.
Bonus Tip for Gmail Users
If you’re creating your first mail merge data file, you can export all your existing Gmail contacts (or “Google Contacts”) to get started quickly. Read my guide on how to export contacts from Gmail to learn how.
Note: Ensure that you finish all edits to the Excel spreadsheet before starting the mail merge process. Making edits to an Excel sheet once you’ve already begun a mail merge is a complicated additional step.
Step 2: Create the main mail merge document in MS Word
The next step is to create the form letter (or mail merge template — your main document) in MS Word. You can create a different mail merge template for every bulk email campaign, and you can save the templates for future use.
A favorite time-saving technique of mass email managers is to choose an old email template that worked well, update the content where necessary, and give the mail merge template a new name.
As a result, when you create your mail merge document, try writing it in a way that will let you adapt and reuse it in future bulk mailings.
Here’s a step-by-step guide on how to create a mail merge template in MS Word:
Step A
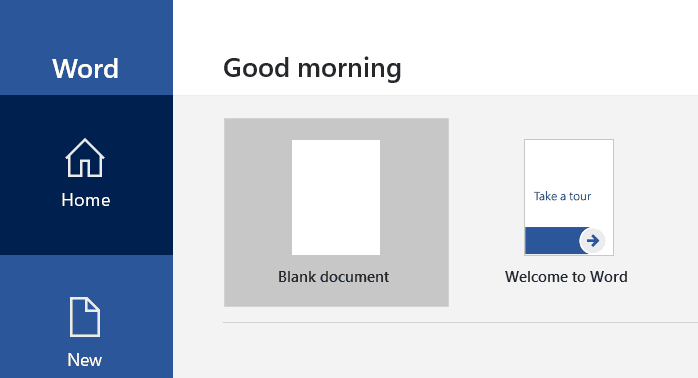
Open a new document (blank document) in Word.
This is the main document for your mail merge.
Step B
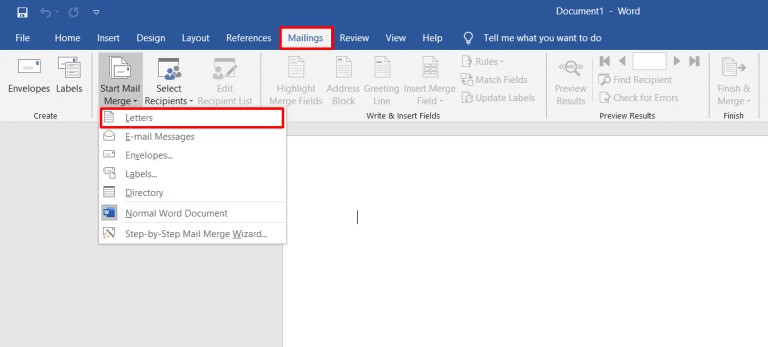
Click on the Mailings tab and select Start Mail Merge. A drop-down menu displaying every different mail merge document type will appear.
You can select the document type for letters, emails, envelopes, mailing labels, or a directory. Since we’re using the Word mail merge feature for sending letters, choose Letters as your merge document.
Step C (Optional)
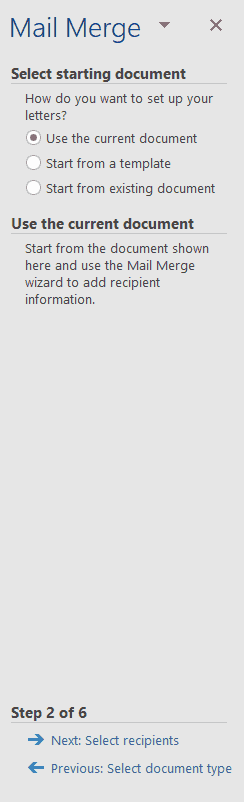
You can also use the Step-by-Step Mail Merge Wizard (from the Start Mail Merge drop-down menu) to streamline the Word mail merge process.
The wizard lets you quickly select the starting mail merge document.
For example, it lets you use the current document, which is the mail merge letter you’re creating now. Or you could choose a starter template or another existing document as your mail merge template.
Step D
Write the body of the letter.
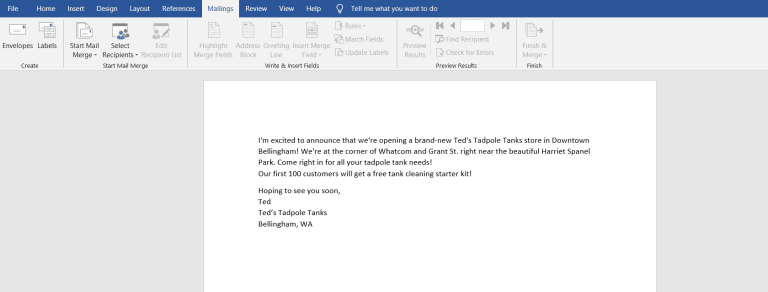
(Don’t worry about manually adding placeholders in your letter yet.)
Step 3: Select the recipient list
Now you can select the list of mail merge recipients (from your Excel file) who will receive your letter.
Here’s a step-by-step guide on how to do this:
Step A
Click on the Select Recipients option in the Mailings tab. A drop-down menu appears, showing different mail merge list sources.
As your contact information is already available as an Excel file, click on Use an Existing List.
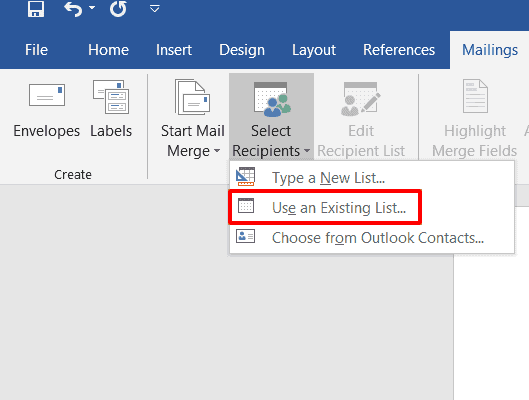
Note: You can also include your Outlook Contact list if you have Outlook connected to Word.
Step B
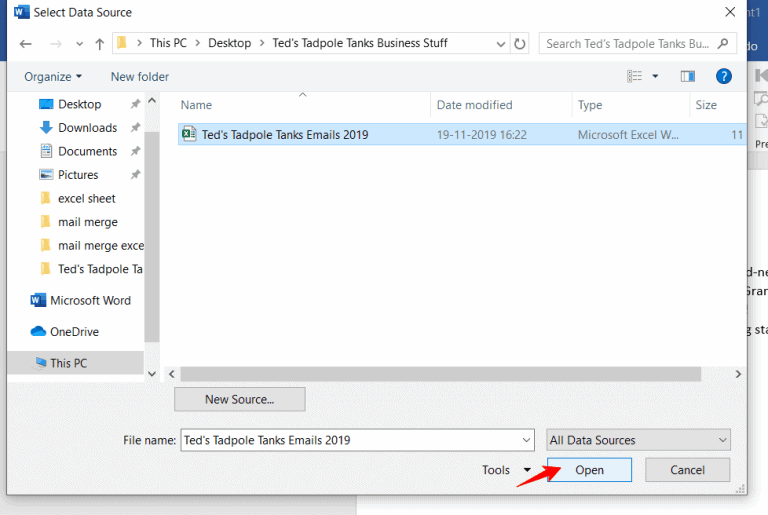
In the dialog box that pops up, select the Excel sheet you created earlier and click Open.
Step C
A Select Table window appears. Choose the Excel worksheet you want to merge with the Word template and click OK.
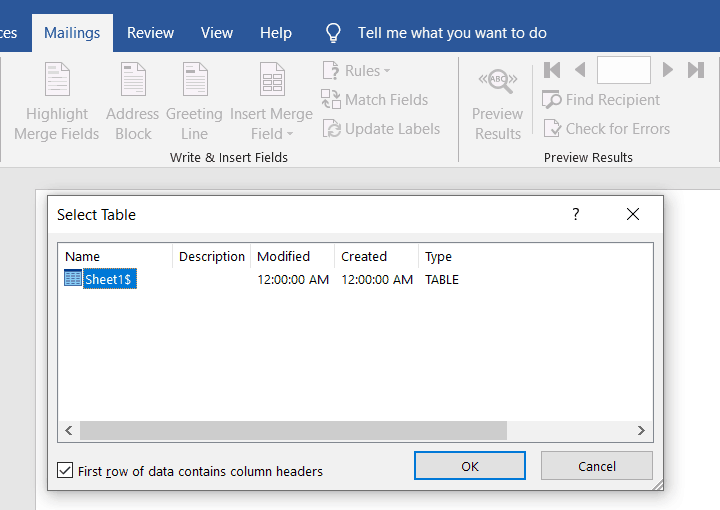
Note: If your Excel spreadsheet has only one worksheet, you’ll only see Sheet1 in the Select Table window.
Step D
If you want to edit your mail merge recipients list, click on the Edit Recipient List tab.
In the Mail Merge Recipients window that pops up, clear the checkbox of the person you don’t want in your mailing list.
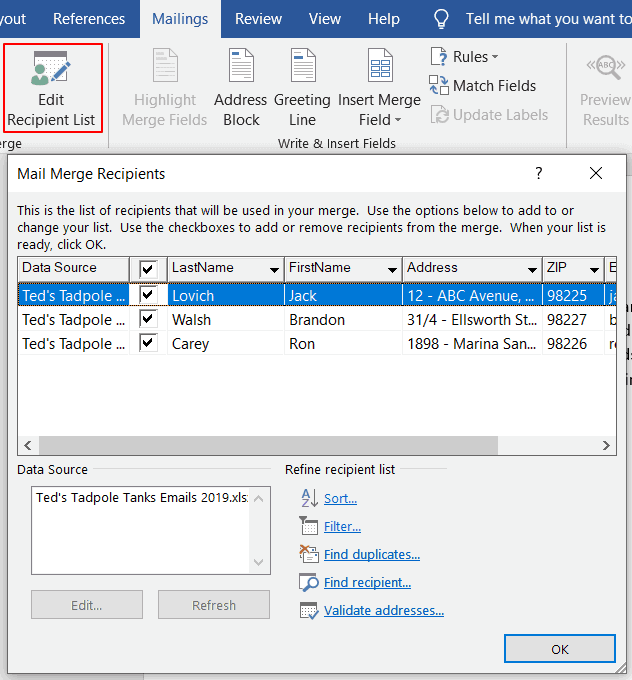
Anyone you remove from your recipient list in this step will be removed from any mail merge project that uses this data file in the future.
Step 4: Add personalized messages
The next step is to add personalized content (like contact names and addresses) to your form letter template (Word mail merge document).
In Word, you can insert three personalization variables into your document:
- Insert Address Block — add a recipient’s address to your document.
- Insert Greeting Line — include a personalized greeting or salutation in your letter.
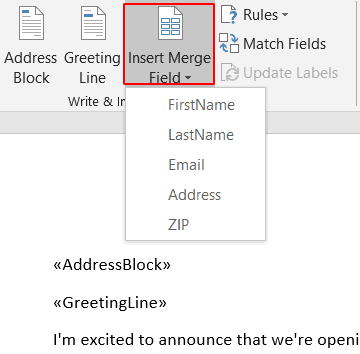
- Insert Merge Field — insert other mail merge fields from your Excel file.
Here’s a walkthrough on how to add all three personalization variables to your merge document (form letter):
Note: You can add a personalization variable at an insertion point of your choice in the Word document. For example, to add a greeting line before the body of your letter, simply place the text cursor at the point you want to add it.
A. Insert an Address block
To insert a recipient’s address from your Excel worksheet, click on Address Block from the Write & Insert Fields section. In the window that appears, choose an address block format of your choice and click OK.
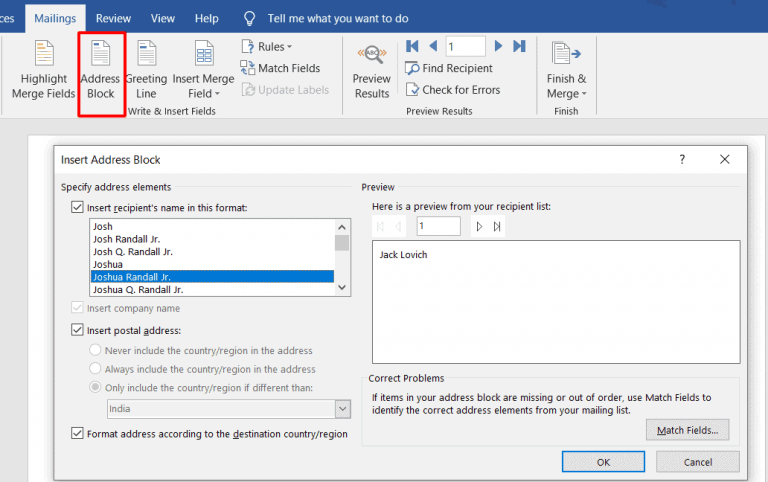
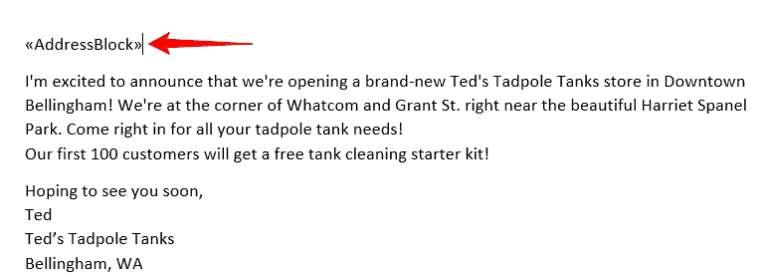
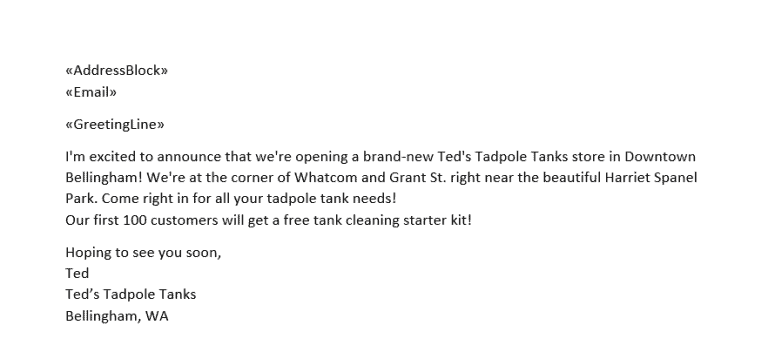
An address placeholder («AddressBlock») will be inserted automatically into your letter.
B. Insert a Greeting Line
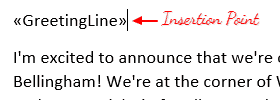
To insert a greeting line, click on Greeting Line from the Write & Insert fields section.
In the dialog box that pops up, select the format you want to use and click OK.
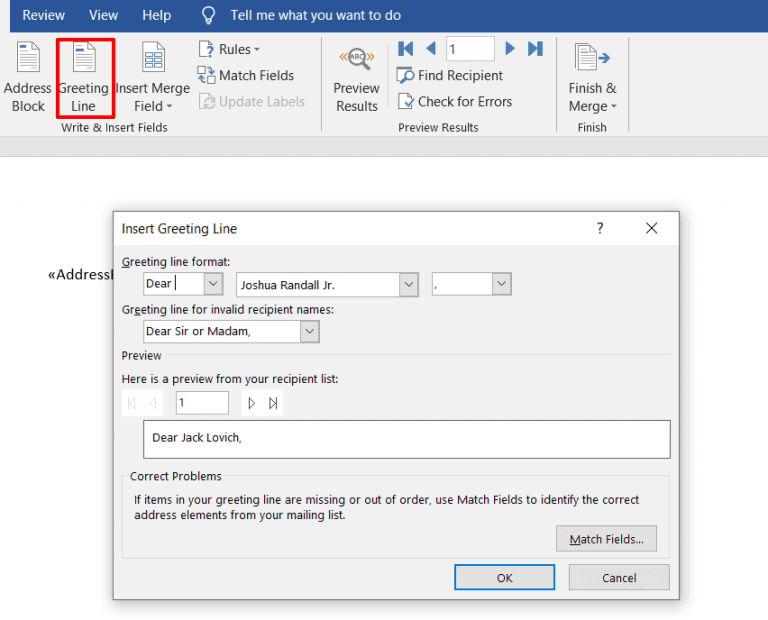
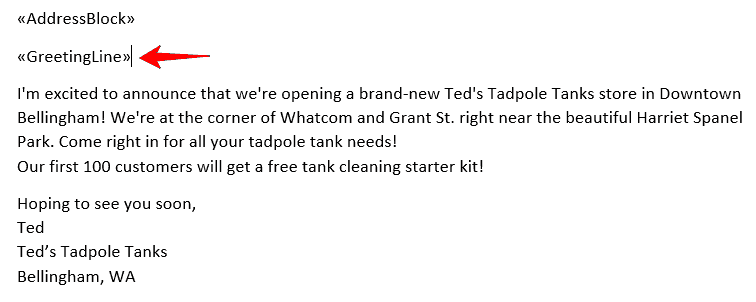
A greeting placeholder («GreetingLine») will be automatically added to your document.
C. Insert a Merge Field
You can also add other mail merge fields, like your contact’s first name, company name, email id, etc., from your Excel worksheet to your Word template.
To do this, click on Insert Merge Field from the Write & Insert fields group.
You can see a drop-down list of some mail merge labels. These labels are the column names in your Excel spreadsheet.
If you want to create a custom field, the easiest way is to add a column to your spreadsheet with the name of the custom field you want to make, like “birthday” or “pet name”. But you must do this before starting the mail merge process since you can’t edit your spreadsheet during mail merge.
Click on the mail merge fields you want to add to your letter.
Here’s how my form letter looks after inserting the placeholders (mail merge fields) I needed:
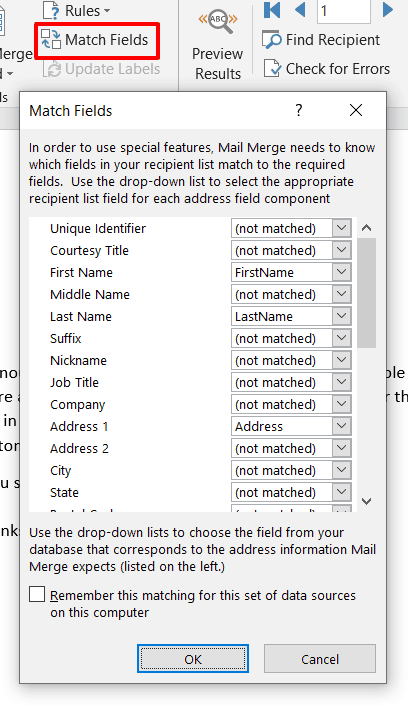
Note: You can also use the Match Fields feature to manually match your Excel column fields with the Word placeholders. This way, you can ensure that all the mail merge fields are accurately mapped to your Excel column names.
Step 5: Preview and finish the mail merge process
After personalizing the form letter for each recipient, you can preview the letters to see how they look with the data inserted from your Excel worksheet.
Here’s a step-by-step guide on how to do this:
Step A
Click on Preview Results under the Mailings tab.
Step B
To preview the result for each recipient, you can enter the recipient number (the corresponding row number in your Excel spreadsheet) in the text box.
For example, to preview the form letter for my second recipient — Brandon Walsh, I type “2” in the text box and click the Preview Results button.
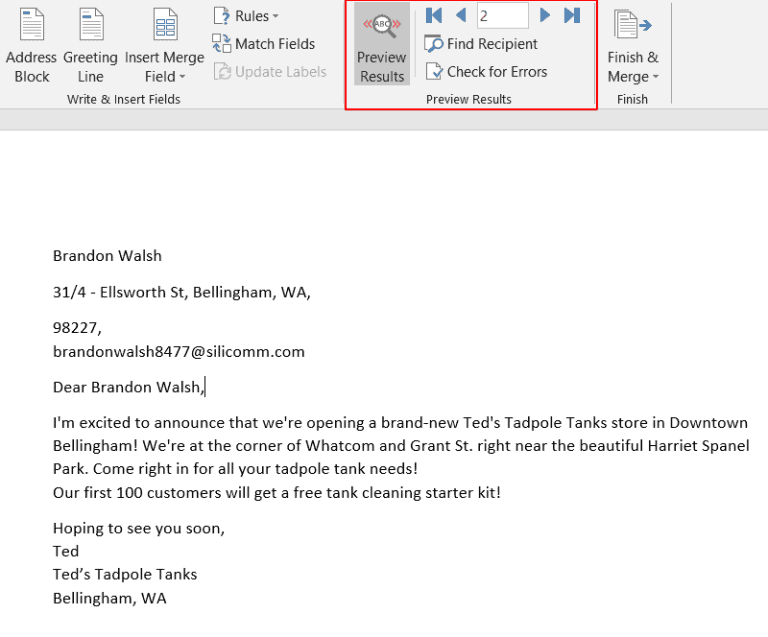
Note: You can also click on the Next and Previous buttons to quickly scroll through your mailing list to preview the letter for each person.
If you realize someone who is scheduled to receive your bulk email should be removed from the recipient list, refer to Step 3 (D) for instructions.
Step C
After previewing the form letter, click on Finish & Merge to finish the Word mail merge process.
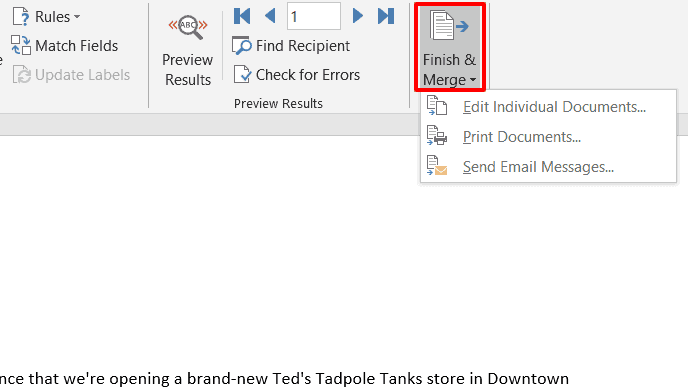
From the drop-down list that appears, you can choose to:
- Edit Individual Documents — if you want to edit each letter further, separately.
- Print Documents — if you want to print the letters.
- Send Email Messages — if you want to send the letters as emails.
Note: If you want to send the letters as email messages to a Gmail or Outlook contact, you must manually set up Gmail/Outlook with Word.
Step 6: Save the form letter
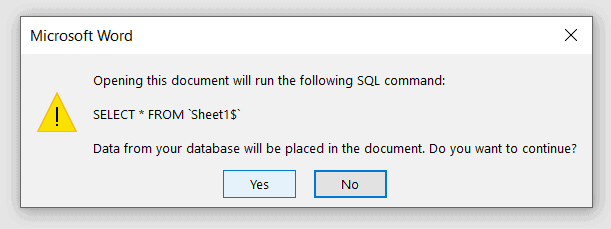
After you’ve finished working with the merged document, you can save it by pressing the Ctrl+S keys or by going to the File menu and clicking Save or Save As.
You can also reuse the merged document for sending additional letters — just open it and click Yes when Word prompts you with this alert:
Go back to Contents
How to Use Mail Merge to Send Mass Emails
You can use mail merge to quickly create personalized emails for newsletters, promos, and other email marketing messages.
Here, your mailing list is the data file, while the email is the mail merge template.
We’ve seen how to use Excel and Word to create personalized form letters.
Just follow the same steps to send merged emails to your mailing list.
However, I don’t recommend using Microsoft Word to send personalized emails at scale. Here’s why…
2 Problems of Using Microsoft Word to Send Mass Emails
While you can use a Microsoft Word document to create merged emails, there are two major drawbacks with this approach:
- To send the merged document as an email message, you must manually set up Microsoft Outlook or Gmail with Word. This can be time-consuming and confusing for most users.
- Microsoft Word isn’t well-equipped to handle mail merges. If your personalization tags are mismatched and there are hundreds of recipients (you can’t preview every email, can you?), you could end up sending something like this:
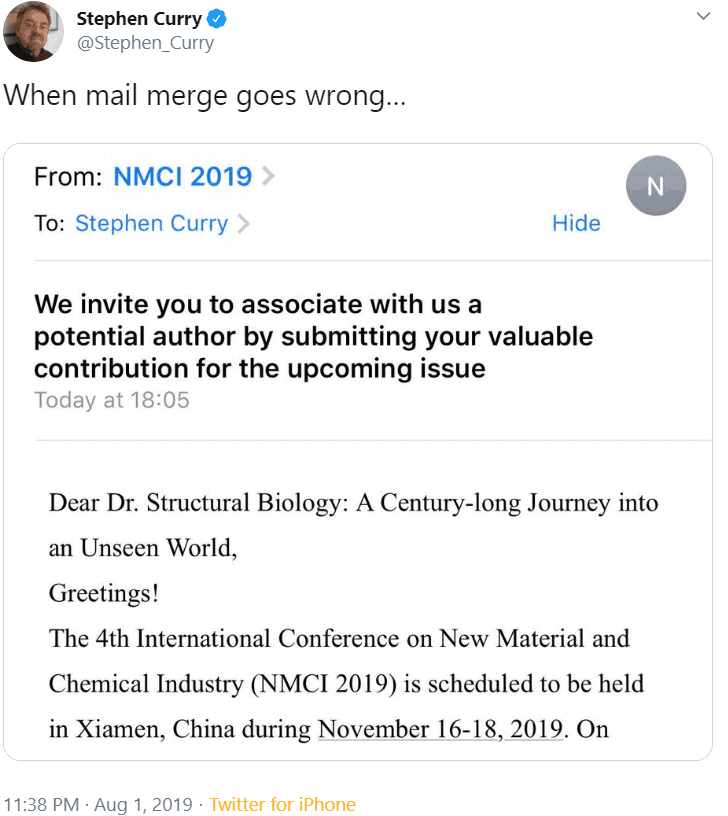
Image Source: Twitter
Now, imagine sending hundreds of such embarrassing emails!
That’s why it’s smarter to use a dedicated mail merge tool like GMass to send mass emails.
How to Use Mail Merge with GMass to Send Mass Emails
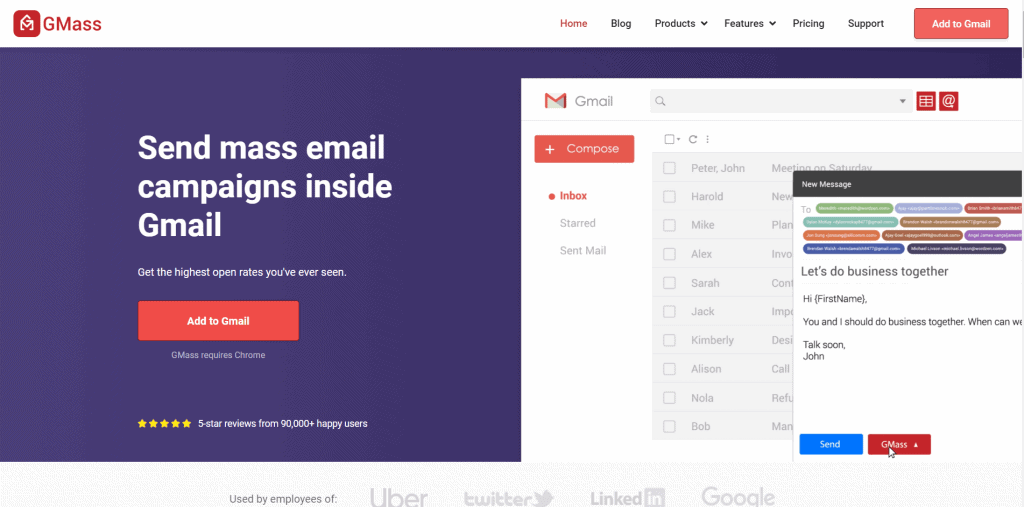
GMass is a powerful mail merge tool that lets you easily create and send tons of emails from your Gmail account.
Its advanced mail merge features have made it a popular tool used by employees from LinkedIn, Uber, Google, and Twitter. GMass is also perfect for individuals and groups like clubs, schools, churches, and other institutions to send emails to a target audience.
With GMass, you can easily create a mail merge with a data file stored as an Excel spreadsheet or a Google Sheet.
Here’s how:
Step 1: Import your Excel spreadsheet into Google Sheets
The first step is to import your Excel file into Google Sheets (this takes only a few seconds).
Why would you want to do this?
Because Google Sheets is far more powerful than Microsoft Excel for mail merging. Its automatic cloud-sync feature auto-saves your work with each edit made in the spreadsheet.
Plus, if you’re sending emails, it makes sense to have your spreadsheet online, right?
Additionally, Google Sheets is completely free and can be used by anyone with a Google (Gmail or Google Workspace) account. You won’t need a Microsoft Office subscription!
Note: If your data file is a CSV file, you can also import it into Google Sheets.
Here’s a step-by-step guide on how to import your Excel document into Google Sheets:
Note: I’ll be using the Excel sheet shown in the screenshot below for the walkthrough.
Step A
Open Google Sheets.

Step B
Select the folder icon to open the Google Sheets File Picker.
![]()
Step C
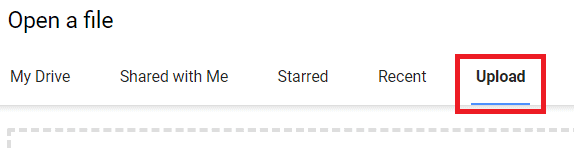
In the window that appears, click on the Upload tab to import your Excel sheet.
Step D
You can now choose the file you want to import from your computer. To select the file, click on the Select a file from your device button.
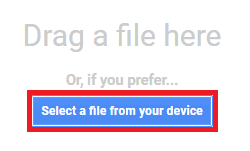
Step E
Choose the Excel file you want to import from your computer and click on the Open button.

Step F
Your file will be automatically imported as a new Google spreadsheet, which becomes your mail merge recipient list and data file.
Step 2: Format your Google Sheet
Your Google Sheet must be well-formatted before you use it with GMass.
But don’t worry, it’s not as complicated as formatting your Excel spreadsheet.
Here are some guidelines to ensure it works well:
- Your column names must be in plain text — they shouldn’t contain spaces, codes, or special characters.
- Your column names must begin from cell A1. If there are any blank rows or additional text (like a sheet title) above the column names, you must delete them.
- The actual personalization data must begin from the second row onward.
- There must be at least one column that has your recipients’ email addresses.
GMass will auto-detect all column names during the mail merge process. It will automatically use the column labels in your Google Sheet as the placeholders in your email template.
Step 3: Install GMass and connect it to your Gmail account
If you haven’t installed the GMass Chrome extension yet, here’s a step-by-step guide on how to install and connect it to your Gmail account quickly:
Step A
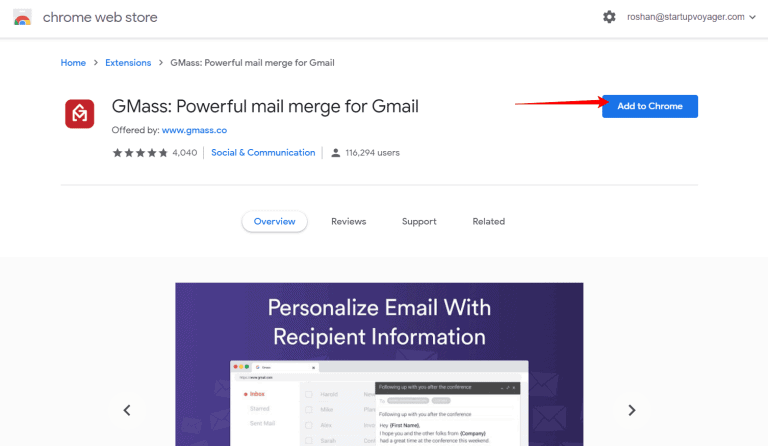
Head to the Chrome Web Store page for GMass.
Step B
Click on the Add to Chrome button.
Step C
A dialog box pops up:
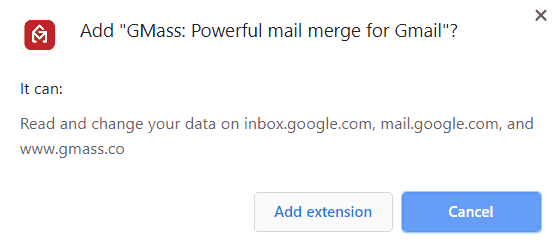
Click on the Add extension button to add GMass to Chrome.
Step D
Log in to the Gmail account you want to use with GMass.
After logging in, you can see three new GMass buttons next to your Gmail search box.
![]()
Click on one of these buttons, and you’ll be prompted to link your Gmail account to GMass:
Click on the Connect GMass Now! button to connect your Gmail account with GMass.
Note: Simply installing the GMass extension doesn’t create a GMass account. It only makes the buttons appear in your Gmail account. You have to link it to your Gmail account (as above) to activate it.
Step 4: Connect your Google Sheet to GMass
Here’s a step-by-step guide on how to perform this last step:
Step A
Open your Gmail account and click on the GMass spreadsheet button near your Gmail search box.

Step B
A dialog window appears:
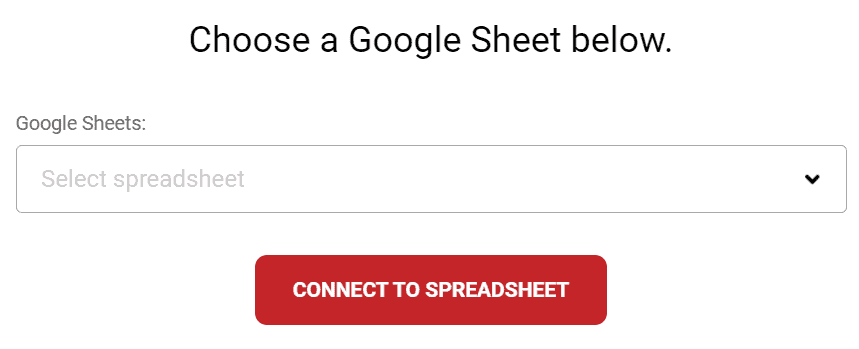
Step C
You can now use the drop-down menu to choose the Google sheet you want to use for the mail merge.
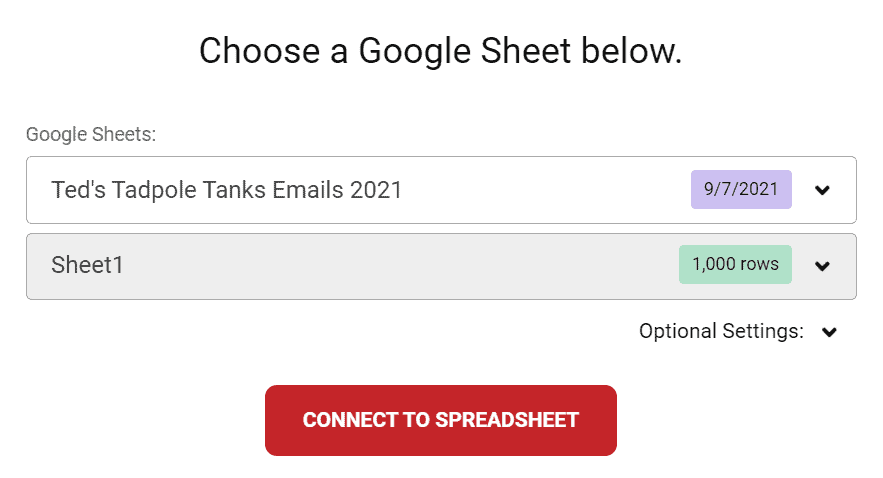
Note: If you have only one sheet (Sheet1) in your Google spreadsheet, that sheet gets chosen by default. However, if your spreadsheet has multiple sheets, you can select the sheet you want from the drop-down list.
Once you’ve chosen a spreadsheet, click on the CONNECT TO SPREADSHEET button.
Step D
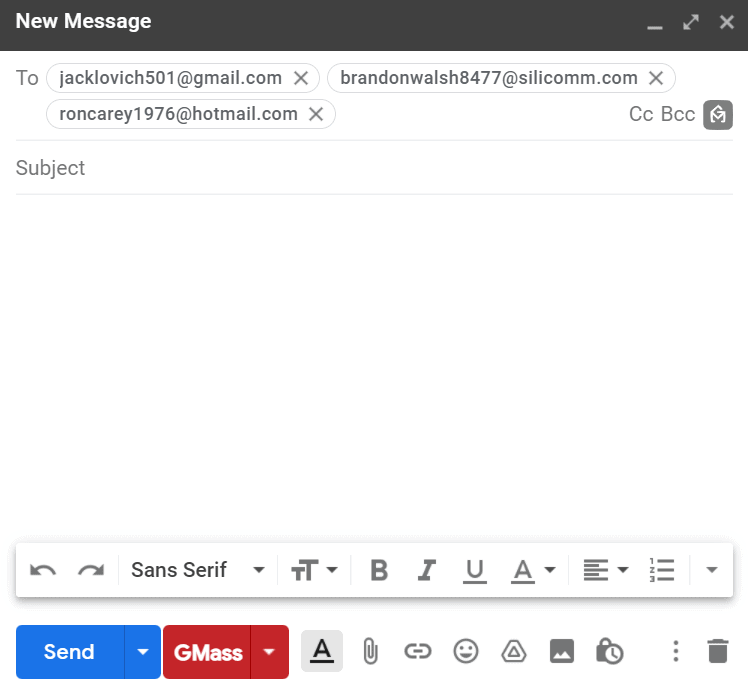
Now, GMass will auto-read all your recipients’ data from your Google sheet. It will also automatically insert their email addresses in the To field of a new email.
Note: GMass replaces the list of individual email addresses with a single alias address.
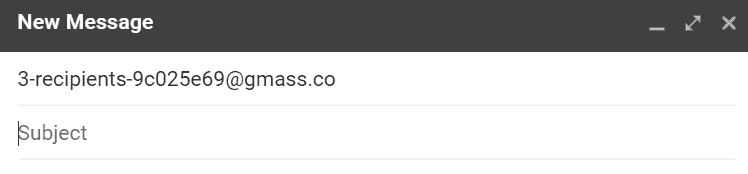
However, you can choose to display the email addresses individually. This way, you’ll be able to see the email IDs of everyone on your recipient list — but don’t worry, each recipient will see only their email address (just like when you add recipients to the BCC field).
Step E
After a new email window appears, you can compose your email with GMass’ powerful personalization features. To use these personalization settings, click on the settings arrow near the GMass button.
![]()
Click on the Personalize drop-down list button to see all the column names present in your Google sheet.
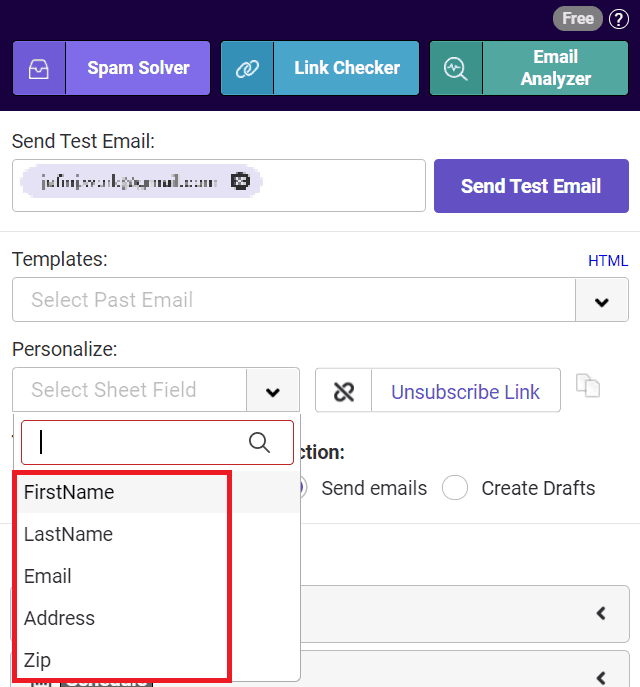
To personalize your email, select the column labels from the drop-down list. You can add these placeholders anywhere in your email message and subject line.
Here’s how my personalized email looks like with placeholders:
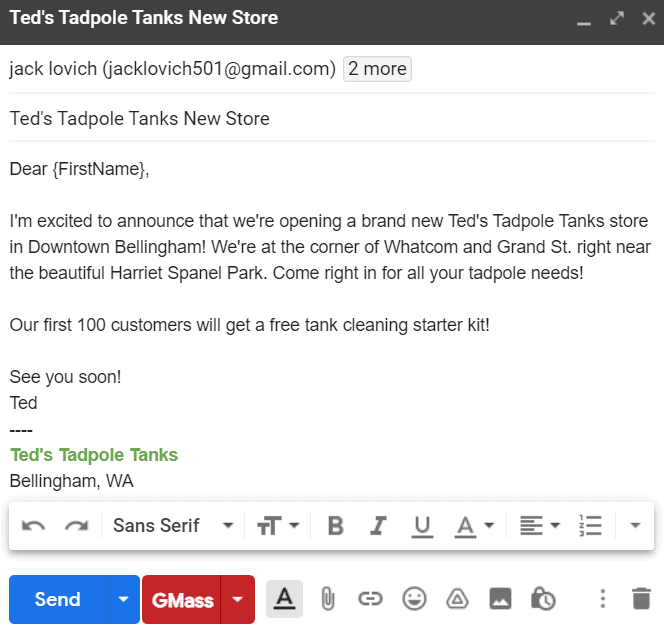
Notice the {FirstName} variable?
That’s a personalization label corresponding to the column header FirstName in my Google Sheet.
Step F
After composing your email, click on the GMass button to send it to all your recipients.
Note: GMass will auto-personalize the email for each person based on the mail merge labels you’ve used in your message.
For example, the third recipient of my email, Ron Carey, will receive an email that starts with “Dear Ron,” as the {FirstName} variable was used in the email message.
Go back to Contents
Now that we’ve seen how to use mail merge to send mass emails let’s check out some important mail merge FAQs.
7 Mail Merge FAQs
Here are the answers to seven commonly asked questions regarding mail merge:
1. What are the advantages and disadvantages of email mail merge?
Mail merge for your email marketing or cold emailing has several strong advantages, such as:
- Personalization: Mail merge personalization makes your form letter sound like individual correspondence, so it’s more likely to be read.
- Saves time: Once you set up your mail merge template, it takes relatively little time to create a large number of personalized messages because it’s tied to your Excel data — the single spreadsheet where all personalized information is kept.
- Controls the appearance of your message: A mail merge template lets you manage how the type and images look, so your email is attractive even where the personalized content is different.
- Allows for testing: You can quickly adapt a template to create two versions of the message for A/B testing. This way, you can effortlessly know what version of your message works best.
On the other hand, a mail merge also has some disadvantages for email campaigns:
- May require additional software: To go beyond the features of Microsoft Word, you may need email merge software, like GMass, with advanced features to automate data collection or add conditional formatting.
- Requires accuracy: If your Microsoft Excel database is incomplete, inaccurate, out of date, or saved under a new name, then mail merge may not work.
- Risk of error: If you make a mistake in your mail merge template or personalization data, that error will get reproduced on all the emails that use those elements. As a result, it’s essential to allow time to test your email before sending it to your entire list.
2. Can you perform an email merge with an attachment?
When you’re using Word, you don’t have the option to include an attachment with a standard mail merge message, but you can if you use the Mail Merge Toolkit add-in for Microsoft Office.
However, if you’re after a better solution, use a purpose-built mail merge platform like GMass that not only lets you include an attachment but even allows you to choose different attachments for each recipient.
Read more about how to send a mass email with personalized attachments.
3. How do you use a Mail Merge Toolkit in Word?
The Mail Merge Toolkit for Word is a third-party add-in that lets you do more personalization than the standard Word mail merge alone (for example, including attachments).
You can download a free trial and view an online toolkit tutorial to get started. Once you have the program, go to the Start Mail Merge selection under the Mailings tab and follow the prompts.
4. Can you send a mail merge from a shared mailbox?
If you want to send a mail merge from a shared mailbox (such as from an email address named for a department, company, or event instead of a person), you can arrange it in Outlook.
Start by finding the “Other User’s Folder” and open it to navigate to the shared mailbox. Associate that mailbox with the spreadsheet that contains your recipients’ data and prepare the mail merge as usual.
5. How do you do a mail merge in Word for labels?
One of the coolest features of MS Word’s mail merge functionality is the ability to drive printed labels with placement designed in Word and data-driven by your personalization datasheet.
If you know how to do a letter or email mail merge in Word, labels are very easy.
Under the Mailings tab in Word, click the Start Mail Merge selection and then the Step-by-Step Mail Merge Wizard. Choose Label as your template document type, and under Label Options, select a label manufacturer and style number (for example, Avery 5160, etc.).
From there, follow the wizard’s prompts.
You may also want to view Microsoft’s brief and helpful video tutorial.
6. How do you do a mail merge with Outlook?
To create an Outlook mail merge, you’ll need to use Microsoft Word, Excel, and Outlook.
Starting in Word, choose the Mailings menu, then Start Email Merge, and then Email Messages.
When your message is ready, click Select Recipients to link to the Excel spreadsheet with your data. Then, select Finish & Merge to send your email to your list using Outlook.
For more info, read my article on performing a mail merge in Outlook.
7. What is extended mail merge?
If you’re a Salesforce user, you have two options for mail merge — standard and extended.
Standard mail merge is the preferred approach for those with specific CRM software and operating systems, such as Luminate CRM and Windows 10.
Extended mail merge is a mail merge tool for all other Salesforce users. Although the tools are different, the results are the same — personalized emails to recipients listed in Salesforce.
Go back to Contents
Final Thoughts
Mail merging isn’t rocket science.
While you can use Microsoft Word to perform mail merges for letters, you need to follow a large number of steps correctly. Additionally, for sending mass emails, you have to set up a webmail client with Word manually.
Instead, why not use a powerful mail merge tool like GMass for sending mass emails?
Its advanced mass mailing features help you to perform mail merges and send out bulk emails effortlessly.
Why not try GMass today and simplify your mail merge experience?
Email marketing, cold email, and mail merge inside Gmail
Send incredible emails & automations and avoid the spam folder — all in one powerful but easy-to-learn tool
TRY GMASS FOR FREE
Download Chrome extension — 30 second intall!
No credit card required

Ajay is the founder of GMass and has been developing email sending software for 20 years.
Love what you’re reading? Get the latest email strategy and tips & stay in touch.
Зачем в 2020 году отправлять Outlook-рассылки? Некоторые компании не могут использовать для рассылок ESP — из-за корпоративной культуры, особенностей коммуникации или по какой-то другой причине. В таком случае они делают рассылку в Outlook. Подобным методом классическую рассылку заменить нельзя, но это имеет смысл, если получатели — сотрудники компании. Большие организации рассылают через Outlook внутренние письма с новостями, инструкциями, опросами.
Если рассылка простая, её можно создать прямо в редакторе письма Outlook. Но если письмо состоит из сложных блоков, имеет картинки, текст и ссылки, то подобную рассылку уже нельзя собрать в редакторе почтовой программы. Как правило, привлекают специалиста, который сделает .oft шаблон (Outlook File Template) для отправки подобных писем. В идеальном варианте пользователь потом может самостоятельно редактировать этот шаблон, менять текст и картинки без знаний кода.
Рассмотрим способы создания .oft шаблона и пошагово покажем, как создавать блоки для такого письма.
Читайте также
HTML вёрстка писем — полная инструкция
Сборка письма в Word
Один из способов сделать .oft шаблон — собрать его в Word. Сама по себе рассылка в HTML верстается таблицами. Здесь нужно сделать примерно то же самое: вручную создать таблицы и наполнить их контентом. Этот способ хорош тем, что Microsoft Word и Outlook используют один движок для рендеринга писем.
Изначально всё равно нужен дизайн письма, который будет собран в Photoshop или Figma. Конечно, можно начать проектировать дизайн в вордовском документе. Но, как показывает практика, гораздо проще сначала сделать дизайн и лишь потом собирать его под .oft шаблон для Outlook. Это упростит сборку как тела письма, так и небольших деталей вроде футера и информации о заказе.
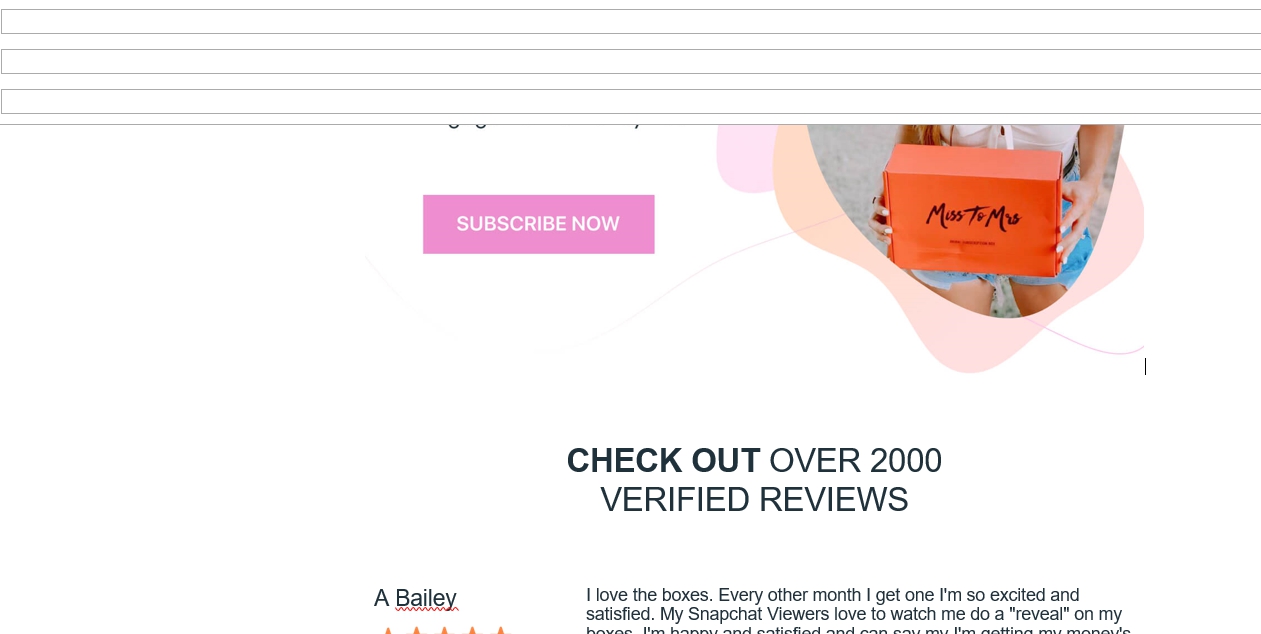
Для примера возьмём наше письмо для misstomrsbox.com. Попробуем собрать его, чтобы отправить через Outlook.

Это большой мастер-шаблон. Мы будем брать из него разные блоки
Читайте также
Дизайн email-рассылок: полная инструкция
Собираем письмо
Начнём с хедера. В нашем примере он состоит из двух логотипов, выровненных по центру, и небольшой черты снизу. Делаем таблицу, в которой будет одна строка и одна ячейка. Помещаем туда наши логотипы.

Стоит отметить, как мы работаем с цветами границы таблицы — оставляем только нижнюю границу. Выделяем таблицу. В левом верхнем углу будет значок, нажав на который мы увидим нужные настройки:
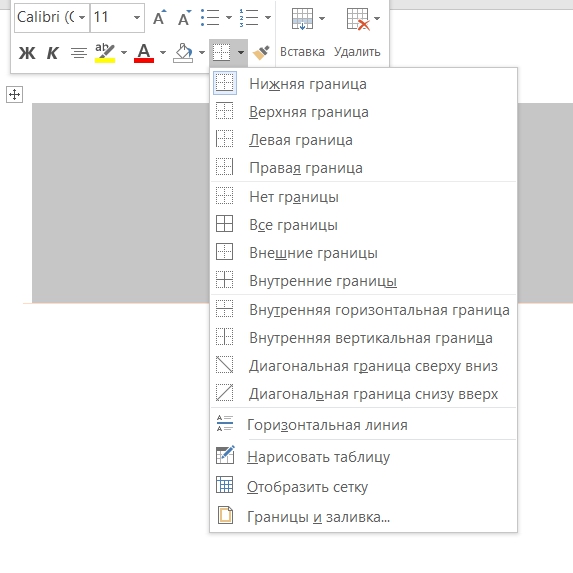
Оставляем только нижнюю границу. Потом нажимаем «Границы и заливка» и выбираем «Другие цвета»:
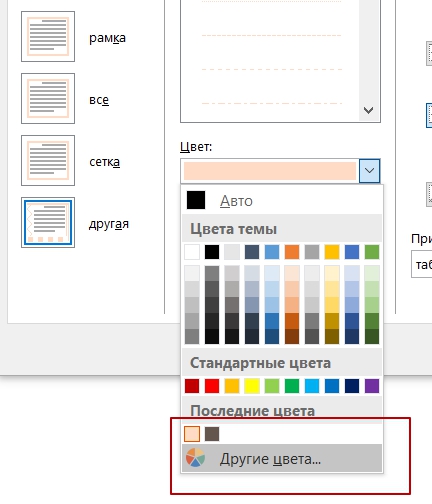
Часто нам нужен конкретный цвет, как в макете, и мы не можем просто выбрать из палитры. Особенность в том, что Word позволяет выбирать цвета в RGB и в HSL. Но часто может быть совсем другой код цвета, который имеет вид: #FFDAC5 . Чтобы узнать RGB-код, можно воспользоваться сайтом encycolorpedia.ru — вводим цвет в строку поиска и получаем его характеристики. Различные цветовые кодировки может показывать и поисковик:
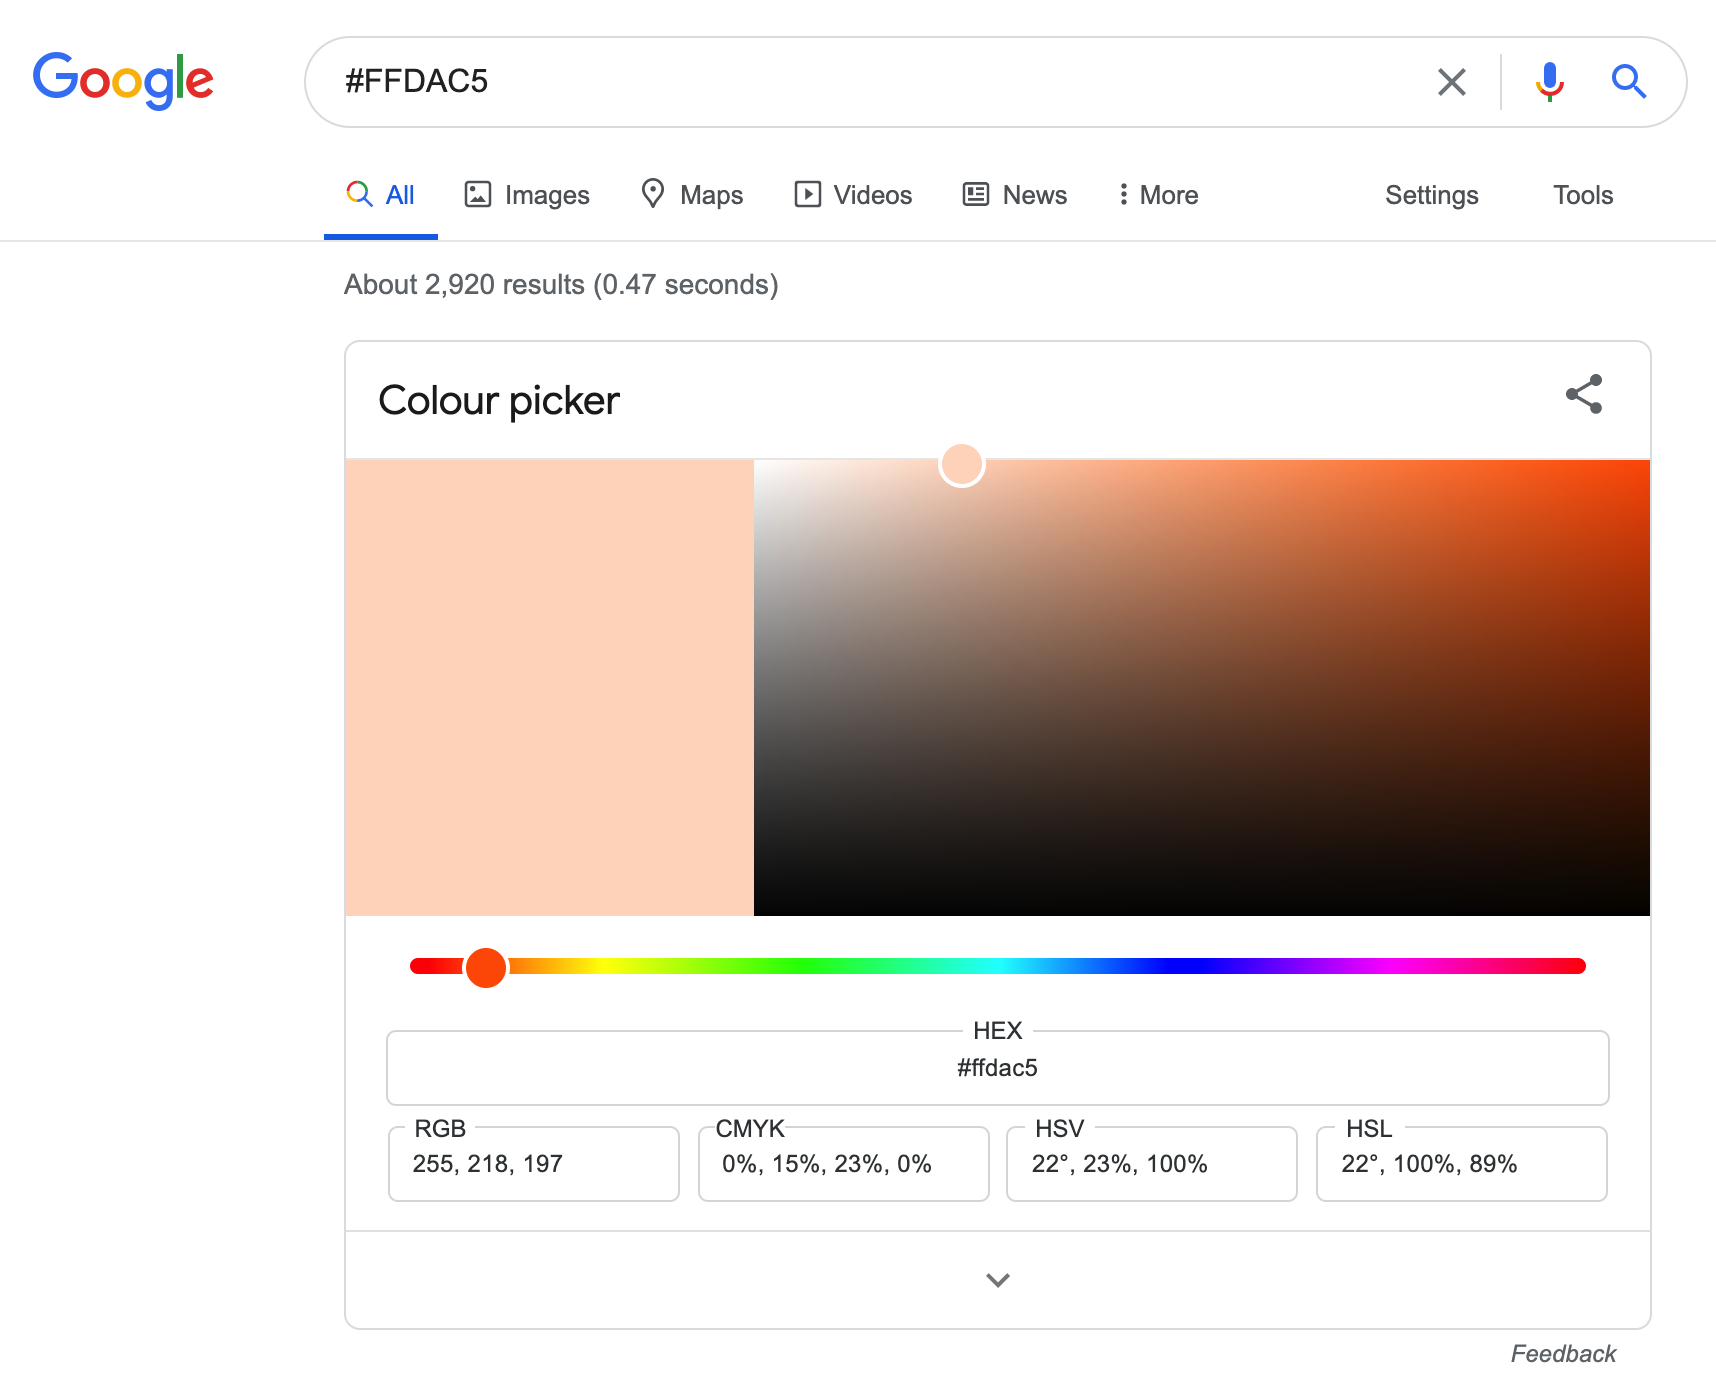
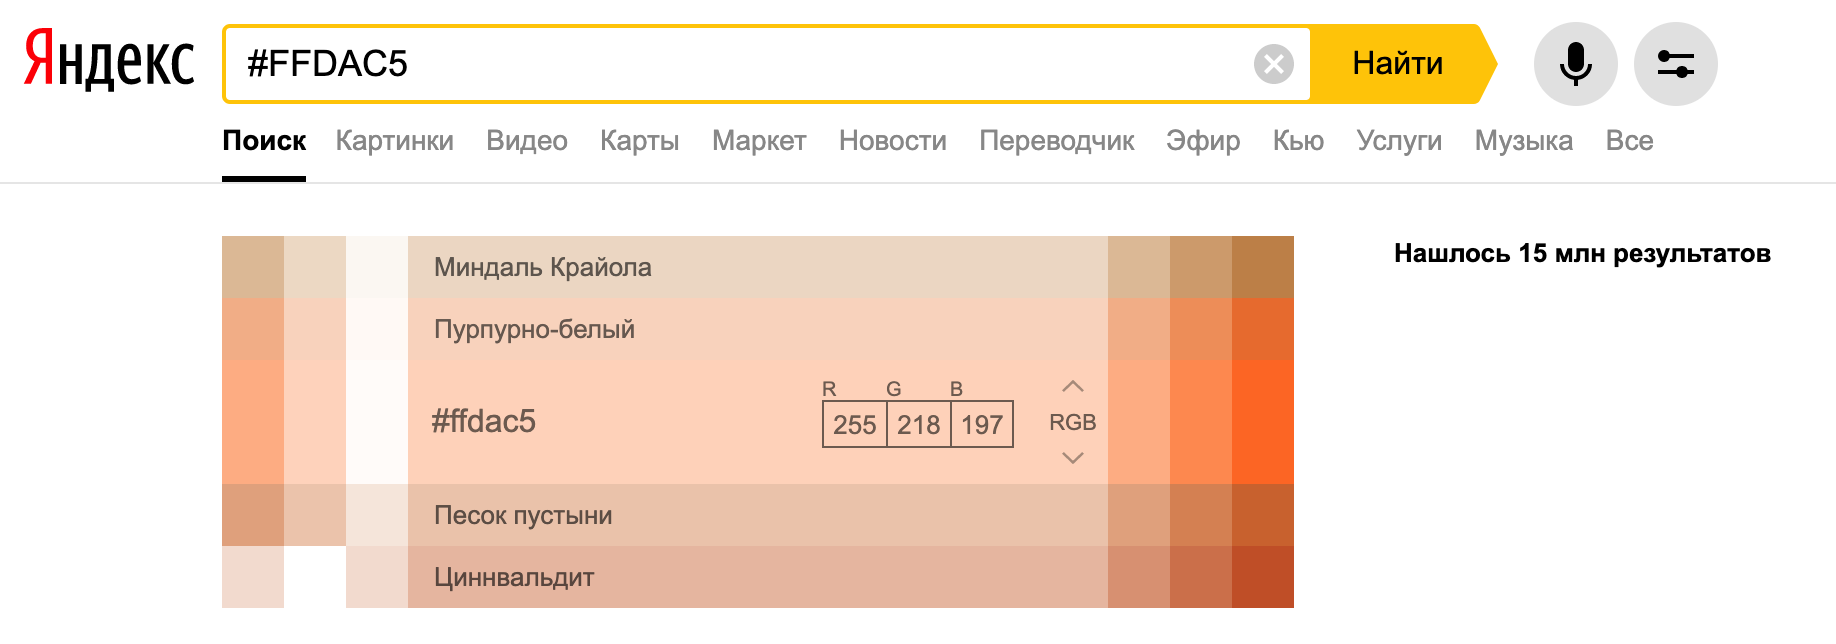
Выбирайте способ, который вам удобен.
В итоге получаем такой хедер:

Осталось сделать отступ между логотипом и нижней границей таблицы. После этого нужно будет оставить только нижнюю границу и покрасить её в нужный цвет.
Читайте также
Как мы делаем красивую GIF-анимацию в письмах
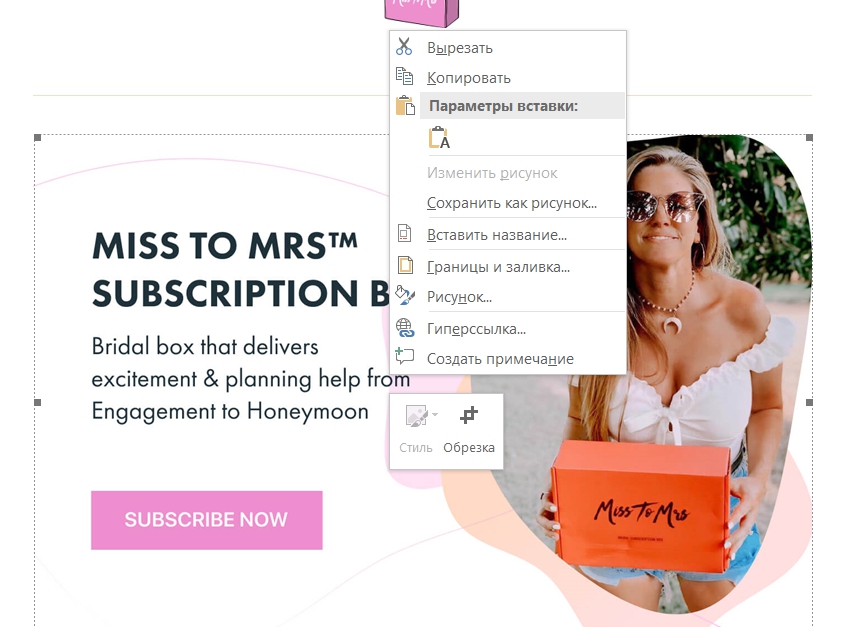
Картинка вставляется в письмо очень просто: нужно перетащить файл в нужную область документа. Если хотите сделать баннер кликабельным, нажмите на него правой кнопкой мыши и выберите пункт «Гиперссылка», а затем укажите нужный адрес.
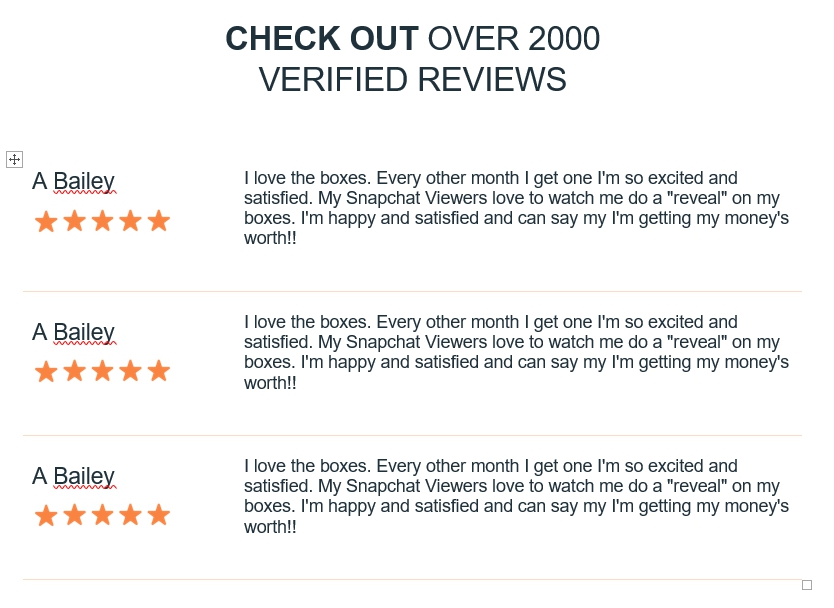
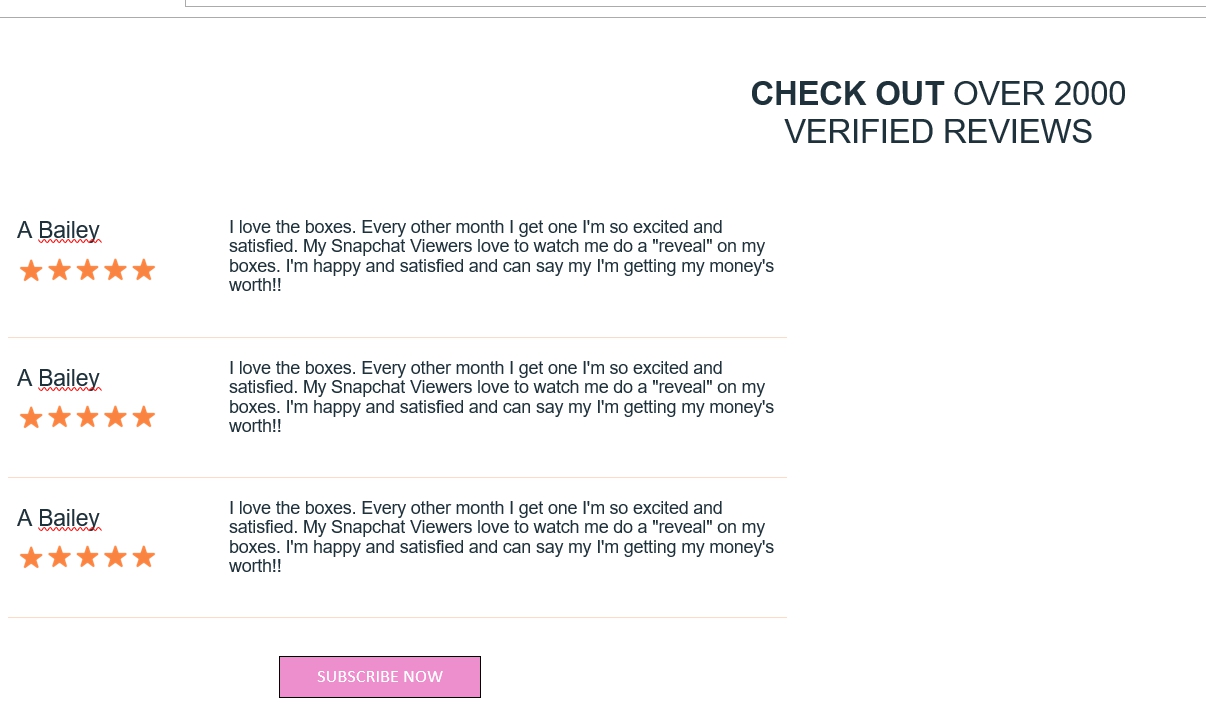
Блок с отзывами
Состоит из заголовка, отзывов, каждый из которых разбит на две ячейки, и кнопки.
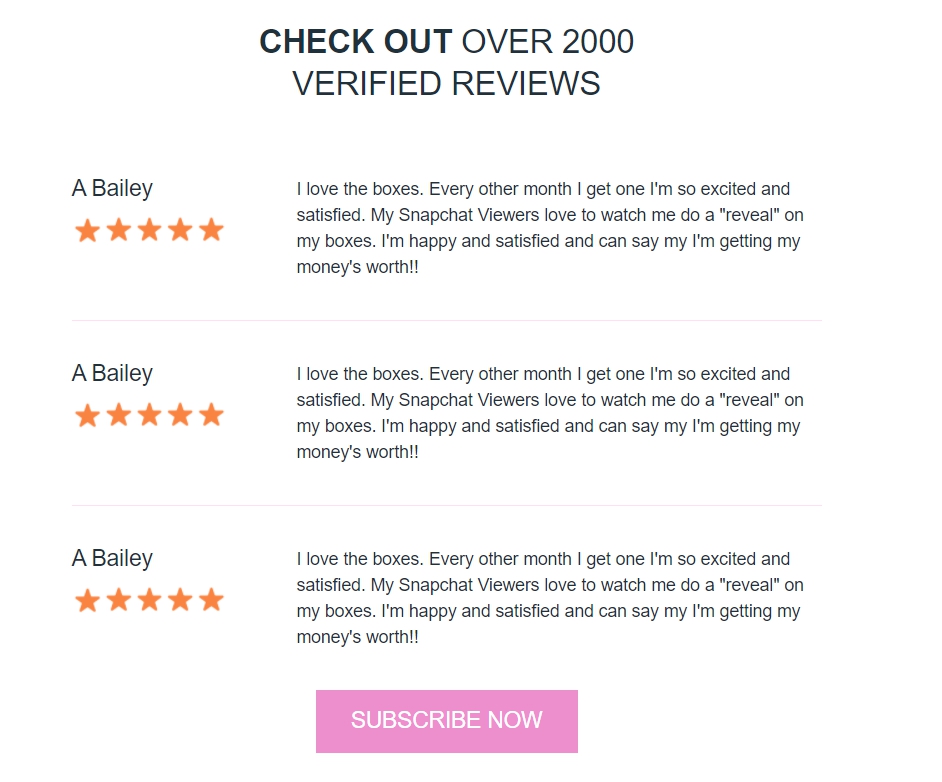
С заголовком всё просто: это обычный текст, выровненный по центру, с теми свойствами, которые есть в макете. Один отзыв состоит из двух ячеек. В правой ячейке только текст, а в левой — текст и пять картинок в ряд. У таблицы есть только нижняя граница, как и у хедера.
Создаём таблицу с двумя ячейками. В левую помещаем текст, под него — картинку. Изначально картинка будет большой, её размеры нужно подогнать, не забыв изменить соотношение сторон. Левая и правая ячейка занимают по 50% всей таблицы, но в макете мы видим, что левая часть должна занимать гораздо меньше места. Изменить это можно с помощью ползунка в центре таблицы.


После этого вставляем текст в правую часть, редактируем его и делаем с границами то же самое, что и с хедером: оставляем только нижнюю границу и задаём ей цвет. Далее копируем таблицу с отзывом, чтобы получить такой же блок, как и в шаблоне.
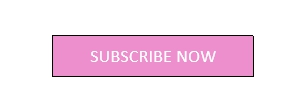
Кнопка подписки
Кнопку в шаблоне для Outlook можно сделать двумя способами, как и в обычной вёрстке. Это может быть просто картинка-ссылка, и здесь всё, как и с обычным баннером: перетаскиваем картинку и ставим на неё ссылку.
Плюсы такого подхода:
- легко реализовать;
- кликабельна вся кнопка.
Минусы:
- картинка тяжелее, чем текст: будет дольше грузиться;
- если у пользователя отключены картинки, он ничего не увидит.
Ссылка может быть таблицей из одной ячейки, залитой определённым цветом и с текстом внутри. Создаём таблицу и корректируем её ширину с помощью ползунков по краям.
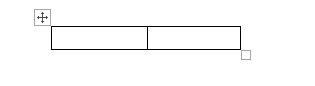
Пишем в ней текст, делаем его белым и нужного размера. Теперь заливаем всю таблицу нужным цветом. Цвет выбирается по тому же принципу, по которому мы выбирали цвет границы таблицы.
Небольшие проблемы могут возникнуть с позиционированием надписи. Нижнюю границу можно отодвигать мышкой с помощью ползунка, а вот верхнюю границу можно отодвигать с помощью кнопки enter. И высота каждого отступа зависит от того, какой размер шрифта у вас выбран. Так можно корректировать и подбирать высоту верхнего отступа, чтобы создавалось ощущение, что надпись у нас в центре кнопки.
Выделяем текст, нажимаем правой кнопкой мыши, выбираем пункт «Гиперссылка» и вставляем нужный адрес.
Плюс такого подхода:
- это не картинка, а значит, у пользователя кнопка прогрузится быстрее;
- если у пользователя отключены картинки, он всё равно увидит кнопку.
Минусы:
- делать такую кнопку чуть дольше;
- кликабелен только текст в кнопке.
Важно учесть
Все таблицы, которые вы создаёте, должны быть отцентрованы. Перед вставкой шаблона в Outlook проверьте, что выравнивание таблицы стоит по центру.

Это важно проверить, потому что внешне всё может выглядеть корректно, а в Outlook вёрстка поедет. Ниже покажу, как это будет выглядеть.
При этом текст в таблице может быть выровнен по левому краю.
Вставляем собранное письмо в Outlook
Создаём в Outlook новое письмо и открываем наш шаблон в Word. Из вордовского файла просто копируем всё в буфер обмена, вставляем в письмо и смотрим, как оно будет выглядеть.
Отображение нужно тщательно проверить, потому что бывают баги. Например, возникнет большой пробел там, где его изначально не было. Или появятся границы у таблиц. Эти баги легко исправить уже в самом Outlook.
Если какая-то таблица в документе выровнена по левому краю, то в Outlook вы будете наблюдать вот такое:
Поэтому не забудьте отцентровать таблицы перед заливкой письма в Outlook.
Чтобы сохранить шаблон, нажимаем «Сохранить шаблон» и выбираем тип файла «Шаблон Outlook».
Читайте также
132 инструмента CRM-маркетолога
Как вставить подпись
Чтобы добавить подпись, которая будет подставляться в конце каждого письма, собираем её по тому же принципу, что и письмо. Можем добавить туда иконки и/или ссылки на соцсети, любой текст и корпоративный баннер. На выходе получаем такой же word-файл, только с шаблоном подписи.
Теоретически её можно открывать каждый раз, как и шаблон, что мы сделали выше. Подпись подставится в письмо, а над ней можно будет писать текст. Но это неудобно. Можно настроить автоматическую подпись в Outlook.
Создаём новое письмо и выбираем «Подпись»:
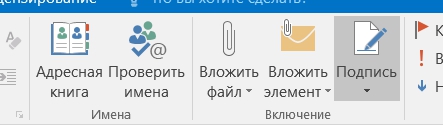
Переходим во вкладку «Электронная подпись», нажимаем «Создать» и задаём имя подписи:
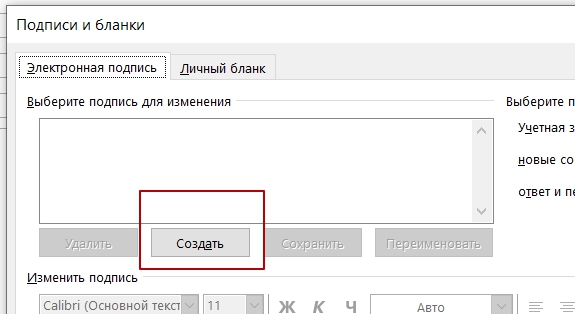
Далее открываем word-файл с подписью и копируем содержимое оттуда в поле для создания подписи:
![]()
После этого нужно просто сохранить шаблон в Outlook — теперь его можно использовать в любом письме. Для этого при создании письма нужно нажать на кнопку «Подпись» и выбрать нужную. Она автоматически подставится в письмо.
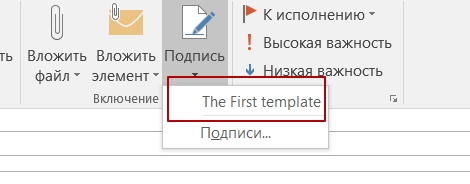
Выбранная подпись будет автоматически появляться при создании нового письма.
Обсудить любой материал и задать вопросы можно в нашем CRM-Chat. И, конечно, подписывайтесь на наш Телеграм-канал «Маркетинг за три минуты», где регулярно выходят полезные материалы в виде постов-трёхминуток.
While there are a lot of things I don’t like about Microsoft Word, there are many more things I love about it. In particular, I love the ability to automate many of the tasks that you do often. One of those tasks is sending reports or emails. Most of us are faced with a job where you have to send a report to an entire team of people, so you find yourself spending hours writing up email after email.

<firstimage=»https://www.makeuseof.com/wp-content/uploads/2011/03/gear1.jpg»>

While there are a lot of things I don’t like about Microsoft Word, there are many more things I love about it. In particular, I like how flexible the drawing tools are, the included templates for things like letters and resumes, and most of all, I love the ability to automate many of the tasks that you do often. One of those tasks is sending reports or emails.
Most of us are faced with a job where you have to send a report to an entire team of people. What makes this worse sometimes is that you have to send individually tailored emails to each person with specific information pertaining to them. Maybe 80 to 90% of the verbiage is the same, but that 10 or 20% specific to the person is unique — so you find yourself spending hours writing up email after email.
Sending Automated Emails
In the past, I wrote about how you could automate Google Analytics to send out scheduled reports, which you could then pass on to your boss or client. But the form of automation that I’m going to show you today is a little different. Instead of producing the data for you, Word is going to automatically fill in the details about the person on your contact list, while allowing you to quickly fill in the data or information that you want to send to that person. This makes the email feel personal and direct, but at the same time you aren’t spending hours writing up tens or hundreds of personal, direct emails.
To get started, in Word (in my examples it’s Word 2007), click on «Mailings» and then click «Start Mail Merge.»
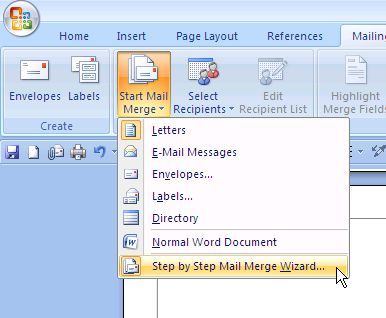
The Wizard isn’t necessary, but it’s nice because it helps you to remember everything you need to do. First, pick a template that you’d like to use for your generic report.

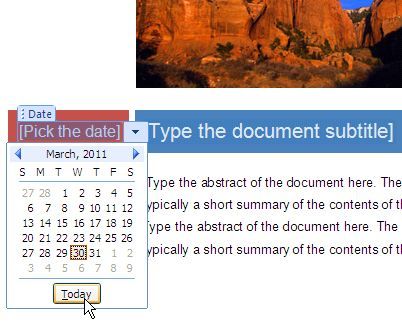
Word has a lot of good styles and layouts. Once you choose your template, just click OK. Now your entire report is written for you, all you have to do is fill in the text. When it comes to the date, make sure to choose «today» so that the document always uses today’s date every time you recreate it later.
When you choose your recipient list to receive these emails, you can use your current Outlook contacts, a current contact list that you’ve exported from somewhere else, or create a new list of contacts.
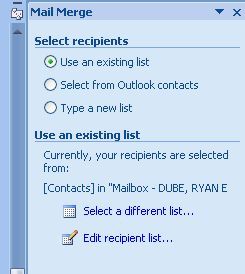
In my example, I’ve selected recipients from my current Outlook contacts.
Now that you have your recipients selected, you’re going to tell the document what information to pull out of the Contacts information and automatically embed into the report. You do this by clicking on the «Insert Merge Field» button.
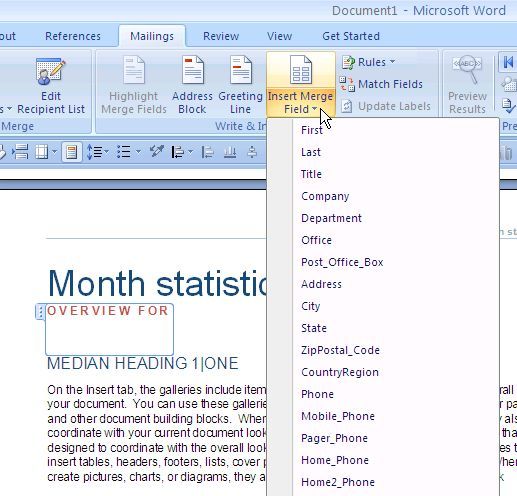
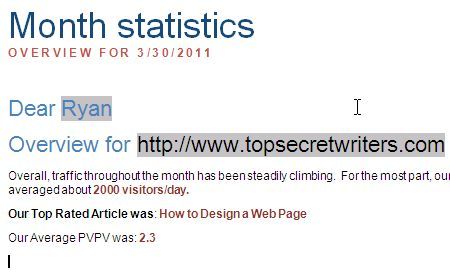
For example, I’m creating a report about a specific website for a client, so I’ve defined that website in their Contact details, and here I’m telling Word to use that URL in the report.
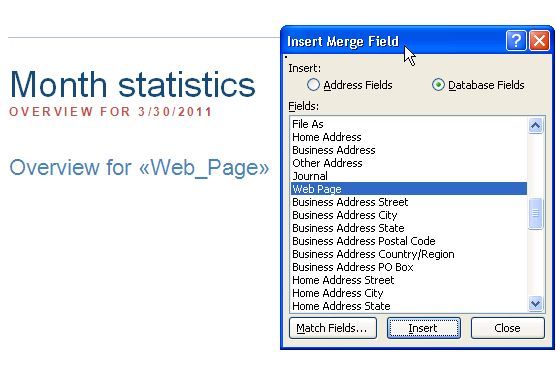
If you’re using Outlook, don’t forget that Outlook Contacts offers User Fields, where you can insert any information you want for that person.
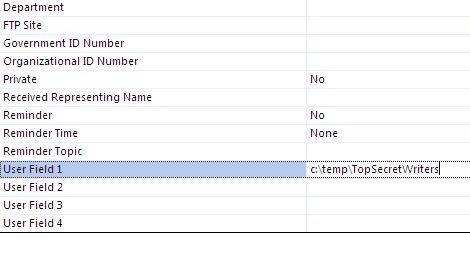
This is useful when the information you want to embed for that person isn’t found in the Contact List fields.
The coolest thing about the Microsoft Word Mailings is that you basically create «fill-in» fields for the parts of the report that are unique for each person.

So as you’re writing the generic message and you get to a place where you have to write something that would have specific data relevant to that person, just click on «Rules» and choose «Fill-in«. This lets you define the prompt question and a default answer. What will happen is when you load up your automated document, it will prompt you to fill in every single one of the fill-in fields for each recipient.
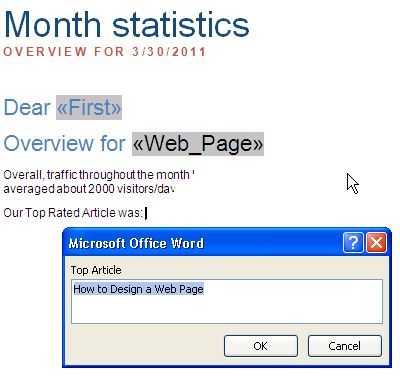
Once you’re finished creating your automated mailing, your document will consist of some fields that automatically fill in based on recipient Contact details, and other fields will fill in based on what you’ve specified for information.
For each document, you can quickly send out the email report from Word by clicking the Outlook button on the upper right part of the screen, choosing «Send Email» (or send as PDF attachment), and you’re done!
Using this technique, you’ll cut down your correspondence work by at least 50% or more. Up front it’ll take you some time to get the document set up perfectly, but every week or month that you need to issue the report, you’ll be very happy that you put in the effort.
Give Microsoft Word Mailings a shot and let us know how it went. Did it save you time? Share your own experiences with it in the comments section below!
Image credit: clix at sxc.hu